A Foreign Extra Stout Beer Recipe You Won't Regret Making

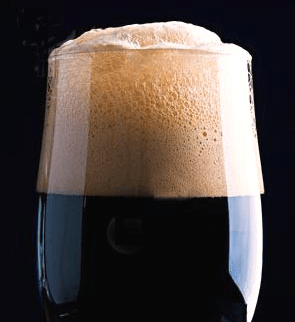
Foreign Extra StoutThe Beer Judge Certification Program classifies six kinds of stout: Dry (or Irish) Stout, Sweet Stout, Oatmeal Stout, Foreign Extra Stout, American Stout, and Russian Imperial Stout. Probably the least descriptive of these is the Foreign Extra Stout. What makes a stout “foreign” and how is it different from the other types of stout?
The Foreign Extra Stout is born from a variety of stouts that were traditionally brewed for foreign markets, especially those in the tropics. You may encounter this type of stout as a “tropical” stout. Examples of Foreign Extra Stout include Guinness Foreign Extra Stout and Dragon Stout from Jamaica, both a 7.5% alcohol by volume.
A foreign extra stout beer recipe may produce a beer that is sweet or dry. The main defining characteristic is that foreign extra stouts are brewed to a higher gravity than sweet or dry stouts, presumably to make them easier to ship. They may also have more hop bitterness (as high as 70 IBUs), which would have helped with shelf-life as well. Keep in mind that foreign stouts should have little to no flavor or aroma hop character. Hoppier stouts fit better in the American stout category.
Another characteristic that may be present in foreign extra stouts is esters. Esters are a fruity aromatic produced during fermentation, primarily by ale yeast. Between the fruity esters, and the high gravity, some foreign-style stouts may come across as fairly sweet and rum-like, making them especially deserving of the name “tropical” stout.
Below are the BJCP stats for Foreign Extra Stout:

  • OG: 1.056 – 1.075
  • FG: 1.010 – 1.018
  • ABV: 5.5 – 8%
  • IBUs: 30 – 70
  • SRM: 30 – 40

The Foreign Extra Stout beer recipe below comes from the book Homebrewing for Dummies. It won a first place award at the American Homebrewers Association National Competition.
New Stout II, by David and Melinda Brockington
(5-gallon batch)
Specs
OG: 1.071
FG: 1.019
ABV: 6.8%
IBUs: 38
SRM: 40+
Ingredients 
9 lbs. English pale malt
3 lbs. Roasted barley
.5 lb. Crystal 40L malt
.5 lb. Black patent malt
2 oz. Kent Goldings hops at :60
Wyeast 1084: Irish Ale Yeast
Directions
The day before brewing, prepare a 2L yeast starter (or just use two packets of Wyeast 1084). Mash crushed grains at 155˚F for 60 minutes. Sparge to collect 6.5-7 gallons of wort in your brew kettle. Bring to a boil and add Kent Goldings hops. Boil for 60 minutes. Whirlpool, chill wort, and transfer to a clean, sanitized fermenter. Aerate well and pitch yeast at 72˚F or below. Ferment at 65˚F for two weeks. Bottle or keg for 2.3-2.6 vols CO2.
If you’ve never brewed a foreign extra stout beer recipe now is the time to do it. This is a killer recipe that has become very popular among many homebrewers.
———————————————————————————————————–
David Ackley is a beer writer, brewer, and self-described “craft beer crusader.” He holds a General Certificate in Brewing from the Institute of Brewing and Distilling and is founder and editor of the Local Beer Blog.

Why Is My Homemade Fruit Wine Not Fermenting?

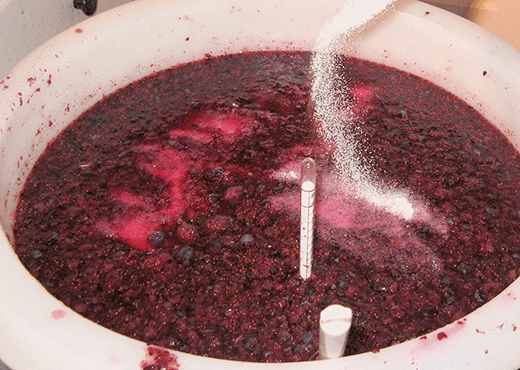
This is Homemade Fruit Wine That Is Not FermentingThis question is somewhat long but well worth the read. Ron’s homemade fruit wine is not fermenting and he is at his wits end as to what to do about it. See what kind of plan of action we came up with.
——————————-
I have a question in regards to some issues I’ve had with my attempt at making a fruit wine (blueberry, specifically). I think I’ve resigned myself to the fact that I’ve lost this batch, but I’d like to try and learn from this so I don’t make the same mistake next time.
I started with roughly 17 lbs of frozen blueberries, which I defrosted. I mashed up the defrosted berries, added water, sugar, pectic enzyme and enough potassium bisulfite (all purchased from Adventures in Homebrewing) to reach a 50ppm sulfite level for 6 gallons of must. I let the berries rest for two days, and in looking at your instructions, the only thing I did NOT do was leave it uncovered. I did have it in a brew pail with a lid and an airlock on it during this time.
When it was time to start fermentation, I transferred the must into a stainless fermentation tank and splashed it around a bit, then commenced with testing the must. Brix was 23.4, so that was fine. The interesting thing is that the pH was low (3.1), but the TA was also low (around .40). I’ve always been taught to adjust to the acid level/taste more so than the pH, so I added enough acid blend to reach a TA between .55 and .60 (it was hard to tell exactly using the acid test kit). This of course would have likely lowered the pH even more, and perhaps this is my problem.
I prepared my yeast using a starter solution made up of GoFerm and warm water, and once it cooled to 104 degrees, I added the packet of Lalvin 71B. After 20 minutes and visible signs of active yeast, I then added half the starter volume in actual wine must to further acclimate the yeast, and waited another 20 minutes, at which time I had a good frothy starter going. I checked the temp in both the must (69 degrees) and the yeast starter (79 degrees) to make sure they were within 10 degrees Celsius of each other, and pitched the yeast into must, stirred it in and waited.
Given that 71B is usually a pretty quick starter, I expected to see some activity the next day, but I had nothing. And then nothing the next day. And then nothing the next day. By then, I assumed something went awry, so I warmed up the must a bit, still nothing. I make beer as well, so I have an oxygen injection stone and bottled O2, and decided to inject some oxygen into the must (I thought that perhaps by boiling the water prior to adding it to the berries, maybe I drove off all of the oxygen). Still nothing. With no other ideas, I added dissolved 6 grams of Fermaid K, mixed it into the must, made another healthy starter and pitched more yeast. And waited. Nothing.
At this point, since it’s been 4 days since I pitched the original yeast starter, I am sure I am on the precipice of having to trash this must, but I am at a loss for what else could be the problem? I am leaning toward the pH, in that since it was low to start with, and probably lowered even more after I added the acid blend, perhaps it lowered the pH beyond the limits of what the yeast can handle? Maybe with a pH that low, and knowing that the pH will rise during fermentation, perhaps I should have waited until AFTER fermentation to make the acid adjustment?
I realize it may be difficult to assess without seeing a full analysis of the must, but I thought perhaps you might have some ideas on what may have happened here.
Name: Ron F.
State: Virginia
—–
Hello Ron,
It is very hard to know what is exactly why your wine is not fermenting without being the one there doing it. All I can really do is take the information you have given and apply a likelihood of what’s going on based on my experience of helping thousands of others other home winemakers.
First I have to say that I do not think it is in any way related to pH. While your pH reading is low, it is not low enough to affect a fermentation to this degree. The best a low pH reading can do is marginally affect the fermentation. It would not stop it from starting all together.
The fact that you boosted the nutrients and oxygen and that the wine must was at the right temperature tells me we need to start looking at the yeast as the cause of your fruit wine not fermenting.
On our website we have the Top 10 Reason For Fermentation Failure. These are the top 10 ways in which we have seen fermentations fail — in order from most likely to least likely. I think we are potentially dealing with two of the reasons: #3 and #4.

  • Sealing Up The Fermenter After Adding Sulfites
    From what I gather you understood that sealing up the wine must between the time you added the sulfites and the time you added the yeast was not the right thing to do. It is important to keep the wine must exposed and not sealed up. This allows the sulfite you added to sanitize the juice time to leave so that it does not destroy the yeast you are adding. I feel that this is a potential cause of why you wine must is not fermenting.
  • Improper Yeast Starting Method
    I also feel that there is a strong likelihood that a most of the yeast — if not all — is being killed in the rehydration process. It is important to understand that if you follow the rehydration steps, exactly, a portion of the yeast is being destroyed in the process. If you do not follow the process, exactly, all the yeast can be destroyed. It is a function of temperature and time. If the temperature is warmer than the direction state, your are killing more yeast than intended. If you leaving it at the warm temperature for longer than the directions state, you are killing more yeast then intended. This is why it is important to actually take a thermometer reading of the water before adding the wine yeast. It is also important to actually clock the time you wait before pitching the yeast.

I don’t think you have necessarily have lost this batch. Taking the above into consideration, what I would do if I were in your shoes is to take another packet of wine yeast and sprinkle it directly onto the wine must. To be honest with you, this is what I normally do anyway. It will take a little longer for the fermentation to start, but you don’t have to worry about inadvertently killing the yeast.
Once you sprinkle the yeast on top, put the lid and air-lock on the fermenter. Wait and the first time you see any signs of activity, take the lid back off and leave the primary fermentation exposed to air. You can cover the primary fermentation covered with a thin kitchen/tea towel.
By handling it in this way, you are protecting the wine must while it is still, but then exposing it to the needed oxygen once the fermentation takes off. I would expect this to happen in around 8 to 12 hours, maybe sooner for you since you’ve added additional nutrients.
Ron, I’m so sorry are having such an issue with your homemade wine not fermenting. Hopefully this information will help you out and get thing on track!
Best Wishes,
Ed Kraus
———————————————————————————————————
Ed Kraus is a 3rd generation home brewer/winemaker and has been an owner of E. C. Kraus since 1999. He has been helping individuals make better wine and beer for over 25 years.
Homebrewing Terms You Should Know: Part 5 – Hops

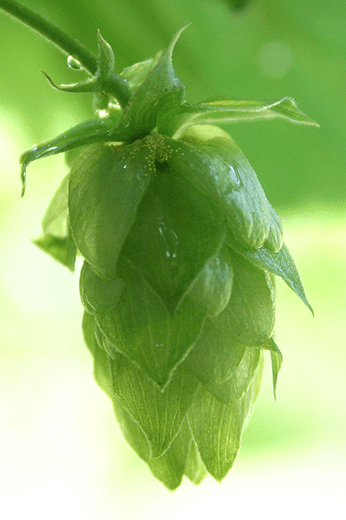
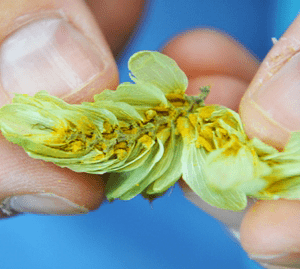
Hop ConeWhile malt is responsible for fermentable sugars and flavor, hops balance the sweet malt flavors with bitterness. Hops also contribute unique flavors and aromas to your homebrew. In some of America’s favorite beer styles (pale ale, IPA, and Double IPA), hops are the star of the show. The following terms are often used when discussing hops and the role they play in your homebrew beer:
  • Humulus lupulus – This is the botanical name for hops. Lupulus refers to the voracious, wolf-like speed at which hops grow.
  • Bittering hops – Sometimes called early addition hops, bittering hops are added early in the boil and are responsible for most of the beer’s bitterness.
  • Aroma hops – Aroma hops, also called finishing or late addition hops, contribute most of the flavors and aromas of the beer.
  • Noble hops – Noble hops are a group of hops of European origin, prized for their aromatic qualities. Many old world beer styles use noble hops.
  • Alpha acids – Alpha acids are the bittering resins in the hop flower. They must be boiled to extract their bitterness.
  • Bracteole – On an individual hop flower, each “petal” is called a bracteole. Lupulin glands (see below) are located at the base of the bracteoles.Hops Showing Lupulin
  • Lupulin glands – Lupulin glands contain the alpha acids, resins, and essential oils that provide bitterness, flavor, and aroma.
  • IBUs – IBUs, or International Bittering Units, are a measurement of a beer’s bitterness. IBUs are determined by the weight and alpha acid percentage of the hops being used, the length of time that they’re boiled, and the gravity of the wort in which they are boiled.
  • Hop utilization – Hop utilization is a figure (a percentage or decimal) used to calculate IBUs. As boil time increases and wort gravity decreases, hop utilization increases. However, maximum hop utilization occurs after about 90-120 minutes of boiling.
  • HBUs/AAUs – These abbreviations stand for Homebrew Bitterness Units and Alpha Acid Units; both mean the same thing. These units are an easy method for homebrewers to measure bitterness, but keep in mind that they are not the same as IBUs. To calculate HBUs/AAUs, multiply the weight of the hops in ounces by the alpha acid percentage of the hops. For example, a recipe calls for 1 oz. of hops with 4% AA (4 HBUs) to be boiled for 60 minutes. If you happen to have hops with 8% HBUs, you can use half an ounce of these hops in their place to get the same amount of bitterness (0.5 oz. * 8% = 4 HBUs)
  • First wort hopping (FWH) – First wort hopping is an alternative method of extracting aroma from your hops. In FWH, hops are adding to the first runnings from the mash tun as the brewer collects wort for the boil, as opposed to being added at the end of the boil.
  • Dry hopping – Dry hopping is another method for improving the aroma of your homebrew. Hops are simply added to the beer during secondary fermentation. Read these tips for dry hopping.

Are you a hop-head? What are some of your favorite hops?
————————————————————————————————————
David Ackley is a beer writer, brewer, and self-described “craft beer crusader.” He holds a General Certificate in Brewing from the Institute of Brewing and Distilling and is founder and editor of the Local Beer Blog.

Leigh Erwin: A Beginner's Wine Making Journey: Part 24

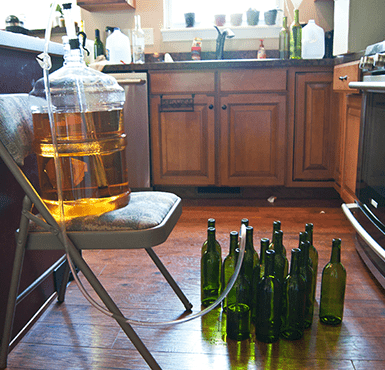
Bottling Wine From CarboyBottling day for my Pinot Chardonnay has finally arrived! This is my second attempt at bottling wine from a carboy.
If you recall, I’d been letting the wine sit for a couple of months to help settle and clarify (per the instructions on the concentrate can).  At the end of this time, I decided that the wine was not yet clear enough so I added some clarifying agents to speed things up a little bit.  I think my fining agent might have been going bad (can they do that??? I’ve only had them for a couple of months), because it was kind of difficult to remove the substance from the pouch (it was solidifying and kind of “crunchy”).  Anyway, I added what I could in and a couple days later still seemed to do the trick.
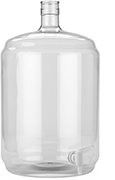
Wine Carboy With SpigotAt the same time that all this clarifying was going along, ECKraus came to the rescue and sent me my replacement carboy spigot that I had basically destroyed a week or so prior.  This meant that I could transfer my Pinot Chardonnay from the carboy that it was in into the carboy with a spigot, since I really liked bottling wine from the spigot instead of using the racking tube.  Well, to be fair, I’ve only tried to bottle using the spigot and have not yet tried bottling wine using the siphoning tube, but since it’s been going so well for me I figured why stop now!
Only “bad” thing that happened when transferring the wine from the first carboy to the “spigotted” carboy was that I accidentally mixed up the sediment on the bottom a little bit and so there was some little bits of things transferred into the wine bottles after bottling.  I suppose I could have let the wine sit for a longer period of time to allow it to settle out, however, I was inpatient and just decided to go ahead and bottle even if it was a little cloudy.  The only other thing that could have helped at this point would have been if I had a filtering system.  That’s still on the list of things to buy, for sure!
Hand CorkerThe most exciting part of bottling my wine was using my new hand corker for the first time!  The first time I bottled wine, I used those small corks with the plastic tops on them that I could just push in with my hand.  This time, I wanted to go a little more “authentic” and decided to put standard corks in my wine bottles.  Since I currently have a very small batch operation, I felt as though the hand corker would be more than enough, and maybe if I ever increase production I could upgrade to a larger floor corker.
I was admittedly a little nervous before I corked my first wine bottle.  How easy would using this device actually be?  How much “elbow grease” would I need?  Turns out—it’s super easy and I didn’t even break a sweat.  First, per the instructions on the corks, I boiled them for a short period of time to get them a little more able to be compressed.  Then, I simply followed the instructions on the box of the hand corker and voila!  Corking a bottle of wine couldn’t be easier!  Everything just went so smooth and at first I was convinced I must have done something wrong since I barely put any effort into the job.  I suppose if you do it correctly, it’s a cinch!
Now time to let the bottles sit upright for a few days while the corks expand, then off to bed on their sides they will go for a while!
All in all, bottling my wine from the carboy went pretty easily. I did get a little sediment mixed up, but I’ll have to chalk that up as a learning experience.
————————————————————————————————————-
Leigh ErwinMy name is Leigh Erwin, and I am a brand-spankin’ new home winemaker! E. C. Kraus has asked me to share with you my journey from a first-time dabbler to an accomplished home winemaker. From time to time I’ll be checking in with this blog and reporting my experience with you: the good, bad — and the ugly.
Your Equipment Matters Part 3: Gear for Making Better Homebrew!

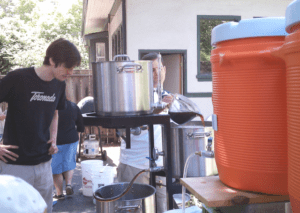
homebrew set up in back yardAs with most of the popular homebrew debates, there are many different ways to make good beer. Your choice of equipment however has a significant impact on the quality of beer that you make. It’s not that you can’t make decent beer with just the basic homebrew kit – you can – the point is that by continuing to invest in your home brewery, you can make beer as good as or even better than what you can find at the bar or grocery store.
Part Three of this series covers…
Equipment to Make Better Beer
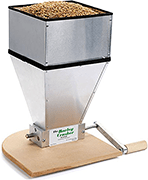
Grain MillGrain mill – A grain mill like the Barley Crusher gives you the opportunity to grind your own malt. Not only does this give you the most freshly crushed grains possible, but it allows you strict control over the coarseness of the grind, a key factor in improving your systems mash efficiency.
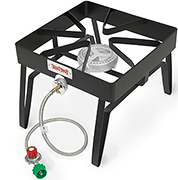
Propane BurnerPropane burner – The propane burner was listed in Part One of this series as a tool for saving time. But the propane burner can also help achieve a more vigorous boil, which will help to coagulate proteins and avoid off-flavors from DMS.
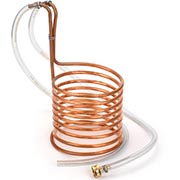
Wort ChillerWort chiller – The immersion wort chiller was also listed as a time saver in Part One of the series, but it can also help you make better beer. The rapid chill time when using a wort chiller helps protein settle to the bottom of the kettle and reduces the chance of infection.
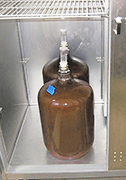
Carboy in Dedicated RefrigeratorFermentation chamber – A dedicated fermentation chamber is the best way to control the temperature of your homebrew fermentations. Search craigslist or your local classifieds for a used refrigerator or freezer. You can even modify it into a kegerator with a beer faucet or beer tower. Use the next item on this list to maintain strict temperature control.
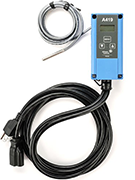
Temperature ControllerTemperature controller – The temperature controller is a device that keeps your refrigerator or freezer set to a particular temperature. It essentially tells your appliance when to turn on and off. Fermentation temperature control is crucial to making the best beer possible – the controller is a worthwhile investment.
Stir Plate
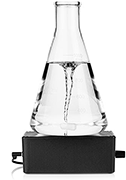
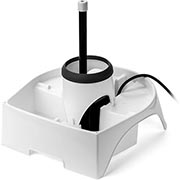
Magnetic stir plate – More and more I’ve found that fermentation quality is the primary factor in the quality of a homebrewed beer, especially the pitch rate and fermentation temperature. A magnetic stir plate is the great tool for quickly building a large, healthy colony of yeast for your yeast starter.

So what are your priorities for your next home brewery upgrade? Do you want to make brew day easier or do you want to make it faster? Or do you want to focus on improving the quality of your beer? Are there any key upgrades I’ve missed?
———————————————————————————————————–
THERE’S MORE! This is part 3 of a 3 part series on home brewing equipment. See part 1 to learn about home brewing equipment that makes brewing easier. See part 2 to learn about homebrewing equipment that saves time!
—————————————————————————————————————————–
David Ackley is a beer writer, brewer, and self-described “craft beer crusader.” He holds a General Certificate in Brewing from the Institute of Brewing and Distilling and is founder and editor of the Local Beer Blog.

Winemaking Terms You Should Know: Part 10

Bottle Washer, Stainless-SteelIn several earlier posts, we introduced a few home winemaking terms.  There are many terms to learn in home winemaking, and this post, like all the previous posts, gives you a short introduction to a few of those terms to help you get started in home winemaking, or perhaps brush up on some of the terms you may not have seen in a while.

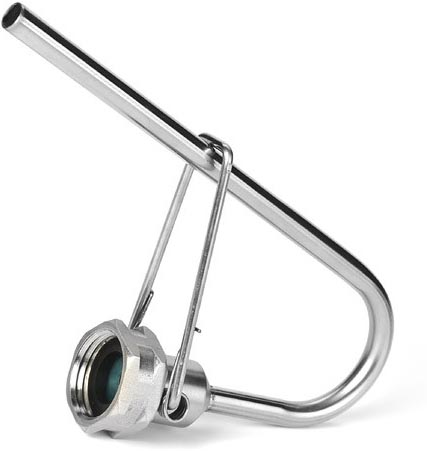
  • Bottle Washer: Bottle washers are great little pieces of home winemaking equipment that you’ll end up using over and over again.  Prior to bottling your wine, you need a clean vessel in which to put the wine.  It can be really hard to clean a bottle due to its odd shape, and sometimes a bottle brush alone simply won’t cut it.  The bottle washer is a stainless steel hose-like piece of winemaking equipment that you can attach to any sink that has outside threading (like outdoor or laundry sink faucets).  This device, once attached to a faucet, will create a very high-powered stream of water which you can use to blast out dirt or soap particles from your wine bottles.
  • Meritage:  The term ‘Meritage’ is often referred to as the “American Bordeaux”.   Created in California, “Meritage” is a mix of the words “merit” and “heritage”, and is pronounced similar to the latter word.  A red Meritage is a red blend that must incorporate at least 2 of the 5 red Bordeaux grapes. A white Meritage is a white blend that must incorporate at least 2 of the three white Bordeaux varieties.  You must be approved to use the term “Meritage” for your blends, and if you are approved, you must pay a fee to use the protected name.
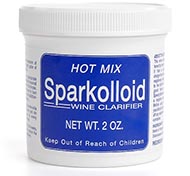
  • Jar Of Hot Mix SparkolloidSparkolloid:  Sounds like it’s straight out of a science fiction movie, but no, it is actually a term used in winemaking.   Sparkolloid is a fining agent made from clay, and is used to clear a wine after fermentation.  On a basic chemical level, the positively charged Sparkolloid ions become attracted to the negatively charged unwanted bits and falls to the bottom of the container.  Use this with Bentonite to ensure you have a clear wine.
  • Yeast Hydration:  Just as people need water to stay alive, yeasts, too, need hydration to become active.   In order to jump start your wine yeast and get them ready to do their job of converting juice to wine, add them to about 4oz of water at no more than 100oF.  Let the yeast sit and hydrate in the water for no more than 15 minutes, and then they are ready to start making some wine.
  • Skeeter Pee: As unappetizing as it sounds, Skeeter Pee is actually lemon wine. It’s a very drinkable and become very popular, lately. There are many Skeeter Pee recipes out there, so good, so not so good so be careful.

———————————————————————————————————
Ed Kraus is a 3rd generation home brewer/winemaker and has been an owner of E. C. Kraus since 1999. He has been helping individuals make better wine and beer for over 25 years.

Leigh Erwin: A Beginner's Wine Making Journey: Part 23

Glass Carboy Of WineWell, the last time we “spoke”, I had the unfortunate disaster of a busted spigot on my hands.  In addition to needing a carboy for my Carmenere wine, I also needed a carboy for the Pinot Chardonnay that had been sitting around for 2 months.  Racking time for this white wine was now!  Good timing, huh?
I still didn’t have another carboy and the primary fermenter was now acting as a carboy for the poor Carmenere wine.  I could have ordered a new spigot from ECKraus to fix the other carboy I had (with the spigot hole in it), but based on my schedule at the time, I really needed a solution like that day.  So, I’m afraid to admit that I cheated on ECKraus.  It was just a little bit!  The other store doesn’t mean anything to me, I swear, ECKraus!  😉  hehehe.
There happens to be a shop in the town where I live that sells homebrew equipment (in addition to other garden-type things) so I drove on over there to see if I could get a replacement spigot for my plastic carboy.  Unfortunately, however, they only carried one plastic spigot in stock, and it wasn’t the right size to fit on the end of my spigot wrench.  Additionally, they didn’t sell any wrenches that would work for me.  Hmmmmmm……..so, what to do?
Well, I made the executive decision right then and there to purchase a glass carboy.  I know, I know, I keep saying I’m not going to purchase a glass carboy until after I move into a new home, but I really didn’t have much choice.  I suppose I could have waited a few days to order a replacement spigot from ECKraus, but time was not on my side and I needed to make a decision immediately.
I’m actually really glad I ended up getting the glass carboy, as now having seen/felt it in person; I really see no reason to wait until I move to have one.  They take up the same amount of space as a plastic carboy, it’s just a little heavier.  I mean, we’re going to be moving an entire apartment into a new house, so what’s a few extra pounds to tote along?
So, long story short, I now have a new glass 6-gallon carboy that my Pinot/Chardonnay is now chilling out in.  The wine kit instructions said to wait until it was clear to bottle, so I went ahead and added some kiesol/chitosan that I had laying around to help it clear a little faster.  It’s been a couple of days now and it’s clearing up a lot—I imagine bottling time will be very soon!  Fingers crossed!

————————————————————————————————————-
Leigh ErwinMy name is Leigh Erwin, and I am a brand-spankin’ new home winemaker! E. C. Kraus has asked me to share with you my journey from a first-time dabbler to an accomplished home winemaker. From time to time I’ll be checking in with this blog and reporting my experience with you: the good, bad — and the ugly.
Your Home Brewing Equipment Matters Part 2: Gear That Saves Time!

One of the main reasons people quit home brewing is that it can be a very time-consuming activity. For those of us who enjoy home brewing, we consider it a good use of time. But even those of us who love to brew have other commitments and things to do. After all, time is money, right?
After a recent 10-hour brew day, I got to thinking about some home brewing purchases that would save me time in the home brewery.
Home Brewing Equipment That Helps Save
Gas Propane BurnerGas burner – When it comes to heating water and boiling wort, you can save a lot of home brewing time by using a propane burner. As you start to brew bigger batches, an outdoor propane burner is the only way to go.
Wort Chiller

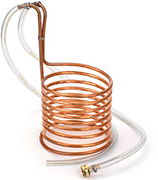
Immersion wort chiller – When cooling 3-4 gallons of wort from a partial mash recipe, an ice bath in the kitchen sink will get the job done, but it still takes a good 30 minutes or longer. An immersion wort chiller will reduce your chilling time by half – maybe even more depending on the temperature of your ground water. Added benefits include a better hot break (reducing haze) and a decreased chance of infection (due to air exposure).
Brew kettle

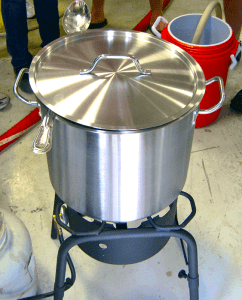
Large capacity brew kettle – I recently brewed a high gravity beer with my five-gallon brew kettle. Since I wanted to end up with a full five gallons of beer, I had to brew the beer even stronger than intended and condense all of the needed sugars into a four-gallon boil. It took over an hour of boiling to condense the wort before I could even start adding hops. I could have saved an hour or more with a larger brew kettle. A 42-quart pot provides ample room for the 6-7 gallons of wort needed for a five-gallon batch of all-grain homebrew. (It’s on my list!)
keg draft system
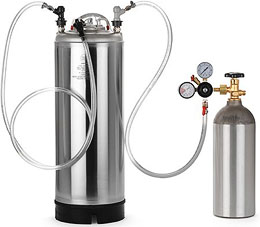
Keg – Anyone who makes beer can tell you how time consuming it can be to remove labels from, to clean, and to sanitize 50+ beer bottles. Eliminate that struggle with your own homebrew keg. Over several batches of beer, the cost of the keg will be balanced out by the time you save.
CO2 Tank
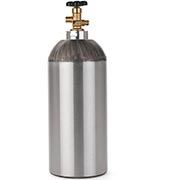
Larger CO2 tank – Enjoy fewer trips for a refill – and sometimes a discounted rate – when you buy a larger capacity CO2 tank. Again, this investment will pay for itself over time.
Marks Keg and Carboy Washer
Keg/Carboy Washer – While the Keg/Carboy Washer definitely makes cleaning your kegs and carboys easier, it also saves time on clean-up duties allowing you to do other things while the washer is running.
What methods have you figured out to save time when homebrewing? What home brewing equipment do you have that saves you time?
———————————————————————————————————–
THERE’S MORE! This is part 2 of a 3 part series on home brewing equipment. See part 1 to learn about home brewing equipment that makes brewing easier.
———————————————————————————————————–
David Ackley is a beer writer, brewer, and self-described “craft beer crusader.” He holds a General Certificate in Brewing from the Institute of Brewing and Distilling and is founder and editor of the Local Beer Blog.

My Homemade Wine Gives Me Heartburn

This Is Homemade Wine That Gives Me HeartburnWe have been making wine for a few years now. Everything from blueberry, blackberry, pear, apple, strawberry, peach, and pineapple. Mostly from fresh fruit but lately some from frozen fruit. The big problem we have is that after 2 glasses I am dying from heartburn! I’m not sure what to do to lessen the acid and after reading some books I’m even more confused and I’m not even sure which acid i should be adjusting! Can you help?
Name: Ann
State: NY
—–
Hello Ann,
What it boils down to is that you have too much acid in your wine. This is why it is giving you heartburn. When I say acid, I am referring to the tartness that is in the fruit combined with the acid you added per any wine recipe.
Typically, a wine recipe will call for acid in the form of Acid Blend. This is a blend of the three most common acids found naturally in fruits: citric, tartaric and malic. You can find more information about Acid Blend on our website.
You can end up with too much acid in your wine even if you are following a wine recipes. This is for the simple fact that the wine recipe does not know exactly how much acid is in the fruit you are using. It varies, and the recipe can only make a good guess.
To Always Have The Tartness Of Your Wines Spot-on…
You need to use an acid testing kit when preparing the wine must. The acid testing kit is essentially a titration kit that will tell you how much acid is in a sample of the wine must as a percentage.
Take a reading before you add any Acid Blend called for in a wine recipe. Once you have this reading, the directions will tell you how much Acid Blend to add to get to the target reading. You will typically be shooting for a range of .55% and .75%.
By taking these actions you will be taking control of your wine’s acidity, and you will be saying goodbye to your heartburn reaction to the wine.
Here’s an example. Let’s say you are making a blackberry wine. You would mix up the wine must as you normally would, except don’t add the Acid Blend. Instead, you take a reading to see how acidic the wine must is without the Acid Blend.
Let’s say you get a reading of .25%, but you want your wine to be .55%. Now you know that your need to raise the acidity percentage by 30 points. Here’s an interesting fact to help you along:

For every teaspoon of Acid Blend you add to a gallon of wine, you will raise the acid percentage by .15%. 

With this bit of information, you now know that you need to add 2 teaspoons of Acid Blend to each gallon of wine must to hit your target acidity level. This will raise the acidity to the target level. This can be applied to any fruit wine you decide to make.
As For The Wine’s You’ve Already Made…
A starting point would be to take a reading to see where the acidity stands. Once you know this, you will know what course of action you will want to take.
There are several ways you can go about lowering a wine’s acidity. All of them require that you put any bottled wines back into a common container. If the acidity is not to far off you can add distilled water to dilute it. In a situation that is a little more severe, you can add potassium bicarbonate to neutralize some of the acid. You can also try blending it with another wine that is lower in acid. Each on of these methods has it’s limitation and can be only taken so far.
With all this being said, you are on the right track as to why your homemade wine is giving you heartburn. It’s all about the acidity. Take control of the acid and you will take control of your heartburn.
Happy Winemaking,
Ed Kraus
———————————————————————————————————
Ed Kraus is a 3rd generation home brewer/winemaker and has been an owner of E. C. Kraus since 1999. He has been helping individuals make better wine and beer for over 25 years.

What Went Wrong With My Beer?

Man Thinking, "What Went Wrong With My Beer?"One of the most rewarding aspects of homebrewing is learning how to make better beer. To do that, sometimes it’s important to be able to answer the question, “what went wrong with my beer?”.
The first step in the problem solving process is to do a full sensory analysis of the beer. Compare what you see, smell, and taste against what you expect from this style of beer or what you intended the beer to be. What does the beer feel like when you take a swallow? Is it under or over carbonated? The BJCP Style Guidelines is a great place to start when analyzing your homebrew.
When something tastes or smells “off”, it may be a clue as to what went wrong with your your beer. It’s up to you to try to identify the specific aroma or flavor that raises a red flag. This can give you a good indication as to where you need to improve your technique. Here are some of the most common flavor and aroma faults associated with homebrew:

  • Phenolic – Phenolic flavors and aromas tend to be described as tasting of plastic, band-aid, smoky, or spicy. Though some degree of phenolics may be desirable in certain beer styles (particularly Belgian ales and hefeweizens), phenols in excess can overwhelm a beer. Excessive phenols are usually caused by fermentation issues, most commonly incorrect temperature or an infection. Clean your equipment thoroughly and do everything you can to control fermentation temperature.
  • Grassy – Grassy flavors most often come from raw ingredients. Try reducing the amount of dry hops and make sure your ingredients are fresh.
  • Alcoholic – With the exception of some barrel aged beers, in most cases you shouldn’t taste or smell alcohol in your beer. If you find your beer to be excessively alcoholic, try reducing the use of simple sugar adjuncts, lowering fermentation temperature, or allowing the beer to age for a longer period of time.
  • Acetaldehyde – You’ll know acetaldehyde when you come across it – it smells and tastes just like green apples. Acetaldehyde is usually caused by stressed fermentation. To avoid acetaldehyde, give your wort good oxygenation, allow adequate conditioning time, and use yeast nutrient.
  • Medicinal – A beer the tastes or smells like chlorine could be due to chlorinated water, residual chlorine from bleach-based sanitizer, or infection. Boil your water to vaporize chlorine or use bottled water. Also, rinse bleach-based sanitizers well with very hot water. Finally, clean and sanitize thoroughly to avoid infection.
  • Sour/Acidic – Unless you are deliberately brewing a sour beer or a beer with sour ingredients, acidic flavors indicate a possible infection. Certain bacteria produce acid, so be sure to clean and sanitize your equipment thoroughly. Scratched fermenters may need to be replaced.
  • Yeasty – Excessively bready or yeasty flavors are caused by yeast still in suspension in your beer. Try allowing the beer more time in secondary so it can flocculate and drop out of suspension. Clarifying agents like gelatin can help. Also, when shopping for beer yeast, look for highly flocculating yeast strains.

You may have noticed that several of the reasons why something went wrong with your beer are due to fermentation problems. Before you make any changes to your homebrew system, I would highly recommend investing in a temperature controlled fermentation space. Between temperature control, using a yeast starter to pitch an adequate amount of yeast, and good cleaning and sanitation, you’ll rarely, if ever, encounter any of the faults above.
So, there you have it! Now the next time you ask yourself the question, “what went wrong with my beer?”, you’ll have an answer!
Do you have an off-flavor horror story? Have you ever had to throw out a batch?
*A full list of BJCP beer faults may be found here.
———————————————————————————————————
David Ackley is a beer writer, brewer, and self-described “craft beer crusader.” He holds a General Certificate in Brewing from the Institute of Brewing and Distilling and is founder and editor of the Local Beer Blog.