How Much Does It Cost To Make Your Own Beer?

Homebrewing GearMany homebrew retailers will tell you that you can save money by homebrewing. But is this really the case? How much does it really cost to make your own beer? Let’s crunch some numbers.
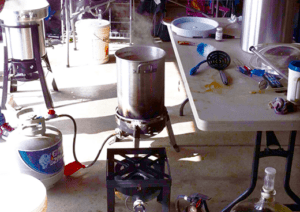
The typical homebrewer brews enough beer to produce about five gallons. Account for some loss, and let’s call it eight six-packs. That’s a lot of beer! What does it cost to buy a six-pack of a typical pale ale? It varies depending on the brand and the retailer, but let’s call it $10, or $80 for eight six-packs. Maybe less if you buy a twelve-pack here and there. Depending on your state, tax can add a nice chunk too.
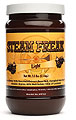
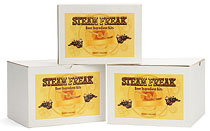
A pale ale recipe kit on the other hand, such as the Steam Freak “Bazz” Pale Ale, costs just shy of $35. Of course there’s shipping to account for, but buy two or more and the price goes down to under $32 per kit, plus you qualify for E. C. Kraus free shipping. Now we’re talking! As you can see it really doesn’t cost that much to make your own beer.
Shop smart and you could be in for some serious savings over buying your beer from the store. Compare it to the amount you’d spend at the local pub…you can save a lot by homebrewing!
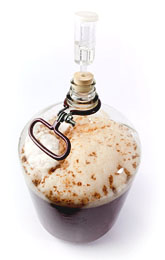
The challenge comes in when we start adding in the variables, such as equipment. Our Beer Makers Necessities Kit runs for just shy of $130, but includes your first ingredient kit and free shipping. It’s an up front investment, so the more your brew, the less it costs per batch. There are other costs that are spread out over time, such as cleaner and sanitizer, but their per-six-pack cost is pretty minimal (at most a dollar or so per gallon of beer).
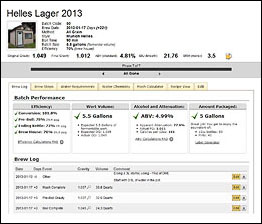
Beer blogger Bryan Roth (who you may remember from his guest post titled Malt, Hops, and Zen) explores this question on his personal blog, This is Why I’m Drunk. He was kind enough to compile some data on the costs of his beer recipes and then compare them to their commercial equivalent:

Bryan’s Homebrew Ingredient Costs

Beer

(K) = Prepared Kit (R) = My Recipe

Ingredient Cost

Cost per Bottle

Cost per Six-Pack

ABV

Jalapeno Blonde (K)

$30

71 cents

$4.26

6.50%

Bass Ale Clone (K)

$33

79 cents

$4.74

5%

Belgian Saison (K)

$39

93 cents

$5.58

6%

Beer/Cider Hybrid (K)

$40

95 cents

$5.70

7.30%

Poor Richard’s Ale (R)

$45

$1.07

$6.42

5.50%

Apricot Wheat (K)

$47

$1.12

$6.72

6%

Blueberry Wheat (R)

$48

$1.14

$6.84

6.50%

Honey Basil Ale (R)

$48

$1.14

$6.84

7%

Imperial IPA (R)

$63

$1.50

$9.00

9.20%

Watermelon wheat (R)*

$65

$1.30*

$7.80

7%

Double IPA w/ honey (K)

$66

$1.57

$9.42

8%

*Watermelon wheat yielded 50 12-ounce bottles due to use of watermelon juice, which increased overall amount of liquid

Bryan’s Homebrew Costs vs. Commercial Equivalent

Bryan’s Beer per Six Pack

Commercial Beer per Six Pack

Price Difference

Bass Ale Clone – $4.74

Bass Ale – $8

-$3.26

Apricot Wheat – $6.72

Magic Hat #9 – $8

-$1.28

Blueberry Wheat – $6.72

Sea Dog Blueberry – $9

-$2.28

Honey Basil Ale – $6.84

Bison Organic Honey
Basil – $9

-$2.16

Watermelon Wheat – $7.80

21st Amendment Hell or High Watermelon – $9

-$1.20

As Bryan points out, between equipment purchases and the time involved in brewing, we’re probably breaking even. The thing is, we brew because we love it, and for a number of other good reasons, too. How else do you explain that there are now over 1 million homebrewers and nearly 1,500 homebrew clubs in the United States? I for one will personally guarantee that if you pick up the hobby of homebrewing, you’ll feel all the richer because of it.
—————————————————————————————————–
David Ackley is a beer writer, brewer, and self-described “craft beer crusader.” He holds a General Certificate in Brewing from the Institute of Brewing and Distilling and is founder and editor of the Local Beer Blog.

7 Confessions Of A Homebrewer

Man Holding Glass Of Homebrew BeerHave you ever brewed a beer that you weren’t proud of? Has your home been taken over by brewing gear, kegs, and bottles? While homebrewers are a proud bunch, there are some aspects of the hobby that we wouldn’t go out of our way to share with just anyone.
At the risk of hurting my street cred (who doesn’t love a little self-deprecation?), here are a few of the “trade secrets” I normally don’t let out of the bag. Can you relate to any of these?

  1. My bathtub is used for brewing more often than bathing. Some call us “bathtub brewers,” but I don’t know anyone who would actually make beer in the tub. It just comes in handy for cleaning and sanitizing and as a staging area for bottles and fermenters in various stages of cleanliness. However, if my girlfriend wants to take a bath, it means I have to move all my brewing equipment out of the way.
  2. Our coat closet is actually a fermentation chamber. Yes, we tend to have more fermenters bubbling than coats hanging at any given time. But who needs a rain jacket when you have beer?
  3. I once made a batch that tasted a little funky…but I still drank every bit of it. It happens to everyone at least once. For some reason, a batch comes out tasting pretty far from what you expected. Luckily, there are no known pathogens that can survive in homebrew, so if you can stand the taste, bottoms up. The fun part is that we learn from our mistakes, and every subsequent beer is that much better!
  4. A significant portion of my disposable income goes towards homebrewing. What can I say? I love to brew. You can see where my priorities lie.

That’s enough self-humiliation for now. To repair my damaged ego, I asked some fellow brewers to contribute skeletons from their own homebrewing closets:

  1. I stained my garage floor when bottling and moved boxes over it so my wife wouldn’t find out. -Anonymous
  2. My wife and I have a delicate balance of understanding when it comes to homebrew, so asking for any extra space for bottles or equipment can be a challenge. So, I’ve had to improvise… I have two dedicated spaces for fermentation, courtesy of tough negotiations with my wife: half of a downstairs closet for primary/secondary and half of an upstairs closet for bottle conditioning. I was very ambitious my first year of homebrewing and made 13 batches, which meant a lot of bottles. When I ran out of space, I had to hide some bottle conditioning beer in the one thing scattered throughout the house that was plentiful — my wife’s vast shoe collection. -Bryan Roth, This Is Why I’m Drunk, @BryanDRoth
  3. My guest bedroom has a kegerator — though I must say, guests rarely complain when I make that confession. -Thom O’hearn, @AVLBeerScout

Do you have any embarrassing stories from your homebrew experience? Share in the comments!
——————————————————————————————————-
David Ackley is a beer writer, brewer, and self-described “craft beer crusader.” He holds a General Certificate in Brewing from the Institute of Brewing and Distilling and is founder of the Local Beer Blog.

Taking Advantage Of Beer Brewing Stats And Calculators

Digital thermometerToday’s guest post is from Larry of Brewer’s Friend. He shares some insights on how to improve your home brewing calculations.
————————————————
The science of brewing can be just as alluring as the smells, tastes, and never ending equipment accumulation related to home brewing. Brewing science is a wide topic that includes everything from yeast growth, to hops analysis, to the various brewing processes.
Let’s start at the beginning: the science and stats behind beer recipes. Beer recipes have several stats including original gravity, final gravity, IBUs (bitterness), SRM (color), and ABV (alcohol content).
A quick walk through of the stats:

  • Original Gravity (OG) – Original gravity tells how much sugar is in the wort prior to fermentation. This is based on how much grain was used, what the volume of the batch is, and mash efficiency (for all grain brewers). This is where the term ‘high gravity beer’ comes from. The higher the OG the higher the alcohol potential. There are two popular gravity scales used in brewing, specific gravity and degrees Plato. Specific gravity (1.xxx) is popular in the home brewing world. Plato is generally used by pro brewers and works well with the metric system.
  • Final Gravity (FG) – Final gravity tells how much sugar the wort contains after fermentation. FG depends on the fermentability of the wort and the yeast strain selected. Other factors like temperature, yeast health, alcohol level, and mash temperature also impact the FG. The FG is the gravity of the completely fermented beer.
  • Alcohol by Volume (ABV) – ABV is calculated using the difference between the OG and FG. The higher the OG and the lower the FG, the more alcohol is in the beer.
  • International Bittering Units (IBUs) – IBUs indicate how bitter a beer is. Perceived bitterness can be different from the raw IBU number. A malty beer at 60 IBUs compared to a thin dry beer at 40 IBUs may appear to have equal bitterness.
  • Standard Reference Measure (SRM) – SRM is the color the beer is expected to be given the grains used. Base grains like 2-row and pilsner impart straw/golden colors. Caramel grains add red, copper, and brown hues. Roasted grains impart dark brown and black color.

Beer recipe software can be used to calculate all of these numbers:
Brewer’s Friend has set of over 20 basic calculators, plus a fully integrated recipe editor.
Taking measurements:
For taking gravity readings (the OG and FG) a hydrometer or refractometer is used. I find both work well as an essential tool for record keeping, but prefer hydrometers for their economy and consistent accuracy. Refractometers can be a little finicky at times in terms of accuracy, but they only require a drop or two of wort vs. a few ounces with hydrometer readings.
Don’t forget to pickup a graduated cylinder to hold the hydrometer sample!
Note: Hydrometer readings must be temperature corrected, since gravity density changes with temperature. Hydrometers are usually calibrated to 60F or 68F. Brewer’s Friend has a hydrometer temperature correction calculator that comes in handy. This way, even if your sample is still at a warm 100F, you can get a good idea of what the actual value is before it cools down.
Refractometer readings are given in Brix (which is effectively the same as Plato), but many home brewers work in specific gravity. Our refractometer calculator automatically handles this conversion, and accounts for the optional correction factor that some refractometers require.
Unfortunately there is no simple gadget to measure IBUs. The process is quite complex and requires a beer sample to be sent to a lab for analysis. Someday, maybe we’ll see a Kickstarter project that delivers IBU measurements in a hand held device?!
Brewer's Friend Beer Recipe PageRecording your measurements:
Brewer’s Friend supports a brew feature that allows log entries for tasting notes, dates, and most importantly gravity and volume measurements. The log entries are used to calculate the batch’s actual ABV, efficiency, attenuation, and other stats so brewers know how their beer really turned out in comparison to a planned recipe.

Other important beer recipe calculations:

  • One way to take your brewing to the next level is to pitch yeast at the pro rates. This usually involves making a starter from a smack pack or vial. Brewer’s Friend has an easy to use yeast pitch calculator, which makes sure you pitch the right amount of yeast for your beer.
  • Water chemistry is also important in brewing. I pay close attention to my ion levels in every brew. Brewer’s Friend has two water chemistry calculators. The first is a basic version targeted at hitting water ion levels for style and taste. The second water chemistry calculator is an advanced version meant for use by all grain brewers, and gives a prediction of mash pH among many other little details. The backend to our advanced calculator was written by Kaiser of Braukaiser.com.

The team behind Brewer’s Friend is a group of highly dedicated and experienced brewers, bloggers, and technologists whose mission is to make your brewing the best it can be. Check out our website for all your brewing calculation needs and don’t hesitate to reach out with any questions!
Cheers!
Guest post by Larry at Brewer’s Friend
https://www.brewersfriend.com

Bitter, Special Bitter, ESB – Brewing English Pale Ales

English Extra Special Bitter (ESB)Bitter is the term given to a category of English pale ales, named for their relative bitterness compared to the English mild ale. Though they’re called bitter, they’re no more so than your average American pale ale. Ideally, English bitter ales should be session-able. Imagine drinking them in rounds at the local pub.
The bitter ales tend to be categorized by their original gravity. “Ordinary bitter” or simply “bitter” refers to the lowest gravity ales. These are ideal for a long day of drinking at the local watering hole. Stronger versions may be called “special” or “best bitter”. Finally, many American drinkers will recognize the name ESB, or Extra Special Bitter. The classic example is Fuller’s ESB (OG: 1.054), and many American brewers have adopted the term for their own English-style pale ales.
Though the naming convention is somewhat loosely defined in the UK, the BJCP has put some guidelines in place to give homebrewers and homebrew judges a framework for comparison. As you can see, gravities and IBUs, tend to increase as we move up the scale:

Ingredients

  • Water – Many English pale ales are brewed with relatively hard water, which help give the hops a little “pop”. If you know you have soft water, consider adding some calcium sulfate, also known as gypsum, to your mash water.
  • Malt – English pale ale malt, such as Munton’s, should form the base of the grain bill (~90%). Munton’s also make a very good light malt extract. Adding some Victory or Vienna malt will bring in some toasted flavors and a pound of Caramel 40L malt will be plenty to give your beer a touch of caramel sweetness and golden to amber color. Some brewers will use sugar to increase gravity and to impart a dry finish.
  • HopsKent Goldings is the classic hop for English pale ales. With aromas of citrus and spice it does very well in late additions. Fuggles is another popular English variety, and tends to be more earthy and woody. Bitter ales are sometimes dry-hopped.
  • Yeast – The fruity esters derived from a classic English yeast strain are desirable. Safale-S04 is an excellent dry ale yeast.
  • Priming – The English are famous for what is known as “Real Ale” — beer that is cask conditioned and naturally carbonated (as opposed to force carbonating under CO2 pressure). To the American palate, cask conditioned ales seem somewhat warm and flat — that’s the way it’s supposed to be! Homebrewers who bottle get a similar effect by using just 1/2 cup priming sugar in a five-gallon batch.

E.S.B. Partial Mash Recipe (from Homebrewing for Dummies):
“1-4-U, 2-4-ME S.B.”
6 lbs. Munton and Fison malt extract
1 lb. 40L crystal malt
.5 pound Victory malt
1 cup brown sugar
2 oz. Kent Goldings @ :60
1 oz. Kent Goldings @ :15
1 tsp. Irish Moss
Primary fermentation for 8 days at 65F
Secondary fermentation for 10 days at 65F
Yeast: Wyeast 1968 / London ESB Ale
**Tips: Prepare a yeast starter and dry hop with an extra ounce if Kent Goldings if desired.
Do you have a favorite bitter ale homebrew recipe? Share in the comments below!
———————————————————————————————————–
David Ackley is a beer writer, brewer, and self-described “craft beer crusader.” He holds a General Certificate in Brewing from the Institute of Brewing and Distilling and is founder of the Local Beer Blog.

Be A Homebrew Champion — Enter a Home Brewing Competition

Home Brewing CompetitionIf you’ve caught the homebrewing bug, chances are that you’ve thought about submitting some of your beers in a home brewing competition. The cost is usually minimal — maybe $5-7 per entry — and the payoff can be huge. Many home brewing competitions offer as the grand prize an opportunity to brew your batch on a commercial system. Win a Pro-Am competition, and your beer could be served at the Great American Beer Festival! What could be cooler?!
There are a couple basic formats for home brewing competitions to be aware of, the open festival and the closed competition. In the festival format, you’ll be placed behind a table to serve your homebrew to the attendees and the judges. It’s a fun opportunity to “sell” your homebrew and yourself to other craft beer fans. Awards may be for different style categories, “People’s Choice”, or superlative-style prizes like “Strangest Ingredient” or “Best Use of Hops”.
The closed home brewing competitions are usually, but not always, BJCP-sanctioned events where beers are submitted within certain style categories and are judged side-by-side with other styles in the category. These competitions a great because you’ll get score sheets with helpful tasting notes from each of the judges. Keep an eye out for opportunities to judge or steward at the event! It’s a great way to develop your sensory and tasting abilities!
Advice for Homebrew Competitions
To help you maximize your home brewing competition success, here are some tips:

  • Brewing a standard style? There will likely be a ton of pale ales, IPAs, and brown ales. Make sure you’ve tried the beer recipe at least once before, because competition will be stiff for the most popular beer styles.
  • If you can, submit more than one beer. This will greatly enhance your odds at gaining recognition for your brews.
  • Not sure which style category your beer fits into the best? It’s usually ok to submit the same beer into more than one category. Read the competition rules for details.
  • Look for home brewing competitions outside your immediate area. Most competitions will accept mail-in submissions. Just don’t mail USPS — it’s illegal to ship alcohol via the postal service!
  • Brew outside the box to stand out from the crowd. This works well for a festival style home brewing competition, where people really let creativity fly. If you have something crazy to bring people to your table, this will increase the chances that they will try your other beers too. Before you know it, everyone will be telling their friends, “Hey, did you try that crazy beer over at table 17?”

What advice do you have for homebrew competition success?
——————————————————————————————————
David Ackley is a beer writer, brewer, and self-described “craft beer crusader.” He holds a General Certificate in Brewing from the Institute of Brewing and Distilling and is founder of the Local Beer Blog.

Excuses, Excuses – The 3 Major Reasons People Quit Brewing!

Homebrew Beer BottlesTime and again I hear someone say, “I  tried brewing once, but I didn’t stick with it.” Before you know it, excuses pile up like trub in the kettle! Maybe I’m biased, but I feel like just one brew isn’t enough to make final judgement on the hobby. In an attempt to convince some of those one-timers to stick with it, here are some of the most common reasons people quit brewing — and why they should dust off the brew pot and give homebrewing another shot.
1. “My first beer wasn’t very good.”
No one’s first beer is very good! A lot of brewers will tell you that their first homebrew was “drinkable”, and many will say that while some batches haven’t turned out perfectly, they’ve never had to pour one down the drain. So even if your first batch wasn’t on par with Boulevard or Sierra Nevada, don’t worry. Your second batch is likely to be much better than your first, and the more you brew the better you’ll get!
2. “I don’t have enough time.”
With kids, a job, and other commitments, I understand that time can get a little tight. Yes, it’s possible to spend most of a whole day brewing, but it’s also pretty easy to make sure that brew day takes no more than a few hours. Hopped extract kits (try the Munton’s, Connoisseur, Brewferm, Mountmellick, or Brew Canada kits) are the fastest, easiest, and most cost-effective way to brew. All you have to do is basically boil the extract with water, chill the wort, pour into a clean and sanitized fermenter, then pitch the beer yeast.
If you want to add a little something to make your brew more interesting, it’s pretty easy to add some dry hops, fruit, or spices during secondary fermentation. It doesn’t take much time at all. Then a couple hours on bottling day, and you’re set!
3. “My boyfriend/girlfriend/significant other doesn’t like beer.”
Chances are, they just haven’t had the right beer yet. After you’ve told them you want to be a brewer, see if you can figure out what kinds of flavors they like and brew something to their tastes. Maybe a fruit beer? Maybe they’re a closet hop-head and just need an American IPA to figure out what real beer tastes like. Gluten-sensitive? We’ve got a kit for that. If worse comes to worst, more beer for you!
There are tons of reasons people homebrew. Don’t you think it’s time to give it another try?
——————————————————————————————————
David Ackley is a beer writer, brewer, and self-described “craft beer crusader.” He holds a General Certificate in Brewing from the Institute of Brewing and Distilling and is founder of the Local Beer Blog.

Scotch Ale Homebrew: Guidelines and Characteristics

Glass Of HomebrewLove malty beers? Then Scotch ales are for you.
To research the history and characteristics of Scotch Ale, I dug into the Oxford Companion to Beer, probably the most comprehensive guide to beer and brewing ever published. (Tip: At the time of writing the Kindle edition of the Oxford Companion was on sale for less than $4.) In the Scotch Ale entry by Horst Dornbusch, I learned that:

  • Scotch ales are brewed in various strengths and categorized accordingly. They use a naming convention that designates the lowest gravity beers as 60- and 70-shilling, with the highest gravity beers being 100-shilling, 120-shilling, or more. These names come from price per barrel that these beers would cost.
  • Further, 60-shilling beers were called “light”, 70-shilling “heavy”, 80-shilling and 90-shilling “export”, and 100-shilling and higher “wee heavy”.
  • The US was a major importer of Scotch ale in the 18th-century: “By 1785 North America and the West Indies soaked up 80% of Scottish strong ale export, reflecting the concentration of Scottish emigrants to Maryland, Virginia, and the Carolinas…”

It’s interesting to think about the affect of Scottish culture on the US and how many of those traditions live on in the beer world. Asheville’s Highland Brewing Co. and the Oskar Blues Old Chub come to mind.
But enough chit-chat — let’s do some brewing!
Key Characteristics: Malt
Scotch ales are malt-forward beers with a somewhat restrained use of hops. They range in color from amber to deep reddish-brown. We often see them brewed with a pinch of roasted barley and sometimes a bit of smoked malt. Dornbusch hypothesizes that the use of smoked malt isn’t especially authentic to Scotch ales, but rather a modern nod to the flavors present in Scottish whisky. It’s an optional component of the grain bill according to the BJCP, and if used, should be included with restraint.
Today’s homebrewers may opt for a base malt such as Briess Two-Row Malt or Munton’s Mild Ale Malt, adding small amounts of lower Lovibond caramel malt for color and caramel flavor and just a couple ounces of roasted barley for dry, grainy flavor. An alternative, perhaps more authentic approach would be to use almost exclusively base malt and achieve caramel color and flavor through an extended, vigorous boil. (The prolonged exposure to heat will cause the sugars in the wort to caramelize, contributing both color and flavor.) Dornbusch suggests a high mash temperature (~158F) to achieve some residual sweetness and body.
Hops
Keeping in mind that Scottish ales are malt-forward, the use of hops a generally modest. The BJCP guidelines call for the strongest Scotch Ale — aptly called Strong Scotch Ale (category 9E) —  to stay within 17-35 IBUS. It would be most appropriate to use English varieties of hops, such as Fuggles.
One interesting tidbit from the Oxford Companion to Beer states that historically, Scottish brewers may have used heather to flavor their beer. I’ve never brewed with heather, but it would be an interesting experiment to throw some heather into your Scotch ale if you’re so inclined.
Use the guidelines above to build your own all-grain Scotch Ale recipe. We also carry a Brewer’s Best Scotch Ale Recipe Kit that’s ideal for extract brewers.
Til next time…Slàinte!
————————————————————————————————
David Ackley is a beer writer, brewer, and self-described “craft beer crusader.” He holds a General Certificate in Brewing from the Institute of Brewing and Distilling and is founder of the Local Beer Blog.
————————————————————————————————
Resources: Oliver, Garrett; Colicchio, Tom (2011-09-09). The Oxford Companion to Beer (Oxford Companion To…). Oxford University Press. Kindle Edition.

Announcing! E. C. Kraus “Steam Freak” Beer Recipe Kits

Beer Recipe KitThis summer we’ve been working hard to develop our own, in-house line of malt extracts and homebrew recipe kits. These products are of the same high quality that we’ve always been proud to offer, backed by a commitment to excellent customer service, and, as always, free shipping on orders over $50. If you’ve been on the fence about home brewing, the time has come to get on board with one of the most rewarding hobbies there is.
And without any further ado, announcing the Steam Freak lineup!
Steam Freak Liquid Malt Extracts (LME)
Each of our liquid malt extracts contain 3.3 pounds of fresh, pure, unhopped malt extract produced right here in the USA. One or two jars are enough to form the basic building blocks of any style of beer. Alternatively, add a jar to boost the gravity of any beer recipe. Mix in some specialty grains and hops to let your creativity fly!Malt Extract

  • Light – Steam Freak Light is the perfect base LME for almost any beer style, including Pilsners, Pale Ales, Kölsches, and more. Add color and flavor by steeping or mashing a small amount of specialty malted barley grains.
  • Wheat – Made from wheat and barley malt, the Steam Freak Wheat Malt Extract is perfect for brewing your own Hefeweizen. Add a quarter pound of Chocolate Malt to make it a Dunkelweizen!
  • Munich – The Steam Freak Munich LME, derived from 50% base malt and 50% Munich malt, provides rich, malty and biscuity flavor. It’s a great LME for a wide range of beer styles, including Oktoberfest, Scottish Ales, Bocks, and more.
  • Amber – Steam Freak Amber provides additional color and sweet caramel flavor for a number of ales and lagers. Recommended for Red and Amber Ales, Bock and Oktoberfest Beers, Scottish Ales, and even darker beers like Stouts and Porters.
  • Dark – Steam Freak Dark is a great LME for brewing Stouts, Porters, Black IPAs, and other dark beers. Made using base barley malt, Munich malt, caramel malt, and black malt.

Steam Freak Home Beer Making Kits
Create some of your favorite beer styles with our all-in-one Steam Freak beer making recipe kits! Each kit contains all of the home brewing ingredients needed to make a five-gallon batch of homebrew, including:

All you will need is water, a stovetop burner, and a Homebrewing Equipment Kit to start making some of the best beer you’ve ever tasted!
Currently there are 25 beer recipe kits from which to choose, but be on the lookout for more:

Questions? Please feel free to contact us with any questions you may have.
————————————————————————————————
David Ackley is a beer writer, brewer, and self-described “craft beer crusader.” He holds a General Certificate in Brewing from the Institute of Brewing and Distilling and is founder of the Local Beer Blog.

Will My Beer With Extended Fermentation Time Still Carbonate?

Fermenting Beer In Glass Carboy
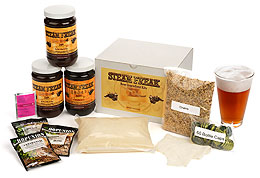
I brewed a decent Scottish ale. Racked it after primary fermentation of about 7 days or so. But just haven’t made time to bottle it. It’s been in the secondary about 5 or 6 weeks. The air lock suggests it’s still fermenting. I pulled out a glass. It’s of course flat, but the flavors are good. If I bottled as normal with priming sugar, will there be enough living yeast to carbonate this late in the process. What should I do to ensure my finished product doesn’t seem like I let it sit too long?
Name: Justin V.
State: PA
—–
Hi Justin,
Thanks for your question!
Your Scottish ale is almost definitely done fermenting and if it tastes good, it should be perfectly fine for bottling as you would normally. Five to six weeks is a little longer than necessary for a typical secondary fermentation, but it’s not an excessive amount of time  or cause for alarm. In fact, some beer styles require extended time in the fermenter to condition or to ferment completely.
As long as you haven’t filtered your beer, there should still be enough beer yeast in suspension for them to consume the priming sugar and carbonate your beer. Even so, in racking from secondary to your bottling bucket, this will stir up a little beer yeast, so I wouldn’t worry about having enough yeast to do the job. You may want to read more in this post about carbonating your homebrew.
The only thing that could possibly cause issues for you is yeast death. When yeast dies it can rupture, resulting in what is called yeast autolysis. The dead cells can leech some unpleasant off-flavors into your brew. If you have the off-flavors from yeast autolysis you will know it. It would have to be a pretty extreme scenario (such as in John Palmer’s example) to cause any problems, and since you racked to secondary, you already left most of the spent yeast in the primary fermenter. Chances are that if you kept the fermentation sealed and at a reasonable temperature, and if the beer tastes fine at this point, your beer will be ok.
In the event that you do pick up some off-flavors when you’re eventually ready to drink your brew, time is your best friend. Leave the bottles alone for a month or longer and you may well discover that unpleasant flavors balance out over time. I’m often surprised by how a homebrew can develop in the bottle over the course of several months.
So that’s the long answer to your question! The short answer is from Charlie Papazian: “Relax, don’t worry, have a homebrew!”
Til next time…Cheers!
——————————————————————————————————-
David Ackley is a beer writer, brewer, and self-described “craft beer crusader.” He holds a General Certificate in Brewing from the Institute of Brewing and Distilling and is founder of the Local Beer Blog.

Home Brew Mixology: 3 Craft Beer Cocktail Recipes

Beer Cocktails With Homebrewed Beer
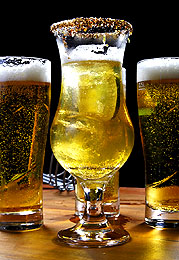
As the craft beer movement has taken the nation by storm, craft beer cocktails have made their way into bars and restaurants around the country. But you don’t have to go to the local pub for a good mixed drink. All you need is some home brew on hand and a few special ingredients to impress your friends with your new skill set: craft beer mixology.
Black and Tan
Ingredients: Home brewed Stout and Home brewed Pale Ale
Take an easy step into craft beer mixology with a Black and Tan! A simple combination of two beers, typically a stout and a pale ale, a Black and Tan is poured so that the dark beer floats on top of the light beer, creating a pretty cool visual effect! For best results, the top layer should have a lower specific gravity than the bottom layer. Guinness and Bass are often used, but for your own homemade spin we recommend the Brewer’s Best English Pale Ale and Irish Stout ingredient kits.
Directions: The trick with this mix is in the pour. Fill a glass halfway with your homemade pale ale, then turn a spoon upside-down and pour the stout gently over the spoon so that the dark beer sits on top of the light beer. Mess up the first one? Good thing you have half a bottle of each left over!
Tip: Use a chocolate stout, a rye pale ale, or any other combination of homebrews for your own unique variation!
The Honey Beer
Start flexing your mixology muscles by combining your home brewed pale ale with gin, lemon, honey, and salt. Imbibe Magazine and Jill Schuster supply this simple concoction:
Ingredients:

  • 1 1/2 oz. gin
  • 1 oz. fresh lemon juice
  • 1 tsp. lemon zest
  • Pale ale [preferably home brewed!]
  • Ice cubes
  • Tools: shaker, strainer
  • Glass: pilsner
  • Garnish: wildflower honey and kosher salt, to rim the glass; lemon twist

Directions: “Dip half of the Pilsner rim in wildflower honey and then lightly in kosher salt. Shake all ingredients but beer. Strain over fresh ice into the prepared Pilsner glass. Top with beer and garnish with a lemon twist.”
Home Brew Michelada
If you like Bloody Mary’s, you have to try a Michelada. Originally a Mexican creation, the Michelada features lime, salt, tomato juice, orange juice, Worcestershire sauce, hot sauce, and a cold, light lager. We recommend you start with either the Muntons Mexican Cervesa or the Brewers Spring Mexican Lager beer kit for a south-of-the-border, salty, tangy refreshment.
Alison Roman, assistant food editor of Bon Appetit, shares the following recipe:
“Rub the rim of a pint glass with a lime wedge and dip in kosher salt; fill glass with ice. Add 1 1/2 ounces fresh lime juice, 1 ounce tomato juice, 1/2 ounce fresh orange juice, and 1 teaspoon Worcestershire sauce; season with hot sauce. Top off with cold Mexican lager and stir to combine.”
—–
Looking for more home brewed beverage combos? Check out Shandy Is Dandy: A Look at a Summer Time Favorite.
—————————————————————————————————
David Ackley is a beer writer, brewer, and self-described “craft beer crusader.” He holds a General Certificate in Brewing from the IBD and is founder of the Local Beer Blog.