
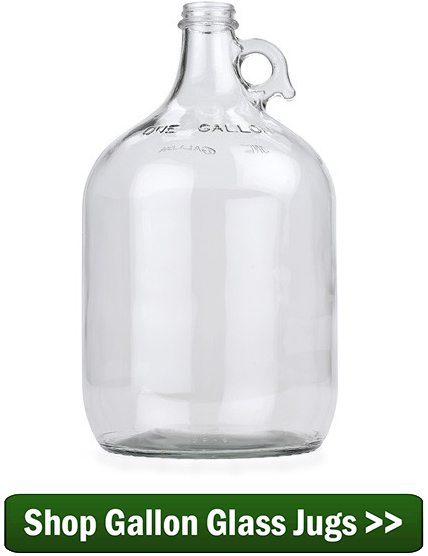
 Many beginning winemakers will be happy to know that you do not have to buy a corker to seal your wine bottles. We have other ways to seal wine bottles during the wine making process. Consider the alternatives listed below for your next batch!
When you go to buy wine corks for your wine bottles you will find that most of them require a corker to press the cork into the wine bottle. This is because a new cork starts out much fatter than what you are used to seeing coming out of the wine bottle when decanting.
These are the type of wine corks we recommend using, particularly if you know you’re going to continue to make more wine into the future. But, if you are not sure if you’ll be making more wine, or you just don’t feel like buying a corker, just yet, there are other ways to seal your wine bottles.
Mushroom corks are an easy way to seal your wine bottles without using a corker. They are basically a cork with a plastic grip top. They come both in natural cork and synthetic cork. With some force they can be pushed in by hand to create a tight seal. While they do not seal quite as tight as traditional corks being pressed in, they are more than sufficient for any wine that will be consumed within 12 months.
Another way to seal your wine bottles that does not require a corker is our reusable wine bottle stoppers. Just like the mushroom corks, these stoppers can be put in by hand as well. Their unique design of ridges creates a series of chambers to produce a seal. While these stoppers are not all that attractive for passing out as wine making gifts, they can be covered up with decorative heat shrink capsules to give them a professional look.
And yes, you can always use screw cap wine bottles. By using screw caps you will be sealing the wine bottle air-tight, however you must have the right screw cap on the right bottle. Not any wine bottle can take a screw cap; it must specifically be a screw cap wine bottle. And, the screw caps you are using must be the correct size with matching threads. Not all threads are the same.
In summary, you do not have to buy a corker. There are other ways to seal a wine bottle. But, if you plan to continue making wine corks and a corker are your best long-term option.
Happy Wine Making,
Ed Kraus
———————————–
Ed Kraus is a 3rd generation home brewer/winemaker and has been an owner of E. C. Kraus since 1999. He has been helping individuals make better wine and beer for over 25 years.
Homebrew FAQ: Top 5 Beginner Questions- Answered
 Spend any amount of time on homebrewing forums, and you’re bound to see several of the same questions come up again and again. Don’t feel bad – it’s just part of the learning process. To simplify that process, I’ve compiled answers to the top 5 most common home brewing questions beginners have about home brewing. But remember, there’s more than one way to open a bottle of beer – ultimately, you will brew the way that makes the most sense for you.
So without further ado: 5 Most Common Home Brewing Questions – Answered!
- Is my beer infected?
If you have to ask, then something may very well be amiss. But if it’s your first batch, don’t freak out just yet. Just follow the instructions that came with your beer recipe kit to the end, and then taste the beer. Does it taste good? If so, you’re in good shape. If not, something went wrong. It might be an infection, or it could be a number of other issues. Consult the BJCP Fault List to try to figure out what might have happened and consider doing some Off-Flavor Training to hone your palate so you can identify potential missteps. Even if you do discover a likely infection, use it as a learning experience – your next batch is bound to be that much better.
- Do I have to rehydrate dry yeast?
Absolutely not. I’ve brewed many batches of beer just sprinkling the yeast over the wort. It works just fine, and it’s certainly easy. But is it the best way to pitch dry yeast? That’s up for debate. Many experts agree that yeast should be rehydrated in a small amount of water before pitching. Their reasoning is certainly sound, but when in doubt, follow the directions on the yeast packet or visit the manufacturer website for more information.
- How come I missed my starting gravity (SG)?
For beginning homebrewers, a starting gravity that’s significantly off is due to one of these reasons:- Hydrometer reading off – Keep in mind that a hydrometer is calibrated to a certain temperature, usually 60 or 68˚F. For best results, chill the sample to the appropriate temperature and/or use a hydrometer temperature correction calculator to make adjustments. Read How to Take a Hydrometer Gravity Sample for more tips on working with hydrometers.
 Added water to fermenter without regards to gravity – Many homebrew recipe kits instruct the brewer to top off to five gallons, but if for some reason you didn’t get all the malt extract out of the can or lost some volume in the process, adding this much water may dilute your beer below the target starting gravity. For best results, take a gravity sample before diluting and use a dilution calculator to figure out exactly how much water to add in order to hit your target SG.
- It’s been two weeks – why aren’t my bottles carbonated?
When bottling homebrew, carbonation occurs by giving the yeast a small amount of extra priming sugar to consume. After capping, the yeast will eat the sugar and produce CO2, but since the bottle is sealed the carbonation will have nowhere to go but into solution in the beer. In order for the yeast to do their job, they have to have ideal conditions, in particular, a temperature range that’s warm enough for them to work. This usually means about 70˚F. If the beer is stored in a cold basement or refrigerator during this phase, the yeast won’t carbonate the beer or may do so very slowly. Make sure the bottles are in a warm room and give them some more time. Only in rare cases will additional action need to be taken in order to carbonate your beer.
- Do I have to do a secondary fermentation?
Absolutely not. Though secondary fermentation is often used as a way to improve beer clarity, many beers will turn out fine with just a primary fermentation of two to three weeks. Secondary fermentation is only required (I use that term loosely), when aging the beer for an extended amount of time (months). Check out The Pro & Cons of Secondary Fermentation for more reasons why, or why not, to do a two-stage fermentation.
There you have it – simple answers to some of the most common beginner home brewing questions.
What other home brewing questions belong on this list?
———————————–
David Ackley is a beer writer, brewer, and self-described “craft beer crusader.” He holds a General Certificate in Brewing from the Institute of Brewing and Distilling and is founder and editor of the Local Beer Blog.
Choosing the Right Yeast Strain for Your Homebrew – Pt. 2
 In part 1 of this series, we discussed several of the choices that come up when choosing the right yeast strain for your homebrew: dry yeast vs. liquid yeast, ales strains vs. lagers strains, flavor, attenuation, and flocculation.
In this blog post, I’ll introduce several of the most popular yeast strains used by homebrewers.
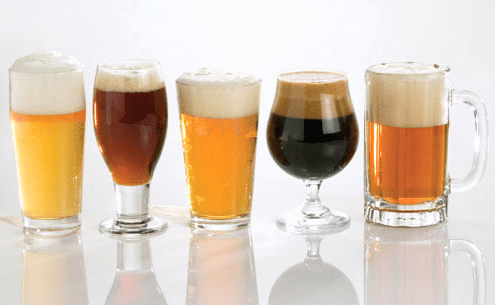
Homebrewing Yeast Style Guide
This is by no means a comprehensive list of every yeast you could use to brew your own beer, simply a guide for some of the most commonly brewed beer styles. Click here to browse our complete selection of homebrewing yeast strains.
German Ale Yeast Options
- Wyeast 1007: German Ale Yeast – A very versatile yeast strain, traditionally used for German Altbier, but often used for American ales; ferments clean with low ester production and finishes dry; requires fairly low fermentation temperature for neutral flavor.
- Wyeast 3056: Bavarian Wheat Blend – Used for brewing German weizen, a wheat beer characterized by yeast-derived banana and clove flavors; this is a relatively neutral strain.
- Wyeast 3068: Weihenstephan Weizen – An alternative to 3056 (above), this strain of weizen yeast is sourced from the Weihenstephan brewery in Germany, which claims to be the oldest brewery in the world. It is a vigorous fermenter producing characteristic banana/clove flavors, which can be controlled by adjustments in fermentation temperature and wort density (high – more banana, low – more clove). A lower pitch rate will enhance banana character.
- Danstar Munich – A dry yeast for brewing Bavarian weizen.
- Wyeast 2565: Kolsch – The preferred yeast for Kolschbier, ferments at cooler temperatures than most top-fermenting ale yeasts, enhancing smooth, lager-like character with a hint of apple. Can also be used to ferment lager styles when temperature control is a challenge.
German Lagers Yeast Options
- Fermentis Saflager S-23 – Dry yeast, deal for Berliner pilsners; also suitable for American lagers.
- Fermentis Saflager 34/70 – Dry yeast, sourced from the Weihenstephan brewery in Germany, produces a malt-forward beer with plenty of body.
- Wyeast 2206: Bavarian Lager – Suitable for malty, German lagers, especially Munich-style beers and Oktoberfest.
Belgian Ales Yeast Options
- Wyeast 1388: Belgian Strong Ale – A high-attenuating, alcohol-tolerant, liquid yeast strain recommended for fermenting golden strong ales. Yields a dry beer with a mild tartness.
- Wyeast 1762: Belgian Abbey II – Temperature- and alcohol- tolerant strain derived from the Trappist brewery Rochefort; produces some dried fruit esters at higher temperatures.
- Wyeast 3787: Trappist High Gravity – Wide temperature range and high alcohol tolerance make this a good strain for abbey-style dubbels, tripels, and quads; great fit for a Westmalle Tripel Clone.
- Mangrove Jack’s M27: Belgian Ale – A dry Belgian ale yeast, tolerant of warmer fermentation temperatures and high alcohol. Use it for saisons, tripels, and quadrupels.
- Wyeast 3942: Belgian Wheat – Produces subtle apple and bubblegum esters, highly recommended for Belgian witbier.
- Wyeast 3278: Belgian Lambic Blend – A blend of yeast and bacteria cultures for the production of Belgian sour beer. For advanced brewers.
American/English/Irish Ales Yeast Options
I lump these strains together because there is a lot of crossover between English and American styles. Indeed, many of the “American” yeast strains we know and love simply migrated from Europe. Where applicable, I’ve provided some more specific guidelines for some of the more distinctive beer styles, like Irish Stout.
- Wyeast 1056: American Ale – Extremely popular style for American pale ales and IPAs, originally sourced from Sierra Nevada Brewery; tends to be very neutral, but may produce citrus notes at the low end of the fermentation temperature range.
- Fermentis Safale US-05 – Same strain as Wyeast 1056, above, but in dry form; sometimes called the “Chico” strain; acceptable for a wide range of American style ales.
- Wyeast 1272: American Ale II – An alternative American yeast strain; accentuates the citrus notes of hoppy American pale ales and IPAs.
- Wyeast 1084: Irish Ale – the classic strain for Irish stouts, this yeast has a slightly lower attenuation, making it ideal for full-bodied beers.
- Danstar Nottingham – A versatile, fast-working, high-flocculating, high-attenuating dry ale yeast; many homebrewers’ go-to strain for American and English ales; tolerance at lower temperatures allows it to be used for lagers.
- Fermentis Safale S-04 – Dry yeast; classic English ale strain with neutral flavor characteristics; works quickly and flocculates well.
- Wyeast 1099: Whitbread – Liquid yeast version of Safale S-04 (above); ideal for a range of British ales.
Cider Yeast Options
- Mangrove Jack’s M02 – Dry yeast for fermenting apple cider; high attenuation and flocculation. Imparts fruity esters to give cider depth of flavor and enhance fruit character.
- Wyeast 3766: Cider – Liquid strain of cider yeast for fermenting a crisp, dry cider. Also works well for pear and peach wine.
These are some of the most popular strains of homebrewing yeast – what are some of your favorites?
———————————–
David Ackley is a beer writer, brewer, and self-described “craft beer crusader.” He holds a General Certificate in Brewing from the Institute of Brewing and Distilling and is founder and editor of the Local Beer Blog.
Leigh Erwin: Wine Fermentation Temperature
 Hi everyone!
I am very excited to finally be starting some new wines! I ended up purchasing two more wine making kits: the Cellar Craft Sterling California Chardonnay and the KenRidge Classic Nebbiolo. I chose the Cellar Craft Sterling Chardonnay because I have yet to make a white wine using oak chips and I wanted the opportunity to do so. As far as the red goes, I chose the Ken Ridge Classic Nebbiolo because it is a red that did not come with the skins, nor does it use oak. It does contain a packet of dried elderberries, which I thought was a fun change-up for a wine making kit.
I decided to start with the Chardonnay first for no reason in particular. Just like all the other times, I drew off water the night before, just in case there was chlorine in there so it could dissipate. The day of fermentation, I first prepared and added the bentonite solution, then added the wine base. Then, I used about 8 cups of warm water to rinse out the bag.
At this point, I checked the specific gravity with my hydrometer as well as the temperature, which came out to 1.100 and 69oF.
Feeling satisfied with these values, I then sprinkled the yeast onto the top of the juice and loosely placed the lid on top. I decided not to place the lid on tightly or use an air lock because from what I’ve read about primary fermentations, they actually like and need to have some oxygen in order to successfully proceed through the process.
According to the instructions that came with the wine making kit, I was to leave the wine fermenting until at least day 6. So, I did just that.
On day 6, I went to check in on the specific gravity and was surprised to find it had barely moved and was at 1.080. I had forgotten to check the temperature of the wine, but I could feel in the room it was somewhat cool.
See, previously the heat was switching on regularly, as it was late winter and that’s what happens! Around the time I started the Sterling Chardonnay, however, it had actually been very warm outside, so I wasn’t using the heat at all. There were actually a couple of days where it was so hot that I needed to switch on the air conditioning, but didn’t think about the fact that the vents were open in the winery room and while I was making things nice and comfortable in the upstairs living areas, I was inadvertently making things very cold in the basement where the winery room is located.
Beginning to wonder if that had something to do with my ridiculously slow fermentation; I decided to try a couple things to get this wine making kit fermenting while simultaneously reaching out to ECKraus for advice. My next post will follow up more on that.
———————————–
 My name is Leigh Erwin, and I am a brand-spankin’ new home winemaker! E. C. Kraus has asked me to share with you my journey from a first-time dabbler to an accomplished home winemaker. From time to time I’ll be checking in with this blog and reporting my experience with you: the good, bad — and the ugly.
Choosing the Perfect Yeast Strain for Your Homebrew – Pt. 1
Yeast: that magical micro-organism that turns sugar into alcohol and carbon dioxide. Simply brew up a batch of sweet wort, pitch the yeast, and in a few weeks you have beer!
But not all yeast is created equal. In fact, there are many different strains used for brewing beer, all with different characteristics that influence the flavor, aroma, body, and mouthfeel of your beer. How do you choose the perfect strain for your beer?
In this two-part post, I’ll first outline some of the considerations for picking a yeast strain, then I’ll share many of strengths and weaknesses of the top yeast varieties available to homebrewers.
We’ll start from a broad level, and then narrow down the options.
Yeast Selection: Dry vs. Liquid Yeast
Choosing between dry and liquid yeast is largely dependent on personal preference. Dry yeast is easy to work with and it stores well. Liquid yeast, while offering a great variety of strains to work with, is less stable and usually requires a yeast starter. For some, the extra work is worth it, but for many, dry yeast gets the job done just as well. For simplicity, I’d suggest that beginning brewers start with dry yeast, and then start experimenting with liquid yeast when they’re ready. From that point, you can make the best choice about whether to use liquid or dry yeast on a batch-by-batch basis.
Yeast Selection: Ales vs. Lagers
As far as rules go, this is where you pretty much have to stick to one or the other. Ales, which ferment warm, require top-fermenting ale yeast; lagers ferment cooler and require bottom-fermenting lager yeast. But even this rule can be bent on occasion. For example, the Brulosopher reports having good results brewing lagers with Kolsch yeast. This may be a good option if you’d like to brew a lager, but don’t have a temperature-controlled fermentation chamber. Otherwise, start by sticking to ale yeast for ales and lager yeast for lagers, at least until you get a few batches under your belt.
Yeast Selection: Picking the Right Strain
The perfect yeast selection for you beer will be largely dependent on the style you are making, but there is certainly some crossover. Some styles have more to do with the malt and the hops than the yeast, so a neutral-flavored yeast strain can work in a variety of situations. For example, German Kolsch yeast may be used to brew an American Blonde Ale. English yeast strains might be used to brew American beers, and vice-versa. Even when you purchase a homebrew ingredient kit, don’t feel like you have to stick with the yeast provided. For example, you may get an American Pale Ale kit, but want to try a Belgian strain – go for it! Hold on to the yeast you got with the kit and use it for your next brew.
The main consideration will be choosing a yeast strain based on specific qualities that you want in your beer. Among the most important are :
:
- Flavor, which often goes hand-in-hand with fermentation temperature. For example, a German hefeweizen is defined by banana and clove flavors produced by German weizen yeast, and the levels of banana or clove can be regulated by adjusting the fermentation temperature.
- Attentuation, or the amount of sugars that will be fermented in the beer. A high attenuating strain will leave a beer with a dry finish. Conversely, a yeast with low attenuation will leave some fermentable sugar and more body. This said, be aware that attenuation can also be controlled with ingredient selection, mash temperature, and a number of other factors.
- Flocculation, or the tendency of the yeast to clump together and settle out at the bottom of the fermenter. This can have an impact on beer clarity.
Above all, the question of what kind of yeast is perfect for your brew will be dependent on how it affects the beer you’re making. So when choosing a yeast, think about the flavor characteristics you’re going for in your beer, including residual sweetness and mouthfeel, and choose the best yeast that fits those parameters.
In part two of this post, I’ll share many of the different yeast strains available to the homebrewer and share some style suggestions for each one.
Do you have some favorite yeast strains? How do you choose the perfect yeast for your homebrews?
———————————–
Read Part 2 >>
———————————–
David Ackley is a beer writer, brewer, and self-described “craft beer crusader.” He holds a General Certificate in Brewing from the Institute of Brewing and Distilling and is founder and editor of the Local Beer Blog.
Q&A: How To Clear Up Homemade Wine
 I’m really pleased with your service, but need some advice. Last year I produced about 13 gal. of blackberry wine with 13% alcohol with pretty good taste. Problem–not as clear as would like. I’ve used pectic enzymes, sparkolloid and the diatase enzymes. Would like your recommendation on further clearing.
Thanks
Patrick J.
——
Hello Patrick,
Sorry to hear that your wine is not clear up all the way.
Usually when we see a situation like this in spring or early summer it is because the fermentation never did complete. In other words, the cloudiness is actually being caused by a slight resurgence of fermentation activity. The yeast went dormant during the cold winter months. But now, since things are warming up again, the yeast are starting to become active – just enough to cause the little bit of cloudiness you are experiencing.
If this is the situation, no wine finings will be able to clear a wine. The fermentation has to be allowed time to finish fermenting all the sugars.
One way to know if a renewed fermentation is what’s causing this cloudiness is to take a reading with a wine hydrometer to see if there are still sugars in the wine that could be causing a slight fermentation. This slight fermentation would most likely be too minor to detect by observing an air-lock, so using a hydrometer is the best way to determine this.
If you believe that there might be a fermentation going on, then your most practical course of action is to allow the wine to ferment until it is done. You can encourage the fermentation by adding a dose of yeast nutrient to the wine and by making sure the temperature stays between 70° and 75°F. Wine yeast is very sensitive to temperature.
If the wine hydrometer indicates that there are no sugars still in the wine, then we need to think about what wine making materials would best clear up the wine. If you have the book, First Steps In Winemaking, the author suggests using a bentonite fining, and I would tend to agree, particularly in the situation.
There are two reasons for this:
- Bentonite is good at clearing what Sparkolloid misses. So much so that some wineries will automatically use one then the other. Since you’ve already used Sparkolloid with limited success, it would only make sense to try its opposite.
- Bentonite is good at clearing excess proteins from a wine, including tannins. Sometimes when you have a wine that isn’t brilliantly clear at this late stage it is due to excessive tannin dropping or precipitating out of the wine. As a side note, warmer temperatures can induce this reaction as well.
Patrick, I hope this gives you some idea as to why your wine is not clear up all the way.
Happy Wine Making,
Ed Kraus
———————————–
Ed Kraus is a 3rd generation home brewer/winemaker and has been an owner of E. C. Kraus since 1999. He has been helping individuals make better wine and beer for over 25 years.
5 of My All-Time Favorite Homebrew Recipes
 Looking for a little homebrew inspiration?
Over my 5+ years of homebrewing, I’ve brewed some 50 batches of beer. There have been a few mishaps, many enjoyable beers, and a few batches that have knocked it out of the park. Below are five of my all-time favorite homebrew recipes.
*Note: I brewed most of these all-grain, but the all-grain homebrew recipes can easily be converted to extract or partial mash. Where no partial mash recipe is provided, simply convert a majority of the base malt using the following ratios: 1 lb. grain = .75 lb. liquid malt extract = .6 lb. dried malt extract. For example, replace 9 lbs. base malt with 6.75 lbs., or about two cans, of LME.
- Uinta Dubhe Imperial Black IPA Clone – If you like big, hoppy, aggressive beers, this homebrew recipe’s for you. A massive grain bill delivers a full-bodied brew with deep rich flavors of chocolate and coffee and an alcohol content upwards of 9% ABV. On the hops side of the equation, Chinook, Bravo, Columbus, and Falconer’s Flight combine to deliver a stout bitterness (100+ IBUs), but also copious levels of dank, spicy, piney, and citrusy hop flavor and aroma. My nickname for this beer is “Holy Hop Tar!”
- Ithaca Beer Company Flower Power IPA Clone – IPAs taste best fresh, and it’s hard to get fresher when you brew it yourself. This cloning experiment yielded a delightful India Pale Ale at a respectable 7.5-8% ABV. The simplicity of the grain bill provides a sweet, honey-like base to support the juicy, citrusy hops, which are added at five separate points throughout the boil and fermentation. You can review the entire Flower Power brew process through the link above.
- Captain Cogsworth Coffee Stout – The desire for a simpler brew day led me to revert back to partial mash brewing for a day. This easy homebrew recipe yielded a tasty American stout with an easy-going, somewhat fruity coffee flavor that helped get me through the winter. I reviewed the finished beer here.

- Chipotle Smoked Porter – This recipe goes back to my early days of homebrewing and still stands out as one of the more audacious beers I’ve made. It starts with a smoked porter recipe kit and adds a can of chipotle peppers straight to boil. This one might make you sweat!
- Munich Dunkel – I’m going to finish with something a little more approachable, a daily drinker, if you will. To me, this traditional German style offers the best of both worlds: the drinkability of a lager with a full flavor of a darker beer. If brewing this one partial mash, I recommend using two cans of Munich LME in place of the Munich malt and the wheat malt. Be sure to ferment cool and lager for several weeks for best results.
Do you have any favorite homebrew recipes from your homebrewing career? Feel free to share them in the comments below!
———————————–
David Ackley is a beer writer, brewer, and self-described “craft beer crusader.” He holds a General Certificate in Brewing from the Institute of Brewing and Distilling and is founder and editor of the Local Beer Blog.
Getting Used Wine Bottles Ready For The Wine
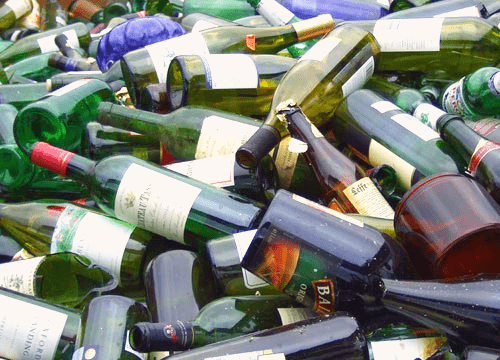 I’m just starting in wine making and my first batch, one gallon of strawberry wine is about ready to be bottled. I have wine bottles from a local hotel/convention center. A friend told me to get Iodophor to sterilize them, but I’m not sure what that is. Can you tell me what I should do to clean these bottles?
Thank You
Jerry R.
——–
Hello Jerry,
Whether you need to clean 5 or 6 wine bottles or 50 or 60 bottles, the process of cleaning and sanitizing the used wine bottles is the same.
Getting the labels off the used wine bottles will be the first job at hand. I have found that there are two types of glues used to put labels on wine bottles: the kind that allows the labels to fall off with a little soaking in water, and the kind that requires a lot of scrubbing, regardless of how long you soak them.
Since you only need five or six bottles, I would take a dozen or so at random. Put them in a soapy bath. You can use a plastic fermenter or something similar. Let them sit over night, and see which labels fall off. Hopefully, you’ll have at least five. If none of the labels fall off the used wine bottles, this will reduce you to having to scrape them of with a utility razor.
Once you get the wine bottle labels off you will need to get the used wine bottles soapy clean, both inside and out. Cleaning the used wine bottles means all the grit and grime needs to be removed.
Regular dish soap works fine for this purpose. You will need a wine bottle brush to scrub the inside and get any dried, leftover wine removed. Our Brass Bottle Washer is also handy for blasting out the inside of the wine bottle with water. It also makes rinsing the soap from the inside of the bottle much easier and quicker.
 Now the used wine bottles are clean, but clean isn’t good enough for bottling wine. They need to sanitized. Your friend’s idea of using Iodophor is not a bad idea and will work for this process, however most winemakers prefer to use sodium metabisulfite for sanitizing their used wine bottles.
There should be directions that come with the sodium metabisulfite, but essentially all you do is mix in 1 teaspoon for each gallon of water. You don’t want to put the wine bottles in the solution, but rather, just put an inch or two of the solution in each wine bottle and let them stand for 20 or 30 minutes. The sulfur fumes from the sodium metabisulfite will sanitize the insides without any effort on your part.
Cleaning and sanitizing used wine bottles can seem like a chore the first time you do it, but what I and most others have eventually discovered is that once you have your own system down, its really not that difficult.
I hope this helps you out.
Best Wishes,
Ed Kraus
———————————–
Ed Kraus is a 3rd generation home brewer/winemaker and has been an owner of E. C. Kraus since 1999. He has been helping individuals make better wine and beer for over 25 years.
Bottling One-Gallon Batches of Beer, Mead, and Cider
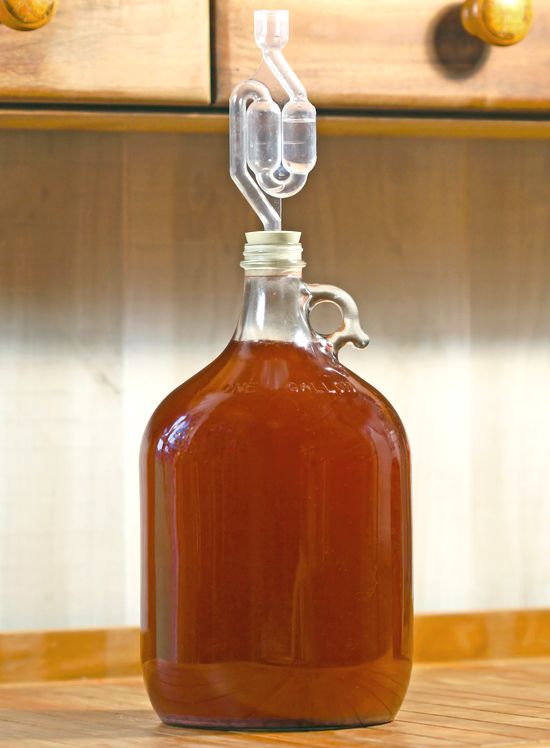 Small batch brewing offers many advantages: you can brew with limited space and equipment, test a new recipe, or divide a batch into smaller batches for experimentation. But one of the challenges with brewing small batches is bottling one gallon of beer. Bottling buckets are made for bottling five gallons at a time. Since the spigot is positioned above the bottom of the bucket, it’s normal to lose a bit of beer, and for a five-gallon batch that’s no big loss. But when just bottling one gallon, we want to maximize the amount of beer, mead, or cider we get from the batch and the task becomes a little awkward.
So what’s the most efficient way to bottle a one-gallon batch? Here are a few options and some tips for small batch brewing:
- Build a mini-bottling bucket – Some homebrewers take a smaller food-grade bucket and convert it into a mini-bottling bucket. Simply drill a hole into a two-gallon, food-grade bucket and install a spigot. Then just follow normal bottling procedures, siphoning your beer and mixing the priming sugar in this smaller bucket.
- Fill from a pot – Some like to transfer these small batches into a pot and siphon into bottles from there. This can be especially helpful if you need to add priming sugar. Just prepare the priming sugar in the pot, siphon your beer onto the priming sugar, and then siphon out into the bottles.
- Use a clamp or stopcock – These nifty devices will take the guesswork out of how to stop the flow while siphoning and will allow you to accurately fill each bottle with minimal spillage. Be sure to leave some space (about an inch) at the top of each bottle.
- Use a mini auto-siphon – It can be a little tricky using a full-size racking cane or auto-siphon when transferring a one-gallon batch. The mini auto-siphon is made just for this purpose and fits perfectly into one-gallon jugs.
- Transfer to the bottling bucket as usual – If all else fails, you can just bottle as usual. Just know that you’ll have to tilt the bucket to get every last drop. You’ll likely end up with a small amount or beer leftover – drink up!
Small batch brewing is a great way to experiment with homebrewing without making a huge investment in ingredients or equipment. To convert a five-gallon recipe into a one-gallon recipe, simply divide the ingredients by 5. And now that you have the tips above, bottling one gallon of beer, mead or cider should be a piece of cake.
Have you ever tried small batch brewing? Do you have any tricks for bottling one gallon at a time?
———————————–
David Ackley is a beer writer, brewer, and self-described “craft beer crusader.” He holds a General Certificate in Brewing from the Institute of Brewing and Distilling and is founder and editor of the Local Beer Blog.
Cooking with Beer: Chocolate Stout Cupcakes
 There are lots of culinary uses for beer: marinades, soups, sauces, baking, cocktails. Cooking with beer is just one more way to bring creativity into your homebrewing hobby. A few years ago, I discovered a recipe for some the most decadent cupcakes I’ve ever had – and they just happened to be made with beer!
For this recipe, most any dark beer will work, though I’d avoid anything with an excessive amount of hops, since the bitterness can come through in the food. For example, I wouldn’t try this with a black IPA, but a milk chocolate stout, a coffee stout, or even Guinness would work great. Another fun commercial beer option is Terrapin’s Moo-Hoo Chocolate Milk Stout.
The recipe below comes from the Food Network, but I’ve made a couple changes. In particular, I reduced the powdered sugar in the icing from 1 lb. to 3/4 lb. Don’t worry – these cupcakes are still plenty sweet!
Recipe: Chocolate Stout Cupcakes
For the cupcakes:
- 3/4 cup unsweetened cocoa (reserve a couple tablespoons for dusting the finished cupcakes)
- 2 cups sugar
- 2 cups all-purpose flour
- 1 tsp. baking soda
- Pinch of fine sea salt
- 12 oz. homebrew beer (milk chocolate stout is amazing!)
- 1 stick butter, melted
- 1 tbsp. vanilla extract
- 3 large eggs
- 3/4 cup sour cream
For the icing:
- 1 (8 oz.) package cream cheese, at room temperature
- 3/4 to 1 cup heavy cream
- 3/4 lb. powdered sugar
To make the cupcakes:
- Preheat oven to 350˚F.
- In a large mixing bowl, mix together the dry ingredients: cocoa, sugar, flour, baking soda, and salt.
- In another mixing bowl, combine the beer, melted butter, and vanilla.
- One at time, beat the eggs into the liquid ingredients, then mix in the sour cream until thoroughly combined.
- Gradually mix the dry ingredients into the wet mixture.
- Lightly grease 24 muffin tins. Divide the batter equally between the muffin tins, filling each 3/4 full.
- Bake for about 25 minutes, rotating the pan halfway through. Remove from the over when the cupcakes are risen, nicely domed, and set in the middle but still soft and tender. Cool before removing the cupcakes from the pan.
To make the icing:
* The icing can be made in advance and kept covered in the refrigerator.
- In a medium bowl, beat the cream cheese on medium speed until light and fluffy.
- Slowly beat in the heavy cream.
- Gradually mix in the powdered sugar until incorporated and smooth.
- Cover with plastic wrap and refrigerate until ready to use.
To serve, top each cupcake with frosting and dust with cocoa. If you’re feeling extra naughty, serve with a glass of your homebrewed stout!
Do you ever cook with your homebrew? What do you like to make?
———————————–
David Ackley is a beer writer, brewer, and self-described “craft beer crusader.” He holds a General Certificate in Brewing from the Institute of Brewing and Distilling and is founder and editor of the Local Beer Blog.