
 Time and again I hear someone say, “I tried brewing once, but I didn’t stick with it.” Before you know it, excuses pile up like trub in the kettle! Maybe I’m biased, but I feel like just one brew isn’t enough to make final judgement on the hobby. In an attempt to convince some of those one-timers to stick with it, here are some of the most common reasons people quit brewing — and why they should dust off the brew pot and give homebrewing another shot.
1. “My first beer wasn’t very good.”
No one’s first beer is very good! A lot of brewers will tell you that their first homebrew was “drinkable”, and many will say that while some batches haven’t turned out perfectly, they’ve never had to pour one down the drain. So even if your first batch wasn’t on par with Boulevard or Sierra Nevada, don’t worry. Your second batch is likely to be much better than your first, and the more you brew the better you’ll get!
2. “I don’t have enough time.”
With kids, a job, and other commitments, I understand that time can get a little tight. Yes, it’s possible to spend most of a whole day brewing, but it’s also pretty easy to make sure that brew day takes no more than a few hours. Hopped extract kits (try the Munton’s, Connoisseur, Brewferm, Mountmellick, or Brew Canada kits) are the fastest, easiest, and most cost-effective way to brew. All you have to do is basically boil the extract with water, chill the wort, pour into a clean and sanitized fermenter, then pitch the beer yeast.
If you want to add a little something to make your brew more interesting, it’s pretty easy to add some dry hops, fruit, or spices during secondary fermentation. It doesn’t take much time at all. Then a couple hours on bottling day, and you’re set!
3. “My boyfriend/girlfriend/significant other doesn’t like beer.”
Chances are, they just haven’t had the right beer yet. After you’ve told them you want to be a brewer, see if you can figure out what kinds of flavors they like and brew something to their tastes. Maybe a fruit beer? Maybe they’re a closet hop-head and just need an American IPA to figure out what real beer tastes like. Gluten-sensitive? We’ve got a kit for that. If worse comes to worst, more beer for you!
There are tons of reasons people homebrew. Don’t you think it’s time to give it another try?
——————————————————————————————————
David Ackley is a beer writer, brewer, and self-described “craft beer crusader.” He holds a General Certificate in Brewing from the Institute of Brewing and Distilling and is founder of the Local Beer Blog.
Scotch Ale Homebrew: Guidelines and Characteristics
 Love malty beers? Then Scotch ales are for you.
To research the history and characteristics of Scotch Ale, I dug into the Oxford Companion to Beer, probably the most comprehensive guide to beer and brewing ever published. (Tip: At the time of writing the Kindle edition of the Oxford Companion was on sale for less than $4.) In the Scotch Ale entry by Horst Dornbusch, I learned that:
- Scotch ales are brewed in various strengths and categorized accordingly. They use a naming convention that designates the lowest gravity beers as 60- and 70-shilling, with the highest gravity beers being 100-shilling, 120-shilling, or more. These names come from price per barrel that these beers would cost.
- Further, 60-shilling beers were called “light”, 70-shilling “heavy”, 80-shilling and 90-shilling “export”, and 100-shilling and higher “wee heavy”.
- The US was a major importer of Scotch ale in the 18th-century: “By 1785 North America and the West Indies soaked up 80% of Scottish strong ale export, reflecting the concentration of Scottish emigrants to Maryland, Virginia, and the Carolinas…”
It’s interesting to think about the affect of Scottish culture on the US and how many of those traditions live on in the beer world. Asheville’s Highland Brewing Co. and the Oskar Blues Old Chub come to mind.
But enough chit-chat — let’s do some brewing!
Key Characteristics: Malt
Scotch ales are malt-forward beers with a somewhat restrained use of hops. They range in color from amber to deep reddish-brown. We often see them brewed with a pinch of roasted barley and sometimes a bit of smoked malt. Dornbusch hypothesizes that the use of smoked malt isn’t especially authentic to Scotch ales, but rather a modern nod to the flavors present in Scottish whisky. It’s an optional component of the grain bill according to the BJCP, and if used, should be included with restraint.
Today’s homebrewers may opt for a base malt such as Briess Two-Row Malt or Munton’s Mild Ale Malt, adding small amounts of lower Lovibond caramel malt for color and caramel flavor and just a couple ounces of roasted barley for dry, grainy flavor. An alternative, perhaps more authentic approach would be to use almost exclusively base malt and achieve caramel color and flavor through an extended, vigorous boil. (The prolonged exposure to heat will cause the sugars in the wort to caramelize, contributing both color and flavor.) Dornbusch suggests a high mash temperature (~158F) to achieve some residual sweetness and body.
Hops
Keeping in mind that Scottish ales are malt-forward, the use of hops a generally modest. The BJCP guidelines call for the strongest Scotch Ale — aptly called Strong Scotch Ale (category 9E) — to stay within 17-35 IBUS. It would be most appropriate to use English varieties of hops, such as Fuggles.
One interesting tidbit from the Oxford Companion to Beer states that historically, Scottish brewers may have used heather to flavor their beer. I’ve never brewed with heather, but it would be an interesting experiment to throw some heather into your Scotch ale if you’re so inclined.
Use the guidelines above to build your own all-grain Scotch Ale recipe. We also carry a Brewer’s Best Scotch Ale Recipe Kit that’s ideal for extract brewers.
Til next time…Slàinte!
————————————————————————————————
David Ackley is a beer writer, brewer, and self-described “craft beer crusader.” He holds a General Certificate in Brewing from the Institute of Brewing and Distilling and is founder of the Local Beer Blog.
————————————————————————————————
Resources: Oliver, Garrett; Colicchio, Tom (2011-09-09). The Oxford Companion to Beer (Oxford Companion To…). Oxford University Press. Kindle Edition.
Announcing! E. C. Kraus “Steam Freak” Beer Recipe Kits
 This summer we’ve been working hard to develop our own, in-house line of malt extracts and homebrew recipe kits. These products are of the same high quality that we’ve always been proud to offer, backed by a commitment to excellent customer service, and, as always, free shipping on orders over $50. If you’ve been on the fence about home brewing, the time has come to get on board with one of the most rewarding hobbies there is.
And without any further ado, announcing the Steam Freak lineup!
Steam Freak Liquid Malt Extracts (LME)
Each of our liquid malt extracts contain 3.3 pounds of fresh, pure, unhopped malt extract produced right here in the USA. One or two jars are enough to form the basic building blocks of any style of beer. Alternatively, add a jar to boost the gravity of any beer recipe. Mix in some specialty grains and hops to let your creativity fly!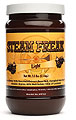
- Light – Steam Freak Light is the perfect base LME for almost any beer style, including Pilsners, Pale Ales, Kölsches, and more. Add color and flavor by steeping or mashing a small amount of specialty malted barley grains.
- Wheat – Made from wheat and barley malt, the Steam Freak Wheat Malt Extract is perfect for brewing your own Hefeweizen. Add a quarter pound of Chocolate Malt to make it a Dunkelweizen!
- Munich – The Steam Freak Munich LME, derived from 50% base malt and 50% Munich malt, provides rich, malty and biscuity flavor. It’s a great LME for a wide range of beer styles, including Oktoberfest, Scottish Ales, Bocks, and more.
- Amber – Steam Freak Amber provides additional color and sweet caramel flavor for a number of ales and lagers. Recommended for Red and Amber Ales, Bock and Oktoberfest Beers, Scottish Ales, and even darker beers like Stouts and Porters.
- Dark – Steam Freak Dark is a great LME for brewing Stouts, Porters, Black IPAs, and other dark beers. Made using base barley malt, Munich malt, caramel malt, and black malt.
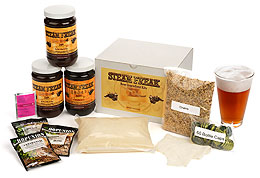
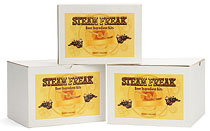
Steam Freak Home Beer Making Kits
Create some of your favorite beer styles with our all-in-one Steam Freak beer making recipe kits! Each kit contains all of the home brewing ingredients needed to make a five-gallon batch of homebrew, including:
- Steam Freak liquid malt extract
- Specialty grains
- Steeping bag for grains
- Hops
- Yeast
- Bottle caps (crowns)
- Priming Sugar
- Easy-to-read, easy-to-follow instructions
All you will need is water, a stovetop burner, and a Homebrewing Equipment Kit to start making some of the best beer you’ve ever tasted!
Currently there are 25 beer recipe kits from which to choose, but be on the lookout for more:
- Pilsner Urkel (Clone)
- Ol’ Glory Amber Ale
- Buddy Light (Clone)
- American Steam Whistle IPA
- Atlantic Airship Pilsner
- Wild Boar Australian Ale
- Babbage Brown Porter
- Full-Steam Special Bitter
- Ironside English Bitter
- Full-Torque Brown Ale
- Steam Powered Pale Ale
- American Platinum Lager
- High-Flyin’ Derwitzer Wheat
- Bazz Pale Ale (Clone)
- Fat Liar Amber Ale (Clone)
- Dublin Docks Red Ale
- Oktoberfest Bier
- Amber Waves American Wheat
- Petey’s Evil Ale (Clone)
- Barnstormer Barleywine
- Von Baron Belgian Tripel
- Captain Cogsworth Coffee Stout
- Spring Loaded Bock
- S.S. Tadcaster Porter (Clone)
- Steam Stoker Stout
Questions? Please feel free to contact us with any questions you may have.
————————————————————————————————
David Ackley is a beer writer, brewer, and self-described “craft beer crusader.” He holds a General Certificate in Brewing from the Institute of Brewing and Distilling and is founder of the Local Beer Blog.
Off-Odors Coming From My Wine!
 I have been making homemade wine now for about 7 years with great success. My wine making has always been from fresh juice or kits. My question is…whenever I open a bottle of wine, no matter its age, it initially has a somewhat homemade odor (tough to describe and not necessarily offensive) that I do not notice in commercial wines. I find that after uncorking a bottle, it almost always smells and tastes better on day two. This seems to ring true no matter what type of wine juice is used. I am assuming something is precipitating out of the wine after it is uncorked, but don’t understand what or why. Can you shed any light on what is happening here? Name: Bob D.
State: Massachusetts
Hello Bob,
I’m not sure how to answer your question. This is not a normal thing to experience, and the fact that you are experiencing it with all homemade wines tells me that there may be some fundamental flaw going on in the wine making process.
If you could describe the odor more clearly and specifically we might be able to hone in on it a little better, but at this point all I can do is try to speculate. Things that come to mind are:
- Squeezing a wet cork over the wine bottle when bottling and allowing the liquid to drip into the wine.
- Too much sulfite such as sodium metabisulfite or Campden tablets being used throughout the wine making process.
- Bottling the wine to soon and trapping off-gases from the wine yeasts’ fermentation.
- Fermenting at too warm of a temperature. 78°F and above can be a problem.
I’m not saying that any of these things are going on. They are only guesses to give you an idea of what types of things to consider. In reality if could be one of a hundred things. Just review what you do and see what you can come up with.
If it turns out you still have no idea, here’s what I would focus on with your next batch. After the fermentation has completed, give the wine plenty of time to clear, more so than with your past batches. Once you get to the point of bottling the wine, degas it thoroughly. This can be done through shaking and agitation, but I have found that the safest, most efficient and most thorough way to degas a wine is to use a degassing/mixing paddle.
A degassing/mixing paddle will not splash the wine. Splashing is something you want to avoid because it saturates oxygen into the wine and promote wine oxidation.
The hope here is to try some simple things first that may have some affect on the aroma of the wine. Time will tell if this is a solution. If you still get the same results, then you will need to move on to something else, such as fermentation temperature, etc.
Best Wishes,
Customer Service at E. C. Kraus
———————————————————————————————————
Ed Kraus is a 3rd generation home brewer/winemaker and has been an owner of E. C. Kraus since 1999. He has been helping individuals make better wine and beer for over 25 years.
———————————————————————————————————
Ed Kraus is a 3rd generation home brewer/winemaker and has been an owner of E. C. Kraus since 1999. He has been helping individuals make better wine and beer for over 25 years.
Will My Beer With Extended Fermentation Time Still Carbonate?
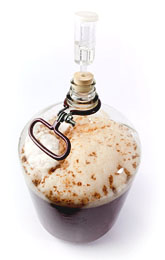 I brewed a decent Scottish ale. Racked it after primary fermentation of about 7 days or so. But just haven’t made time to bottle it. It’s been in the secondary about 5 or 6 weeks. The air lock suggests it’s still fermenting. I pulled out a glass. It’s of course flat, but the flavors are good. If I bottled as normal with priming sugar, will there be enough living yeast to carbonate this late in the process. What should I do to ensure my finished product doesn’t seem like I let it sit too long?
Name: Justin V.
State: PA
—–
Hi Justin,
Thanks for your question!
Your Scottish ale is almost definitely done fermenting and if it tastes good, it should be perfectly fine for bottling as you would normally. Five to six weeks is a little longer than necessary for a typical secondary fermentation, but it’s not an excessive amount of time or cause for alarm. In fact, some beer styles require extended time in the fermenter to condition or to ferment completely.
As long as you haven’t filtered your beer, there should still be enough beer yeast in suspension for them to consume the priming sugar and carbonate your beer. Even so, in racking from secondary to your bottling bucket, this will stir up a little beer yeast, so I wouldn’t worry about having enough yeast to do the job. You may want to read more in this post about carbonating your homebrew.
The only thing that could possibly cause issues for you is yeast death. When yeast dies it can rupture, resulting in what is called yeast autolysis. The dead cells can leech some unpleasant off-flavors into your brew. If you have the off-flavors from yeast autolysis you will know it. It would have to be a pretty extreme scenario (such as in John Palmer’s example) to cause any problems, and since you racked to secondary, you already left most of the spent yeast in the primary fermenter. Chances are that if you kept the fermentation sealed and at a reasonable temperature, and if the beer tastes fine at this point, your beer will be ok.
In the event that you do pick up some off-flavors when you’re eventually ready to drink your brew, time is your best friend. Leave the bottles alone for a month or longer and you may well discover that unpleasant flavors balance out over time. I’m often surprised by how a homebrew can develop in the bottle over the course of several months.
So that’s the long answer to your question! The short answer is from Charlie Papazian: “Relax, don’t worry, have a homebrew!”
Til next time…Cheers!
——————————————————————————————————-
David Ackley is a beer writer, brewer, and self-described “craft beer crusader.” He holds a General Certificate in Brewing from the Institute of Brewing and Distilling and is founder of the Local Beer Blog.
Home Brew Mixology: 3 Craft Beer Cocktail Recipes
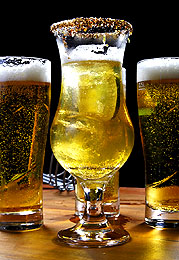 As the craft beer movement has taken the nation by storm, craft beer cocktails have made their way into bars and restaurants around the country. But you don’t have to go to the local pub for a good mixed drink. All you need is some home brew on hand and a few special ingredients to impress your friends with your new skill set: craft beer mixology.
Black and Tan
Ingredients: Home brewed Stout and Home brewed Pale Ale
Take an easy step into craft beer mixology with a Black and Tan! A simple combination of two beers, typically a stout and a pale ale, a Black and Tan is poured so that the dark beer floats on top of the light beer, creating a pretty cool visual effect! For best results, the top layer should have a lower specific gravity than the bottom layer. Guinness and Bass are often used, but for your own homemade spin we recommend the Brewer’s Best English Pale Ale and Irish Stout ingredient kits.
Directions: The trick with this mix is in the pour. Fill a glass halfway with your homemade pale ale, then turn a spoon upside-down and pour the stout gently over the spoon so that the dark beer sits on top of the light beer. Mess up the first one? Good thing you have half a bottle of each left over!
Tip: Use a chocolate stout, a rye pale ale, or any other combination of homebrews for your own unique variation!
The Honey Beer
Start flexing your mixology muscles by combining your home brewed pale ale with gin, lemon, honey, and salt. Imbibe Magazine and Jill Schuster supply this simple concoction:
Ingredients:
- 1 1/2 oz. gin
- 1 oz. fresh lemon juice
- 1 tsp. lemon zest
- Pale ale [preferably home brewed!]
- Ice cubes
- Tools: shaker, strainer
- Glass: pilsner
- Garnish: wildflower honey and kosher salt, to rim the glass; lemon twist
Directions: “Dip half of the Pilsner rim in wildflower honey and then lightly in kosher salt. Shake all ingredients but beer. Strain over fresh ice into the prepared Pilsner glass. Top with beer and garnish with a lemon twist.”
Home Brew Michelada
If you like Bloody Mary’s, you have to try a Michelada. Originally a Mexican creation, the Michelada features lime, salt, tomato juice, orange juice, Worcestershire sauce, hot sauce, and a cold, light lager. We recommend you start with either the Muntons Mexican Cervesa or the Brewers Spring Mexican Lager beer kit for a south-of-the-border, salty, tangy refreshment.
Alison Roman, assistant food editor of Bon Appetit, shares the following recipe:
“Rub the rim of a pint glass with a lime wedge and dip in kosher salt; fill glass with ice. Add 1 1/2 ounces fresh lime juice, 1 ounce tomato juice, 1/2 ounce fresh orange juice, and 1 teaspoon Worcestershire sauce; season with hot sauce. Top off with cold Mexican lager and stir to combine.”
—–
Looking for more home brewed beverage combos? Check out Shandy Is Dandy: A Look at a Summer Time Favorite.
—————————————————————————————————
David Ackley is a beer writer, brewer, and self-described “craft beer crusader.” He holds a General Certificate in Brewing from the IBD and is founder of the Local Beer Blog.
Winemaking Terms You Should Know
 If you’re new to home winemaking, some of the language used in the wine making books and wine recipes can be very intimidating. But after you’ve done some research and have been practicing for a little while, you’ll wonder why you were ever confused to begin with!
There are many terms to learn in home winemaking, and this post will give you a brief introduction into just a few of those terms to help you get started in home winemaking, or perhaps brush up on some of the terms you may not have seen in a while.
- Acidity: You can measure acidity in grapes, must, or wine, and is an important thing to measure throughout the home winemaking process. If you don’t have enough acid in the must, you’ll have a hard time with fermentation, and the finished wine will have a sort of medicinal flavor. You can use an acid testing kit to determine the acidity level in the must or wine, and if it looks like these levels are too low, you can add tartaric acid, malic acid, or citrus acid in order to achieve the proper acidity level for good fermentation and desirable aromas and flavors.
- Bentonite: Bentonite is a fine clay substance that is used either as a clarifying or stabilizing agent in wine. Basically, it functions to remove excess proteins in the wine, including yeast, as well as removing other fining agents or helping to achieve heat stabilization.
- Stabilization: A wine is considered to be stable or have been stabilized when the fermentation is complete. Stabilization can occur naturally, or through additives like Wine Stabilizer.
- Inoculation: To inoculate a wine is just a fancy way of describing the act of adding active wine yeast to the must or wine. Additionally, you can inoculate a wine with malolactic bacteria if you’re planning on having your wine go through malolactic fermentation.
- Lees: Lees are basically dead wine yeast plus other solids that are formed during the winemaking process. In order to remove this sediment from the wine, you can perform as few or as many rounds of racking as needed. For some wines, leaving the lees in contact with the juice for a period of time may be desirable, as this contact incorporates more complex flavors and aromas into the wine than if they were immediately removed and discarded.
- Oxidation: In very basic terms, oxidation occurs as a reaction between wine and the oxygen in the air. You want some oxidation in your wine in order to help in the development and maturation process, however, too much oxygen exposure can result in a wine that is known as being “oxidized”, which possesses undesirable flavors and aromas, as well as a browning in color.
———————————————————————————————————
Ed Kraus is a 3rd generation home brewer/winemaker and has been an owner of E. C. Kraus since 1999. He has been helping individuals make better wine and beer for over 25 years.
How To Make Spent Grain Dog Treats!
 Home brewers and commercial brewers alike generate a fair amount of waste products that have to be processed in one way or another. One of the most significant of these is the mountain of malted grains left over after the mashing process. When the sweet, sugary wort is drawn out of the mash tun, brewers need something to do with those spent grains. Of course, we could just throw them away, but in many cases this grain can still be put to good use, for livestock feed, compost, or other purposes.
One use that has become very popular is turning the grains into spent grain dog treats. Even Dogfish Head sells dog treats made from their leftover grains. The recipe is pretty simple, and just right for using up nearly all of the grains generated from a five-gallon partial mash brew. (Please note: Hops are toxic to dogs. If making dog treats with your leftover grains, please be sure that they haven’t had any contact with hops.)
Let’s get cooking!
Ingredients (for about 30 dog treats):
- 2 cups spent grain
- 1 cup flour
- 1/2 cup peanut butter
- 1 egg
Directions:
- Use your spent grains as soon as possible after brew day. If making the treats after brew day, collect the leftover grains and either refrigerate or freeze them to avoid mold.
- When you’re ready to cook, preheat the oven to 350F.
- Meanwhile, combine the ingredients in a bowl and mix thoroughly.
- Use a rolling pin and a cookie cutter to form the treats, or just shape them by hand. Be sure to make the treats a size that’s appropriate for your dog.
- Bake the treats at 350F for 30 minutes.
- Turn the heat down to 200F and bake for an additional 3 hours to dry them out. Once cool, store them in an airtight container.
- Reward your pup for being a good brew mate with a yummy dog treat! Don’t forget to store the treats out of reach. Fido is bound to love ‘em!
What other uses do you have for spent grains?
Til next time…cheers!
——————————————————————————————————-
David Ackley is a beer writer, brewer, and self-described “craft beer crusader.” He holds a General Certificate in Brewing from the Institute of Brewing and Distilling and is founder of the Local Beer Blog.
3 FREE Online Resources To Make Homebrewing Easier
 For some, making beer at home is an art. For others, it’s a science. Most of us, however, fall somewhere in the middle and just want to make good beer. These three, free, online tools and resources will help you do just that:
1. Brewer’s Friend
While there are a number of great homebrewing apps out there, Brewer’s Friend offers several online tools designed to help with recipe building, calculations, and other brew day activities. I frequently head over to the site to get help with hydrometer corrections, IBU calculations, and the like.
In addition to the calculators, Brewer’s Friend offers a number of other free resources, including:
- Free printable brew day sheets
- A free Android brewing app
- A free iOS brewing app (premium version $8.99)
I know I’m only skimming the surface of the tools offered by this handy website, so stay tuned for a guest blog post from Larry over at Brewer’s Friend!
2. Kettle Volume Calculator
If you’re lucky enough to have a sight glass on your brew kettle, that’s great, but if you don’t, this nifty tool from the Merry Cuss Brew Club allows you to calculate the volume of wort in your kettle based on the depth of the wort and the width of the kettle. (I’ll sometimes use a clean, sanitized, plastic or metal ruler to take a measurement.)
Why would we want to know the volume of wort in the kettle?
Knowing the volume in the kettle makes it easier to measure how much wort you’ve run off from the mash, as well as to calculate IBUs, boil-off rates, dilution volumes, and things of that nature. You could even use the tool to calibrate a dipstick for your kettle so you don’t have to use the calculator every time you need to figure out your kettle volume.
3. Hop Variety Handbook
When creating a home brewed beer recipe, it’s important to consider the characteristics of different hop varieties. The HopUnion Handbook will help you answer questions like:
- Would I rather have woody, earthy hops, or something more bright and citrusy?
- What is the typical alpha acid content of Cascade?
- What beer styles are typically brewed with Magnum?
- What is a good substitute for Columbus hops?
The virtual Hop Variety Handbook from HopUnion provides a wealth of information so you can pick the best hops for your brew.
These are just a few of the many great home brewing resources online. What are some of your favorites?
———————————————————————————————————
David Ackley is a beer writer, brewer, and self-described “craft beer crusader.” He holds a General Certificate in Brewing from the IBD and is founder of the Local Beer Blog.
Cooking With Homebrew – 3 Delicious Summer Recipes!
 Nothing goes together quite like beer and food. In fact, many Americans are starting to come around to the idea that beer can pair with food at least as well as wine does.
In addition to being served with your food, beer can also be used in it, often as a substitute for other liquid ingredients. Beer adds layers of complexity and a malty sweetness that you don’t get from water, broth, or milk.
Cooking with homebrew offers yet another way for homebrewers to experiment and share their passion with friends and family. Besides, it’s always fun to serve the beer alongside the food you make with it — and of course to drink it while cooking, too!
Here are three delectable summer recipes that use beer as a main ingredient:
Smoked Porter Beer Brine
Sean Z. Paxton, also known as the Homebrew Chef, suggests the Alaskan Smoked Porter for this recipe, but feel free to use your own homebrewed smoked porter to give added flavor to your pork, chicken, salmon, or whatever else you want to throw on the grill.
Makes: just over a gallon of brine
Ingredients:
- ½ gallon water, filtered and cold
- 1 cup kosher salt
- ¼ cup brown sugar
- ¼ cup honey, local variety
- 2 tbsp mixed peppercorns, ground
- 2 each onions, yellow, large, peeled and sliced
- 1 each garlic head, peeled and chopped
- 18 each bay leaves
- 2 each oranges, halved
- 66 ounce Alaskan Smoked Porter ale [or smoked porter homebrew]
Directions:
In a large pot, add the water, salt, sugar, honey, peppercorns, onion, garlic, bay leaves, and citrus. Turn heat to medium, stir occasionally until the mixture comes to a boil. Turn off heat and let sit, to infuse the flavors, and cool to room temp. Add cold Alaskan Smoked Porter [or smoked porter homebrew] and mix well. Make sure the brine temperature is below 40°F, as you want to keep the item to be brined cold.
The general rule of thumb is to brine 12 hours per 1 pound of meat. If you brine longer than that, you can risk having an over salty piece of protein. Place the cooled brine in a sealable container that is large enough to hold the brine and the displacement of what is to be brined (the meat). The new extra large 2 gallon Ziplock® bags work well or a cleaned ice cooler (with sealed bags of ice to keep the cooler cold over time). Add the pork (butt, shoulder, loin or belly), chicken (whole or cut up), or filet of salmon to the container and let brine. For pork, I usually brine for 36-48 hours, chicken 24
hours and a filet of salmon 12 hours.
Remove the meat at least 12 – 24 hours before cooking. This will help the meat dry, continue to distribute the added flavor and not over brine the meat. To cook the meat, one can roast, grill, smoke or bake the pork, chicken or fish.
(view the full recipe here)
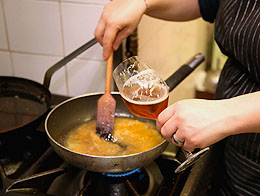
IPA-Battered Shrimp Tacos
Ashley Routson, the Beer Wench, is a regular contributor to the Whole Foods blog. In this recipe, she recommends a bitter American IPA for the fried shrimp batter.
Ingredients:
- 1 1/2 pound medium shrimp
- 1 1/2 cups [American IPA]
- 1 cup unbleached all-purpose flour
- 1 tablespoon cornstarch
- 1 teaspoon salt
- 3/4 teaspoon garlic powder
- 1/4 teaspoon cayenne pepper
- 1 1/4 cup panko breadcrumbs
- Vegetable oil for frying
- A few soft tortillas
- Taco toppings, like cilantro, tomato, shredded cabbage, avocado
Method:
- Remove the tails from the shrimp, devein and clean.
- In a medium mixing bowl, whisk together the beer or seltzer, flour, cornstarch, salt, garlic powder and cayenne pepper. Pour the panko breadcrumbs into another bowl.
- Dip each shrimp into the batter, then gently roll in panko to coat. Place battered shrimp on a clean plate.
- Heat 1/2 inch of cooking oil in a skillet over medium heat. Add the shrimp in small batches – I recommend six at a time.
- Fry shrimp on each side about 2 minutes, until golden brown. Place fried shrimp pieces on a wire rack or paper towels to drain off excess oil.
- Prepare soft shell tacos with shrimp and toppings of your choice and pair with a [American] IPA! Cheers!
(view the original recipe here)
Chocolate Stout Cupcakes
Don’t forget the dessert! In one of my all-time favorite recipes made with beer, Dave Lieberman’s chocolate stout cupcakes are some of the best cupcakes I’ve ever had. Chocolatey, roasty stout makes them incredibly moist. The homemade icing is well worth the effort, though I’ve found that using just 3/4 cup of confectioner’s sugar is plenty sweet.
Ingredients:
- 3/4 cup unsweetened cocoa, plus more for dusting finished cupcakes
- 2 cups sugar
- 2 cups all-purpose flour
- 1 teaspoon baking soda
- Pinch fine salt
- 1 bottle stout beer
- 1 stick butter, melted
- 1 tablespoon vanilla extract
- 3 large eggs
- 3/4 cup sour cream
- 1 (8-ounce) package cream cheese, softened at room temperature
- 3/4 to 1 cup heavy cream
- 1 (1-pound) box confectioners’ sugar
Directions:
- Preheat oven to 350 degrees F.
- In a large mixing bowl, whisk together the cocoa, sugar, flour, baking soda, and salt.
- In another medium mixing bowl, combine the stout, melted butter, and vanilla. Beat in eggs, 1 at time. Mix in sour cream until thoroughly combined and smooth. Gradually mix the dry ingredients into the wet mixture.
- Lightly grease 24 muffin tins. Divide the batter equally between muffin tins, filling each 3/4 full. Bake for about 12 minutes and then rotate the pans. Bake another 12 to 13 minutes until risen, nicely domed, and set in the middle but still soft and tender. Cool before turning out.
To make the icing:
In a medium bowl with a hand mixer, beat the cream cheese on medium speed until light and fluffy. Gradually beat in the heavy cream. On low speed, slowly mix in the confectioners’ sugar until incorporated and smooth. Cover with plastic wrap and refrigerate until ready to use. Icing can be made several hours ahead and kept covered and chilled.
Top each cupcake with a heap of frosting and dust with cocoa.
(view the original recipe here)
Bon appétit!
———————————————————————————————————-
David Ackley is a beer writer, brewer, and self-described “craft beer crusader.” He is a graduate of the Oskar Blues Brew School in Brevard, NC, and founder of the Local Beer Blog.