Best Beer Styles for Spring Homebrewing

Spring Homebrewing Season Beer Style
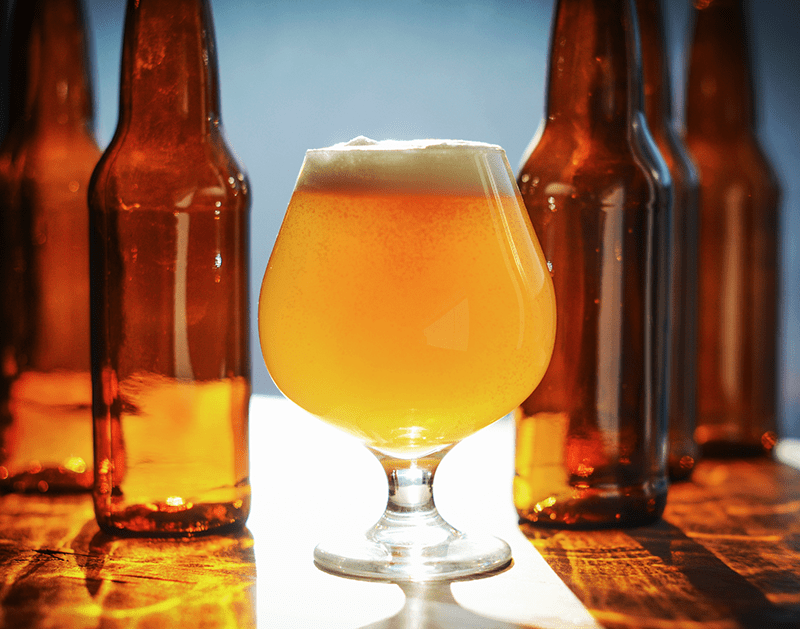
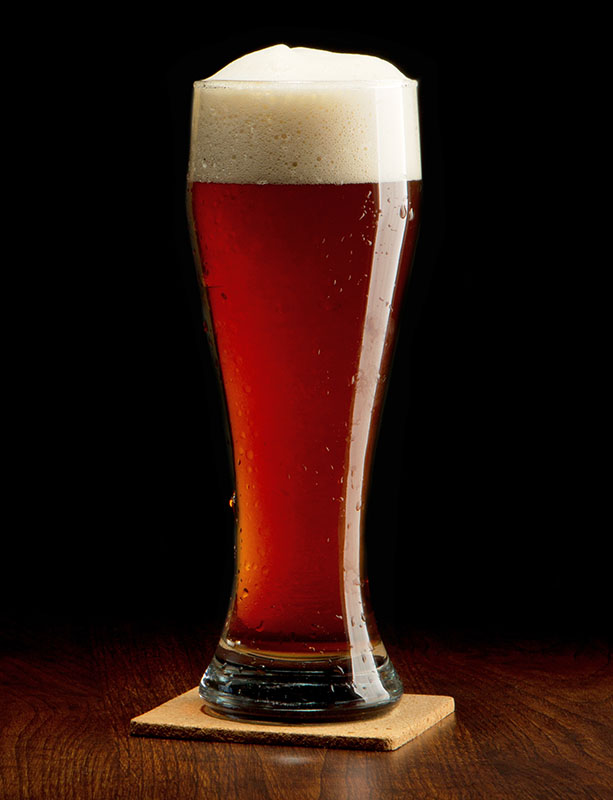
After a long, dreary winter, I for one as a homebrewers can’t wait to get out of the house in the spring time and fire up the brew kettle. What do homebrewers brew in the spring? Generally some lighter-bodied beers that exemplify the qualities of the spring season. As if to salute the growing season, these beers tend to showcase the lively flavors of floral hops and fruity yeast varieties.

Below are some of the best beer styles for brewing this spring:

  • SaisonSaison is a dry, Belgian-style farmhouse ale typically characterized by fruity and spicy flavors from the use of estery Belgian ale yeast and spices like coriander. Many versions use specialty grains, like oats, wheat, and rye, and can range from a sessionable 4.5% ABV up to 7% or higher. Sometimes honey or sugar are added to help achieve a dry finish. High carbonation and sprightly acidity make saison a supremely refreshing beer to brew in the spring.
  • Bière de Mars – It’s not too late to pull off this high-gravity cousin of the saison this spring. Bière de Mars is a malt-forward Franco-Belgian ale with notes of toffee, dry, fruity flavors, and minimal hop aroma. Like saison, Bière de Mars may utilize adjunct grains, sugar, and spices to achieve the appropriate style characteristics. It’s a no-brainer for spring time brewing.Shop Beer Recipe Kits
  • Maibock – Maibock, or “May bock”, is Germany’s answer to spring weather. It’s a higher-gravity lager just like traditional bock, but paler and a little more bitter. Check out Growler Magazine for a wonderfully simple maibock recipe.
  • Rye Pale Ale – Like barley, rye is a cereal grain that can be used in making beer. It’s often added in smaller doses to contribute a subtle spicy notes to pale ales, IPAs, and sometimes Beglian-style beers. Try this clone of Terrapin Brewing Company’s Rye Pale Ale.
  • Tripel – Belgian Tripels are the true champagne of beer. Bright, golden, effervescent, with notes of fruit and spice, triples are high-gravity Trappist-style beers that showcase the complexity of Belgian ale yeast. Try a Belgian Tripel recipe kit or try this Westmalle Tripel clone when brewing this spring.
  • Belgian WitbierShop Homebrew Starter KitBelgian wit, or white beer, is the perfect beer for drinking the spring sunshine. Brewed in the style of Hoegaarden or Allagash White, witbier is a sessionable beer at just 4-5% ABV. The color is very pale, often cloudy and creamy due to the use of oats and wheat. Citrus peel and coriander make the beer bright, fragrant, and refreshing. Try the Brewer’s Best Witbier kit or Blue Noon, a clone of the ever-popular Blue Moon.

These are some of my favorite beers for brewing in the spring – what’s your favorite spring time brews?

—–
David Ackley is a beer writer, brewer, and self-described “craft beer crusader.” He holds a General Certificate in Brewing from the Institute of Brewing and Distilling and is founder and editor of the Local Beer Blog.

2 Great Questions About Bottling Homemade Wine

Screw-Cap-Wine-Bottle1. Are the mushroom cork or t-corks easy to install, or do you need special equipment. Do they seal as well as regular wine corks, (over time)?
2. Wine bottles that have a screw top, can you reuse them with a wine cork?
Name: Tom H.
State: Davison, MI
—–
Hello Tom,
The T-corks (mushroom corks) are very easy to install. This is the biggest advantage to using them over traditional wine bottle corks. You do not need a wine bottle corker or any mechanism of any kind. You simply put T-corks in by hand. Every now and then you may get a stubborn one, but that can easy be remedied by tapping on it with a rubber mallet or similar.
The biggest disadvantage with T-corks is that they are not meant for long-term storage. Some wines made from fresh grapes or maybe elderberries may require several years of aging. These are not the corks to use for that situation. We recommend using T-corks for wines that you intend to drink within a one to two years.
Shop T-CorksAs to your second question about using wine bottle corks on a screw-cap wine bottle, the answer is “not advisable”. This is for two reasons. The first is that the size of the opening of the wine bottle is critical to the success of the wine bottle cork. The wine bottling opening needs to be 3/4″. This is not the case with most screw-cap wine bottles. They are all close, but usually off a bit.
The second reason, and the one that is most important, is the shape of some screw-cap wine bottles are not correct to accept a wine bottle cork. The opening of the wine bottle needs to be a straight barrel. With some screw-cap wine bottles the barrel is not straight. The shoulder of the wine bottle rises too high to accommodate a straight barrel opening that a wine bottle cork needs, so what you end up with is a slightly-flared barrel opening.
Without this straight-barrel opening two things can happen:

  1. TheShop Wine Bottle Corkers cork does not seal tightly enough along the whole length of its side. As the barrel opening flares out, the resistance against the side of the cork becomes less and less.
  1. Because of this flaring and uneven resistance, it can actually entice the wine cork stopper to pull down into the bottle. I’ve seen this happen more than once. Think of squeezing a marble between your fingers. If you don’t squeeze it evenly or to one side, it pops out. This is the same effect that can happen when corking a screw-cap bottle that has a flared barrel.

Thanks for the great questions, Tom.
Happy Winemaking,
Ed Kraus
—–
Ed Kraus is a 3rd generation home brewer/winemaker and has been an owner of E. C. Kraus since 1999. He has been helping individuals make better wine and beer for over 25 years.

Belgian Saison Beer Recipe (All-Grain & Extract)

Made With Saison Beer RecipeAround this time last year, we shared some tips and guidelines for brewing a saison. Well it’s that time of year again; I actually just enjoyed my second-to-last bottle of saison homebrew from last year, and it’s time to brew another one.
A few techniques and characteristics can help make your homebrewed saison a good one when using this saison beer recipe:

  • Hard water – Mineral rich water can help your saison have a dry finish that’s typical of the style. Consider adding gypsum to your mash water.
  • Simple sugar – Another way to achieve a dry finish is through the use of simple sugar adjuncts. Since the sugar will ferment almost completely your overall attenuation will be higher. Use about 1-1.5 pounds of adjunct sugar in your saison beer recipe.
  • Adjunct grains – A small amount of adjunct grains like wheat or oats can help give your saison some body and head retention. These adjunct grains can be used in raw, rolled, or flaked form. I’ve had good results with as little as 1/4-lb. of Shop Gypsumoats or wheat.
  • Get creative with herbs and spicesOrange peel and coriander are two of the most common flavor additives used when making a saison, but you can try anything from ginger to lavender to rose hips to chamomile. I find that the floral additions really work well in this kind of seasonal beer.
  • Belgian yeast strain – There is a particular yeast character in saisons that can only be achieved by using a Belgian yeast strain. There are several saison-specific yeast strains, including the Danstar Belle Saison Yeast. Other Belgian ale yeasts such as Wyeast 3942: Belgian Wheat Beer Yeast may also be used. Don’t be afraid to let fermentation temperatures push the upper limits when making this saison beer recipe, as the aromatic esters and phenolics are desirable in saisons.

Ready to try a saison of your own? Try this all-grain recipe! (See bottom for an extract / partial mash option!)
Shop Beer Flavorings
Belgian Saison Beer Recipe
(all-grain, five-gallon batch)
Specs
OG: 1.059
FG: 1.013
ABV: 6.1%
IBUs: 29
SRM: 7
Ingredients 
9 lbs. Two-row malt
1 lb. Caramel 20L malt
4 oz. Flaked oats
1 lb. Brown sugar
1 oz. Kent Goldings hops at :60Shop Grain Mills
.5 oz. Kent Goldings hops at :30
.25 oz. fresh crushed coriander seed at :20
.5 oz. Kent Goldings hops at :10
.25 oz. fresh crushed coriander seed at :10
1.5 tsp. yeast nutrient at :10
1.5 tsp. Irish moss at :10
1 oz. Kent Goldings hops dry hopped for 7 days
Lallemand’s Danstar Yeast: Belle Saison Ale (2L yeast starter recommended)

Directions: Mash crushed grains in moderately hard water at 148-150˚F for 60 minutes. Sparge to collect 7 gallons of wort. Mix in brown sugar and bring to a boil. Boil for 60 minutes, adding hops and additives according to recipe. Remove from heat, whirlpool, and cool wort. Pitch yeast at about 70˚F. Ferment at 70-75˚F. Add dry hops to the secondary fermenter. Bottle or keg for 2.5 vols CO2.
EXTRACT / PARTIAL-MASH OPTION: Replace the two-row malt with 6.6 lbs. of Extra Light liquid malt extract. Steep the caramel malt and flaked oats for 30 minutes Shop Steam Freak Kitsin 2 qts. water at 150˚F. Strain wort into brew kettle and add the light liquid malt extract and enough water to make a 3.5-gallon boil. Boil for 60 minutes, adding hops and additives according to beer recipe. At the end of the boil, remove the kettle from heat and mix in the brown sugar. Whirlpool, chill wort, and adding enough cool, clean bottled water to make 5.5 gallons. Pitch yeast at about 70˚F. Ferment at 70-75˚F. Add dry hops to the secondary fermenter. Bottle or keg for 2.5 vols CO2.
Do you have a favorite saison beer recipe from either extract or all-grain? What makes yours unique?
—–
David Ackley is a beer writer, brewer, and self-described “craft beer crusader.” He holds a General Certificate in Brewing from the Institute of Brewing and Distilling and is founder and editor of the Local Beer Blog.

Try This Amazing Blueberry Wine Recipe

Homemade Blueberry WineIf you’ve never made wine before, I would submit to you that making a blueberry wine is a perfect place to start.
For one, blueberry wine is any easy wine to make. And, it only requires the most elementary pieces of wine making equipment. Secondly, it makes an INCREDIBLE wine. Blueberries, quite frankly, are well suited to making wine. The flavors come through fruity and bright.
Secondly, it’s springtime and blueberry season is just around the corner, so what better time to get your ducks-in-a-row and everything squared-away, so that when they do come in you’ll have exactly what you need and know what to do.
The blueberry wine recipe below is very simple to use. All you need are the ingredients listed and to follow the basic wine making directions that’s are on our website. The blueberries can be fresh or frozen. Either way will work equally well in the recipe.
To prepare the blueberries all that is required is that the berries be lightly crush. You can do this by hand, or you could use something like a potato masher. You do not want to crush the berries too much, and you definitely do not want to break any seeds. This could unnecessarily add a bitterness to the wine.

Ed’s Blueberry Wine RecipeShop Wine Making Kits
(Makes 5 Gallons)
13 lbs. Blueberries (lightly crushed)
11 lbs. Cane Sugar (table sugar)
1 tbsp. Yeast Energizer
Pectic Enzyme (as directed on its package)
2 tbsp. Acid Blend
Red Star Montrachet Wine Yeast
10 Campden Tablets (5 before to fermentation, 5 before bottling)

One of the fun thing about making your own wine is that you get to make it as sweet or as dry as you like. If you do nothing more than follow the directions, you will end up with a dry blueberry wine. But if you want to make a sweet wine, you can sweeten the blueberry wine to taste just before bottling. Just remember, if doing so, to also add potassium sorbate along with the Campden tablets called for in the blueberry wine recipe.Shop Wine Conditioner
Now, doesn’t that sound simple? I imagine the hardest part is keeping your patience in tact. Be sure the fermentation has completed and give it plenty of time to clear up before bottling. Once in the bottle, realize that aging the wine will dramatically improve its quality over the first couple of 3 months. After that drink up.
If you need wine making equipment to make the wine, the “Your Fruit!” wine making kit is taylor-made for making this blueberry wine recipe. Not only does it have the equipment you’ll need, but it also has plenty of the basic wine making ingredients for making many different kinds of wine – all at a discounted price.


Calibrating a pH Meter for Brewing Beer

A pH Meter For Brewing BeerMeasuring pH is an important part of all-grain brewing for a number of reasons. pH influences starch conversion during the mash, the quality of fermentation, resistance to infection, and flavor. While it’s possible to make good beer without paying any attention to pH, being able to measure the acidity or alkalinity at different points in the brewing process gives you one more tool in your homebrewing toolbox to gain full control over the end result – the beer!
With that in mind here is some basic information on calibrating a pH meter for brewing beer. Some first-time pH meter owners are a bit intimidated by the process, but as you will see, there is not all that much to it.

Is measuring pH just for all-grain brewers?
pH is most relevant when mashing, or mixing crushed malt with water. The enzymes that convert the complex sugars found in malt into fermentable sugar work best within a certain pH range (5.2-5.5). While it may be helpful for extract brewers to measure the pH of their wort or finished beer, it’s usually not a priority.

Calibrating a pH Meter for Brewing

To calibrate your digital pH meter, you will need:

  • your pH meter
  • 500mL distilled water
  • one or two beakers or glass jars (depending on how many buffer solutions you have) Shop Temp Probe
  • pH buffer solution
  • a thermometer

*Note: pH meters and testing procedures may vary. Follow the instructions that came with your pH meter.

To calibrate your digital pH meter:

  1. Prepare buffer solution: If using a buffer powder, mix 250 mL water with buffer powder, and fully dissolve buffer powder in water. If using a solution, pour buffer solution into testing jar.
  1. Turn on pH meter.
  1. Submerge the electrode end of the pH meter into the buffer solution.
  1. Wait until reading stabilizes.
  1. Adjust pH meter as needed. Most entry-level pH meters can be calibrated with a small screwdriver. Turn the small screw on the pH meter until the reading matches the pH of the buffer solution.Shop Digital pH Meter
  1. If using a second buffer solution, rinse the electrode on the pH meter with distilled water and repeat the steps above for the second solution.

 
pH Meter FAQs:

  • What is pH? pH stands for potential hydrogen and it measures the acidity or alkalinity of a liquid on a scale of 0-14. A pH of 7.0 is neutral. Measurements below 7.0 are acidic; above 7.0 are alkaline.
  • How often should I calibrate my pH meter for brewing? pH meters should not need to be calibrated for every brew, but will fall out of calibration over time. Calibrate before the first time you use it, and again every 3-6 months. When you recalibrate, make a note of the date and how far off the reading was. This will help you determine how often to recalibrate your particular pH meter when brewing.
  • Do I need to make adjustments for temperature? Shop Accurate ScalesSome pH meters come with automatic temperature control (ATC), in which case you do not need to adjust for temperature. However, you will still need to make sure you’re using the meter within its operating temperature range. Check the manual before using the pH meter in very hot wort.

 
Do you use a pH meter in your home brewery? How often do you calibrate your pH meter for brewing?

—–
David Ackley is a beer writer, brewer, and self-described “craft beer crusader.” He holds a General Certificate in Brewing from the Institute of Brewing and Distilling and is founder and editor of the Local Beer Blog.

Is Homebrewing Art Or Science?

Artist rendition of homebrew.What gets you excited about homebrewing? Is it the art of recipe development? Or the science behind fermentation and mashing? The creativity behind combining malt, hops, and yeast, or the learning that comes from every single batch of beer you make? These are the thoughts that crop up when we ponder the question: Is homebrewing art or science. While some may lean towards either the art or the science side of homebrewing, my guess is that for most of us, we’re drawn to both aspects of the hobby.

The Science of Homebrewing
One could spend a lifetime trying to understand the science behind making beer. Indeed, many do. It’s the science side of homebrewing that helps us understand the specific actions that allow four ingredients to combine into a flavorful, alcoholic beverage known as beer.
First, we have the science of water. Not all water is created equal. What is the make-up of your brewing water? Is it pure, like the soft water of the home of Pilsner in the Czech Republic? Or is it hard, like the sulfate-rich water of Burton-on-Trent, homeland of Shop Malted GrainsEnglish pale ales. Knowing the mineral content of the water you brew with can help you optimize mashing, fermentation, and flavor.
How about the science of malting? Why does grain need to be malted? It’s the malting process that begins to convert the energy in the grain into what will become fermentable sugar and eventually alcohol. Malting also affect the flavor and color of the grain and creates a whole range options that allow beer to be light or dark, sweet or roasty, and everything in between.
The science of hops reveals what makes beer bitter. It helps us understand IBUs and why an IPA stands apart from a pale ale. Understanding hop oils allows us to grasp how beers can taste and smell like citrus, pine, or grapefruit.
Finally, my favorite science of homebrewing, the science of beer yeast, the mysterious microorganism responsible for converting sugar into alcohol and carbon dioxide, explains how the other ingredients can magically transform a sugary porridge into an Shop Hopselixir that relaxes the body and soothes the senses.

The Art of Homebrewing
Brew masters have a deep understanding of their craft, not only the brewing side of the equation, but also the sensory side. For without understanding the way that flavor can change our mood or remind us of a special memory, brewers would just be shooting in the dark.
Brewers have to understand the flavors that different ingredients bring to a beer. Science can begin to explain flavor, but to fully understand it, a brewer needs experience. They need the vocabulary to describe the flavor, and only experience can help them understand how much is too much. While some scientific measurements (BU/GU) can help to facilitate an understanding of balance, only experience can help brewers develop an inherent knowledge of it.
There is an art to homebrewing – a creativity, but creativity isn’t just haphazardly throwing in whatever ingredients come to mind. The art is in understanding balance. Shop Beer Recipe KitsHow much hop bitterness is appropriate for a Bohemian pilsner? How much coriander should be used in a Belgian wit? One could easily follow a recipe, but a true artist will know from experience when enough is enough.
And of course there’s an art to the act of brewing. There’s a certain art to learning how and when to transfer beer from one fermenter to another, and a certain art to bottling without losing a drop of beer. Again, the art is improved with experience.

Putting It Together

So, is homebrewing art or science? My approach is that through understanding the science of homebrewing, we begin to develop the artistic skill needed to create truly wonderful beer. This is something that only comes through practice and repetition. Through science with develop our art of homebrewing. John Palmer agrees:
“Brewing is an art as well as a science. Some people may be put off by the technical side of things, but this is a science that you can taste. The science is what allows everyone to become the artist.”Shop Home Brew Starter Kit
Yes, homebrewing is both an art and a science. The beginning homebrewer may focus on the art of the brewing procedures before getting into the science of different ingredients and techniques. Then maybe combine the two into the art and science behind recipe development. I believe that a large part of this hobby’s appeal is that homebrewing fits so easily into both categories. It’s both.
What’s your take? Do you learn more toward the art of homebrewing or toward the science of homebrewing?

—–
David Ackley is a beer writer, homebrewer, and self-described “craft beer crusader.” He holds a General Certificate in Brewing from the Institute of Brewing and Distilling and is founder of the Local Beer Blog.

My Favorite Strawberry Wine Recipe

Wine made from strawberry wine recipe.If you could take springtime and put it into a bottle you would most likely end up with something close to a strawberry wine. For me, strawberry wine is the very essence of spring. Its flavor is bright and fresh. Its aroma is floral and sweet. As far as I’m concerned strawberry wine represents all things spring quite well.
If fresh strawberries are not already available in your area, they will be soon. With that in mind here is a strawberry wine recipe that you can use to get your springtime groove on. It’s a wine recipe I have used several times with great results. I couldn’t think of a better time to share it than right now!

Strawberry Wine Recipe
(5 Gallons)
19 lbs. Strawberries
10 lbs. Cane Sugar (1.090)
4 Tsp. Acid Blend 
5 Tsp. Yeast Nutrient
1/2 Tsp. Wine Tannin
Pectic Enzyme (as directed on package)
1/4 Tsp. Potassium Metabisulfite (or 5 Campden Tablets)
Wine Yeast (recommend Lalvin 71B-1122)
10 Campden Tablets (5 before fermentation, 5 before bottling)

You can use the basic wine making directions that are on our website for making this strawberry wine recipe. Just be sure to remove any stem or green parts of the strawberry before using. You do not need to crush the strawberries. Just give them a coarse chopping. The strawberries will breakdown and release all their goodness during the fermentation.Shop Fruit Wine Bases
One variation I have done a couple of time when making this is to exchange 2 pounds of the sugar for 3 pounds of raspberry spun honey. This exchange will keep your starting specific gravity about the same. The raspberry honey will intensify the sweet, perfume-y bouquet this wine likes to give. Essentially, it’s giving you more of one of the features that makes strawberry wine so great.
Another great thing about making this strawberry wine recipe is that it does not need much aging. So many wines are consumed before they reach their best simply because they need so much aging. Fortunately, that’s not the case with making strawberry wine.
I would not attempt to bulk-age the wine for any length of time, at all. Give it plenty of time to clear, but after that go straight into the wine bottles. Once in the bottles, give your strawberry wine at least one month to develop its bouquet. It will taste its best at around 4 to 6 months. Don’t let it sit around for any more than 1 year. Drink up!Shop Wine Making Kits
Do you have a strawberry wine recipe you’d like to share with other home winemakers? Just leave it in the comments below. We’d love to see what you’ve got cookin’!
Happy Wine Making,
Ed Kraus
—–
Ed Kraus is a 3rd generation home brewer/winemaker and has been an owner of E. C. Kraus since 1999. He has been helping individuals make better wine and beer for over 25 years.

Award-Winning Munich Dunkel Lager Recipe (All-Grain)


Beer Made From Munich Dunkel Lager RecipeWe recently explored some famous German beer styles. The next one on my “to brew” list is a Munich Dunkel Lager. Here’s some of the basic characteristics of this German style beer.
A Munich Dunkel is a dark lager (dunkel = dark in German). But just because it’s a dark beer doesn’t mean that it’s heavy, bitter, and roasty. Munich Dunkels use little (if any) heavily roasted malt. That means no black malt and no roasted barley. Most of the color and flavor in this beer comes from mid-range malt, particularly Munich malt. (Extract and partial mash brewers may use Munich malt extract.) The Munich malt provides the somewhat sweet, bready, malty flavors that characterize this beer.
In terms of hops, only enough hops are used to provide balance to the beer. You don’t want to cover up the malt flavor. The BJCP Guidelines for the style call for 18-28 IBUs. In a five-gallon Munch Dunkel lager recipe this may only be an ounce or two of hops. For an accurate representation of the style, only German varieties of noble hops should be used.
When brewing a Munich Dunkel Lager recipe, fermentation temperature control will be imperative. The German lager yeast used in this beer prefers temperatures of about 50˚F or below. Before attempting to brew this beer (or any lager for that matter), read Controlling Homebrew Fermentation Temperatures.
The all-grain Munich Dunkel Lager recipe below comes from the American Homebrewers Association. It’s an award-winning beer recipeShop Liquid Malt Extract created by Shekhar and Paula Nimkar of Swampscott, MA. The beer won the Dark Lager category at the 2010 AHA National Homebrew Competition.

Tara’s Slam Dunkel
(five-gallon batch, all-grain recipe)
*Note: This beer recipe assumes a mash efficiency of ~86%. You may wish to have some DME on hand in case you undershoot your OG.
Specs
OG: 1.060
FG. 1.020
ABV: 5.25%Shop Steam Freak Kits
IBUs: 13
SRM: 17
Ingredients
8 lbs. Munich malt
2 lbs. Wheat malt
4 oz. Chocolate malt
.66 oz. Hallertau hops at :45
.33 oz. Hallertau hops at :15
2 packets Wyeast 2206: Bavarian lager yeast
1 tbsp. Irish moss at :20
.5 tsp. calcium carbonate (added to sparge water)

Directions: The day before brewing, prepare a 4L yeast starter. Mash grains in about 3.25 gallons of clean water at 122˚F for 30 minutes. Remove 1/3 of the mash and raise to 158˚F for 20 minutes. Bring it to a boil for 20 minutes. Return the decoction to the main mash vessel and raise temperature to 149˚F. Remove 1/3 of theShop Grain Mills mash and bring to a boil. Return it to the main mash and sparge with 167˚F water to collect seven gallons of wort. Do a 90-minute boil, adding hops according to schedule. Remove kettle from heat and cool wort to 65˚F. Aerate wort and pitch yeast. When fermentation activity begins, reduce temperature to 55˚F. Ferment for 14 days, then transfer to secondary and ferment at 41˚F for three weeks. Bottle or keg for 2.4 volumes CO2.
Do you have a solid Munich Dunkel Lager recipe you’d like to share with us? Share in the comments below!
—–
David Ackley is a beer writer, brewer, and self-described “craft beer crusader.” He holds a General Certificate in Brewing from the Institute of Brewing and Distilling and is founder and editor of the Local Beer Blog.

My Homemade Wine Is Too Dry. Is There Anything I Can Do?

Zach Galifianakis who's homemade wine is too dry.I have a mustang grape wine that has been aging in a carboy. Last night I tried and it has a hydrometer reading of .992. When I tasted the wine, it was too dry for me. How can I sweeten up this wine to a semi sweet?
John
_____
Hello John,
One of the great things about making your own wine is that you get to drink it the way you want to – even if you want to drink it like our buddy Zach Galifianakis does. For me personally, this is the fun part of making homemade wine. Adjust it until you get the wine just the way you like it. This is something that can’t practically be done unless you are making the wine yourself. This is what makes this hobby so valuable.
Shop Wine ConditionerIn your case, you are not particularly happy with one of the basic features of the wine: the dryness or sweetness of the wine. You are saying that your homemade wine is too dry for your own personal taste. Fortunately, the solution is very simple. All you need to do is add sugar to the wine until it is at the sweetness you desire – custom made for you!
It is important to remember that you do not want to adjust the sweetness of a wine until it has completely cleared up and is ready to bottle, so make sure the wine is ready to be bottled before adding the sugar.
At bottling time you can make the wine sweeter tasting. One of the easiest ways of doing this is to use Wine Conditioner. This is basically a sweetener and stabilizer combined together into a syrup. The stabilizer (potassium sorbate) makes sure that your wine does not start fermenting the new sugars while in the wine bottle.
You can also use your own sugar, honey, etc. to sweeten your wine, but you will also need to add potassium sorbate separately to eliminate any Shop Potassium Sorbatechance of the wine re-fermenting. So, as I think you can start to see, if your homemade wine is too dry, it’s not that big of a deal to fix.
If the sugar you are using is granulated, I would also suggest that you pre-dissolve the sugar into a syrup before adding it to the wine. This will help to eliminate the need for excessive stirring when adding the sugar.
When actually sweetening your wine it is best to sweeten a portion of the batch, first. For example, take a measured sample of the wine – say, one gallon – and add measured amounts of sweetener to it to establish a dosage to your liking. Once the dosage is determined you can then do the same thing to the rest of the wine. This insures that you do not get the entire batch too sweet.
Shop HydrometersIf you do accidentally add too much sugar to the measured sample, just blend it back into the rest of the batch and start all over with a new gallon sample.
We also have an article on our website, Making Sweet Wines, that will have more information about what to do if your homemade wine is too dry. You may want to take a look at it as well.
Happy Wine Making,
Ed Kraus
—–
Ed Kraus is a 3rd generation home brewer/winemaker and has been an owner of E. C. Kraus since 1999. He has been helping individuals make better wine and beer for over 25 years.

How Long Does It Take to Make Beer?

He Knows How Long It Takes To Make BeerWhen discussing how long it takes to make beer at home or the brewing timeline, we can separate the question into two parts: how much time is spent actively working on the beer vs. the time the beer is sitting in the fermenter or the beer bottles. While the beer will need weeks or months before it’s at it’s best to drink, the number of active hours actually spent brewing is relatively low.

Hands-on vs. Hands-off Time
My all-grain brew days usually take about six hours from start to finish, including cleaning, but a lot of that time is spent waiting for water to heat, for the mash to convert, and for the wort to boil. (During this time I’m able to multitask and do some chores around the house.) Add to that an hour or so for transferring to secondary and an hour or so for bottling, and the active time for making a batch of beer is about 8-10 hours, spread out over two or three days. You can shave off an hour or so if you’re brewing with malt extract or doing a partial mash. Here’s more information on these brewing methods.
The bulk of the time that it takes to make beer actually involves very little work on the part of the homebrewer. During fermentation and conditioning, it’s the yeast that does all the work of converting sugar into alcohol and developing flavor.Shop Homebrew Starter Kit
The question of how long it takes beer to ferment and condition is largely dependent on beer style. On the short end, a low-gravity ale can take as little as 2-3 weeks if you have a way to force carbonate the beer. However, homebrew almost always improves with some aging, and some beer styles simply take longer to ferment and condition than others.

Ales vs. Lagers
When we ask: how long does it take to make beer?, we can’t ignore the difference between ales and lagers. In general, ales are ready to drink sooner that lagers. It’s not unusual to open the first beer after 4-6 weeks of fermentation and conditioning. Lagers, on the other hand, ferment more slowly at cooler fermentation temperatures, and then go through a cold lagering phase, which may last 6-8 weeks or longer. A standard lager may take 2-3 months or longer from brew day to bottling.Shop Winemaking For Dummies

Amount of Fermentable Sugars

In general, the higher the gravity, or the amount of fermentable sugar in the wort, the longer it takes to ferment. High-gravity ales and lagers both benefit from extended conditioning, during which time the yeast cleans up some undesirable fermentation byproducts, harsh alcohols mellow out, and the different flavors in the beer meld together. Many brewers age barleywines and Russian imperial stouts for a year or longer.
One theory states that for every gravity point in the final gravity, age the beer for one week. This is a technical way of saying the more body your beer has, the more aging it will benefit from. In general, this theory would support aging your average beer for 2-3 months before drinking. Of course there are no absolute rules in brewing. Determining when a beer is ready to drink will come from experience and your ability to taste when a beer has reached its peak flavor.
Shop Steam Freak Kits
Conclusion
So, how long does it take to make beer at home? Though the amount of time from start to finish can be as little as a month, most of that time is spent allowing the beer to ferment and condition. In general, expect to spend 6-10 hours of hands-on time brewing, and 2-4 months between brew day and drinking. That said, you will often be rewarded for being patient and allowing your homebrew the time it needs to develop the best flavor.
—–
David Ackley is a beer writer, brewer, and self-described “craft beer crusader.” He holds a General Certificate in Brewing from the Institute of Brewing and Distilling and is founder and editor of the Local Beer Blog.