How to Calibrate Your Homebrew Hydrometer

Calibrated Hydrometer In Beer
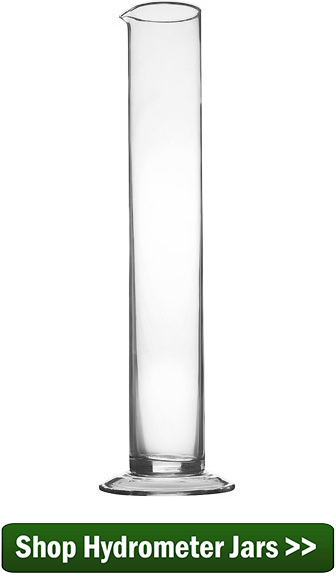
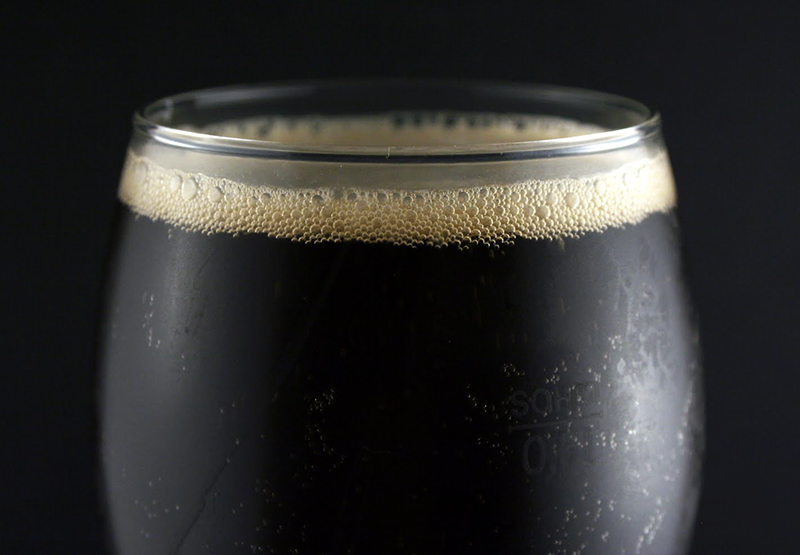
How many times have you dropped your hydrometer in its testing jar or into a fermenter and the hydrometer tapped the bottom? Each time could tap the paper scale just a little bit out of place. Do that several times, and before long your homebrew hydrometer could be pretty far out of whack.
When using scientific gadgets in homebrewing, it’s easy to assume that they’ll do all the hard work for you. Au contraire – thermometers, pH meters, and hydrometers are not foolproof. All instruments should be calibrated periodically. This means you should calibrate you homebrew hydrometer, as well.
I calibrated my hydrometer for the first time in about five years the other day, and boy am I glad I did – it was off by 5 gravity points! Now, because ABV is measured by the difference between two readings, and not a single reading, this discovery doesn’t really affect the ABV data I have on my previous batches. But it does make a significant difference on what I thought was my extract efficiency. (If you’re an all-grain brewer, this is an important number.) Basically, I’ve been thinking my extract efficiency was better than it actually was. Time to take a closer look at my mash procedures.
Anyways, the method for calibrating a homebrew hydrometer is very easy. It’s probably not a test that needs to be done more than once or twice a year, but if you haven’t ever done it, I’d recommend you go ahead and calibrate before your next batch.

How to Calibrate Your Homebrew Hydrometer

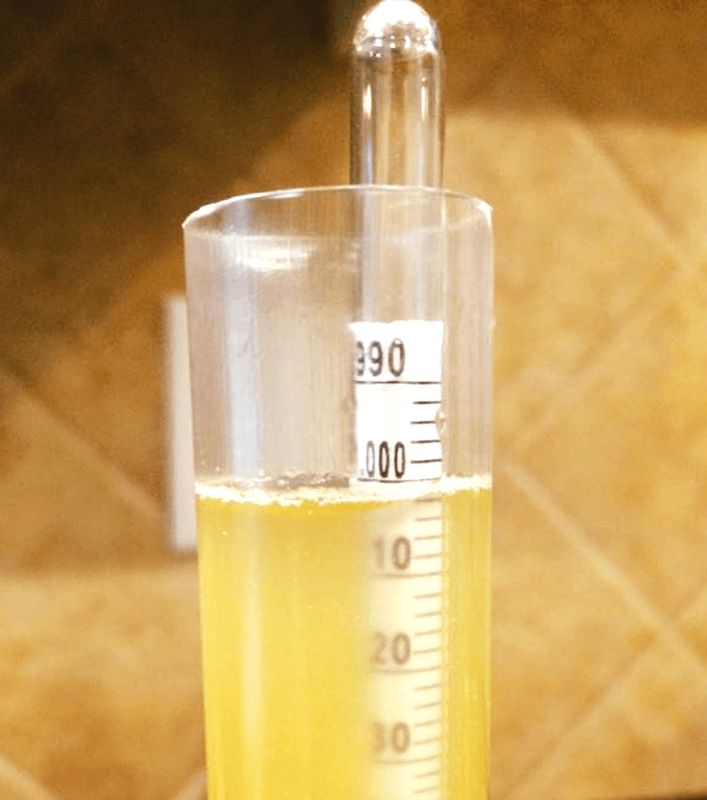
  1. Fill your hydrometer testing jar with 60˚F (or 68˚F depending on your hydrometer calibration temperature) distilled water
  2. Suspend your hydrometer in the testing jarShop Hydrometer Jars
  3. Take note of the reading. If it’s over or under 1.000, the difference will be your correction factor. (Ex: if your hydrometer reads 1.002, you’ll subtract .002 from future hydrometer readings.)
  4. Prepare a solution of 28g table sugar and 176g distilled water and adjust the solution to the calibration temperature of your hydrometer.
  5. Use your hydrometer to measure the gravity of the solution. It should be 1.048. Make note of the difference.

If your second reading is off by the same amount as the first reading, then correction is easy. For example, if your first reading is 1.002 (instead of 1.000) and your second reading is 1.050 (instead of 1.048), then all you have to do is subtract .002 from future readings to get the true specific gravity. In the very rare case of the two readings are off by different amounts, you can simply plot the two numbers on a graph, draw a line through the two points, and use the graph as a visual tool for correcting future readings.
Have you calibrated your homebrew hydrometer lately?
———————————–
David Ackley is a writer, brewer, and craft beer marketing consultant. He holds a General Certificate in Brewing from the Institute of Brewing and Distilling and is founder of the Local Beer Blog.

How "NOT" to Win a Homebrew Competition: Common Mistakes

Man Holding Beer Bottles With Gold MedalWe’ve covered plenty of tips and advice for participating in homebrew competitions. But what about homebrew competition mistakes? Is there anything you absolutely shouldn’t do if you hope to hang a few blue ribbons on your wall? You bet!
If you want to do well in homebrew competitions, do not:

  1. Enter your beer in the wrong category – You might brew the best IPA around, but if you submit it as a stout, you won’t do very well. If you enter a BJCP or similar homebrew competition, be sure to read the rules thoroughly and enter your beer into the appropriate category. This is especially important in some of the more experimental styles, like fruit beers.
  1. Serve a beer that tastes like mayonnaise – Sure, entering your beer in a homebrew competition can be a good way to get constructive feedback on your brew. That said, if something tastes absolutely awful, do the judges a favor and don’t submit it. If you’re serving at a homebrew festival, serving bad beer will only turn people off to homebrew. So be sure to taste your beer before entering it into a homebrew competition. If you’re not sure, share it with a beer geek friend or two to get their opinion about what you should do.
  1. Enter a beer with distinguishing marks on the bottle – BJCP-style competitions are blind, meaning that the judges don’t know who submitted the beer. Any beer bottles that have something that might tip off the judges to who submitted the beer may be disqualified, so don’t get caught up in this homebrew competition mistake. To be sure, submit your beer in a plain, 12-oz. brown glass beer bottle with a plain old boring bottle cap.
  1. Submit commercial beer – Trying to pass off commercial beer as your own is just wrong. It’s disrespectful to all the other brewers who worked hard to make the best beer they possibly could, not to mention the brewer who actually made the beer. Besides, how good will you really feel if the beer you submitted actually wins something? Chances are, you won’t feel like much of a winner.Shop Beer Bottles
  1. Slam other people’s beers – If you can say something nice, don’t say anything at all. No one is immune to making bad beer, and anyone can make good beer with enough practice. If you come across a beer that has some obvious faults, do your best to offer the brewer constructive feedback. Find something good to say about the beer, and then make a suggestion about how they might make an improvement.
  1. Give up – Chances are good that you won’t win an award for every beer you submit. That’s okay! Homebrew competitions are a great way to learn how to improve your homemade beer. If you’re really determined to win a homebrew competition, you’ll constantly improve your brewing skills and eventually bring home that gold medal.

What other advice do you have for people entering homebrew competitions? What homebrewing competition mistakes have you made or seen made by others?

———————————–
David Ackley is a writer, brewer, and craft beer marketing consultant. He holds a General Certificate in Brewing from the Institute of Brewing and Distilling and is founder of the Local Beer Blog.

Black Lager Brew Day: Evaluation and Recipe Adjustments

Black LagerIt’s been just over three weeks since I bottled my black lager (a.k.a. schwarzbier). Though I’m generally happy with the beer recipe I used, my tasting notes have caused me to take a closer look at my all-grain brewing procedures and my methods of water chemistry adjustment (it’s a work in progress!).
First, let’s look at the tasting notes from evaluating this black lager beer:

  • Aroma: bready, with note of chocolate, dark fruit, and lager yeast
  • Appearance: dark brown with a tan head, brilliant clarity
  • Flavor: malt-forward and dry with a carbonic bite and some hop bitterness
  • Mouthfeel: medium-light bodied with prickly carbonation
  • Overall: solid recipe, no fermentation faults, but mineral content seems strong

So what do I mean by that “carbonic bite” and “mineral content seems strong”? It’s a little hard to explain, but I’ll do my best.
Carbonated soft drinks contain obscene amounts of sugar – one 12-oz. can has the equivalent of 40 packets of sugar. Part of the reason that sodas don’t taste as sweet as they are is the carbonation. The dissolved carbon dioxide reacts to create carbonic acid, which balances out some of the sweetness. What I taste is similar to the dry, slightly acidic sensation you get when drinking soda.
The reason I’m pretty sure that what I taste comes from carbonate comes from my brewing notes. Looking back over my brew day, I recall that I added 14 grams of chalk to my water in an attempt to mimic the hard water of Munich. In retrospect, 14 grams seems like a lot. What I failed to realize is that brewers in Munich often decarbonated the water before brewing with it.

What is Decarbonation?
shop_beer_recipe_kitsDecarbonation simply reduces the amount of carbonate in water. To decarbonate brewing water, brewers in Munich (and other areas with hard water) would boil their brewing water, which caused the chalk to come out of solution and settle to the bottom of the brew kettle. Then the decarbonated water could be removed for brewing. (You can read more about decarbonation here.)
It seems that brewers in Munich often decarbonated their water when brewing lighter colored beers, like Maibock or Munich Helles, but it’s unclear whether or not they traditionally decarbonated their water when brewing schwarzbier (if you have this information, I’d love to see it!).
So based on what I’ve discovered and the tasting notes from evaluating this black lager beer, what would I do next time around to make this it better?
First, I’d cut that chalk addition in half, maybe targeting a more balanced water profile than what I used. I think in general, homebrewers should take care not to go overboard with water additions. Also, I wouldn’t mind a little more sweet, bready character in the beer. Either using more Munich malt or increasing the mash temperature could help with this.
Have you ever brewed a black lager? What advice do you have about water amendments?
The Rest of This Story:
Preparing for a Black Lager Brew Day
Black Lager Brewday: Double Infusion Mash
Bottling My Black Lager Beer
———————————–
David Ackley is a writer, brewer, and craft beer marketing consultant. He holds a General Certificate in Brewing from the Institute of Brewing and Distilling and is founder of the Local Beer Blog.

12 New Budget-Friendly Homebrew Kits from Black Rock Brewery

Black Rock malt extract beer kitsWe’re excited to share that we’ve added twelve new homebrew beer kits to our lineup of malt extract beer kits! These kits are very easy to brew – ideal for anyone new to homebrewing or for seasoned homebrewers looking to simplify their brew day.
Each kit is fully hopped and comes with straightforward directions to guide you through the homebrewing process. You’ll just need to add water and 2.2 lbs. of corn sugar to complete the recipe. If you’ve never brewed before, we recommend you browse our “New to Brewing” articles to learn what it takes to get started. These are no-boil kits, so the only equipment you really need is a beermaking starter kit.
The twelve new malt extract beer kits from Black Rock Brewery include:

  • Pilsner Blonde – A European-style golden lager. Dry with full hop flavor. 14-18 IBUs, 2-4 SRM.
  • Apple Cider – Not a beer of course, this kit is made using New Zealand’s finest apples. 0 IBUS, 2-4 SRM.
  • Miner’s Stout – An everyday stout. Dark and roasty with flavors of chocolate and coffee, but not too bitter. 25-35 IBUs, 40+ SRM.
  • Bock A German classic, bock is a dark, malt-forward lager with flavors of toast and caramel. 14-18 IBUs, 23-28 SRM.
  • Nut Brown AleAn English-style amber ale with flavors of caramel and toffee and a hint of biscuit. This beer kit is a great choice for beginning homebrewers. 19-23 IBUs, 11-14 SRM.
  • New Zealand Company BitterA New Zealand take on the English bitter. Rich, strong, and well-balanced with a pronounced hop character, but not overhopped. A sessionable pale ale. 26-34 IBUs, 11-14 SRM.
  • Pale AleA light, golden ale with a subtle, floral hop character from the finest New Zealand hops. Easy drinking, yet full of flavor. 14-18 IBUs, 2-4 SRM.
  • Whispering WheatAn easy-drinking and refreshing wheat ale. Crisp and slightly sweet. A great beer for warmer weather. 14-18 IBUs, 2-4 SRM.
  • Mexican LagerA smooth lager in the Mexican style, perfect for your next fiesta. 14-18 IBUs, 2-4 SRM.
  • LagerA crisp, clean, pale golden lager. Moderate hop bitterness and aroma. 18-22 IBUs, 2-4 SRM.
  • Dry LagerA pale lager with a crisp, dry finish. Not quite as bitter at the lager above. 14-18 IBUs, 2-4 SRM.
  • Export PilsnerA Czech-style pilsner lager, similar to Pilsner Urquell, with more hop bitterness than the other lagers listed here. 35-40 IBUs, 6-7 SRM.

 If you’re new to homebrewing, any one of the malt extract beer kits would be a good place to start!

What other kinds of beers are you interested in making?

———————————–
David Ackley is a writer, brewer, and craft beer marketing consultant. He holds a General Certificate in Brewing from the Institute of Brewing and Distilling and is founder of the Local Beer Blog.

Bottling My Black Lager Beer

Black Lager BeerAfter three months of patience, it’s finally time to bottle my black lager beer It’s been quietly waiting at about 40°F for the lagering phase and I can’t wait to taste it.
Three months seems like a long time to wait for beer, and it is. That’s why very few craft breweries make lagers. They just can’t commit to tying up that much fermentation capacity when they could turn out three (or more) batches of IPA in the same time period. Of course, it’s the same thing for homebrewers. I’d be happy to let the beer age even longer, but I want to brew more beer!
For me, bottling day for my homebrew always starts with an assessment of the situation: What do I need to bottle this batch of beer? Bottles, obviously, but also bottle caps, a bottling bucket, priming sugar solution, an auto siphon, tubing, and a bottle filler. One of the first things I do when bottling my beer is check the bottling bucket spigot. This is a notorious place for gunk to build up and potentially contaminate your bottled beer. It doesn’t need to be checked every time you bottle, but definitely every two or three times is a good idea.
Another thing I do pretty early on when bottling my beer is move the fermenter into position. This will give any sediment that gets stirred up a chance to settle down before racking the beer into the bottling bucket.
Once that’s taken care of, I usually fill up the bottling bucket with cleaning solution and clean all the necessary parts. If you’ve done a good job rinsing equipment and bottles after use, cleaning should be pretty easy – just a quick soak will suffice. But be sure to keep an eye out for deposits inside the beer bottles that may need a little extra scrubbing. With a brewing cleanser like One Step, you don’t even need to rinse.
Sanitizing is basically the same process as cleaning, but instead of using a cleanser, you use a solution of sanitizer. Most homebrewers like working with Star San or Iodophor.Shop Bottle Cappers
While my beer making equipment is soaking in sanitizer, I usually start getting the priming sugar ready. I am a huge advocate of getting as specific as possible with priming sugar. I recommend using a digital scale and a priming sugar calculator to figure out exactly how much sugar to use to prime the beer.
By the time the priming sugar solution is mixed, it’s time to take a final gravity reading from the beer – and my favorite part – tasting it! The beer is pretty flat at this stage, but it gives a pretty good indication of what the beer will be like when it’s ready to drink.
This black lager is tasting good! Bready malt flavor and aroma, with just a hint of chocolate and a touch of hop bitterness. Can’t wait to to get this beer primed, bottled, conditioned, and ready to drink!
———————————–
David Ackley is a writer, brewer, and craft beer marketing consultant. He holds a General Certificate in Brewing from the Institute of Brewing and Distilling and is founder of the Local Beer Blog.

How To Make Chicha: Corn Beer Recipe

Native Central AmericansWhat would you do if corn were the only grain you had available to brew with? You’d make corn beer with it!
That’s exactly what native cultures throughout Latin American have done for hundreds, maybe even thousands of years. Plenty of variations exist, but chicha is a corn-based beer traditionally made by chewing the corn to convert its starches to fermentable sugars, spitting it out, and fermenting the corn in water. Sometimes chica is consumed young, sweet, and low-alcohol, sometimes it is allowed to ferment to a higher alcohol content.
As Sam Calagione of Dogfish Head found out, making chicha this way is not easy. Luckily, modern day homebrewers have access to practically unlimited ingredients for making corn beer at home. Making a corn-based beer is as easy as mixing flaked corn with hot water, adding various flavoring ingredients, and fermenting as you normally would any other batch of homebrew.
The corn beer recipe below is a modern interpretation from one of my favorite homebrewing books, the Homebrewer’s Garden. It’s a one-gallon recipe, so be sure to have a one-gallon glass jug with a 6.5 rubber stopper and an airlock. You can easily scale up the recipe to a five-gallon batch, but you should probably try the one-gallon batch first to make sure you like it.

Chicha (Corn Beer) Recipe
(one-gallon recipe, adapted from the Homebrewer’s Garden)
Specs
OG: 1.048 – 1.060
FG: 1.010 – 1.013
ABV: 5 – 6.2%
IBUs: 0
SRM: 5

Ingredients
4 lbs. flaked corn (maize)Shop Beer Flavorings
1/4 lb. brown sugar
16 oz. homebrewed porter
2 bags Tension Tamer tea (or approx. 4 grams of cinnamon, ginger, and chamomile)
1 packet Munton & Fison ale yeast
1/4 cup corn sugar for priming

Directions
Mix the flaked corn with 1 gallon of boiling water. After one hour, strain the wort into a brewpot. Repeat in order to collect 1.5-1.75 gallons of wort. Bring wort to a boil and mix in the brown sugar and the porter. Boil gently for three hours, or until one gallon of wort remains. Add the tea to the wort at the end of the boil, then chill and transfer to a sanitized one-gallon jug. Ferment at 60-70˚F. Chicha is traditionally consumed after only 3-4 days. In this case, you may transfer the beer to a serving vessel (a growler, for example) and store in the fridge. Otherwise, ferment until complete and bottle condition as normal.
This chicha corn beer recipe is easy to make and can be altered with different spices or beer to match your personal tastes.
Interested in other ways to add corn to your homebrewed beer? Read: Brewing with Corn
———————————–
David Ackley is a beer writer, brewer, and self-described “craft beer crusader.” He holds a General Certificate in Brewing from the Institute of Brewing and Distilling and is founder and editor of the Local Beer Blog.

Homebrew FAQ: Top 5 Beginner Questions- Answered

Beer Roundtable
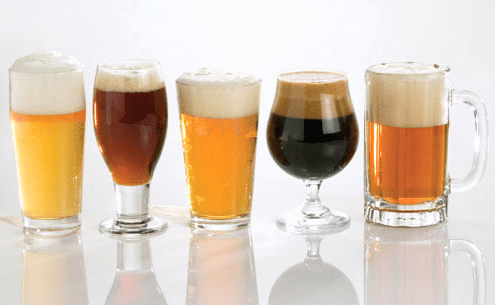
Spend any amount of time on homebrewing forums, and you’re bound to see several of the same questions come up again and again. Don’t feel bad – it’s just part of the learning process. To simplify that process, I’ve compiled answers to the top 5 most common home brewing questions beginners have about home brewing. But remember, there’s more than one way to open a bottle of beer – ultimately, you will brew the way that makes the most sense for you.
So without further ado: 5 Most Common Home Brewing Questions – Answered!

  1. Is my beer infected?
    If you have to ask, then something may very well be amiss. But if it’s your first batch, don’t freak out just yet. Just follow the instructions that came with your beer recipe kit to the end, and then taste the beer. Does it taste good? If so, you’re in good shape. If not, something went wrong. It might be an infection, or it could be a number of other issues. Consult the BJCP Fault List to try to figure out what might have happened and consider doing some Off-Flavor Training to hone your palate so you can identify potential missteps. Even if you do discover a likely infection, use it as a learning experience – your next batch is bound to be that much better.
  1. Do I have to rehydrate dry yeast?
    Absolutely not. I’ve brewed many batches of beer just sprinkling the yeast over the wort. It works just fine, and it’s certainly easy. But is it the best way to pitch dry yeast? That’s up for debate. Many experts agree that yeast should be rehydrated in a small amount of water before pitching. Their reasoning is certainly sound, but when in doubt, follow the directions on the yeast packet or visit the manufacturer website for more information.
  1. How come I missed my starting gravity (SG)?
    For beginning homebrewers, a starting gravity that’s significantly off is due to one of these reasons:

    • Shop Homebrew BooksAdded water to fermenter without regards to gravity – Many homebrew recipe kits instruct the brewer to top off to five gallons, but if for some reason you didn’t get all the malt extract out of the can or lost some volume in the process, adding this much water may dilute your beer below the target starting gravity. For best results, take a gravity sample before diluting and use a dilution calculator to figure out exactly how much water to add in order to hit your target SG.
  1. It’s been two weeks – why aren’t my bottles carbonated?
    When bottling homebrew, carbonation occurs by giving the yeast a small amount of extra priming sugar to consume. After capping, the yeast will eat the sugar and produce CO2, but since the bottle is sealed the carbonation will have nowhere to go but into solution in the beer. In order for the yeast to do their job, they have to have ideal conditions, in particular, a temperature range that’s warm enough for them to work. This usually means about 70˚F. If the beer is stored in a cold basement or refrigerator during this phase, the yeast won’t carbonate the beer or may do so very slowly. Make sure the bottles are in a warm room and give them some more time. Only in rare cases will additional action need to be taken in order to carbonate your beer.
  1. Do I have to do a secondary fermentation?
    Absolutely not. Though secondary fermentation is often used as a way to improve beer clarity, many beers will turn out fine with just a primary fermentation of two to three weeks. Secondary fermentation is only required (I use that term loosely), when aging the beer for an extended amount of time (months). Check out The Pro & Cons of Secondary Fermentation for more reasons why, or why not, to do a two-stage fermentation.

There you have it – simple answers to some of the most common beginner home brewing questions.
What other home brewing questions belong on this list?
———————————–
David Ackley is a beer writer, brewer, and self-described “craft beer crusader.” He holds a General Certificate in Brewing from the Institute of Brewing and Distilling and is founder and editor of the Local Beer Blog.

Choosing the Right Yeast Strain for Your Homebrew – Pt. 2

Wyeast DisplayIn part 1 of this series, we discussed several of the choices that come up when choosing the right yeast strain for your homebrew: dry yeast vs. liquid yeast, ales strains vs. lagers strains, flavor, attenuation, and flocculation.
In this blog post, I’ll introduce several of the most popular yeast strains used by homebrewers.

 Homebrewing Yeast Style Guide
This is by no means a comprehensive list of every yeast you could use to brew your own beer, simply a guide for some of the most commonly brewed beer styles. Click here to browse our complete selection of homebrewing yeast strains.

German Ale Yeast Options

  • Wyeast 1007: German Ale Yeast – A very versatile yeast strain, traditionally used for German Altbier, but often used for American ales; ferments clean with low ester production and finishes dry; requires fairly low fermentation temperature for neutral flavor.
  • Wyeast 3056: Bavarian Wheat Blend – Used for brewing German weizen, a wheat beer characterized by yeast-derived banana and clove flavors; this is a relatively neutral strain.
  • Wyeast 3068: Weihenstephan Weizen – An alternative to 3056 (above), this strain of weizen yeast is sourced from the Weihenstephan brewery in Germany, which claims to be the oldest brewery in the world. It is a vigorous fermenter producing characteristic banana/clove flavors, which can be controlled by adjustments in fermentation temperature and wort density (high – more banana, low – more clove). A lower pitch rate will enhance banana character.
  • Wyeast 2565: Kolsch – The preferred yeast for Kolschbier, ferments at cooler temperatures than most top-fermenting ale yeasts, enhancing smooth, lager-like character with a hint of apple. Can also be used to ferment lager styles when temperature control is a challenge.

German Lagers Yeast Options

  • Fermentis Saflager 34/70 – Dry yeast, sourced from the Weihenstephan brewery in Germany, produces a malt-forward beer with plenty of body.

Belgian Ales Yeast Options

  • Wyeast 1388: Belgian Strong Ale – A high-attenuating, alcohol-tolerant, liquid yeast strain recommended for fermenting golden strong ales. Yields a dry beer with a mild tartness.
  • Mangrove Jack’s M27: Belgian Ale – A dry Belgian ale yeast, tolerant of warmer fermentation temperatures and high alcohol. Use it for saisons, tripels, and quadrupels.

American/English/Irish Ales Yeast Options
I lump these strains together because there is a lot of crossover between English and American styles. Indeed, many of the “American” yeast strains we know and love simply migrated from Europe. Where applicable, I’ve provided some more specific guidelines for some of the more distinctive beer styles, like Irish Stout.Shop Liquid Beer Yeast

  • Wyeast 1056: American Ale – Extremely popular style for American pale ales and IPAs, originally sourced from Sierra Nevada Brewery; tends to be very neutral, but may produce citrus notes at the low end of the fermentation temperature range.
  • Fermentis Safale US-05 – Same strain as Wyeast 1056, above, but in dry form; sometimes called the “Chico” strain; acceptable for a wide range of American style ales.
  • Wyeast 1084: Irish Ale – the classic strain for Irish stouts, this yeast has a slightly lower attenuation, making it ideal for full-bodied beers.
  • Danstar Nottingham – A versatile, fast-working, high-flocculating, high-attenuating dry ale yeast; many homebrewers’ go-to strain for American and English ales; tolerance at lower temperatures allows it to be used for lagers.
  • Fermentis Safale S-04 – Dry yeast; classic English ale strain with neutral flavor characteristics; works quickly and flocculates well.

 
Cider Yeast Options

  • Mangrove Jack’s M02 – Dry yeast for fermenting apple cider; high attenuation and flocculation. Imparts fruity esters to give cider depth of flavor and enhance fruit character.
  • Wyeast 3766: Cider – Liquid strain of cider yeast for fermenting a crisp, dry cider. Also works well for pear and peach wine.

These are some of the most popular strains of homebrewing yeast – what are some of your favorites?
———————————–
David Ackley is a beer writer, brewer, and self-described “craft beer crusader.” He holds a General Certificate in Brewing from the Institute of Brewing and Distilling and is founder and editor of the Local Beer Blog.

Choosing the Perfect Yeast Strain for Your Homebrew – Pt. 1

Wyeast DisplayYeast: that magical micro-organism that turns sugar into alcohol and carbon dioxide. Simply brew up a batch of sweet wort, pitch the yeast, and in a few weeks you have beer!
But not all yeast is created equal. In fact, there are many different strains used for brewing beer, all with different characteristics that influence the flavor, aroma, body, and mouthfeel of your beer. How do you choose the perfect strain for your beer?
In this two-part post, I’ll first outline some of the considerations for picking a yeast strain, then I’ll share many of strengths and weaknesses of the top yeast varieties available to homebrewers.
We’ll start from a broad level, and then narrow down the options.

Yeast Selection: Dry vs. Liquid Yeast
Choosing between dry and liquid yeast is largely dependent on personal preference. Dry yeast is easy to work with and it stores well. Liquid yeast, while offering a great variety of strains to work with, is less stable and usually requires a yeast starter. For some, the extra work is worth it, but for many, dry yeast gets the job done just as well. For simplicity, I’d suggest that beginning brewers start with dry yeast, and then start experimenting with liquid yeast when they’re ready. From that point, you can make the best choice about whether to use liquid or dry yeast on a batch-by-batch basis.

Yeast Selection: Ales vs. Lagers
As far as rules go, this is where you pretty much have to stick to one or the other. Ales, which ferment warm, require top-fermenting ale yeast; lagers ferment cooler and require bottom-fermenting lager yeast. But even this rule can be bent on occasion. For example, the Brulosopher reports having good results brewing lagers with Kolsch yeast. This may be a good option if you’d like to brew a lager, but don’t have a temperature-controlled fermentation chamber. Otherwise, start by sticking to ale yeast for ales and lager yeast for lagers, at least until you get a few batches under your belt.

Yeast Selection: Picking the Right Strain
The perfect yeast selection for you beer will be largely dependent on the style you are making, but there is certainly some crossover. Some styles have more to do with the malt and the hops than the yeast, so a neutral-flavored yeast strain can work in a variety of situations. For example, German Kolsch yeast may be used to brew an American Blonde Ale. English yeast strains might be used to brew American beers, and vice-versa. Even when you purchase a homebrew ingredient kit, don’t feel like you have to stick with the yeast provided. For example, you may get an American Pale Ale kit, but want to try a Belgian strain – go for it! Hold on to the yeast you got with the kit and use it for your next brew.
The main consideration will be choosing a yeast strain based on specific qualities that you want in your beer. Among the most important areShop Beer Yeast Culturing :

  • Flavor, which often goes hand-in-hand with fermentation temperature. For example, a German hefeweizen is defined by banana and clove flavors produced by German weizen yeast, and the levels of banana or clove can be regulated by adjusting the fermentation temperature.
  • Attentuation, or the amount of sugars that will be fermented in the beer. A high attenuating strain will leave a beer with a dry finish. Conversely, a yeast with low attenuation will leave some fermentable sugar and more body. This said, be aware that attenuation can also be controlled with ingredient selection, mash temperature, and a number of other factors.
  • Flocculation, or the tendency of the yeast to clump together and settle out at the bottom of the fermenter. This can have an impact on beer clarity.

Above all, the question of what kind of yeast is perfect for your brew will be dependent on how it affects the beer you’re making. So when choosing a yeast, think about the flavor characteristics you’re going for in your beer, including residual sweetness and mouthfeel, and choose the best yeast that fits those parameters.
In part two of this post, I’ll share many of the different yeast strains available to the homebrewer and share some style suggestions for each one.
Do you have some favorite yeast strains? How do you choose the perfect yeast for your homebrews?
———————————–
Read Part 2 >>
———————————–
David Ackley is a beer writer, brewer, and self-described “craft beer crusader.” He holds a General Certificate in Brewing from the Institute of Brewing and Distilling and is founder and editor of the Local Beer Blog.

5 of My All-Time Favorite Homebrew Recipes

Assorted BeersLooking for a little homebrew inspiration?
Over my 5+ years of homebrewing, I’ve brewed some 50 batches of beer. There have been a few mishaps, many enjoyable beers, and a few batches that have knocked it out of the park. Below are five of my all-time favorite homebrew recipes.
*Note: I brewed most of these all-grain, but the all-grain homebrew recipes can easily be converted to extract or partial mash. Where no partial mash recipe is provided, simply convert a majority of the base malt using the following ratios: 1 lb. grain = .75 lb. liquid malt extract = .6 lb. dried malt extract. For example, replace 9 lbs. base malt with 6.75 lbs., or about two cans, of LME.

  1. Uinta Dubhe Imperial Black IPA CloneIf you like big, hoppy, aggressive beers, this homebrew recipe’s for you. A massive grain bill delivers a full-bodied brew with deep rich flavors of chocolate and coffee and an alcohol content upwards of 9% ABV. On the hops side of the equation, Chinook, Bravo, Columbus, and Falconer’s Flight combine to deliver a stout bitterness (100+ IBUs), but also copious levels of dank, spicy, piney, and citrusy hop flavor and aroma. My nickname for this beer is “Holy Hop Tar!”
  1. Ithaca Beer Company Flower Power IPA Clone – IPAs taste best fresh, and it’s hard to get fresher when you brew it yourself. This cloning experiment yielded a delightful India Pale Ale at a respectable 7.5-8% ABV. The simplicity of the grain bill provides a sweet, honey-like base to support the juicy, citrusy hops, which are added at five separate points throughout the boil and fermentation. You can review the entire Flower Power brew process through the link above.
  1. Captain Cogsworth Coffee Stout – The desire for a simpler brew day led me to revert back to partial mash brewing for a day. This easy homebrew recipe yielded a tasty American stout with an easy-going, somewhat fruity coffee flavor that helped get me through the winter. I reviewed the finished beer here.Shop Homebrew Recipe Kits
  1. Chipotle Smoked Porter – This recipe goes back to my early days of homebrewing and still stands out as one of the more audacious beers I’ve made. It starts with a smoked porter recipe kit and adds a can of chipotle peppers straight to boil. This one might make you sweat!
  1. Munich Dunkel – I’m going to finish with something a little more approachable, a daily drinker, if you will. To me, this traditional German style offers the best of both worlds: the drinkability of a lager with a full flavor of a darker beer. If brewing this one partial mash, I recommend using two cans of Munich LME in place of the Munich malt and the wheat malt. Be sure to ferment cool and lager for several weeks for best results.

Do you have any favorite homebrew recipes from your homebrewing career? Feel free to share them in the comments below!
———————————–
David Ackley is a beer writer, brewer, and self-described “craft beer crusader.” He holds a General Certificate in Brewing from the Institute of Brewing and Distilling and is founder and editor of the Local Beer Blog.