Why Is Your Homemade Wine Spoiling?

Man With Wine That's Been Spoiling.Hi, I have two one gallon batches of wine going. One is blueberry and the other is muscadine. They both smell and taste soured. What is wrong?
Brandon A. — NC
—–
Hello Brandon,
It’s really hard for me to know exactly what you did wrong, if anything. What I can tell you is there are two key reasons for a homemade wine spoiling:

  1. The number one reason for a wine spoiling is because sulfites were not used in the winemaking process — sulfites such as Campden tablets or potassium metabisulfite. Skipping the use of sulfites does not guarantee that your homemade wine will go bad, but it does increase the chance of this dramatically.
  2. The number two reason for a wine spoiling is that the fermentation vessels and equipment were not sanitized. They may have been washed in soapy water, but not sanitized with something like Basic A or Cleanpro SDH. Soap will get the grime off the surface of the equipment, but to destroy all traces of mold and bacteria that can later grow and take over a wine, you need to use a cleanser of some sort.

The absence of sulfites and cleansers in the winemaking process is the reason almost all wines spoil. They are fundamental and should always be used when making wine.
Shop Potassium BisulfiteAnother reason a homemade wine can start spoiling is if the fermentation is not strong. You can sanitize everything and add sulfites to the wine must before fermenting, but all this is futile if the fermentation does not take off quickly and fully. A wine must that is sitting still for several days is a prime target for being taken over by molds, bacteria and other little nasties that might be floating in the air. The wine must is packed with nutrients and sugar. What more could a contaminant ask for?
This is one of the reasons you do not want to rely on wild yeast to ferment your wine. As a home winemaker there are too many other airborne microbes competing with the yeast for a place to colonize. You want to use domesticated wine yeast so that it has the upper-hand. The yeast cell count will be greater and the yeast more vigorous. Once you have a solid fermentation, mold and bacteria will not stand a chance. It’s analogous to having a solid stand of grass in your yard to help keep the weeds down. A strong fermentation keeps the contaminants down.
Shop SanitizersThe last thing I’d like to bring up is that your wines may be perfectly fine. If this is your first time making wine, it may be that you have not experience what a fermentation smells and taste like and are just mistaking the usual odors for the wine spoiling. During a fermentation you should be smelling the fruit used to make the wine, but you will often times also experience a sulfur smell from the fermentation — sometimes like a freshly boiled egg. I’m not saying this is what’s going on, I just wanted you to be aware of this.
It you are correct and your homemade wine is spoiling, one thing you can be assured of is it will get worse. If it is not spoiling, then you will notice the symptoms getting better, until eventually you end up with a great tasting wine. At this point there is little you can do. If the fermentation has finished you should be adding a full dose of sulfites. But, other than that it’s a wait and see proposition. There is nothing you can do to reverse any effects. Time will take care of this homemade wine if is still fresh and not spoiled.
Best Wishes,
Ed Kraus
—————————————————————————————————————–
Ed Kraus is a 3rd generation home brewer/winemaker and has been an owner of E. C. Kraus since 1999. He has been helping individuals make better wine and beer for over 25 years.

What is Gruit? (3 Gruit Ale Recipes)

Ingredients For A Gruit Ale Recipe
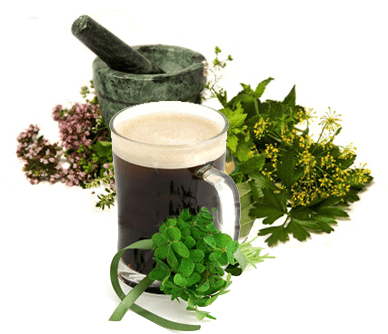
In the modern world of craft beer and homebrew, hops take center stage. Many brewers and drinkers enjoy pushing the limits on just how hoppy a beer can be. But it wasn’t always this way. Before their use became widespread, hops were actually frowned upon in favor of the wide range of herbs and spices that were used to flavor beer. These herbed beers of antiquity are known as gruit.
Gruit is a term that refers to both the mixture of herbs and spices used to flavor beer or mead as well as the alcoholic beverage flavored with such herbs and spices. There’s no one particular mixture of herbs and spices used in gruit – every brewer had their own proprietary combination.
Though the plants used in gruit can vary quite a bit, below are some of the usual suspects you will find in a gruit ale recipe:

  • myrica gale
  • wild rosemary
  • yarrow
  • juniper
  • spruce tips
  • birch tips
  • bay
  • nettles
  • marjoram
  • chamomile
  • rose hips
  • lavender
  • elder flowers
  • dried licorice root
  • fennel seed

Give one of these gruit ale recipes a shot to get a taste of some medieval!
Mumm (adapted from the Homebrewer’s Garden)
(five-gallon batch, partial mash recipe)
Specs 
OG: 1.055 – 1.062
FG: 1.018 – 1.014
ABV: 5.7 – 6.7
Ingredients
3.3 lbs. light LME
3.3 lbs. wheat LME
.75 lb. caramel 60L malt
.33 lb. wheat malt
1.5 lbs. steel cut oats
.25 lb. rye malt
.25 lb. black patent malt
.25 lb. roasted barley
1 oz. Northern Brewer hops at :60 (9 AAUs)
Any six herbs/spices from the list above (use 1/4 to 1/2 oz. of each)
Wyeast 3068: Weihenstephaner Weizen Yeast
Directions
Mash the crushed grains in 1.5 gallons of water at 148˚F for 60 minutes. Sparge with .5 gallons water at 170˚F. Add the LME and bring to a boil. Add hops and herbs/spices and boil for 60 minutes. Chill wort and transfer to a clean, sanitized fermenter. Add enough cool, clean, chlorine-free water to make 5 gallons. Pitch yeast when wort is 70˚F or below. Ferment at 65-70˚F for 1-2 weeks. Bottle with 2/3 cup priming sugar and condition for 3-6 weeks or longer before drinking.
Gruit Ale Recipe (from Sacred & Herbal Healing Beers)
(one-gallon batch, all-grain recipe)
Ingredients
1.75 lbs. pale malt
1.5 lbs. Carapils malt
1.5 grams myrica gale
1.5 grams marsh rosemary
1.5 grams yarrow
ale yeast
Directions
Heat one gallon of water to 170˚F and mash in the grains. Let mash rest for three hours, stirring occasionally. Sparge with 170˚F water to collect just over 1 gallon of wort. Add herbs and boil for 90 minutes. Chill wort to 70˚F or below, transfer to a clean, sanitized fermenter, and pitch yeast. Prime with 24 grams of corn sugar and bottle. Condition for four months before drinking.
Do It To It Gruit (from Radical Brewing)
(five-gallon batch, partial mash recipe)
Specs
OG: 1.054
ABV: 4.5 – 5.2
IBUs: 10
SRM: ~25
Ingredients
5 lb. amber DME
.5 lb. caramel 60L malt
1 lb. smoked malt
.25 lb. chocolate malt
2 oz. juniper berries
5 g. bog myrtle (myrica gale)
5 g. caraway
5 g. mugwort
5 g. winemaker’s tannin or grape seeds
3 g. rosemary
3 g. ground cloves
3 g. cardamom
3 bay leaves
Belgian or German ale yeast
Directions
Mash crushed grains for one hour at 154˚F. Sparge and collect about 6.5 gallons of wort. Boil for 90 minutes. In the last five minutes, add all of the herbs/spices. Cool wort, transfer to a clean, sanitized fermenter, and pitch yeast. Condition for at least 6-8 weeks before drinking.
Have you ever brewed a gruit ale recipe? What herbs and spices did you use? Here some more information on brewing beer with herbs.
—————————————————————————————————————–
David Ackley is a beer writer, brewer, and self-described “craft beer crusader.” He holds a General Certificate in Brewing from the Institute of Brewing and Distilling and is founder of the Local Beer Blog.

Leigh Erwin: Wine Is Patient Too

Homemade wine being patientWhen winemaking gets left on the back burner….
One nice thing about making homemade wine is that there are stages where you can just leave your homemade wine sitting in a carboy for weeks and months on end when your life gets a little crazy, and the wine should theoretically be just fine!
I’m definitely at a stage in my life right now where making homemade wine has sadly taken the back burner to everything else, though it is still constantly there in the back of my mind just excitedly waiting for me to make it a priority again!
You see, I’m getting married in less than a month, and I’m making/doing A LOT for the wedding, so of course that takes priority over the poor little carboy filled with mead.  Also, I am leaving my full-time “day job” in one week from now, so at least after that I SHOULD be able to do a little bit more here and there before all may homemade mead evaporates into thin air!
Shop Grape ConcentrateThat being said, it would be nice to finish this mead prior to moving, but depending upon how things go, I’m not sure if that’s going to happen.  It’s still just as cloudy as it was, though I’m not surprised because everything I’ve read says mead takes a million years to clear up.  I tried testing the acid of the mead a little while ago, and STILL haven’t done anything to follow up with that yet, but I do happened to have a little extra time today while I’m not up to my elbows in wedding hullaballoo that I can actually taste it and maybe make some adjustments.
Worst case scenario: I end up moving the mead while still in the carboy.  That’s OK—I’ll just make sure it rides with me in the car, buckled up, and well cushioned against possible mishaps!
Have you ever had life get in the way of making homemade wine?  It’s hard to find a balance sometimes!

——————————————————————————————————————–
Leigh ErwinMy name is Leigh Erwin, and I am a brand-spankin’ new home winemaker! E. C. Kraus has asked me to share with you my journey from a first-time dabbler to an accomplished home winemaker. From time to time I’ll be checking in with this blog and reporting my experience with you: the good, bad — and the ugly.

Proposed Updates to the BJCP Style Guidelines

Beer JudgesIf you attended the National Homebrewers Conference in Grand Rapids, you may have heard that the Beer Judge Certification Program has been hard at work updating the BJCP Style Guidelines. Gordon Strong, President of the Beer Judge Certification Program, gave a presentation about the proposed changes to the BJCP Style Guidelines at the conference. Chip Walton of the video blog Chop & Brew recorded Gordon’s talk. I’ve transcribed some of the main changes below.
Want to learn more about the BJCP? Read Become a Beer Judge! by Jason McLaughlin.
First, why change the style guidelines?

  • The last update to the guidelines was in 2008, with the last styles added way back in 2004. Brewing has changed a lot in the past 10 years – it’s time for an update!
  • To embrace the growing number of international homebrewers – the current guidelines are focused on styles brewed in the US.
  • To represent some historical beer styles (like Kentucky Common) that have become popular in recent years.
  • To include new ingredients, especially hop varieties, which are being used. For example, recent American hop varieties may go beyond citrus and pine to include grapefruit, tropical, strawberry, “skunk”, and a number of other flavor/aroma descriptors.
  • To improve the use of the guidelines in competition.

Is anything staying the same?
The four ways beers are described will remain the same: appearance, aroma, flavor, mouthfeel – but more focus will be placed on perception as opposed to statements about ingredients and process:

  • Expanded overall impression descriptions, more “consumer-level”
  • Comments section: Will focus on interesting facts, not perception
  • History section: A brief synopsis of the history of the style
  • New section: Characteristic Ingredients will list the important ingredients needed to brew that style of beer
  • New section: Style Comparison: Will suggest how it’s similar or different to related styles
  • New section: Entry instructions added
  • Revised and updated some commercial examples of various style
  • New glossary
  • New section: Using the Style Guidelines – Emphasizes that these are guidelines, not end-all-be-all specification

Shop Beer Recipe KitsNew Styles
Several styles and style categories will be added to the BJCP Guidelines to represent some of the popular new styles and those traditional styles experiences a resurgence.
New styles, Historical category:

  • Gose – a sour beer with coriander and salt
  • Grodziskie – a Polish smoked wheat beer
  • Lichtenhainer – a Berliner-style sour beer with smoked malt
  • Sahti – a traditional Finnish beer made with juniper
  • Kentucky Common – similar to a dark cream ale
  • Pre-Prohibition Porter – a Yuengling-style or “Pennsylvania” porter
  • Pre-Prohibition Lager – formerly classic American pilsner
  • Roggenbier – German rye beer, moved from category 15
  • London Brown Ale – formerly Southern English brown ale

New styles, American wild ale category (brewers must declare a base style!):

  • Brett beer – beer fermented with brettanomyces (not necessarily all brett, and not necessarily sour)
  • Mixed fermentation sour beer – a sour beer fermented with a mix of yeasts and/or bacteria
  • Soured fruit beer – sour beer with fruit

New styles, Czech lager category (similar to German lagers, but generally hoppier):

  • Czech light lager
  • Czech amber lager
  • Czech dark lager
  • Czech pilsner (formerly Bohemian pilsner)

New styles, going into existing categories:

  • German leichtbier – like a german light lager
  • Trappist single – not known as such in Belgium, but often referred to that way, low alcohol table beer
  • English golden ale – golden bitter or summer ale
  • Australian Sparkling Ale – a smooth and balanced ale showcasing Australian ingredients
  • American Strong Ale – a catch-all for strong beers, not quite barley wine but not an IPA, Arrogant Bastard is an example
  • Wheatwine – a barleywine made with wheat
  • International Pale Lager – these are the green bottle imports & mass market Euro beers (formerly premium American lager)
  • International Amber lager – similar to above but amber in color
  • Kellerbier (Munich and Franconian variants) – fresh lager, German in origin

New Specialty IPA Subcategory
Exciting to many, there will be a new category for Specialty IPA, with descriptions for:

  • Black IPA
  • Brown IPA
  • Red IPA
  • White IPA
  • Belgian IPA
  • Rye IPA

Brewers will be able to specify strength (Session, Standard, Double) and also combine different styles.
Shop Draft SystemsModified Styles
These styles will be modified or changed as follows:

  • Premium American Lager – split into Standard American Lager and International Pale Lager
  • Oktoberfest – traditional (amber) renamed to Marzen, modern (gold) called a festbier
  • Rye beer removed from the American wheat category, moved to a Alternative Grains specialty category
  • Scottish 60 & 70 combined into Scottish light
  • Scottish 80 & 90 combined in to Scottish heavy
  • English Brown Ale – formerly northern brown ale, but expanded
  • Dry stout split into Irish stout and Irish extra stout
  • Tropical stout split from foreign extra stout
  • Weizenbock – gold versions allowed
  • Fruit lambic – sweetness and carbonation specified, sweet allowed
  • Old ale – overlay on new a English strong ale category

Renamed Styles
To reduce confusion, the following style will be renamed:

  • Lite American lager > American Light Lager
  • Standard American Lager > American Lager
  • Dortmunder Export > German Exportbier
  • German Pilsner/Pils > German Pils
  • Dark American Lager > International Dark Lager
  • Schwarzbier (Black Beer) > Schwarzbier
  • Maibock/Helles Bock > Helles Bock
  • traditional Bock > Dunkles Bock
  • Northern German Altbier > rolled into International Amber Lager
  • California Common Beer > California Common
  • Dusseldorfer Altbier > Altbier
  • Standard/Ordinary Bitter > Ordinary bitter
  • Special/Best/Premium Bitter > Best Bitter
  • Extra Special/Strong Bitter > Strong Bitter
  • Strong Scotch Ale > Scottish Wee Heavy
  • Mild > Dark Mild
  • Brown Porter > English porter
  • Robust Porter > American porter
  • Imperial IPA > Double IPA
  • Weizen/Weissbier > Weissbier
  • Dunkelweizen > Dunkels weissbier
  • Belgian Specialty Ale > deleted
  • Flanders Brown Ale (Oud Bruin) > Oud Bruin
  • Straight (unblended) Lambic > Lambic
  • Christmas/Winter Specialty > Winter Seasonal Beer
  • Classic Rauchbier > Rauchbier

Specialty-Type Beers
The specialty beers will have more specific entry categories, rather than just referencing classic styles. These will have more detailed explanations for what’s allowed.

  • Fruit Beer – fruit beer, fruit and spice beer (fruit dominant), specialty fruit beer – with other fermentables
  • Spiced Beer – spice/herb/vegetable beers, winter seasonal beer, autumn seasonal beer
  • Alternative Fermentables – alternative grain beers, honey beers
  • Smoked Beer – Classic style smoked beer, specialty smoked beer
  • Wood-Aged Beer – wood-aged beer, specialty wood-aged beer (might include a wine barrel or bourbon barrel)
  • Specialty Beer – clone beer, mixed style beer, experimental beer
  • Belgian Specialty will get wrapped into Specialty Beer

Updates to Meads and Ciders

  • Gave spiced mead its own category
  • Added berry mead and stone fruit mead category
  • Added fruit and spice mead to spiced mead
  • Added historical mead to specialty mead

Cider

  • common cider now called new world cider
  • added ice cider and cider with Herbs/Spices to Specialty Cider and Perry (to include hopped ciders)

Other Changes
Electronic version of the guidelines will include categorization, as well as a sorting feature of the guidelines so you can re-group styles by similarities.
As you can see, the changes to the BJCP Guidelines are quite extensive! Review Gordon’s slides here and the video presentation here. See the draft guidelines here.
——————————————————————————————————————-
David Ackley is a beer writer, brewer, and self-described “craft beer crusader.” He holds a General Certificate in Brewing from the Institute of Brewing and Distilling and is founder of the Local Beer Blog.

Moving Homemade Wine Cross Country

Two Carboys Of Wine That Need To Be Moved Across CountryHi there, I have to say, thank you for the amazing site. It’s been a wealth of knowledge… I will hopefully be moving cross country in the next few months. Currently I have two wines I am in the process of making… My questions are what would be the best way to transport a possibly bulk fermenting wine? If they are done fermenting am I safe to degas the wines, then plug the carboys and move or should I add something to either of them? As a side note, I do plan on making crates to protect the carboys…
Isaac — WA
—–
Hello Isaac,
There are several concerns when moving homemade wine cross country: sunlight and temperature being my two biggest ones. Both of these promote oxidation in the wine. This is where a wine starts to take on a brownish or orange-like tinge, and the wine’s flavor starts to take on a bitter, raisin character.
You will want to keep the wines out of direct sunlight. You also want the wines’ temperature to stay consistent. The cooler the better. This will help to slow down the oxidative process, but i understand you can only do what you can do.
You can move the wine in carboys — degassed and sealed up tight — but if the wine warms up just a few degrees, it can pop the rubber stopper out of the carboy. Six gallons of wine can easily expand enough from any warmth to push out a stopper.
Shop Grape ConcentrateYou can wire down the stopper with some bailing wire. If the wine warms up a few degrees you should be fine, but if the wine warms up excessively, you could be building up considerable pressure in the carboy, which is never a good thing. Having a carboy fail is not unheard of in such situations.
Sediment is another concern when moving homemade wine cross country. The ideal situation is for all the sediment to be gone before moving. In other words, the wine has cleared up completely and is not depositing any new sediment. You have also removed the wine from all the sediment that has occurred.
Leaving the sediment in the carboys while traveling can promote a process call autolysis. This is when some of the live yeast cells start consuming some of the dead yeast cells. The result is a wine that starts to take on a nutty / to bitter / to metallic flavor. It is something that occurs to some insignificant degree in any wine, but when the sediment is contentiously being stirred up by the constant vibration of traveling, the amount of autolysis can become excessive.
Here’s What I Would Do If I Were Moving Homemade Wine Cross Country…

  1. Have the wine cleared and degassed. You would like to have the wine this far along in the winemaking process.
  2. Put the wine in carboys. The carboys should be topped-up. You do not want excessive head-space. There are several ways you can eliminate head-space in a carboy. Having excessive air in with the wine will help promote oxidation, as well.
  3. Add a dose of sulfite. This could be Campden tablets, potassium metabisulfite or sodium metabisulfite. Use 1/16 of a teaspoon per gallon or 1 tablet per gallon of wine. Sulfites will go a long way in help to reduce any effects of oxidation and help to keep the wine from from oxidation.
  4. Seal the carboys with an actual tapered cork stopper. Cork will allow some pressure to release if it built up. A rubber stopper will not give at all. A tapered cork stopper will breath a little.
  5. Wire down the tapered cork stopper with bailing wire. This can be done by going around the neck of the carboy with the wire, then running one strap of wire over the top of the cork stopper and securing the end.

Your idea of putting the carboys in crates is a good idea. You can never be too protective particularly when moving your homemade wine cross country.
Good luck to you. I hope this was the information you was looking for.
Happy Winemaking,
Ed Kraus
—————————————————————————————————————–
Ed Kraus is a 3rd generation home brewer/winemaker and has been an owner of E. C. Kraus since 1999. He has been helping individuals make better wine and beer for over 25 years.

Leigh Erwin: Mead Acidity – Pt. 2

Using Acid Test Kit  On A MeadHi everyone!
I just wanted to follow up a little more on this issue of using the acid test kit to test the acid levels in my mead.
As a reminder, from my last post the results of the acid test showed that my mead has 0.725% tartaric acid and 4.64ppt sulfuric acid.  I calculated the TA (titratable acidity) to be 4.35g/L, based on instructions found online.  According to some forums I’ve read online, measuring the titratable acidity using the acid test kit method may not be accurate for mead, since the sugars and other compounds in mead react a lot differently than those found in white and red grapes or fruit wines.
Here are some more details that I discovered about mead and how problematic it is to test the acid:
The issues are related to the unique chemistry of the honey used to create the mead.  Instead of tartaric acid, gluconic acid is the dominant acid in mead.  Where the issue lies is that in mead there is also a compound called gluconolactone that converts to gluconic acid as the pH level rises.  If you think about it, when you’re running an acid titration on a mead, you’re adding a strong base (sodium hydroxide) to your acidic solution, thus increasing the pH of the sample.  So, by adding the sodium hydroxide, the gluconolactone in the mead will actually convert to gluconic acid as the pH naturally rises during the process.
Shop 3 Gallon CarboysYou basically end up having to add a lot of “extra” sodium hydroxide to the sample, since acid continued to be created during the process instead of measuring ONLY the acid that was in there prior to the start of titration.  Too much base means that you are effectively overestimating the amount of acid in your mead.
If this is correct, that means the actual titratable acidity level in my mead is lower than 0.725%, but how much lower, I’m not sure.  I foolishly did not taste the wine this time around, but it still had that “odd” smell it had previously.  I’m thinking maybe the acid levels in my mead are actually too low?  What I should really do is taste the wine again, maybe add a little acid blend, then taste again a few weeks later?
What do you all think?  Am I on the right track thinking this way about using an acid test kit on a mead?  Or am I totally off my rocker?
————————————————————————————————————-
Leigh ErwinMy name is Leigh Erwin, and I am a brand-spankin’ new home winemaker! E. C. Kraus has asked me to share with you my journey from a first-time dabbler to an accomplished home winemaker. From time to time I’ll be checking in with this blog and reporting my experience with you: the good, bad — and the ugly.

6 Great Beers To Brew For Football Season!

Beer made from homebrew recipe kit that goes good with football.
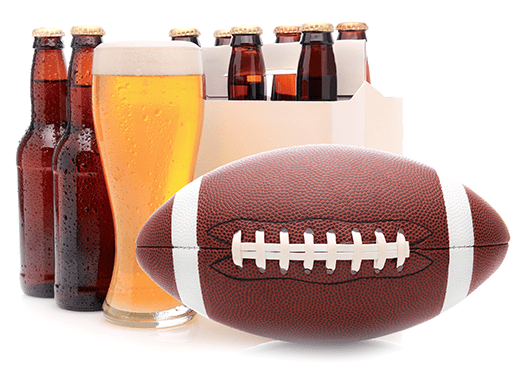
Just like apple pie, baseball and Cracker Jacks, and mac & cheese, beer and football is a classic combination. For football season you need something you can drink over the course of a three-hour game, a tasty session beer that’s just as good for tailgating as it is for sharing with friends around the tube. Granted, just about any beer goes well with football, but some seem to fit the season better than others.
Consider brewing one or more of these homebrew recipe kits to enjoy throughout the football season.

  • Steam Freak Buddy Light – This homebrew recipe kit delivers the ideal tailgating beer, a light American lager that’s easy to drink. A clone of Peyton Manning’s favorite beer, the Buddy Light kit will be perfect for playing cornhole, throwing the pigskin around the parking lot, and washing down a portion of burgers and brats.
  • Steam Freak Fat Liar – Balance is the main feature of this American amber ale. Floral hops and biscuity malts combine to deliver a pleasant, drinkable, moderately hopped beer with some roasted notes to keep things interesting.
  • Brewer’s Best German Oktoberfest – Although football is an American sport, sometimes it’s nice to enjoy some beer styles from across the pond. This malt-forward German lager fits the bill perfectly. Coming out at about 5.5% ABV with some malty sweetness and just a hint of hops, this amber beer is made for a long fall day of drinking.
  • Steam Freak Blue Noon – This Blue Moon clone kit satisfies all the requirements of a Shop Homebrew Recipe Kitsgood football beer: light, flavorful, and easy-drinking. Orange peel and coriander bring an interesting combination to the beer, while wheat gives it some body. Feel free to serve with a wedge of orange or lemon.
  • Steam Freak Steam Stoker Stout – If you find yourself tailgating in the snow, you might be ready for a dark, roasty, higher gravity thirst quencher with a little extra alcohol to keep the cold at bay. This homebrew recipe kit delivers about 7% ABV and roughly 50 IBUs, packing plenty of punch to keep you warm well into the fourth quarter.
  • Brewcraft Pacific Northwest Pale Ale – For the West Coast hop heads out there, this homebrew recipe kit features the classic, citrus/pine combination of Cascade and Centennial hops, supported by some toasty and malty specialty grains for a tasty malt flavor. It’s a well-balanced beer at 5.3% ABV, 54 IBUs.

What do you think – what’s the perfect homebrew recipe kit to make for football season? Tell us below!
—————————————————————————————————————–
David Ackley is a beer writer, brewer, and self-described “craft beer crusader.” He holds a General Certificate in Brewing from the Institute of Brewing and Distilling and is founder of the Local Beer Blog.

Walt's Idea For Topping-Up Wine With Carbonated Water

Walt From ArkansasI have been thinking about a way to protect wine from unnecessary oxidation during 2nd and 3rd rackings. Mainly, I want to get the oxygen out of the empty carboy before racking into it, but how? CO2 cartridges? Dry ice? Finally hit upon a simple idea. Since I have to top up with water anyway, why not do the “topping” first, with carbonated water. The escaping CO2, being heavier, will drive everything else out of the carboy. What do you think?
Walt — AR
—–
Hello Walt,
If I am understanding you correctly, you are saying to put any carbonated water needed for topping-up the wine into the empty carboy — first — before racking the wine into it. And, letting the CO2 gas from the water drive the air out of the fermenter. You would be estimating the amount of carbonated water needed for topping up.
I commend you on your idea!
In theory, what you are saying it correct. The CO2 would slowly drive air out of the vessel. The main issue I see is getting enough of the CO2 gas to release to have any real results.
Assuming you only need to top-up the wine with a quart or less of water in a 5 or 6 gallon batch, the amount of CO2 in a quart of carbonated water is not all that great. If you need to top-up the wine with a greater amount of water than this, then you shouldn’t be topping up with water at all, but rather a similar wine or some other method. Here’s some more information on different ways for topping up a wine.
Absolutely, the carbonated water would drive some of the air out of the fermenter, but not nearly all of it. There’s just not enough of it in a quart or less to do the job completely.
The second issue is getting all the CO2 gas to release from the water. Only a portion of the gas will release through agitation. The rest will want to stay saturated in the water. One way to get the CO2 gas to release more completely from the water would be to make sure it’s warm. The CO2 gas will release more freely from warm water than cold.
Having said this, I do not see any problems with putting carbonated water in the fermenter for topping-up the wine. It will be effective in driving out some air, just marginally so.
Shop Potassium MetabisulfiteI personally have never concerned myself with purging air from my fermenters when racking. The amount of contact time with the air is not enough to oxidize the wine in any way. Oxidation takes time. The one thing you do have to look out for is splashing. You do not want the splash the wine with racking. Fill the fermenter from the bottom up. That is, have the hose reach to the bottom of the fermenter being filled so that the hose is in the wine during the racking and not splashing.
Secondly, if [the fermentation has completed, and] you add sulfites such as Campden tablets or potassium metabisulfite to the wine after racking — as you should — you will be driving any air out of the wine and replacing it with SO2 gas in a matter of minutes.
There is nothing wrong with topping-up your wine with carbonated water. I just don’t think it will be affective in purging the air out of the fermenter.
Happy Wine Making,
Ed Kraus
—————————————————————————————————————–
Ed Kraus is a 3rd generation home brewer/winemaker and has been an owner of E. C. Kraus since 1999. He has been helping individuals make better wine and beer for over 25 years.

Brew & Review: Tasting Steam Freak Special Bitter – Pt. 5

Glass of bitter beerAt long last, the Steam Freak Special Bitter has been brewed, fermented, kegged, and is now ready to drink. Now it’s time to taste the beer and figure out if it can be improved in any way.
Here are the notes from my taste test of the Steam Freak Special Bitter beer recipe kit.
Tasting Notes: Steam Freak Special Bitter Recipe Kit
Final Stats:
OG: 1.048
FG: 1.017
ABV: 4.1%
IBUs: ~25
SRM: ~15

  • Aroma – Primarily caramel and toffee, with just a touch of spicy hop aroma from the last minute decision to add some Cascade dry hops.
  • Appearance – Very dense, foamy, off-white head that sticks around for at least a couple minutes. Head retention probably due in part to the Carapils malt. Medium-dark amber color, a little darker than expected, but still appropriate for the style. Somewhat hazy. I didn’t use any finings, so they will probably help next time around.
  • Flavor – First thing I get from this beer recipe kit is the caramel/toffee malt sweetness, followed by some spicy and floral hops flavor. The beer finishes dry with a slightly mineral aftertaste.
  • Mouthfeel – Neither too heavy nor too light – just right. Slightly dry finish.Shop Beer Recipe Kits
  • Overall – Overall I’m pleased with how the beer turned out. It’s well-balanced, moderate gravity, and with plenty of flavor to keep things interesting.

If I were to brew this beer recipe kit again I might consider making a few changes:

  1. Move some of the liquid malt extract to a late addition and add some aroma hops during the boil. This should bring a little hop bitterness and aroma to the forefront. Any low alpha acid hop variety will do, but Kent Goldings and/or Fuggles would be two of the most authentic options.
  2. Also, looking back over my homebrewing notes, I recall that I ran out of Irish moss. A teaspoon or two added during the last ten minutes of the boil would likely help with the haze.
  3. I will probably not prime the keg next time. I’m glad I tried it, but I ended up pulling a good bit of yeast out of the keg for the first few pints. Good old force carbonation will work just fine.

All in all, the opportunity to brew the Steam Freak Special Bitter was a good one. I got to review some extract brewing techniques and try my hand at a style I’d never brewed before.
Which Steam Freak beer recipe kit would you like to try?
Read the other posts of this review! Part 1 | Part 2 | Part 3 | Part 4 | Part 5 |
—————————————————————————————————————-
David Ackley is a beer writer, brewer, and self-described “craft beer crusader.” He holds a General Certificate in Brewing from the Institute of Brewing and Distilling and is founder of the Local Beer Blog.

Leigh Erwin: Mead Acidity – Pt. 1

Testing Mead AcidityHi everyone!  I hope all your home winemaking adventures are going well!
For me, I have to admit I’m somewhat confused… It has to do with mead acidity.
Backing up a second, one thing that did happen this week was that I got the shipment I ordered from ECKraus.  I ordered several items, including a new floating thermometer to replace the “sticker” one that I had previously, the Pressurized Wine Filter system, a couple of filter pads to fit in the filter system I purchased, a longer racking cane from my slightly taller carboy, and finally the Acid Test Kit.
Why am I confused?  Well, it’s related to the results of the Acid Test Kit when testing my mead.  I wanted to test it to see if there was something off about the acid levels, since the specific gravity has stopped at 1.002 (still that value when I tested the acid).  I figured I’d check the acid levels of the mead to see if maybe that needed some adjustment before moving forward, or if it’s just simple matter of jump starting any remaining yeasts.
Well, the results of the acid test showed that my mead has 0.725% tartaric acid and 4.64ppt sulfuric acid.  I calculated the TA (titratable acidity) to be 4.35g/L, based on instructions found online.
On the acid test kit instructions, it gives recommendations for different types of wine in terms of what the % tartaric and ppt sulfuric acid should be.  For white grape wine, they recommend a range of 0.65-0.75 tartaric and 4.2-4.9 sulfuric.  For red grape wine, they recommend a range of 0.60-0.65 tartaric and 3.9-4.2 sulfuric.  Finally, for fruit wine, they recommend a range of 0.55-0.65 tartaric and 3.6-4.2 sulfuric acid.
Here’s where my confusion lies:
I’m not making white, red, or fruit wines.  I’m making mead!  What in the world are the recommended acid ranges of tartaric acid and sulfuric acid for mead? Do I count it as a “white wine” because that’s what it most closely resembles?  No, that can’t be right.  It’s honey, no grapes!  Different chemistry.
Well, after a nearly fruitless search through Google, I could barely find anything that even remotely hinted at what mead acidity levels I should be looking for.  After a while, I did find a page that discussed how measuring titratable acidity in mead was actually often highly inaccurate and not a trusted way to determine acid levels in honey wine.  It is basically related to the types of sugar found in honey versus the types of sugar found in grapes or other fruits (namely: gluconic acid/gluconolactone).  Supposedly, the sugars and other compounds in the mead react much differently than those in grape or fruit wine, thus significantly skewing the true results.
So, does this mean I just wasted my time using the acid test kit to test my mead’s acidity?  Well, I think it depends on how you look at it.  It might not be the best measure for acid in mead, but at least I got to practice how to perform the test!  I’m going to have to dig a little deeper on this, I think!
————————————————————————————————————-
Leigh ErwinMy name is Leigh Erwin, and I am a brand-spankin’ new home winemaker! E. C. Kraus has asked me to share with you my journey from a first-time dabbler to an accomplished home winemaker. From time to time I’ll be checking in with this blog and reporting my experience with you: the good, bad — and the ugly.