 It’s brew day! I finally get to brew the Special Bitter beer recipe kit that I introduced last week.
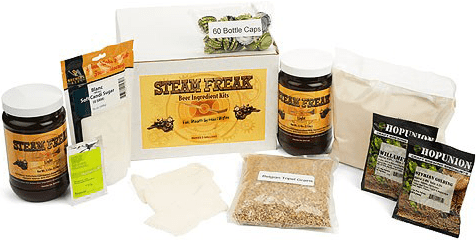
Before I start making the beer recipe kit, I need to get my equipment in order. Everything listed below comes in a homebrew equipment starter kit.
Brew Day Equipment for Extract Brewing
- Five-gallon brew kettle
- Fermenting bucket with lid and airlock
- Long spoon for stirring
- Hydrometer
- Thermometer
- Brewing specific cleaner (such as Basic A or One Step)
Additionally, every brewer needs:
When I started making the beer recipe kit, the first thing I did was read through the instructions. It always helps to know what you’re getting yourself into before you get started!
The basic extract brew day goes something like this:
- Clean and sanitize everything you’ll be using to make your own beer. Take care to clean everything so that no visible debris remains, then soak in your sanitizer of choice. I find it helpful to reserve some cleaning and sanitizing solution for later in the brew day.
Multitask: When making a beer recipe kit it often helps to think from the end of the process first. I knew that I’d need 2.5 gallons of water to mix into the wort at the end of brew day, so while cleaning my gear I started the day by boiling some water for 20 minutes to sterilize it and drive off any chlorine that may be in it. This will improve the overall flavor of the finished beer. I then chilled the water using my immersion wort chiller and poured it into a sanitized carboy so it would be ready when I needed it at the end of the brew day. You’re welcome to use bottled water for the dilution if you’d like to skip this step.
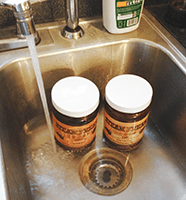
- Heat about 2.5 gallons of water to 155-165˚F. Meanwhile, if using liquid malt extract, soak your canisters of malt extract in a large bowl or pot of hot water. This will make it easier to pour out the extract in step 4.
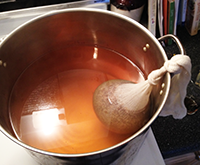 If applicable, steep your crushed grains in the hot water using the grain steeping bag for about 20-30 minutes. Just like making tea. I recommend tying the grain bag to one of the handles on the kettle to keep it from touching the hot bottom. After the steep, remove the grains from the kettle, letting the liquid drain from the bag. I tossed my “spent grains” in the compost heap. The water is now wort.
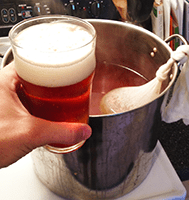 Don’t forget to enjoy a brew while brewing!
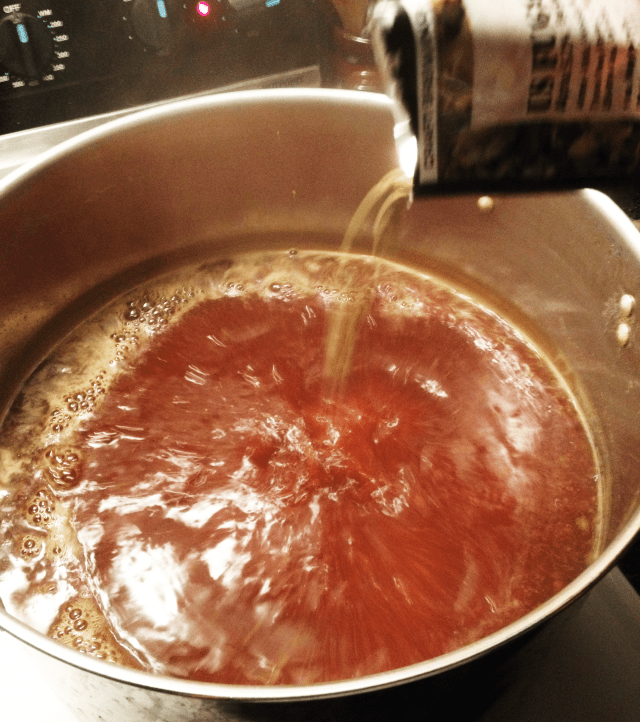
 After the steep, remove the kettle from the heating element and mix in the liquid malt extract. Having soaked the canisters of LME in hot water, I was able to pour the contents into the kettle pretty easily. Keeping the burner turned off during this step helps to keep the extract from sticking to the bottom of the kettle.
At this point, I added a teaspoon of gypsum to the wort. Though the directions didn’t call for this, I know for a fact that my water is very soft. English pale ales are often brewed with hard, sulfate-rich water, similar to what is used at Burton-on-Trent in England (home of Bass Pale Ale). The added minerals in the water should help accentuate the hop character of the beer. (Ray Daniels suggests adding as much as 4-5 teaspoons of gypsum to very soft water when brewing an English bitter.)
- Heat the wort to a strong boil. Keep a close eye on it to avoid a boil over!
At this point, it’s critical to keep your eyes on the kettle. This is the most likely time for a boil over. Usually the wort will start foaming up as it approaches the boiling point. Avoid the boil over by either tossing a small glass of cold water in the wort (have one at the ready), or by taking the kettle off the heat. Usually, if you can avoid the first boil over, you’ll be safe for the rest of the boil. This is true when boiling any wort, not just when making a beer recipe kit.
 From the start of the boil, add hops depending on your homebrew recipe. For the Full Steam Special Bitter, the recipe called for 1 oz. of Willamette hops. All you have to do is pour in the bag of hops and give them a quick stir. Since this is a 60-minute boil, I call this the 60-minute hop addition. We’ll then count down as the boil progresses. With 30 minutes left in the boil, I added the Fuggles hops.
- At the end of the boil, kill the heat, give it a quick stir to create a whirlpool, and chill down the wort as quickly as possible. An immersion wort chiller will usually do the job in about twenty minutes.
- Once it’s down to about 70˚F, pour the wort into your fermenting bucket or carboy and mix in the water from earlier. Do your best to leave most of the hops and “trub” at the bottom of the kettle. It’s important from here on out that everything that touches your wort is thoroughly sanitized.
- Aerate the wort by stirring with your stirring spoon. This is to provide oxygen for the yeast to feed on and to mix the wort with the water.
- Take a hydrometer reading, correcting for temperature if necessary. Carefully suspend your sanitized hydrometer in the bucket, or use a sanitized measuring cup to pull a sample of wort to pour in a hydrometer testing jar. This will help you measure alcohol content after your beer has fermented.
Hydrometers are calibrated for a specific temperature. A reading more than a few degrees outside the calibrated temperature can affect your hydrometer reading, so when making a beer recipe kit note the temperature or the wort and use a calculator like this one to adjust for temperature. The resulting figure is know as the original gravity. The OG for the Full Steam Special Bitter came out right at 1.050, exactly where it was supposed to be!
- Pitch yeast. Some brewers like to rehydrate dry yeast. I usually don’t rehydrate Safale S-04 and just follow the instructions on the packet: “sprinkle into wort.” Couldn’t be easier than that!
- Seal the fermenter and attach an airlock filled halfway with sanitizer solution.
- Put the fermenter in a closet or other dark room at a constant temperature. A temperature of 65-70˚F is ideal for this style of beer.
All in all, making this beer recipe kit went pretty smoothly. The beer smelled amazing as it was brewing. Now all I have to do is wait for a few days while the beer ferments.
Stay tuned for updates from fermentation and bottling!
Read the other posts of this review! Part 1 | Part 2 | Part 3 | Part 4 | Part 5 |
—————————————————————————————————————-
David Ackley is a beer writer, brewer, and self-described “craft beer crusader.” He holds a General Certificate in Brewing from the Institute of Brewing and Distilling and is founder and editor of the Local Beer Blog.