 Though most of the heavy lifting has been completed with this beer recipe kit, the key process of making beer has just begun: fermentation. Fermentation is what converts the sugary wort into beer, and yeast is the handy microorganism that does all the work. So we can just sit back, relax, and let the yeast do its thing, right? Not so fast.
Primary Fermentation
The first 24-48 hours is critical to the outcome of a beer. With sufficient aeration, the yeast should reproduce in number and then rip through the fermentable sugars. Our job as brewers is to make sure that the yeast are pitched into ideal conditions and that the fermentation temperatures stay in check.
Though my basement was the ideal environment for fermenting a lager this winter, its now a little on the warm side. Since I don’t yet have a temperature-controlled fermentation space, I monitored the fermentation temperature of the Full Steam Special Bitter beer recipe kit and when I saw that it started to push 75˚F, I set the fermenter in an ice bath. As mentioned before, this first 24-48 hours period is when yeast can go nuts.
If left unchecked, yeast can start giving off some unpleasant off flavors. During this early phase of fermentation, they will give off heat that can raise the fermentation temperature by 5-10˚F. Luckily, the yeast that came with this beer recipe kit, Safale S-04, is a pretty clean strain. Also, some ester production is generally acceptable English ales, but I wanted to make sure things didn’t get out of control. After 48 hours I was able to remove the fermenter from the ice bath and allow it to just hang out in my 70-75 degree basement.

Secondary Fermentation
Enter the age-old debate: secondary fermentation or no? I’m just in the habit of doing a secondary, so for me the answer is usually yes. In my experience, it helps clear the beer, plus you end up with less yeasty “floaters” in the bottle.
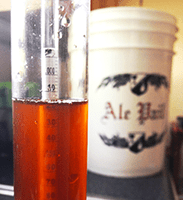
After five days of primary, I checked the gravity of the beer by cleaning and sanitizing my auto-siphon and pumping about 3/4 cups of beer into a hydrometer test tube: 1.020. A little higher than I would have liked, and I detected some diacetyl, so I decided to leave the beer in primary for a couple more days to let the yeast keep working.
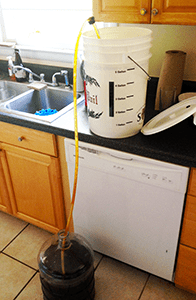
 Two days later, I checked the gravity again…a touch lower at 1.018. I decided to go ahead and transfer. If you’ve never racked to secondary before, an auto-siphon is the easiest way to transfer your beer. Just put it in the bucket, attach your tubing, and pump the siphon once or twice to start the flow. Just make sure your primary fermenter is higher than the secondary, and you’ll have no issues moving the beer from one container to the other. Don’t forget to clean and sanitize all of your equipment before transferring!
I will check the gravity of this beer recipe kit again on bottling day and hope it drops a little more, but 1.018 isn’t so high that I’m going to worry about it too much. Besides, the gravity sample tasted great: caramel malty sweetness with just enough hop bitterness and flavor to balance it out. I’m looking forward to it when it’s cold and carbonated!
Read the other posts of this review! Part 1 | Part 2 | Part 3 | Part 4 | Part 5 |
—————————————————————————————————————-
David Ackley is a beer writer, brewer, and self-described “craft beer crusader.” He holds a General Certificate in Brewing from the Institute of Brewing and Distilling and is founder of the Local Beer Blog.
