 Extract brewing is the easiest way to brew your own beer. Many homebrewers begin with extract beer brewing and later progress to all-grain. Some even go back to extract brewing because it’s easier and much less time consuming than all-grain brewing.
So what is extract brewing?
Professional brewers extract fermentable sugars from barley malt through a process called mashing. When extract brewing you can skip this step by using malt extract, which is a condensed form of liquid wort. (Wort is the term for unfermented beer.) Malt extract is available as a liquid malt extract or dry malt extract (LME or DME), and LME is either hopped or unhopped. Much like malt, malt extract is categorized by color, ranging from Pilsen, Pale, and Amber, to Munich and Dark.
By using malt extract, beginning homebrewers can save easily an hour or more on brew day. Plus, they can still make perfectly good beer with significantly less equipment.
Further below you will find some extract brewing instructions. Here is the basic list of equipment you will need to follow those instructions (5-gallon batch):
- Brew kettle (3 gallons or larger)
- Long plastic or stainless steel spoon for stirring
- Brewing specific cleaner (such as One Step)
- Brewing specific sanitizer (such as Star San)
- Hydrometer
- Thermometer
- Fermentation bucket with lid (with drilled hole in top), or carboy
- Airlock (you will also need a drilled rubber stopper if using a carboy)
 Most homebrew supply shops carry homebrew equipment kits with everything you need to get started. Adventures in Homebrewing also carries extract brewing kits with everything you need to brew your first batch of beer. You can also find an extract brewing recipe, and purchase all the ingredients, à la carte.
Extract Brewing Instructions:
- Thoroughly clean and sanitize everything you’ll be using to make your own beer. Many homebrewers consider this to be the most important step!
- Heat your clean, chlorine-free water. If you can smell chlorine in your tap water, you’ll want to boil your water for 30 minutes first. Or, you can use bottled spring water from the grocery store. The exact amount of water you use isn’t critical for extract brewing process; shoot for 3 gallons or so. Give yourself at least a couple inches from the top of your brew kettle.
- Meanwhile, if using liquid malt extract, soak your canisters of malt extract in a large bowl or pot of hot water. This will make it easier to pour out the extract in the next step.
- When your brew kettle of water is hot (not boiling), turn off the burner (for gas stoves) or remove the kettle from the heating element (for electric).
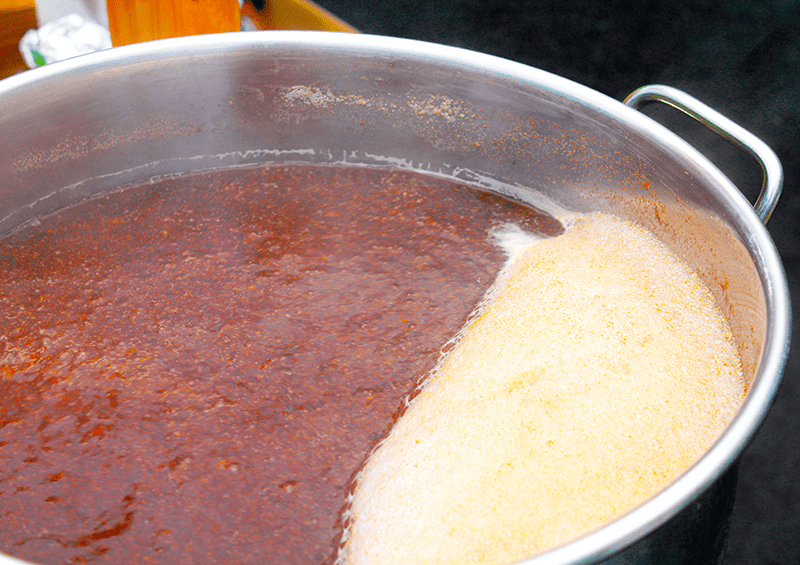
- Slowly stir in your malt extract until completely dissolved, taking care that it doesn’t stick to the bottom of your brew kettle. Your water is now wort!

- Heat your wort to a strong boil. Keep a close eye on it to avoid a boil over!
- From the start of the boil, add hops depending on your extract brewing recipe. (If you’re using hopped extract, you may not need to add any hops.)
- At the end of the boil, turn off the heat, give the wort a good stir, and move your kettle to a nearby sink for an ice bath. Fill the sink with cold water and replace as needed. The idea here is to cool your wort so that you can add the beer yeast. Yeast is a living organism (and responsible for creating alcohol!), so you don’t want to kill it by pitching it into wort that is too hot.
- When your wort is at about 90°F or so, carefully pour the wort into a sanitized fermenter. If using a carboy, you may want to siphon it using a sanitized siphoning hose. If you added hops to the boil, do your best to leave those behind. It’s important from here on out that everything that touches your wort is thoroughly sanitized.
- Top off your wort with water to make 5 gallons. Fermenting buckets usually have lines on the side that show you your volume.
- Aerate the wort by stirring vigorously. This is to provide oxygen for the yeast to feed on. This is the only step in the extract brewing instructions where adding oxygen is desirable.
- Take a hydrometer reading, correcting for temperature if necessary. This will help you measure alcohol content after your beer has fermented.
- Add the beer yeast according to the packaging instructions. Give it a good stir with your spoon.
- Put the fermenter in a closet or other dark, temperature constant room.
- Close the lid with air-lock attached (if using a bucket) or close with a rubber stopper and air-lock (if using a carboy).
- Fill your air-lock about halfway with clean water and place it firmly in the drilled hole of the rubber stopper.
If you follow these extract brewing instructions, within 24 hours you should see bubbles coming out of the airlock. After a week or so, you’ll be ready to bottle your beer!
—–
Ed Kraus is a 3rd generation home brewer/winemaker and has been an owner of E. C. Kraus since 1999. He has been helping individuals make better wine and beer for over 25 years.

I’ve been brewing for quite a few years now and most of those have been all grain. I hate to say that I became a bit snobby when it came to extract brewing, but one of the best Czech style Pils that I ever made was from Pilsen DME that I had sitting around for a few years. I just wanted to do something with it so that it didn’t go to waste. Now I’m back to brewing all year round instead of waiting for nice weather to set up the big kettle and mash tun outside. I also converted a favorite American PA that’s usually done all grain to a DME and mini mash on the stovetop.
I am assuming that your instructions for Extract Brewing is not meant for brewing beer from your kits. as all the kits I have used have grain bags in them. Also they have flavoring hops and bittering hops..What is your take on this? Thanks William
William, the boxed beer kits that you are referring to are partial mash brewing. You still have liquid malt but will also do a mini extract brew. The article posted below will explain the difference in more detail.
Extract vs. Partial Mash
http://www.eckraus.com/blog/extract-vs-partial-mash-brewing