Can I Use Welch’s Grape Juice To Make Wine?

Welchs Grape JuiceHello Kraus,

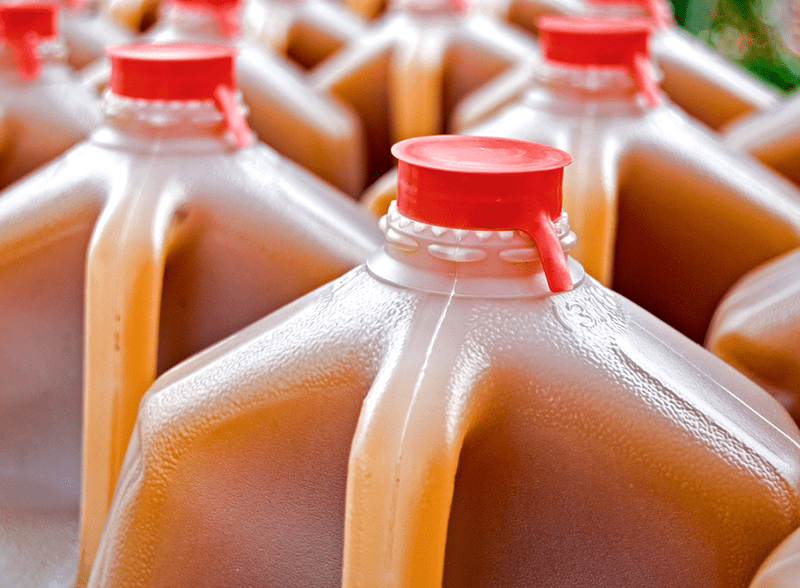
I would like to know if wine can be made from Welch’s grape juice that you buy at your local grocery store if you use yeast and go through the process of wine making? Will the Welch’s grape juice ferment into wine?

Curtis
—–
Hello Curtis,

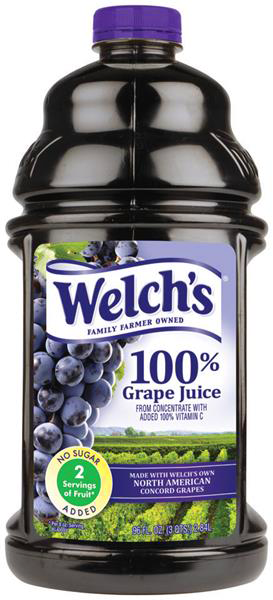
As a beginning winemaker, using Welch’s grape juice is a great way to learn how to make your own wine. The resulting wine may not necessarily be prize-winning, but it will be well worth the effort.

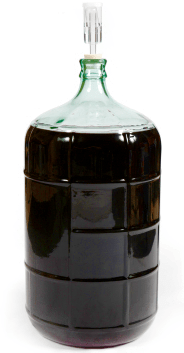
The really neat part about it is you can make a few gallons of grape wine without having to worry about crushing the grapes and dealing with using a grape presses. You will still need, however, regular wine making materials such as wine yeast, yeast nutrient, wine tannin, etc.

You can use other brands besides Welch’s. The main thing to remember is that the grape juice can not have any preservatives that would interfere with a fermentation. Examples of these would be: sodium benzoate or potassium sorbate. All of Welch’s products are fine for fermentation.

Here’s a basic Welch’s grape wine recipe. It is for making one gallon. If you want to make 5 gallons, just times everything by 5, expect for the yeast. Each packet of yeast is good for 1 to 5 gallons of wine:

Welch’s Grape Juice Wine Recipe (1 Gallon)
2- 64 oz. Welch’s Grape Juice
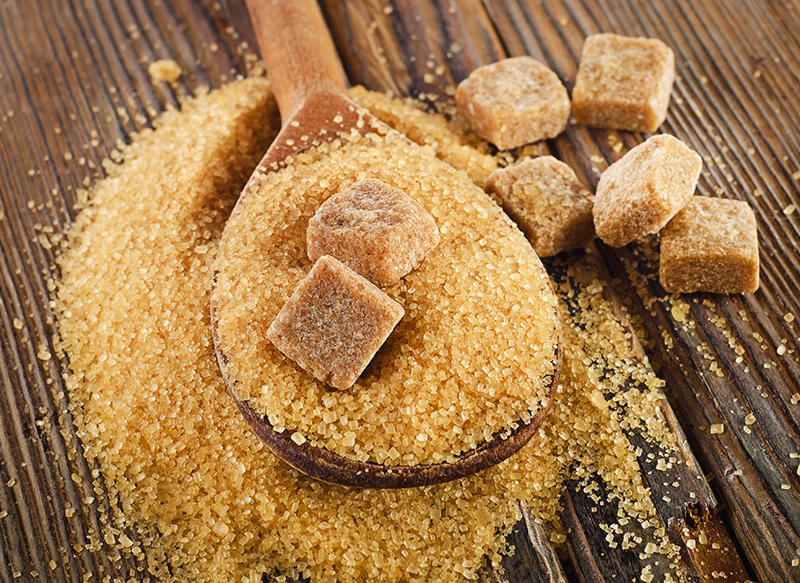
1/2- lb. Cane Sugar
1- Package of Yeast (Red Star Montrachet)
1- Teaspoon Yeast Nutrient
Shop Wine Making Kits3/4 – Teaspoon Acid Blend
1/8 – Teaspoon Grape Tannin

If you prefer, you can use Welch’s Frozen Concentrate, you can do that as well. Just reconstitute the Welch’s concentrate with water as the directions from Welch’s indicate, and start from there.

You can follow the 7 Easy Steps To Making Wine that are listed on our website. We also have other wine recipes you can use with these Easy Steps on our Wine Recipe Page.

This should be all the info you need to make some Welch’s grape wine. If you have any other questions just let us know.

Happy Wine Making,
Ed Kraus

—–
Ed Kraus is a 3rd generation home brewer/winemaker and has been an owner of E. C. Kraus since 1999. He has been helping individuals make better wine and beer for over 25 years.

How to Know When to Bottle Your Homebrew Beer

Homebrewer who knows when to bottle his beer.You’ve been waiting patiently while your homebrew ferments away in the closet and you can’t wait to try the beer you’ve worked so hard to create. But how do you know when it’s ready to bottle? How do you know when to bottle your homebrew beer?

First of all, let’s talk about why it’s important to bottle your beer at the right time. The main concern is that if you bottle before it has completely fermented, you run the risk of having excessive carbon dioxide in the bottle. The result: bottle bombs! Not only is this a safety hazard, but if your bottles explode, you lose that precious beer!

The best way to figure out when to bottle your beer is to take hydrometer readings. In the final days of the fermentation period, take a hydrometer reading every 1-2 days until there is no change in the reading. That’s how you know when fermentation is complete. (Note: Most homebrews finish in the ballpark of 1.010-1.020.)

If you’re using a fermenting bucket, hydrometer readings are pretty easy. Just open up the bucket, drop your sanitized hydrometer in the beer, give it a spin to dislodge any bubbles, and take your reading. (Don’t forget to correct for temperature!) Another method is to use a sanitized measuring cup to pull a sample out of the bucket, which you can then pour into a hydrometer testing jar to conduct your reading. Of course, a bucket with a spigot makes pulling a sample even easier!Shope Hydrometers

If you’re fermenting in carboy, taking a hydrometer reading is a little more tricky. You could drop the hydrometer into the carboy, but then it would be a challenge getting it back out. The easiest way around this is to use a sanitized fermentation sampler, sometimes called a thief, to pull a sample from the carboy. All you have to do is dip the sampler in the beer and pull it out again. A one-way valve will automatically lock in a sample of beer, then you can do your reading right in the tube! That’s about as easy as it gets!

Sometimes it’s tempting to pour the beer sample back in the fermenter, but I don’t think it’s worth the risk of contaminating your beer. If you choose to pour the beer back into the fermenter, just make sure you use impeccable sanitation. I’ll usually just use the sample for a taste test — a preview of what’s to come!

So, after a couple identical hydrometer readings you know the fermentation is done, it’s time to bottle your beer! Learn all about bottling your own homebrew on our post Bottling Beer at Home.shop_beer_bottles

Many homebrewers guess, but using a hydrometer is, by far, the best way to know when to bottle your fermented beer after fermentation. So, take some readings and bottle your beer at the right time.

Til next time…Cheers!
—–
David Ackley is a beer writer, brewer, and self-described “craft beer crusader.” He holds a General Certificate in Brewing from the Institute of Brewing and Distilling and is founder of the Local Beer Blog.

4 Tips For Losing Less Wine When Siphoning

Carboy of WineI generally wait until the stuff has settled out of the wine, and then I very slowly siphon my wine. I have set my wine outside when it is below 0 degrees and that clarifies it. I know there is a chemical I can use but I don’t like doing that. My biggest problem is the waste that occurs when I siphon. Is there a filtering method to save this wine? Thanks!

Name: Roger M.
State: WI
—–
Hello Roger,

Thanks for asking such a question about racking your homemade wine. Losing too much wine when racking is something that is concerning to many home winemakers.

Fortunately, there are a few things you can do to decrease the amount of wine you lose when racking (siphoning) your wine. These are simple little techniques that will allow you lose less wine. I’ll go over them one-by-one:

  1. Use An Actual Wine Yeast
    By using a wine yeast verses baker’s yeast, you will be able to get more wine with less sediment. Wine yeast is bred to pack more firmly to the bottom of the fermenter. This creates a sharper line between the wine and the sediment. This makes it easier for you to get all the wine.
  1. Tilt The Fermenter
    By tilting the fermenter towards the end of the siphoning you can cause the wine to roll off the yeast, into the corner, giving you a deeper area to siphon from. This is very helpful. Again, an actual wine yeast will help in this regard. If the yeast doesn’t pack firmly, this method is not nearly as effective.
  1. Save The Murky Stuff
    If you are in a situation where there is a lot of cloudy wine towards the bottom, save it in a separate container, like gallon jugs. Give it more time to clear up on its own. Then siphon off the sediment.
  1. Rack (Siphon) The Wine More Than Once
    Rack the wine right after the fermentation has completed. Wait a few weeks and then rack the wine again, right before bottling. And here’s the secret part. When you do the first racking, get as much of the wine as you can, even it if comes with some sediment. But when you get to the final racking, before bottling, do whatever it takes to leave all the sediment behind. What you will find by doing this is that you will have very little sediment at the last wine racking, maybe a dusting, causing you to loose hardly any wine at all.

Shop Bentonite

Additional Thoughts:
You mentioned that you did not want to add chemicals to your wine, but I would ask you to consider adding bentonite to your wine to help clear it out faster and pack more firmly on the bottom. Bentonite is a natural clay that attracts particles such as the wine yeast and fruit fiber, and drags it to the bottom. We sell it in a food-grade form. It does not permanently mix with the wine and does not affect the wine in any way other than to clear it. The bentonite settles out and is left behind, just like the particles. This will help you quite a bit.

I hope these tips on racking your wine helps you out. Another blog post that you might want to take a peek at is How Do I Get The Wine From The Sediment? This blog post may give you some clearer ideas on racking your wine.

Happy Winemaking,
Ed Kraus
—–
Ed Kraus is a 3rd generation home brewer/winemaker and has been an owner of E. C. Kraus since 1999. He has been helping individuals make better wine and beer for over 25 years.

Boost Your Beers With These Alternative Brewing Sugars

Alternative Brewing Sugars For BeerWhile barley malt is the preferred source of fermentable sugars in beer, other ingredients are often used to supplement the grains. Among these, sugar is one of the most common.

Sugars come in many different varieties, all of which affect flavor, gravity, and color in different ways. Brewing sugars may be added to simply increase the gravity of a beer. Try adding a pound of sugar to a standard beer recipe kit to make an “Imperial” version of whatever base beer you’re brewing.

Brewing sugars can also be added to obtain certain flavor characteristics. Alternative brewing sugars for beer such as: brown sugar, Belgian candi sugar, and molasses all have distinct flavors that can add a layer of complexity to brown ales, Belgian ales, and stouts. Simple sugars will often ferment out almost completely, so they can be used to achieve a dry finish in Belgian ales, pale ales, and darker beers.

Alternative Brewing Sugars For Beer:

  • White table sugar – While table sugar is fine for priming, it has been known to produce “cidery” flavors when used in any significant quantity. It’s been highly refined to remove color and “impurities”, so it will not affect the color of your beer.
  • Corn sugarCorn sugar is ideal for priming, its fine, powdery grind helping it dissolve easily. Corn sugar can be used to boost gravity and lighten flavor without contributing color, so it’s ideal in styles such as Light American Lagers.
  • Cane sugar – Cane sugar is derived from the sugar cane plant, usually through a pressing to extract the cane juice. Then an evaporation to concentrate the crystals. The minimal processing means that it still contains some color and molasses flavor, but not as much as some of the sugars listed below. Cane sugar can be used for priming, but can also increase gravity in a wide range of beer styles.Shop Candi Sugar
  • Brown sugar – Brown sugar is a great alternative brewing sugar. It tends to be darker than cane sugar, usually due to molasses being added back in to the refined sugar. Brown sugar can be light or dark and it contributes significantly more caramel and molasses flavor than cane sugar.
  • Panela/Picadillo/Jaggery – Panela, also known as picadillo or jaggery, is an unrefined dark brown cane sugar pressed into blocks or cones. It contains higher levels of molasses and natural minerals than more refined sugars. Since it’s pressed, it takes a bit longer to dissolve than granulated sugars, but the rich caramel flavor is worth the wait!
  • Molasses – Molasses is a byproduct of the sugar refining process. It’s a dark syrup which can contribute significant flavor and color to stouts and other dark beers.
  • Lactose sugar – Lactose sugar, or milk sugar, is a non-fermentable sugar and the key ingredient that contributes residual sweetness to milk stouts and sweet stouts.
  • Candi sugar – Belgian candi sugar is probably the most commonly used alternative brewing sugar used in beer. It is usually sold in large crystals, can be either light or dark. It’s a key ingredient in dubbels, tripels, and other high-gravity Belgian ales.
  • HoneyShop Steam Freak Kits – Honey contains significant amounts of simple and complex sugars, as well as a wide range of vitamins, minerals, and other nutrients. It will contribute wonderful flavors and aromas, which will vary with the type of honey. To preserve them, try adding the honey right at the end of the boil.
  • Maple syrup – Maple syrup is another alternative sugar source that will contribute unique flavors to a beer. It works great in brown ales.

When planning on using alternative brewing sugars in beer it is important to know that they have gravities in the ballpark of 1.036-1.046. Check out this table for more detailed gravity and color estimates.
—–
David Ackley is a beer writer, brewer, and self-described “craft beer crusader.” He holds a General Certificate in Brewing from the Institute of Brewing and Distilling and is founder of the Local Beer Blog.

My Wine Fermentation Is Not Bubbling

Fermentation BubblingI made a batch of wine using concentrated grape juice. The fermentation is not bubbling, so I do not think it’s fermenting. I think it’s too cool in my basement. Can I add more wine yeast, or what can I do to save my wine?

Name: Glenn , beginner
State: WV
—–
Hello Glenn,

Thank you for your question, and sorry you are having such a problem with this batch of wine. I think that your assumption is probably correct. By far, the #1 reason for a wine fermentation to not start bubbling is because of temperature. Wine yeast is very sensitive to temperature… some strains more than others.

My recommendation is to keep your fermentation between 70° F. and 75° F. Getting out of this temperature range can cause your fermentation to not bubble. You can use a thermometer to keep tabs on the fermentation temperature. I prefer to use a liquid crystal thermometer. This is a plastic strip that you stick on the outside of the fermenter. The correct temperature will always illuminate. It’s very easy to use and very accurate.

The good new is that if the temperature is the reason your fermentation is not bubbling, then your batch of wine is in little danger of being ruined, and the solution is very simple — warm the wine up! You can do this by:

  • Moving the wine to a warmer locationShop Thermometers
  • Warming up the room the fermentation is in
  • Applying heat to the wine fermenter, itself.

Many beginning wine makers will instinctively run to the closet to get an electric blanket to throw around the fermenter. This is not a good idea. Every electric blanket I’ve seen, even on its lowest setting, is way, way to warm for this application. Unless your wine must is about to freeze solid, what you need is something much more subtle.

Fortunately, there are several products on the market for this specific purpose. We carry the one we think works best. It’s call the Brew Belt. Just as the name sounds, it’s a belt that goes around the fermenter and applies a gentle heat.

If temperature is the reason your fermentation is not bubbling, once you get the fermentation to the correct temperature range, you will see the fermentation start to bubble on its own. There is no need to add more wine yeast. The yeast that is already in the wine is just fine. It has just become inactive because of the cooler temperature.

Shop Heating BeltThe last thing I’d like to mention is that we are under the assumption that temperature is the reason why your fermentation is not bubbling, and I’d say that assumption is probably correct, but for the sake of completeness, I would suggest that you also take a look at the Top 10 Reasons For Fermentation Failure that are listed on our website. These 10 reasons cover well over 95% of the issues we run across when helping others — temperature being #1 on the list. See if any of the other 9 ring true to your situation.

I hope this helps you out.

Happy Wine Making,
Ed Kraus
—–
Ed Kraus is a 3rd generation home brewer/winemaker and has been an owner of E. C. Kraus since 1999. He has been helping individuals make better wine and beer for over 25 years.

5 Beer Recipes for Brewing This Fall

A Flight Of Fall Beers
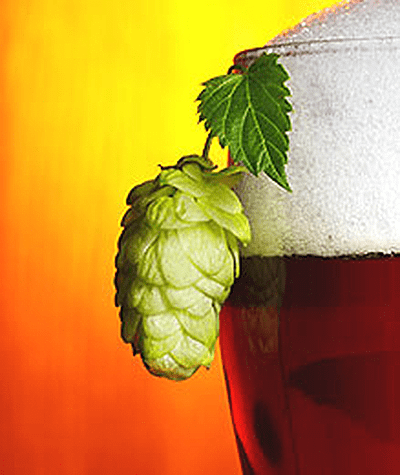
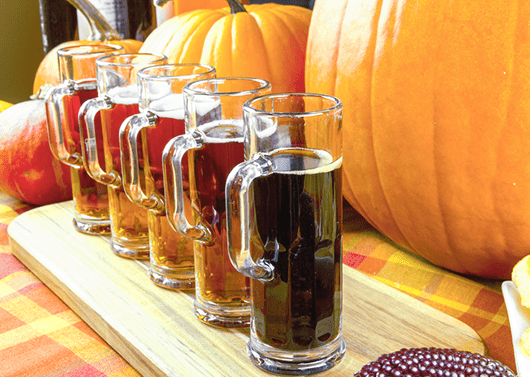
It’s time to start thinking ahead to what you might want to drink and share with your friends this fall. Are you a fan of pumpkin beer? Oktoberfest? Consider these suggestions as you’re figuring out fall beer recipes are going to be on your homebrewing calendar!

  • Oktoberfest – Oktoberfest traditionally kicks off at the end of September, though the beer may be consumed throughout the following months. Oktoberfestbier is a lager, meaning you’ll have to start brewing it several weeks ahead of when you plan to drink it. Be sure to use plenty of Vienna and/or Munich malt if you brew all-grain or choose a German Oktoberfest Recipe Kit if you brew extract or partial mash. Ferment the beer cold using a Bavarian Lager Yeast for best results.
  • Pumpkin Ale – With a flavor like pumpkin pie, pumpkin ale seems to be more and more popular every year. Brew a pumpkin ale recipe now and plan to enjoy it from Halloween through Thanksgiving. You can use fresh pumpkin from the pumpkin patch, which will actually contribute fermentable sugar to your homebrew. Consider increasing the grain bill to make an imperial pumpkin ale.
  • Hard Apple Cider – Nothing says fall quite like fresh apples. If you live in an area that grows apples, keep an eye out at the farmers market for cider apples or fresh pressed, unpasteurized apple juice. Follow this recipe for a basic cider, but consider adding some herbs or spices to mix it up. Ginger is a flavorful choice.
  • Shop Beer Recipe KitsAmerican Amber Ale – With a maltier backbone than a pale ale or IPA , a good amber ale is a fantastic choice for a fall beer recipe. It provides a nice transition into the colder months that favor darker, heavier beers. Amber Ales can be either hoppy or malt forward – the balance is up to you. Consider brewing the Phat Tyre Recipe Kit – it’s a clone of New Belgium’s Fat Tire, a malty, biscuity ale with just a hint of Belgian malt for a balanced, nutty flavor and full-bodied mouthfeel.
  • Fresh Hop AleAmerican hop growers harvest their hops in the late summer and early fall. If you have any growers in your area – or if you grew some hops yourself – try to get your hands on some hops straight from the field. Use them towards the end of the boil to maximize the flavor and aroma you get from those fresh-picked hops. Because fresh or “wet” hops weigh more, you’ll need six to eight times as much as you would using dried hops in pellet form. Try using your wet hops to dry hop a pale ale, IPA, or Black IPA this fall.

Do you have a favorite fall beer recipes? What are some of your favorite fall beers?

Using Pasteurized Juice For Making Wine

Pasturized JuiceI have decided to get in to the mysterious world of wine making. I have gotten my hands on carboys, yeast, corks, airlocks, etc. My only problem is that I can’t find any preservative free, unpasteurized apple juice, or any juice, to use in my first batch. Is using pasteurized juice for making wine OK? I’ve been told that the pasteurization process takes away from the final flavor. How much of an impact does it actually make? Thanks for the help!

Name: Steve G.
State: North Carolina
—–
Hello Steve,

I’m glad you’ve decided to make some wine. Using a pasteurized juice for making your wine, is a pretty good place to start for a beginning winemaker. The process is fairly straightforward and representative of the winemaking process in general.

You are correct in your assumption that you need to read the label and see what’s in the juice before actually buying it and using it to make wine. You need to look for preservatives that could sabotage your fermentation.

For example, you want to make sure that the juice does not have sodium benzoate or potassium sorbate. These specific preservatives will interfere with wine yeast ability to multiply and start a fermentation. However, things like potassium metabisulfite or ascorbic acid are just fine and will not give you any troubles whatsoever.

Buy FermenterAbout the pasteurization, it is perfectly fine to make wine from a juice that has been pasteurized. It does not effect the flavor in any way and is a good thing for the juice to go through. While this process does have a big fancy name — named after Prof. Louis Pasteur, the creator of process —  it is really a very innocent and simple process. Pasteurization is simply performing a flash heating and cooling of the juice.

These days, the juice is heated and cooled so fast that it does not even have a chance to oxidize the juice. But it is being heated long and hot enough to kill any microbes that would have eventually caused the juice to spoil. This process has no chemistry to it and is nothing more than what I have described. So as far as affecting flavor, it does not.

The bottom line is that using pasteurized juice for making wine is perfectly fine. What you want to be on the look-out for is things like sodium benzoate or potassium sorbate.

Happy Winemaking,
Ed Kraus
—–
Ed Kraus is a 3rd generation home brewer/winemaker and has been an owner of E. C. Kraus since 1999. He has been helping individuals make better wine and beer for over 25 years.

6 Tips For Fixing Your Home Brew Beer

Two Men Fixing Home BrewIf you spend a significant amount of time homebrewing, you’re bound to come across a batch or two that just didn’t turn out as good as you’d hoped. Maybe the flavor is off or your bottles aren’t carbonated enough. Before you throw in the towel and call it quits, there may be something you can do to fix your home brew beer.

Read these tips below for some ideas on how to fix the occasional “off” home brew batch:

  1. Beer too flat? If you’ve bottled a batch of homebrew and found it’s too flat, you have several options to add more bubbles to your brew. First, move the bottles into a warmer area and give them some extra time to carbonate. If after a month or so they’re still not where you want them to be, you may be able to add some extra sugar to the bottles. Use your judgment to estimate how much additional priming sugar you need to add. Hopefully, you took notes on how you primed and can make an adjustment for next time.
  1. Beer too carbonated? Beer that gushes when you open it can be a nuisance – and it can be pretty embarrassing if you’re trying to impress some friends! The best way to try to fix this home brew problem is to try is to get the bottles extra cold before opening. Either stick them in the freezer for a few minutes or put them in an ice bath. Once they’re ice cold, carefully open the bottles over the sink. If you still get a gusher, you can pour the beer into a pitcher to allow the foam to settle down.
  1. Beer too bitter? If you’ve brewed a beer that’s too bitter, it may just need some time to age. Set it aside for a month or so. The extra time can go a long ways towards getting rid of the green beer taste. As a last resort, you can blend the beer with something less bitter to bring it into balance.
  1. Buy FermenterBeer too sour? Unless you’ve deliberately brewed a sour beer, there’s not much you can do to “fix” a home brew beer that’s gone sour from infection. If you catch it early enough though, you may be able to save it. If you catch it before bottling, you can easily dose the beer with Campden tablets. Otherwise cold crash the beer to slow any microbial growth and drink quickly. Or maybe just embrace the fact that you’ve brewed your first sour beer!
  1. Beer too sweet? First we need to identify why the beer is too sweet. Was it a stuck fermentation? Maybe you can add more yeast. Or was it a problem with recipe formulation? Maybe the beer has too much lactose or caramel malt? Blending the beer with a drier batch could help balance it out. Either brew a new batch of the same beer, or try blending the beer in the glass with a complementary beer style. (Black and tan, anyone?)
  1. If at first you don’t succeed… If after doing everything you can to save an “off” batch, the beer still doesn’t stack up to your expectations, it may just be time to scrap the batch and try a new one. Remember that each batch is a learning experience. You’re unlikely to repeat the same mistake again, so keep calm and brew on!

The point here is not to get too bent out of shape if your home brew doesn’t come out as planned. Take a deep breath is see if there is any way of fixing your home brew beer.

—–
David Ackley is a writer, brewer, and craft beer marketing consultant. He holds a General Certificate in Brewing from the Institute of Brewing and Distilling.

Is Grape Juice Quality the Key to Making Great Wine?

California Connoisseur With White WineThe art and science of winemaking has been around for millennia, though certainly the techniques and procedures have evolved throughout the course of winemaking history.  It takes a lot of time, practice, and patience to become an expert winemaker, and even then, a bad batch can come along despite all your best intentions and efforts.  With all that being said, one thing has always remained true over time:

“It doesn’t matter how skilled you are at making wine, if you don’t have quality grape juice, you are not going to make quality wine.”

How do you get quality grape juice for winemaking?  Well, there are several different sources, all of which can result in quality wine if you are careful and follow the instructions.

The first source for grape juice for winemaking is to simply buy a grape juice concentrate. There is an extremely wide selection of grapes varieties to choose from when shopping for a grape juice concentrate.  Some of the concentrate on the market are produced by using low-quality grapes. These are fine for drinking sweet, but not so much for making wine, so it is important to do some research into the overall quality of the grapes used to create the grape juice concentrate. There are a lot of products out there utilizing known vineyards and quality grapes, so do your research!

The next source for grape juice for winemaking is freshly pressed juice.  This may be a more expensive option, as you will need to work directly with a vineyard, which may or may not be charging higher prices than the easy-to-get grape juice concentrate.  Keep in mind that when purchasing freshly pressed grape juice for winemaking, you will only be able to attain the juice at a particular time during the year, and you will be bound to the grape variety that is being grown by that particular vineyard.  Grape juice concentrates stay perfectly fresh in the packaging for years.

Another source of grape juice for winemaking is to grow the grapes and press them yourself!  This, of course, is the most labor intensive and most expensive method, however, it can be very rewarding, particularly if you have a “green thumb” and would like to be a part of the entire winemaking process from vine-to-wine, as they say.  Similar to getting fresh grape juice from a vineyard, you will only be able to get the juice at a certain time of the year (harvest) and only the same variety year after year.

There are many sources for attaining winemaking juice: grape juice concentrate, local vineyard, or you own backyard. Any of these sources are fine. Just be certain you are getting quality juice from quality sources, otherwise you can end up with bad wine before you’ve even begun making it!

Another blog post that discusses the virtues of grape juice concentrate and fresh grapes is, Concentrate vs. Grapes.
—–
Ed Kraus is a 3rd generation home brewer/winemaker and has been an owner of E. C. Kraus since 1999. He has been helping individuals make better wine and beer for over 25 years.

A Quick Guide To Dry Hopping Your Beers

Dry Hopping A BeerDry hopping is a popular technique for adding a burst of hop aroma to beer. Basically, all you do is add hops during the secondary fermentation. Because the hops aren’t boiled, they won’t contribute much bitterness (IBUs) to your beer. Dry hopping your beer can lend desirable pine, grapefruit, citrus, or floral aromas, depending on the hop variety you use.

Many popular American craft beers are dry hopped, especially pale ales and IPAs. Sierra Nevada’s Torpedo Extra IPA, makes use of a hop back, or torpedo as they call it, which circulates conditioning beer through a stainless steel vessel packed with whole cone hops.

But don’t let complicated brewing equipment intimidate you — dry hopping your beer at home is easy!

When should I add the dry hops?
The most convenient time to dry hop is when transferring from primary to secondary fermentation. Hops can be added at any time during the secondary fermentation, but for best results, they should have at least a few days to work their magic.

What variety of hops should I use for dry hopping?
Hops with low alpha-acids, usually referred to as “aroma hops”, are best suited for dry hopping. Examples of aroma hops include:

Shop HopsShould I use pellets, plugs or whole leaf for dry hopping?
It is best to do your dry hopping with pellets as opposed to whole leaf hops. Due to the processing involved in producing hop pellets, the aromatic oils are more accessible. They’re also a little easier to separate from the beer than whole leaf hops.

How much hops should I use?
A good range to stick with is 1/4 to 2 ounces of hops for a 5 gallon batch, though I think some hop aficionados are prone to adding more.

Will adding hops contaminate my brew?
If you’re worried about contamination you could briefly steam the hops before adding them to the fermenter, but most will agree that the alcohol present in your beer after primary fermentation will protect it against bacteria.

What about straining the hops?
Regardless of how you go about dry hopping your beer, the hops will need to be strained from the beer one way or another

  • DIY screen – You can try attaching a sanitized screen to the bottom of your racking cane when siphoning the beer from the secondary fermenter. An auto-siphon, which makes life much easier for the homebrewer, has a tip that won’t let much through, you could tie a sanitized hops bag around the bottom for some added filtering.
  • Put the hops in small mesh hop bagShop Wort Chillers – Placing the hops in a hop bag before even adding them to the beer is probably the easiest option. A brewer in this forum recommends tying dental floss to the bag for easy removal – you’ll probably want to use unflavored floss, unless you’d like a little mint or cinnamon flavor in your brew!
  • Cold crashing – Dropping the temperature on your secondary fermentation will help the hops settle out to the bottom of the fermenter, making it easier to siphon beer into a bottling bucket or keg without pulling along a lot of hops material.

Hopefully, this information will help you out. Just remember that the best way to go about dry hopping is to use hop pellets in the secondary fermentation. Use somewhere around 1/4 to 2 ounces, and stick with a variety of hops that is big on aroma and low in bitterness.

Have you tried dry hopping your beer? How did it turn out?
—–
David Ackley is a beer writer, brewer, and self-described “craft beer crusader.” He holds a General Certificate in Brewing from the Institute of Brewing and Distilling.