10 Refreshing Wheat Beer Recipe Kits

One Of The Wheat Beer Recipe KitsWheat – it’s good in bread, but even better in beer! Here’s an overview of a variety of wheat beer recipe kits. Take a look, and see which one you want to try…
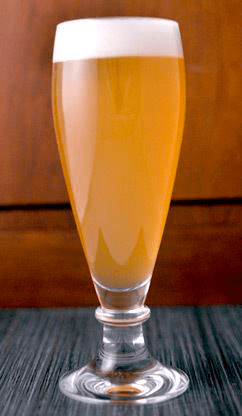
Wheat beers offer a refreshing alternative to some of the all-barley ales and lagers out there. Wheat beers often deliver a tasty counterpoint between malty sweetness and tart acidity from style-specific yeast strains, making wheat beers excellent thirst quenchers. Though brewing with wheat can sometimes be tricky for all-grain brewers, extract and partial mash wheat beer recipe kits eliminate those challenges.
Consider the options below to easily brew your own wheat beer at home! (Bonus – some of these kits ship for free!)

German Wheat Beer Recipe Kits

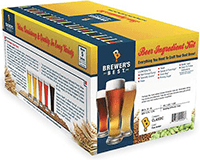
  • Brewer’s Best Weizenbier – Weizenbier is a style of wheat beer from southern Germany, characterized by a high proportion of wheat and a banana/clove flavor derived from the yeast. A hefeweizen is a weizenbier served with yeast; a single-stage fermentation should keep some haze in the bottle.Steam Freak Wheat Beer Recipe Kit
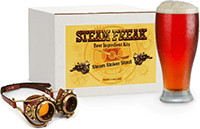
  • Steam Freak High-Flyin’ Derwitzer Wheat – The Steam Freak line also offers a Bavarian-style wheat beer recipe kit. It’s a beginner level kit with 6.6 lbs. of wheat liquid malt extract, 8 oz. of steeping grains, 2 oz. of German hops, and an authentic weizen ale yeast. Expect a golden yellow brew at about 4% ABV with the classic banana/clove yeast profile.
  • Brewer’s Best Kölsch – Though maybe not the first style that comes to mind when thinking of German wheat beers, Kölsch is often brewed with a portion of wheat, usually about 10-20% of the grain bill. This beer Ingredient kit uses Pilsner LME, wheat DME, and German hops to yield a pale, dry, refreshing beer with a moderate hoppy bitterness.

American Wheat Beer Recipe Kits

  • Brewcraft American Wheat AleBrewcraft wheat beer ingredient kit 
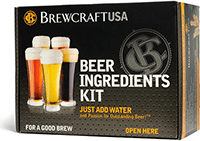
– American wheat ale offers the light, flavorful, refreshing qualities of wheat, but taste of American hops and yeast. This Brewcraft Premium wheat beer ingredient kit makes a beer reminiscent of Bell’s Oberon.
  • Brewer’s Best American Pale Wheat – The Brewer’s Best American Pale Wheat beer recipe kit yields a stronger, more robust version of wheat ale. A partial mash of pale malt and flaked wheat gives additional flavor, mouthfeel, and gravity to the brew, bringing it up to about 6.5% ABV. Hop bitterness is also more assertive at about 31-35 IBUs.
  • Brewcraft Apricot Wheat Ale – If you’re a fan of Magic Hat #9, this is for you! This wheat beer ingredient kit in the Brewcraft Ultimate series uses apricot puree and natural apricot flavor to bring a refreshing apricot flavor to the beer. A great introduction to brewing fruit beers.

Belgian Witbier Beer Recipe Kit

  • Brewcraft Premium Belgian WitbierThe Belgian’s take on wheat beer is called witbier, or white beer, and is commonly flavored with spices like orange peel and coriander. The Brewcraft Belgian Wit kit uses a partial mash of two-row malt, unmalted wheat, flaked oats, and a touch of acidulated malt for an authentic body, flavor, and mouthfeel with just a touch of acidity. Orange peel, coriander, and grains of paradise complete the spicy, fruity complexity in this delicious brew.
  • Brewer’s Best WitbierBrewers Best Wheat Beer Recipe Kit
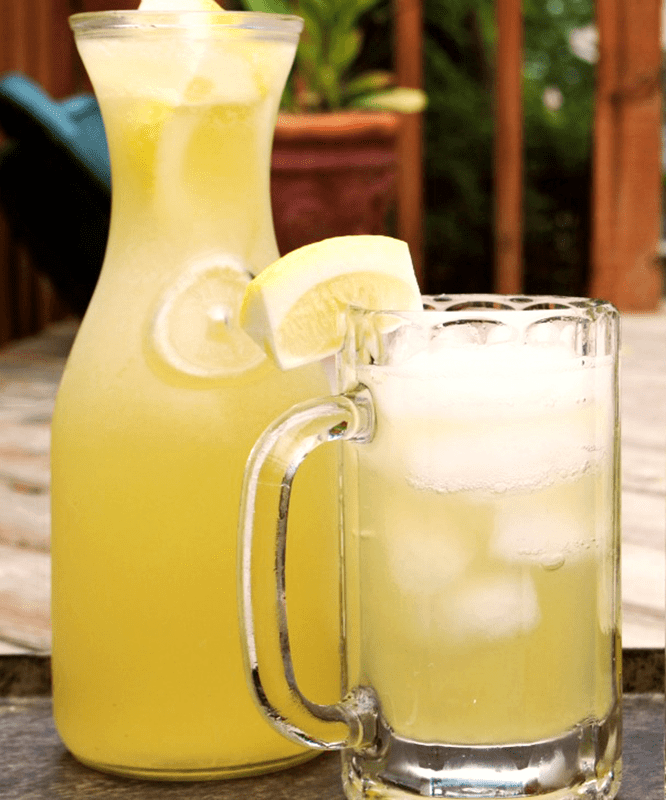
Brewer’s Best Witbier ingredient kit uses a partial mash of wheat and oats along with a classic witbier spice pack to craft a flavorful witbier of moderate gravity, about 4.5% ABV. Feel free to serve with a lemon or orange wedge!
  • Steam Freak Blue Noon Belgian WhiteJust like you would suspect, this is an American version of a Belgian wheat. It has a beautiful balance of zest and hops that is set off by just the right amount of orange peel. Its calm demeanor make it a great session beer for this category.

Have you already tried some of the wheat beer recipe kits? Do you have a wheat beer recipe you’d like to share? Go right ahead in the comments section below…
—–
David Ackley is a beer writer, brewer, and self-described “craft beer crusader.” He holds a General Certificate in Brewing from the Institute of Brewing and Distilling and is founder and editor of the Local Beer Blog.

Bohemian-style Pilsner Beer Recipe (Extract)

Pilsner Beer In GlassBohemian-style pilsner is one of those beers that works in nearly every situation. It’s refreshing, easy-drinking, and pairs well with a variety of different foods. That’s why I’d thought I’d share this simple, but prize-winning, pilsner beer recipe.
Pilsner was developed in the area formerly known as Czechoslovakia, in a place called Plzen. Plzen, incidentally, is home to Pilsner Urquell, one of the most iconic pilsner breweries, founded in 1842. Pilsner Urquell was the original pilsner lager, a style that spread all over the world and is probably the most consumed style of beer in the world (though the American pilsners are quite different than Czech).
Characterized by a pale yellow color, Bohemian-style pilsners feature a pilsner malt flavor with a pronounced hop bitterness. At 35-45 IBUs, it’s about as bitter as an American pale ale, however, unlike the pale ale, Bohemian pilsners have low to medium hop flavor and no fruity esters in the aroma. And instead of the citrus/pine hop flavors we see so often with American hops, the Bohemian-style pilsner beer recipe tends to exhibit the qualities of the noble hops: spicy, earthy, and herbal.
As a lager, it’s important that Bohemian Pilsner be fermented at lager temperatures, usually around 45°-55° F. This means you will have to get a handle on controlling your fermentation temperatures.
The beer recipe below comes from Marty Nachel’s Homebrewing for Dummies. It won 1st Place at the AHA Nationals.

Yellow Dogs Pilsner Beer Recipes (Extract)
(five-gallon recipe)
Specs
OG: 1.050
FG: 1.013
ABV: 5%
IBUs: 39
SRM: 6
Ingredients 
Shop Steam Freak Kits6 lbs. light liquid malt extract
1 lb. amber dry malt extract
1 oz. Chinook hops at :60 (11.5 AAUs)
1 oz. Saaz hops at :15
1.5 tsp. Irish moss at :15
1 oz. Saaz hops at :5
1 packet Safale US-05
Directions 
To make this Pilsner beer recipe you will need heat 2.5 gallons of clean, chlorine-free water to about 150°F. Remove the kettle from the heat source and thoroughly mix in the malt extract. Bring wort to a boil, then add hops according to schedule. At the end of the 60-minute boil, chill wort using an immersion wort chiller or ice bath. Transfer wort into a sanitized fermenting bucket containing about 2.5 gallons of pre-chilled, distilled water. Top off with enough water to make 5 gallons. Stir well and aerate.
Rehydrate the lager yeast in warm water before pitching. Gradually add small amounts of cooled wort to your yeast mixture until the yeast is within 10-15 degrees of the wort. Pitch yeast and ferment at 54˚F for two weeks, then transfer to secondary. Drop the fermentation temperature about 10 degrees over 5 days and lager for 2-3 months. After the lagering phase, bottle or keg as usual.
Do you think this Bohemian-style pilsner beer recipe would be something you’d like? Interested in more tasty lager recipes? Check out these 3 Homebrew Lager Clones.
—–
David Ackley is a writer, brewer, and craft beer marketing consultant. He holds a General Certificate in Brewing from the Institute of Brewing and Distilling and is founder of the Local Beer Blog.

Controlling Esters in Your Homebrew

Ester coming from beerEsters are one of many byproducts of fermentation and they’re an important flavor element of many beer styles that are produced by the beer yeast. When things go well, the esters lend a subtle complexity to beer with aromas usually described as fruity, sometimes banana. But when yeast is stressed, ester production may go overboard, and in addition to a number of other compounds, may contribute to some unpleasant, solvent-like off-flavors. This is the double-edged sword of homebrew yeast esters.
The key to getting good ester production from your yeast is keeping them happy and healthy. This means pitching an appropriate number of yeast cells and maintaining a fermentation temperature that is within a target range. There’s no one-size-fits-all solution to achieving the right level of ester production. The right fit will be determined by the yeast strain, the beer style, and the gravity of the beer. For example, what’s appropriate in a Belgian tripel would be out of place in an Irish stout – though it could make for an interesting Belgian stout!
But regardless of the style of beer you’re brewing, you’ll want to make sure that homebrew ester production is balanced. It really comes down to yeast strain selection, temperature control, and pitch rate.

Yeast Strain Selection
First, pick a yeast strain that is typical for the style of beer you’re brewing. If you aren’t brewing to style, then select a strain that embodies the flavor and aroma characteristics you’re going for. American ale strains tend to have relatively low ester production and so are often described as “clean.” English ales often exhibit some mild fruity character, so English ale yeast strains produce slightly more fruity esters. Belgian yeasts and other expressive strains, like German hefeweizen yeast, are known for higher levels of ester and phenol production. Lagers, in general, tend to have very little ester production.

Using Temperature to Manage Flavor and Aroma
After you’ve picked your yeast strain, decide how estery you want the beer to be. Higher fermentation temperatures tend to increase ester production. Many brewers who consider esters a key flavor component of their Belgian ales deliberately ferment their beers in excess of 75˚F. I’ve even heard of a brewer who won’t ferment a saison below 90˚F!Shop Liquid Beer Yeast
On the other hand, if you want to brew a clean ale that lets the malt and the hops shine through, you won’t want to ferment at such extreme temperatures. You will want to do what you can to keep homebrew ester production low. All beer yeast is packaged with temperature guidelines. If you want to avoid excessive esters, stay away from the high end of that range. This may mean getting a fermentation chamber or at the very least setting up a swamp cooler for your fermenter.

Pitch Rate
A key to keeping homebrew esters in check is pitching an adequate amount of yeast. Underpitching tends to drive fruity ester production, so use a yeast pitch calculator to make sure your yeast starter is big enough. On the other hand, underpitching may work to your benefit. Some brewers deliberately underpitch hefeweizen yeast to increase the banana esters the style is known for.
Learning how to best control homebrew esters will largely come from experience, but there is a decent amount of information online about the characteristics of different beer yeast strains. Next time you brew a beer, do a little research on other brewers’ experience with your yeast strain of choice. With the right yeast selection, fermentation temperature, and starter size, you’ll be well on your way to brewing a well-balanced beer with the perfect level of esters!
—–
David Ackley is a writer, brewer, and craft beer marketing consultant. He holds a General Certificate in Brewing from the Institute of Brewing and Distilling and is founder of the Local Beer Blog.

Beers for People Who Don’t Like IPAs

Malty BeerDespite the fact that IPAs are the best-selling craft beer in the US these days, not everyone is into hoppy beer. Some would prefer a malty beer style. In many cases, people who are new to craft beer may prefer to start with something more approachable before moving on to things like Heady Topper. Heck, I like IPAs and sometimes I’m just in the mood for something different.
One of the reasons people homebrew is so they can drink beers they can’t get at the store. With so many IPAs on the shelves, it’s nice to brew a malty beer or … to mix things up.
If for whatever reason you’re not into IPAs – you don’t like the bitterness, or you’re just ready for a change – consider one of these malty beer styles for your next homebrew:
The Malt Bomb
Well, the opposite of a hop bomb is a malt bomb. These beers feature – you guessed it – malt as the main flavor ingredients. You could try a caramel-rich Irish Red Ale, a bready, toasty German Bock, or a clone of Sierra Nevada and Ninkasi’s Double Latte Coffee Stout.
Belgian Ale
Belgian beers offers a level of complexity you don’t always get from IPAs, mainly due to the use of Belgian ale yeast. If you’re into dry, complex white wines, you might like to try a Hennepin Clone or an Abbey Single. This rich and fruity Rochefort 8 clone is a near perfect copy of one of the most highly regarded beers in the world.
Wheat Beer
This is not necessarily a malty beer style, but the effect is the same. Wheat tends to give beer a sweet, bready flavor and a smooth mouthfeel. On a hot day they sure go down easy! In my mind, Paulaner Hefeweizen is the quintessential German wheat beer. You could also try an American wheat or a Blue Moon clone if you’d like something more citrusy.
Fruit Beer Shop Steam Freak Kits
Adding fruit is a great way to bring some complexity to beer, and may be just the thing a new craft beer enthusiast needs in order to make the jump. Try the chocolate-berry combination of a Blackberry Porter, the tropical fruit flavors of a Hibiscus Mango Blonde Ale, or the tartness of a Cranberry “Lambic”.
Lawnmower Beer 
If you’re looking for something a step or two above macro lager, consider brewing your own American Cream Ale or Honey Blonde Ale. If tailgate quaffability is what you’re after, try brewing this Buddy Light Clone.
Drink up and brew a malty beer style! As they say, variety is the spice of life!
What’s your favorite malty beer style?
—–
David Ackley is a writer, brewer, and craft beer marketing consultant. He holds a General Certificate in Brewing from the Institute of Brewing and Distilling and is founder of the Local Beer Blog.

Recipe of the Week: Stone IPA Homebrew Clone

Stone Brewing Company IPAStone Brewing Company is one of the original heavy hitters of the craft beer industry. They quickly made a name for themselves with such high-octane, style-defying brews as Arrogant Bastard, Ruination, and Smoked Porter. But it’s some of their more “straightforward” beers – their top-selling Stone IPA, for instance – that really sets them apart as a leader in the craft beer world.
If you’re a fan of brewing IPAs, you may have heard of Mitch Steele, Stone’s Brewmaster. He literally wrote the book on IPA. And, if you’ve ever tasted any of Stone’s IPA options, you can tell he knows what he’s doing. Read his 5 Tips on Brewing IPAs to learn some guidelines for brewing this hoppy style.
This Stone brewing company IPA clone recipe comes from Brew Your Own Magazine. At 77 IBUs, it’s a heavy-hitter with loads of citrusy and piney hop character. This is one you’ll likely want to brew over and over!

Stone Brewing Company IPA Clone Recipe (via BYO Magazine)
(5-gallon batch, extract with specialty grains)
Specs 
OG: 1.065
FG: 1.012
ABV: 6.9%
IBUs: 77
SRM: 8
Ingredients 
5 lbs. light DME
1 lb. 10 oz. light LME (late addition)
1 lb. two-row pale malt
1 lb. crystal 15L malt
0.5 oz. Magnum hops at :60 (7 AAUs)
0.64 oz. Perle hops at :60 (4.5 AAUs)
2 oz. Centennial hops at :15Shop Barley Crusher
1 tsp. Irish moss at :15 mins
1 oz. Centennial whole leaf hops (dry hopped for 3-5 days)
0.5 oz. Chinook whole leaf hops (dry hopped for 3-5 days)
Wyeast 1968: London ESB ale yeast (1.5L starter) or 1 pack Safale S-04
priming sugar (if bottling)
Directions 
Mash crushed grains in 0.75 gallons of water at 149˚F. Hold for 45 minutes, then transfer wort to a kettle. Add enough water to make 4 to 4.5 gallons of wort, then mix in dry malt extract (reserve liquid malt extract for later) and bring to boil. Keep an eye out for boil overs! Boil for 60 minutes, adding hops and Irish moss according to schedule above. In the last 15 minutes of the boil, mix in the liquid malt extract. At the end of the boil, chill wort and transfer to a clean, sanitized fermenter. If needed, top up with clean, chlorine-free water to make five gallons. Pitch yeast and ferment at 68˚F for about 7 days. Transfer to a secondary fermenter. During the last few days of secondary, add the dry hops and allow them to steep for 3-5 days. Bottle or keg as usual.
Stone IPA is a great beer – what are some of your favorite IPAs?
—–
David Ackley is a writer, brewer, and craft beer marketing consultant. He holds a General Certificate in Brewing from the Institute of Brewing and Distilling and is founder of the Local Beer Blog.

Extract vs. Partial Mash Brewing: What’s the Difference?

Checking Mash TemperatureBeginning homebrewers have some options when learning to brew – quite of few of them actually. But one of the main decisions is whether to start with extract brewing, partial mash, or all-grain. Because all-grain is typically for more seasoned brewers, most beginners start with either extract or partial mash brewing. In this post, I’ll lay out some of the key differences between the two kinds of homebrewing.

First, some basics…

When looking at the difference between extract, partial mash, and all-grain, the main difference lies in the source of fermentable sugars. All-grain brewers (and the pros) extract everything they need from malted grains through a process called mashing. It requires strict attention to parameters like temperature, pH, and water chemistry – something that can be a little overwhelming if you’re just cutting your teeth on homebrewing.
Luckily for beginners, there’s a way around all this work. It’s called malt extract. Basically, professional brewers have already done the mash, then taken the resulting liquid (wort) and condensed it into either a liquid syrup or a spray-dried powder. These two types of malt extract are referred to as liquid malt extract (LME) and dried malt extract (DME). There are a few different flavors to choose from, so extract offers plenty of options for beginners.

Extract Brewing vs. Partial Mash Brewing

Both techniques use malt extract to supply a majority of the fermentable sugars, but the key difference between the two brewing methods is in the use of malted grains. The main difference is that extract brewing gets nearly all of its fermentable sugars from extract, whereas for partial mash, the brewer will do a mini-mash – the same procedures as an all-grain brewer, but on a much smaller scale – and then supplement with malt extract. For a five-gallon batch, the mini-mash may be just be a pound or two of grain, compared to ten pounds or more for all-grain.
Extract sometimes (but not always) will use a small amount of specialty grains in a beer recipe. These are steeped, like a tea, to extract color and flavor from the grains, but the contribution of fermentable sugar is negligible.
With partial mash, on the other hand, the brewer actually performs a mash. That means mixing both base malt and specialty grains with water with the purpose of extracting fermentable sugar from the malt. The brewer stills gets a good amount of sugars from malt extract, but he/she is also trying to extract sugars from the grains. To do this, the brewer needs a few additional tools: a thermometer, a method for checking pH, gypsum, and chalk. To learn more about partial mash, read these step-by-step instructions.

Shop Steam Freak KitsBenefits of Extract Brewing

  • Fewer grains – easier cleanup
  • Shorter brew day
  • Focus on the overall brewing process instead of getting bogged down by mashing
  • Lots of recipe kits to choose from

Benefits of Partial Mash Brewing

  • Learn more about brewing the way all-grain brewers do it
  • The mash allows the brewer to use a wider range of different malts and grains, giving them more flexibility for recipe development and adaptation
  • There are also lots of partial mash recipe kits to choose from

Whether you decide to start out with extract or partial mash brewing is entirely up to you – there’s no right or wrong way to do it, and there’s no reason you can’t switch back and forth from batch to batch. Whatever you do, make sure you’re having fun and the rest will take care of itself!
—–
David Ackley is a writer, brewer, and craft beer marketing consultant. He holds a General Certificate in Brewing from the Institute of Brewing and Distilling and is founder and editor of the Local Beer Blog.

When (And When NOT) To Be Paranoid About Home Brewing Sanitation

Man going overboard on home brewing sanitation.You’ve heard it again and again – cleaning and sanitation are two of the most important aspects of homebrewing. It’s true – lax cleaning and sanitation can easily spoil a batch of homebrew – but there are some things about beer and brewing that inherently prevent spoilage. Knowing what they are can save some time and headache.
Now this advice may go against conventional wisdom, but in an effort to save you some stress, here’s a breakdown of when – and when not – to be overly concerned about home brewing sanitation.
 
When to Be Paranoid About Home Brewing Sanitation

  • Yeast handling – Anytime you’re handling yeast is a good time to be concerned about sanitation. In fact, it’s when you should be most paranoid about sanitation. That said, by pitching a large number of yeast cells into a wort, that yeast will likely outcompete any other microorganisms – but there’s no sense in giving those spoiling microbes a leg up. Whenever you’re harvesting yeast or preparing a yeast starter, go the extra mile to make sure that anything that might come in contact with the yeast has been thorough cleaned and sanitized.
  • Post boil, post chill – One of the reasons we boil wort is to sanitize it. Maintaining a high temperature effectively sanitizes the wort, giving the beer yeast a clean slate for it to ferment. But once the temperature of the wort drops, it becomes susceptible to wild yeast and bacteria. After the wort has been chilled, everything it touches needs to be thoroughly sanitized: fermenters, airlocks, racking tubing, thermometers, hydrometers. This is why it’s not recommended to return wort used for hydrometer reading back to the main batch.
  • Bottling – To continue from the previous point, you don’t want to go through all the hard work of brewing a batch of beer just to put it in a dirty bottle. Make sure all the bottles are extra clean and don’t forget to check the spigot of the bottling bucket.

 
When NOT to Be Paranoid About Home Brewing Sanitation

  • During a normal mash – Clean the mash tun, yes, but you don’t really need to sanitize it. That said, a mash that’s left alone for a long time can go sour. In fact, some brewers use what’s called a sour mash in brewing sour beer. But a normal, 60-90 minute mash will not have enough time to spoil. Of course, it might be a good idea to clean and sanitize your mash tun after the mash to prevent mold growth.
  • When boiling – There’s really no need to sanitize your brew kettle. The high temperature of the boil will be more than sufficient for sanitizing.Shop Sanitizers
  • When using an immersion wort chiller – There’s no need to sanitize your immersion wort chiller. Make sure it’s clean, yes, but placing it in nearly boiling wort will be plenty hot for sanitizing. Just make sure you clean it well afterwards.
  • After fermentation – Once your beer has made it through fermentation, you’re not exactly out of the woods, but your beer is in a much safer place than it was before fermentation. For one, the alcohol content in the beer will protect it from spoilage organisms to some degree. Also, the lower acidity of the beer will inhibit wild bacteria. Plus, the hops have a preservative effect as well. So when checking final gravity readings, for example, it’s still a good idea to clean and sanitize your gear, but don’t stress about sanitation – you’re almost in the clear!
  • When dry hopping – One of the most common stress points is when adding dry hops. Shouldn’t they be sanitized before throwing them in the beer? Some brewers do this, but it’s not really necessary. The hops have naturally preservative properties, and as long as they’ve been stored properly, there’s little to know chance that they’ll contaminate your beer.

This isn’t a license to throw good cleaning and sanitation habits out the window. You’re certainly better off going overboard than missing a spot and spoiling a batch. But in terms of being paranoid about sanitizing, simply make sure your yeast are the only ones fermenting your beer. That’s what home brewing sanitation is all about. Then all you have to do is relax, don’t worry, and have a homebrew!
—–
David Ackley is a writer, brewer, and craft beer marketing consultant. He holds a General Certificate in Brewing from the Institute of Brewing and Distilling and is founder of the Local Beer Blog.

Barrel-Aging Your Homebrew – Without a Barrel!

Barrel-Aged BeerAs with wine, beer will often benefit from barrel-aging. Depending on the type of wood used to make the barrel and whether the barrel was previously used or not, barrel-aging homebrew offers an additional realm of complexity, with flavors ranging from oak, vanilla, and toast, not to mention the characteristics of the wine or spirits that previously occupied the barrel.
Though homebrewers can certainly obtain barrels for aging their beer, an easier and more cost effective method is to let the beer age on wood chips. Oak is the wood of choice, and brewers can get French or American white oak, each of which offer a slightly different flavor profile. Additionally, these oak chips may be toasted, which will lend the beer notes of coconut or vanilla. Plain, or non-toasted oak offers more of a “raw” wood flavor. The oak should be sap clear. This is typically done by allowing it to sun-dry for 18 months to 3 years.

So what types of beers work best for oak-aging?
Generally, the best beers for oak-aging are more robust beer styles. Imperial and barleywines are good choices, as the higher gravity lends itself to longer aging. The intensity of the flavor in more robust beers can also more easily stand up to the oak flavor without getting covered up. Some of these stronger styles may be aged for months before developing the appropriate balance. That’s not to say I haven’t had great oak-aged saisons and IPAs. It can be done, but achieving the right balance is a more delicate operation.
To avoid over-oaking your homebrew, you might try one of two different strategies:

  • Option 1: Add 1-2 ounces of oak chips to your beer in the secondary fermenter. Taste the beer periodically, every week or so, and rack the beer off the oak chips when the taste is to your liking.
  • Option 2: Remove 1 gallon of beer by racking it into a 1-gallon glass jug with 2-4 ounces of oak chips. This will result in strongly oaked beer, which can then be blended back into the main batch at the ratio that tastes good to you.

What about mixing in wine or spirits when barrel-aging homebrew?shop_toasted_oak_chips

If you’re into craft beer, you’ve probably come across beer aged in all kinds of different barrels: red wine, white wine, bourbon, tequila, brandy. If you’d like to add the flavor of a wine or spirit to your wood-aged beer, simply soak the oak chips in about a cup of your wine or spirit of choice for a week or more. Then strain out the oak chips and place them in your secondary fermenter. If desired, you can blend in some of the reserved wine or spirit to taste. The best way to do this is to pull out a small sample of beer and then dosing it with small amounts of the wine or spirit. Then you can calculate how much to blend back in to the larger batch. Err on the side of caution – you can always add more, but you can’t take it out.
Barrel-aging homebrew – with or without wine and spirits – introduces a new skill set to the brewer’s palette: tasting and blending. Barrel-aging may be more of an art than a science, so for best results, taste your beer as it ages on the oak and if needed, blend together multiple oaked and un-oaked batches to get the flavor your want.
Do you barrel-age your homebrew? What are some of your favorite beer styles for barrel-aging?
—–
David Ackley is a writer, brewer, and craft beer marketing consultant. He holds a General Certificate in Brewing from the Institute of Brewing and Distilling and is founder of the Local Beer Blog.

Summer Beer Recipe: Making Radler Beer

Radler BeerHow would you react if someone suggested that you cut your beer with lemonade or soda? Would you raise your eyebrows in shock? Gasp with horror? Well, that’s how you make a radler beer.
In many parts of the world, mixing beer is nothing to be afraid of. In fact, many years ago in the US, it wasn’t uncommon to hear of people drinking shandy – a mix of beer with soda or another non-alcoholic beverage. Though shandy all but disappeared in the late 20th century, in recent years it has made a comeback as beer drinkers continue to search out new and exciting alcoholic beverages.

What is a Radler Beer?
In Germany, one of the popular beer-soda hybrids is known as radler. Radler means “cyclist”, and legend has it that radler was invented by an innkeeper who when faced with a beer shortage, blended his beer with a lemon soda and marketed it as a thirst-quenching, low-alcohol alternative for bicyclists who passed by his establishment.
Making radler at home is a fun experiment for blending homebrew. There are a couple ways to do it:

  1. Brew a beer and a lemon soda, bottling them separately, and then blend them together in the glass, or:
  2. Brew the beer and the lemon soda, blending them in secondary and bottling or kegging them together.

If you’re just starting out with radler, I’d recommend the first option. This way, you can control the ratio and blend the two together just the way you like it. But if you’re serving for a large group, the second option may be more convenient.
Traditional radler is made with about a 50/50 blend of pilsner beer and lemonade or lemon soda. A popular variation is made with hefeweizen in place of the pilsner.
To make your own radler beer, follow the instructions below.Shop Steam Freak Kits

How to Make a Radler Beer

  1. Brew a batch of your favorite pilsner or hefeweizen. Some beers you might try include American Platinum Lager, High-Flyin’ Derwitzer Wheat, or Pilsner Urkel. If you’re feeling adventurous, you can even try using a pale ale or IPA as your base beer.
  2. Bottle or keg this beer as you normally would.
  3. When the beer is finished and you’re ready to make a radler, brew up a batch of sparkling lemonade:

Mix 1/2 cup sugar with 1/2 cup water in a small saucepan. Heat and stir until the sugar is dissolved. Mix in 3/4 cup lemon juice. Cool the mixture in the refrigerator. When ready to serve, mix in 1 can club soda.

  1. When ready to serve, blend the beer with the lemon soda into a glass at about a 50/50 ratio. Adjust to taste. Optionally, serve with ice and a slice of lemon and enjoy your delicious summer sipper!

Buy Shop Conical FermenterThis is just a basic radler beer recipe. There are many ways to make a radler beer. The options are only limited by your imagination.

Have you every tried a radler beer? How do you make your radler beers? Do you have a favorite radler beer recipe? Share it in the comment section below…
—–
David Ackley is a writer, brewer, and craft beer marketing consultant. He holds a General Certificate in Brewing from the Institute of Brewing and Distilling and is founder of the Local Beer Blog.

A Quick Guide To American Hop Varieties

American Hops With American FlagAmerican hop varieties display a wide range of flavor and aroma characteristics, from citrus and floral to piney and resinous.
Hops are generally categorized as bittering, finishing, or dual-purpose hops. Higher alpha-acid hops usually lend themselves to bittering, whereas the lower alpha-acid hops are preferred for flavor and aroma. Dual-purpose hops work well in both situations.
Here’s a quick guide to some of the most popular American hop varieties:

  • Amarillo: Amarillo is one of the relatively new American hop varieties that has become very popular among craft brewers for its fruity hop character. Similar to Cascade, it features strong fruity notes when used as an aroma hop, often described as “tropical”.
  • Cascade: Perhaps the most popular American hop of all, Cascade is well known for its use as a finishing hop in Sierra Nevada’s Pale Ale and countless other American ales. It has a distinctly spicy, citrus character that gives very fragrant grapefruit notes when used in later additions.
  • Centennial: Generally considered a dual-purpose hop (meaning it works well both early and late in the boil), Centennial has a citrus and floral character that makes it work well when combined with Cascade and similar hop varieties.
  • Chinook: ChinookBuy Beer Hops is a dual-purpose hop with distinct piney and spicy hop notes. Maybe you could try an all-Chinook IPA?
  • Cluster: According to Ray Daniels, Cluster “is believed to be the oldest of all the American hop varieties still grown today.” It’s a dual-purpose hop with alpha-acids in the mid-range. If you want to brew a pre-Prohibition style American lager, Cluster may be a good choice.
  • Columbus: High alpha-acid content makes Columbus an excellent bittering hop, but it also works well for later additions and dry hopping. Oskar Blues’ award-winning Deviant Dale’s IPA is dry-hopped with Columbus.
  • Fuggle (US): US Fuggles are a low alpha-acid hop derived from the English variety of the same name. When used as a finishing hop, it gives beer a pleasant woody hop aroma.
  • Liberty: Liberty is derived from the Hallertau strain of the German noble hops. It’s a lower alpha-acid hop that works well as a finishing hop in American-style pilsners and lagers.
  • Magnum: US MagnumBuy Hop Bags is a clean, high alpha-acid bittering hop comparable to the German Magnum.
  • Mt. Hood: Mt. Hood as another aroma hop comparable to the German noble hops, named for the region in Oregon where it’s grown.
  • Willamette: Willamette (“Will-AM-ette”) is a low alpha-acid aroma hop bred from the UK Fuggles. It works well in a wide variety of American ales and lagers.

For more great resources on other hop varieties, check out Ray Daniels’ Designing Great Beers.
What are your favorite American hop varieties? Are there any you’d like to see us carry?
—–
David Ackley is a beer writer, brewer, and self-described “craft beer crusader.” He is a graduate of the Siebel Institute of Technology’s “Start Your Own Brewery” program and the Oskar Blues Brew School in Brevard, NC.