Get Sweet On Your Beers: Start Brewing Beer With Honey!

Man Brewing Beer With HoneyWe put it in tea, we mix it into our lip balm and of course it’s good for baking, but for many homebrewers, honey is also a pivotal ingredient for brewing.
From the “ealu” of Great Britain’s Anglo-Saxons to President Obama’s White House Honey Ale, brewing beer with honey has been an important part of the craft. What makes honey so great is its flexibility for brewers, whether they simply want to use it as a fermentable sugar in their boil, as a source of sweet flavor or even as a priming ingredient.
Honey is great as a medium to connect all the aspects of your homebrew, from the sweet taste of wort to herbal aromas of hops and even yeast esters.
So how can you start brewing beer with honey? Here are three different ways:

Brewing With Honey In The Boil
For many, the high fermentability of honey provides an easy way to add extra gravity to a beer, since the sugar found in honey is almost entirely fermentable. Unless you’re making mead or braggot, you’ll want to make sure honey isn’t more than about 30 percent of all your fermentable sugars in a brew, depending on the level of honey flavor you seek. For best results, the National Honey Board recommends that when brewing with honey, not using more than 2.5 pounds of honey per five gallons.
A key trick is to know when to add honey. If you want to use it in the boil, consider adding it as a late addition. Due to its high fermentability, using honey early on in the boil can dilute the body of a beer and cause a drier finish when drinking your homebrew. Many beer recipes will call for a honey addition at the very end of a boil (in the last five minutes) or at flameout, which is best for retaining the honey’s aromas and flavors.

Brewing With Honey In The Secondary
If you want to avoid using honey on brew day, adding it during secondary fermentation is a good option. It allows you to keep the characteristics of the honey you’ll want to show up in your beer. To eliminate any wild yeasts and bacteria that may be in the honey, it’s important to pasteurize your honey first:Shop Beer Recipe Kits

  1. Preheat an oven to 176°F.
  2. Pour honey into a sanitized, oven-proof saucepan.
  3. As the oven preheats, heat the honey on the stove top to 176°F., stirring occasionally.
  4. Once the honey is 176°F., cover it and put it in the oven for 2.5 hours.
  5. Place the saucepan in an ice bath to lower the honey’s temperature to match that of your beer and pour it into the secondary.

The reason we heat the honey to 176°F. is that this temperature is hot enough to kill off microorganisms, but not so hot that it drives off the honey’s valuable aromas and flavors.

Brewing Beer With Honey: As A Priming Sugar
While substituting honey for your normal priming sugar may not add a lot of unique flavor, priming with honey does have the potential to add a small layer of complexity to your beer. Just be sure you only adding the honey for priming, as combining it with any other priming sugar can have explosive results.
If priming beer with honey, the honey will need to be diluted with water before adding to your homebrew. Different honeys have different densities, so there’s no uniform amount of water that may be ideal. You may need a small digital scale to weigh out the honey. Most formulas suggest four to five cups of water should be sufficient to mix with the honey.Shop Accurate Scales
As a precaution, you can bring the water-honey mix to a boil to kill any potential bacteria, the same as you would when mixing any other priming sugar.
Now that you’re ready to start brewing beer with honey, what to make? If you’re feeling experimental, check out the available beer kits from E. C. Kraus and see which beers you may enjoy with a touch of honey!
—–
Bryan Roth is a beer nerd and homebrewer living in Durham, North Carolina. You can read his thoughts on beer and the beer industry on his blog, This Is Why I’m Drunk, and send him suggestions on how to get his wife to drink craft beer via Twitter at @bryandroth.

Using Torrified Wheat For Head Retention

Homebrew With Torrified WheatI’ve been home brewing for just over a year and I’ve heard that adding torrified wheat as an adjunct can improve the head retention in beer and lace work within the glass. However, not once in my circle of friends has any experience of quantity and outcome. I generally brew all grain pale ales using Maris Otter as the base. Is there a recommended amount of torrified wheat to use that will add a creamy head without causing any degradation in clarity?
Name: Kevin Holmes
State: Essex, United Kingdom
—–
Hi Kevin,
Thanks for your homebrewing question about using torrified wheat for head retention in brewing!
In the context of homebrewing, a good torrified wheat definition would be a type of brewing grain that has been heated in order to break down its cell walls. The idea is that this gives water and enzymes in the brewing mash fast, easy access to the wheat’s proteins and starches, resulting in a quick conversion and a higher yield of fermentable sugars. It’s worth noting however that torrified wheat does not have any diastatic power of its own.
You are correct in your understanding that using torrified wheat in your homebrews can improve head retention in a beer. The torrified wheat percentage needed in a grist is approximately 5-10%. This amount can make a big improvement in head formation Shop Barley Grainsand retention. Briess recommends using up to 40% torrified wheat in a beer recipe, with the upper limit being for a weizen, Belgian witbier, or other wheat beer. If mashing with a significant proportion of wheat, rice hulls are recommended in order to avoid a stuck mash.
Please note that these same benefits can come from brewing with malted wheat, instead of torrified wheat. Both the red wheat and white wheat varieties are great alternatives for producing head retention. But unlike torrified wheat, malted wheat also has a significant amount of diastatic power (160-180 DP), worth considering if using a high proportion of wheat in a grain bill. Again, as little as 5-10% can improve head formation and retention. Personally, I have had good results using as little as half a pound of wheat malt in a 5 gallon pale ale recipe. The improvement in head retention was certainly noticeable.
If you’re looking for ways to improve head performance, other than using torrified Shop Barley Crusherwheat or malted wheat, you may also want to look into using Carapils malt (sometimes called dextrin malt). If for some reason you want to avoid using wheat, this is the way to go. Briess recommends using 1-5% of Carapils in your grain bill for improved body and head retention, without significantly impacting your beer’s color or flavor.
Kevin, thanks again for your great question about using torrified wheat in brewing for head retention. Anyone else have suggestions for controlling head retention in their beers?
—–
David Ackley is a beer writer, brewer, and self-described “craft beer crusader.” He holds a General Certificate in Brewing from the Institute of Brewing and Distilling and is founder and editor of the Local Beer Blog.

Brewing With Chili Peppers For Fun And Torture

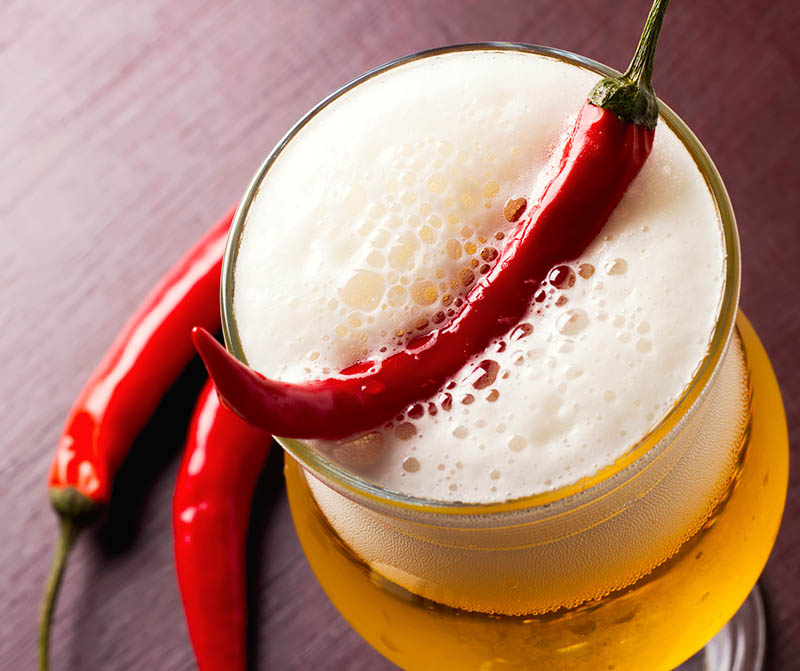
Beer With Chili PeppersBeer drinkers are an eclectic bunch. Some are hop-heads and some prefer malt bombs, but mixed in with the plethora of sects is a smaller group – those who like it hot.
You may have noticed commercial breweries experimenting more by brewing with chili with peppers, recently. Stone has the painfully hot Crime and Punishment and Twisted Pine has the infamous Ghost Face Killah. But there’s no need to go to the extreme with your homebrew!
If you’re looking for unique heat or some layered vegetable flavor, there are lots of ways to go about adding chili peppers to your beer – and lots of peppers to use – when brewing with chili peppers.

What Kind of Homebrew?
Before you find the kind of pepper you want to use, it’s important to determine the style of homebrew you’d like to make. The homebrew you use as your base beer will help you pick what kind of chili peppers to use and how much heat you want to feature.
For example, you could brew something light, like a lager, which could help really showcase aspects of a pepper, all the way up to a stout, which can balance the spice and heat with its own sweet maltiness and roasted characteristics. Here’s a chipotle porter recipe as an another example.
The first time I tried brewing with chili peppers I used a blonde ale base because I wanted the pepper to be front and center. It was perfect for my love of hot food, but a little too much heat came through for other drinkers. Find a style that you enjoy and that will allow you to feature the right amount of heat.

Which Peppers to Use?
Once you’ve got a beer style picked out, consider these three popular chili peppers to reach your desired level of intensity:

  • Anaheim: This pepper may be ideal for those who don’t want a ton of spicy heat, as it falls relatively low on the Scoville heat scale. As a mild pepper, it mixes a little bit of sweetness with low-level heat. Anaheim peppers will be good for lighter-bodied brews with a touch of heat.Shop Steam Freak Kits
  • Jalapeño: Chances are you’re familiar with this pepper, which is often found in spicy food dishes. Jalapeños offer stronger heat than Anaheim peppers and fall about midway on the Scoville scale. Chipotle peppers – smoked jalapeños – also make an excellent option when brewing with chili peppers. The smoke adds another layer to the pepper heat and flavor. Consider jalapeños to be good for just about any beer style, depending on your tolerance for heat.
  • Habañero: Among the hotter peppers easily found at grocery stores, habañero peppers aren’t for everyone, thanks to a heat level many times that of a jalapeño. If you love spicy heat, adding this chili pepper to heartier beers like porters or stouts that can withstand the heat.

When to Add Chili Peppers to a Brew

Like other unique ingredients (such as herbs and fruit), you’ve got options for when to add peppers in your homebrew. You can leave them whole if you want to minimize heat or slice them in half to expose seeds and the vegetable’s membrane, which contain capsaicin, the compound that makes a pepper hot.
Other timing options when brewing with chili peppers:

  • Late-boil: This will add heat, but little aroma to your beer. Add peppers at the very end of the boil and let them sit in the wort for 10 to 15 minutes.
  • Primary fermentation: If you want a bit more balance, adding peppers during primary fermentation will offer some heat, pepper flavor, and aroma. Just make sure to sanitize or gently blanch peppers them before putting them in your carboy or bucket.
  • Secondary fermentation: To get the most flavor, aroma, and heat from your peppers, try adding them after primary fermentation. This offers the option of starting with a pepper or two, and then you can taste the beer to find out if you want to add more during the secondary process.
  • In the bottle: For pepper enthusiasts only! Adding a pepper straight into a beer bottle will leave no doubt as to what you’re drinking!Shop Home Brew Starter Kit

How Adding Chili Peppers Impact Your Homebrew
When brewing with chili peppers you’ll definitely get a pepper flavor in your beer, but it’s important to know that how you use peppers may also affect the head retention of a beer.
If you’re using seeds and other exposed parts of the chili pepper, oils from the vegetable may seep into your beer, greatly reducing head retention. In my experience with a jalapeño blonde ale, carbonation wasn’t a problem, but little to no foam remained in my glass a few minutes after it was poured.
Think you can stand the heat? A good place to start for first-timers is with selecting a homebrew recipe kit. Find a brew you like and think will support the pepper heat and give it a shot. It’s an easy way to test pepper flavors and discover the kick they can add to your homebrew!
—–
Bryan Roth is a beer nerd and homebrewer living in Durham, North Carolina. You can read his thoughts on beer and the beer industry on his blog, This Is Why I’m Drunk, and send him suggestions on how to get his wife to drink craft beer via Twitter at @bryandroth.

Brewing Beer With Corn (Maize) – History and Technique

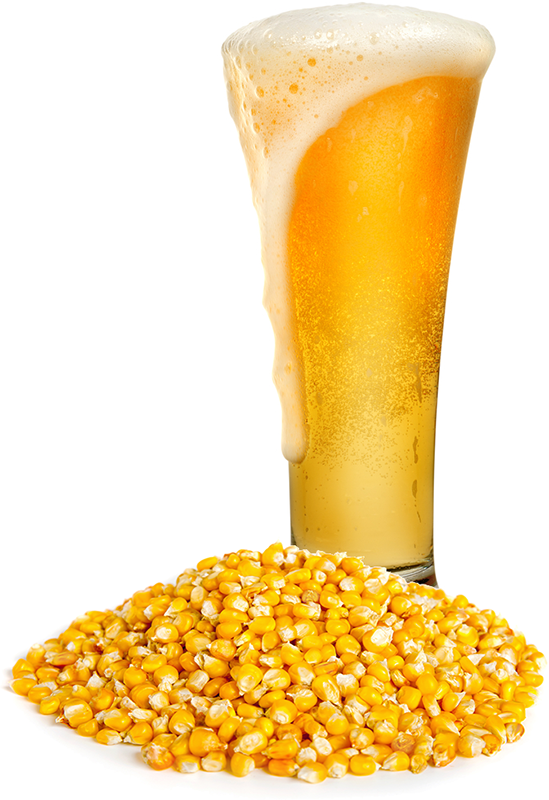
Corn Maize In BeerCorn, also known as maize, is most frequently used in brewing as an adjunct grain to lighten beer body, color, and flavor. Though the macro brewers bastardized its use to some extent, today’s craft brewers may find that using corn in beer has its place. Some styles (cream ale, for one) have found a home among brewers who hope to demonstrate that it is possible to make artistic, flavorful beer with maize.
Corn actually played a significant role in brewing long before the modern craft beer revolution. Foreseeing the need for a potable beverage, the earliest European settlers carried malt with them to the New World. But when that ran out, they often turned to brewing beer with corn. Malting maize turned out to be quite a challenge, but the determined settlers found a way to make it work — two ways in fact, as shared in the book Brewed in America.
The easiest method was to bake copious amounts of corn bread. When it came time to make beer, the brewers would just toss the loaves right in the mash tun to make wort! This avoided the process of malting the maize, which turned out to be more difficult than malting barley or wheat.
For those determined to malt the local maize, they found that the best way to do this was to dig a large hole in the ground, wait for the corn to sprout, dig it all up again, wash it, then kiln it. Clearly these settlers were desperate for beer!
Even before the colonists arrived in the New World, chicha was brewed in South America among the Peruvian Incas. Dogfish Head’s Sam Calagione attempted a chicha, and while the end result doesn’t sound very authentic, it’s definitely entertaining to read about.Shop Steam Freak Kits
Of the craft brewers making beer with corn, one in particular stands out. Charlottesville, VA’s Starr Hill Brewing Company researched what Thomas Jefferson might have brewed at Monticello and developed a beer recipe for their limited release Monticello Reserve Ale. Flaked corn is used for a touch of sweet corn flavor, but it’s not at all overwhelming. The beer won a Silver Medal at the 2011 Great American Beer Festival.

Methods for Brewing Beer with Corn
Because corn has a higher gelatinization temperature than barley, it must be cooked prior to mashing. Malting corn is a difficult process and as a result, most brewers will use one of the three forms below:

  • Flaked MaizeFlaked maize can account for as much as 20-40% of the total grain bill, depending on the style. The corn is pressed through hot rollers, so the flakes can be added directly to the mash without prior cooking.Shop Barley Crusher
  • Corn Grits – Corn grits must be cooked in a separate vessel before being added to the mash. Otherwise, use them in the same way as flaked corn.
  • Corn Sugar – Most commonly used as priming sugar, corn sugar can also be added to the kettle to increase alcohol content without significantly affecting body, color, or flavor. I wouldn’t advise using more than a pound in a five-gallon batch, two at the most, otherwise your beer may become thin and cidery.

Interested in brewing beer with corn or maize? Consider the Brewer’s Best Cream Ale Recipe Kit.
—–
David Ackley is a beer writer, brewer, and self-described “craft beer crusader.” He holds a General Certificate in Brewing from the Institute of Brewing and Distilling and is founder and editor of the Local Beer Blog.

Using Finings In Beer For That Professional Look

Beer With Finings Used In ItProfessional brewers often filter their beers to make them clearer, but homebrewers can also achieve clarity without a filter. Enter: beer finings.
Using finings in beer will give it a brilliantly clear appearance. While clarity may not affect a drinker’s perception of aroma or flavor, appearance makes a key first impression when evaluating your homebrew.
Home brew beer finings work by electromagnetically attaching themselves to some of the materials which cause haze: protein, yeast, tannins. Sounds pretty science-y, I know, but you don’t need a Ph. D. to make clear beer! Here’s some basic instructions on using homebrew fining agents.
When considering different beer finings, there are two types: kettle finings and finings added to the fermenter. Both types may be used in combination within the same brew, but you may find that one or the other is adequate for your needs. Using three different finings in your beer is probably not necessary.

Type of Beer Fining Agents

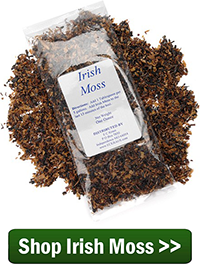
  • Irish Moss – One of the most common beer finings for homebrewers, Irish moss is a type of seaweed that contains something called carrageenan. It works by aiding in protein coagulation, helping protein settle out during the cold break (i.e. when wort is chilled). When using Irish moss as a fining in beer, the more quickly you can chill your wort, the more effectively the protein will settle out of suspension.
  • Isinglass – Isinglass has been used in the brewing industry for hundreds of years. It’s a collagen derived from the swim bladders of fish. Being positively charged, it attaches to negatively charged yeast and other particulates and helps them to settle out more quickly. Use isinglass at least 24 hours prior to bottling your homebrew.Shop Bottling Bucket
  • Gelatin – Similar to Isinglass, gelatin is a beer fining derived from animal collagen. It works by attaching to negatively charged yeast and protein, thereby increasing the size of the particle and helping it to settle out.

Since Irish moss is negatively charged and the collagen finings are positively charged, you may find that using them both produces good results. When using finings in beer, be sure to follow the instructions on the package and mix the fining agent appropriately. There’s no need to use more than is recommended by the manufacturer.

Other Tools for Clarification
If using finings in beer is something you are hesitant to do, you can still clear your beer with other methods:

  • Time – Given enough time, any particulate that’s more dense than beer will settle out eventually. Consider lengthening your secondary fermentation period to improve clarity. Time can often clear a beer just a well as any beer fining.
  • Temperature – Cold temperature helps protein and tannin particulate settle out. As little as a day of refrigeration can make a big difference in clarity.Shop Irish Moss
  • Filtration – If you’re in a rush, you can certainly save time by filtering your homebrew beer. These systems are not inexpensive, and you may need a draft system to push the beer through the filter.

Remember that some beers are supposed to be cloudy, in particular, hefeweizens and witbiers. You may wish to omit using finings in such beers. But for your pale ales, porters, and lagers, a bit of home brew beer finings may be just what you need for a crystal clear brew!
—–
David Ackley is a beer writer, brewer, and self-described “craft beer crusader.” He holds a General Certificate in Brewing from the Institute of Brewing and Distilling and is founder and editor of the Local Beer Blog.

The Difference Between Malt Extract vs All Grain Brewing

Pouring Malt ExtractOne of the eternal debates in the world of homebrewing is around the merits of malt extract vs all grain brewing. There’s no one-size-fits-all answer to the questions. Homebrewers who love to make beer the way the professionals do it prefer all grain brewing. Homebrewers with limited time, space, and equipment may find it easier to brew with malt extract. Though you will hear some people say that all grain brewing makes better beer, it is certainly possible to make great beer with malt extract, and conversely bad beer with all grain. Taste is not a concern here.
Whether you brew using extract or grain, it will ultimately be a decision based on your needs and constraints. Here are some of the primary differences between malt extract vs all grain brewing to consider when deciding which method to use in your home brewery:

Malt Extract Benefits

  • Faster: With extract brewing, there’s no need to wait 60 minutes for the mash. Just mix the extract with water and you’re ready to start the boil. If you play your cards right, you can be done with a brew in as little as two hours, including cleanup.
  • Easier: Again, with extract brewing, we skip the mash. That means no measuring pH and no measuring temperature.
  • Less equipment required: When brewing with malt extract, there’s no need for a separate mash tun. This can easily save the homebrewer a hundred dollars or more.
  • Less kettle capacity required: When brewing malt extract vs all grain, it’s typical to brew with a smaller kettle. Again, the smaller kettle makes extract brewing more economical for the budget brewer.

Malt Extract Drawbacks

  • Higher ingredient cost: You will likely pay more for the malt and hops when brewing with extract. Malt extract tends to cost more than the amount of grain needed to achieve the same gravity. Additionally, extract brewers often use a higher gravity boil. Due to the higher gravity of the boil, hop utilization decreases and it takes more hops to extract an equal amount of bitterness.Shop Liquid Malt Extract
  • More difficult to brew lightly colored beers: Between two beers brewed to the same original gravity, one extract, one all-grain: the extract brew will most likely be darker. This can make it tricky to get beers like wits, Kölsches, and hefeweizens to come out on the lighter end of the color spectrum.

All Grain Brewing Benefits

  • Ingredients cost less: As previously mentioned, you will probably spend less money brewing all grain vs malt extract when brewing the same beer.
  • It’s how the pros do it: If you have aspirations to be a professional brewer, you should learn how to brew all-grain. The mechanics of mashing is very important component of brewing great beer.

All Grain Brewing Drawbacks

  • Takes longer: A mash of 60 minutes or longer – plus the sparge – adds a significant amount of time to the brew day. If you’re tight on time, you may want to stick with malt extract.
  • More mess: The mash leaves behind a significant amount of wet grain. You have to account for the extra time required to dispose of the grains and clean the mash tun.Shop Barley Crusher
  • Requires more equipment: As mentioned earlier, all-grain brewing requires some additional equipment. The most economical way to get into all-grain brewing is Brew in a Bag.

There you have it: the pros and cons of malt extract vs all grain brewing. Whether you choose extract or all grain will depend on your cash flow, level of experience, and time availability. Regardless of the method you choose, be confident that you can brew great beers with great taste either way!
—–
David Ackley is a beer writer, brewer, and self-described “craft beer crusader.” He holds a General Certificate in Brewing from the Institute of Brewing and Distilling and is founder and editor of the Local Beer Blog.

10 Homebrew Beer Recipe Kits To Get You Through The Summer!

Beer Recipe KitAs the weather gets warmer, many homebrewers turn towards beers that are relatively light and refreshing – Russian Imperial Stouts are a bit heavy this time of year. Here are ten suggestions from our catalog of beer recipe kits that are perfect for warm weather homebrewing. Each recipe kit comes with all of the ingredients you need for a five gallon batch: fermentables, hops, yeast – even bottle caps!
(Remember – order any two or more beer recipe kits and save 10% on each one! Plus, as always, get free shipping on orders over $50!)

American Ales

  • American Amber – Ambers tend to be a little sweeter than pale ales, but still have a decent amount of hops. This beer kit uses all amber malt extract plus a pound of Caramel 80°L malt for added color and flavor. Expect a well balanced beer at about 40 IBUs and 5% ABV.
  • American Light – Need a “lawnmower beer” for post-yard work refreshment? A bit of corn sugar and rice syrup lighten the body on this one. For an even smoother beer, try lagering it by doing a secondary fermentation at colder temps than usual (40°-50°F). IBUs 13-16, ABV 4-4.5%
  • Pacific NW Pale Ale – A “West Coast” style pale ale that uses Centennial hops for bittering, and Cascade for flavor and aroma – the classic combination for American Pale Ales.
  • Double IPA – Out of these 10 beer recipe kits this is the one for the hop heads! Despite its high gravity (OG: approx. 1.070), this is a very straightforward beer recipe that’s easy to brew. With and IBU approaching 100 and alcohol approaching 7%, you’ll want to savor every sip!
  • Rye Pale Ale – A unique combination of specialty grains will make this a fun one. This is a pale ale with a twist — flaked rye lends a spicy character, balanced by honey malt, Munich malt, and hops. Practice both partial mash and dry hopping!Shop Home Brew Starter Kit

German Ales

  • Kölsch – A Kölsch is an ale from Cologne, Germany. It’s very light in color and moderately hopped, making it comparable to a Pilsener. 25-28 IBUs, about 4.5% ABV
  • Weizenbier – A Weizen is a Bavarian style wheat beer featuring banana/clove character from the yeast and low hops bitterness. I’d recommend upgrading to the Weihenstephan Weizen Yeast from Wyeast. It’s the same strain of yeast used by the Weihenstephan brewery in Germany, where they’ve been making beer for nearly a thousand years!

Lagers
These lager beer recipe kits will require more control over fermentation temperature than the ales. Fermentation should take place around 40° or 50°F, which for most people means a dedicated beer fridge. Also keep in mind that fermentation usually takes longer for lagers.

  • Munich Helles – “Helles” means “light” in German. This Munich lager is just a little lighter in color and a touch lower in IBUs than the Vienna Lager above.Shop Malt Extract Kits
  • German Pilsner – If you’re looking for something with a little body and still crisp you might take a look at this beer recipe kit. German Pilsners are known for their brilliant golden color and assertive bitterness that is accentuated by its dry finish.

You’ve got some choices ahead of you…what will you brew this summer? If these 10 don’t excite you then take a look at the other 70 or so beer recipe kits we offer!
—–
David Ackley is a beer writer, brewer, and self-described “craft beer crusader.” He holds a General Certificate in Brewing from the Institute of Brewing and Distilling and is founder of the Local Beer Blog.

Quick Guide To Brewing Beer With Herbs

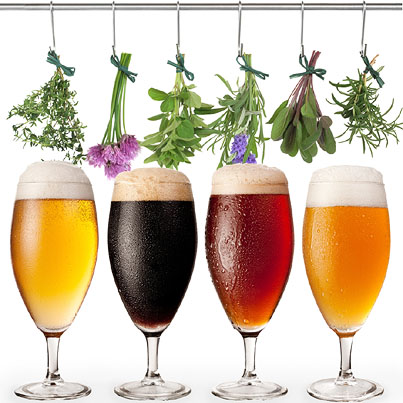
The results of brewing beer with herbs.Brewing beer with herbs is not some new fad, a product of the recent craft beer boom. Before hops were popular (we’re talking hundreds of years ago), a wide variety of herbs and spices provided the bittering and flavoring characteristics to balance beer’s malty sweetness. Brewing beer with herbs was the norm. By adding herbs in your own homebrew, you can recreate ancient styles of beer (such as Sahti and Scottish Gruit) and also exercise your creative spirit to develop something entirely new. Below are just a short list of herbs, flowers, and other plants that can be used, alone or in combination, to contribute a unique flavor profile to your homebrew:

  • Basil
  • Betony
  • Birch
  • Borage
  • Chamomile
  • Coriander
  • Dandelion
  • Elderflowers
  • Ginger
  • Ginseng
  • Heather
  • Horehound
  • Juniper
  • Lavender
  • Lemon Balm
  • Licorice
  • Mint
  • Nettles
  • Oregano
  • Rhubarb
  • Rosemary
  • Sage
  • Savory
  • Thyme

When thinking about how to use herbs in homemade beer, add them in the same way as we do hops. These herbs may be added early or late in boil (depending on whether you’re looking for more bitterness, flavor, or aroma) or to the secondary fermenter, just like with dry hopping. One thing to keep in mind when brewing beer with herbs is that the herbs tend to be more delicate than hops. Many of them don’t need to be boiled as long as hops in order to extract bitterness and flavor.
You can pick these herbs from your own garden, or buy them from the store. Many herbs are available as tea blends, the tea bags making it east and convenient to strain out the herbs.
When developing an herb beer recipe, think about what flavor characteristics work well with the base beer. The herbs should complement the style characteristics, rather then dominate them. (Consult the BJCP guidelines for style 21A for more detailed information.) If brewing a gruit, forgo the hops. Other base beer styles, such as pale ale and wit, can be given an interesting twist by incorporating herbs in addition to the hops.Shop Beer Flavorings
To help start you out brewing beer with herbs, here is a pale ale recipe using oregano. Feel free to substitute basil, rosemary, and other herbs as desired.

Oregano Pale Ale Recipe (5 gal):
OG: 1.054
FG: 1.011
ABV: 5.6%
SRM: 11
All-grain:
8 lbs. Two Row Malt
1 lb. Munich Malt
1 lb. Caramel 40L
Partial Mash:
6 lbs. Golden Light Extract
1 lb. Munich Malt
1 lb. Caramel 40L
Hops:
1 oz. Northern Brewer @ :60
1 oz. Centennial @ :30
0.5 oz. Tettnanger @:15
0.5 oz Tettnanger @ :5
Other:
0.25-1 oz. of fresh oregano* @ :15
1 tsp. Irish Moss @ :15Shop Steam Freak Kits
Yeast:
Wyeast 1056 American Ale Yeast**
*The oregano can contribute a lot of bitterness and flavor. Up to a full ounce of fresh oregano may be used, but may need to be aged depending on your taste preferences.
**For best results, prepare a yeast starter.
Have you ever tried brewing beer with herbs before? How did it turn out? Do you have an herb beer recipe you’d like to share? Put it in the comments section below.
—–
David Ackley is a beer writer, brewer, and self-described “craft beer crusader.” He is a graduate of the Siebel Institute of Technology’s “Start Your Own Brewery” program and the Oskar Blues Brew School in Brevard, NC.

Late Addition Malt Extract & Late Addition Hops

Late Addition Brewing IngredientsThere are plenty of ways to impact the aroma and flavor of your beer: the beer yeast you choose, additives, and especially malt and hops. But one important “ingredient” that can impact how your beer turns out is often overlooked – time.
In recent years, two methods to create the most optimum homebrew have become popular. For homebrewers using extract, the late addition of malt extract can benefit both the taste and color of your beer, regardless if it is dried malt extract or liquid malt extract. Similarly, any homebrewer can utilize a “hop bursting” technique of late addition hops that’s becoming commonplace for many of the most popular IPAs you’ll find in your bottle shop.
So why switch up your brew day schedule? What are the benefits of late additions? Let’s break it down.

Late Addition Malt Extract (DME/LME)
Whether you’re an extract brewer or an all-grain brewer using malt extract to aid with high gravity beers, waiting until the end of your boil to add all the malt extract may help you perfect your brew.
The benefit of add your malt extract late in the process is simple – it’ll provide greater clarity to your beer as well as increase hop utilization. How those steps take place is a bit more complicated.
To make the best use of malt extract, add 15 to 25 percent at the start of your boil, as your beer recipe instructions tell you to do so. However, by saving the remaining amount to add at the end of your boil, you’re able to avoid a Maillard reaction, a caramelization that leads to the darkening of your beer. Essentially, it’s what happens when sugars get stuck in your pot and begin to harden because of heat. This principal is the same whether you are using liquid malt extract (LME) or dried malt extract (DME).Shop Dried Malt Extract
An added benefit of late addition malt extracts is that they also improve the utilization of hops, allowing for more bittering to come through. This may be a good or bad thing, depending on what beer recipe you’re making and how you prefer your beer to taste.
Late malt extract additions should be added anywhere from when you have 15 minutes left in the boil to flameout. Just turn off your heat source and mix everything in thoroughly before turning the heat back on. If you wait until flameout, the wort will still be hot enough to sanitize everything.

Late Addition Hops
One way to increase hop flavor and aroma and avoid excessive hop bitterness is a technique called “hop bursting.”
The premise is simple: use little or no hops at the beginning of your boil, saving nearly all of them for the “flavoring” and “aroma” addition times at the end of the boil. By doing so, you decrease the alpha acid utilization that adds bitterness and increase the use of oils that lead to fruit, citrus and pine flavors and hop aromas you love so much.
This is particularly important, as the characteristics of late addition hops will greatly impact your senses, especially smell. Even though your tongue helps you out when you taste beer, the sense of smell really helps to drive how you perceive flavors.
Shop HopsA proper hop bursting technique consists of adding hops from 15 minutes left in the boil to after flameout. Remember that the later you add hops, the stronger the aroma. Popular American hop varieties like Simcoe, Amarillo, Cascade, Citra or Centennial will give you a great combination of flavors. Think of hop bursting as an ideal complement to dry-hopping your beer, which also provides strong smells.
If you want an idea of how late addition hops can make a beer taste, try picking up brews made by Stone. Most notably, their popular “Enjoy By” series of IPAs uses hop bursting techniques to create some of the strongest, tastiest hop flavors I’ve ever experienced in a beer.
Half the fun of homebrewing is the potential for experimentation, timing is just one more dynamic that can be toyed with and mastered, so try doing some late addition malt extract and late addition hops, and see how they can work best for you. They may be the key to unlocking your next great homebrew, especially if you’re a hop-head like me!
—–
Bryan Roth is a beer nerd and homebrewer living in Durham, North Carolina. You can read his thoughts on beer and the beer industry on his blog, This Is Why I’m Drunk, and send him suggestions on how to get his wife to drink craft beer via Twitter at @bryandroth.

What is Diastatic Power?… Definition and Chart.

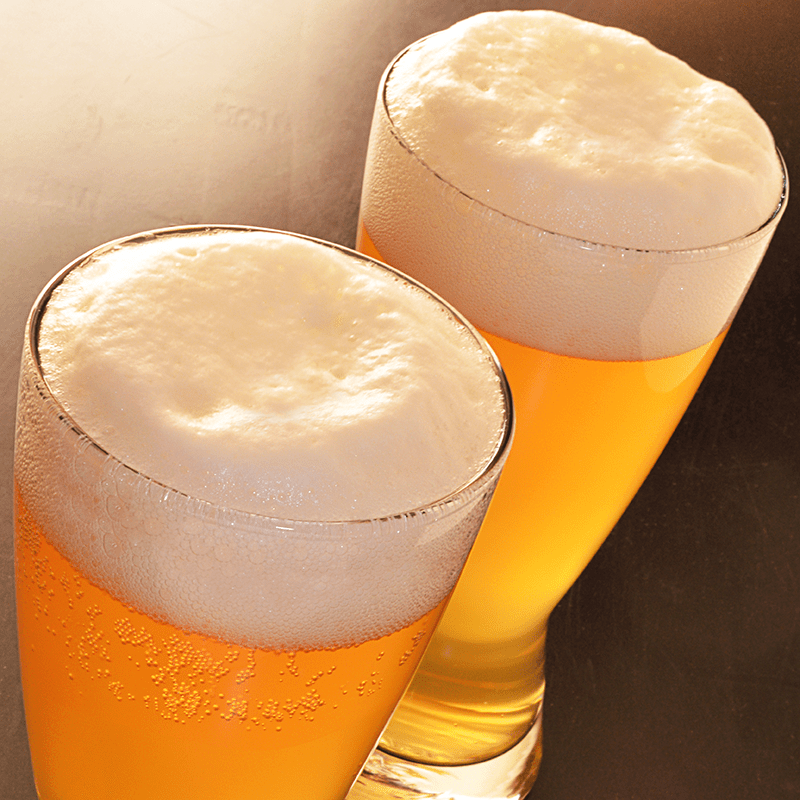
Barley With Diastatic Power In Beer MugIf you’ve been brewing for a while, you’ve probably come across the term “diastatic power” when exploring different malts and learning how to mash. What is diastatic power? What’s the big deal?
A good “diastatic power” (DP) definition would be that it is a measurement of a malted grain’s enzymatic content. When grain is malted, enzymes are produced during germination. These enzymes are responsible for converting the grain’s starches into sugar during mashing. Diastatic power is an indicator of the amount of enzymes available to convert those starches into sugar.
In the US, diastatic power is generally measured in degrees Lintner. Malts with enough DP to convert themselves are at least 30 degrees Lintner; base malts can reach as high as 180 or more. That covers the question as to “what is diastatic power“. Now here’s some actual numbers to take a look at.
Here is a diastatic power chart for some of the more common malted grains:

            Malt                             Degrees Lintner

Briess Red Wheat Malt                    180
Briess White Wheat Malt                 160
Briess Two-Row Malt                      140
Briess Pilsen Malt                            140
Briess Vienna Malt                          130
Briess Rye Malt                               105
Briess Munich Malt 10L                      40
Briess Caramel 20-120                        0
Briess Chocolate Malt                          0Shop Barley Grains
Briess Black Malt                                 0

For most all-grain beer recipes with a substantial amount of base malt, diastatic power isn’t going to be a major issue. DP comes in to play when brewing with a high proportion of specialty malts or unmalted adjuncts. There needs to be enough DP to not only convert the starches in the base grains, but in the specialty malts as well. One of the reasons American adjunct lagers are so high in two-row malt is that the extra DP is needed to convert the adjunct starches into sugar.
Diastatic power is also important when brewing partial mash. Take for example the grain bill for a partial mash recipe such as this one:
6.6 lbs. Light LME
1.5 lb. Caramel 40L
1 lb. Munich Malt (10L)
We know that the Caramel 40L contributes no diastatic power and the Munich only 40 degrees Lintner. The DP available to convert this mini-mash (simply the average by weight of the grains) is only about 16. This is far below the minimum recommended value of 30. Some recommend aiming for 70. In short, the higher the average DP, the more likely your chances are of a successful starch conversion.
There are several possible solutions for the example above:

  1. We could replace the Munich with Vienna malt without a huge impact on flavor and bring up the average diastatic power to 52.
  2. Alternatively, we could add 1 lb. of two-row barley malt to the mini-mash, bringing the average diastatic power to 52, as well.
  3. We could also “cheat” by adding a small amount of diatase enzyme.Shop Barley Crusher

The point is, all it takes is a little tweaking to help make sure the mash has enough DP to convert. The good news is that with a partial mash recipe, the mash represents such a small proportion of the overall gravity that it won’t make a huge difference if it doesn’t. Most of the gravity points will come from the LME.
The next time you brew, calculate your diastatic power and record your brewhouse efficiency. Did you have enough DP for a successful conversion? These are all advantages to know the answer to the question, what is diastatic power.
—–
David Ackley is a beer writer, brewer, and self-described “craft beer crusader.” He holds a General Certificate in Brewing from the Institute of Brewing and Distilling and is founder and editor of the Local Beer Blog.