7 Tips For A Healthy Homebrew Fermentation

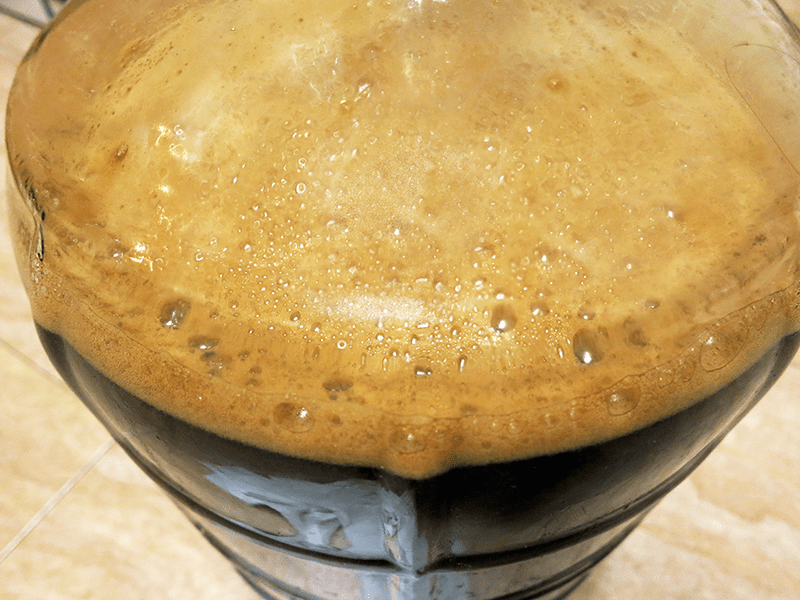
Healthy Homebrew FermentationIf malt is the heart, or the backbone, of beer, then yeast is its soul. While malt is responsible for flavor, color, and body, and hops for bitterness, yeast often contributes many subtle and sometimes incredibly complex nuances to beer. Without yeast, beer would not exist as we know it.
It stands to reason then that in order to make good beer we should do everything we can to make sure we are having a healthy homebrew fermentation with each batch we make.
Yeast is a living, breathing microorganism that responds to stresses or challenges it faces during storage and fermentation. In some cases, and for some beer styles, it’s actually beneficial to stress the beer yeast, but more often than not, it’s critical to make sure that the yeast is happy and that you have a healthy homebrew fermentation with little stress on the yeast.
In fact, good yeast management is one of the best ways to improve the quality of your homemade beer. Having a healthy homebrew fermentation is what it is all about.
Below are 7 tips for making sure that your homebrewing yeast is happy, healthy and well cared for:
  1. Shop Liquid Beer YeastUse fresh yeast – All living things die eventually, and beer yeast is no exception. Over time, the yeast loses its viability, so it’s important to use the freshest beer yeast you can when homebrewing. Otherwise, what few living yeast cells might remain in the package will have a very hard time fermenting your beer, possible resulting in a stuck fermentation. Dry yeast is best used within 1 to 2 years of the packaging date. Liquid yeast is best used within about three months of the packaging date. Check the yeast package for this information to make sure you’re brewing with a fresh yeast culture.
  1. Check your pitch rates – The pros recommend pitching a specific amount of beer yeast depending on the gravity and the style of beer being made. In general, a pack of dry beer yeast that has been stored under the right conditions has enough yeast cells for a beer of moderate gravity. Lagers and high-gravity beers require more yeast. If brewing with liquid yeast it’s usually recommended to use a yeast starter (see below) and/or to pitch multiple packs of yeast.
  1. Make a yeast starter – This is an easy and effective way to help insure that you’ll have a healthy beer fermentation. A yeast starter will help to guarantee that there are enough healthy yeast cells for fermentation. Read our blog post on yeast starters to learn how to make one.
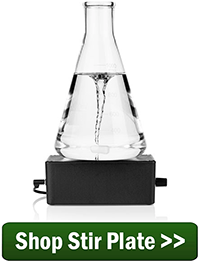
  1. Shop Stir PlateUse a stir plate – A stir plate helps make yeast starters healthier by infusing oxygen into the starter, giving the yeast what it needs in order to grow and multiply. It’s a really cool device that spins a magnetic stir bar inside a flask or jar, driving out CO2 and at the same time making oxygen available for the yeast. It’s a really good investment that will pay off through many happy, healthy fermentations.
  1. Use yeast nutrient – Though yeast nutrient is not essential to making beer, every professional brewer I know uses it. Yeast nutrient simply provides some of the nutrients that support a healthy fermentation. It is typically added during the last 10 to 15 minutes of the boil, usually right along with Irish moss or another kettle coagulant. It can also be added to the secondary fermenter to help resolve a slow or stuck fermentation.
  1. Oxygenate the wort – After yeast is pitched, it goes through an aerobic growth phase called respiration. Oxygen is critical to this step of the process. For this reason, aerating the wort by stirring it very vigorously can go a long ways in helping your beer have a healthy fermentation. Just give the wort a good stir right before you pitch the yeast. Even better, invest in an oxygenation system to pump pure oxygen right into the wort.
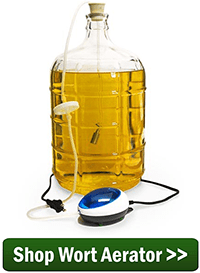
  1. Shop Wort AeratorControl fermentation temperature – After making sure that the yeast that goes into your beer is up to the task, keep it happy by maintaining a steady fermentation temperature within the recommended range for whatever strain of beer yeast you’re using. Ales do best in the ballpark of 65-70˚F., while lagers require temperatures between 45 and 55˚F. Either way, some techniques for controlling homebrew fermentation temperature will serve you and your yeast well for many batches to come.

Using some or all of the techniques above will encourage your brews to have a healthy homebrew fermentation and help you make the best beer possible.

What techniques do you use to keep your homebrew yeast happy?
—–
David Ackley is a beer writer, homebrewer, and self-described “craft beer crusader.” He holds a General Certificate in Brewing from the Institute of Brewing and Distilling and is founder of the Local Beer Blog.

A Quick Way To Learn Hop Aroma Profiles

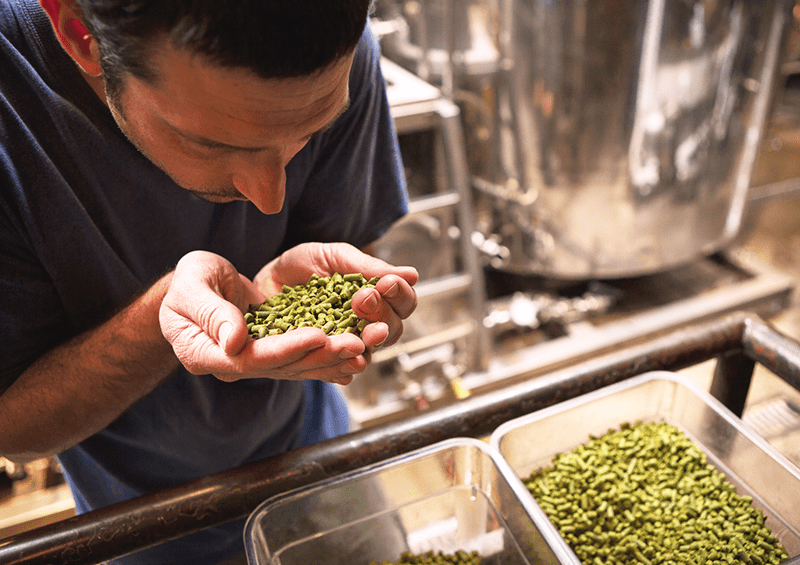
Smelling Hop Aroma ProfilesOur friend Bryan Roth recently shared some of the reasons that experimenting is a good homebrewing habit. In that pioneering spirit, here’s an experiment that will help you learn about how different hop aroma profiles and how they affect your beer.
A quick refresher:
Hops have essential oils that contribute to beer aroma. When added at the end of the boil or to the secondary fermenter, these oils can develop aromas described as citrus, pine, spice, dark fruit, herbal, or floral, to name a few. A hop aroma wheel can be a useful tool for selecting appropriate hop varieties, but the best way to learn the different hop aroma profiles and what they can offer to your homebrew is to actually brew with them.
That said, with an endless number of hop varieties out there and more being released all the time, it could take years to brew all the beers it would take to get a complete understanding of different hop aroma profiles. In the experiment below, you can brew one batch of beer, then split it up after fermentation to dry hop with different hop varieties. This will expose you to different hop aroma profiles 5 times as fast as using a single hop variety.

The Experiment Shop Hops

You will need:

Here’s how it works:

  1. Brew one batch of beer, but only use the first bittering addition during the boil.
  2. After primary fermentation, divide the batch into five, 1-gallon jugs and dry hop each jug with about 1/4 to 1/2 oz. of each hop variety. The exact amount isn’t as important as making sure you use the same amount for each 1-gallon batch. A typical dry hopping period lasts about 5-7 days.
  3. Bottle the beers, being sure to identify which are which.Shop Hop Bags
  4. When the beer is ready, do a tasting session to identify the different hop aroma profiles and characteristics presented by each hop. Maybe try a blind tasting to figure out which is your favorite. Was it the one you expected?
  5. Share the beers with friends to see if they agree with your assessments. What seems like a pleasing citrus aroma for one person may be unpleasant for someone else.
  6. To take it a step further, try blending the beers to get a sense of what hop varieties work well together.

Learning the characteristics of your homebrewing ingredients is one of the best ways to become a better brewer. With experiments like this one, you can accelerate your way to becoming a true hop aficionado.
Have you tried some experiments with hops? Did you learn anything about hop aroma profiles?
—–
David Ackley is a beer writer, brewer, and self-described “craft beer crusader.” He holds a General Certificate in Brewing from the Institute of Brewing and Distilling and is founder of the Local Beer Blog.
Use Alternative Priming Sugars For A New Twist

Priming sugar used in homebrewingAfter fermentation is done, but before the beer hits my glass, my brew sits away in a corner of a small closet – dozens of sudsy brothers and sisters conditioning away.
Depending on the style of beer I’ve brewed and its ABV, the wait time for all those bottles to fully prime can vary. So can your method for adding priming sugar to your brews.
The sugar you use for priming your beer is not chiseled in stone. For homebrewers like me, priming a batch of beer before bottling offers some variation in what to use if you want to step away from regular, old corn sugar or DME. Here are a few alternative priming sugars to consider for your next bottled batch:

Carbonation Tabs
For sake of ease, these small, pill-like drops are my go-to option for bottling my homebrew. I love carbonation tabs because they are as easy as placing one drop into each bottle right before I transfer my finished beer to its final vessel. The best part: it takes the worry out of the conditioning process as I’ve never had a problem with an under or over-carbonated beer when I’ve used these. That makes these one of the better alternative priming sugars.Shop Bottling Bucket
Some brands of carbonation tablets will have small drops the size of an aspirin and others will be oblong like a tiny football. They all work the same, but some brands may simply require one drop for ideal carbonation levels while you can use multiple small pills to adjust carbonation with other brands.

Honey
Some alternative priming sugars, like honey, offer the chance to add a little extra layer of flavor to your beer. Curious to see what it may offer your next brew? Try it with a wheat beer, which might work nice if you’ve added fruit during fermentation, too.
To add a little extra sweetness to your homebrew at bottling time, use 1 cup of honey per 5 gallons. Mix the honey with a little warm water to thin it out to make sure it blends in with your beer.

Maple Syrup Shop Bottle Washer

Making a brown ale? Consider experimenting with maple syrup for your priming sugar to mash up flavors perfect for a cold fall or winter night. Whether it’s grade A or B, use 1 1/4 cup for a 5-gallon batch and again, mix it with some water to dilute the syrup. As with any of these alternative priming sugars, it’s easy to over-carbonate if you add too much. Also check out this Maple Scotch Ale homebrew recipe.

Brown Sugar/Molasses
When talking about alternative priming sugars, one cannot leave these two out. Both of these options would work great for a porter or stout. Imagine that little extra bit of deep, earthy sweetness mixing with the roasted and chocolate flavors of those styles – a great mix for a holiday beer!
Shop Bottle CappersThe benefit of brown sugar as a priming sugar is it can be used in the same fashion as cane sugar – boil 2/3 of a cup with two cups of water for a 5-gallon batch, then mix it in before bottling.
If you’re using molasses, use 1 cup with boiled water per 5 gallons and make sure this super-thick liquid breaks down a bit. You don’t want a mess on your hands.

Priming Sugar Calculator
If you’re ready to change up your priming routine, one great resource is this priming sugar calculator from HomebrewDad.com. It has a variety of sugars listed that you can choose when using alternative priming sugars . This calculator will offer up specific amounts depending on your exact volume of beer, desired carbonation levels, and more.Shop Fridge Monkey
Happy Brewing!
—–
Bryan Roth is a beer nerd and homebrewer living in Durham, North Carolina. You can read his thoughts on beer and the beer industry on his award-winning blog, This Is Why I’m Drunk, and send him suggestions on how to get his wife to drink craft beer via Twitter at @bryandroth.

Using High Alpha Hops For Bittering

High Alpha HopsWhile noble hops are revered for their delicate aromatic qualities and are lower in alpha acid content, high alpha hops (or “super alphas”) offer maximum bittering potential per ounce. Super high alpha hops will have 10% AA or higher, some into the high teens!
What this means for the budget-minded brewer (and who isn’t?), is that you can get the same amount of bitterness using less hops with a high alpha hop than with a lower alpha acid hop. This not only saves money, but also reduces the amount of trub in the kettle and the volume of beer lost in the trub. Here’s an example of how to do a hop substitution:
Hop A has an alpha acid content of 5%. The beer recipe calls for one ounce. Hop B has an alpha acid of 10%. You can use half an ounce of Hop B to end up with the same amount of bitterness and IBUs.
This being said, not all alpha acids are created equal. Cohumulone is a type of alpha acid that tends to present a harsher bitterness, so it’s important to key an eye on the percentage of cohumulone when switching out one type of hop for another. Otherwise, you may change the quality of the bitterness in your beer from something clean or soft into a bitterness that’s harsh or biting. A hop acid chart can be helpful in identifying typical cohumulone content, but the best thing to do is experiment and gauge for yourself what hops provide the qualities you enjoy.
A rule of thumb: these super high alpha hops seem to do best in bigger beers – beers with lots of flavor. For more delicate beers, use the lower alpha acid hops.

Without further ado, here are some of the most popular super high alpha hops used by homebrewers:

  • BravoShop HopsBravo is sometimes called a “super Cascade.” It’s a good bittering hop with desirable flavor and aroma characteristics described as fruity and floral. (14-17% AA)
  • Chinook – Chinook is a classic American bittering hop. When used in later hop additions, it gives an herbal, somewhat smoky character. (12-14% AA)
  • Citra – Citra is one of the more popular varieties of high alpha hops. In addition to the high alpha acid content, Citra offers flavors and aromas of grapefruit, melon, and tropical fruit. (11-13% AA)
  • Columbus – Columbus is one of the high alpha hops with flavor and aroma characteristics described as oniony, citrusy, and resiny. Sometimes called Tomahawk. (14-16% AA)
  • Galena – A clean bittering hop that’s well suited for a variety of styles. (10-14% AA)Shop Accurate Scales
  • Horizon – Good for hop-forward beers like pale ales and IPAs. When used for flavor and aroma additions, it lends herbal, earthy, and spicy characteristics. (11-13% AA)
  • Millenium – Released in 2000, Millenium is a cross of Nugget and Coumbus with floral, resiny, and spicy characteristics. (14.5-16.5% AA)
  • Simcoe® – Simcoe is another of the high alpha hops from the Cascade hop family. Its strong piney characteristics make is popular in IPAs and double IPAs. (12-14% AA)
  • Sorachi Ace – Sorachi Ace is a cross between Brewers Gold and Saaz. It has a distinct lemony quality. (10.5-12.2% AA)
  • Summit – Summit is one of the highest of all the alpha hops with citrus characteristics. (17.5-19% AA)Shop Steam Freak Kits
  • Warrior – Warrior is a newer bittering hop with very high alpha acid content. Flavor and aroma desribed as grapefruit, lemon, and pine. (14-16% AA)
  • Yakima Magnum – Yakima Magnum is a clean and versatile bittering hop derived from the German-grown Magnum hop. (12-14% AA)
  • Zythos – Zythos is a blend of popular American hops, featuring notes of pineapple, tropical fruit, and a touch of pine. (10-12% AA)

What are some of your favorite super high alpha hops and why? Share in the comments below!
—–
David Ackley is a beer writer, brewer, and self-described “craft beer crusader.” He holds a General Certificate in Brewing from the Institute of Brewing and Distilling and is founder and editor of the Local Beer Blog.

Base Malt Guide: Descriptions & Comparisons

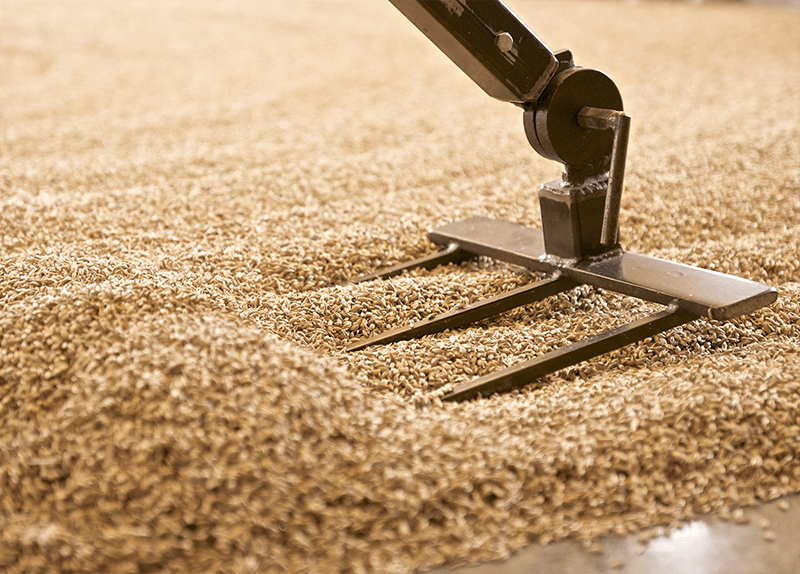
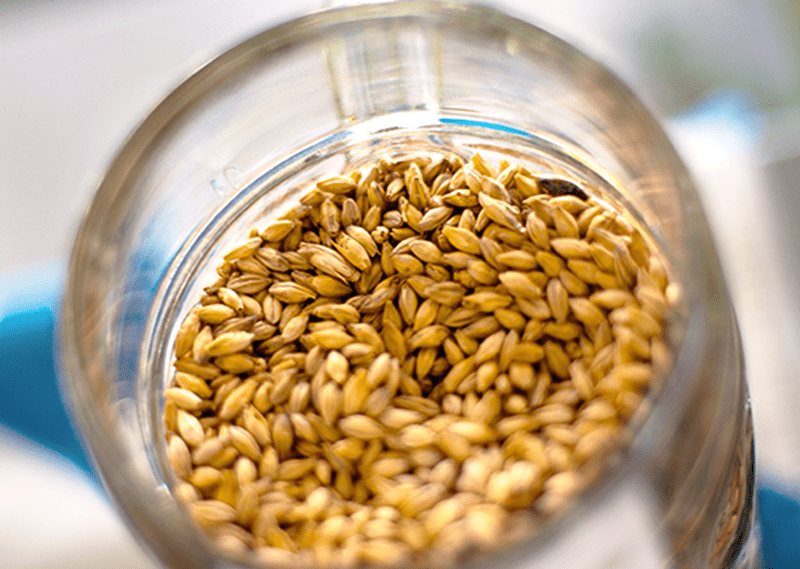
Base MaltBase malt is the term we use to refer to the majority of the malted grains used to make beer. Base malt typically forms between 70% and 100% of the malt used in a given homebrew recipe. Base malts are certainly used by all-grain brewers, but also by partial mash and extract brewers who may want to add some diastatic power to their mash or additional grain flavor to their beer. One or more types of base malt may be used in a beer, often complemented by a range of specialty malts for additional flavor, body, and other characteristics.

All base malts are typically:

  • Made from barley. (Though beers can be made from 100% malted wheat or rye, these are generally considered adjunct grains.)
  • Light in color.
  • Kilned at a low enough temperature to maintain the diastatic power of the malt.

Below is a base malt guide with descriptions and comparisons. It’s a list of the most popular base malts used in home brewing. Also provided is a brief profile of each one:

  • Two-row malt – Two-row base malt is made from two-row barley, which typically features plump kernels and a high starch to protein ratio. Light in color at 1.8˚L.Shop All Grain System
  • Pilsner malt – This base malt is the lightest colored malt available (1˚ Lovibond). It works well for very light lagers and ales. Its profile makes it a suitable base malt for brewing just about any style of beer, but it is a must when making a pilsner lager.
  • Pale or mild ale malt – As a comparison, pale malt is kilned at a slightly higher temperature than pilsner malt, giving it a slightly darker color (2.5˚L) and a maltier flavor. It’s a good option for just about any ale recipe, especially pale ale, IPA, brown ale, porter, and stout.
  • Vienna malt – Vienna malt is another step above pale malt in terms of darkness (3.5˚L). It’s a great option for Vienna lagers, Oktoberfest, and other amber lagers.
  • Munich malt – This base malt is the darkest malt that still has diastatic power. Its flavor profile is has rich, malty flavor reminiscent of bread crusts. As much as 100% Munich malt may be used in some types of German-style dark lagers, such as bocks and Munich dunkel. 10-20˚L.

Shop Barley GrainsThis is not a complete base malt list, but these are by far the most common ones with some descriptions and comparisons. As you can see each one has its own profile, including comparisons and contrast with each other. With these simple variations alone, you can begin creating a world of beers.
Want to learn more about the differences between the different base malts? Try this experiment: Brew five, one-gallon, single-malt beers using the same amount of malt, the same yeast, and the same hopping schedule. How are the beers different?
—–
David Ackley is a beer writer, brewer, and self-described “craft beer crusader.” He holds a General Certificate in Brewing from the Institute of Brewing and Distilling and is founder and editor of the Local Beer Blog.

Homebrew Experiment: Adding Gypsum To Beer To Affect Flavor?

Adding Gypsum To BeerI recently dove head on into the world of water treatments for homebrewing. I’ve always made changes to my brewing water to control mash pH, but I decided it was time to look at water from a historical/regional perspective to see exactly how does gypsum affect beer flavor. Gypsum, also known as calcium sulfate, is a major component in many of the brewing water profiles used around the world. But, does adding gypsum to beer really make a difference in flavor?
Let’s back up for a moment to review one of the ways water and its mineral content, or hardness, can impact your homebrew’s flavor. Different regions of the world have different mineral compositions in their brewing water supply. These differences can be significant. Just look at the levels (ppm) of these common minerals in Burton-on-Trent (UK) vs. Plzn:

Burton-on-Trent

Plzen

Calcium

294

7

Carbonate

200

15

Chloride

36

5

Magnesium

24

2

Sodium

24

2

Sulfate

800

5

*Source: Homebrewing for Dummies

In these two examples, it’s believed that the high sulfate water of Burton-on-Trent led to the development of bitters and pale ales, whereas the soft water of Plzen in Bohemia (now the Czech Republic) was suited to the creation of crisp, clean lagers. Homebrewers have the ability to mimic regional brewing water profiles by adding gypsum to beer along with others such as calcium carbonate.
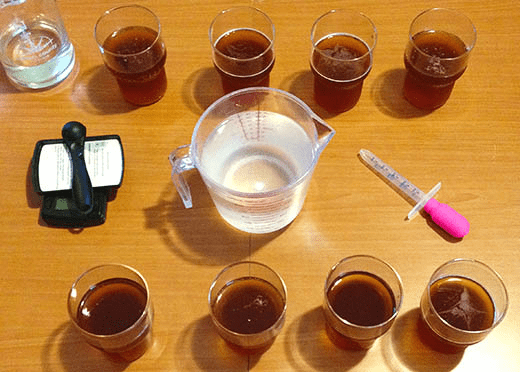
Having just brewed and English Bitter, I was curious how a Burton brewing water profile might affect the flavors in the beer. After doing some research, I came across an experiment to help gauge the effects of a mineral salt on a beer. It goes like this:Shop Gypsum

  1. Prepare concentrated solutions using the mineral salt in question. For my test, I’m using gypsum. I started with filtered or distilled water and add measured amounts of the salt in one-gram increments into 500ml or 1L volumes of water.
  1. Measure out equal beer samples. Be sure to use a consistent volume and record it in your notes.
  1. Add 1 ml of each solution to the different samples. After doing the first round of taste tests, you might try adjusting the concentration of the solution.
  1. Take notes on how the flavor changes and find your ideal adjustment. Be sure to have some water and possibly some unsalted, relatively bland crackers or bread between each sample to cleanse your palate.
  1. Calculate how much salt would be needed for a full volume batch of beer.

So how did my experiment go? Did adding gypsum to beer affect its flavor?
Initially, the concentration of gypsum I was adding to the beer was too low to make any difference. I started with a 1 gram gypsum/500 mL water solution. Adding 1 mL of said solution to a 125 mL sample of beer only increased the effective concentration of by 1.6 ppm – an imperceptible change for my palate. As you can see, it would take a very concentrated amount of gypsum/water solution to simulate the Burton water profile. What I ended up doing was stirring about .5 gram of gypsum into a .5 L sample of beer to come close to the level of Burton water in the English bitter. Using this concentration of gypsum absolutely affected the beer’s flavor. The hops went from a background bitterness to a full floral sensation that covered the whole mouth. I will definitely use more gypsum in future pale ales.
Shop Digital pH MeterUsing the method above you can begin to get a stronger understanding of how to adjust your brewing water. Just remember different salts affect beers in different ways, and different styles may lend themselves to different mineral concentrations. Experiment, test, record your results!
While the above experiment does give us some ideas as to how adding gypsum to beer affects its flavor, it does leaves some questions. In particular, how does mashing and boiling the hard, gypsum-infused water throughout the brewing process affect the perception of different flavors?
What is your take on the subject? Share in the comments below!
—–
David Ackley is a beer writer, brewer, and self-described “craft beer crusader.” He holds a General Certificate in Brewing from the Institute of Brewing and Distilling and is founder of the Local Beer Blog.

Some Hot Info For Brewing Beer With Coffee

Coffee Beans For BrewingI used to drink coffee, but haven’t had the stuff in years. I loved the aroma and flavor, but hated depending on it to function in the morning.
These days, the only time I drink coffee is when it’s in my beer.
Coffee porter, coffee stout … I’ve even had a coffee IPA. For fans of both beer and the caffeinated drink, there are lots of great options. So how can you mix the two for homebrewing? It’s easier than you think.

Choose a Style
The first step for brewing a beer with coffee is determining what kind of base style you’d like to use. These days, brewers are all over the map with what kind of beer they’ll add coffee to, but classic examples include Founder’s Breakfast Stout, brewed with Sumatra and Kona coffee, and Kona’s Pipeline Porter, which uses Kona coffee as well.
You’ll often see coffee beers use a malt-forward base, as coffee flavors match the profile of roasted barley and chocolate malt very nicely. There are a lot of great stout and porter kits you can use as your base, but consider an imperial stout or robust porter for ideal pairings.
That said, experimentation is the beauty of homebrewing, so maybe an American pale ale with coffee is more up your alley. When it comes to brewing beer with coffee everything is open to one’s own interpretation.

Pick a Coffee
Once you know the style of homebrew you’d like to use, you’ll want to pick a coffee that matches nicely. Not all coffee beans are the same.
Coffee PorterTechnically speaking, any style of coffee will work, but you may have specific tastes or even strength you prefer. Espresso will be much stronger in perceived coffee flavor than a “cinnamon roast” coffee bean, which might offer more nut-like flavor. The National Coffee Association has a great list of roasts – from light to dark – that may help you find the kind you want.
One thing to be aware of when brewing beer with coffee is the oil content of beans, as it may impact head retention and mouthfeel of your homebrew. Depending on the beer style you’re using, that may or may not be an issue. An imperial stout, for example, isn’t as reliant on a big stack of foam as a pale ale.

Adding Coffee To Beer

Depending on the intensity of coffee flavor you seek, you may be interested in adding coffee to your boil, but the best way to get that roasted taste is in secondary fermentation. To maximize flavor without too much astringency, try cold brewing coffee.
Making a cold brew coffee is easy. Take a cup of ground beans and mix with four cups of cold or room temperature water. Let it sit for 12 to 24 hours, strain the coffee grounds from the water and you’re set. You’re left with less acidic, more flavorful coffee.
Shop FermentersKeep in mind the risk for infection is fairly low as long as you properly sanitize whatever the cold brewed coffee touches.
As an alternative, you could also place ground coffee beans into a muslin bag and steep them like a tea for up to seven days in your secondary. Just make sure to sample your beer as the ground beans steep to make sure you achieve the right amount of flavor you’re looking for.
Ready to start brewing beer with coffee? Check out the Captain Cogsworth Coffee Stout, which has all the ingredients prepared for you.

Bryan Roth is a beer nerd and homebrewer living in Durham, North Carolina. You can read his thoughts on beer and the beer industry on his blog, 
This Is Why I’m Drunk, and send him suggestions on how to get his wife to drink craft beer via Twitter at @bryandroth.

A Quick Look At The Different Types Of Specialty Malts Used To Make Beer

Specialty Malt For All Grain BrewingWe recently covered a number of popular base malts, which form the majority, or foundation, of a given all-grain beer recipe. Most homebrew recipes will incorporate a small to moderate amount of specialty malts to give the beer additional character, color, and flavor. Every specialty malt has its own unique characteristics that it adds to a beer, which may be used alone or combined with other specialty malts to create a certain malt profile.
So what are some of the most popular specialty malts used in beer? Here’s a rundown of the descriptions of the different types of specialty malts you might use for partial-mash or all-grain brewing.

Most specialty malts are made from barley grain, but these first two are made from wheat and rye.

  • Wheat malt – Wheat malt is an adjunct grain that provides bready wheat flavor, body, head stability, and diastatic power, with little impact on color. A little may be added to ales and lagers, or a larger portion may be the backbone of a German weizen. If using a substantial amount of wheat, rice hulls are recommended to prevent a stuck mash.
  • Rye malt – Rye malt can be used in many of the same ways as wheat malt, but provides a distinctly different flavor, often described as spicy. Think of the flavor difference between wheat bread and rye bread. Rye also contributes body, and sometimes a mouthfeel described as oily or slick. Most rye pale ales will only use about 10-20% rye malt, while a German roggenbier may use as much as 100%.

All of the descriptions below are for the different types of specialty malts used in beer that are made from barley grain:

  • Carapils® malt – Carapils®, or dextrin malt, is a very lightly colored malt used to increase body and head retention without affecting color. This is accomplished due to the higher level of unfermentable dextrins in this malt. Generally only 5% or less is used in a grain bill.Shop Barley Grains
  • Munich malt– Munich malt can be used as either a base malt or a specialty malt. It is commonly added in smaller amount (1-2 lbs.) to add a malty or bready depth of flavor to the grain bill, though beers may be made with up to 100% Munich malt. Munich malt contains enough diastatic power to self-convert.
  • Aromatic malt – Aromatic malt is a Belgian-style Munch malt contributing, rich, sweet, toasted, and malty flavors to a beer. Commonly used in brown ales and darker Belgian styles such as dubbels.
  • Victory® malt – Victory® malt is a trademarked specialty malt made by Briess. As a lightly roasted malt, it has a nutty, biscuit-flavor characteristic. A small amount (~5%) may add a slight biscuit flavor to a lighter ale or lager. Use more in a darker beer to bring out those same flavors. No diastatic power.
  • Special B – Special B is another darker Belgian-style malt. At 118˚L, it is only appropriate for use in darker beer styles. For example, a pound in a Belgian dubbel or barleywine will contribute strong flavors of raisin or toffee.
  • Caramel malt – Of all the different types of specialty malts, this category is the broadest. A wide range of caramel and crystal malts provide color, body, and flavor to a number of beer styles. They’re rated by color, from 10 to 120 degrees Lovibond. At the lower end of the spectrum, they may offer flavors of caramel, biscuit, or honey. Sweet malt flavors become more rich into the 60 to 80 range. Caramel 90 and 120 offer darker color and flavors of raisins, dates, and burnt sugar. All caramel malts will contribute some unfermentable dextrins to your beer, increasing body and head retention.
  • Carafa malt – This type of specialty malt is a very dark, de-bittered roasted malt. Use it when aiming for a beer with color, but no astringent, roasted bitterness. Commonly used in swarzbier, dunkel, and black IPA, but also works in less roasty stouts and porters. Very dark at 500˚L.Shop Barley Crusher
  • Chocolate malt – A dark roasted malt offering chocolate flavor. A pound is plenty in a five-gallon porter or stout, though as much as two pounds may be used. A very small amount can be used to adjust color in amber or red ales.
  • Black patent – A very dark, very bitter specialty malt. Too much may make your beer taste burnt. Generally, 1-4 oz. of black patent in a stout will contribute plenty of dark roasted flavor and color.

This is just a brief list of the more common different types of specialty malts along with a description of their basic characteristics. There are many other specialty grains available that can used in beer as well. What are some of your favorite specialty malts?
—–
David Ackley is a beer writer, brewer, and self-described “craft beer crusader.” He holds a General Certificate in Brewing from the Institute of Brewing and Distilling and is founder and editor of the Local Beer Blog.

Quick Guide To Understanding Brewing Water Chemistry

Homebrewer With Brewing WaterIn home brewing, water chemistry can have a huge impact on beer flavor and quality. For one, it has to be clean and free of microbiological contamination. That’s a given to prevent spoilage. But in addition to that, the concentration of minerals in your brewing water can impact not only flavor, but also mash performance, acidity, hop bitterness, yeast health, body, mouthfeel, and other factors. For these reasons, many home brewers pay fierce attention to the chemistry profile of the water they use for brewing.
When looking at the brewing water chemistry, brewers pay attention to the following minerals:

  • Calcium – Lowers pH and helps with mash conversion.
  • Magnesium – Lowers pH and aids yeast health.
  • Sodium – Sodium can help give beer body, but too much might make a beer taste salty.
  • Carbonate/Bicarbonate – These can slow the mashing process and make hop flavors taste harsh.
  • Sulfate – Sulfate can introduce harsh, dry flavors.
  • Chloride – May contribute sweetness.

Water Chemistry for Mashing
One of the many ways water chemistry comes into play in home brewing is with the mashing process. This is particularly important for all-grain brewers, but also partial mash brewers. The enzymes in malt need certain conditions in order to covert starches into sugars. One of the primary factors is pH, or acidity. The enzymes work best when working within a specific pH range. Pure water has a pH of about 7, whereas ideal conditions for enzyme activity is about 5.4-5.5. Certain malted barleys can lower pH more than others. Depending on the source water, it may be necessary to add mineral salts to raise or lower the brewing water’s pH for a given beer recipe.

Water Chemistry for Brewing Certain Styles
Shop Homebrew BooksSome styles of beer were developed based on the local water profiles of the breweries that made them. To recreate a Munich Dunkel or English Bitter, it may be necessary to replicate the brewing water chemistry of those locations.
Brewing water chemistry analysis and profiles for specific locations is widely available from books such as Homebrewing for Dummies, Designing Great Beers, and others.

So How Can Brewers Change Their Water?
Before making changes to your brewing water, it’s very important to establish a starting point, otherwise you’re just shooting in the dark. Consider checking with your local homebrew club. Someone may have already figured out the mineral content of your local water source and offer some recommendations for how to adjust your water, if at all. You can also check with the local water department for a water quality report. Another option is to use only reverse osmosis or distilled water, in which case you’re essentially starting from pure H2O. This would be the purist way of handling your brewing water chemistry.
Shop Water TreatmentOnce you’ve established a baseline, you can add minerals to adjust your water profile. There may be a balancing act between maintaining an appropriate pH level and replicating the water of a particular region. Once the concentration of the minerals listed above are established, a brewer can use the following to make adjustments:

  • GypsumGypsum adds calcium sulfate, which lowers pH. 1 teaspoon per five gallons adds 140 ppm of sulfate and 60 ppm of calcium.
  • Calcium CarbonateCalcium carbonate raises pH. For every teaspoon added to 5 gallons of water, it adds about 60 ppm of carbonate and 36 ppm of calcium.
  • Magnesium Sulfate – As the name suggest, magnesium sulfate adds both magnesium and sulfate. 1 teaspoon in five gallons will increase sulfate by 100 ppm and magnesium by 25 ppm.
  • Table Salt – Table salt contributes sodium and chloride. 1 teaspoon adds 170 ppm of chloride and 110 ppm of sodium.

*Source on ppm data: Homebrewing for Dummies

With these four ingredients, you can manage mash pH and effectively match any global water profile you want.
Though the calculations can certainly be made by hand, there are some water chemistry calculators which can help you determine how much of each to add to reach a certain water profile. BeerSmith is a software program for brewers with water calculations built in. Brewers Friend has a water chemistry calculator. Bru’n Water offers a water chemistry spreadsheet that will help you make adjustments.

Shop Digital pH MeterConclusion
Before adjusting your brewing water chemistry, it’s important to know what you’re starting with. To start with a blank slate, use reverse osmosis or distilled water. Otherwise, contact your local water department a water analysis or profile or ask your local homebrew club for help. If those resources aren’t available to you, there are also water testing kits that can help you determine the mineral content of your water. Start paying attention to the mineral content of your water and pay attention to its effects on mash efficiency, yeast performance, and flavor. This is this essence of brewing water chemistry.
—–
David Ackley is a beer writer, brewer, and self-described “craft beer crusader.” He holds a General Certificate in Brewing from the Institute of Brewing and Distilling and is founder of the Local Beer Blog.
Dried Malt Extract vs Liquid: Which is Better?

Dried Malt Extract vs Liquid 2There are a number of “this vs. that” debates in homebrewing: dry vs. liquid yeast, single vs. two-stage fermentation, extract vs. all-grain brewing. On both sides of the argument you will hear supporters of their chosen method insist that theirs is better. But often times the answer depends on the brewer, their equipment, their skill level, their time availability, and a number of other factors. It all boils down to personal preference.
The same can be said for dried malt extract vs liquid malt extract. Neither is necessarily better than the other. Both forms of malt extract have their merit, and both have their drawbacks. Let’s break down the difference between both types of malts to determine when you might prefer dried malt extract or liquid syrup in your homebrew.
Continue reading