Using High Alpha Hops For Bittering

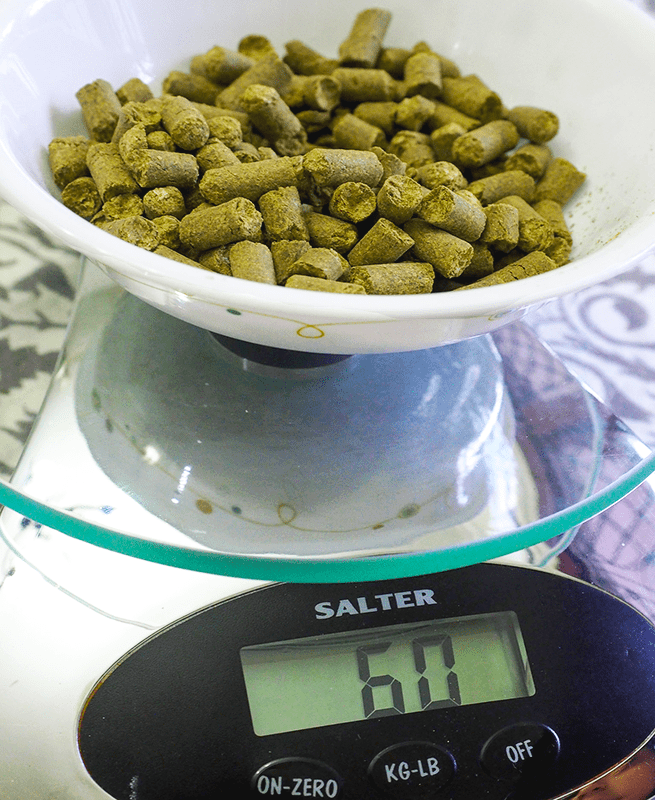
High Alpha HopsWhile noble hops are revered for their delicate aromatic qualities and are lower in alpha acid content, high alpha hops (or “super alphas”) offer maximum bittering potential per ounce. Super high alpha hops will have 10% AA or higher, some into the high teens!
What this means for the budget-minded brewer (and who isn’t?), is that you can get the same amount of bitterness using less hops with a high alpha hop than with a lower alpha acid hop. This not only saves money, but also reduces the amount of trub in the kettle and the volume of beer lost in the trub. Here’s an example of how to do a hop substitution:
Hop A has an alpha acid content of 5%. The beer recipe calls for one ounce. Hop B has an alpha acid of 10%. You can use half an ounce of Hop B to end up with the same amount of bitterness and IBUs.
This being said, not all alpha acids are created equal. Cohumulone is a type of alpha acid that tends to present a harsher bitterness, so it’s important to key an eye on the percentage of cohumulone when switching out one type of hop for another. Otherwise, you may change the quality of the bitterness in your beer from something clean or soft into a bitterness that’s harsh or biting. A hop acid chart can be helpful in identifying typical cohumulone content, but the best thing to do is experiment and gauge for yourself what hops provide the qualities you enjoy.
A rule of thumb: these super high alpha hops seem to do best in bigger beers – beers with lots of flavor. For more delicate beers, use the lower alpha acid hops.

Without further ado, here are some of the most popular super high alpha hops used by homebrewers:

  • BravoShop HopsBravo is sometimes called a “super Cascade.” It’s a good bittering hop with desirable flavor and aroma characteristics described as fruity and floral. (14-17% AA)
  • Chinook – Chinook is a classic American bittering hop. When used in later hop additions, it gives an herbal, somewhat smoky character. (12-14% AA)
  • Citra – Citra is one of the more popular varieties of high alpha hops. In addition to the high alpha acid content, Citra offers flavors and aromas of grapefruit, melon, and tropical fruit. (11-13% AA)
  • Columbus – Columbus is one of the high alpha hops with flavor and aroma characteristics described as oniony, citrusy, and resiny. Sometimes called Tomahawk. (14-16% AA)
  • Galena – A clean bittering hop that’s well suited for a variety of styles. (10-14% AA)Shop Accurate Scales
  • Horizon – Good for hop-forward beers like pale ales and IPAs. When used for flavor and aroma additions, it lends herbal, earthy, and spicy characteristics. (11-13% AA)
  • Millenium – Released in 2000, Millenium is a cross of Nugget and Coumbus with floral, resiny, and spicy characteristics. (14.5-16.5% AA)
  • Simcoe® – Simcoe is another of the high alpha hops from the Cascade hop family. Its strong piney characteristics make is popular in IPAs and double IPAs. (12-14% AA)
  • Sorachi Ace – Sorachi Ace is a cross between Brewers Gold and Saaz. It has a distinct lemony quality. (10.5-12.2% AA)
  • Summit – Summit is one of the highest of all the alpha hops with citrus characteristics. (17.5-19% AA)Shop Steam Freak Kits
  • Warrior – Warrior is a newer bittering hop with very high alpha acid content. Flavor and aroma desribed as grapefruit, lemon, and pine. (14-16% AA)
  • Yakima Magnum – Yakima Magnum is a clean and versatile bittering hop derived from the German-grown Magnum hop. (12-14% AA)
  • Zythos – Zythos is a blend of popular American hops, featuring notes of pineapple, tropical fruit, and a touch of pine. (10-12% AA)

What are some of your favorite super high alpha hops and why? Share in the comments below!
—–
David Ackley is a beer writer, brewer, and self-described “craft beer crusader.” He holds a General Certificate in Brewing from the Institute of Brewing and Distilling and is founder and editor of the Local Beer Blog.

Create Your Own Seasonal Beer Brewing Calendar

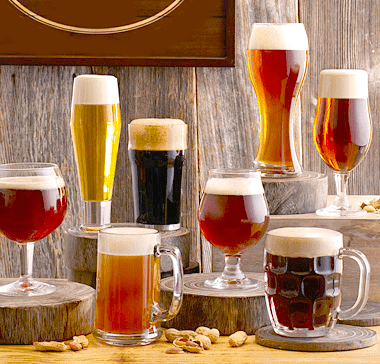
Beers To Put On A Beer Brewing CalendarAt certain times of the year, some styles of beers just taste better than others. An imperial stout in summer and a hefeweizen in winter seems equally out of place. But you can’t well wait til December to brew your imperial stout and hope that it will be ready by Christmas. Enter: a seasonal beer brewing calendar.
Due to the nature of brewing, it’s important to do some planning and scheduling if you want to drink your beer during a certain time period. Plan on at least a month or two of “production” time before your homebrew is ready to drink. With high gravity beers and lagers, you may need even longer. That means if you want to drink your Oktoberfest in October, you should start brewing by mid-August at the latest. A seasonal beer brewing calendar will help you to plan this out.
The information blow isn’t meant to be an end all resource – you’re welcome to brew and enjoy any style of beer any time of year! There will be a lot of overlapping of beer styles depending on your tastes and time constraints. But for the occasion when you want to pull off – for example – a summer ale for the summer, a seasonal beer brewing calendar can be very helpful to keep you beer styles on schedule.

Year Round Beers!
These beers seem to work well any time of year and are good options for year-round “house” beers. Consider them for any month on your beer brewing calendar.

  • Pale Ale
  • IPA
  • Amber ale
  • Pale lagers
  • Pilsner

Brew in the Winter (for Spring drinking)
Shop Steam Freak KitsIn anticipation of those long, final months of cold, brew a bock or an Irish stout. Irish stout (as well as Irish Red) will also come in handy on St. Patrick’s Day. Imperial stout and barleywine is often aged for 9-12 months, so this is a good time to get a start on next year’s vintage. Consider putting these beer styles on your beer brewing calendar for fall brewing. Get started on a spring ale or Maibock so they’ll be ready when the weather starts to warm.

  • Irish Red
  • Irish Stout
  • Bock
  • Barleywine (for next winter)
  • Imperial Stout (for next winter)
  • Spring Ale
  • Maibock

Brew in the Spring (for Summer drinking)
The summer season is high time for lighter colored ales and lagers, from pale ale and Kölsch to pilsner and witbier. Unlike the previous group, these beers do not need much , if any, aging at all, so they can be put on the beer brewing calendar closer to the time of anticipated consumption. The warmer weather also lends itself to brewing some Belgian ales that can tolerate higher fermentation temperatures, like saison and bière de mars.

  • Cream Ale
  • Pale Ale
  • IPA
  • Summer Ale
  • Kölsch
  • Hefeweizen
  • Witbier
  • Light Lager
  • Pilsner
  • Saison
  • Belgian Pale Ales
  • Bière de Mars
  • Gose

Brew in the Summer (for Fall/Winter drinking)Shop Conical Fermenter
Darker beers, such as brown ale, start to hit the spot in the fall. Pumpkin beers are popular around Halloween and Thanksgiving. To make sure it’s ready for Oktoberfest, plan on starting your Oktoberfestbier by mid-summer to allow for a long, cool lagering period. You can start an imperial stout or barleywine in the summer and still have several months of conditioning to make sure it’s ready for winter.

  • Brown ale
  • Pumpkin beer
  • Oktoberfestbier/Marzen
  • Vienna lager
  • Imperial stout
  • Barley wine

Fall (for winter drinking)
By fall, you should be enjoying your Oktoberfestbier and pumpkin ale. Get a jump on some darker beers to get you through the winter, such as stout, bock, and strong Scotch ale. Start some holiday spiced ales so they’ll be ready in time to give away as gifts. If started in the fall, you should be able to pull off a batch of imperial stout or barleywine by winter, though the longer they can age the better.

  • Strong porter
  • Stout
  • Bock
  • Dopplebock
  • Dunkelweizen Shop Brew Kettles
  • Strong Scotch Ale/Wee Heavy
  • Imperial stout (last chance)
  • Barleywine (last chance)
  • Holiday spiced beers

Do you follow a seasonal beer brewing calendar, or do you just make whatever beer style you feel like brewing?
—–
David Ackley is a beer writer, brewer, and self-described “craft beer crusader.” He holds a General Certificate in Brewing from the Institute of Brewing and Distilling and is founder and editor of the Local Beer Blog.
Create Your Own Barleywine Recipe! It's Easy!

Barleywine RecipeBarleywine is an English style of high gravity ale. A typical barley wine recipe will have loads of malt and extra hops to create a full bodied beer that approaches wine in its alcohol content. Because of the high alcohol content, barleywines are often consumed in the cold weather. They also age well. Brew a barleywine recipe now and be sure to save some bottles for future winter holidays and special occasions!
Looking for a ready-to-brew barleywine recipe kit? Steam Freak Barnstormer Barleywine may be just what you’re looking for! If you’d like to create your own barleywine recipe, consider the tips below.

Creating a Barleywine Recipe: Vital Stats
First, think about whether you’d like to create an American or English barleywine recipe. Traditional English barleywines tend to be a little more malt forward than the American versions. English barleywines will still have a significant amount of bittering hops and will focus on English varieties (like Kent Goldings and Fuggles), while American barleywines tend to use American hop varieties (like Cascade) and will probably have more significant late boil hop additions.
Here are the BJCPs statistics for comparison:
English Barleywine Recipe Profile:
OG: 1.080 – 1.120
IBUs: 35 – 70
FG: 1.018 – 1.030
SRM: 8 – 22
ABV: 8 – 12%
American Barleywine Recipe Profile:
OG: 1.080 – 1.120
IBUs: 50 – 120
FG: 1.016 – 1.030
SRM: 10 – 19
ABV: 8 – 12%Shop Steam Freak Kits

Malt
Barleywine ale requires a significant amount of fermentable ingredients to achieve the higher levels of alcohol. Many all-grain brewers will supplement a normal volume of grain with additional malt extract and/or sugar in their barleywine recipes. This allows them to perform a mash that fits in their all-grain system and still collect a decent volume of wort of the appropriate gravity. Aim for an OG of at least 1.090.
All-grain brewers: Using a pale ale malt as a base, add up to 10-15% specialty malts for color and flavor complexity. A Munton’s mild ale malt would be a good choice of base malt for a traditional barley wine. To create a more fermentable wort, mash the grains at the low end of the range, at about 150°F.
Extract brewers: will need three cans of liquid malt extract to achieve the gravity needed for this brew. Try a combination of light, Munich, and amber LME and steep some crystal malt to get the malt complexity that’s characteristic of barleywines.Shop Liquid Malt Extract

Hops
To balance the enormous malt bill, barleywines are balanced by a generous dose of bittering hops. Higher alpha acids hops, such as Chinook, work well for this purpose. At least an ounce will be needed in the early part of the boil, probably two. If bittering with a lower alpha acid hop, such as East Kent Goldings (a traditional English variety), use at least three ounces for a five gallon recipe. Four or five ounces of bittering hops would be better.
In barleywines, hop flavor and aroma vary quite a bit. An American-style barley wine will likely have more hop flavor and aroma than an English one. Think about your taste preferences and add late addition hops accordingly. Centennial and Cascade are popular choices to add to an American barleywine recipe. Fuggles and Willamette are also good options.
Dry hopping isShop Hops common and traditional for English ales. Consider adding 1-2 oz. dry hops (or more based on your preference) up to a week in advance of bottling.

Beer Yeast
Be prepared for a long fermentation. Barleywines are also typically aged. If you want your barleywine to be ready for Christmas or New Year’s, plan to start your barley wine recipe at least two or three months in advance of when you plan to serve it. Many American and English ale yeasts will work. The best yeast for a barleywine recipe, I have found is Wyeast 1728: Scottish Ale. You may also want to consider Wyeast 1056: American Ale, or even a combination of the two.
For brewing a high gravity beer, it’s essential to pitch enough beer yeast to complete the fermentation. Be sure to prepare a yeast starter (you’ll probably need about three liters) and aerate the wort well prior to pitching. Alternatively, use three packs of liquid beer yeast in order to have enough yeast cells. It may be necessary to pitch a second yeast (possibly a different strain) when racking into secondary fermentation, so it might be a good idea to have some Safale-S04 or Safale-S05 on hand.Shop Liquid Beer Yeasat
Ray Daniels points out the traditionally, brewers would rouse, or stir up the yeast throughout the secondary fermentation to make sure that it remained active:
“One favored method of rousing was to take the large secondary fermentation casks for a “walk.” Periodically, each cask would be taken out and rolled around the brewery courtyard a few times to achieve the necessary awakening of the yeast.”
Sounds like a good way to get some exercise!
Do you have experience with brewing a barleywine recipe? What tips do you have to share? We’d love to hear them!
—–
David Ackley is a beer writer, brewer, and self-described “craft beer crusader.” He holds a General Certificate in Brewing from the Institute of Brewing and Distilling and is founder and editor of the Local Beer Blog.
Is It Possible To Re-Bottle Homemade Wine?

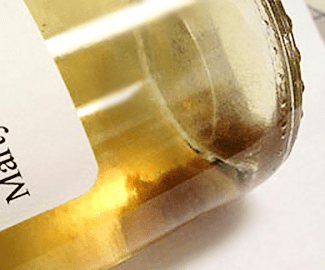
Wine That Needs Re BottlingI bottled some wine in 2014-2015 when I first started wine making. Back then I skipped too many step. Well the wine taste good but some of the batches have sediment. Though this does not bother me when you are sharing it bothers some. My question is can I filter and re-bottle homemade wine. I thought it might be that easy.  If so, I would have a short bottle of wine after filtering that I would get to drink. 🙂 The picture is some Pumpkin wine I made that still has Pumpkin fibers in it.
Name: Marty
State: IL
—–
Hello Marty,
Yes, you can re-bottle wine, even at this late date, but you will need to be concerned with keeping air exposure to a minimum. Excessive air can cause your wine to oxidize. Oxidation will cause the wine to become darker and more brown in color. It will also cause the wine to be less fruity or more lifeless in character.
With that said, here’s the direction on how to re-bottle wine.
Getting the wine out of the bottle is where most of the oxygen exposure will occur. This is due to the glugging of the wine as it is being poured. This is the step where you will want to take care, and keep the glugging of the wine to minimum.
Fortunately, there are a couple of things you can do to counter the potential effects of oxidation when re-bottling wine:

  • First is to treat the wine with sulfites after it has been put into a common container. This would either be Campden tablets, potassium metabisulfite or sodium metabisulfite. Any of these will work. This will drive out most of the oxygen that was saturated into the wine during decanting.Shop Ascorbic Acid
  • Secondly, you can add a dose of ascorbic acid to the wine. This will help to lower the pH of the wine without affecting its flavor. Lower pH means oxygen will have a harder time oxidizing the phenolic compounds in the wine.

A carboy would be the ideal container in which to clear the wine when it is being re-bottled. This will allow you to eliminate any excessive airspace in with the wine due to the shape of the carboy’s neck. Keeping the airspace down to a minimum is important because it will take the wine several days, if not a couple weeks, to clear.
Filtering the wine is not a good option in this situation. Judging from the picture you provided, the wine is clear; it just needs to taken away from the solids collecting in the wine.
To help speed up the process and get the wine re-bottled, I would recommend using a fining agent or wine clarifier on the wine. Because this is a pumpkin wine, which is light in color and may have an abundance of protein in it, I would suggest using Sparkolloid as the choice for a fining agent. Sparkolloid will easily drop out the protein, or fiber as you called it. It is also helpful in stripping some of the browning affects of oxidation from a wine. This is an added bonus. Just follow the directions on the jar to treat the wine.Shop Sparkolloid
Once the wine has been treated and cleared you can then re-bottle the wine. Re-bottling this time will be no different than any other time. You will want to add sulfites, again, just before doing so, as most of the sulfite added earlier will have dissipated from the wine.
Many home winemakers have ask, “can I re-bottle homemade wine”, for a number of different reasons: from making the wine sweeter to, “I don’t like the color of the wine bottle”. Hopefully, this information will clear up how to re-bottle wine in a safe way that will not jeopardize the wine so much.
Best Wishes,
Ed Kraus
—–
Ed Kraus is a 3rd generation home brewer/winemaker and has been an owner of E. C. Kraus since 1999. He has been helping individuals make better wine and beer for over 25 years.

Partial Mash Brewing: 5 Reasons To Love It!

Partial Mash BrewingSometimes partial mash brewing gets a bad rap. Some think that the only way to make good beer is by brewing all-grain. On the contrary, you can make good beer with malt extracts and some specialty grains. I can think of several examples of good beer made with malt extract, and if you’re a homebrewer, chances are you can too.
Having recently gotten back into partial mash brewing in my home brewery, I’d like to share a few of the reasons I’ve enjoyed going back to this simpler method of brewing:

  1. It’s how most of us got started with homebrewing. Maybe you’ve been brewing for a while. Remember partial mash? Remember those first few batches you did way back when, the ones that came out surprisingly good? Without the ease and simplicity of partial mash brewing kits, you may not be brewing today. Try getting back into partial mash brewing, and whatever you do, don’t discourage would-be homebrewers by giving partial mash a bad name.
  1. Partial mash brewing takes less time. Partial mash brewing eliminates a couple key steps of the brewing process: the mash and the lauter. Combined, these steps can take well over an hour. Additionally, since a partial mash brew often has a smaller boil volume, it takes less time to bring the wort to a boil, and less time to chill it afterwards. Looking for other ways to save time while homebrewing? Check out these 8 Time-Saving Tips for Homebrewers.
  1. Shop Steam Freak KitsPartial mash brewing requires less effort. Because there’s less grain and less water, there’s less heavy lifting when doing partial mash recipes. Plus, with the easy availability of partial mash brewing kits, there’s no need to stress over building a beer recipe.
  1. Partial mash means easy cleanup. Partial mash brewing may only leave you with a pound of so of spent grains. It’s much easier to dispose of a pound than ten or more pounds of wet grain. Better yet, it’s a perfect amount of spent grains to put into spent grain bread or dog treats. Plus, if using a grain bag, you don’t have to clean out a mash tun.
  1. You still end up with great beer! At the end of the day, a partial mash brewing kit still gives you five gallons of great beer. With a few tricks up your sleeve – stellar cleaning and sanitation, late extract additions, yeast starters, fermentation temperature control – you’ll be able to make great beer every time.Shop Home Brew Starter Kit

Partial mash brewing offers quite a few advantages over all-grain. If you’ve been brewing all-grain for a while, maybe it’s time to circle back and give partial mash another chance.
Do you brew partial mash vs all-grain? Why or why not? Share in the comments below!
—–
David Ackley is a beer writer, brewer, and self-described “craft beer crusader.” He holds a General Certificate in Brewing from the Institute of Brewing and Distilling and is founder and editor of the Local Beer Blog.
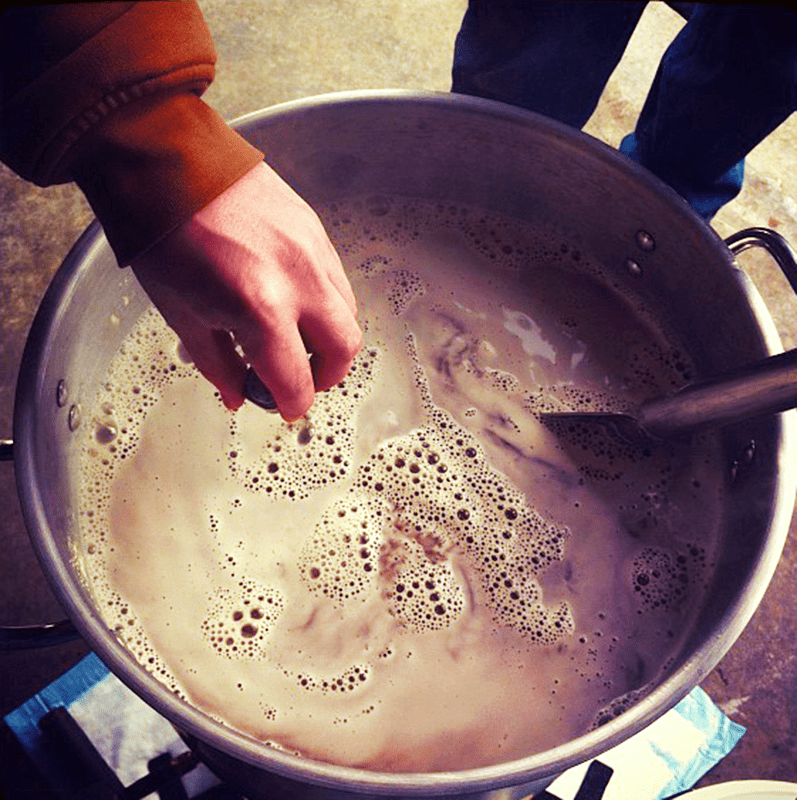
What Causes A Nutty Flavor In Wine?

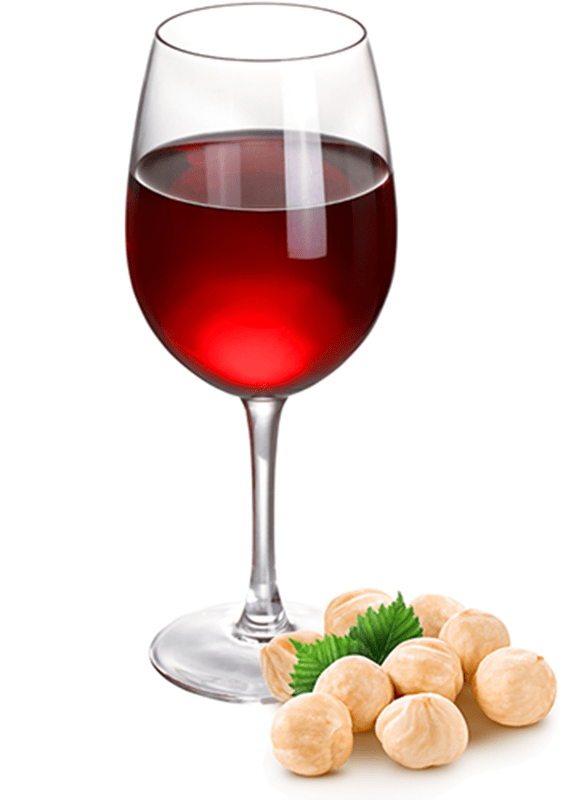
Nutty Flavor In WineMy red wine harvested this year is currently going through a malolactic fermentation, but it has a nutty flavor that has persisted for a month or so. I have never tasted this particular flavor in a wine undergoing malolactic fermentation before. What causes a nutty flavor in wine?
Jack W. – TX
—–
Hello Jack,
A malolactic fermentation can have a light, nutty influence on a wine, but it is typically not noticeable in reds. It is more likely to be a characteristic experienced in whites, more specifically, Chardonnay.
If the your homemade wine has a nutty flavor or taste that is more like hazelnut, I would not be concerned about it too much. It is most likely coming from the malolactic culture. But, if your homemade wine has more of a bitter nut flavor, giving almost a metallic impression, then it could be something called autolysis.
Autolysis is a process that can happen as a fermentation runs out of sugars. The active yeast cell – still looking for food – will begin to consume the dead and inactive yeast cells that lay at the bottom of the fermenter. In doing so, the yeast produce an enzyme that puts off a bitter-nut to metallic flavor. This is the more common reason for having a nutty flavor in wine – particularly, such a young wine.
Shop Potassium BisulfiteThe one sure way to keep autolysis from occurring in any wine is by not allowing it to sit on any dead yeast cells for extended periods of time. A few days, or even a couple of weeks is fine in some cases, but neglecting the wine further than this can result in the autolysis process occurring enough to put a nutty flavor in wine.
If you have been keeping up with your rackings, then I doubt autolysis is something that should have even brought up here. In this situation the nutty taste is most likely to be all caused by the malolactic fermentation, but if you still have the wine on the sediment from the primary fermentation, then autolysis is a very real possibility.
If after reading this you feel that the nutty flavor or taste in your homemade wine is coming from the MLF, you have a choice. You can allow the MLF to continue, or if you do not like the flavor, you can permanently stop the MLF by adding a dose of sulfite to the wine. A teaspoon of potassium metabisulfite for every 16 gallons will be sufficient. This will keep it from getting any more intense. If you feel the nutty flavor is coming from autolysis, then you will need to rack the wine into a clean vessel, away from the sediment.
Regardless of why there’s a nutty flavor in wine, it is irreversible. I have seen situations where the nuttiness has reduced or mellowed with aging, Shop Malolactic Culturebut I would not count on it happening. As a benefit, the nuttiness could end up working out to compliment other characters that develop as the wine ages. This would help by promoting the wine’s complexity.
Jack, I hope this clears up what’s happening to your wine for you. If it is a light hazelnut type flavor I would not consider it a defect at all. Consider embracing it. But if it’s a flavor you just can’t stand, hit the wine with sulfites and see what develops with a little aging.
Happy Winemaking,
Ed Kraus
—–
Ed Kraus is a 3rd generation home brewer/winemaker and has been an owner of E. C. Kraus since 1999. He has been helping individuals make better wine and beer for over 25 years.

Base Malt Guide: Descriptions & Comparisons

Base MaltBase malt is the term we use to refer to the majority of the malted grains used to make beer. Base malt typically forms between 70% and 100% of the malt used in a given homebrew recipe. Base malts are certainly used by all-grain brewers, but also by partial mash and extract brewers who may want to add some diastatic power to their mash or additional grain flavor to their beer. One or more types of base malt may be used in a beer, often complemented by a range of specialty malts for additional flavor, body, and other characteristics.

All base malts are typically:

  • Made from barley. (Though beers can be made from 100% malted wheat or rye, these are generally considered adjunct grains.)
  • Light in color.
  • Kilned at a low enough temperature to maintain the diastatic power of the malt.

Below is a base malt guide with descriptions and comparisons. It’s a list of the most popular base malts used in home brewing. Also provided is a brief profile of each one:

  • Two-row malt – Two-row base malt is made from two-row barley, which typically features plump kernels and a high starch to protein ratio. Light in color at 1.8˚L.Shop All Grain System
  • Pilsner malt – This base malt is the lightest colored malt available (1˚ Lovibond). It works well for very light lagers and ales. Its profile makes it a suitable base malt for brewing just about any style of beer, but it is a must when making a pilsner lager.
  • Pale or mild ale malt – As a comparison, pale malt is kilned at a slightly higher temperature than pilsner malt, giving it a slightly darker color (2.5˚L) and a maltier flavor. It’s a good option for just about any ale recipe, especially pale ale, IPA, brown ale, porter, and stout.
  • Vienna malt – Vienna malt is another step above pale malt in terms of darkness (3.5˚L). It’s a great option for Vienna lagers, Oktoberfest, and other amber lagers.
  • Munich malt – This base malt is the darkest malt that still has diastatic power. Its flavor profile is has rich, malty flavor reminiscent of bread crusts. As much as 100% Munich malt may be used in some types of German-style dark lagers, such as bocks and Munich dunkel. 10-20˚L.

Shop Barley GrainsThis is not a complete base malt list, but these are by far the most common ones with some descriptions and comparisons. As you can see each one has its own profile, including comparisons and contrast with each other. With these simple variations alone, you can begin creating a world of beers.
Want to learn more about the differences between the different base malts? Try this experiment: Brew five, one-gallon, single-malt beers using the same amount of malt, the same yeast, and the same hopping schedule. How are the beers different?
—–
David Ackley is a beer writer, brewer, and self-described “craft beer crusader.” He holds a General Certificate in Brewing from the Institute of Brewing and Distilling and is founder and editor of the Local Beer Blog.
Brewing A German Bock Beer Recipe

Bock BeerBock is a traditional German beer typically served in late winter and early spring. A higher-gravity lager, the added alcohol provides a warming kick to help throw off the winter chills.
As a lager, this beer style requires good control of fermentation temperatures to brew it successfully. Expect to ferment for 2-3 weeks at about 50°F, followed by a lagering phase between 32-35°F for two months or more. If you have this capability, read on to develop and brew your own German bock beer recipe!

Choosing a Bock Style
There are a few kinds of bock to choose from, varying somewhat in regards to gravity and color. The traditional bock beer must be at least 1.066, according to German law. It is malt forward and medium bodied, generally a copper or light brown color. A Maibock or Helles bock is similar but golden in color, with a touch more hop bitterness. Maibocks are traditionally served in May.
Dopplebock originated in the Germany monastery that predated Paulaner Brewery. Their famous Salvator defines the style, such that other dopplebocks commonly use -ator in their name (e.g. Spaten Optimator, Troeg’s Troegenator, Ayinger Celebrator). Dopplebocks are higher in gravity that traditional bocks, at least 1.074 according to German law.
Finally, Eisbock is the strongest variety of bock, with an original gravity typically 1.092-1.116. If you’ve never brewed a bock before, start with a traditional bock or Maibock, as the higher gravity beers can be a challenge.
The guidelines that follow are for brewing a traditional bock beer recipe:

Bock Beer Recipe Malt
Though bock originated in the German town of Einbeck, it soon found a home in Munich. In Designing Great Beers, Ray Daniels suggests that brewers in Munich likely used as much as 100% of what we now know as Munich malt. Many homebrewers will combine a significant portion of Munich malt with pilsner malt and some specialty grains, such as chocolate malt or crystal 120°L, in their bock beer recipes.
In Germany, bocks must have an original gravity of at least 1.066, so an all-grain bock beer recipe will likely need about 12 pounds of grain for a five gallon batch. One option would be to supplement a grain bill with enough malt extract to reach the appropriate OG.
In either case, mash in the higher end of the temperature range (~155°F) to achieve a beer that will have enough body and residual sugar to be appropriate for the beer style.
For partial mash brewers, use two to three cans of Munich malt extract. Perform a mini mash with some Munich malt and specialty malt for improved flavor and body.

Bock Beer Recipe HopsShop Steam Freak Kits
Bocks are malt forward beers with little to no hop flavor or aroma, so hops will only be used to provide enough bitterness to keep the beer from being overly sweet. 20-27 IBUs is the range provided by the BJCP for Traditional Bock. Consider using traditional German hops such as Hallertau or Tettnanger for an authentic bockbier.

Bock Beer Recipe Yeast
When brewing a German bock beer recipe, Ray Daniels recommends the Bavarian strain of lager yeast (Wyeast 2206) for this beer style. He also recommends using a yeast starter pitched into well-aerated wort only when it has been cooled to fermentation temperature (45-55°F). A long (approx. two month) lagering period as low as 32°F will help develop the clean, malt forward flavor as appropriate for the style.

German Bock Beer Recipe
(5 Gallon, Partial Mash)
Total Batch Size: 5 Gallons
Recipe Type: Partial Mash
Approx. Original Gravity: 1.069
Total Boil Time: 60 min.Shop Heating Belt
Anticipated IBUs: 24-30
Estimated ABV: 7.2%
Fermentables:
6.6 lbs. Steam Freak: Munich Liquid Malt Extract
1.5 lbs. Dried Malt Extract (Light)
1 lb. Munich malt
0.25 lb. Chocolate malt
Hops:
1.5 oz. Pelletized Hallertau (60 min. Boil Time)
0.5 oz. Pelletized Hallertau (20 min. Boil Time)
Yeast:
Wyeast 2206: Bavarian Lager Yeast
Bottling:
5 oz. Priming Sugar (Corn Sugar)
52 Bottle Caps Shop Conical Fermenter
Directions:
This is a “partial mash” style of bock beer recipe. To make this beer recipe you will need to follow the Partial Mash Directions. Be sure to prepare a yeast starter in advance and pitch yeast into well-aerated wort that has been cooled to fermentation temperature (45-55°F). Lager for 6-8 weeks at 32°F, then bottle.
Til next time…Cheers!
—–
David Ackley is a beer writer, brewer, and self-described “craft beer crusader.” He holds a General Certificate in Brewing from the Institute of Brewing and Distilling and is founder and editor of the Local Beer Blog.
Tips For Removing Wine Bottle Labels

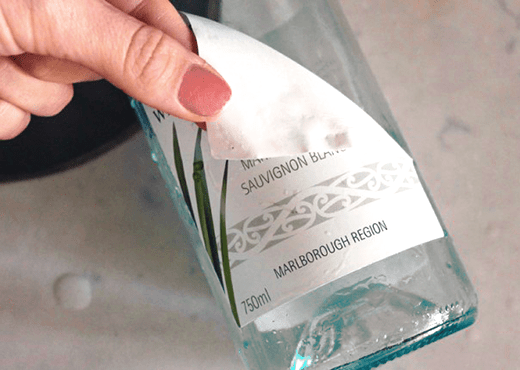
Removing Wine Bottle LabelsWhat’s the best way to go about removing wine bottle labels off store bought wine bottles.
Donald D. – OH
—–
Hello Donald,
By far the best way to handle removing wine bottle labels from your wine bottles is to find someone else to do it. There’s nothing fun about it, and there’s no magical tricks that makes it effortless for the home winemaker. There’s some work involved. Having said this, there are some things you can do to make removing wine bottle labels a little less dreadful.
The number one thing you can do to make the process easier is to be selective about what used wine bottles you save. Not all wine bottle labels are the same. Some wine bottle labels are easier to remove than others.
The ideal wine bottle label to take off is a paper label, one where the paper has not been sealed or coated. These types of wine bottle labels will allow water to soak directly through them and to the glue. If given a little time the labels almost fall off once the water as dissolved the glue. These labels can be identified as being rough to the touch and flat in appearance – not glossy and slick.
Wine bottle labels that are made of a sealed paper will be smooth to the touch and have a shiny appearance. The glue will usually dissolve just as easily. The problem is getting the water to the glue. It will not soak as readily through a wine bottle label made from a sealed paper.Shop Wine Bottles
If you do find that this is the kind of label you are dealing with, you can get around this problem with a little extra effort. By taking a razor blade and liberally scoring the label before soaking, you can give the water access points to the glue. Run a bunch of cuts across the label in all directions. The more the better. Let the wine bottle labels soak overnight. You will then need to use a utility scraper to take the labels off.
Once you are done removing wine bottle labels you will still need to deal with some residual glue that is left on the wine bottle. One product I have used for this purpose for years is Goo Gone. Apply it to the glue, and rub it down with a rag.
Donald, I hope this gives you some better insight as how to go about removing wine bottle labels. As you can see there is some time and effort involved. It’s enough work that it’s not something you want to do the same day you plan on bottling your wine. This go much more smoothly if you are removing wine bottle lables ahead of time. That way all you’ll need to do is sanitize the wine bottles before bottling your wine.
Shop Mini Jet Wine FilterAs a final note, it doesn’t have to be this way! We always have new wine bottles that will save you all this trouble. In fact, we have quite a variety now – both cork finish and screw cap finish – in different colors and in different sizes. These would eliminate the need of removing labels from the wine bottles all together.
Happy Winemaking,
Ed Kraus
—–
Ed Kraus is a 3rd generation home brewer/winemaker and has been an owner of E. C. Kraus since 1999. He has been helping individuals make better wine and beer for over 25 years.

7 Skills For Becoming A Better Homebrewer

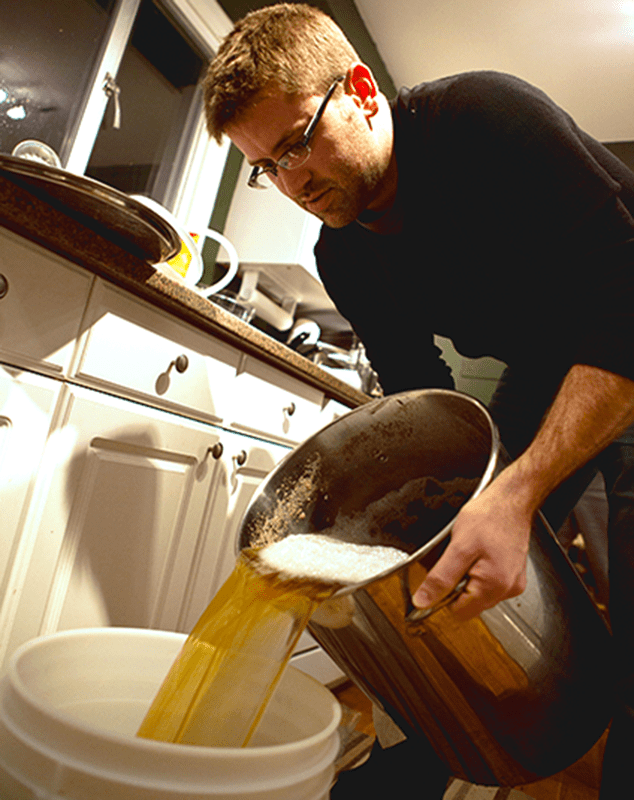
Person Becoming A Better HomebrewerWhat skills are needed for becoming a better homebrewer? Do you need to be the boldest out of your friends or have the biggest beard? I don’t think so.
Homebrewing is a hobby that (in addition to providing you with great beer!) offers an opportunity to develop a wide range of skills. Not only do these skills make you a better brewer, but they can be transferred to other hobbies and activities as well. So in a sense, becoming a better homebrewer is a path towards self-improvement.
Below you can learn about 7 key skills I’ve needed to master to help me become a better homebrewer:

  1. Attention to detail – Together, cleaning and sanitation comprise the critical first step in homebrewing. If you can’t keep your equipment clean or skip steps on the sanitation process, sooner-or-later you’ll get an infected homebrew and have to dump a batch. While you can avoid some of the more “science-y” aspects of homebrewing, don’t skimp on cleaning and sanitation.
  1. Resiliency – Homebrewing is not for people who give up easily. At times, you may encounter frustration. Just remember to breathe and keep in mind that you’re doing this for fun!
  1. Problem solving – Becoming a better homebrewer means being Shop Liquid Malt Extracta better problem solver. Occasionally, something will not go as planned with a batch of beer. Homebrewing tests your ability to break down a multi-step process to identify the source of a problem. Even when things go right, you will be tested to identify the nuances in process and ingredients that affect a beer’s color, flavor, aroma, and other characteristics.
  1. Creativity – Homebrewing is a great avenue for exploring your creative side. Just about any ingredient can be used when making beer. Want to brew some unusual concoctions? Try a chipotle smoked porter, oak barrel IPA, or a maple Scotch ale to flex your creative muscle.
  1. Consistency – This skill is essential for professional brewers, but it can be important for homebrewers as well. Anyone can brew one good batch of beer, but can you do it over and over? Take good homebrewing notes and test your consistency by perfecting some of your favorite beer recipes.
  1. Curiosity – Homebrewing offers an endless path for learning, whether it’s about yeast propagation, water chemistry, or calculating IBUs. If you’re inclined to dive deep into a hobby, then homebrewing is for you.Shop Home Brew Starter Kit
  1. Good attitude! – This one can’t be stressed enough. Above all, homebrewing should always be fun. That’s not to say it won’t be challenging at times. But sometimes becoming a better homebrewer requires that you remind yourself of the reasons you started homebrewing in the first place. If you ever need a refresher on how to keep your cool, check out Hops, Malt, and Zen: How I Learned to Relax, Not Worry, and Enjoy Homebrewing.

What skills would you add to the list for becoming a better homebrewer?
—–
David Ackley is a beer writer, brewer, and self-described “craft beer crusader.” He holds a General Certificate in Brewing from the Institute of Brewing and Distilling and is founder of the Local Beer Blog.