A Homebrewed-Beer, Wassail Recipe

Christmas Carolers Drinking Wassail
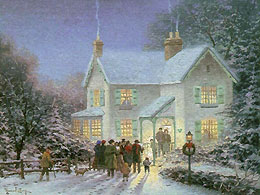
Wassail is a warm alcoholic drink mixed with spices and made with either wine, beer, cider, brandy, or a combination of more than one. It’s traditionally enjoyed during the week of Christmas, accompanying carolers as they go from house to house wishing good tidings. There’s also a lesser-known forms of wassailing, that of going to the orchards to bless the tress in hopes for a bountiful season.
You may be familiar with the carol “The Wassail Song”:

Here we come a-wassailing
Among the leaves so green,
Here we come a-wand’ring
So fair to be seen.
Love and joy come to you,
And to you your wassail, too,
And God bless you, and send you
A Happy New Year,
And God send you a Happy New Year.

The word “wassail” likely predates the Christmastime association. It’s derived from the old English “waes hail” – a toast to good health – and is found in literature dating back to the eighth-century.
Whether you’re wassailing from house to house, blessing the apple trees, or just spending time with family this holiday, consider making some wassail with your own homebrew. The wassail recipe below calls for sherry or Madeira wine to be combined with brandy. I’ve adapted it to use a combination of homebrewed beer and wine, leaving the brandy optional if you want that extra punch.
Wassail Recipe (adapted from the Joy of Cooking)
Makes 22 six-ounce servings
Core and bake:

  • 12 all-purpose apples

Combine and boil for 5 minutes:

  • 4 cups sugar
  • 1 cup water
  • 1 tbsp. ground nutmeg
  • 2 tsp. ground ginger
  • 1/2 tsp. ground mace
  • 6 whole cloves
  • 6 allspice berries
  • 1 cinnamon stick

Meanwhile, beat in a large bowl until stiff but not dry:

  • 12 egg whites

Beat in another large bowl until light in color:

  • 12 egg yolks

Fold the whites into yolks. Strain the sugar and spice mixture into the eggs, combining thoroughly, but gently. Bring nearly to a boil in a large pot:

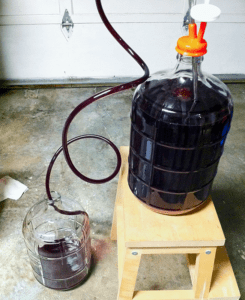
  • 6-7 twelve-oz. bottles of homebrewed ale (I would shoot for something malt-forward, like a porter or a Scotch ale)
  • 2 cups of sherry or Madeira wine
  • up to 2 cups brandy (optional)

Gradually add the beer/wine mixture to the spices and eggs, whisking vigorously with each addition. Add the brandy towards the end. Just before serving, with the mixture foaming, add the baked apples. Serve in warm mugs, placing a piece of baked apple in each one.
If I remember correctly from last Christmas, this wassail recipe certainly does the trick! Do you have a favorite holiday drink tradition?
————————————————————————————————
David Ackley is a beer writer, brewer, and self-described “craft beer crusader.” He holds a General Certificate in Brewing from the Institute of Brewing and Distilling and is founder and editor of the Local Beer Blog.

Leigh Erwin: A Beginner's Wine Making Journey: Part 4

wine in secondary fermenterI get so excited when it’s time to do the next step!  Eeek!  Well, primary fermentation is supposedly complete, and so the next step is for me to siphon the wine from the primary fermentation vessel to the plastic carboy that came with my home winemaking kit.  According to the instructions, I first had to measure the specific gravity using the hydrometer in order to determine if primary fermentation was, in fact, complete, and if I could actually move onto the next step, or if I had to let it sit for a couple more days.
The specific gravity at this stage, according to the instructions, is supposed to be less than 1.010.  So, I sterilized my hydrometer, the cylinder in which to put my wine sample for reading, and also a turkey baster for removing some of the wine sample (I need to buy a wine thief—one that’s not going to spill have the wine like the turkey baster, anyway).  The moment of truth came when I read the specific gravity reading on the hydrometer and it was……..  0.09945!  That’s definitely less than 1.010!
I’m slightly concerned (or just wondering) about that low number, as that’s what it’s supposed to be after secondary fermentation is complete.  Is it OK that it’s that low?  Hmmm, well, better siphon the wine and plug her up to see if there is any yeast activity still.
Siphoning was an interesting process for me.  I don’t yet have an auto-siphon, but after reading some of the home winemaking and home brewing threads, it sounds like it would be a smart investment.  Since I don’t have an auto-siphon, I first attempted the siphon-by-mouth method.  I tried to dry my lips as much as possible, and inhaled through one end of the siphon tubing with the other end was attached to the siphon cane that was placed in the primary fermentation container.  Having failed at this, since I was too afraid to inhale so hard that I would end up drinking it, I went to the message boards again to figure out how I should siphon the wine without using my mouth (and without an auto-siphon).
The advice I found on the home winemaking thread turned out to be great, as I was able to successfully siphon my wine in just one shot.  Basically, I filled up the siphon tubing with the wine, and kept my (sterilized) finger over the end so it didn’t pour right back out.  Once it was full, I put the siphon cane end into the batch of wine and put the other end of the tubing into my new secondary fermentation carboy (which was lower than the original container so gravity could work it’s magic).  The wine flowed and flowed and filled up that carboy pretty quickly!  I tried to minimize the amount of oxygen bubbling into the wine, but I’m sure I couldn’t completely protect against it.
So, now that I had all the wine moved into the new secondary fermentation carboy (which I sterilized with the cleaning solution I got in the kit), I was wondering if secondary fermentation would even happen since the specific gravity level I read at the end of primary fermentation was just as low as the instructions indicate it should be at the end of secondary fermentation.  Did it go so fast that I finished both primary and secondary fermentation?
To convince myself that the wine was still OK, I simply stopped up the carboy with the stopped and secured the air lock in place.  I figured if there was no yeast activity anymore, there wouldn’t be any movement in the air lock.  Lo and behold, however, the yeasts are still kicking!  The air lock almost immediately started slowly releasing CO2 in the airlock, so I’m convinced that everything is still going to plan.  I hope I’m right, anyway…..only time will tell, I suppose.
Here is a short video of the air lock action right after I siphoned the wine and closed it off to all air:

Everything looks pretty good so far (at least I think so), so now I am to wait 12 days until secondary fermentation is complete.  It’s going to be tough waiting that long, but I think I’ll manage.

——————————————————————————————————–
Leigh ErwinMy name is Leigh Erwin, and I am a brand-spankin’ new home winemaker! E. C. Kraus has asked me to share with you my journey from a first-time dabbler to an accomplished home winemaker. From time to time I’ll be checking in with this blog and reporting my experience with you: the good, bad — and the ugly.

4 Quick Tips For Pairing Beer And Cheese

Pared Beer And Cheese
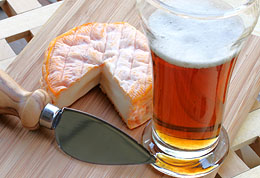
So much of the appreciation of beer comes from its relationship with food. Among the many gastronomical combinations, few offer such a perfect marriage as the pairing of beer and cheese.
Beer and cheese actually have a lot in common. Both are crafted by skilled artisans, utilizing mysterious processes to transform raw materials into something greater than the sum of its parts. In both cases, the creativity of the brewer and the cheesemaker can result in a unique and delicious product.
As with homebrewing, don’t let anyone tell that there is one right or wrong way to do a pairing of beer and cheese. Let your tastes and personal preferences guide you as you seek to match them. That said, here are some pointers:

  1. Match like with like
    Often times, a subtle, mild beer will go well with a lighter cheese. Neither overwhelms the other. Hefeweizen and chevre is a great light on light combination. Similarly, big, hoppy IPAs often match well with funky blue cheeses. The bitterness of the beer helps balance out the strong, pungent flavors of the blue. Also look for specific flavor elements in both the beer and cheese that can exist in harmony.
  2. Find contrast
    Like a conversation, a paired beer and cheese can agree or disagree. Sometimes, a contrast in flavors yields an interesting combination. Try a big, malty Scotch Ale with a light farmhouse cheese.
  3. Go from light to heavy  
    When it’s time to progress through the tasting, start with the lightest beers and cheeses first. This helps maintain your palate for the more aggressive flavors later on.
  4. Taste the beer first
    When you’re ready to taste a pairing of beer and cheese, start with the beer. Identify its characteristics, including aroma, flavor, and mouthfeel. Then try the cheese. What are its characteristics? Is it soft and mild, or hard and aggressive? Finally, try the beer again to see how the beer and cheese interact. Does the combination enhance any flavors? Does it mask any flavors? How does the beer cut through the texture of the cheese?

A pairing of beer and cheese that is exceptional can bring about what I like to call food nirvana. Try some of these combinations to see if you can find the perfect match:

  • Brie with Black Lager
  • Chevre and Hefeweizen
  • Mild cheddar with a Nut Brown Ale
  • Gorgonzola with an Imperial IPA
  • Gruyere and Bock
  • Gouda and Stout

Want to go the extra mile? Pair a homemade beer with cheese made with beer. Now we’re talking! Do you have any tips for pairing beer and cheese? We’d love to hear yours!
——————————————————————————————————–
David Ackley is a beer writer, brewer, and self-described “craft beer crusader.” He holds a General Certificate in Brewing from the Institute of Brewing and Distilling and is founder of the Local Beer Blog.

Stirring A Slow Wine Fermentation

Stirring A Slow Wine FermentationI just wanted to ask you if you think stirring or swirling a wine must when it starts to slow down before the first racking, because point zero hasn’t been reached yet, would that help or hurt anything as far as the wine is concerned, or should I just add more nutrient and not stir or swirl at all?
Thanks,
James
—–
Hello James,
The first thing that should be pointed out is that it is not unusual for a fermentation to slow as it reaches the end of fermentation. A lot of it has to do with the viability of the particular wine yeast strain you have chosen. Having said this, there is nothing about a slow wine fermentation that is inherently bad. The wine will turn out the same. Just think of it as the wine getting a little aging time in during the fermentation.
If you are making your wine from fresh fruit or fresh grapes, you should be stirring the wine once or twice a day while the pulp is the wine must, but it as nothing to do with the fermentation being slow or sluggish. The reason the stirring is done is to make sure that the wine fermentation does not form a dried floating cap of pulp. If this happens the oxygen is cut off from the wine yeast at a time with the it needs the oxygen the most.
Air or oxygen is what allows a wine yeast to grow into a colony large enough to ferment all the sugars in your wine must. If the air is limited, the colony will not grow successfully. The result is a slow wine fermentation, which by the way, is what you are experiencing right now.
Here’s what you can do for a slow wine fermentation…
If it has been going for at least 4 days in the primary, with the fruit pulp, I would go ahead and rack the wine into a secondary fermenter. Do it in a splashing manner so as to introduce oxygen into the wine must. This should help to invigorate the wine yeast.
Also, add a dose of yeast nutrient. If you already added yeast nutrient at the beginning of the fermentation, then go ahead and add another half-dose. This would be a 1/2 teaspoon per gallon. The yeast nutrient will add nitrogen to the wine must which can help the yeast in some of the same ways oxygen will.
Even though this is a slow wine fermentation, I would still put an air-lock on the secondary fermenter. The fermentation is coming towards a time when it will be susceptible to spoilage, so the air-lock is a necessity once racked. By the way, if you had the primary under air-lock, this can contribute to a sluggish wine fermentation with or without a dried cap.
Hope this information helps you out a little.
Best Wishes,
Ed Kraus
———————————————————————————————————
Ed Kraus is a 3rd generation home brewer/winemaker and has been an owner of E. C. Kraus since 1999. He has been helping individuals make better wine and beer for over 25 years.

Homebrewing Terms Worth Knowing: Part 1

Krausen In Carboy
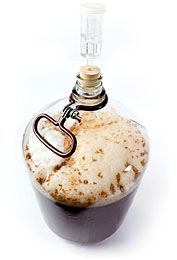
Over on the E. C. Kraus Wine Blog, Ed has been sharing some of the key winemaking terms used by professional and hobbyist winemakers.
A great deal of jargon also surrounds the world of brewing. To help you talk like a brewer and improve your craft, here are some of the brewing and beer terms you should add to your playbook:

  • IBUs – IBUs stand for international bittering units, which measure the amount of alpha-acids (the part of the hop that contributed bitterness) that are isomerized during the boil and absorbed into the beer. IBUs range from the single digits for light lagers, lambics, and wheat beers and up to 100 or higher for Imperial IPAs and barley wines. Check out this IBU range chart for bitterness ranges for different beer styles.
  • Krausen – Krausen is just a German word that refers to the foamy layer of yeast and protein that sits on the top of wort at the height of fermentation. The peak is sometimes referred to as “high krausen”. (You may hear reference to a practice called “krausening”. It’s an interesting technique, but neither practical nor necessary for the average homebrewer.)
  • Phenol – Phenol is an aromatic byproduct of the fermentation process, produced by yeast. Depending on the style, phenol may or may not be desirable. For example, German weizens are expected to have a certain level of spicy, clove-like phenols. In other beers, undesirable phenols may be produced by excessive fermentation temperatures. This is one of the reasons why controlling fermentation temperature is so important.
  • Hot Break – The “hot break” is the point in the boil where proteins coagulate and start to foam on top of the boiling wort. This is normal. Too much hot break and the wort can boil over, creating a big mess and an even bigger headache. If it looks like you’re about to have a boil-over, you can remove the pot from the heat source or quickly add a dose of cold water.
  • Cold Break – The cold break happens during the cooling of the wort, prior to pitching the yeast. Chilling the wort rapidly ensures helps proteins settle out of suspension, which helps avoid haze when the beer is ready to serve. Immersion wort chillers are one of the best ways for homebrewers to chill wort quickly.
  • Adjuncts – Adjuncts are sugar sources other than barley malt that increase gravity or affect flavor in some way. Some adjuncts are used for head stability. Examples include wheat, various sugars, and more.

Are there any homebrewing terms you’d like to learn more about? Leave a comment below!
————————————————————————————————–
David Ackley is a beer writer, brewer, and self-described “craft beer crusader.” He holds a General Certificate in Brewing from the Institute of Brewing and Distilling and is founder and editor of the Local Beer Blog.

Leigh Erwin: A Beginner's Wine Making Journey: Part 3

Thanksgiving meal with wine
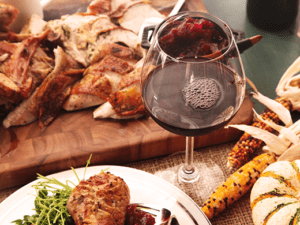
Happy Belated Thanksgiving, everyone!  Leigh here, just checking in!
While eating the delicious meal I prepared for my guests, my only regret is that I didn’t decide to start making my own wine earlier than I did.  OK, I don’t regret anything, but I did think it would have been really nice to serve my own homemade wine with the meal!
One of my “problems”, if you can even call it that, is that I get so excited about things that I just want them to happen RIGHT NOW!  Making my own wine for the first time has definitely been a lesson in practicing the art of patience, that’s for sure!  Day 1 for my first batch of wine (that Pinot Grigio kit from California Connoisseur) was about 5 days ago, so there are only 2 more days to wait before I test the specific gravity to see if it’s less than the required 1.010.  I really hope it’s “on time”, as I somewhat stupidly planned the timing of everything so that I leave for my Christmas/New Year vacation almost immediately after the predicted bottling date.  Whoops 😉  Hope nothing is running slow 😉
Last time I expressed a little concern/confusion over the whole “do I use the air lock for primary fermentation or do I not”?  Well, after asking the team at Homebrewing.org, and reading up on a few of the blog posts there, I determine that no, I do not need to use the air lock during primary fermentation.   The yeast actually requires some oxygen during primary fermentation in order to do convert the sugars into alcohol, so in a completely anaerobic environment (i.e. no access to oxygen), the fermentation would go really slow, and possibly get stuck.
Since I have a tiny space, and one which I share with another human, 2 canines, and 1 kitty, I can’t just have the cover open the entire time.  So, as a “compromise” to the yeast, I crack the lid open when I am in the condo so I can keep an eye on any curious animals, and when I’m sleeping at night or gone off to work, I close the lid and use the airlock.  This way, my yeasts are still getting some oxygen a decent chunk of the day, and are protected from little paws and tongues of the beasts running around my house when I’m not home or not conscious.
So, how’s my fermentation doing?  Well, seems to be going well!  The yeasts started doing their thing over night after the first night, and I woke up the next day to the site of some foamy bubbles on the top of the must.

This video shows basically what my wine was doing 24 hours after I added the yeasts.  If you listen closely, it sounds like the fizz from a soda can after you open it, and you can see some tiny bubbles and activity on the surface.  It’s really difficult to hear the sound of the “fizz” in the video, as obviously the camera used to record it was pretty basic, but you can definitely see the bubbles coming up and you’ll just have to take my word for the sound.  5 days later, I still hear the fizz going strong, and it definitely smells like a wine in the middle of fermentation.
Crossing my fingers everything stays on schedule, though one never knows what can happen, I suppose.  I’ll for sure report back to you guys on Day 8, which will be here before we know it!

——————————————————————————————————–
Leigh ErwinMy name is Leigh Erwin, and I am a brand-spankin’ new home winemaker! E. C. Kraus has asked me to share with you my journey from a first-time dabbler to an accomplished home winemaker. From time to time I’ll be checking in with this blog and reporting my experience with you: the good, bad — and the ugly.
 

I Added Too Much Wine Tannin Powder To My Wine

Wine Tannin From Grape StemsWhat happens when you add too much tannin? I’ve been making wine for about 5 yrs now and have had good results for each of the many fruit wines that I’ve made…I was always very careful to make sure measurements were accurate…this time making a pear wine, I made the mistake of picking up wine tannin powder and added 2 tbls…I was suppose to be adding pectic (which is what I thought I was holding)….when I realized what I had done, I was able to pull some of the tannin out, since I hadn’t mixed the must…though I’m sure I didn’t take enough of it back out…can this be fixed or do I need to trash this wine…
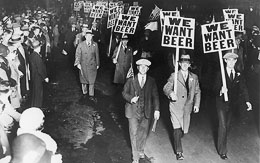
Name: Lu
State: NY
—–
Hello Lu,
Wine tannin powder adds a dry, puckering zest to the wine. It is the zest, literally. It comes from the stems and outer skin of the grapes. Think of what it would taste like to chew on a grape stem or some grape skins, and that’s the flavor we are dealing with in this situation.
It is possible that that you added enough wine tannin powder to make your pear wine permanently unpleasant to drink, but there is hope. Much of the wine tannin you added will simply drop out of the wine. Any wine is only able to saturate so much tannin. The excess will never dissolve, or only temporarily dissolve, and drop out as sediment during the fermentation.
One thing you can do to help drop out excess wine tannin is to warm up the wine. As the temperature goes up the wine’s ability to hold tannin goes down. It drops out as more sediment. The problem with doing this is that heat also promotes oxidation. This is where a white wine will turn amber, or in the case of a red wine, it will turn orange or brown. Pear wines are very susceptible to oxidation, so this make this a very delicate situation.
Here’s What I Would Suggest
Once the wine is done fermenting and has cleared the best it can on its own, gently warm the wine up to 85°F. This can be done with a heat source as mild as a 100 watt light bulb. It may take a day or better for the temperature to rise.
Once up to 85°F. add a dose of bentonite to the wine. Bentonite is great for dropping our excess proteins — tannin being one of them. It is the closest thing to a wine tannin remover as you will find. Keep the wine at 85°F until it becomes clear again, usually 2 to 4 days. Then rack the wine off the sediment and allow to cool back down to normal temperatures.
Three things that would be helpful in reducing the affects of oxidation from this process would be:

  1. Add ascorbic acid to the wine, now. Ascorbic acid will help to limit the oxidative reactions throughout the wine making process and from heat. The dosage should be 1/8 teaspoon per gallon.
  2. Keep the wine vessels topped-up. Don’t allow air-space to be in with the wine.
  3. Keep the wine sulfited. You should add a dose right after the fermentation has completed and again, after adding the bentonite. This could be either: Campden tablets, sodium metabisulfite or potassium metabisulfite.

Some additional thoughts: Wines with too much wine tannin powder tend to need more aging, but once aged out they tend to taste better than the same wine low in tannin. This is all subjective, of course, but it is a general consensus among winemakers. So you have that going for you. Also, wine tannin lowers the pH of a wine. Low pH is deterrent to oxidation, so this is a good thing for your pear wine, as well.
It sums up to this: the fact that you added too much wine tannin powder does not necessarily mean your wine is ruined. There are ways of reducing it. Both heat and bentonite act in concert as a wine tannin remover to some degree. Time can also help to reduce any astringent effects the wine tannin powder that may still be left in the wine, so there are a lot of reasons not to give up on your pear wine.
Best Wishes,
Ed Kraus
———————————————————————————————————
Ed Kraus is a 3rd generation home brewer/winemaker and has been an owner of E. C. Kraus since 1999. He has been helping individuals make better wine and beer for over 25 years.

The History Of Homebrewing In America – Part 2

We Want Beer Pickett ParadeWhen we left off in Part One of this “History of Homebrewing” series, Prohibition outlawed the making of beer at home. Still, families didn’t give up on their desire for beer, and the breweries did their best to survive through the dry spell by producing non-alcoholic “near beers” and, not so discreetly, products that could be used for beer making. Red Top and other companies offered malt barley syrup for home “cooking.” Prohibition did little to stop homebrewing: it’s estimated that Americans brewed over 700 million gallons of homemade beer in 1929!
When Prohibition was repealed in 1933, winemaking was legalized, but not homebrewing. It wasn’t until 1978 that Jimmy Carter signed into law a bill that legalized homebrewing, but by this time America’s breweries had grown, consolidated, and drastically reduced the variety of beer in the US, resulting in the dismal beer landscape that existed from Prohibition to the 1970s. It was up to the few remaining homebrewers to resurrect lost beer styles and build interest in “craft” beer.
By the time Jimmy Carter officially legalized homebrewing in 1978, Charlie Papazian had picked up the hobby. In 1978, he and Charlie Matzen founded the American Homebrewers Association and published the very first issue of Zymurgy magazine.
During these early stages of the modern brewing renaissance, there were a number of resources published that allowed homebrewers to learn about brewing and beer styles. Papazian published the Complete Joy of Homebrewing in 1984. Several of the early brewing books are still popular today.
Even with the growing enthusiasm for homebrewing, not every state permitted it. It wasn’t until this year (2013) that Alabama and Mississippi became the 49th and 50th states in the US to legalize homebrewing!
Some of the success of homebrewing must be attributed to the homebrewers who were determined to make a living from their passion. If it weren’t for the likes of Jim Koch, Ken Grossman, and Sam Calagione, homebrewing probably wouldn’t have the following that it does today.
Just check out these stats from the American Homebrewers Association!
2012 Homebrewing Stats

  • There are more than 1,000,000 homebrewers in the United States.
  • There are more than 37,000 American Homebrewers Association members.
  • Nearly 1,500 homebrew clubs exist in the United States.
  • 300+ homebrew competitions are scheduled to be held in the United States.
  • 1,802 attendees at the 2012 AHA National Homebrewers Conference.
  • 7,823 entries were judged in the 2012 AHA National Homebrew Competition.

So, if you’ve read this far, you’re probably a homebrewer, part of a long tradition of American brewing. Why do you brew? Why do you love it?
—————————————————————————————————-
David Ackley is a beer writer, brewer, and self-described “craft beer crusader.” He holds a General Certificate in Brewing from the Institute of Brewing and Distilling and is founder of the Local Beer Blog.
—–
Resources: Homebrewers Association: History of Homebrewing,

Leigh Erwin: A Beginner's Wine Making Journey: Part 2

Leigh Erwin - First-Time WinemakerWell, hello there readers of the Homebrewing.org blog!
My name is Leigh Erwin, and I am a brand-spankin’ new home winemaker!  E. C. Kraus has asked me to share with you my journey from a squeaky-clean new home winemaker to what I hope will eventually be an expert!  Well, maybe not an expert, but perhaps “more experienced”.
Over the next few months I plan on sharing with you my experiences as a beginning winemaker: the good, bad — and the ugly. I hope all of you will take the journey with me as I periodically post my trials and tribulations as a first-time home winemaker on this blog. The is my second post. To start at the beginning you can go to my first post.
—————————————————————————————————–
Wine Yeast Sprinkled Onto The Wine Must
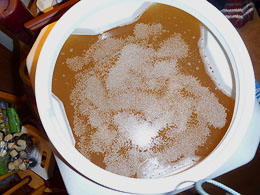
Last time I “saw” you all, I had just received my new home winemaking kit from Homebrewing.org.  Due to the timing of things this past week, I let the kit sit for almost a couple of days before I did anything with it.  I finally had some time on a chilly afternoon to start Step 1 of the wine making kit instructions.
I know later on I’m going to think my feelings were pretty silly, but right now I feel pretty nervous about whether or not this is actually going to work!  Eek!  Did I sterilize everything sufficiently?  Is the temp OK?  Is that cat going to find a way in and drink it?
It’s not like I have much space to deal with here.  I live in a 750 square foot 2 bedroom condo with my fiancé, our two big dogs, and our cat. That leaves very little space for winemaking, but I’m going to try my best to make it work.  Right now, I have everything situated on a little side table in between the living room and dining areas, as this side of the condo tends to retain heat better than the two bedrooms.  I wrapped the spout of the fermenter with plastic wrap and a twist tie, in hopes that it’ll mask any smells from the cat or dogs and hopefully avoid them trying to get into it.
So, getting right down to it!
I first sterilized all the equipment I was going to need today by following the kit instructions on the cleaning solution I received with my kit.  I’m hoping I did it right—I’m banking on the fact that the kit is brand new, so hopefully even if I “missed a spot”, it’ll still be OK.
Once sterilization was finished, I launched into “Stage 1” of the wine making kit instructions.  Removing the base wine from the bag was a little tough at first, as I wasn’t sure how much force I would need to remove the cap while avoiding any spillage!  It ended up being easier than I thought, though I did have to use a little elbow grease to get that cap off.
For water, I ended up getting bottled water from the store, and made doubly sure that it said it had undergone reverse osmosis, as suggested in the instructions.  I actually used one gallon of the bottled water for the sterilization process, then used another 4 gallons for the wine (the juice concentrate itself was nearly 2 gallons).   The wine making kit instructions said I could use tap water as long as I let it sit out overnight to blow off any chlorine that may be there, but I was too nervous to try that on my first go around, and I didn’t really have anywhere to put 5 gallons of water overnight since my place is so small.
Taking A Hydrometer ReadingThe initial specific gravity reading on my juice was 1.086, which was in between the recommended 1.080-1.095 levels.  So far, so good, right?
I basically followed all the basic kit instructions to a T, reading them all multiple times just to be sure I wasn’t forgetting everything.
The only thing I’m not sure about is the use of the cover and/or airlock.  The wine making instructions said to close the lid and use the airlock, though when I went to the ECKraus blog, there was a recommendation saying NOT to use the airlock but to leave the lid open for at least the beginning in order to get the fermentation process off on a good foot.  My problem with leaving the lid open is that the cat is going to drink it.  I know she will—she’s a piggy!    I think what I might try is leaving the lid just resting on top but not sealed while I’m in the room, then when I have to leave, I’ll close it and use the airlock.  Hopefully this will allow the fermentation to get enough air to get started, whilst keeping the animals out.
Other than the lid, I feel pretty confident about this first stage, and I’m hoping that within the next 18-36 hours, I’ll be confident that fermentation has actually started.  I think right now it kind of smells like it (when I open the lid and sniff), and there are some tiny bubbles on the side of the fermenter, but it’s still too early to tell if it’s going to get started or not.
In the meantime, I’ll keep my fingers crossed and hope for the best.  Now, it’s just a matter of waiting 7 days.  Hopefully at the end of that time I’ll have a positive progress report to give you all!
Cheers!

The History of Homebrewing in America – Part 1

Revolutionary Figure Holding BeerSince the earliest Sumerians fermented grains in pots some 10,000 years ago, making beer at home was for a long time an important part of domestic responsibilities. Extensive beer making traditions exist around the world whether in Africa, Asia, or the Americas, where indigenous cultures used what resources they had available to make the nutritious, seemingly magical beverage that we know as beer. However, in the United States, the homebrewing tradition nearly died out.
In the early days of the American colonies, brewer’s malt was one of the most important commodities. The colonists carried copious amounts of malt and hops (as well as beer!) with them from Europe to the New World. Sanitation wasn’t well understood, so beer (which is boiled in the brewing process) and other alcoholic beverages were considered safer to drink than water. It was a matter of necessity to have a steady supply of beer.
Many households arriving from Europe brought along the necessary equipment for making beer at home. Numerous records show that the wealthiest families developed fairly sophisticated brewhouses, though certainly there were families who were less well off who made do with more basic beermaking equipment.
Many of the New World settlers set out immediately to find ingredients that could be used for brewing. This led many of them to discover the local maize, though it wasn’t long before barley, wheat, rye, and hops were planted throughout the colonies. In the late 1700 and early 1800s, Thomas Jefferson wrote about the beer that was brewed at his home in Monticello, using the resources produced at his farm and in the surrounding area.
Brewing at home was often the responsibility of women. In fact, Thomas Jefferson’s wife brewed 15 gallons of beer every two weeks! It’s encouraging that female brewers today are growing in number, both on the professional and hobbyist level.
As the country entered the mid 19th-century, brewing became the domain of large industrial companies (think of Yuengling, founded in 1829). Through the Industrial Revolution, these companies could brew enormous amounts of beer at a higher quality and lower cost than most households could do at home.
And then came Prohibition. Along with the sale of alcohol, making beer or wine at home became illegal in 1919.
So how did we get from a point where beer couldn’t be sold, or even made at home, to where we are today? Stay tuned for Part Two to find out!
—–
Resources: Thomas Jefferson Encyclopedia: Beer, Homebrewers Association: History of Homebrewing, Brewed in America
————————————————————————————————————
David Ackley is a beer writer, brewer, and self-described “craft beer crusader.” He holds a General Certificate in Brewing from the Institute of Brewing and Distilling and is founder of the Local Beer Blog.