Basic Water Management for Extract Brewing: Part 1

water for brewing beerMatt Chrispen, a blogger at Accidentalis.com, shares some of his advice about water management for extract brewing. The first step: choosing the right water source.
There is a myth that good tasting water makes good tasting beer… this is just not true. With many good water sources, you need to decide which will make the best beer. Water chemistry has less impact on the extract brewer, but starting with the right water will help you have the best chance at a great beer.
Tap Water: Tap water contains either chlorine or chloramines to deliver safe water to your home. These chemicals must be removed or will cause off-flavors to form in the beer that taste strongly of chemical plastics, vinyl, or iodine. Filtering slowly with active charcoal, letting the water stand, or boiling the water will remove chlorine, but treatment with potassium metabisulfite or Campden tablets will fully eliminate both chemicals. Often it is best to both filter and use Campden tablets. Tap water quality can also fluctuate due to seasonal issues.

  • Using Campden Tablets: For brewing, use ¼ tablet per 5 gallons of brewing liquor. Crush the tablet and vigorously stir it into the bucket of water. The reaction is fairly immediate, and you may smell a bit of sulfur.

If you have a water softener, use the water tap before the softener to avoid excessive levels of sodium or potassium in the water.
Well Water: Professional tests should be run to ensure that organic, metallic, or chemical contamination is not present such as iron or fertilizer residue. If the water is safe, then evaluate its hardness. Low to moderately hard water, low in alkalinity is preferred for brewing.
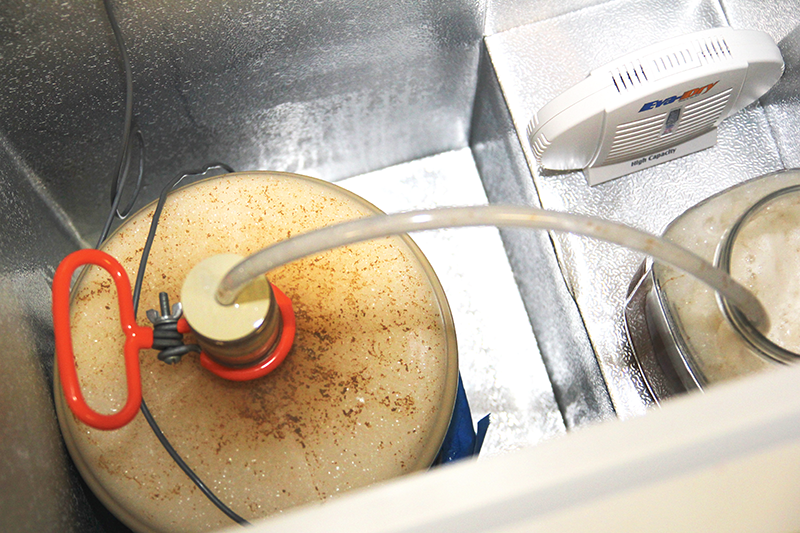
Store Bought Spring Water: Most bottled spring waters are filtered (the treatment varies) and have re-mineralized the water ensuring a good taste. You can also purchase these in convenient 5-gallon carboys. The mineral concentration will be added to the minerals in the extract. However, the consistency of bottled spring water is preferable to seasonable quality changes that often affect tap water.
Shop Water Treatment
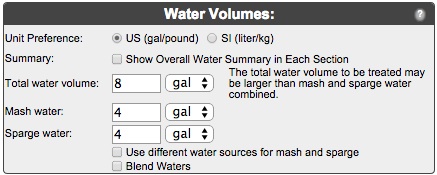
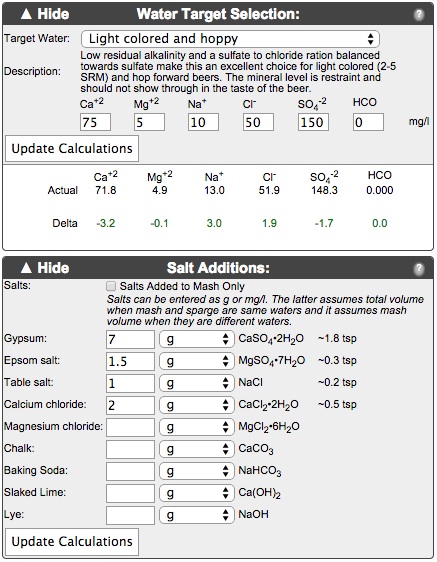
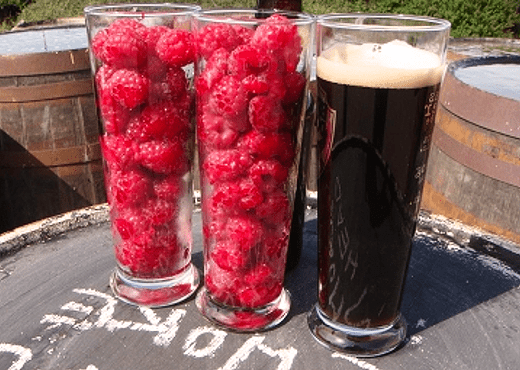
Tap, well and Spring Waters contain dissolved minerals that impart flavor and mouth feel to your beer. Be careful adding minerals, which might, in concert with minerals already in the extract, create strong mineral or metallic flavors. Experiment for the best results.
Reverse Osmosis (RO), De-Ionized (DI) and Distilled Water: Some stores offer filtered water products in bulk. In addition, home RO or RO/DI filters have become quite common and inexpensive. Distilled water is also a good choice. These water sources are really ideal for extract brewing, and offer the best basis for adding minerals as part of your beer recipe.
Water is the fundamental ingredient (up to 97%) in beer. Your tap water may make good beer, but try an alternative source and see if things improve. Choosing the best quality water will ensure your extract recipes have the best chance of becoming great beers!
In Part Two, we will explore the use of common mineral additions to enhance and tweak your extract and partial mash recipes.
———————————————————————-
Series: Part 1 | Part 2 | Part 3
———————————————————————-
Matt Chrispen is a passionate, experienced home brewer, craft beer fanatic, and collector of brewing gear. He also maintains a blog on advanced brewing topics at Accidentalis.com.

My First Mead

Mead in a fermenterAfter attending a mead-making workshop and listening to some tips from the pros, I’ve decided it’s time to make my first mead! Since it’s my first go-round, I’m keeping it simple: honey, water, yeast, and yeast nutrient. If the flavor needs adjusting later on, I can easily do that during secondary fermentation, but for now, I’d like to start with the basics of making mead.
Preparing the mead couldn’t have been easier. I actually mixed it together while making a batch of homebrew, so it took essentially zero extra time out of my day. While the malted grains for my beer were steeping, I mixed the honey and the water for the mead in a fermenting bucket. Since this is my first try, I’m just doing a one-gallon batch.

My First Mead Recipe (1 Gallon)
1 qt. blackberry honey
3 qts. reverse osmosis water
1/2 pack Lalvin 71B wine yeast
1 teaspoon yeast nutrient, added in fourths over 72 hrs

Since there is no boiling or mashing in making mead, mixing the ingredients together was a cinch:

  • Pour the water into the sanitized fermenting bucket
  • Pour in the honey
  • Add 1/4 tsp. of the yeast nutrient
  • Mix well with a sanitized stirring spoon
  • Pitch the rehydrated yeast

*Note: Rehydrating the yeast is simply placing the yeast in a small amount of pre-boiled water at about 100˚F. Just practice good sanitation and follow the directions on the packet.
 
All in all, the mixing of the mead probably took about 30 minutes tops, including rehydrating the yeast and cleaning/sanitation. Per Michael Fairbrother’s recommendation, I set the fermenting bucket in my new fermentation chamber at 62˚F.

shop carboysStaggered Nutrient Additions
You probably noted that the yeast nutrient in the recipe was divided into four parts. Many mead makers suggest adding yeast nutrient gradually during the fermentation process. I followed Michael Fairbrother’s recommendation again, adding a quarter teaspoon of the yeast nutrient during the initial mixing step, then a quarter teaspoon each at 24 hours, 48 hours, and 72 hours into fermentation. Pretty easy. Once again, sanitation is really important any time you open the fermenter. Sanitize the stirring spoon, the teaspoon, and anything else that may come in contact with the mead when adding the staggered yeast nutrient additions.

So that’s it! I’m planning to leave the mead alone at 62˚F for about three months before transferring it to a one-gallon jug. I’ll taste the mead at that point to decide whether to add any tannin, acid blend, or any other flavorings to enhance the mead.

Have you ever made mead? How did it turn out?
———————————————————————-
David Ackley is a beer writer, brewer, and self-described “craft beer crusader.” He holds a General Certificate in Brewing from the Institute of Brewing and Distilling and is founder and editor of the Local Beer Blog.

Cloning Ithaca Beer Co.'s Flower Power-Pt. 4: Primary Fermentation Mishaps

Beer Fermenting With Blow OffThis is part 4 of cloning a Flower Power IPA from Ithaca Beer Co. In part one I discussed how I researched and went about developing the clone recipe. In part 2 I showed how I went about calculating some brewing water adjustments. In part three I went over how the brewing process went. Now, in part four I’ll go over how the yeast pitching went and how primary fermentation is doing.
———-
Primary fermentation is usually one of those “hurry up and wait” situations where you just watch the yeast chug along and the airlock bubble away. But that’s not always the case.
After pitching the yeast starter for my Flower Power clone, I watched as the krausen grew on the surface of the wort for about 24 hours. Then the airlock started its telltale blip, signaling that CO2 was leaving the fermenter. Fermentation temperature was in the mid to upper 60s and everything was looking great. But by the second day of fermentation, I started running into some problems.
This Flower Power clone is a relatively high gravity beer, with an original gravity of 1.075. That translates to the unfermented wort being about 18% sugar. About 48 hours into primary fermentation, the yeast started going nuts!
Upon checking the fermenter one afternoon, I found that the fermentation had blown the bung right off the fermenter and was slowly spewing yeasty goodness all over my fermentation chamber! At this point, it wasn’t anything I hadn’t seen before and wasn’t cause for much concern. Besides, the beer smelled amazing. So I cleaned up the fermenter, the bung, and the airlock, and rigged up a blow-off tube to handle the excessive krausen. Within minutes of doing so, the pressure inside the fermenter blew off the blow-off tube!
It took me a couple repetitions of cleaning and replacing the tube to finally figure it out, but what was happening was that the krausen, being laden with a significant amount of hop material, was getting clogged on its way out of the fermenter. Pressure inside the fermenter would build until the bung would pop right out.
Shop Beer Recipe Kits
I attempted an alternative to the blow-off tube: wetting a paper towel with sanitizer solution and using a rubber band to secure it at the mouth of the fermenter. But this didn’t work either.
So how did I get past this messy situation?
I discovered that the airlock that I had been using had a small crosspiece at the base, a little “X” that provided a barrier for hop material to get stuck on and become clogged. What eventually worked was switching out the base with an airlock without the little X – you can see how this airlock has an open hole at the bottom. This opening gave the krausen and CO2 unimpeded flow out of the fermenter.
This “crisis” averted, the Flower Power clone has gotten through the most vigorous stage of fermentation and continues to chug away at about 68°F. And just from the whiffs I got while changing out the blow-off tube, I’m very excited about this beer. Stay tuned!
—————————————————————–
Review the whole Flower Power clone brewing process below:

—————————————————————–
David Ackley is a beer writer, homebrewer, and self-described “craft beer crusader.” He holds a General Certificate in Brewing from the Institute of Brewing and Distilling and is founder of the Local Beer Blog.

5 Gallons of Apple Juice, Three Hard Cider Recipes – Pt. 2: Secondary Fermentation

Apples For Making Cider
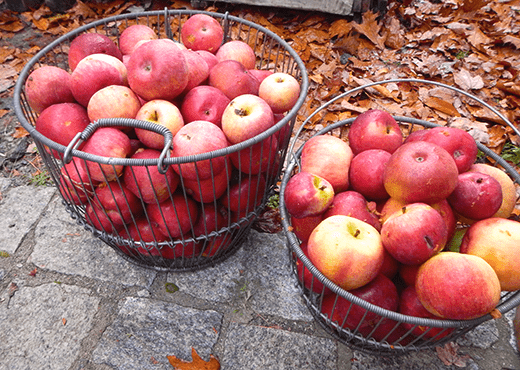
I recently shared my plans for making hard apple cider this year. Pasteurization and pitching the yeast was pretty straight forward, and for the first week or so fermentation chugged along without a hitch. The plan for secondary fermentation was to add hops to some of the cider, fruit and spices to some of it, and leave the rest plain.
To make room for my Flower Power clone, I went ahead and transferred my cider into the three different fermenters and added the extra flavoring ingredients. Turns out, I might have done this a little early – my gravity was still about 1.025 – but like I said I needed the space.
Here’s how I went about racking the cider into three different fermenters:
1. Cleaned and sanitized all fermenters, transfer tubing, stoppers, and airlocks.
2. Filled the three-gallon carboy with about 1 ounce of hops that I had on hand: .5 ounce Palisade and .5 ounce Columbus.
3. Filled one of the one-gallon jugs with about 10 ounces of frozen blueberries, plus 5 grains of decorticated cardamom. Cardamom can be a pretty assertive spice, so I wanted to use a light hand.
4. The last one-gallon jug didn’t get any additions. It’s the “control” batch.
5. Racked the five gallons of juice from the 6 gallon carboy to the three gallon carboy and the two, 1-gallon jugs. This was a little tricky. There must be a good way to do this without getting juice on the floor, but I haven’t figured it out yet. One of these flow control hose clamps, or better yet, a siphon faucet, would probably help.
6. Sealed up each fermenter with a bung and airlock and return to the fermentation chamber.
Aside from some mess on the floor, making this hard apple cider had gone pretty easy. But within a day or so noticed an issue.
Since I wanted to avoid headspace and potential infection, I filled each fermenter to within an inch or so of the bung. Unfortunately, I found that transferring the cider and adding hops really agitated the hopped cider, so much so that it started pushing cider into the airlock and hops into the upper portion of the carboy – some of the hops didn’t have good contact with the cider.Shop Beer Flavorings
I ended up using a sanitized auto-siphon to remove about a cup of cider from the fermenter. This gave the cider a little extra room for fermentation activity and it seemed to resolve the issue of clogging the airlock.
So after that relatively minor episode, the ciders continue to ferment away in the mid to upper 60s. Hopefully they will hurry up and finish so I can go ahead and bottle. With any luck, I’ll have three hard ciders to get me through the winter!
I’ve heard that cider takes time to age. What is your experience with making hard apple cider? How quickly can it be consumed? Share in the comments below!
Series: Part 1 | Part 2 | Part 3
———————————————————————-
David Ackley is a beer writer, homebrewer, and self-described “craft beer crusader.” He holds a General Certificate in Brewing from the Institute of Brewing and Distilling and is founder of the Local Beer Blog.

A Simple Recipe And A Holiday Wish

We would like to stop and take a moment to wish you the very best this holiday season. We sincerely hope that your Christmas is full of joy and excitement, and that the New Year brings you the brightest of days and provides you with all for which you strive.
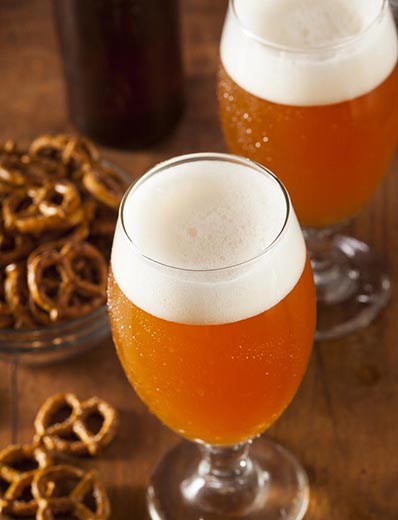
In keeping with the holiday spirit I have listed below an eggnog recipe that I have used for many years. It has ‘Breakfast’ in its title, but have found that works equally well for lunch, dinner and bedtime cap.  I’d like to share it with you in hopes that it might bring a little warmth to your holiday season.
Holiday Breakfast Eggnog

  • 10 ounces of Apricot Brandy
  • 3 ounces of Triple Sec
  • 1 Quart of Eggnog
  • Mix together and sprinkle with Nutmeg

MERRY CHRISTMAS!
From Everyone At E. C. Kraus
———————————————————————————————————
Ed Kraus is a 3rd generation home brewer/winemaker and has been an owner of E. C. Kraus since 1999. He has been helping individuals make better wine and beer for over 25 years.

Cloning Ithaca Beer Co.’s Flower Power – Pt. 3: Brew Day

Brewing Flower Power Clone Beer RecipeAfter developing a recipe and experimented with brewing water adjustments for this beer, the actual brewing of the Ithaca Beer Co. Flower Power clone beer recipe was put on hold for a couple weeks while I was out of town. I finally got around to brewing the IPA last weekend and boy am I excited about this beer! Brew day didn’t exactly go off without a hitch, but there weren’t any major issues that should cause major problems down the line. Here’s how brew day went last weekend.

Preparing the Yeast Starter

The night before brewing I made a yeast starter with light DME and one pack of California ale yeast. I don’t have a stir plate or flask yet (they’re on the list!), so I just used a growler and gave the starter a swirl every few hours or so.

The Set Up

I usually try to get all my ingredients and gear together before I actually start brewing. This helps eliminate the multitasking that can often result in a mistake.
First I assembled the ingredients: malt, hops, yeast starter, and water amendments. Then I get all the equipment set up, plus a stack of towels at the ready. I’ll usually turn on some music and have a snack on hand just in case. At least a few days in advance, I’ll check the propane tank to make sure there’s enough fuel for the brew. Did you know you can weigh the tank to estimate how much fuel you have left? I’ll share how to do that in a separate post.

Clean and Sanitize 

The next step before brewing the Flower Power clone recipe– and in many ways the most important – is to clean and sanitize the brewing equipment. I won’t go over this in detail, but if you need a refresher you can check out this post for tips.

The Mash

I mashed my crushed grains in about 4.75 gallons of water. One thing I’ve been trying to dial in over the past few brews in my strike temperature – that is, the temperature of the water before it goes into the mash. Since the grain and the mash tun are often room temperature, you have to compensate by adding water that’s at least 10-15˚F hotter than your target mash temperature. Given that things are even colder in the winter, I aimed high. With a strike temperature of 180˚F, I was able to get the mash temperature right where I wanted it, in the mid-150s. You can use a calculator such as this one to estimate your strike temperature.
Here’s where I ran into a little problem – despite my efforts to get organized before brewing, after 60 minutes I realized I’d forgotten to add the honey malt! Doh! Luckily it’s not a big mistake. The honey malt is in the clone recipe mostly for flavor and color, and in theory the sugars should only take 30 minutes to convert. So I just mixed in the honey malt and added 30 minutes to the mash time. With the extra time added to the mash, I probably ended up with even better efficiency than I would have otherwise!

The Sparge  Shop Barley Crusher

I find I’m consistently low on the amount of sparge water I need. My calculations said 4-4.5 gallons would do the trick, but between grain absorption and volume loss in the mash tun, I was about a gallon short of my pre-boil volume. I just quickly heated up another gallon of water and made a note to adjust my calculations for next time.
At the end of the sparge I found I had six gallons of wort with a preboil gravity of 1.068 – right on target!

The Boil 

I think of the boil as the start of the home stretch. All it takes is watching the clock to make sure the hops get in on time. The four hop additions for this Flower Power clone beer recipe smelled amazing – Simcoe at :60, Chinook at :20, Citra at :10, and Ahtanum and Centennial at :0. And we haven’t even touched the dry hops yet!
My post-boil gravity was 1.075 – just a point shy of the estimated OG – but well within the margin of error. This beer should easily surpass 7% ABV.

The Chill & the Pitch

The colder ground water temperatures this time of year really help with cooling the wort quickly. My immersion wort chiller got the wort to pitching temperature in about 20 minutes. I pitched the yeast starter and now the beer is fermenting happily in the fermentation chamber!
Stay tuned to see how this Flower Power clone beer recipe turns out!
—————————————————————–
Review the whole Flower Power clone brewing process below:

—————————————————————–
David Ackley is a beer writer, homebrewer, and self-described “craft beer crusader.” He holds a General Certificate in Brewing from the Institute of Brewing and Distilling and is founder of the Local Beer Blog.

Judging Fruit Beers

Glasses Of Raspberries With Glass Of PorterIn the afternoon session of my recent BJCP beer judging experience, I was assigned to Category 20: Fruit Beer. Check out my previous post about Judging In A Homebrew Competition: English Brown Ales.
The Fruit Beer category is an odd bird. It basically allows the homebrewer to add fruit to any beer. As with about any style, the keys to success in the Fruit Beer category are balance and overall harmony with the base style. This creates some interesting combinations on the beer side, and presents some challenges for someone who is judging fruit beers, who will be confronted with a range of different beer styles. For example, you might come across a strawberry wheat beer, a blackberry porter, and a raspberry stout, and have to judge each beer based on its own merits.
Balance is the key with this style. Since just about any base style can be declared, someone who is judging fruit beers has to determine whether the base beer is in balance with the fruit. This is the case in the flavor as well as aroma. However, the judge must keep in mind that some fruits have very distinctive flavors and aromas. Typically hops are reduced in fruit beers to allow the fruit to come through.
Fruit can do some funny things to the appearance of beer. Though the appearance of the beer should be appropriate for the base style, sometimes fruit can contribute color or haze to a beer. It’s not necessarily a problem for the beer to take on some color from the fruit, but a clear beer generally gets higher marks for appearance than a hazy one. Pectic enzyme can help break down the pectins that are responsible for fruit-derived haze.
shop_beer_recipe_kitsFor about 80% of the entries that came across my table while judging fruit beers, the fruit was out of balance, much too heavy. On the flip side, the handful of beers that showed restraint in the fruit could have used a little more. It was evident how challenging it is to find the perfect balance when brewing fruit beer.
Interestingly, some of the more robust styles stood up to the fruit better than some of the lighter styles. Though there were some excellent strawberry blondes and strawberry wheats, the porters worked very well with blackberries and raspberries. This seems to indicate that the more delicate the fruit, the more delicate the base style should be.
Ultimately, one of my favorite beers of the bunch was a blackberry porter. Check out this article to make your own fruit beer.
Have you ever brewed an award-winning fruit beer? What’s your secret?
—————————————————————————————————————–
David Ackley is a beer writer, brewer, and self-described “craft beer crusader.” He holds a General Certificate in Brewing from the Institute of Brewing and Distilling and is founder and editor of the Local Beer Blog.

5 Gallons Of Apple Juice, Three Hard Cider Recipes – Part 1: Pasturization & Pitching

Baskets Of ApplesOne of the benefits of joining a homebrew club is that you’re often exposed to group events and discounts. My local homebrew club does an annual cider pressing at a local cidery. This year I picked up five gallons of juice. Here’s my game plan for making hard apple cider.
From my five gallons of apple juice I want to make three different hard ciders: one plain, one with hops, and one with fruit and/or spices. I plan to ferment the five gallons together, then split them up at secondary fermentation into three different fermenters: one three-gallon glass carboy and two one-gallon glass jugs. (I already have the appropriate bungs and airlocks from previous experiments.)
As for the other ingredients, I opted not to use any additional sugar at this time. Upon recommendation from a friend, my yeast of choice making these hard apple ciders was Wyeast 1098: British Ale Yeast.
The first step when making hard cider from soft (non-alcoholic) cider is to stabilize the juice. One dilemma I had to sort through was how to stabilize the juice.
Campden Tablets vs. Pasteurization
Last year, I tried making hard apple cider using the standard method of adding Campden tablets to the juice. The Campden tablets stabilize the juice by releasing sulfur dioxide, which kills off any microbes that my have been living on the fruit. Yes, it smells a little like rotten eggs, but none remains at the end of the cider making process. Typically, the cider maker will add one tablet per gallon of juice, wait 24 hours while it does its thing, then pitch the yeast.
shop_carboysFor some reason, this didn’t work out for me last year. Either the juice was especially funky, or I left the apple cider in the primary fermenter for too long and with a more head-space than it should have had. The cider got moldy and I had to dump the whole thing.
This year, I’m doing things differently. In an attempt to prevent infection, I’m pasteurizing the juice. Yesterday afternoon, I picked up the juice. Last night I pasteurized the juice by heating it to 180˚F. Why 180˚F? 180˚F is hot enough to kill off wild microbes, but not quite boiling. Boiling the apple juice could result in a pectin haze. The pectin haze wouldn’t affect flavor, but I’d like to get a clear cider if I can. (I may still end up with some haze. In this case, pectic enzyme could come in handy.)
In theory, this pasteurization process should have killed off any yeast or bacteria that may have been living on the apples. During this run of making hard apple cider I had been thinking about adding sugar to boost the potential alcohol content, but my hydrometer showed the juice had a specific gravity of 1.050. Since apple juice will usually ferment completely dry, this should come out to about 6.5% ABV. That’s right where I want it, so no sugar needed.
Yeast Nutrient for Hard Cider
I added 1 tsp. of yeast nutrient per gallon of juice. I mixed this in while pasteurizing the juice.
Yeast Starter for Hard Cider
Cider FermentingWhile pasteurizing the juice (see above), I pulled off a half gallon for use in a yeast starter, pasteurized it separately, cooled it down and pitched the yeast. This gave the yeast a couple hours to grow and multiply before being pitched into the main batch. That’s not much of a head start, but it’s better than nothing.
I’m no cider master, but I have a good feeling about where this one is headed. I’m learning that making hard apple cider may not be as difficult as I first had suspected. Today, it’s fermenting away at 68˚F!
Stay tuned to see how it turns out!
Series: Part 1 | Part 2 | Part 3
—————————————————————————————————————–
David Ackley is a beer writer, brewer, and self-described “craft beer crusader.” He holds a General Certificate in Brewing from the Institute of Brewing and Distilling and is founder of the Local Beer Blog.

Judging In A Homebrew Competition: English Brown Ales

Scoresheet for judging a homebrew competition
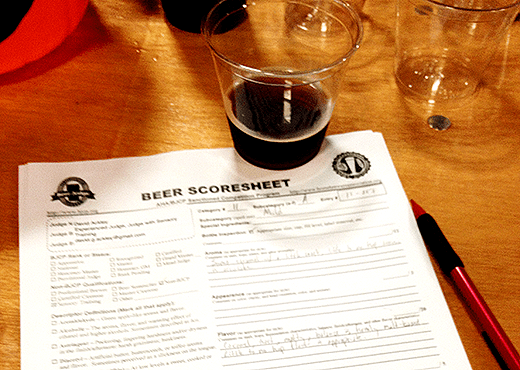
I recently had the opportunity to judge at a local homebrew competition. Judging homebrew in competition is a great way to improve your sensory technique and your abilities to detect subtle differences in ingredients within a certain style. I will share my experiences to shed some light for those who are interested in competing in homebrew competitions.
The competition I judged for was a BJCP-sanctioned homebrew competition. That means all of the beers were submitted in and judged against categories based on the Beer Judge Certification Program Style Guidelines. Though the BJCP has recently announced changes to the style guidelines, this competition was judged using the 2008 Style Guidelines.
What typically happens with these homebrew competitions is that the host homebrew club seeks out volunteer judges and stewards. Judges judge the beer; stewards facilitate distributing the entries to the judges. Judges are assigned to different style categories. There are at least two judges per category. Sometimes categories are combined if there aren’t enough judges to go around.
For this homebrew competition, I was assigned to judge English Brown Ales and Fruit Beers. I’ll start by sharing my experience with the English Brown Ales.
One of the challenges in judging this category was in the diversity of the three sub-styles within the broader category:

  • Mild: “A light-flavored, malt-accented beer that is readily suited to drinking in quantity. Refreshing, yet flavorful. Some versions may seem like lower gravity brown porters.”
  • Southern English Brown Ale: “A luscious, malt-oriented brown ale, with a caramel, dark fruit complexity of malt flavor. May seem somewhat like a smaller version of a sweet stout or a sweet version of a dark mild.”
  • Northern English Brown Ale: “Drier and more hop-oriented that southern English brown ale, with a nutty character rather than caramel.”

If you click the links above, you’ll see that each has fairly specific specifications for the aroma, flavor, appearance, and mouthfeel of each beer. The judge scores each entry on each of the four sensory areas, as well as their overall impression. Scores are given by each judge, which are then averaged out by the steward. The top three beers in each category are awarded prizes, with the top beer in each category moving forward to compete for the Best of Show (the top three best beers out of the whole competition).Shop Beer Ingredient Kits
In this homebrew competition, there were about 5-6 entries each for Mild and Northern English Brown Ale, and a single entry for Southern English Brown Ale. It quickly became apparent how subtle the differences could be between each beer. Though each beer within a subcategory may look identical, some would have more prominent malt flavor than others. Some had more of a toasty character, while others had stronger caramel notes. Most of them were very good, but a few had some fermentation faults and off-flavors, such as diacetyl, in which case the judge is expected to make suggestions for how to fix it.
In judging the English Brown Ales, I found that while color may be similar between the three subcategories, Mild is more nutty, Southern English Brown Ale more fruity, and Northern English Brown Ale more nutty with a more assertive hoppy character. The Southern English Brown is very fruity compared to the Mild and the Northern English Brown. With the Mild being such a delicate style, it was hard to hide subtle faults. The beers with clean fermentation were quite good, and those with fermentation problems stuck out. There just aren’t that many hops to hide behind.
For the best beers, the key was balance, which leads me to believe that to achieve such a balance, it really requires a brewer to brew the beer multiple times to really refine the recipe. If you’re interested in competing in homebrew competitions, you might consider picking a style or two to concentration on in order to really get your recipe dialed in.
Have you done any judging in a homebrew competition? Do you ever submit beers in competition to be judged? What has your experience been like?
—–
David Ackley is a beer writer, brewer, and self-described “craft beer crusader.” He holds a General Certificate in Brewing from the Institute of Brewing and Distilling and is founder and editor of the Local Beer Blog.
—————————————————————————————————————–
Ed Kraus is a 3rd generation home brewer/winemaker and has been an owner of E. C. Kraus since 1999. He has been helping individuals make better wine and beer for over 25 years.

Cloning Ithaca Beer Co.’s Flower Power – Pt. 2: Brewing Water Adjustments

Flower Power BeerLast week I put together a clone recipe for Ithaca Beer Co.’s Flower Power, a deliciously hoppy American IPA. As I prepare to brew the beer, the next thing I will focus on is a water profile and making brewing water adjustments necessary.
I’ve been getting relatively obsessed with water profiles and brewing water chemistry lately. After conducting an experiment with gypsum, I am absolutely convinced that it can have an effect on the perception of hop flavor. I’ve also noticed that including elements like magnesium, which are beneficial to yeast health, my fermentations have appeared stronger and healthier.
To figure out how to adjust the brewing water for this IPA, I need two sets of figures: a source water profile and a target water profile. There are several programs that can help with these water calculations, but in this case I’ll use the water adjustment calculator on Brewer’s Friend. It’s free to use and relatively straightforward. Let’s walk through how to use it.
1. Input water volumes
Here I will stick with the defaults:
Flower Power pt 2 - Water Volumes.jpg
2. Input source water profile
Here’s what my municipal water profile looks like:
Flower Power pt 2 - image 2.jpg
3. Select a target water profile and compare source water to target water
Here I’ll choose the “light colored and hoppy” water profile. Brewer’s Friend also provides target water profiles for many of the major brewing cities of the world.
After clicking on Update Calculations, I can now see the difference between my source water and the target water profile. A number in green is relatively close to the target, a number in red is off. The arrows show whether your water has too much or too little of a given mineral. It’s easy to play around with the Salt Additions (next box down) to see how they will adjust the water profile.
One trouble spot in this example is the alkalinity. Since I can’t add minerals to remove alkalinity, I have to change my source water by using reverse osmosis or distilled water. That’s the only way to get the HCO levels down to 0 (as far as I know).
In this case, I’ve gone back to edit my input water to match distilled water:
Flower Power pt 2 - image 3.jpg
4. Compare source water to target water and determine salt additions
Now I can play around with the mineral salt addition inputs to get the brewing water profile adjusted to as close to the target as possible. Here’s the initial difference between the two waters:
Flower power pt 2 - image 4.jpg
And here’s the mineral salt combination I’ve found that will get me pretty close to the target water profile I need:
Flower Power pt 2 - image 5.jpg
On brew day, I’ll use a small digital scale to weigh out the different mineral salts. This mineral salt combination will be added to the total water used in the beer recipe – all 8 gallons as determined in the original water volume input. For now, I can add the additions to my homebrewing notes so they’ll be ready when I need them.
The Water Calculator goes on to include brewing water adjustments and inputs for adjusting mash pH as well, but I’ll save you the trouble and just say that in this case none are needed. Feel free to play around with the calculator to determine whether you need to add any acids to acidify your mash.
Next, stay tuned for the Flower Power Brew Day!
—————————————————————–
Review the whole Flower Power clone brewing process below:

—————————————————————–
David Ackley is a beer writer, homebrewer, and self-described “craft beer crusader.” He holds a General Certificate in Brewing from the Institute of Brewing and Distilling and is founder of the Local Beer Blog.