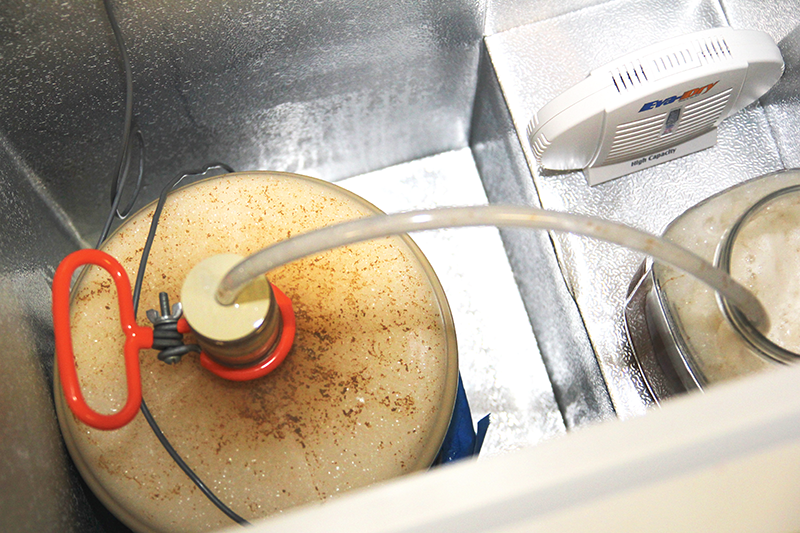
 This is part 4 of cloning a Flower Power IPA from Ithaca Beer Co. In part one I discussed how I researched and went about developing the clone recipe. In part 2 I showed how I went about calculating some brewing water adjustments. In part three I went over how the brewing process went. Now, in part four I’ll go over how the yeast pitching went and how primary fermentation is doing.
———-
Primary fermentation is usually one of those “hurry up and wait” situations where you just watch the yeast chug along and the airlock bubble away. But that’s not always the case.
After pitching the yeast starter for my Flower Power clone, I watched as the krausen grew on the surface of the wort for about 24 hours. Then the airlock started its telltale blip, signaling that CO2 was leaving the fermenter. Fermentation temperature was in the mid to upper 60s and everything was looking great. But by the second day of fermentation, I started running into some problems.
This Flower Power clone is a relatively high gravity beer, with an original gravity of 1.075. That translates to the unfermented wort being about 18% sugar. About 48 hours into primary fermentation, the yeast started going nuts!
Upon checking the fermenter one afternoon, I found that the fermentation had blown the bung right off the fermenter and was slowly spewing yeasty goodness all over my fermentation chamber! At this point, it wasn’t anything I hadn’t seen before and wasn’t cause for much concern. Besides, the beer smelled amazing. So I cleaned up the fermenter, the bung, and the airlock, and rigged up a blow-off tube to handle the excessive krausen. Within minutes of doing so, the pressure inside the fermenter blew off the blow-off tube!
It took me a couple repetitions of cleaning and replacing the tube to finally figure it out, but what was happening was that the krausen, being laden with a significant amount of hop material, was getting clogged on its way out of the fermenter. Pressure inside the fermenter would build until the bung would pop right out.

I attempted an alternative to the blow-off tube: wetting a paper towel with sanitizer solution and using a rubber band to secure it at the mouth of the fermenter. But this didn’t work either.
So how did I get past this messy situation?
I discovered that the airlock that I had been using had a small crosspiece at the base, a little “X” that provided a barrier for hop material to get stuck on and become clogged. What eventually worked was switching out the base with an airlock without the little X – you can see how this airlock has an open hole at the bottom. This opening gave the krausen and CO2 unimpeded flow out of the fermenter.
This “crisis” averted, the Flower Power clone has gotten through the most vigorous stage of fermentation and continues to chug away at about 68°F. And just from the whiffs I got while changing out the blow-off tube, I’m very excited about this beer. Stay tuned!
—————————————————————–
Review the whole Flower Power clone brewing process below:
- Part 1: Developing a Recipe
- Part 2: Brewing Water Adjustments
- Part 3: Brew Day
- Part 4: Primary Fermentation Mishaps
- Part 5: Bottling & Kegging
- Part 6: A Conditioning Taste Test
- Part 7: Final Side-by-Side and Recipe Edits
—————————————————————–
David Ackley is a beer writer, homebrewer, and self-described “craft beer crusader.” He holds a General Certificate in Brewing from the Institute of Brewing and Distilling and is founder of the Local Beer Blog.
