Bottling One-Gallon Batches of Beer, Mead, and Cider

Gallon Of Beer Ready To Be Bottled.
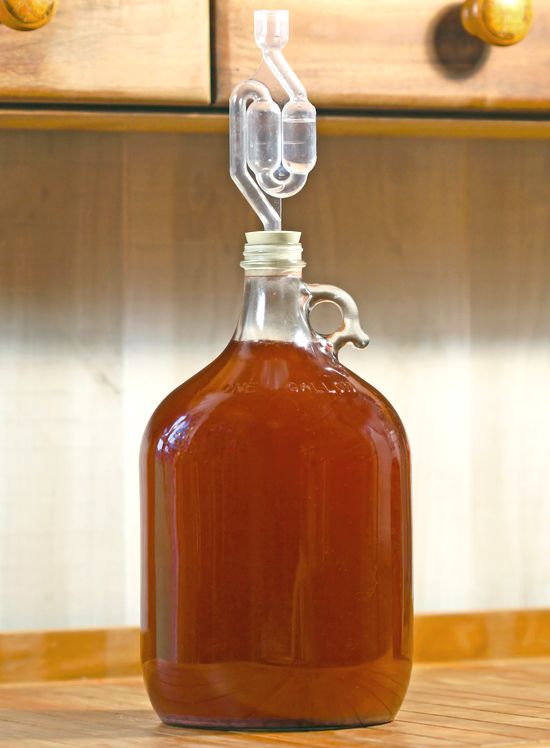
Small batch brewing offers many advantages: you can brew with limited space and equipment, test a new recipe, or divide a batch into smaller batches for experimentation. But one of the challenges with brewing small batches is bottling one gallon of beer. Bottling buckets are made for bottling five gallons at a time. Since the spigot is positioned above the bottom of the bucket, it’s normal to lose a bit of beer, and for a five-gallon batch that’s no big loss. But when just bottling one gallon, we want to maximize the amount of beer, mead, or cider we get from the batch and the task becomes a little awkward.
So what’s the most efficient way to bottle a one-gallon batch? Here are a few options and some tips for small batch brewing:

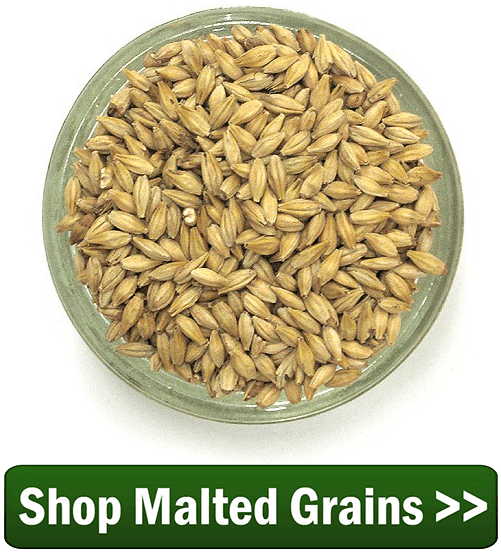
  1. Build a mini-bottling bucket – Some homebrewers take a smaller food-grade bucket and convert it into a mini-bottling bucket. Simply drill a hole into a two-gallon, food-grade bucket and install a spigot. Then just follow normal bottling procedures, siphoning your beer and mixing the priming sugar in this smaller bucket.
  1. Fill from a pot – Some like to transfer these small batches into a pot and siphon into bottles from there. This can be especially helpful if you need to add priming sugar. Just prepare the priming sugar in the pot, siphon your beer onto the priming sugar, and then siphon out into the bottles.
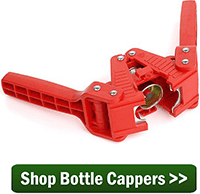
  1. Use a clamp or stopcock – These nifty devices will take the guesswork out of how to stop the flow while siphoning and will allow you to accurately fill each bottle with minimal spillage. Be sure to leave some space (about an inch) at the top of each bottle.
  1. Use a mini auto-siphon – It can be a little tricky using a full-size racking cane or auto-siphon when transferring a one-gallon batch. The mini auto-siphon is made just for this purpose and fits perfectly into one-gallon jugs.Shop Gallon Glass Jugs
  1. Transfer to the bottling bucket as usual – If all else fails, you can just bottle as usual. Just know that you’ll have to tilt the bucket to get every last drop. You’ll likely end up with a small amount or beer leftover – drink up!

Small batch brewing is a great way to experiment with homebrewing without making a huge investment in ingredients or equipment. To convert a five-gallon recipe into a one-gallon recipe, simply divide the ingredients by 5. And now that you have the tips above, bottling one gallon of beer, mead or cider should be a piece of cake.
Have you ever tried small batch brewing? Do you have any tricks for bottling one gallon at a time?
———————————–
David Ackley is a beer writer, brewer, and self-described “craft beer crusader.” He holds a General Certificate in Brewing from the Institute of Brewing and Distilling and is founder and editor of the Local Beer Blog.

Cooking with Beer: Chocolate Stout Cupcakes

Chocolate Stout CupcakesThere are lots of culinary uses for beer: marinades, soups, sauces, baking, cocktails. Cooking with beer is just one more way to bring creativity into your homebrewing hobby. A few years ago, I discovered a recipe for some the most decadent cupcakes I’ve ever had – and they just happened to be made with beer!
For this recipe, most any dark beer will work, though I’d avoid anything with an excessive amount of hops, since the bitterness can come through in the food. For example, I wouldn’t try this with a black IPA, but a milk chocolate stout, a coffee stout, or even Guinness would work great. Another fun commercial beer option is Terrapin’s Moo-Hoo Chocolate Milk Stout.
The recipe below comes from the Food Network, but I’ve made a couple changes. In particular, I reduced the powdered sugar in the icing from 1 lb. to 3/4 lb. Don’t worry – these cupcakes are still plenty sweet!

Recipe: Chocolate Stout Cupcakes
For the cupcakes:

  • 3/4 cup unsweetened cocoa (reserve a couple tablespoons for dusting the finished cupcakes)
  • 2 cups sugar
  • 2 cups all-purpose flour
  • 1 tsp. baking soda
  • Pinch of fine sea salt
  • 12 oz. homebrew beer (milk chocolate stout is amazing!)
  • 1 stick butter, melted
  • 1 tbsp. vanilla extract
  • 3 large eggs
  • 3/4 cup sour cream

For the icing:

  • 1 (8 oz.) package cream cheese, at room temperature
  • 3/4 to 1 cup heavy cream
  • 3/4 lb. powdered sugar

To make the cupcakes:

  1. Preheat oven to 350˚F.
  2. Shop Beer Recipe KitsIn a large mixing bowl, mix together the dry ingredients: cocoa, sugar, flour, baking soda, and salt.
  3. In another mixing bowl, combine the beer, melted butter, and vanilla.
  4. One at time, beat the eggs into the liquid ingredients, then mix in the sour cream until thoroughly combined.
  5. Gradually mix the dry ingredients into the wet mixture.
  6. Lightly grease 24 muffin tins. Divide the batter equally between the muffin tins, filling each 3/4 full.
  7. Bake for about 25 minutes, rotating the pan halfway through. Remove from the over when the cupcakes are risen, nicely domed, and set in the middle but still soft and tender. Cool before removing the cupcakes from the pan.

To make the icing:
* The icing can be made in advance and kept covered in the refrigerator.

  1. In a medium bowl, beat the cream cheese on medium speed until light and fluffy.
  2. Slowly beat in the heavy cream.
  3. Gradually mix in the powdered sugar until incorporated and smooth.
  4. Cover with plastic wrap and refrigerate until ready to use.

To serve, top each cupcake with frosting and dust with cocoa. If you’re feeling extra naughty, serve with a glass of your homebrewed stout!
Do you ever cook with your homebrew? What do you like to make?
———————————–
David Ackley is a beer writer, brewer, and self-described “craft beer crusader.” He holds a General Certificate in Brewing from the Institute of Brewing and Distilling and is founder and editor of the Local Beer Blog.

Introducing: Steam Freak Blue Noon (A Blue Moon Clone Recipe)

Steam Freak Beer Recipe KitsBlue Moon is a very popular beer in the United States. Many consider it a “gateway beer” to other beer styles from around the world. Based on the Belgian witbier style, Blue Moon is a hazy, golden orange brew with pronounced orange flavors. As with traditional witbier, Blue Moon is brewed with orange and coriander and often served with a slice of orange. It’s a great beer for the summer!
Our Steam Freak Blue Noon Recipe Kit uses two cans of Steam Freak light LME make for an easy brew day, while oats and white wheat contribute body and soft grain flavor. And of course, orange peel and coriander contribute enticing notes of citrus.
This is a partial mash recipe kit. In this recipe, partial mash brewing combines the brew in a bag (BIAB) technique with extract brewing. Using a grain bag (included in the kit) steep the 2.75 lbs of crushed grains in 150-160˚F water for 20-30 mins, then withdraw the bag and proceed with the recipe.
Consider saving 10% by buying two kits, which will also qualify for free shipping!

Steam Freak Blue Noon (Blue Moon Clone)
(Partial-mash recipe, five-gallon batch)

glass_of_blue_moon
Specs
Style: Belgian Wit
OG: 1.055 – 1.060
FG: 1.0014 – 1.018
ABV: 5.5%
IBUs (Bitterness): 20

Ingredients
6.6 lbs. Light Liquid Malt Extract
1 lb. two-row malt
1 lb. white wheat malt
12 oz. flaked oats
2 oz. Hallertau hops
Orange peel
Ground coriander
Mangrove Jack’s M20: Bavarian Wheat Yeast
Also included in this kit:
Grain Bag
Bottle Caps
Priming Sugar
Directions: Shop Steam Freak KitsPreboil and chill about 3 gallons of water. This will be used at the end of brew day. Clean and sanitize all equipment. Place crushed specialty grains in the included grain bag and steep in three gallons of clean water for 30 minutes at 155˚F. Remove grains and discard. Mix in malt extracts while stirring and bring wort to a boil. Add hops and spices according to recipe instructions. At the end of the boil, stir wort to create a whirlpool and chill to about 70°F. This can be done with an ice bath or a wort chiller. Pour wort into a sanitized fermenter, leaving sediment behind in the brew kettle. Mix in enough of the preboiled and chilled water to make five gallons and stir with a sanitized spoon. Pitch yeast by sprinkling directly into wort. Seal fermenter with a sanitized lid and airlock and ferment at about 70˚F for two weeks. Bottle and condition for at least two weeks.
———————————–
David Ackley is a beer writer, brewer, and self-described “craft beer crusader.” He holds a General Certificate in Brewing from the Institute of Brewing and Distilling and is founder and editor of the Local Beer Blog.

6 of the Strangest Beer Recipes You’ve Ever Seen

Glowing BeerEvery homebrewer likes to experiment. That’s part of what draws us to the hobby. But sometimes that experimentation can get a little out of hand. Just how far is too far?
Personally, I feel that every batch of homebrew is an opportunity to learn something new about making beer at home. Whether the beer turns out great or you have to dump the batch, there’s always something to be learned about ingredients, techniques, and yes, maybe even yourself. So in that respect, it’s impossible to go to far or make a beer that’s too weird.
But if you want to brew a strange beer that’s actually drinkable, try a recipe that’s been tested before. Here are six strange beer recipes to get you started:

  • Sweet Potato Buckwheat Ale – This is a gluten-free beer recipe I devised for my girlfriend. More than anything else, she misses hoppy beers, so the sweet potato and buckwheat in this recipe offer a gluten-free backdrop for some Willamette hops. I highly recommend roasting the sweet potatoes before mashing. This recipe also lets you take a shot at malting some buckwheat. If you’re not gluten-free, you might consider swapping the molasses for some light DME.
  • Gruit (Partial Mash & All Grain) – Gruit is an ancient style of ale flavored with herbs and spices instead of hops (though hops can be used as well). Based on the number of herbs out there, there are an endless number of possible variations of gruit. This blog post features three gruit recipes for you to choose from.
  • Pomegranate Wheat Dopplebock (Extract)This strange — but intriguing — beer recipe that combines at least three different beer styles: fruit beer, wheat beer, German bock. It’s a relatively simple recipe, using 9 lbs. of wheat DME along with a small variety of specialty grains and 1.5 lbs. turbinado sugar. The trick here is extracting the juice from the pomegranate. You’ll find it easiest to just add pomegranate juice to the secondary fermenter.
  • Wild Root Brown Ale (All-Grain) – The bulk of this brown ale recipe is normal enough: pale malt, roasted malts, and chocolate malts, Cascade hops, Galena hops, Nugget hops, American ale yeast. What’s really strange about this beer recipe is the pound of wild rice, mashed separately, then mixed with the other grains, and the use of roasted dandelion root, which contributes a roasty, nutty, slightly licorice flavor to the beer. Sounds pretty good!
  • Smoked Pumpkin Seed Saison (Partial Mash & All-Grain) – This beer recipe requires the brewer to smoke some pumpkin and pumpkin seeds. These ingredients are simply mashed along with the grains in the mash. For additional complexity, the recipe adds cloves, cinnamon, and nutmeg, all towards the end of the boil. Keep this in mind for after you carve that Halloween pumpkin!

There are plenty more strange beer recipes out there – what are some of the weirdest beers you’ve ever made?

———————————–
David Ackley is a beer writer, homebrewer, and self-described “craft beer crusader.” He holds a General Certificate in Brewing from the Institute of Brewing and Distilling and is founder of the Local Beer Blog.

Black Lager Brewday: A Double Infusion Mash

Homebrewer Using Mash TunWe recently had a question on the E. C. Kraus Homebrewing Blog about doing a double infusion mash in a mash tun cooler. Since I recently used this procedure for my black lager, I figured I’d walk you through the step-by-step of a double infusion mash.
The challenge when doing a double infusion mash in a cooler-style mash tun is that you can’t add heat directly to the mash tun. To raise the temperature of the mash, you have to add enough water of a certain temperature to raise the temperature of the mash to hit your target mash temperature. The math is a little complicated, so I prefer to use a software program to help me figure out the water additions. In this case, I’m using iBrewMaster.
The mash schedule as specified by my beer recipe calls for the following:

  • 30 minutes at 95˚F (protein rest)
  • 60 minutes at 153˚F (saccharification rest)
  • 10 minutes at 170˚F (mash out)

The trick with using a software program is that it takes a few batches to calibrate the constant figures in the program. There are a number of factors that influence the calculations, including:

  • Grain weight
  • Grain temperature
  • Mash tun temperature
  • Mash tun volume loss

The mash tun volume loss should be a constant, but grain temperature and mash tun temperature may change with the season if you keep all of your brewing gear in a garage or basement. Ideally, you’ve already brewed a few times and you have a good idea of these numbers. I’ve filled them in to the iBrewMaster defaults under “Equipment Profiles.”
Mash Profile Software For Double Infusion Mash

After entering these numbers, I can apply the equipment profile and mash profile to the recipe to calculate how much water I need for each step of the double infusion mash. Here’s what it gave me:

  • 5 qts. of water at 129˚F to hit 95˚F
  • 57 qts. of water at 212˚F to hit 153˚F
  • 59 qts. of water at 212˚F to hit 170˚F
  • 8 qts. of water for sparging

Now it takes a little common sense to look at these numbers. 28.8 qts. is more than enough sparge water for a five-gallon batch. In reality, it will only be 2-3 gallons, but it’s better to have too much than too little!
Shop All Grain SystemFrom here on out, brew day is pretty simple. Follow the mash schedule for the double-infusion mash, simply mixing in the water into the cooler at the appropriate time. The only exception is the sparge water. To avoid diluting the wort, I recommend mixing in the sparge water gradually. Either do a fly sparge, in which the water trickles in over the grains at the same rate that it leaves the mash tun, or a batch sparge, where the mash tun is completely drained, then you calculate how much additional wort you need, then mix in that amount of sparge water into the mash tun and drain again. Read this post about homebrew sparging techniques to learn more about batch vs. fly sparging.
The beer recipe for this black lager is fairly simple, so I won’t walk through the remaining step of the brew day: boil, chill, pitch yeast!
Check back soon to see how this black lager turns out!

———————————–
David Ackley is a beer writer, homebrewer, and self-described “craft beer crusader.” He holds a General Certificate in Brewing from the Institute of Brewing and Distilling and is founder of the Local Beer Blog.

Preparing for a Black Lager Brew Day

Beer made from black lager recipe.A few months ago I shared beer recipe for a German black lager: schwarzbier. I’ve decided to make this my next batch.
To me, dark lagers represent the best of two worlds. With roasted malt, they offer the depth of flavor of some heavier beers while still being relatively light and smooth – qualities contributed by the lager side of the equation.
As a lager, I find this to be a more challenging style to brew than say, a double IPA. With a relatively low amount of hops, there’s no hiding potential faults behind extreme hop bitterness or flavor. Paying particular attention to yeast pitching rates and fermentation temperatures will be critical towards making this a great beer.
To gear up for my black lager brew day, I’m going to plan my water amendments and prepare a yeast starter.

Water Amendments for a Munich Schwarzbier

To calculate the water amendments for this beer recipe, I’m going to head over to the mash chemistry calculator over at Brewers Friend. First, I’ll input my local water profile.
Black lager 1 - Source Water
Then I’ll play around with the “Salt Additions” section until the “Actual” numbers for each of the main brewing minerals matches relatively closely to the profile for Munich Dark Lager. It’s not about getting a perfect match so much as getting in the ballpark.
Black lager 2 - Water Target Salt Addtions
So, I’ll add 14 grams of chalk and 3 gram of Epsom salt, which gets me pretty close to the Munich water profile.
Now I can get to work on the yeast starter.

Yeast Starter for a Munich Schwarzbier
Of the two, this part is probably more important than the water amendments. Pitching enough yeast to fully ferment the lager is critical to getting a complete fermentation with a minimum of off-flavors. And since lagers require about twice as much yeast as ales, it’s extra important to build a yeast starter.
For this calculation, I’ll use the Brewer’s Friend Yeast Pitch Calculator to make sure my yeast starter has enough cells to do the job.
First, I’ll input the original gravity of the beer, the wort volume, and the number of yeast packs I’m using, and the manufacture date of the yeast. Unfortunately, I’ve been sitting on this yeast for a little while, so the “cells available” count falls well short of the target 386 billion yeast cells need for this beer. Clearly, we need a yeast starter.
Black lager 3 - Yeast Pitch Rate
Scroll down to the next section to continue. Hit the “Grab from Above” to pull in the info from the previous section. Then, using the defaults, choosing the appropriate growth model and aeration technique. I don’t have a stir plate yet, so I’ve chosen “C. White – Shaking.” This means I’ll give the starter swirl every now and then.
Black lager 4 - Yeast Starter
As you can see, the ending yeast cell count is still well short of the yeast count we need. To step up the starter again, we’ll check the box for step 2 and repeat the process.
Black lager 5 - Starter
In practice, all that’s required in stepping up a yeast starter is decanting some of the liquid from the starter and then transferring it onto an additional 2L of starter wort. After two steps, the yeast count is still a tiny bit short of the target (368 vs. 369 billion cells), but it’s close enough. On brew day, after the beer is chilled to pitching temperature, the whole starter can go right into the wort. Make sure there’s plenty of headspace in the primary fermenter – this one should get chugging right away!
Check back soon to follow along with brewing this schwarzbier! Cheers!
—————————————————————–
David Ackley is a beer writer, homebrewer, and self-described “craft beer crusader.” He holds a General Certificate in Brewing from the Institute of Brewing and Distilling and is founder of the Local Beer Blog.

Get Ready for the 2015 AHA Big Brew

Beer Fest MovieEvery year for National Homebrew Day, the American Homebrewers Association organizes a “Big Brew.” The idea is that homebrewers across the country – and even around the world – celebrate homebrewing by all brewing on the same day. In 2014, it’s estimated that over 8,000 homebrewers from 49 states and 14 countries brewed some 17,550 gallons of beer!
Find a Big Brew Event Near You
Register Your Own Big Brew Event
Each year, the AHA selects a handful of recipes for the Big Brew, just to increase the sense of community among homebrewers. This year, the recipes come from Gordon Strong, President of the BJCP. The recipes are soon to be published in Gordon’s new book, Modern Homebrew Recipes.

Columbus Pale Ale
(5-gallon batch, all-grain)
Specs 
OG: 1.056
FG: 1.012
ABV: 5.8%
IBUs: 43
SRM: 6
Ingredients
8.5 lb. Pale two-row malt
8 oz. Munich malt
4 oz. Wheat malt
8 oz. CaraVienne® malt
4 oz. 20° L Crystal malt
4 oz. Victory malt
8 oz. Orange blossom honey (added during the boil)
0.5 oz. Columbus whole hops at 60 min
0.5 oz. Columbus whole hops at 15 minShop Barley Grains
0.5 oz. Columbus whole hops at 5 min
1 oz. Columbus whole hops at flameout
1.5 oz. Centennial whole hops, dry-hopped for 9 days
Wyeast: 1272 American Ale II or Safale US-05
Directions: Mash crushed grains in about 4 gallons of clean water at 152˚F. Hold for 60 minutes, then raise to 168˚F for mash out. Sparge to collect 6.5 gallons of wort. Boil for 75 minutes, adding hops according to schedule. Add the honey during the last 5 minutes of the boil. Chill and transfer to a clean, sanitized fermenter. Pitch at 68˚F and ferment at that temperature for 9 days, then transfer to a secondary fermenter and dry hop. After 9 days, bottle or keg.
Extract option: Replace the 2-row, Munich, and wheat malts with 7.5 lbs. light LME. Reduce boil time to one hour.

Old School Barleywine Shop Hops
(5-gallon batch, extract with grains)
Specs
OG: 1.109
FG: 1.033
ABV: 10%
IBUs: 95
SRM: 13
Ingredients 
13 lbs. Light LME
4 oz. Biscuit malt
8 oz. CaraVienne® malt
8 oz. Crystal 40˚L malt
4 oz. Crystal 60˚L malt
2 oz. Crystal 120˚L malt
2 oz. Special B malt
1 lb. orange blossom honey
1 oz. Cascade whole cone hops (first wort hops)
2 oz. Columbus hops at :60
1 oz. Centennial hops at :15
1 oz. Cascade hops at :5
1 oz. Columbus hops at :2
1 oz. Cascade hops at :0
1 oz. Centennial hops at :0
2 oz. Cascade hops, dry-hopped for nine days
1 oz. Centennial hops, dry hopped for nine days
Wyeast: 1272 American Ale II or Safale US-05
Directions: Steep the specialty grains (in a grain bag) and the 1 oz. of Cascade first wort hops in two gallons of 160˚F water for 30 minutes. Remove the grain bag, allowing the wort to drip back into the pot. Mix in malt extract and bring to a boil. Boil for 75 minutes, adding hops according to schedule. Add the honey during the last 5 minutes of the boi. At the end of the boil, strain the wort into a sanitized fermenter with about 2.5 gallons of pre-boiled, pre-chilled water. Top off to make 5 gallons. Pitch yeast and ferment at 68˚F for nine days, then transfer to a secondary fermenter for dry hopping. After nine days, keg or bottle.
All-Grain option: Replace the LME with 12 lbs. two-row pale malt and 6 lbs. Maris Otter malt. Mash these grains at 152˚F for 90 minutes, then mix in the specialty grains listed above during the vorlauf and sparge. Collect 6.5 gallons of wort in the brew kettle and proceed with recipe above.

Killer Kolsch
(5-gallon batch, all-grain) 
Specs 
OG: 1.046
FG: 1.011
ABV: 4.6%
IBUs: 16
SRM: 3
Ingredients
8.5 lb. Pilsner malt
3.1 oz. Vienna malt
3.1 oz. CaraVienne® malt
0.3 oz. Liberty hops (first wort hops)
1 oz. Hallertauer hops at 30 min
0.3 oz. Crystal hops at 5 min
Wyeast 2565: Kolsch yeast
Directions: Implement a step mash as follows: 10 minutes at 131˚F, 45 minutes at 145˚F, 20 minutes at 158˚F, 10 minutes at 168˚F for mash out. Sparge to collect 6.5 gallons of wort. Boil for 90 minutes, adding hops according to schedule. Chill and transfer to a clean, sanitized fermenter. Pitch yeast at 58˚F and ferment allowing temperature to rise to 68˚F after 4 days. Lager for two months at 40˚F, then bottle or keg.
Extract option: Replace the pilsner malt and 0.8 oz. each of the Vienna and Caravienne malts with 6.5 lbs. pilsen LME. Reduce the 30-minute hop addition to 0.8 oz.
All of the recipes can be found in their original form, both extract and all-grain, here, along with more information about Big Brew 2015.
We’ll be homebrewing for the Big Brew – will you?

———————————–
David Ackley is a writer, brewer, and craft beer marketing consultant. He holds a General Certificate in Brewing from the Institute of Brewing and Distilling and is founder of the Local Beer Blog.

An Ode to Beer’s Main Ingredient

Yeast Starter In FlaskTim from One Mind Brewing shares some tips and tricks about working with his favorite brewing ingredient: yeast.
My name is Tim, and I’m a brewaholic. I love beer, I love brewing beer, and I love everything about the process. Today I want to ramble about the most important ingredient. What is it you ask? Well, to get there first we must ask a simple question.

What makes beer?
The single most important ingredient when it comes to making beer is yeast. To those who might argue and say that without water there is no beer, my retort is simple: With water and no yeast you still have no beer, so to me, the yeast is the most important ingredient!

Getting the Most From Your Beer Yeast – Pitching Rates
The beer yeast is a huge part of what makes beer. Without adequately pitched yeast, flavor profile and alcohol content are difficult to control at best, and horrific at worst.
You may have noticed the word “adequately” in there. It’s probably the most important word, because without an adequate yeast pitch it’s entirely possible you’ll still end up with beer — even likely. But it’s much harder to get the exact result you want without consistent yeast pitching across all of your homebrew batches.
But what is adequate, exactly? Well, there are a few sources online to help with that. My go-to source for preparing a dry yeast starter is Mr Malty, because there is a dry yeast option. For preparing liquid beer yeast starters though, I prefer yeastcalculator.com. Both options are fairly intuitive, but I’ll share some tips below.

Preparing a Beer Yeast Starter – Parameters
If you’re new to calculating pitch rates, don’t worry about the additional “steps” as mentioned in the calculators. It’s not really necessary if you’re using fresh yeast and making a moderate gravity brew. The important parts here are: the date on the beer yeast to determine viability; the starting specific gravity of your beer (OG, as measured with a Hydrometer or Refractometer); the volume of the starter; and the aeration method of the starter. There is also a starter calculator off to the left to help you with how much DME to use for your starter, though that becomes rote quickly if you do the same size starters regularly.

Do I Have to Have a Stir Plate?
It is important to note that you do not absolutely need a stir plate or any specialized equipment other than a jug or a growler to do a yeast starter in. However, you will get far better results out of a stir plate.

Preparing a Beer Yeast Starter – Aeration
Back to the calculator. The first two options for “Method of Aeration” are pretty self-explanatory. If you’re not going to shake the starter periodically, put none. If you are, then select “intermittent shaking.” Then you’ve got Troester vs. Zainasheff. My understanding is that Zainasheff’s method is to scale up from unstirred starters, while Troester’s method was devised with science. Cell counts from stir plate starters, rather than guesswork based on unstirred. If you’re ready for a headache or have a much better understanding of it than I do, read more about it here. That said, I opt for the Troester method with my stir plate.Shop Stir Plate

Putting Your Yeast Starter to the Test
The real fun part about yeast starters is learning (trial and error means you get to brew MORE!) what pitch rates result in what flavor profiles. While there are some resources online to assist, you really do have to try it to know for sure with your own setup what works best for you. For example, I wanted a Hefeweizen with a more pronounced banana flavor/aroma. After a bit of research, I stumbled upon this lovely thread regarding open fermentation to get more ester production. I blogged about it on my blog and used WLP300 for that one. I’m going to try open fermenting with WLP565 (Belgian Saison) in the near future as well as a few others, though those aren’t set in stone just yet. There are many, many ways to experiment with beer yeast and flavor profiles. Your only limit is your imagination. Well, that and your bank account I suppose.
To really be able to appreciate it, experimentation needs to be done in a controlled way. The best way to control it is to do things in reproducible ways. The most important variable is controlling your yeast pitch rates and the fermentation temperature. If you have a fermentation chamber, great. If not, a simple swamp cooler will suffice. The hard part is really going to be reproducible yeast pitch rates for new brewers.
Without doing yeast cell counts in a lab, the best we can do on a homebrew scale is to keep the way we are preparing our beer yeast starter consistent and use the same equipment every time. Your exact numbers may not match what the calculators say, but as long as you’re consistent within your process, the results will be reproducible on your system. That’s the important part for experimentation, at least as far as I and my taste buds are concerned.
Remember: The difference between science and screwing around is writing it down. So don’t forget to take notes while you brew!
So know you should have enough information for preparing your own beer yeast starter. If you have any questions about yeast starters, feel free to reach out!
—————————————————————–
Tim Daniel is a brew blogger from One Mind Brewing. He’s an avid brewer who loves sharing tips and tricks with others. You can visit him on Facebook, as well.

Cloning Ithaca Beer Co.'s Flower Power–Pt. 7: Final Side-by-Side and Recipe Edits

Flower Power IPA Clone Side-by-SideI’ve got to tell you, this Flower Power IPA clone has really come into its own over the past few weeks. The somewhat harsh, alcoholic bite that I noticed in the initial tasting has completely gone away, leaving behind a lush, citrusy hop flavor that’s damn near irresistible. I’ve recently had a few IPAs from the store (from major American craft brewers, no less) that don’t stand close to this brew. It just goes to show that it is possible to make better beer than you can buy.
In addition to the development in flavor, there has also been a big change in the appearance of the beer. In my initial taste test about two weeks after kegging and bottling, both the kegged and bottled beers showed some serious haze. The kegged beer gradually became clearer as it was consumed, and with a little extra time, the bottled beer became clear as could be, as long as I avoided pouring the sediment into the glass.
Regrettably, I finished off the kegged portion of the Flower Power clone before getting a final photo, but I’ve got some bottles stashed away and one more bottle of the original Flower Power IPA for a final side-by-side comparison. Here are my tasting notes:

  • Aroma – Both burst with fresh, American hop aroma. The original Flower Power has more of a malty, sweet honey aroma.
  • Appearance – Both clear, with a decent white head. The clone has somewhat more head retention than the original. Original is golden straw in color, while the clone is more of a bright orange.
  • Flavor – For all intents and purposes, they are identical. It’s hard to pick out differences when the hops just sit on your palate.
  • Mouthfeel – Both are medium-full bodied, carbonation is good. Bitterness doesn’t linger too much.
  • Overall – Aside from the color, the clone is nearly spot on. A wonderful IPA in its own right.

Flower Power Clone Recipe Adjustments
Don’t get me wrong – this clone is awesome just the way it is. But if I wanted to make a perfect clone of the Flower Power IPA, how would I change the beer recipe to make it more accurately resemble the original version of the beer?shop_malted_grains
When adjusting a beer recipe, it’s important not to make too many drastic changes all at once. Instead, focus on just one or two areas and make incremental adjustments. This will make it easier to keep track of what changes have what effect on the beer. After all, the beer is close – we don’t need to reinvent it, just tweak it a little.
That said, the biggest “fault” is the color. To fix that, I would make the following adjustment:

  • Grain bill – The clone is too dark. In the original beer recipe, the grain bill is 14.5 lbs. Weyerman pale malt and 1 lb. honey malt, with an estimated color of 9 SRM. I’d consider switching the base malt from a pale ale malt (3˚L) to a 2-row brewers malt (1.8˚L) and possibly reduce the honey malt to .75 lb. to get the color closer to 7 SRM. To maintain a malty sweetness (which is where I think the original really stands out), I’d make sure to keep the mash temperatures on the high end, maybe 154˚F.

Conclusion
This has been a fun experiment in recipe development. Though the first attempt at this Flower Power clone wasn’t a perfect match, I’ve stumbled across an amazing IPA recipe in the process. Best of all, I feel that I’ve really proven to myself that yes, you can make better, fresher beer at home than what you can buy at the store.

What beer would you like to see cloned on the E. C. Kraus Homebrew Blog?
—————————————————————–
Review the whole Flower Power clone brewing process below:

—————————————————————–
David Ackley is a beer writer, homebrewer, and self-described “craft beer crusader.” He holds a General Certificate in Brewing from the Institute of Brewing and Distilling and is founder of the Local Beer Blog.

5 Gallons Of Apple Juice, Three Hard Cider Recipes – Part 3: Bottling

baskets of applesAfter several weeks of fermentation, it’s time to bottle my hard apple cider.
Just as a refresher, I took five gallons of apple juice, pasteurized the juice and pitched the yeast, and then divided it into three separate fermenters for secondary fermentation: one plain, one dry-hopped, and one with blueberry and cardamom.
Unfortunately, the blueberry and cardamom batch became infected. I took measures to stave off the infection, but I probably could have been more timely and/or aggressive with my efforts. Today, I decided to just dump the blueberry cardamom batch. I gave it a taste and while it may well have passed as drinkable, in my head I would’ve known that it wasn’t as good as it could have been. In the end, dumping a few bottles (less than a gallon) worth of cider isn’t the end of the world. I’m not going to worry about it, and instead I’ll just learn from my mistakes and move on. I think next time I would wait a little longer to add the fruit and spices, and maybe make a blueberry syrup or extract instead of using whole fruit.
Meanwhile, my other two hard apple ciders look and taste pretty good, so I’m going to go ahead and bottle. The only thing is that they are very hazy, which is weird, because the infected cider was nearly crystal clear. Who can explain that phenomenon? Next time I make a cider, I’ll do a proper cold crash to see if it will clear. The good news is, as far as I can tell, there’s no infection.
So on to bottling…
Shop Bottle CappersWhen bottling split batches like this, it’s essential to use a priming sugar calculator. This will help make sure that you have enough carbonation and also don’t over prime and end up with a bottle bomb. The bottling process takes a little longer for the split batches, simply because you have to add the priming sugar, bottle, rinse, and repeat. Still, I think I finished bottling in just about an hour.
Now here’s a timesaving bottling tip: Line up your bottles single file, then put caps in place. Then you can go down the line and quickly cap each bottle in succession. (You might do this in several rows.)
After tasting the hydrometer samples, I’m pretty excited about the plain hard apple cider: dry, but with plenty of apple flavor and some vanilla notes. The hopped apple cider is good too, but I think it will really shine once it’s bottled, carbonated, and chilled.
The one thing I’d like to figure out is how long to age the cider. I’ve heard that hard apple cider can take a year to really peak, but I’ve also heard that using ale yeast (like I did), can lead to a drinkable product a lot sooner. I guess I’ll just have to taste ‘em as I go and find out!
Do you like to make hard apple cider? What advice do you have for fermenting and bottle conditioning?
Series: Part 1 | Part 2 | Part 3
—————————————————————–
David Ackley is a beer writer, homebrewer, and self-described “craft beer crusader.” He holds a General Certificate in Brewing from the Institute of Brewing and Distilling and is founder of the Local Beer Blog.