When to Plan Your Hop Garden

Hops growing in a field

When to Plant Hops

One of the basic ingredients in beer is also very easy to grow. Hops will thrive in most moderate climates. Learning how to plant and care for Hops is easy and rewarding with your own homebrew hops garden.

The hop plant is a hardy perennial plant. It will grow vines annually from the rootstock. These vines will grow up to 25 feet each season and die back after the harvest. The rhizome is part of the rootstock but posses the buds for propagation. Under good conditions, each hop vine will produce 1/2 to 2 pounds of dried flowers.

You may be asking, “can I plant hops where I live?”

The answer is yes…. probably. Hops are hardy in U.S. Department of Agriculture plant hardiness zones 3 through 8. Most of the US in in one of these zones. Here is a USDA Map of the United States that shows exactly where the hardiness zones are. The temperatures are the average minimum temperatures for each area:

Even parts of Alaska and Hawaii are suitable for growing your favorite hops.

What Time of the Year to Plant Hops

Planting months can very from coast to coast. California can probably plant earlier that Maine, but early May for most of the country would be as late as you would want to plant.

Hop Rhizomes are typically cut in March or early April. As with all crops, this depends on the weather. If the farmer’s field is too wet, they have to wait for the water to drain. The problem can get worse if the field is still covered in snow. The farmer needs to wait for the snow to melt and then the fields to drain. It is also possible that not all varieties are going to be harvested at the same time. If some of the fields have better weather than others, they will cut rhizomes at different times.

Adventures in Homebrewing ships their Hop Rhizomes as soon as they arrive from our farmers, which is typically early April. As long as your planting area is out of frost danger, we recommend planting in the ground as soon as you receive them. If your mounds are ready and mulched properly, rhizomes can survive days as cold as 20°.

If you have to store the rhizomes for a bit after you receive them, store them in the refrigerator until you are ready to plant.

Although most varieties will thrive if you are in a temperate region, there are a few variables you should consider when deciding on a variety of hops. If you are planting your hops simply for their aesthetic value, then you are really free to choose any variety you please. If you are in an area that sees a shorter growing period, you may want to plant a vine that will develop more quickly, allowing you to enjoy your plants for the longest possible period. Growing your own hops is rewarding and exciting. Adventures in Homebrewing can help you get started on this great part of the hobby with your own homebrew hops garden. Shop Hop Rhizomes.

Cheers!

Heady Topper Double IPA Clone Recipe


Heady Topper Double IPAThe Alchemist’s Heady Topper is one of the most coveted beers in America. Beer fans drive from all over the country for the chance to get “Heady” straight from the brewery in Waterbury, VT, and it’s not uncommon for people to line up for hours outside their favorite beer retailer in anticipation of a delivery of this ridiculously hoppy American Double IPA.
With any beer this popular, homebrewers naturally want to clone it. On the homebrewing website HomebrewTalk, there’s one thread with nearly 3000 comments from people trying to develop their own Heady Topper recipe!
Luckily, I have a friend who has brewed several batches to dial in his own Heady Topper double IPA clone recipe. When I visited him last winter, we did a side-by-side blind tasting and the two beers were nearly indistinguishable. With his permission, I’ve shared the recipe below. But first, some considerations.

Yeast
Many homebrewers believe that the single most important part of cloning this beer is to use the same yeast as the Alchemist uses in Heady Topper, but since it’s a proprietary strain, this is easier said than done. One option is to harvest yeast from a can of Heady (see How to Harvest Yeast from a Commercial Beer), but even obtaining a can of Heady can be a challenge. There are a few boutique yeast shops that offer cultured strains of the famous “Conan” yeast. The easiest option is to use a similar strain. I’ve included Wyeast’s London Ale 1028 as a substitute. Just be sure to build a yeast starter!

Hops
This beer uses a lot of hops! Most of them are added at the end of the boil during the whirlpool. If you read our recent post about hop oils, you know that many of the aromatic oils are driven off at higher temperatures. To preserve those oils, allow the wort to cool slightly before adding the whirlpool hops. If your brew kettle has a ball valve, you may want to invest in a torpedo screen to prevent all those hops from clogging it.
Ready to brew this Heady Topper Clone? Try this all-grain recipe, or use the partial mash option below. Happy brewing!

Sam’s Heady Topper Double IPA Clone Recipe
(5-gallon batch, all-grain)
Specs
OG: 1.078
FG: 1.017
ABV: 8%
IBUs: 120+
SRM: 6-7
Ingredients
MALT:

HOPS – This beer uses a lot of hops! You’ll need a total of:

2.5 oz. Summit at :60
.25 oz. Amarillo at :5
.25 oz. Cascade at :5
.25 oz. Centennial at :5
.25 oz. Summit at :5
1.5 oz. Centennial at :0
1 oz. Summit at :0
.5 oz. Citra at :0Shop Hops
.25 oz. Cascade at :0
.25 oz. Amarillo at :0
.75 oz. Centennial, dry-hopped for 8 days
.5 oz. Citra, dry-hopped for 8 days
.5 oz. Summit, dry-hopped for 8 days
.5 oz. Amarillo, dry-hopped for 8 days
.5 oz. Centennial, dry-hopped for 4 days
.5 oz. Cascade, dry-hopped for 4 days
.5 oz. Summit, dry-hopped for 4 days
YEAST:
“Conan” yeast harvested from a can of Heady Topper or Wyeast 1028: London Ale – prepare a 2L starter
Directions
Mash crushed grains in about 6 gallons of clean, chlorine-free water at 150˚F for 60 minutes. Sparge to collect about 7 gallons of wort in the kettle, then bring wort to a boil. Add hops according to schedule above. For the 0 minute additions, add the hops gradually after cutting off the heat, allowing the hops to steep in the wort as you chill it down, at least 30 minutes, or for as long as an hour. When the wort temperature reaches 68˚F, transfer to a fermenter and pitch the yeast starter. Ferment for 7 days at 68˚F, then pitch first round of dry hops. After 4 days, transfer to secondary fermenter and pitch second round of dry hops. After four days, bottle or keg. Beer will be ready to drink in 1-2 weeks.
Partial Mash Option: Replace the two-row and pilsner malts with 9 lbs. light DME. If boiling in a five-gallon kettle, add half the DME at the end of the boil.
Do you have a Heady Topper double IPA clone recipe you’d like to share? Just leave it in the comments below.
Looking for more super hoppy beer recipes? Try the Uinta Dubhe Clone and the Ithaca Flower Power Clone!

—–
David Ackley is a beer writer, brewer, and self-described “craft beer crusader.” He holds a General Certificate in Brewing from the Institute of Brewing and Distilling and is founder and editor of the Local Beer Blog.

6 of the Strangest Beer Recipes You’ve Ever Seen

Glowing BeerEvery homebrewer likes to experiment. That’s part of what draws us to the hobby. But sometimes that experimentation can get a little out of hand. Just how far is too far?
Personally, I feel that every batch of homebrew is an opportunity to learn something new about making beer at home. Whether the beer turns out great or you have to dump the batch, there’s always something to be learned about ingredients, techniques, and yes, maybe even yourself. So in that respect, it’s impossible to go to far or make a beer that’s too weird.
But if you want to brew a strange beer that’s actually drinkable, try a recipe that’s been tested before. Here are six strange beer recipes to get you started:

  • Sweet Potato Buckwheat Ale – This is a gluten-free beer recipe I devised for my girlfriend. More than anything else, she misses hoppy beers, so the sweet potato and buckwheat in this recipe offer a gluten-free backdrop for some Willamette hops. I highly recommend roasting the sweet potatoes before mashing. This recipe also lets you take a shot at malting some buckwheat. If you’re not gluten-free, you might consider swapping the molasses for some light DME.
  • Gruit (Partial Mash & All Grain) – Gruit is an ancient style of ale flavored with herbs and spices instead of hops (though hops can be used as well). Based on the number of herbs out there, there are an endless number of possible variations of gruit. This blog post features three gruit recipes for you to choose from.
  • Pomegranate Wheat Dopplebock (Extract)This strange — but intriguing — beer recipe that combines at least three different beer styles: fruit beer, wheat beer, German bock. It’s a relatively simple recipe, using 9 lbs. of wheat DME along with a small variety of specialty grains and 1.5 lbs. turbinado sugar. The trick here is extracting the juice from the pomegranate. You’ll find it easiest to just add pomegranate juice to the secondary fermenter.
  • Wild Root Brown Ale (All-Grain) – The bulk of this brown ale recipe is normal enough: pale malt, roasted malts, and chocolate malts, Cascade hops, Galena hops, Nugget hops, American ale yeast. What’s really strange about this beer recipe is the pound of wild rice, mashed separately, then mixed with the other grains, and the use of roasted dandelion root, which contributes a roasty, nutty, slightly licorice flavor to the beer. Sounds pretty good!
  • Smoked Pumpkin Seed Saison (Partial Mash & All-Grain) – This beer recipe requires the brewer to smoke some pumpkin and pumpkin seeds. These ingredients are simply mashed along with the grains in the mash. For additional complexity, the recipe adds cloves, cinnamon, and nutmeg, all towards the end of the boil. Keep this in mind for after you carve that Halloween pumpkin!

There are plenty more strange beer recipes out there – what are some of the weirdest beers you’ve ever made?

———————————–
David Ackley is a beer writer, homebrewer, and self-described “craft beer crusader.” He holds a General Certificate in Brewing from the Institute of Brewing and Distilling and is founder of the Local Beer Blog.

How To Pair Beer With Food

Image courtesy of https://www.scientificamerican.com/

For a beverage consisting of so few ingredients, beer makes a huge statement.  Its rich diversity of flavors, aromas and textures make it the ideal partner for almost any meal.  As a homebrewing citizen, one of the greatest challenges you might face is finding the right grub to compliment your brew.  With so many possibilities, it can be a challenge to know where to begin.
The best place to start is with the profile of your beer since this will govern its interactivity with food.  This is determined by three main ingredients: malt, hops, and yeast.  Malt is sweet and often adds hints of chocolate or coffee to malt-heavy beers such as stouts and porters.  Hops are considerably more dynamic and will add bitter, spicy, floral and/or fruity flavors to beers, most pronouncedly in India Pale Ales.  Then there are the more yeasty beers, such as American wheat beers and German hefeweizens, which are generally lighter with heavy yeasty flavors.  Together, these ingredients bring out the sweet, bitter, spicy and rich features in the product of your beer brewing experience.
The next step is determining how you want your food to relate to your beer.  Oftentimes, the best partnerships arise from shared flavors and aromas.  The key is finding the correct balance in the harmonies you wish to create through complementary or contrasting flavors.  As a general rule of thumb you should keep the strength of your food and beer consistent, but there are otherwise no wrong answers. With homebrewing kits, the flavor creation possibilities are endless.  In the end, the way in which you consume your brew is the final step in getting the most out of your beer brewing kits.

Beer Brewing Safety

Image Courtesy of https://collegecurlies.blogspot.com/

Beer brewing is a time-honored tradition that has been under development for thousands of years.  Today, over 750,000 Americans engage in the practice from the comfort of their own homes.  Thanks to the conception of beer brewing kits, it is now safer than ever for you to unleash your inner brewmaster.
The notion of a safe home brew is not an oxymoron; reality portrays an exercise that is no more dangerous than cooking pasta.  It is a complex albeit easy process that requires around four to five hours of work spread out over a minimum of a four week period.  It consists of five steps: brewing, cooling and fermenting, priming and bottling, aging, and everyone’s favorite, drinking.  Unlike distillation, the process used to make hard liquors, homebrewing does not involve high pressures or flammable liquids.  Instead, it incorporates yeast and boiling liquids in a fashion similar to making a loaf of bread or a pot of spaghetti.
The fact of the matter is that the most unsafe element of beer brewing is already installed in your home.  While purpose-built propane burners are available for purchase, most aficionados choose to brew beer on the same stoves on which they prepare their meals.  This is not to say homebrewing is without its risks; however, a good brewer will identify them ahead of time and prepare accordingly.  In addition to acquiring a quality beer making equipment, you can follow this list of general guidelines to ensure a positive brewing experience:
–       Be aware.  The fermentation process produces carbon dioxide and inhaling large quantities can cause you to black out.  While this poses a much greater risk at commercial breweries, it is still something to be mindful of.
–       Glass breaks.  This seemingly obvious fact can become painfully apparent at inopportune times.  In order to avoid accidents, you might want to consider using plastic carboys as opposed to glass ones during the fermentation process.  The former is less likely to break and has no adverse effect on taste.  You also need to make sure your beer is fully fermented before bottling to prevent your bottles from exploding.  Once preserved, be sure to store it in cool, dark conditions.
–       Be mindful when boiling water or wort.  Do not leave your pots unattended, ever, and make sure they are large enough to contain the heated liquids.  Keep in mind that what you are boiling is hot and is occasionally liable to boil over.
–       Respect your equipment and ingredients.  Everything should be fresh, stored properly, and sterilized.  Older or improperly stored ingredients can ruin a batch, and good sanitation is necessary to avoid contamination.  You are incubating a living entity and you want to take the best care possible to ensure a healthy and full development.

Five Stages of Homebrewing

Beer brewing kitsHomebrewing – a rapidly growing hobby, yet still a time-honored tradition. Brewing your own ales, lagers and stouts allows you total control in your beer’s taste, strength, crispness, etc. By having creative control over your bottle of brew – beer lovers can enjoy beers to their exact taste. Not to mention the sense of accomplishment, knowing that your efforts produced something of value to you.
Beer brewing kits help make this happen – but what goes into the brewing process? Beer brewing comes in five stages, which means you’re just five stages away from enjoying a delicious cold one.
What’s in wort? – Pale malt extract and hops are boiled together with water for about an hour to sterilize the extract and release the bittering qualities of the hops.  Frequently grains are steeped in the mixture prior to the boil to add additional color and flavor complexity. This hot mixture is called a wort.
Chill Out and Ferment for a While – The hot wort is cooled to room temperature and siphoned to a fermenter where it is combined with more water to achieve the desired batch size.  Once the mixture drops to room temperature, brewing yeast is added to start the fermentation process.  Cleanliness and sanitation are very important since bacteria in this state can easily infect the wort.  An airlock is used to keep the fermenter sealed during fermentation.  Your beer will ferment for 1-2 weeks.
All Bottled Up – Once the beer is fully fermented, it is siphoned once again, this time to a container for bottling.  This begins the priming process, when priming sugars such as corn sugar are mixed with the beer.  The beer is siphoned into bottles and each bottle is capped with beer bottling equipment.
Age is more than a number – Once the beer has been bottled it needs to age for 2-6 weeks.  During aging the yeast will ferment the remaining sugar you added and create carbon dioxide.  This carbon dioxide will naturally carbonate your beer so it is nice and bubbly.  In addition, undesirable sediments such as excess yeast and proteins will drop out of the beer during aging and this will enhance the flavor of your beer.  In may take several months to reach peak flavor, though homemade beer usually drinkable after a month.
Enjoy – Once the brew is properly aged, pop them in the fridge to cool once last time. Then, lay back, crack one open and enjoy!

The Science and Art of Home Wine & Beer

Step in your local grocery store, stroll down to the beer and wine aisles and take a good look. Some of the words that come to mind: vast, impressive, confusing, overwhelming. Why is this bottle $59 dollars and this one is $11? What do the labels really mean? How do you know where to begin?
You don’t need a sommelier to help you navigate the world of wine. And, just because one brand of beer had a funny Superbowl commercial doesn’t mean it’s any better than the rest. If you really want to drink the best beer and wine you’ll ever have, you can brew beer and make wine at home, yourself, for pennies on what you’d spend at the store.
You Don’t Have to Grow Grapes
Home Wine Making and Beer Brewing making doesn’t mean you need a field of grapes or hops in your backyard. Like any chef preparing a quality meal, you can buy top-quality ingredients, as well as beer brewing kits and wine-making equipment. Home brewing will give you a unique experience, a one-of-a-kind perspective on the process, and a point of pride when you’re done. All you need are the right ingredients, some bottles, and the desire and time.
You Can Get Cheap Beer and Wine Anywhere
You may find other kits that let you make your own beer and wine with very little effort. Don’t forget, what you get out of it is only what you put into it. Don’t go for quick — choose quality.
It’s a Science and an Art 
Like any good recipe, wine and beer making requires you to follow a rigid set of directions to ensure success. The art lies in the subtle nuances that you create to make it your own. You need to learn the rules before you know when to break them. There are recipes for beer and wine all over the Internet. There are even websites devoted to each one. Take the time and study how the pros do it. Adventures in Homebrewing has detailed instructions that can turn you into an expert in no time.
Patience is a Virtue but Waiting is Hard
When you have created your masterpiece, you still need to let nature do its work. Complex chemical reactions turning sugar into alcohol take time. Your perseverance will be greatly rewarded.
Indulge Your Ego
Aside from the joy of drinking your homemade beverages, some say naming your brew and creating your own labels is the most fun. Since glass bottle can easily be recycled, and even washed and reused, there is no reason not to house your spirits in quality containers with a bright colorful label proclaiming yourself as the proud brew master.
Get Started
Now that you are ready to start, Adventures in Homebrewing can walk you through the steps. Adventures in Homebrewing has an extensive selection of home wine making supplies and equipment along with beer brewing kits. With more than 40 years of experience under our belts, we can answer any questions you may have. In no time at all, you’ll be making beer and wine with your own hands

Homebrewing by the Seasons

Ever wonder why you have a subconscious thirst for a full bodied beer when there’s snow on the ground? Or how about a beer that offers a certain level of refreshing crispness when you’re at the picnic table for a 4th of July party?  Perhaps you’re at a renaissance fair on a cool fall day and you have your palate is craving a brew that’s malty instead of hoppy.  Beer Brewing kits can quell these cravings and provide a fun, rewarding way to put your own stamp on brewing beer at home.
Most seasonal home brewing recipes offer obvious generic names to stand out amongst other recipes.  Names such as “Winter Lager” and “Summer Ale” come to mind.  While these recipes are, in their own rite, still very satisfying beers, there are many more recipes for home brews that coincide with the seasons.  To enjoy these beers during the season in which they are designed for it is recommended that you give ample time for preparation and fermentation.  Starting the process during the prior month of its consumption is the typical practice. (For example, to enjoy a summer beer in the summer, start the process during spring.)

Winter Style Beers

Winter style beers are typically brewed to yield high percentages of alcohol to get you through the cold winter months.  The colors usually range between light brown and black.
Scotch Ale– Scotch Ales are considered a fairly strong beer with colors ranging from amber to light brown. They tend to be sweet and full bodied with a pronounced malty caramel and roasted malt flavor. They can typically yield an ABV% ranging between 6-11.
Winter Warmers– Winter Warmers are the typical winter beers.  Most commercial winter lagers are modeled in the Winter Warmer fashion.  They tend to rely heavily on a malty sweet presence rather than a hoppy bitterness.  Winter warmers can typically yield an ABV% ranging between 6 and 9 and their colors range from reddish-brown to pitch black.

Spring Style Beers

Spring style beers begin to transition from the heavier, darker beers into beers that emphasize wheat flavoring.  They offer a myriad of characteristics including beers that are citrusy, cloudy, crisp and refreshing.
Bocks– Bocks are common spring beers that offer medium to full bodied profiles, but no roast flavor.  They tend to favor more of a malty influence with low levels of hop bitterness.  They are generally brown to dark red in color, but bock variants such as Maibock can come in a golden color.  Transitioning from the stronger winter beers, the Bock’s ABV% ranges between 5.5 and 7.5.
American Blond Ales– Blond Ales offer pale yellow to deep gold colors. It is an all malt brew, with most showing a level of subdued fruitiness. Hop character is of the noble variety, or similar, leaving a light to medium bitterness. A balanced beer, light bodied and sometimes lager like.  Blonde Ales generally hold a ABV% between 4-7.

Summer Style Beers

Summer style beers are brewed to be relatively pale, light, crisp and relying heavily on wheat elements and citrus nodes that are smooth and pleasing to the palate.
Saison– Saisons are traditionally brewed in the winter, to be enjoyed throughout summer. It is a French beer in origin but has a strong following in the United States.  Saisons typically are fruity in aroma and flavor resembling a wheat beer and brewed with heavy amounts of spice to build a mild tartness.  The typical “summer ale” is modeled off of Saison Variants.  They tend to be semi-dry with many only having touch of sweetness.  The ABV% of Saison beers range between 5 and 8.
Kolsch– Light to medium in body with a very pale to clear color, hop bitterness is medium to slightly assertive. Some versions of Kolsch are considered to be very similar to pilsners.  ABV% ranges from 4-6.

Fall Style Beers

Fall style beers, typically varieties of ales, are brewed to transition back into the cooler fall months.  They generally rely on malty, spicy elements to provide a beer that is sweeter than it is bitter.
Pumpkin Ale– The Pumpkin Ale is quite varied and can sometimes be referred to as a variant of Harvest Ales.  Flavorings can come from actual hand cut pumpkins to pumpkin purees.   These beers also tend to contain ground ginger, nutmeg, cloves, cinnamon, and allspice. Pumpkin Ales are typically malty, with a spicy aftertaste due to the combination of the “pumpkin pie spices.”  The ABV% of Pumpkin Ales range between 4 and 7.
Marzen/Oktoberfest– The prototypical fall beer, Marzenbier is full-bodied, rich, toasty, typically dark copper in color with a medium to high alcohol content.  The common Marzenbier contains roughly 5-6% ABV and has a mild hop profile relying mostly on a malty influence to blend its robust flavor.

Beer Brewing: Understanding the Various Types of Brews

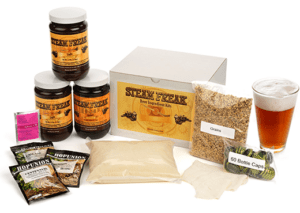
It is likely you have come across hundreds, maybe thousands of different beers in your lifetime, all with a special taste and unique history. The differentiation between the third most popular drink in the world starts with the beer brewing process. The two main types of beer are lager and ales, which are characterized by the type of yeast used in the fermentation process.  There are endless types of ales and lagers, as well as specialty beers that all can be brewed from the comfort of your own home with a home beer brewing kit. It is important to understand the difference between these types of beer, especially in homebrewing.
Ales: Typically served at “cellar temperature” (not too cool, around 50-55 degrees Fahrenheit), ales are more complex and full-bodied in flavor than lagers.  When brewing ale, the yeast tends to gather at the surface of the fermentation tank for the first couple of days prior to settling at the bottom.  Ale brewing must be done in warmer temperatures, between 60 and 72 degrees, which allow the yeast to multiply. Ales are usually more complex, robust, and flavorful, with higher alcohol content than lagers. After fermentation, ales are aged for a few weeks at 40 to 50 degrees.  The types of ales are many, and because of the fact that they are quicker and easier to brew than lagers, they’re great choices for home beer brewing!
Barley Wine: Despite its name, barley wine is a type of ale beer that has been around since 1903. In brewing barley wine, there is not a difference in the grain, but the quantity of grain packed into the brew.  There is around double the grain in barley than in pale ale, and more than double the grain than in a pilsner. A barley wine is boiled longer than other beers, which causes the sugar to caramelize which intensifies the color and the taste.
Pale Ale: The British are responsible for this improvement in brewing expertise, discovering that using coal instead of wood in a kiln would cause beer to amber colored and clearer than pervious British ales. Many pale ale brewers find the type of water to be the most important element in making this type of beer. They often try and chemically treat the water to make it identical to the naturally occurring water from the original brewery in England. Pale malt is naturally used to make this understated and woody brew, and some mixtures have small amounts of crystal in them.
Indian Pale Ale: In the 1700’s, several British service men and citizens resided  in India as part of the colonial rule and did not have access to British ale, which led to the creation of IPA. To protect this brew from high temperatures and motion of the British ships, generous amounts of hops were added which are responsible for its high alcohol content.  When the British occupation of India was over, the popularity of IPA grew due to a shipwreck off the coast of England. The barrels were recovered from the ocean and sold in England, which soon were high in demand because of the atypical amount of hops in the ale. The beer also has a bit of crystal malt to sweeten it up, with a golden amber body.
Porter: Porters were very popular before the creation of pale ale, and declined in consumption because of the Prohibition in the U.S. and the beer tax in Britain. Porters are very dark in appearance, with touches of roasted grains, chocolate, coffee, toffee, and licorice. This brew uses traditional English hops and is thin and mild to the taste.
Stout: This creamy brew is black in appearance, with a thick and creamy flavor. Stout is typically brewed at higher gravities than most beers because of its high density. Stout is made with black unmalted barley and specialty grains, adding non-fermentable sugars, which is responsible for the thickness.  It can be brewed with coffee, oatmeal, or milk sugar to add aroma and uniqueness.
Lagers: Lagers are smooth and crisp in taste and when serving, the colder the beer the better. In brewing a lager, the yeast sinks to the bottom of the fermentation tank instantaneously, which is why it is known at bottom fermenting. Lagers are brewed successfully at cooler temperatures, typically between 46 and 55 degrees. Light and dry are adjectives that classically describe lagers, which are the most frequent type of beer sold in the United States. Lagers have higher alcohol content than ales and are aged for longer and at cooler temperatures, on average between 32 and 55 degrees Fahrenheit. There are various different types of Lagers, which are the most popular type of brew sold in the United States today.
Bock: In brewing a bock, ingredients aren’t the only important element. Decoction, a German style of heating mash, taking out parts of it, boiling those parts and then returning it to the mash is practiced when making this rick, malty beer. Munich malt contributes to a bocks deep color, and yeasts with low congealing tendencies are used so they can survive in the high gravity liquids that come from mashing the grains.
Oktoberfest: In 1872, Spaten brewer Josef Sedlmayr made a beer comparable to the Vienna lager that was a hit during the first Oktoberfest in Munich, which is now known as Oktoberfest brew or Maerzen brew. Oktoberfest is undoubtedly German and is made with Pilsner as the base malt, and Vienna or Munich malt. The hopping in this brew is classically light and uses yeast that doesn’t result in a dry beer. Oktoberfest should be malty but not nutty, with a light brown flavorful body.
Pilsner: Commanding more than half of the beer market internationally, Pilsner is undoubtedly the most admired style of beer and is brewed all over the world. Pilsner’s are made with lightly kilned malted barley and Noble Saaz hops that create a fresh and simple beer. This brew has a light grain flavor that allows for a refreshingly clean and cool beer.

Beer Brewing Supplies, in a One-Stop Shop

Whether you are new at home wine making or an old pro at home brewing your own beers, you have likely faced the challenge of finding the best supplier for all of your current and prospective future growth needs.
Basic Needs
The list of basic needs for brewing is quite long.

  • Steel Boiling Pot. The boiling pot you purchase must comfortably hold at least three gallons. Bigger is better in this case. Use only high-quality boiling pots that are made of ceramic-coated steel, stainless steel or aluminum.
  • Two Fermenters with Airlocks. It is best to have two fermenters so that one can act as a bottling bucket. A six-gallon food-grade plastic type is recommended for early beginners. Also available are glass carboys that commonly come in three, five and six and a half-gallon sizes.
  • Siphon with Bottle Filler. Siphons are available in many different configurations. However, they commonly consist of clear plastic tubing with a racking cane. They can also have bottle fillers. A bottle filler is most often made of plastic or metal tubing with a spring-loaded valve for filling your beer or wine bottles.
  • Bottle Capper. There are different styles of bottle cappers available. You will need to decide between a bench-style or hand capper. Although bench cappers are more flexible and will be required to create champagne bottle caps, they are definitely more expensive.
  • Bottle Caps. Oxygen and standard absorbing crown caps are the choices in bottle caps.
  • Large Stirring Spoon. You will need a food-grade plastic paddle or stirring spoon for the wort during the boiling process.
  • Bottle Brush. Used bottles should be thoroughly cleaned with a long-handled nylon bottle brush.
  • Thermometer. Make sure the thermometer you select can be safely immersed during the boiling and wort process. It should have a range of approximately 40°F to 180°F.
  • Hydrometer. The hydrometer can measure the specific gravity between pure water and water that has had sugar dissolved in it. A hydrometer is definitely required when creating beers from scratch.

Cost to Start Making Wine or Beer at Home
Considering all the above requirements, it is still not as expensive as you may believe to begin making your own wine or beer at home. Expect to spend anywhere from $100 to $200 at Adventures in Homebrewing for the first shot that includes buying the equipment. Subsequent brewings for five to six gallons of wine should cost anywhere from $50 to $200 depending on the quality and rarity of ingredients used.
Most home brewers have found that the experience, as well as the options for customization in their beer or wine, is sufficient reward for the brewing process. Home brewers also commonly market their own products locally with unexpectedly good results since even smaller grocers now cater to microbreweries and other open market opportunities. The affordable investment into a home brewing kit for wine or beer may even pay for itself in your very first batch as long as you are sure to purchase the most affordable brewing equipment for your needs at a reputable supplier such as Adventures in Homebrewing.