Simple Style Guide: Brewing Irish Stout

Irish Stout With Clovers 
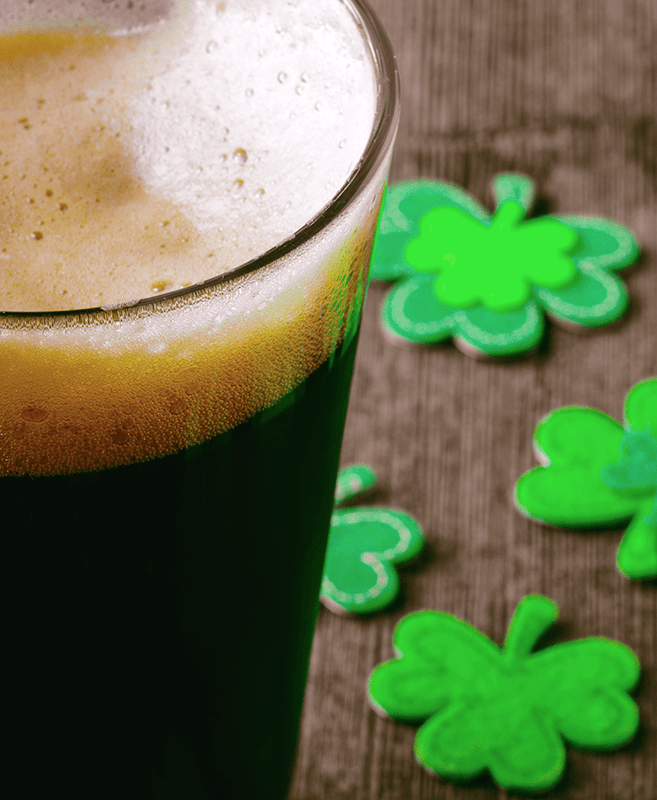
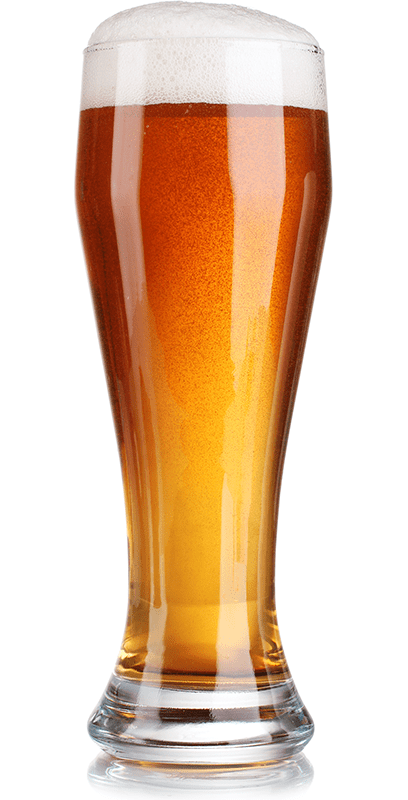
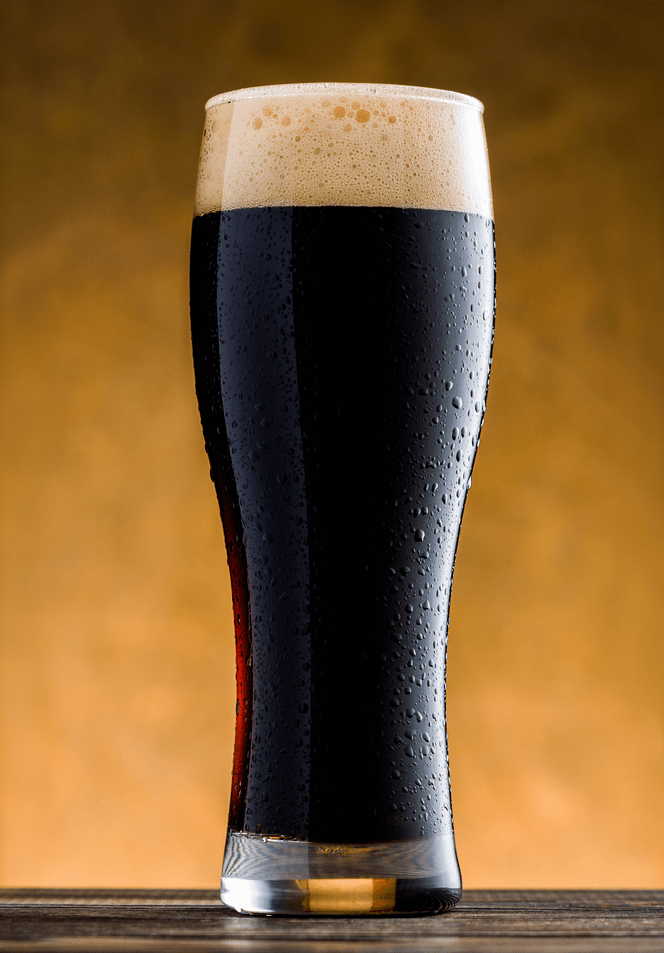
An Irish stout is a dark, robust ale, technically considered a dry stout. (Other types of stout include sweet stout, oatmeal stout, American stout, and Russian Imperial stout.)
We can’t talk about Irish stouts without mentioning Guinness. Since the late 1700s, Guinness has been brewing dark, flavorful ales in Dublin. They now distribute their famous stouts all over the world. Murphy’s is another example of Irish stout. It’s somewhat less bitter than Guinness. Try both, as well as a stout from your local brewery, to get a sense of the flavor characteristics that you enjoy in an Irish stout.
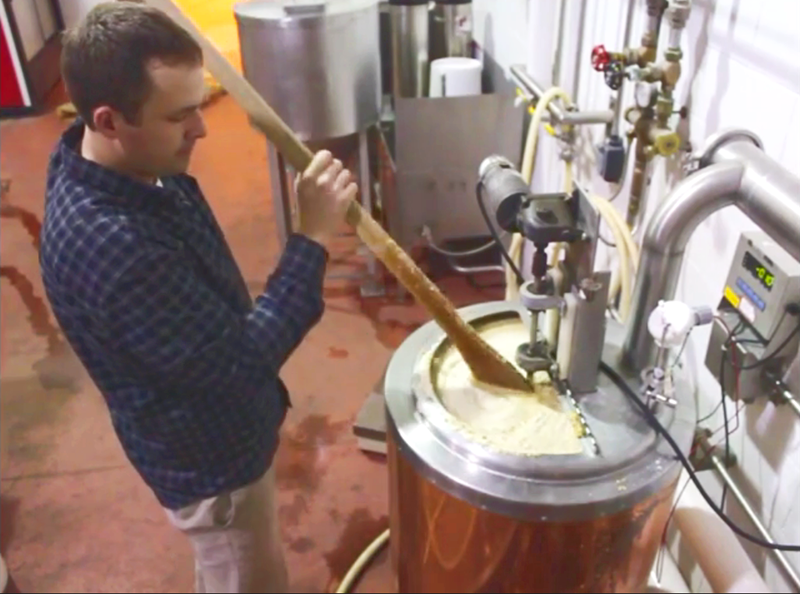
Brewing Irish Stout
The easiest way to go about brewing an Irish stout is to use a beer recipe kit. Brewers Best has an excellent Irish Stout Recipe Kit, as does Brewcraft.
For the more adventurous brewers, follow these guidelines to build your own beer recipe.

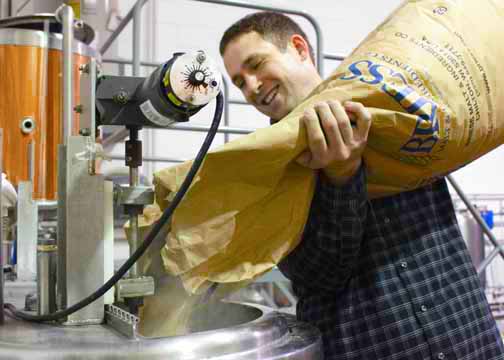
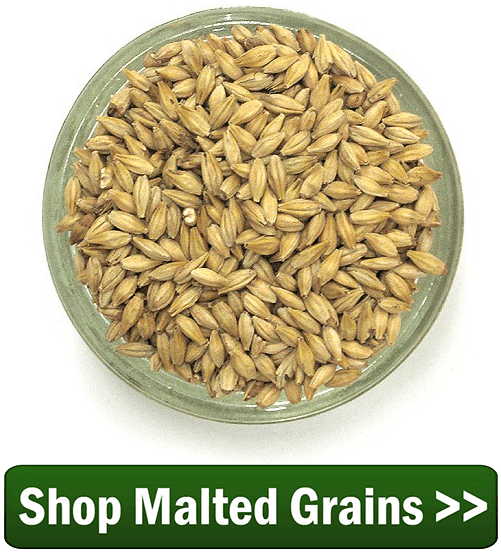
Grain Bill and Fermentables
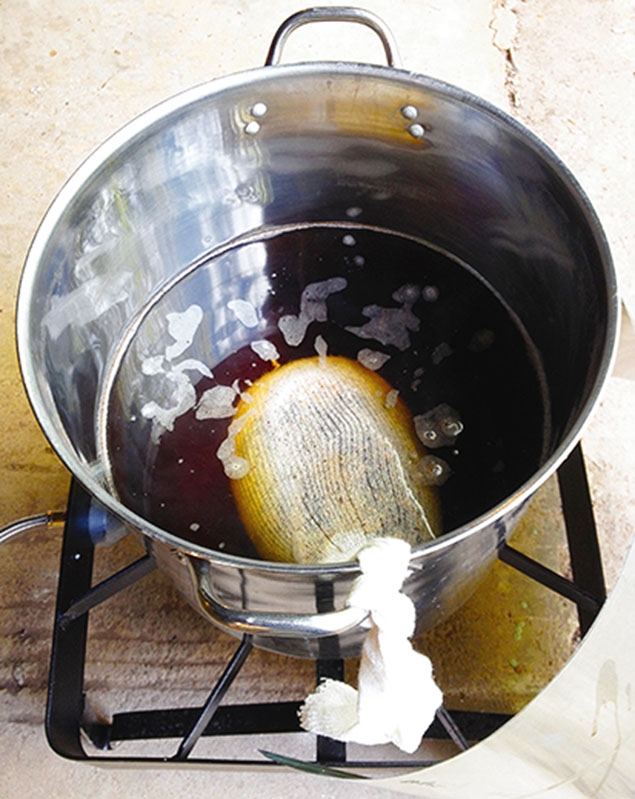
An Irish stout gets its dark color and dry, bitter flavor from roasted barley. When brewing Irish stout roasted barley is a “must”. Roasted barley is not malted. Instead, it is steeped in water and then kilned at a high temperature, giving the grain a very dark brown, nearly black, color. This will affect the color of the beer, and can also give the head on the beer a nice tan color. Roasted barley also imparts the dry, bitter flavor of coffee that stouts are known for. It doesn’t take much – Briess recommends using roasted barley for just 3-7% of the total grain bill.Shop Steam Freak Kits
Replace a portion of the roasted barley with black malt or chocolate malt to reduce to dry bitterness. Try Murphy’s, Guinness, and other Irish Stouts to judge how much bitterness you would like.
These ingredients can be combined with mild ale malt or light malt extract to form the majority of your grain bill. Your original specific gravity shouldn’t exceed 1.050.
One defining characteristic of Irish stouts is their creamy mouthfeel. Sometimes this is achieved through the use of flaked barley (Guinness uses about 25% flaked barley in their Guinness draft). Sometimes these Irish stouts are given an extra creamy mouthfeel by using nitrogen instead of CO2 to “carbonate” the beer. Nitrogen forms smaller bubbles than CO2, so they’re less prickly on the tongue. It can be difficult to accomplish this as a homebrewer, though if you’re set up to serve your beer on draft, it can be done with sanitary nitrogen instead of CO2.
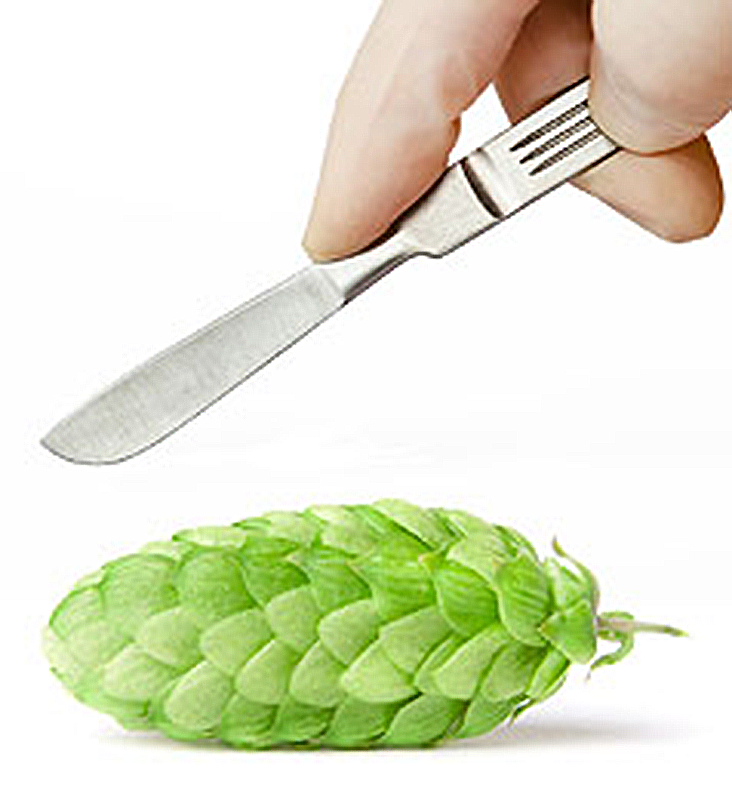
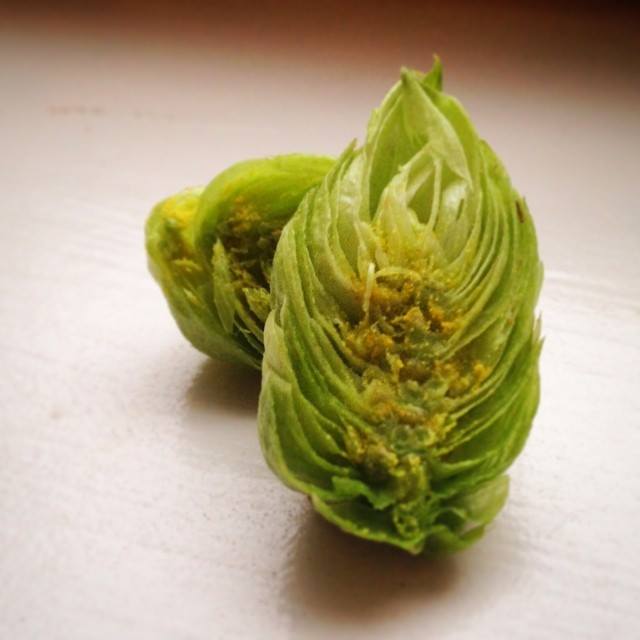
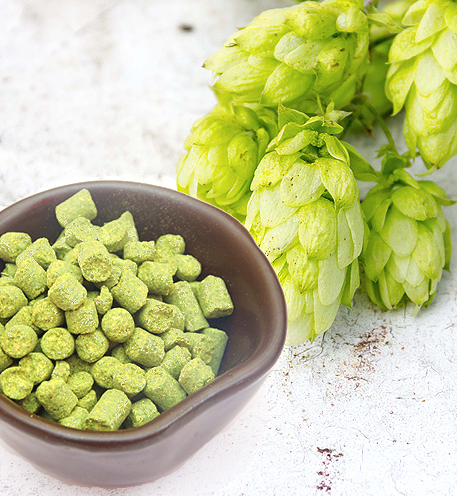
Hops
English hops work best when brewing Irish stout. The majority of hops in Guinness is Kent Goldings, while Murphy’s uses mostly Target. Shoot for 30-45 IBUs. Since hop aroma is low to none, emphasize the early additions.Shop Home Brew Starter Kit

Yeast
Irish stouts typically have some mild fruity aromas, which come from esters produced by the yeast. Wyeast 1084: Irish Ale is the best option here. Prepare a yeast starter to achieve a complete fermentation and the dry finish you’re looking for.
With these basics, you’ll brewing Irish stout fit for the pub in no time. What tips do you have for brewing a stout?
—–
David Ackley is a beer writer, brewer, and self-described “craft beer crusader.” He holds a General Certificate in Brewing from the Institute of Brewing and Distilling and is founder and editor of the Local Beer Blog.

Special Interview: Dan Bies Of Briess Malt

Dan Bies 4Today we have an extra special guest! In this exclusive interview, Dan Bies of Briess Malt & Ingredients Co. shares his tips for brewing with Briess malts and malt extracts, as well as some insights into the Briess product development process. This is great information for brewers of all levels! We hope you enjoy!
Dan works in the technical service department at Briess. He is their pilot brewer which essentially means he gets to have a lot of fun doing test batches of beer with vast array of products that Briess has to offer.

1. Hi Dan, thanks for taking the time to share your expertise with us today. For starters, can you tell us how you came to work with Briess, how long you’ve been with the company, and what you do there?
The day I started working in the Briess malt analysis lab is the day I became determined to start home brewing. I’ve been at Briess for six years now and my current position is as a Pilot Brewer, Technical Services Representative, and QA Chemist. I help to commercialize new extract products and assist customers with application-related questions on our existing products. I also do recipe and finished product development on a variety of beverages including beer, Malta, and Flavored Malt beverages.

2. Part of the fun of home brewing is developing your own recipes. Can you share with us some of things you think about in terms of malt and malt extract when developing a new beer recipe?
Dan Bies 5When formulating with malt and extract my first consideration is a target style. Once I have this I try to think of what is traditionally used in its formulation and what attributes the ingredients bring to the character of the beer. Next I consider possible substitutions; this usually results in chewing on malts and making malt teas. Lastly, I brew. I typically use extract and grain interchangeably, but I almost always find myself steeping additional grain into extract brews.

3. What are some of the main differences between wort made from extract and wort made from grain? How do these products differ in the their effects on the final beer? Are there any additives in malt extract?
There’s almost no difference when using extracts Briess makes. We brew all of our malt extracts from the same Briess malts used by breweries and home brewers, using traditional brewing techniques in a 500-barrel brewery. By the way, it’s the second largest brewhouse in Wisconsin. Malt and water, that’s all that goes into our extracts. Absolutely no additives are used. Plus, all of our extracts are made using specialty malts to achieve full color and flavor. Some malt extract producers use the boil to develop color and flavor.Dan Bies 2
Extract brewers who use Briess extracts can achieve the same results as an all grain brewer, however they must take care in choosing their ingredients. Liquid malt extracts will develop color and some flavor if they’re not stored properly and exposed to heat. Time can do the same thing, but heat is the worst offender. So it’s really important that malt extracts are properly stored from the time they leave the Briess warehouse. Using the freshest possible liquid malt extract from a reliable distributor is key. You can tell the date a Briess malt extract was produced by reading the lot code. For example, 130521 would be May 21, 2013. The first two digits indicate the year, the middle two the month and the last two the date of production.
If you’re not sure of the freshness we recommend that you use dry extracts. These do not darken or develop flavor defects over time because the products are simply too dry for the negative reactions to occur.

4.  Have you found a ratio of malt extract to grain that works well for you?
Depends on style and desired character. Not all Briess malts are showcased in the CBW® [Brewers Grade Malt Extracts] line. If I ever want to go heavy on specialty malts, but don’t have time for all-grain, I will formulate with specialty malts to match a flavor and color target, steep the malt, then add the remaining fermentables with a light malt extract. I feel that almost any style can be made with a large inclusion of light malt extract and steeped grains. A small amount of Munich 10 or Bonlander® Munich Malt steeped with Pilsen Light extract is a great substitute for Pale Ale Malt.Shop Malted Grains

5. OK, now let’s switch gears and talk a little about product development. I’ve noticed that Briess releases a new variety of malt from time to time. How does Briess go about developing a new malt or malt extract product? What is that process like?
When we determine a new malt or malt extract we would like to add to our standard product list, the first thing we do is bring in all competitor products of the same or similar style. Then we conduct blind sensory, analyze the results and decide the target flavor, color and other attributes it should have. Then we produce pilot batches until the target product is met. Some of the recent introductions only took one try. Then a second blind sensory is held to see how our new malt fits into the category. That process is repeated, if necessary, until we are entirely happy with the results. Then we make several productions, use the new malt or extract in our pilot brewery, develop recipes that showcase it, and then brew at a number of breweries before officially releasing it. Our sensory panel includes our maltsters, brewers, experienced GABF judges, food scientists trained in sensory analysis, and other staff members.

shop_home_brew_starter_kit6. Are there any new products in the pipeline you’d like to share with us?
We recently started producing a high maltose yellow corn syrup for use in gluten-free beers and food. Produced from corn grits, this product is the equivalent of the wort brewers would get if they used corn in their brews; however, it is in a convenient liquid form. This makes brewing with this popular grain easy and avoids the needs for long separate grain cooking and boiling cycles. Because it’s made from grain and unrefined, this type of corn syrup has a pleasing corn flavor, yellow color and some of the vitamins and nutrients needed for yeast nutrition. We made this syrup using Organic Corn so it is all-natural and non-GMO.
Did you enjoy this post? Please take a moment to share it on your favorite social network! Thanks and cheers!
—–
David Ackley is a beer writer, brewer, and self-described “craft beer crusader.” He is a graduate of the Oskar Blues Brew School in Brevard, NC, and founder of the Local Beer Blog.

The Anatomy Of A Hop Cone

Look at anatomy of hop conePrized by brewers far and wide for its bittering, flavor, and aroma qualities, the hop is an integral part of beer. But what is a hop? What’s inside the hops? What’s the anatomy of a hop cone?
Hops come from a perennial plant called Humulus lupulus (lupulus as in wolf, so named for the voraciousness of the plant’s growth), which sends vines up from a rhizome in the ground. These vines (a.k.a. bines) have been known to climb to 20 feet or higher in a commercial hop field. Hops, the part of the plant used in brewing, are the flowers of the plant. It is the hop flowers’ essential oils and resins that make it so valuable as a beer brewing ingredient.
A hop flower looks like a miniature green pine cone. The resins, commonly referred to as alpha acids, are contained at the base of the hop cone in the lupulin glands. When boiled, these alpha acids are isomerized, a quick shift in molecular structure that makes them soluble in wort.
The alpha acids are what make beer bitter. A simple calculation allows brewers to figure out the IBUs (international bittering units) of their beer and compare their beer to others using a universally accepted scale. The two primary chemicals within the alpha acids are called humulone and cohumulone.
But also within the anatomy of a hop cone are other components that contribute to flavor and aroma. These characteristics are derived from hop oils. Because they’re more delicate than the alpha acids, the hop oils will evaporate if they’re boiled for too long. For this reason, they’re added to the wort late in the boil or afterwards. Commercial brewers may use a hop back, but homebrewers will usually put the hops directly in the secondary fermenter (this practice is called dry hopping).
There are several different types of essential oils within the hop cone, each contributing different flavor and aroma characteristics:

  • Myrcene – floral, citrus, and piney
  • Humulene – spicy, herbal, European
  • Caryophyllene – herbal, European
  • Farnesene & other oils

(If you’re interested, Ray Daniels’ book, Designing Great Beers, is a great source for more info on the different hop oils.)Shop Hops
After being harvested from the hop plant, hop cones are usually processed into pellets. Specialized machinery removes the extraneous vegetative material, preserving the resins and oils. The processing results in higher hops utilization (a measure of how many alpha acids are dissolved in the wort) and makes for easier storage. Some brewers, like Sierra Nevada, still use whole hops, but hop pellets have become the industry standard.
When buying hops for home brewing, fresher is always better (unless brewing a lambic, which is made with aged hops). It’s best to purchase your hops right before you use them. If you will be using the hops within a few days, store them sealed in a plastic bag in the refrigerator. Otherwise, keep them in the freezer, preferably vacuum-sealed, until you’re ready to brew.
This is the basic anatomy of a hop cone and why it is used in beer. Here’s where you can find more information about hops: (Nearly) Everything You Need To Know About Hops.
—–
David Ackley is a beer writer, brewer, and self-described “craft beer crusader.” He is a graduate of the Oskar Blues Brew School in Brevard, NC and founder of the Local Beer Blog.

Style Guide: How to Brew an American Amber Ale

American Amber AleAn American Amber Ale profile, as the name implies, lies somewhere in the spectrum between a pale ale and a brown ale, with a rich, amber color matched by a sweet, caramel malt flavor. They’re often moderately to aggressively hopped, more so than a golden ale or pilsner, but not as much as an India Pale Ale. Their middle-of-the-ground nature makes them agreeable to many a beer fan, ideal for every day drinking, and part of many craft breweries’ year-round line-ups.
There are many good examples of American Amber Ales on the market. New Belgium’s Fat Tire, Bell’s Amber, and Highland’s Gaelic Ale all come to mind.
The BJCP Guidelines for an American Amber Ale profile offer the following: “Like an American pale ale with more body, more caramel richness, and a balance more towards malt than hops (although hop rates can be significant).” That emphasis on caramel richness makes Caramel malt a critical ingredient when brewing.
Further, according to the BJCP, Amber Ales should fit more or less within these guidelines:

  • IBUs: 25 – 40+
  • Color (SRM): 10 – 17
  • OG: 1.045 – 1.060
  • FG: 1.010 – 1.015
  • ABV: 4.5 – 6%

We carry an excellent Fat Liar Amber Ale beer recipe kit, but if you’d like to create your own beer recipe, here are some suggestions:
Grain Bill

Hops

  • American Amber AlesShop Steam Freak Kits should be brewed with American hop varieties. Marty Nachel, author of Homebrewing for Dummies, recommends finishing with Cascade. New Belgium’s Fat Tire, a very popular American Amber, uses Willamete, Target, and Goldings.
  • Amber Ales are sometimes dry-hopped.

Yeast

  • A classic American Amber Ale should use a clean fermenting American ale yeast strain. All of the following beer yeasts are great options: Safale S-05, Wyeast 1056: American Ale, or Wyeast 1272: American Ale II. There should be little to no yeast character or esters in the aroma, so try to keep fermentation temperatures in the recommended range for your selected yeast strain.

These are the very basics of an American Amber Ale profile. What ingredients and techniques do you use when home brewing your American Amber Ale? Share in the comments below!
Til next time…Cheers!
—–
David Ackley is a beer writer, brewer, and self-described “craft beer crusader.” He holds a General Certificate in Brewing from the IBD and is founder of the Local Beer Blog.

Bière de Mars Beer Recipe (Partial Mash)

Bière de Mars Beer In A Glass
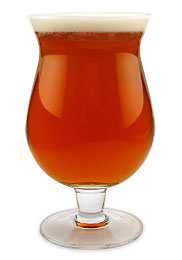
If you’re like me, you’re already thinking ahead to the warmer temperatures of spring. Traditional Belgian and French brewers did the same thing. In the winter, they would often brew a Bière de Mars (March beer) that could stand up to the final colder months, yet still be enjoyable in the warmer spring weather.
According the BJCP, Bière de Mars is a subset of the Bière de Garde category (16D). Bière de Garde is a strong ale meant to be stored. As such, it often displays a somewhat funky, “corked” cellar character. Bière de Mars, on the other hand, is intended to be consumed fresh. Maybe this freshness is reminiscent of spring.
The main features of the style include a malt forward balance and toasty or toffee-like sweetness, with little to no hop aroma. The finish is dry, with the yeast contributing some fruity and/or spicy characteristics.
The most prominent commercial example in the US is probably New Belgium’s Bière de Mars. It sits comfortably within the BJCP guidelines for the Bière de Garde style:

  • OG: 1.060-1.080
  • FG: 1.008-1.016
  • ABV: 6-8.5%
  • IBUs: 18-28
  • SRM: 6-19

New Belgium’s rendition also uses lemon peel to enhance the fruity aroma of the beer. If you’re so inclined, add the fresh zest from one lemon during the last ten minutes of the boil.
Bière de Mars Beer Recipe
(Partial Mash, five gallon batch)
Specifications
OG: 1.066-1.073
FG: 1.015-1.017
ABV: 6.7-7.3%
IBUs: 20-24
SRM: 11
Ingredients
6.6 lbs. Light Liquid Malt Extract
1 lb. Amber Dried Malt Extract
1 lb. Munich Malt
1 lb. Belgian Aromatic Malt
1 lb. Belgian Biscuit Malt
1 lb. Flaked Oats
1 lb. Belgian Candi Sugar (light)
.75 oz Styrian Gold hops at :60 (3.8 AAUs)
.75 oz Styrian Gold hops at :20 (3.8 AAUs)
zest from one lemon at :10 (optional)
Yeast: Safbrew S-33  
Beer Recipe Directions
Mash the crushed grains and flaked oats in 1.5 gallons of water at 150F. Strain the grains and rinse with 1 gallon of water at 170F. Mix in malt extracts and Belgian candi sugar. Add water if needed. (Calculated boil volume: 7 gallons)
Bring wort to a boil. Add hops as scheduled and lemon peel if desired. Whirlpool, chill, and transfer to a clean, sanitized fermenter. If needed, mix in enough clean, sanitized water to make five gallons. Pitch yeast at 70F and ferment at 65-70F for seven days, then transfer to secondary for ten. Bottle or keg as you would normally.
Are you a fan of brewing Bière de Mars? Do you have a Bière de Mars beer recipe you’d like to share with us? Share your tips in the comments below!
—–
David Ackley is a beer writer, brewer, and self-described “craft beer crusader.” He holds a General Certificate in Brewing from the Institute of Brewing and Distilling and is founder and editor of the Local Beer Blog.

Tips for Brewing A Lambic Beer Recipe At Home

Lambic Beer
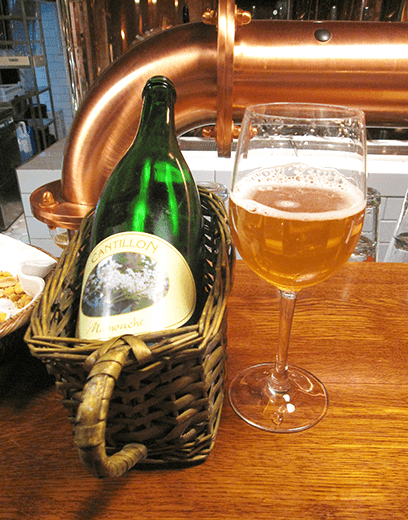
I love lambics. I don’t have much of a sweet tooth for anything except alcohol, but a good lambic seems out of my reach if for no other reason than I don’t have a building with louvred vents like they do in Belgium to capture wild yeasts. I’ve done a little searching online for lambics, but the process seems to be: “make a good ale, then add a bushel or two of apples and let ferment for another 2 years and bottle.” There has to be more to it than that. What do you recommend?
Name: Justin V.
State: Pennsylvania
—–
Hi Justin, thanks for your great question!
I can tell you right now that brewing a lambic beer recipe at home will be a labor of love. First, let me cover some of the elements that make a traditional lambic a lambic, and then I’ll share a couple lambic beer recipes.
As you probably know, lambics were developed around Belgium, specifically in the area of Brussels and the nearby town of Lembeek. Lambic can be traced back hundreds of years and is a very distinctive brew.
One of the main characteristics of lambic is that it is fermented with a variety of wild yeasts, particularly Brettanomyces. These wild yeasts and bacteria gave the beer a dry, unique flavor profile, a combination of tart, earthy, leather, fruity, and even “horse blanket.” As you mentioned, Belgian brewers would traditionally move their wort to a “cool ship,” a large, rectangular vessel with an open top, then leave the wort in the open to collect wild yeasts and bacteria through windows or vents. Some brewers would even refuse to clean those rooms for fear of disturbing the precious microbes!
Lambics can be characterized as pale and moderate in gravity. It’s traditional to have about 30% unmalted wheat in the grain bill. You might try using torrified wheat.
It’s also traditional to use aged hops when brewing a lambic beer recipe, which were used for their preservative value more than their bittering, flavoring, or aroma characteristics. The aged hops would produce a negligible bitterness that wouldn’t interfere with the sour, earthy, and complex wine-like flavors of the lambic. If you don’t have any aged hops on hand, try asking around your homebrewer friends – someone will likely have some lying around.
After the mash and boil, the beer would be moved to the cool ship, and then fermented in barrels. Sometimes fruit was added, especially cherries and raspberries, for added flavor and fermentability. Here is where the tough part comes in – lambic is usually aged one to three years or longer!
Liquid Beer Yeast For Lambic Beer RecipeAs a beginning lambic brewer, I would recommend using a premixed lambic culture, such as the one offered by Wyeast . This blend contains the appropriate combination of yeast and bacteria to make a lambic. Some brewers will recommend that you use a dedicated set of equipment for your lambic and other “funky” beers so as to avoid cross contamination with your other brews.
With all the information above, I believe you have some good hints as to what to do when you brew a lambic beer recipe at home. Below are two beer recipes. The first is for a lambic-esque beer, made sour with cranberries rather than funky microbes. The second beer lambic recipe is for a more traditional lambic, and comes from the book Brewing Classic Styles by Jamil Zainasheff.
Good luck!
Cranberry “Lambic”, from A Year of Beer 
(5-gallon batch, all-grain recipe)
Specs
OG: 1.053
FG: 1.018
ABV: 4.6%
Ingredients
6 lbs. Wheat malt
3.5 lbs. Pilsner malt
1 oz. Hallertau hops at :60 (2.8 AAUs)
.25 oz. Hallertau hops at :15 (.7 AAUs)
.5 oz. orange peel (5 minutes)
5/8 cup priming sugar
1 can cranberry juice concentrate added to secondary
Bavarian Wheat ale yeast
Directions 
Mash crushed grains at 124˚F for 30 minutes, then raise temperature to 153˚F for 60 minutes. Raise to 168˚F for mash out. Boil wort for 75 minutes, adding hops according to schedule above. Ferment at 65˚F for 10 days, then move to secondary for 14 days. Glass carboys are recommended for fermentation.

Lambicus Piatzii, from Brewing Classic Styles
(5-gallon batch, extract recipe)

Specs
OG: 1.053
FG: 1.006
ABV: 6.2%
IBUs: 5
SRM: 4
Ingredients 
5 lbs. Wheat LME
4.1 lbs. Pilsner LME
3 oz. aged hops (any European low-alpha variety) at :90 minutes
Safale US-05
Directions
Mix LME with enough hot water to make 7.7 gallons and bring to a boil. Add hops and boil for 90 minutes. Chill wort to 68˚F and pitch ale yeast (use half a packet of dry yeast or a full packet of liquid yeast without a starter). After a week, add the lambic blend. Ferment at 68˚F for six months to a year. A layer will form on the top of the beer called a pellicle. This is caused by the lambic culure and it is normal. The pellicle will often fall to the bottom of the fermenter when the beer is ready to be bottled. Bottle for 1 to 1.5 vols CO2.
Justin, this should be enough information to get you on your way to brewing a lambic beer. There are two beer recipes that you can brew at home and some insight and tips on how to get either of them brewed.
—–
David Ackley is a beer writer, brewer, and self-described “craft beer crusader.” He holds a General Certificate in Brewing from the Institute of Brewing and Distilling and is founder and editor of the Local Beer Blog.

Pellet Hops vs Whole Leaf – Which is Better?

pellet hops and whole leaf hopsAmong the “this or that” debates of homebrewing, the question of whether to use pellet hops or whole leaf hops is primarily a matter of personal preference. But, there are a few things to consider when deciding what kind of hops to use when brewing.

Pellet Hops vs Whole Leaf

The term “whole leaf” is a bit of a misnomer when it comes to talking about hops. Brewers use the flowering part of the hop plant, often called a cone or a strobile. When hops are harvested, the pinecone-shaped flowers are picked by hand or with a machine. Then the hops are dried in an oast. Next, if the hops are being processed into pellets, the hop cones get milled and pressed into pellets. Finally, the hops are pressed into bales, vacuum packaged, sealed, and stored cold.
One of the main arguments against using pellet hops in your beer is that heat generated during the pelletizing process can degrade the quality of the hops, but most any modern hops farm will take precautions against this. You can be confident that any of the major hop producers you buy from have taken care to prevent any degradation due to pelletizing of the hops.
Without further delay, below are several of the pros and cons of pellet hops vs whole leaf.

Pellet Hops: Pros Shop Hops

  • Less plant material means less wort gets lost in the kettle trub, improving brewhouse efficiency.
  • Pellet hops offer slightly higher hop utilization, meaning more IBU bang for your buck.
  • Pellet hops store well.
  • Pellet hops are readily available.

Pellet Hops: Cons

  • The processing of the pellets may damage some of the aroma compounds in the hops. That said, with modern harvesting and processing techniques, actual damage is likely negligible. Hop pellets are used by brewers all over the world.
  • Since the hop material is shredded, it can sometimes clog spigots and tubing. A bazooka screen can be installed inside the brew kettle to protect against this.

Leaf Hops: Pros Shop Bazooka Screen

  • Whole leaf hops can be used as a filter bed when drawing wort from the brew kettle.
  • Whole leaf hops are the best option if brewing a wet hop beer.
  • Some think whole leaf hops offer better flavor and aroma characteristics. Sierra Nevada uses exclusively whole leaf hops. Randy Mosher, author of Radical Brewing, also prefers whole leaf hops.

Leaf Hops: Cons

  • Whole leaf hops take up more space in storage and in the brewing kettle.
  • Whole leaf hops offer slightly less hop utilization than pellet hops.
  • Whole leaf hops may not always be available or their selection may be more limited.

There you have it. There are some of the pro’s and con’s of pellet hops vs whole leaf hops. As you can see they are somewhat minor, even thought there is a minority who believe whole leaf is the only way to go. In the end, both can be used to make excellent beer.Shop Hop Bags
So what’s your preference – pellet hops or whole leaf?

—————
David Ackley is a beer writer, homebrewer, and self-described “craft beer crusader.” He holds a General Certificate in Brewing from the Institute of Brewing and Distilling and is founder of the Local Beer Blog.

Brewing A Coffee Stout Beer Kit – Part IV

Glass Of Coffee Stout From A Beer Recipe Kit
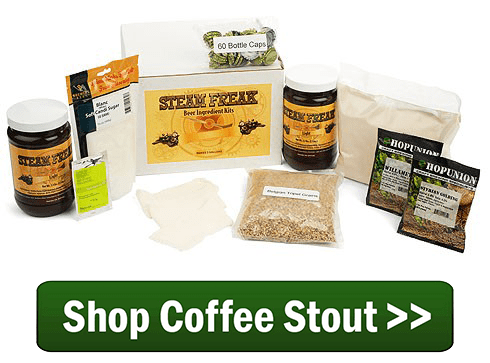
Over the past several weeks, I’ve been making a coffee stout partial mash beer kit: Captain Cogsworth Coffee Stout. First, I reviewed the ingredients and made a plan about how to add the coffee to the beer. I then brewed the beer, guided it through fermentation, and bottled it with the coffee. Now we can taste the coffee stout and see what changes might be made next time around.
Here are the notes from my taste test of the Steam Freak’s Coffee Stout beer kit.

Tasting Notes: Steam Freak Captain Cogsworth Coffee Stout
Final Stats:
OG: 1.059
FG: 1.020
ABV: 5.1%
IBUs: ~44
SRM: ~35

  • Aroma – Soft malt aroma, primarily roasted malt, with just a touch of caramel sweetness. Some notes of chocolate and coffee, but not too bitter or astringent. Some subtle esters from the American ale yeast, which combined with the malts come across as dark fruit. A wildly inviting aroma.
  • Shop Steam Freak KitsAppearance – Dense, tan head that holds over time fairly well. Very dark brown color, nearly opaque. Some light brown highlights around the edges, just as a stout should be.
  • Flavor – Primarily roasted malt and coffee flavors, supported by subtle malty sweetness. The beer is bitter without being over the top or astringent. Hop flavor is minimal. Some ester character is present. The beer tastes a little young, so it will be interesting to see how it changes over the coming weeks. (Added Note: It has now been 5 weeks since bottling, and the flavors have come together beautifully. The maltiness rolls into the roasted/coffee, then finishes with the hops.)
  • Mouthfeel – Medium bodied. Slight astringency from roasted malts.
  • Overall – This beer’s pretty darn good! It’s a flavorful dark beer with subtle coffee flavors, but not as heavy as something like Guinness. I look forward to sharing it with family and friends!

So would I make any changes to this partial mash recipe kit? Two things come to mind:

  1. Shop Wort AeratorThis is more of a personal preference than anything else. I wouldn’t mind a little American hop character in the aroma. Maybe just dry hopping for a few days with a half-ounce or so of Cascade or Nugget hops would do the trick.
  1. I’d also like to explore how to get a more assertive coffee aroma. Would brewing the coffee hot make a difference? Several brewers recommend the cold-brew method, so I’m not sure whether that would be an improvement. Maybe increasing the roasted malt from 8 ounces to 12 would help. Another option would be to increase the amount of coffee added to the coffee stout, or even try aging the beer directly on the ground or whole beans.

All told, I think this coffee stout partial mash beer kit turned out great! Luckily I have these comments in my homebrewing notes, so the next time I brew a coffee stout, I’ll know exactly what to do to make it even better.
Which Steam Freak homebrew beer kit would you like to try?
Part I – Brewing a Coffee Stout
Part II – Brew Day, Partial Mash Shop Liquid Malt Extract
Part III – Adding Coffee, Priming
Part IV – Final Tasting Notes
———————————–
David Ackley is a beer writer, homebrewer, and self-described “craft beer crusader.” He holds a General Certificate in Brewing from the Institute of Brewing and Distilling and is founder of the Local Beer Blog.

Brewing A Coffee Stout Beer Kit – Part Three

Bottled Homebrew Two CasesLast night I bottled the Steam Freak Captain Cogsworth Coffee Stout. This brew requires a somewhat unusual bottling process, so I’ll walk you through it. The objective: add the coffee and the priming sugar at the same time.
Luckily, both can be done without a major modification to the bottling process. Basically, instead of mixing the priming sugar with water, the instructions that came with this coffee stout beer kit call for mixing the priming sugar with coffee. I like to do things differently, so instead of making a regular cup of coffee, I decided to make cold brew.
Cold brewed coffee is simply ground coffee steeped in cold water. The idea is that this avoids extracting harsh, burnt flavors from the coffee. The only catch is that it takes longer to brew than traditional coffee brewing methods, about 24 hours instead of a few minutes. Here’s how I went about adding cold brewed coffee to my coffee stout:

  1. Shop Coffee StoutAbout 24 hours before bottling, pre-boil the steeping water. For the sake of sanitation and to remove any chlorine in the water, I boiled my steeping water for about 20 minutes. I placed the lid of a mason jar in the boiling water for several minutes to sanitize it.
  1. Pour the boiled water into a quart-size mason jar. I poured the water into the jar when it was still very hot, so this should have sanitized the jar.
  1. Cool the water in the refrigerator. I set the jar in the fridge for a few hours while I did some work around the house.
  1. Mix the ground coffee into the water. I poured off about half of the water and added the coffee to the jar. I sealed it up and mixed the coffee around a bit.
  1. The next day, get ready to bottle. One of the first things I do when bottling a beer kit is move the fermenter into position. This gives sediment a chance to settle while I clean and sanitized bottles, caps, the auto-siphon, tubing, and the bottle filler.
  1. Shop Bottle CappersMix coffee and priming sugar. First, I used a priming sugar calculator to find out how much priming sugar to use. Then I strained out the coffee using a sanitized French press. I poured the coffee into a small pot and mixed in the priming sugar, heating the mixture to just short of boiling.
  1. Transfer beer into bottling bucket and mix in priming sugar/coffee mixture. I gave the coffee/sugar mixture a moment to cool, then got ready to transfer. I started transferring the beer and poured in the coffee/sugar mixture once there was about an inch of beer in the bottling bucket. The swirling motion of the beer as it filled the bottling bucket was enough to mix things together.
  1. Bottle. Fill bottles and cap as usual!

Ideally, using the cold-brewing coffee method will bring a smooth, aromatic coffee character to beer, without adding much bitter astringency. Stay tuned to see how it this coffee stout beer kit turns out!
Interested in other coffee-flavored beer recipes? Try this Sierra Nevada/Ninkasi Double Latte Clone and check out these tips for brewing beer with coffee.Shop Fermenter
Part I – Brewing a Coffee Stout
Part II – Brew Day, Partial Mash
Part III – Adding Coffee, Priming
Part IV – Final Tasting Notes
———————————–
David Ackley is a beer writer, brewer, and self-described “craft beer crusader.” He holds a General Certificate in Brewing from the Institute of Brewing and Distilling and is founder of the Local Beer Blog.

Brewing A Coffee Stout Beer Kit – Part Two

Partial Mash BrewingThis weekend I brewed my latest homebrew recipe kit from E. C. Kraus: Captain Cogsworth Coffee Stout.
Though I often brew all-grain, I enjoy other methods of making beer. For example I like partial mash brewing for a number of reasons. For one, partial mash brewing takes less time. I can usually do a partial mash brew in about four hours, as apposed to six for all-grain, cleaning and sanitation steps included. Most of the time savings come from eliminating the mash and lauter steps. Bringing the wort to a boil is faster too, since you’re dealing with about half as much liquid. It’s also nice that after steeping the grains you only have to dispose of half a pound of grain, not twelve, and there’s no mash tun to clean out.
When I brew partial mash brewing kits, I will sometimes make small adjustments to the recipe in the box. For this coffee stout beer kit, I added a little extra base malt to the steeping grains for a more grainy malt flavor and a little diastatic power. The extra grains may contribute some extra body and mouthfeel as well.
The first step in partial mash brewing (after cleaning and sanitation, of course) was steeping the specialty grains. I used pure RO water from the store. After about 20 minutes at 150°F, it was time to bring the wort to a boil.Shop Steam Freak Kits
This is the point where malt extract is added to the wort. Regardless of whether brewing on the stove or on a gas burner, I always turn off the heat before adding the malt extract. This helps prevent a boil over. After adding the malt extract, the wort smelled glorious! A lot like hot cocoa.
After bringing the wort to a boil, I added the first round of hops, in the case of this Cogsworth coffee Stout, one ounce of Northern Brewer. Thirty minutes later, I added the rest of the hops: one ounce Tettnanger. With 15 minutes left in the one-hour boil, I added a couple additional ingredients that weren’t called for in the beer recipe with this kit: Irish moss and yeast nutrient. In my experience, these can help with clarity and fermentation, and I’ve simply gotten into the habit of adding them to every brew.
As with bringing wort to a boil, chilling a wort with the partial mash brewing method is much faster. I was able to chill the wort with my immersion wort chiller in basically half the time compared to doing a full wort boil. After that, all I did was pour about two gallons of water into my sanitized fermenter, pour the wort on top, top off to five gallons, and then stir to mix and aerate. Sometimes I will top off a little more than five gallons just to account for losses in trub.
Shop Wort ChillersSo far, the partial mash brewing directions that came with this brew kit have worked well. I took a quick hydrometer sample (1.059 – right on target!), pitched the yeast, and in a couple weeks I’ll be ready to add the coffee! Based on how the coffee smells…I’m excited!

Part I – Brewing a Coffee Stout
Part II – Brew Day, Partial Mash
Part III – Adding Coffee, Priming
Part IV – Final Tasting Notes
———————————–
David Ackley is a beer writer, brewer, and self-described “craft beer crusader.” He holds a General Certificate in Brewing from the Institute of Brewing and Distilling and is founder and editor of the Local Beer Blog.