Brewing With Chili Peppers For Fun And Torture

Beer With Chili Peppers
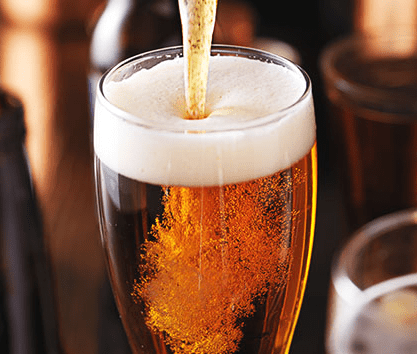
Beer drinkers are an eclectic bunch. Some are hop-heads and some prefer malt bombs, but mixed in with the plethora of sects is a smaller group – those who like it hot.
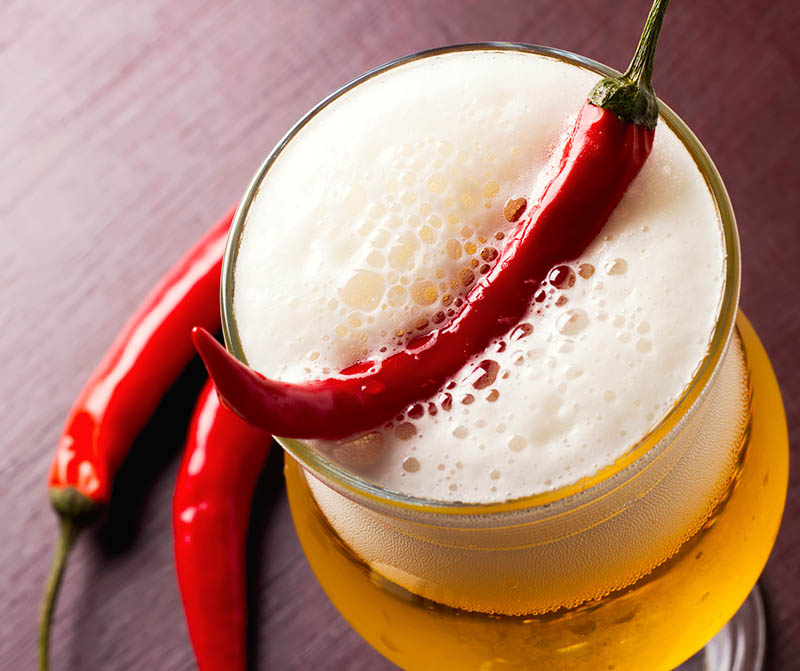
You may have noticed commercial breweries experimenting more by brewing with chili with peppers, recently. Stone has the painfully hot Crime and Punishment and Twisted Pine has the infamous Ghost Face Killah. But there’s no need to go to the extreme with your homebrew!
If you’re looking for unique heat or some layered vegetable flavor, there are lots of ways to go about adding chili peppers to your beer – and lots of peppers to use – when brewing with chili peppers.

What Kind of Homebrew?
Before you find the kind of pepper you want to use, it’s important to determine the style of homebrew you’d like to make. The homebrew you use as your base beer will help you pick what kind of chili peppers to use and how much heat you want to feature.
For example, you could brew something light, like a lager, which could help really showcase aspects of a pepper, all the way up to a stout, which can balance the spice and heat with its own sweet maltiness and roasted characteristics. Here’s a chipotle porter recipe as an another example.
The first time I tried brewing with chili peppers I used a blonde ale base because I wanted the pepper to be front and center. It was perfect for my love of hot food, but a little too much heat came through for other drinkers. Find a style that you enjoy and that will allow you to feature the right amount of heat.

Which Peppers to Use?
Once you’ve got a beer style picked out, consider these three popular chili peppers to reach your desired level of intensity:

  • Anaheim: This pepper may be ideal for those who don’t want a ton of spicy heat, as it falls relatively low on the Scoville heat scale. As a mild pepper, it mixes a little bit of sweetness with low-level heat. Anaheim peppers will be good for lighter-bodied brews with a touch of heat.Shop Steam Freak Kits
  • Jalapeño: Chances are you’re familiar with this pepper, which is often found in spicy food dishes. Jalapeños offer stronger heat than Anaheim peppers and fall about midway on the Scoville scale. Chipotle peppers – smoked jalapeños – also make an excellent option when brewing with chili peppers. The smoke adds another layer to the pepper heat and flavor. Consider jalapeños to be good for just about any beer style, depending on your tolerance for heat.
  • Habañero: Among the hotter peppers easily found at grocery stores, habañero peppers aren’t for everyone, thanks to a heat level many times that of a jalapeño. If you love spicy heat, adding this chili pepper to heartier beers like porters or stouts that can withstand the heat.

When to Add Chili Peppers to a Brew

Like other unique ingredients (such as herbs and fruit), you’ve got options for when to add peppers in your homebrew. You can leave them whole if you want to minimize heat or slice them in half to expose seeds and the vegetable’s membrane, which contain capsaicin, the compound that makes a pepper hot.
Other timing options when brewing with chili peppers:

  • Late-boil: This will add heat, but little aroma to your beer. Add peppers at the very end of the boil and let them sit in the wort for 10 to 15 minutes.
  • Primary fermentation: If you want a bit more balance, adding peppers during primary fermentation will offer some heat, pepper flavor, and aroma. Just make sure to sanitize or gently blanch peppers them before putting them in your carboy or bucket.
  • Secondary fermentation: To get the most flavor, aroma, and heat from your peppers, try adding them after primary fermentation. This offers the option of starting with a pepper or two, and then you can taste the beer to find out if you want to add more during the secondary process.
  • In the bottle: For pepper enthusiasts only! Adding a pepper straight into a beer bottle will leave no doubt as to what you’re drinking!Shop Home Brew Starter Kit

How Adding Chili Peppers Impact Your Homebrew
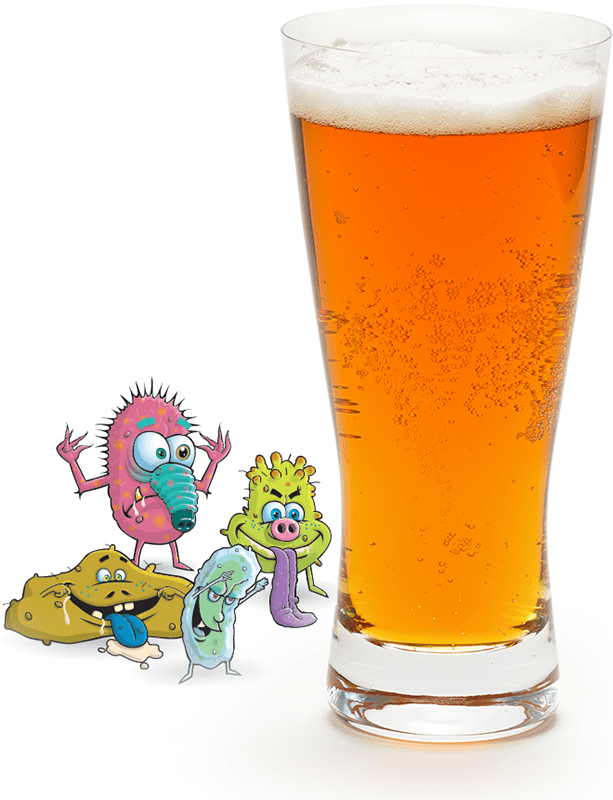
When brewing with chili peppers you’ll definitely get a pepper flavor in your beer, but it’s important to know that how you use peppers may also affect the head retention of a beer.
If you’re using seeds and other exposed parts of the chili pepper, oils from the vegetable may seep into your beer, greatly reducing head retention. In my experience with a jalapeño blonde ale, carbonation wasn’t a problem, but little to no foam remained in my glass a few minutes after it was poured.
Think you can stand the heat? A good place to start for first-timers is with selecting a homebrew recipe kit. Find a brew you like and think will support the pepper heat and give it a shot. It’s an easy way to test pepper flavors and discover the kick they can add to your homebrew!
—–
Bryan Roth is a beer nerd and homebrewer living in Durham, North Carolina. You can read his thoughts on beer and the beer industry on his blog, This Is Why I’m Drunk, and send him suggestions on how to get his wife to drink craft beer via Twitter at @bryandroth.

5 Cool Tips For Brewing Beer In The Summer

Keeping Cool While Brewing Beer In The SummerThroughout the home brewing process, sometimes it’s easy to get a little stressed. With all the different steps, temperatures to hit, and precious beer on the line, we all want to make sure the batch turns out the way we want it to. On top of it all, the summer heat has a way of boosting that stress level.
But the most important thing is to have fun. What’s the point if brewing isn’t enjoyable? Besides, the more we can relax and enjoy the process, the less likely it is that we make a costly mistake.
Here are five ways you can keep your cool when brewing beer in the summer and enjoy your brew day:

  1. Brew with a friend: An extra pair of hands makes brewing much easier… and more fun too! Share some homebrews, divvy up the responsibilities, and talk some shop. If you’re visiting someone’s house, just remember to bring something – ingredients, beer, or food – to contribute and to say “thanks” to your host.
  1. Clean up first: I don’t know about you, but I always prefer brewing in a clean space. The more clear surfaces you have available, the less you’ll have to balance things precariously and the less chance you have of spilling something.
  1. Shop Steam Freak KitsRead all directions and plan the process ahead of time: Just like in grade school, read all beer recipe directions before beginning. All of our Beer Box Recipe Kits come with step-by-step instructions to guide you through the brew day. Here are 10 recipe kits just right for brewing beer in the summer. If you’ve built your own beer recipe, plan out in advance what temperatures and what volumes of water you want for your batch. Planning out a road map for your brew day will help eliminate at least some of the guesswork later on. The more details the better.
  1. Measure out all ingredients beforehand: Taking a few minutes to weigh out your grains and hops will give you a little extra time to pay attention to those things that will almost definitely go wrong. If you measure out things like Irish moss in advance, you’re much less likely to forget about them in the heat of the moment.
  1. Take your time: What’s the rush?! It’s always easier to make mistakes and get flustered under pressure of a deadline. If it means devoting a whole day to brewing, so be it. If you can plan it so that you have no where else to be, you’ll be much more likely to enjoy where you are and what you’re doing.

Shop Home Brew Starter KitJust like Charlie Papazian always says, “relax, don’t worry, have a homebrew!” This couldn’t be more true when brewing beer in the summer. Remember that even if your brew day doesn’t go perfectly, your beer will probably still come out pretty well. Embrace the process and keep in mind there is nothing you’d rather be doing than brewing your own beer!
—–
David Ackley is a beer writer, brewer, and self-described “craft beer crusader.” He is a graduate of the Oskar Blues Brew School in Brevard, NC, and founder of the Local Beer Blog.

Developing A Clone Beer Recipe

Man Developing A Clone Beer RecipeSome may get into homebrewing for the “do it yourself” challenge, some may start homebrewing to simply have fresh beer around the house, but others may take the step because they’ve fallen in love with a commercial beer and thought: “I could make this.”
I know – I’m one of them.
Peruse through this website or others and you’re bound to come across dozens – if not hundreds – of recipe kits at your disposal, from coffee stouts to hoppy IPAs and everything in between. But what may pique the interest of many is the ability to make “clone” beers using ingredient kits of such iconic brands as New Belgium’s Fat Tire or Samuel Smith’s Taddy Porter.
But why clone beer? It’s a good way to put your skills to the test. With that said, here’s my perspective on developing a clone beer recipe.

Developing a clone beer recipe to learn
Using prepared clone beer kits can be a good experiment in the homebrewing process, as you have a “control beer” to test your skills. Sometimes subtle differences in mash temperature, hop utilization, and grain bill can impact the final product. By making a beer and testing it side-by-side with the commercial version, you can get a better idea of what works best during your brew day and what you may need to pay more attention to.
I once made a Bass Pale Ale clone beer kit for the sheer challenge of trying to replicate one of the most famous versions of the style. While it ended up about 1 percent higher in alcohol content than I had hoped, it taught me to pay more attention to temperatures and how I was using my grains. It was a valuable lesson for future brew days.Shop Steam Freak Kits
If you want to clone beers yourself, the key to success is to hone your palate. As you build clone beer recipes, you’ll want to know what kind of ingredients to buy and how each piece impacts the larger puzzle.
One popular way both commercial brewers and homebrewers alike accomplish this is by brewing experimental beers, like single hop pale ales and IPAs as well as SMaSH beer recipes, which stands for “Single Malt and Single Hop.” In both cases, the goal is to hone the use of a specific ingredient so you can better understand it. Breweries like Mikkeller, Flying Dog, and even Sam Adams have produced single-hop beers as a means for consumers to taste the subtle differences between two different hop varieties, like Citra and Sorachi Ace, for example.

Develop a clone beer recipe to replicate your favorites
One of the first cloned beer recipes I made was a watermelon wheat beer based off of 21st Amendment’s famous Hell or High Watermelon Wheat. Sipping the California brewery’s fruit-laced beer from the can, I thought I might like to try this beer, but with more intense watermelon taste.
To make my own personal take on the clone beer, I looked up a clone recipe. Instead of using natural flavoring, I wanted to go for the real thing, so I sanitized two watermelons, cut them up and squeezed juice from them to add to my secondary. The result: a beer that tasted quite like a boozy watermelon. Unique, for sure.
One of the best parts of homebrewing beer is the ability to experiment, and cloning gives you the perfect opportunity to do just that. We all have different palates, and the aromas and tastes we experience may be better served with a tweak or two of our favorite commercial beers.Shop Conical Fermenter
No matter why you choose to develop a clone beer recipe, it’s one more tool in your toolbox (or is it bottle in your six-pack?) to help you become a better homebrewer. If you’re ready to take the plunge, check out “North American Clone Brews,” which offers 150 clone beer recipes for brewing beers from Anchor, Sierra Nevada, Fat Tire, Samuel Adams and more. Each of the clone beer recipes come with an extract, partial mash and all-grain version for homebrewers of any skill set.
—–
Bryan Roth is a beer nerd and homebrewer living in Durham, North Carolina. You can read his thoughts on beer and the beer industry on his blog, This Is Why I’m Drunk, and send him suggestions on how to get his wife to drink craft beer via Twitter at @bryandroth.

Brewing Beer With Corn (Maize) – History and Technique

Corn Maize In BeerCorn, also known as maize, is most frequently used in brewing as an adjunct grain to lighten beer body, color, and flavor. Though the macro brewers bastardized its use to some extent, today’s craft brewers may find that using corn in beer has its place. Some styles (cream ale, for one) have found a home among brewers who hope to demonstrate that it is possible to make artistic, flavorful beer with maize.
Corn actually played a significant role in brewing long before the modern craft beer revolution. Foreseeing the need for a potable beverage, the earliest European settlers carried malt with them to the New World. But when that ran out, they often turned to brewing beer with corn. Malting maize turned out to be quite a challenge, but the determined settlers found a way to make it work — two ways in fact, as shared in the book Brewed in America.
The easiest method was to bake copious amounts of corn bread. When it came time to make beer, the brewers would just toss the loaves right in the mash tun to make wort! This avoided the process of malting the maize, which turned out to be more difficult than malting barley or wheat.
For those determined to malt the local maize, they found that the best way to do this was to dig a large hole in the ground, wait for the corn to sprout, dig it all up again, wash it, then kiln it. Clearly these settlers were desperate for beer!
Even before the colonists arrived in the New World, chicha was brewed in South America among the Peruvian Incas. Dogfish Head’s Sam Calagione attempted a chicha, and while the end result doesn’t sound very authentic, it’s definitely entertaining to read about.Shop Steam Freak Kits
Of the craft brewers making beer with corn, one in particular stands out. Charlottesville, VA’s Starr Hill Brewing Company researched what Thomas Jefferson might have brewed at Monticello and developed a beer recipe for their limited release Monticello Reserve Ale. Flaked corn is used for a touch of sweet corn flavor, but it’s not at all overwhelming. The beer won a Silver Medal at the 2011 Great American Beer Festival.

Methods for Brewing Beer with Corn
Because corn has a higher gelatinization temperature than barley, it must be cooked prior to mashing. Malting corn is a difficult process and as a result, most brewers will use one of the three forms below:

  • Flaked MaizeFlaked maize can account for as much as 20-40% of the total grain bill, depending on the style. The corn is pressed through hot rollers, so the flakes can be added directly to the mash without prior cooking.Shop Barley Crusher
  • Corn Grits – Corn grits must be cooked in a separate vessel before being added to the mash. Otherwise, use them in the same way as flaked corn.
  • Corn Sugar – Most commonly used as priming sugar, corn sugar can also be added to the kettle to increase alcohol content without significantly affecting body, color, or flavor. I wouldn’t advise using more than a pound in a five-gallon batch, two at the most, otherwise your beer may become thin and cidery.

Interested in brewing beer with corn or maize? Consider the Brewer’s Best Cream Ale Recipe Kit.
—–
David Ackley is a beer writer, brewer, and self-described “craft beer crusader.” He holds a General Certificate in Brewing from the Institute of Brewing and Distilling and is founder and editor of the Local Beer Blog.

5 Summer Beer Styles That Taste Better Outdoors

Summer BeerWhen asked what are some good summer beer styles for drinking outdoors, I’m inclined to say, “the one in your hand.” But some beer styles lend themselves to drinking in the summer some more than other, and likewise, there are some beer recipes that lend themselves to being brewed in the summer. This isn’t the time or place for heavy dopplebocks or Russian imperial stouts (though I certainly wouldn’t fault you for enjoying one on the back porch!). These summer beer styles are relatively sessionable yet still full of flavor.
Below are five of my favorite summer beer styles for outdoor drinking:

  • Kölsch – A light, crisp effervescence with just enough hop bitterness to keep things interesting. A slight fruity aroma may be present due to the use of an authentic Kölsch yeast. Some noble hop flavor may be perceptible and a little wheat may be used for flavor. A dry finish makes it a great thirst quencher.
  • Rauchbier – Though not yet very popular stateside, German smoked beer can be a very pleasant summer beverage. The smoked malt flavor is reminiscent of barbeque or campfire and may pair well with grilled meats like bratwurst, steak, and lamb. A rauchbier isn’t for everyone – some may be turned off by the smokiness. But for the more adventurous, a smooth, smoky rauchbier is an excellent summer beer style option for drinking outdoors.
  • Pilsner – Like Kölsch, pilsner is light, crisp, and dry with a firm noble hop bitterness. Unlike Kölsch, pilsner is a true lager and may feature more grain flavor and more assertive hop flavor. There are three types of pilsner (German, Czech, and American) and all three would be enjoyable during outdoor festivities.
  • California Common – California common is another ale-lager hybrid, fermented with a lager yeast on the cooler side of ale temperatures, usually around 60-65˚F. Color for this beer style can range from light to dark amber. Hop bitterness is significant, usually 30-45 IBUs. The malt flavor has some toasted and caramel notes, while hop flavor can range from medium to high. Anchor Steam, the original California Common, uses all Northern Brewer hops.
  • SaisonShop Steam Freak Kits Any list of summer beer styles would be incomplete without saison. Developed in the French-speaking part of Belgium, saison was a classic thirst quencher among farmers and farmhands. A Belgian saison features a complex spicy and fruity yeast character, a crisp effervescence, and a dry finish. There may be a slight tart note. Many saisons use herbs and spices for additional flavoring and complexity, anything from coriander and orange peel to peppercorns and lemongrass. Next time you’re on the farm, don’t forget the saison!

These are just five of my favorite summer beer styles for drinking outdoors. There are others. What are your favorites?
—–
David Ackley is a beer writer, brewer, and self-described “craft beer crusader.” He holds a General Certificate in Brewing from the Institute of Brewing and Distilling and is founder and editor of the Local Beer Blog.

Want A Balanced Beer? Calculate The BU:GU Ratio

Well Balanced BeersWe all know that some beers are more bitter than others. Perhaps you’ve noticed that high gravity barley wines and double IPAs often have IBUs (International Bittering Units) in the 80s, 90s, or above. Without substantial hop bitterness, these beers would come across as excessively sweet.
On the other hand, some beers are more malt forward. Belgian tripels, for example, can be just as alcoholic as double IPAs, but the tripel features phenolics, esters, and malt character, whereas the double IPA tends to be focused on the hops.
What we find in comparing beer styles is that balance can be calculated by comparing the hop bitterness to the original gravity of the beer recipe. It is this IBU and OG balance relationship that primarily controls a homebrew’s hoppy impression or the relative bitterness.
Let’s explore this relationship with some easy math.

Bitterness Units / Gravity Units Ratio
To calculate the BU:GU ratio, simply multiply the original gravity by 1000 then subtract 1000 to get the gravity units: (1.050 * 1000)-1000 = 50. Another way to say this is move the decimal place over three spaces and get rid of the “1” on the left. Now divide the IBUs by the gravity units to get the BU:GU ratio.
Let’s go back to our double IPA/Belgian tripel comparison. In the first example, we have the original gravity and the IBUs for a hypothetical double IPA:
Double IPA OG: 1.080
Double IPA IBUs: 80
BU/GU = 80/80 = 1.00
That’s a pretty bitter beer!
Now let’s calculate the BU:GU ratio for a Belgian tripel:
Tripel OG: 1.079
Tripel IBUs: 37
BU/GU = 0.47Shop Steam Freak Kits
In this case, the bitterness of the tripel is not nearly as prominent as the IPA.
The BU:GU ratio may range from as low as 0.20 for the least bitter beers and as high as 1.00 or more for IPAs and other highly hopped beers. To give you an idea of the range, let’s look at some BU:GU ratios from some of our most popular beer recipe kits:

These BU:GU ratios gives us a good indication of the hop bitterness compared to the original gravity. However, there are other secondary factors that can affect the relative bitterness, as well, including dryness (from a low final gravity), astringency (as from roasted grains), and other flavor and mouthfeel characteristics. You may want to take these into consideration when trying to produce a well balanced beer.
For example, a high proportion of caramel malt in the double IPA example may help take some of the edge off the IBUs, while the dryness of the tripel may make it seem more bitter than the IBUs suggest.Shop Conical Fermenter
I’d encourage you to explore the BU:GU ratio for some of your favorite beers to figure out how you define good balance. Try calculating the ratio for some of your homebrews and use this number to determine whether you’ve hit the mark or not on hop bitterness and balance.
What to learn more about IBU and OG balance? Ray Daniels examines BU:GU ratios for many of the most common beer styles in his book Designing Great Beers.
—–
David Ackley is a beer writer, brewer, and self-described “craft beer crusader.” He holds a General Certificate in Brewing from the Institute of Brewing and Distilling and is founder and editor of the Local Beer Blog.

Pliny the Elder Clone Beer Recipe (All-Grain & Extract)

Pliny The Elder BeerPliny the Elder is a Double IPA and one of the top five most highly rated beers on Beer Advocate. It’s brewed by Russian River Brewing Company in Santa Rosa, CA, and is named for the Roman scholar who reportedly gave hops their original botanical name way back in the first century AD. With enough IBUs to tear the enamel off your teeth, Pliny the Elder is extremely popular and can be hard to find – why not brew your own?
This Pliny the Elder clone beer recipe comes from the book Brewing Classic Styles by Jamil Zainasheff and John Palmer. Vinnie Cilurzo, co-owner and brewmaster at Russian River, contributed to the beer recipe specifically for the book, so you can be sure it’s close to the real thing!
The clone beer recipe below assumes a mash efficiency of 83% and a 90-minute boil time. It also uses nearly seven ounces of dry hops, so if needed, review our Quick Guide to Dry Hopping Your Homebrew. Good luck!

“Hop Hammer” – Pliny the Elder Clone Beer Recipe
(6-gallon batch, all-grain version)
Specs
OG: 1.080
FG: 1.013
ABV: 8.9%
IBU: 100+
SRM: 6
Ingredients
Shop Steam Freak Kits15.25 lbs. American two-row malt
0.5 lb. Wheat malt
1.5 lb. Corn sugar
0.5 lb. Crystal 40L malt
2 oz. Warrior hops at 90 mins (30 AAU)
2 oz. Chinook hops at 90 mins (26 AAU)
1 oz. Simcoe hops at 45 mins (12 AAU)
1 oz. Columbus hops at 30 mins (14 AAU)
2.25 oz. Centennial hops at 0 mins (20.25 AAU)
1 oz. Simcoe hops at 0 mins (12 AAU)
3.25 oz. Columbus hops, dry hop for 7-10 days (45.5 AAU)
1.75 oz. Centennial hops, dry hop for 7-10 days (15.75 AAU)
1.75 oz. Simcoe hops, dry hop for 7-10 days (21 AAU)
Wyeast 1056: American Ale Yeast or Fermentis Safale US-05
Shop Home Brew Starter KitDirections: The day before brewing the Pliny the Elder clone beer recipe, prepare a yeast starter sufficient for an OG of 1.080. On brew day, mash the crushed grains at 150˚F in approximately 5 gallons of water. Lauter and sparge to collect 7.75 gallons of wort. Bring to a boil. Add hops according to schedule. Mix in corn sugar just before flameout. Ferment at 67˚F, slowly raising the temperature to 70˚F towards the end of primary fermentation. When most of the yeast has settled, transfer to a secondary fermenter and add the dry hops. Dry hop for 7-10 days. Bottle or keg for 2-2.5 vols CO2 of carbonation.
EXTRACT VERSION: Replace the two-row and wheat malt with 10.9 lbs. of light LME and 0.5 lb. of wheat LME. Steep the crushed caramel malt for about 30 minutes at 150˚F before mixing in the malt extracts and proceed with the beer recipe.
—–
David Ackley is a beer writer, brewer, and self-described “craft beer crusader.” He holds a General Certificate in Brewing from the Institute of Brewing and Distilling and is founder and editor of the Local Beer Blog.

10 Tips For Putting Your Homebrew Through A Secondary Fermentation

Homebrew Beer In Secondary FermentationMany homebrewers consider a secondary fermentation to be a worthwhile step when brewing beer. For the time it takes to move a batch of beer from a primary fermenter to a secondary fermenter, it offers a number of opportunities to improve your homebrew and make the best beer that you can.
Check out these ten tips for putting your beer through a secondary fermentation. Most are just suggestions, but the first is imperative:

  1. Sanitation, sanitation, sanitation – Don’t spoil you hard work by being lax at this stage! Thoroughly clean and sanitize the secondary fermenter as well as your hoses and tubing used to transfer the beer. Be sure to sanitize the airlock as well and fill with either clean water or a diluted vodka solution.
  1. Use an Auto-Siphon – Transferring the beer is much easier with an Auto-Siphon. It’s one of the most cost-effective upgrades you can make as a homebrewer. The Auto-Siphon will prime your siphon flow for you with just one pump. It’s a no-brainer for the homebrewer who routinely does secondary fermentations.
  1. Take a hydrometer sample – Transferring to a secondary fermenter offers a good opportunity to check in on your beer’s gravity — and while you’re at it, clarity, too. This is a good time to head off any potential issues while you still can. Remember to record the gravity in your homebrewing notes.
  1. Add sugars – If you find that your alcohol content is a little lower than you’d like, you can add additional sugars when putting your beer into secondary fermentation. It can be corn sugar, brown sugar, honey, or dried malt extract…any fermentable ingredient can be used to boost gravity. Most should be dissolved in clean, sterile water before mixing.
  1. Add clarifiers – Many brewers choose to add finings, or clarifiers, when doing a secondary fermentation on their beer. Gelatin or isinglass may be added at this stage.
  1. Add watershop_carboys – If you find you’re short on volume and can afford to spare some alcohol content, you may want to mix in a small amount of sterile water to the fermenter. Boil the water for 20 minutes and allow to cool to the temperature of the beer, stirring it in using a sanitized spoon. Use a dilution calculator to figure out how much water to add.
  1. Add dry hops – A secondary fermentation is also an opportunity to boost your beer’s hop flavor and aroma. Check out our Quick Guide to Dry Hopping Your Homebrew Beers for advice.
  1. Add herbs or spices – Just like dry hopping, you can “dry spice” your homebrew with herbs and spices. Remember: a little goes a long way!
  1. Keep the temperature stable – Big swings in the secondary fermentation temperature can lead to off-flavors. Read these tips for controlling homebrew fermentation temperatures.
  1. Try it in the keg – If you’re set up with a homebrew draft system, you can do a secondary fermentation right in the keg. Sediment at this stage will be minimal, just keep the keg vent open so the fermentation does not build up to much pressure. Then all you have to do is force carbonate after the secondary fermentation period.

What other techniques do you use during your beer’s secondary fermentation to ensure a successful homebrew?
—–
David Ackley is a beer writer, brewer, and self-described “craft beer crusader.” He holds a General Certificate in Brewing from the Institute of Brewing and Distilling and is founder and editor of the Local Beer Blog.

Using Finings In Beer For That Professional Look

Beer With Finings Used In ItProfessional brewers often filter their beers to make them clearer, but homebrewers can also achieve clarity without a filter. Enter: beer finings.
Using finings in beer will give it a brilliantly clear appearance. While clarity may not affect a drinker’s perception of aroma or flavor, appearance makes a key first impression when evaluating your homebrew.
Home brew beer finings work by electromagnetically attaching themselves to some of the materials which cause haze: protein, yeast, tannins. Sounds pretty science-y, I know, but you don’t need a Ph. D. to make clear beer! Here’s some basic instructions on using homebrew fining agents.
When considering different beer finings, there are two types: kettle finings and finings added to the fermenter. Both types may be used in combination within the same brew, but you may find that one or the other is adequate for your needs. Using three different finings in your beer is probably not necessary.

Type of Beer Fining Agents

  • Irish Moss – One of the most common beer finings for homebrewers, Irish moss is a type of seaweed that contains something called carrageenan. It works by aiding in protein coagulation, helping protein settle out during the cold break (i.e. when wort is chilled). When using Irish moss as a fining in beer, the more quickly you can chill your wort, the more effectively the protein will settle out of suspension.
  • Isinglass – Isinglass has been used in the brewing industry for hundreds of years. It’s a collagen derived from the swim bladders of fish. Being positively charged, it attaches to negatively charged yeast and other particulates and helps them to settle out more quickly. Use isinglass at least 24 hours prior to bottling your homebrew.Shop Bottling Bucket
  • Gelatin – Similar to Isinglass, gelatin is a beer fining derived from animal collagen. It works by attaching to negatively charged yeast and protein, thereby increasing the size of the particle and helping it to settle out.

Since Irish moss is negatively charged and the collagen finings are positively charged, you may find that using them both produces good results. When using finings in beer, be sure to follow the instructions on the package and mix the fining agent appropriately. There’s no need to use more than is recommended by the manufacturer.

Other Tools for Clarification
If using finings in beer is something you are hesitant to do, you can still clear your beer with other methods:

  • Time – Given enough time, any particulate that’s more dense than beer will settle out eventually. Consider lengthening your secondary fermentation period to improve clarity. Time can often clear a beer just a well as any beer fining.
  • Temperature – Cold temperature helps protein and tannin particulate settle out. As little as a day of refrigeration can make a big difference in clarity.Shop Irish Moss
  • Filtration – If you’re in a rush, you can certainly save time by filtering your homebrew beer. These systems are not inexpensive, and you may need a draft system to push the beer through the filter.

Remember that some beers are supposed to be cloudy, in particular, hefeweizens and witbiers. You may wish to omit using finings in such beers. But for your pale ales, porters, and lagers, a bit of home brew beer finings may be just what you need for a crystal clear brew!
—–
David Ackley is a beer writer, brewer, and self-described “craft beer crusader.” He holds a General Certificate in Brewing from the Institute of Brewing and Distilling and is founder and editor of the Local Beer Blog.

Meet the Microbes Who Cause Homebrew Contamination

Contamination Spoiling HomebrewBlogger Bill Downs introduces us to the opponents in the opposite corner of the homebrewing ring: the microbes that can spoil you beer!
—–
I remember my first beer very well. It was an extract kit with a pound of grain, sometimes called a partial mash. It was a stout and a good one.
What did I do right? In spite of being under-equipped and inexperienced, I did some things right. I followed the directions in the kit to the letter, and the most important thing I did was to make sure everything was sanitized! Why?
There are two natural spoilers that are guilty of causing homebrew contamination:

  • Wild Yeast
  • Bacteria

Wild Yeast Contamination:
Let’s examine this with a little more detail starting with wild yeast. When it comes to homebrew contamination, there are two broad types of wild yeast:

  • Saccharomyces, which can cause flavor defects and also cause over performance of the fermentation process.
  • Non-Saccharomyces: They produce acid and cause strong mousey flavors, films and unusual esters (fruit or bubble gum flavors).

There are some types of non-saccharomyces yeasts, such as Brettanomyces bruxellensis (Brett for short), that are intentionally allowed in some types of beers. An example of this particular yeast is what you find in Lambic style beers. The smell of “sweaty horse blankets” is a common smell that comes from Brett.Shop Basic A
As a rule however, you never want this type of yeast in beer. Not only does non-saccharomyces strains cause off-flavors, some brewers will tell you they are almost impossible to clean off of equipment (especially plastic) and it will continue to taint all your beers with off-flavors. That depends on whom you ask, but some breweries take it seriously enough to use separate equipment for their Brett beers.

Bacterial Contamination:
Here are some details about homebrew contamination through bacterial infection. There are six basic types of bacteria brewers need to watch for. These are:

  1. Lactic acid bacteria: Probably the most problematic bacterial contamination because it can survive in a low oxygen environment and is tolerant to low pH, high alcohol, and hops.
  1. Common brewer’s bacteria: These are less troublesome because they don’t do well in a pH of higher than 4.2, but should not be discounted – they will still cause off-flavors.
  1. Acetic acid bacteria: These are particularly bad since they metabolize ethanol into vinegar.
  1. Pectinatus: This type of homebrew bacterial contamination produces fatty acids and acetic acids.
  1. Megashaera: These poisonous bacteria produce hydrogen sulfide, which causes a rotten egg smell.
  1. Zymomonas: These are very potent. They survive well in high alcohol and a low pH environment. Fortunately, zymomonas is not very often found and seems to confine itself to ale breweries.Shop Homebrew Books

All these bacteria can be found in raw homebrewing materials such as grain, hops, additives, vessels, tubes and other brewing equipment. This is why cleanliness and sanitation are next to beer Godliness!
But, don’t let this scare you! Here is all you have to know to completely avoid any type of homebrew contamination:

  • Clean all around you.
  • Clean all equipment and sanitize.
  • Clean and sanitize anything that will come in contact with the beer.

If you do these things, there is no reason to worry about wild yeast or homebrew bacterial contamination. Or as Charles Papazian would say, “Relax, don’t worry, have a homebrew!”
—–
In 2000, after a lot of reading and research, Bill Downs started homebrewing. He founded, and then became the president of his local homebrew club, the Mesa Verde Mashers. Bill is a contributing reporter for the Rocky Mountain Brewing News, a BJCP Beer Judge, and owner and webmaster of www.homebrewingnews.com.