Tips For Home Brewing In Cold Weather

Home Brew In Cold Weather
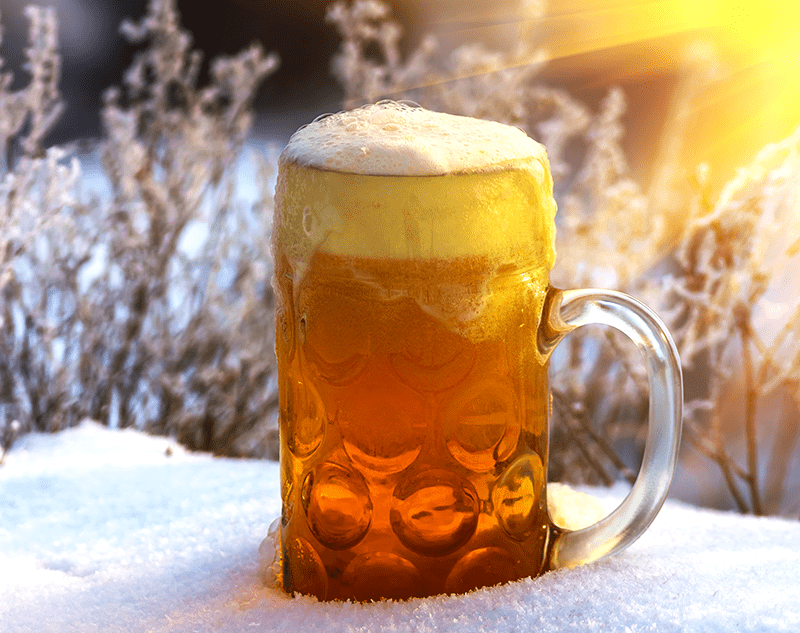
Many homebrewers prefer to home brew in cold weather because it tends to be easier to keep beers within proper fermentation temperature range. Historically, the only way to brew lagers was to brew in the winter and store the beer in caves while it conditioned.
While in some ways home brewing in cold weather is preferred over brewing in the summer, it still offers its own challenges – but also some opportunities to try some different beer styles.

Home Brewing In Cold Weather: The Challenges
Challenge #1: Proper fermentation temperature
Hot or cold, proper fermentation temperature is always important. Determining the appropriate fermentation temperature begins with yeast selection. Lager yeasts by nature do better at 45°-60°F., so if you have a cellar that stays cool in the winter, this may be the best time for homebrewers to try making a lager. If brewing an ale, Wyeast 1007: German Ale, Wyeast 2565: Kolsch, and Wyeast 1028: London Ale all work as low as 55°-60°F.
Challenge #2: Maintain steady temperature Shop Heating Belt
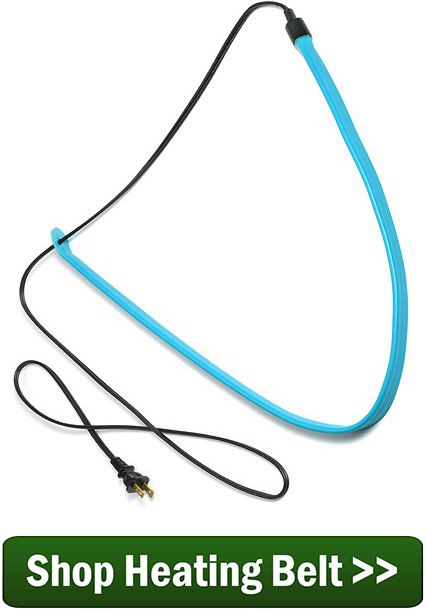
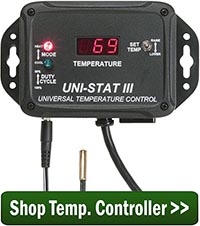
Controlling fermentation temperature is always important. Only in the winter you run the risk of beer yeast going dormant if the temperature drops too low. Try to find an area of the home for your fermenters that won’t be too sensitive to big swings in outdoor temperature. A fermentation brew belt may be necessary in some cases.

Home Brewing In Cold Weather: The Opportunities
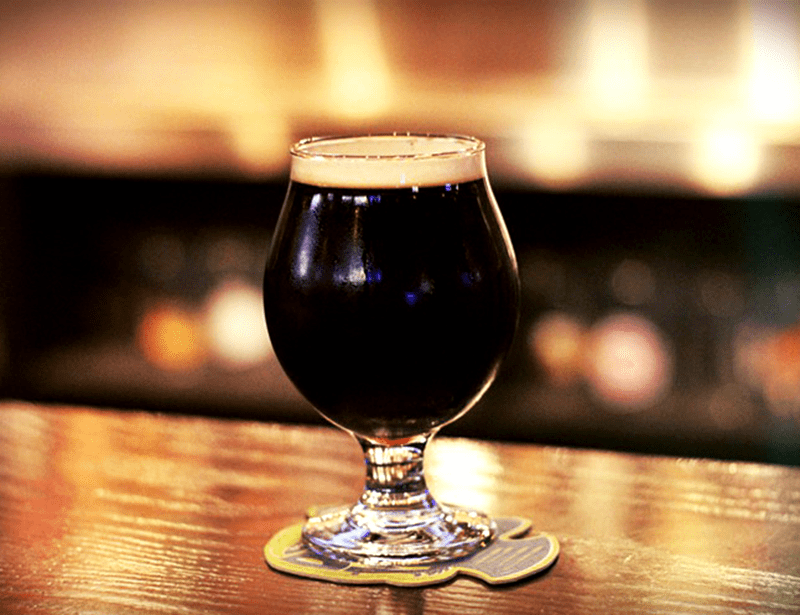
As mentioned earlier, winter is a great time to brew lagers. Here are four beer recipe kits to try when brewing in cold weather:

  • Brewer’s Best Vienna Lager – This traditional lager is in the style of Austrian amber lagers. This partial mash kit results in a smooth, toasty lager with a touch of caramel flavor, balanced hop bitterness, and just enough hop aroma for a little intrigue. (ABV: 4.5 – 5.0%, IBUs: 24-28)
  • Brewer’s Best Munich Helles – A golden lager in the south German style, marked by German hops for bittering and flavoring. (ABV: 4.75 – 5.25%, IBUs: 16 – 20
  • Steam Freak Spring Loaded Bock – A stronger, maltier lager utilizing nearly ten pounds of Steam Freak liquid malt extract. Traditional European hop varieties stand up to the higher gravity of this lager. (ABV: 7%, IBUs: 24)Shop Temp Controller
  • Brewcraft Premium Series Rocky Mountain Amber – This balanced American-style amber kit can be brewed as either an ale or a lager. The included Fermentis Saflager S-23 beer yeast works as low as 51F and as high as 75F, though lower temperatures are ideal.

What kind of changes do you make when home brewing in cold weather? Share in the comments below!
—–
David Ackley is a beer writer, brewer, and self-described “craft beer crusader.” He holds a General Certificate in Brewing from the Institute of Brewing and Distilling and is founder and editor of the Local Beer Blog.

Winter Spiced Ale Recipe Just For The Holidays

Friends Drinking Winter Spiced Ale RecipeWho doesn’t love the holiday season? Time to brew this winter spiced ale recipe. Sure, family time is great, but how about all those big, flavorful beers that come out around the end of the year?! Sierra Nevada’s Celebration Ale, a fresh-hop beer, is one of my all-time favorites.
We also start to see some usual ingredients show up in the beer aisle. Thinking about some of the foods that go on the table for the holidays brings some inspiration. Ohio’s Great Lakes Brewing Company makes a Christmas Ale that’s extremely popular, brewed with honey and spiced with fresh ginger and cinnamon.
Brewing a winter spiced ale recipe for the holidays opens the door to using some fun fruits and spices. Go a little crazy with this one: apples, cranberries, orange peel, coriander, cinnamon, nutmeg, ginger, vanilla, chocolate, and cloves are all fair game. BJCP guidelines suggest that spices complement the base style rather than overwhelm it, so be judicious when it comes to herbs and spices.
A winter spice ale recipe can be based on any classic style (pale ale, porter, stout), but winter ales tend to be high-gravity and more full-bodied than the average beer. The extra punch of alcohol helps keep us all warm and merry in the colder months. Use additional malt extract and/or adjunct sugars to boost gravity. Try some extra caramel malt to help balance out the hodgepodge of wintery flavors.
Brewing a winter spiced ale recipe doesn’t have to be difficult! One method would be to take a beer recipe kit, such as the Barleywine Recipe Kit, then pick a handful of spices and flavorings to add to the boil or the secondary fermenter. Read Brew Your Own Herb Beers for some suggestions.
Here’s an idea – start a tradition! Brew your winter ale every year, cellaring a portion of the batch to open in subsequent holidays.Shop Steam Freak Beer Kits

Winter Spiced Ale Recipe
This extract recipe is adapted from Marty Nachel’s book, Homebrewing for Dummies. It was Philip Fleming’s first place award winner at the American Homebrewer’s Association national competition:

Anne’s Choice Christmas Ale
6.6 pounds Munton’s Amber Malt Extract
3.3 pounds Munton’s Dark Malt Extract
.5 oz. Hallertauer hops at :55
.5 oz. Hallertauer hops at :5
Wyeast #1007: German AleShop Beer Flavorings
.75 pound honey
5 three-inch cinnamon sticks
2 tsp. allspice
1 tsp. cloves
6 oz. grated ginger root
rinds from 6 medium oranges
Instructions: Simmer all the miscellaneous flavoring ingredients in the honey for 45 minutes; strain into the brew pot. (Proceed following the instructions for extract brewing.)
So, what’s your favorite winter spiced ale recipe, and what makes it special? Do you have a winter spiced ale beer recipe you’d like to share?
—–
David Ackley is a beer writer, brewer, and self-described “craft beer crusader.” He holds a General Certificate in Brewing from the Institute of Brewing and Distilling and is founder of the Local Beer Blog.

Quick Guide To Belgian Beer Styles

One Of The Belgian Beer StylesBelgium has one of the oldest, most diverse, and vibrant beer cultures in the world, from the centuries-old Trappist breweries housed in monasteries to the multitude of artisanal farmhouse breweries littered throughout the countryside. There is a lot of history when it comes to Belgian beer styles.
It would take a very big book to list all of the varieties of beer made in Belgium, so for the purposes of this blog post, I will list some of the styles that are most iconic of the country and the ones you will most commonly find when home brewing Belgian style beers.

  • Belgian Pale Ale – A Belgian pale ale looks very similar to it’s American cousin, but the flavor profile is all its own. For one, Belgian pale ale is lower on the IBU scale and more malt focused. Pale malts form the base of the grain bill, with some medium-colored malts like Vienna, Munich, Biscuit, and Aromatic malt providing some color and complexity. Adjunct sugars may be used to increase gravity, add flavor, and impart a dry finish. Spices may be used for additional complexity, but Belgian yeast provides the signature fruity and spicy flavors that define this style.
  • Belgian Abbey-Style Beers (Singel, Dubbel, Tripel) – Abbey-style beers are made in the style of those crafted by the Trappist breweries, six of which are located in Belgium. These abbey beers are segregated by alcoholic strength and characterized by a range of malt flavors that may be described as toast, raisins, or dates. They may have a sweet, rum-like flavor from the use of Belgian candi sugar. An Abbey-style Belgian ale yeast provides dominant fruity and aromatic flavors. A singel may be low to moderate strength and golden in color,Shop Beer Flavorings with a dubbel often darker and closer to 7% ABV. Belgian tripel tends to be golden, dry, herbal or floral, and 7.5-10% ABV. Consider making this Westmalle Tripel clone recipe. It’s a great place to start when home brewing Belgian beer styles.
  • Belgian Witbier – Made popular among modern drinkers by the likes of Hoegaarden and Blue Moon, Belgian wit is one of the most well-known styles of Belgian beer. Witbier, or “white beer”, is very pale in color (2-4 SRM), cloudy, and somewhat sweet with a high proportion of unmalted wheat. Orange peel and spice may contribute a refreshing, fruity complexity, but should not dominate the flavor profile. A Belgian wheat yeast strain will provide the appropriate phenolics and esters for this style.
  • SaisonSaison is style of beer from the French-speaking part of Belgium. It’s a moderate strength pale ale brewed with a little more hops than a Belgian pale, often including adjunct grains like wheat, adjunct sugar such as cane sugar, and spices, especially coriander, orange peel, or a mix of “mystery spices”. Saison Dupont is considered one of the classics.
  • Lambic – Lambic is a type of sour ale that should only be attempted by seasoned homebrewers. It’s characterized by a dry, acidic taste and a range of complex flavors that may be smokey or earthy. A true lambic requires a culture of wild bacteria and yeast and aging of a year or longer to achieve the appropriate flavor profile. Young and old lambic may be blended to produce gueuze, while fruit lambic may be aged on raspberries or cherries.Shop Steam Freak Kits

You will likely see a number of Belgian beer styles beyond those listed above – remember this is just a quick guide to Belgian beer styles – including a mashup of other common styles: Belgian stout, Belgian IPA, Belgian amber, Belgian holiday beers, Belgian specialty beers. The list above is only the common ones you will run across when home brewing Belgian style beers.
What are some of your favorite Belgian beer styles to brew?
—–
David Ackley is a beer writer, brewer, and self-described “craft beer crusader.” He holds a General Certificate in Brewing from the Institute of Brewing and Distilling and is founder and editor of the Local Beer Blog.

There Are Black Spots In My Wine

Black Spots In WineI have made a number of batches of fruit wine and consumed most of it. This is the first time I have used cherimoya in a persimmon blend. Cherimoya is a very sweet fruit, large amounts of sediment, and does not fully clear after racking it four times.
The bottled wine is stored on its side in a dark environment for 6 months. Placing a bottle on its side creates a small air bubble at the top most section of the bottle. A black spot appears on the inside of the bottle within the air bubble. Most of these black spot will merge with the wine after the bottle is turned upright for a day or so.
What is this black spot in my wine?
Name: Mark A.
State: Hawaii
—–
Hello Mark,
It’s hard to know precisely what these black spots in your wine are, but normally we associate having black spots in your wine with either a mold or bacteria growth. Combined with the fact that it is appearing where there is an air pocket in the wine bottle, I would say that it is more likely to be a growth of some sort. This is where you would typically see mold or bacteria to start to grow – next to the air.
Shop Potassium MetabisulfiteIf you did not add a sulfite to your wine before bottling such as: Campden tablets, potassium metabisulfite or sodium metabisulfite, this would strongly add to my belief that a mold or bacteria is trying to grow in your wine. Sulfites are needed to help protect the wine from spoilage while it is in the wine bottle.
In addition to bottling time, you should also be using Campden tablets in the wine must before the fermentation. This is to rid the wine must from contaminates that may have come along with the fruit. The sulfites are added 24 hours before the wine yeast. Leave the the fermenter uncovered during this 24 hours to allow the sulfites to dissipate, otherwise they can interfere with the fermentation.
If you did not sanitize your wine bottles in addition to cleaning them with soapy water, this would also make me think that you are dealing with a mold or bacteria and could easily be the reason you have black spots in your wine. Cleaning the grime from the wine bottles is not good enough. They need to be sanitize with something like: Basic A or B-Brite. Any of these will easily destroy the microscopic contaminants that can grow in your wine.Shop Basic A
If you have been doing all the above, it is still possible for a mold  or bacteria to contaminate a wine and cause these black spots to form in your wine. It’s just a little harder to know how it is happening. It could be from the corks, screw-caps or whatever you are using to close the wine bottle. It could be from a piece of equipment you are using that has a nook-or-cranny that is not getting sanitized sufficiently. It could also be something as blindsiding as the sulfites you are using are old and expired. Any and all things must be considered.
After having said all this, I would like to point out that if you had said the black spots where at the lower part of the wine bottle my answer would have been completely different. I would have attributed this to tannins dropping out of the wine. This is very common and expected with some wines. But the fact that you said the black spot were next to the air pocket makes all the difference in the world.
Shop Bottle TreeAny time there are black spots in your wine, there is reason for concern. At this point I would be very hesitant to drink the wine for fear of getting sick. It is possible to save the wine by putting it all back in a fermenter; add sulfites, and re-bottle. The sulfites will kill the mold or bacteria. However, I do not recommend doing this if there is any question to the smell of flavor of the wine. Adding sulfite at this point will only stop the wine from getting worse and make it safe to drink. It will not improve the wine’s flavor or aroma. So if the wine taste or smells bad now, don’t waist your time and effort. Dump it.
Best Wishes,
Ed Kraus
—–
Ed Kraus is a 3rd generation home brewer/winemaker and has been an owner of E. C. Kraus since 1999. He has been helping individuals make better wine and beer for over 25 years.

A Quick Way To Learn Hop Aroma Profiles

Smelling Hop Aroma ProfilesOur friend Bryan Roth recently shared some of the reasons that experimenting is a good homebrewing habit. In that pioneering spirit, here’s an experiment that will help you learn about how different hop aroma profiles and how they affect your beer.
A quick refresher:
Hops have essential oils that contribute to beer aroma. When added at the end of the boil or to the secondary fermenter, these oils can develop aromas described as citrus, pine, spice, dark fruit, herbal, or floral, to name a few. A hop aroma wheel can be a useful tool for selecting appropriate hop varieties, but the best way to learn the different hop aroma profiles and what they can offer to your homebrew is to actually brew with them.
That said, with an endless number of hop varieties out there and more being released all the time, it could take years to brew all the beers it would take to get a complete understanding of different hop aroma profiles. In the experiment below, you can brew one batch of beer, then split it up after fermentation to dry hop with different hop varieties. This will expose you to different hop aroma profiles 5 times as fast as using a single hop variety.

The Experiment Shop Hops

You will need:

Here’s how it works:

  1. Brew one batch of beer, but only use the first bittering addition during the boil.
  2. After primary fermentation, divide the batch into five, 1-gallon jugs and dry hop each jug with about 1/4 to 1/2 oz. of each hop variety. The exact amount isn’t as important as making sure you use the same amount for each 1-gallon batch. A typical dry hopping period lasts about 5-7 days.
  3. Bottle the beers, being sure to identify which are which.Shop Hop Bags
  4. When the beer is ready, do a tasting session to identify the different hop aroma profiles and characteristics presented by each hop. Maybe try a blind tasting to figure out which is your favorite. Was it the one you expected?
  5. Share the beers with friends to see if they agree with your assessments. What seems like a pleasing citrus aroma for one person may be unpleasant for someone else.
  6. To take it a step further, try blending the beers to get a sense of what hop varieties work well together.

Learning the characteristics of your homebrewing ingredients is one of the best ways to become a better brewer. With experiments like this one, you can accelerate your way to becoming a true hop aficionado.
Have you tried some experiments with hops? Did you learn anything about hop aroma profiles?
—–
David Ackley is a beer writer, brewer, and self-described “craft beer crusader.” He holds a General Certificate in Brewing from the Institute of Brewing and Distilling and is founder of the Local Beer Blog.

Do Wine Ingredient Kits Need Adjusting?

Wine Ingredient Kit That Does Not Need AdjustingI purchased a California Connoisseur Merlot concentrate kit. Do wine ingredient kits need adjusting of any kind. Like does this concentrate consist of tannins?  If it does, would it hurt to add tannin to help it’s staying qualities? Should I have an acid testing kit?  If so, does the tannin have to be added during/before fermentation or can I put it in at any time? Are there any other adjustments that need to be made to these wine ingredient kits?
Doug B.
———-
Hello Doug,
Thank you for this great question about adjusting wine ingredient kits.
All of the wine ingredient kits we offer have been adjusted and bench-tested with sample batches to produce a balanced, stable wine with great flavor. Any attempts to make further adjustments with various wine making ingredients such as wine tannin, acid blend or flavorings are completely unnecessary and more likely to be counterproductive.
These wine ingredient kits come complete with all the additional packets of wine making ingredients you will need to add to the wine along the way. All that is required of you to make a perfectly balanced wine is to follow the instructions that are included with these wine ingredient kits.
TShop Wine Kitshe producers of these kits crush the grapes and allow the juice to sit on the pulp until the right amount of flavor, color and body components are extracted from the grape skins into the juice. After the extraction process, the pulp is removed and the grape juice is concentrated, and sample batches of wine are made. It is at this time that any necessary adjustments are made to the grape concentrate for the sake of flavor balance and stability.
You can go ahead and make adjustments by adding other wine making ingredients to the wine must, however you will be running the risk of upsetting the stability and flavor balance of the resulting wine. In the case of adding tannin to a wine ingredient kit, you could be adding more than the wine will be able to saturate or hold within the liquid. This could result in the development of dark, dusty deposits in your wine bottles over time.Shop Wine Making Kits
Doug, I hope this answers your question about adjusting wine ingredient kits. I hope you can start to see, a lot of care goes into the production process of these wine ingredient kits, so much so that they do not need any further adjusting of any kind. Once they are packaged they are ready to be made simply by following the directions that come with them. Add the additional packets as called for, and you will be making a stable wine with great balance and flavor.
Happy Winemaking,
Ed Kraus
—–
Ed Kraus is a 3rd generation home brewer/winemaker and has been an owner of E. C. Kraus since 1999. He has been helping individuals make better wine and beer for over 25 years.

Brewing An Uinta Dubhe Imperial Black IPA Clone Beer Recipe

Uinta Dubhe Imperial Black IPA CloneI was drinking one of my favorite beers last night and felt compelled to share a clone beer recipe for it. It was the Dubhe Imperial Black IPA from Uinta Brewing Co. of Salt Lake City, Utah. Uinta is one of may favorite American breweries and they make some fantastic beers. If you haven’t tried any of them yet, I highly encourage you to take a tour of their beer selection.
Their Uinta Dubhe Imperial Black IPA is a BIG beer: pitch black, 9.2% ABV, 109 IBUs. As dark as it is, it’s surprisingly not very heavy on the roasted flavors. Hops are a major factor, with huge spicy and citrus characteristics throwing themselves across the palate. There’s some light toasty and nutty character, which could come from the use of toasted hemp seeds. At 9.2% alcohol by volume, this beer is definitely a sipper.
Scouring the internet for tips and advice, I came across the Jamil Show on the Brewing Network. Jamil Zainasheff is something of a rockstar in the homebrewing world. He’s the author of two books about brewing, he writes the style guide section of Brew Your Own magazine, and has brewed dozens (maybe even hundreds) of award-winning homebrew beer recipes.
In one episode of the show, they interview a brewer from Uinta Brewing Co. to get the details on Dubhe. Here are some key points from the episode for brewing an all-grain version:

  • Shop GypsumUinta Dubhe uses a single step infusion mash at 152˚F. (To make enough beer for their 120-barrel batch, they have to mash twice and boil three times – a 22-hour brew day!)
  • The brewer recommends using calcium sulfate (a.k.a. gypsum) for water hardness (can help accentuate the hop character).
  • The brewer goes into a lot of detail about grain and hop ratios. I’ve scaled them down for a 5.5-gallon batch in the clone beer recipe below.
  • The brewer recommends using yeast nutrient since this is such a high gravity beer (normally added in the last 15 minutes of the boil).
  • Ferment at 68˚F.
  • Dry hop with Falconer’s Flight hops for about three weeks.
  • Uinta Dubhe uses a proprietary yeast strain, but the brewer recommends California ale yeast or German ale yeast.

Though the brewer admitted that a craft beer this big is “not a very efficient use of raw ingredients,” I highly recommend giving it a shot – especially if you love hops!Shop Yeast Energizer
Here are some additional tips for brewing this Uinta Dubhe Imperial Black IPA clone:

  • The clone beer recipe below assumes a 75% mash efficiency. It can be difficult to get a good efficiency with such a high gravity beer, so you may want to increase the grain bill by 10% or so to make sure you hit your numbers.
  • Assume a fair amount of volume will be lost in the trub, both at the end of the boil and after fermentation.
  • Also, boil-off volume should be adjusted to accommodate the longer, two-hour boil.
  • Hemp seeds can be found at a specialty grocery or health food store. I’d suggest toasting them in a dry skillet for several minutes to increase the toasty flavor and reduce the likelihood of them getting too soggy and clogging the mash.

This is a great beer for drinking year-round, but it’s also a strong beer, so it should age well. Don’t feel like you need to drink it all at once!
Ready to give it a shot? Check out the clone beer recipe below!Shop Barley Grains

Black as Night DIPA (Uinta Dubhe Imperial Black IPA Clone) 
(all-grain recipe, 5.5 gallon batch)
Specs 
OG: 1.093
FG: 1.023
ABV: 9.2%
IBUs: 120+
SRM: 40+
Ingredients 
16.2 lbs. Pale 2-Row malt
2 lbs. Munich 10L malt
2 lb. Crystal 60L malt
1 lbs. Chocolate malt
.25 lb. Roasted barley Shop Hops
.25 lb Carafa III
.25 lb. toasted hemp seeds added to last 15 mins. of mash (use a grain bag)
1.5 oz. Chinook hops at :60 left in boil
2.5 oz. Columbus hops at :30 left in boil
2 tsp. Yeast nutrient at :15 left in boil
1.4 oz. Bravo hops at :5 left in boil
1.4 oz. Columbus hops at :5 left in boil
1.4 oz. Bravo hops during 60-minute whirlpool
3 oz Falconer’s Flight hops dry-hopped for 21 days
3 packets Wyeast 1056: American Ale Yeast or Wyeast 1007: German Ale Yeast (into a 2L yeast starter)

Directions: Mash crushed grains at 152˚F for 60 minutes. Add toasted hemp seeds during last 15 minutes of mash. Sparge to collect a total of roughly 9 Shop Steam Freak Kitsgallons of wort in the brew kettle. Boil for 120 minutes. Add hops according to schedule above. Whirlpool for one hour. Chill wort to 65-70˚F and oxygenate. Ferment at 68˚F. Add dry hops to secondary fermenter and allow for 3 weeks in secondary. Cold crash prior to kegging or bottling to help dry hops settle out.
Have you brewed a Black IPA before? What tips do you have about brewing a Black IPA? Share in the comments below!
—–
David Ackley is a beer writer, brewer, and self-described “craft beer crusader.” He holds a General Certificate in Brewing from the Institute of Brewing and Distilling and is founder and editor of the Local Beer Blog.

Use Alternative Priming Sugars For A New Twist

Priming sugar used in homebrewingAfter fermentation is done, but before the beer hits my glass, my brew sits away in a corner of a small closet – dozens of sudsy brothers and sisters conditioning away.
Depending on the style of beer I’ve brewed and its ABV, the wait time for all those bottles to fully prime can vary. So can your method for adding priming sugar to your brews.
The sugar you use for priming your beer is not chiseled in stone. For homebrewers like me, priming a batch of beer before bottling offers some variation in what to use if you want to step away from regular, old corn sugar or DME. Here are a few alternative priming sugars to consider for your next bottled batch:

Carbonation Tabs
For sake of ease, these small, pill-like drops are my go-to option for bottling my homebrew. I love carbonation tabs because they are as easy as placing one drop into each bottle right before I transfer my finished beer to its final vessel. The best part: it takes the worry out of the conditioning process as I’ve never had a problem with an under or over-carbonated beer when I’ve used these. That makes these one of the better alternative priming sugars.Shop Bottling Bucket
Some brands of carbonation tablets will have small drops the size of an aspirin and others will be oblong like a tiny football. They all work the same, but some brands may simply require one drop for ideal carbonation levels while you can use multiple small pills to adjust carbonation with other brands.

Honey
Some alternative priming sugars, like honey, offer the chance to add a little extra layer of flavor to your beer. Curious to see what it may offer your next brew? Try it with a wheat beer, which might work nice if you’ve added fruit during fermentation, too.
To add a little extra sweetness to your homebrew at bottling time, use 1 cup of honey per 5 gallons. Mix the honey with a little warm water to thin it out to make sure it blends in with your beer.

Maple Syrup Shop Bottle Washer

Making a brown ale? Consider experimenting with maple syrup for your priming sugar to mash up flavors perfect for a cold fall or winter night. Whether it’s grade A or B, use 1 1/4 cup for a 5-gallon batch and again, mix it with some water to dilute the syrup. As with any of these alternative priming sugars, it’s easy to over-carbonate if you add too much. Also check out this Maple Scotch Ale homebrew recipe.

Brown Sugar/Molasses
When talking about alternative priming sugars, one cannot leave these two out. Both of these options would work great for a porter or stout. Imagine that little extra bit of deep, earthy sweetness mixing with the roasted and chocolate flavors of those styles – a great mix for a holiday beer!
Shop Bottle CappersThe benefit of brown sugar as a priming sugar is it can be used in the same fashion as cane sugar – boil 2/3 of a cup with two cups of water for a 5-gallon batch, then mix it in before bottling.
If you’re using molasses, use 1 cup with boiled water per 5 gallons and make sure this super-thick liquid breaks down a bit. You don’t want a mess on your hands.

Priming Sugar Calculator
If you’re ready to change up your priming routine, one great resource is this priming sugar calculator from HomebrewDad.com. It has a variety of sugars listed that you can choose when using alternative priming sugars . This calculator will offer up specific amounts depending on your exact volume of beer, desired carbonation levels, and more.Shop Fridge Monkey
Happy Brewing!
—–
Bryan Roth is a beer nerd and homebrewer living in Durham, North Carolina. You can read his thoughts on beer and the beer industry on his award-winning blog, This Is Why I’m Drunk, and send him suggestions on how to get his wife to drink craft beer via Twitter at @bryandroth.

Homebrew Hacks: The Art of the Blow Off Tube

Using A Blow Off TubeIf you’ve been homebrewing for a while, chances are you’ve had a foamy fermentation bubble up through your airlock, maybe even blow the lid right off your fermenter! This is the time you wished you used a blow off tube.
The foam on top of your fermenting beer is often called “krausen”. It’s a mix of very active yeast, gummy protein, and hoppy trub that rises and falls over the course of several days. Anytime you anticipate an extra vigorous fermentation, such as when brewing high-gravity beers or fermenting at higher temperatures, you might want to rig up a blow off tube setup.
If you’ve been on many brewery tours, you may have noticed the hoses that run from the fermenters into a big bucket of sanitizer solution. The bucket may or may not be actively bubbling. It may even be spilling over with yeasty trub! Below is some information that will show you how to make a blow off tube for the homebrew setup.
The mechanism is basically a large airlock system. It allows CO2 to escape from the carboy or bucket fermenter, while also providing an exit for any yeasty krausen, which will get pushed into the bucket of sanitizer.

To make a blow off tube setup, you will need:

  • a large jar or small bucket (a large mason jar or plastic milk jug works fine)

How to Make a Blow-Off Tube

  1. Prepare a sanitizer bath. Just a gallon or so should be sufficient.
  1. Clean and sanitize all parts. Reserve some of the diluted sanitizer.
  1. Fit one end of the hose over the inside of the airlock.
  1. Fill the bucket or jar about two-thirds full of sanitizer. Leave some space to give that foam a place to go.
  1. Attach the airlock end of the blow off tube to your fermenter and run the other end into the bucket of sanitizer.

More often than not, you’ll probably have to rig up a homebrew blow off tube as the Shop Carboysfoam is already flowing out of the airlock and all over the floor. Just keep your cool, clean the mess, and remember to sanitize. With all that stuff coming out of the fermenter, there’s probably not much that’s going to get in.
A homebrew blow off tube setup can be a lifesaver when fermentation gets out of control. To avoid a blow-off disaster, leave about a gallon worth of headspace during primary fermentation to give the krausen room to grow. Be sure to check on your fermentation over the first few days and have your blow off tube ready!
So that’s the basics of how to make a blow off tube. Do you use a homebrew blow off setup? Do you use it all the time or only when you need it? Share in the comments below!
—–
David Ackley is a beer writer, brewer, and self-described “craft beer crusader.” He holds a General Certificate in Brewing from the Institute of Brewing and Distilling and is founder of the Local Beer Blog.

Using Concentrated Grape Juice For Topping-Up

Topping Up Wine With ConcentrateOn the question of head space in the secondary fermenter–Can you add concentrate grape juice?
Gavin V. — GA
—–
Hello Gavin,
I’m assuming that you are referring to our resent blog post on ways to reduce head-space in a fermenter.
Certainly, topping up wine with concentrate is something that can be done, however realize that you are adding sugar. In fact, the concentrated grape juice is mostly sugar.
If the fermentation has completed, this will add more fuel for it to start up again. For this reason it is important that a wine stabilizer such a potassium sorbate also be added along with the concentrated grape juice. This will help to eliminate the chance of your wine having a re-fermentation.
If the fermentation has completed you do not want it starting up again. You will also need to take into consideration the more-obvious issue – that is – the concentrated grape juice will make the wine sweeter. If you want your wine to be dry, this would not be what you’d want to use top up your wine.
If the fermentation is still going, then adding the concentrated grape juice will increase the potential alcohol of the fermentation. There is always the possibility of Shop Potassium Sorbateraising the alcohol level too much, bringing the wine out of balance. Very seldom will you ever want the total potential alcohol of a wine to go over 13%, and only then if your wine has a lot of flavor. Wines with higher alcohol will have a tendency to taste hot and less flavorful.
It is also important to understand that topping up wine with concentrate will also add more acidity to the wine. Just like there is a lot of sugar in the concentrated grape juice, there is a lot of fruit acid. It is possible that using it to top up your wine could make it too tart or sharp tasting. This is the case regardless if the wine is still fermenting nor not.
So, if your wine must is low in acid and you like your wine’s off-dry or even sweet, then topping up your wine with a grape concentrate may be a good option. But, other than this scenario, I do not think this is a great option for you.
Regular grape juice would be a much better choice.
Since the regular, un-concentrated, grape juice will have about the same acidity level as a wine, blending the two will not change the tartness of the wine to any noticeable degree.Shop Grape Concentrate
The sugar will still be a consideration. If you want your wine to stay dry as it would normally be after a fermentation, then grape juice – concentrated or not – would not be what you want to use. On the other hand, if you like your wines a off-dry or the wine is still fermenting, then grape juice might be something to consider.
Happy Winemaking,
Ed Kraus
—–
Ed Kraus is a 3rd generation home brewer/winemaker and has been an owner of E. C. Kraus since 1999. He has been helping individuals make better wine and beer for over 25 years.