10 Home Brewing Spices For Your Creative Pleasure

Man Using Spices In Beer
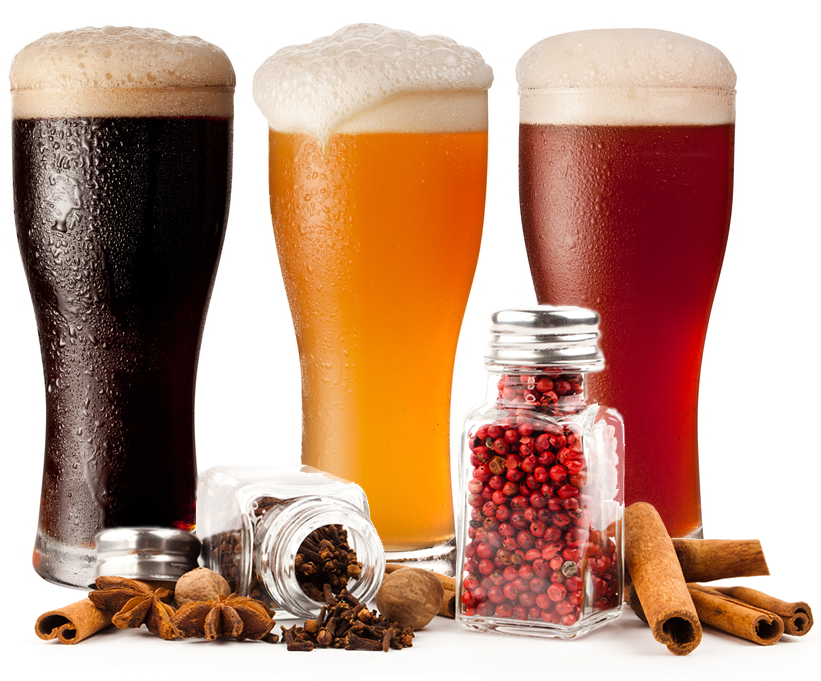
Looking to add a dash of creativity to your homebrew beer? Try using one – or more – of these ten home brewing spices! Adding spices to your beer can create a whole new dimension to its flavor profile. Here are 10 spices you can experiment with:

  1. Caraway – If you’re a fan of rye bread, you might try a caraway rye ale. Caraway seeds tend to work well with darker beers. Use about 5 grams of toasted seeds per gallon as a starting point, added for a few days at the end of secondary fermentation.
  1. Cayenne – Much like with a chipotle smoked porter, cayenne can be used to give a spicy kick to nearly any beer. Remember, moderation is key! 1/2 teaspoon at the end of the boil in a five-gallon batch should give you plenty of heat.
  1. Cinnamon – Cinnamon actually comes from the bark of a tree. There are two types: Cassia cinnamon – the one most commonly found in grocery stores – and “true” cinnamon (Cinnamomum verum or Cinnamomum zeylanicum). Choose which one you prefer. Both work well in combination with other commonly used home brewing spices like: ginger, cloves, and nutmeg. Put the cinnamon stick or ground cinnamon directly in the boil.
  1. Shop Beer FlavoringsCloves – You might try to add a dash (no more!) of cloves to a hefeweizen to accent the clove character of the Weizen beer yeast, which tends to come out when this style is fermented at the lower end of the temperature range. This is one of the more practical ways of using spices in beer. Cloves also work nicely in winter spiced ales.
  1. Coriander – Notorious for its use in Belgian witbier, coriander can also lend a pleasant citrus spiciness to other brews, such as saisons.
  1. Fennel Seed – I had an excellent beer at a homebrew festival a couple years ago, a whiskey fennel ale. It was an amber ale base, with the whiskey and fennel added in perfect balance. Try from a cup to a quart of whiskey added into the secondary fermenter. The fennel seed can be added towards the end of the boil, into the fermenter, or maybe even steeped in the whiskey for a few days prior to mixing it into the beer.
  1. Ginger – Of all the spices you can add to a beer, ginger is one of the most commonly found. Used in high enough proportions (an ounce or more per gallon), it can lend a very sharp, spicy kick to your homebrew. Check out our guide for brewing a real ginger ale.
  1. Mole – New Belgium’s Cocoa Mole Ale is amazing. Though mole is actually a blend of spices, you can find mole blends at most grocery stores.
  1. Peppercorns – I have had a couple of excellent saisons brewed with peppercorns. As when using most spices in beer, the subtlety was the key. There are a variety of different peppercorns (white, red, black, green). Try aging some beer on a teaspoon or two of whole peppercorns for a touch of spicy complexity.
  1. Turmeric – A subtle earthy spice, turmeric is a major component of yellow curry powder with an intense yellow color. Try mixing turmeric with a combination of other spices, like ginger and coriander in your homebrew, but be aware that it may stain your plastic fermenter!

*Remember: When adding home brewing spices to beer, less is more! If you’re Shop Accurate Scalesunfamiliar with a particular spice, start with just a touch. For the stronger spices (like hot chiles), a teaspoon in the homebrew may well impart a lot of flavor. A quarter-ounce to an ounce at most will be plenty, adding the spice either into the secondary fermenter or during the last 10-15 minutes of the boil. I’ve found that when some home brewing spices are boiled too long they can impart some bitterness that may overwhelm the palate.
In the event that the spice flavor is too much, try giving the beer a month or two to age, maybe even longer. The spice will usually subside to some degree over time.
Have you ever tried adding home brewing spices to beers? What spices would you like to try using in your future brew?
—–
David Ackley is a beer writer, homebrewer, and self-described “craft beer crusader.” He holds a General Certificate in Brewing from the Institute of Brewing and Distilling and is founder of the Local Beer Blog.

Homebrew Spruce Beer Recipe

Spruce For Making Spruce Beer Recipe
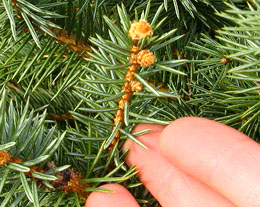
Before we get to the spruce beer recipe lets talk a little bit about spruce. Trees and their branches, barks, and berries have been used traditionally for flavoring beers, especially in Scandinavian countries, for hundreds of years. Juniper, spruce, and fir are some of the most common. Delaware’s Dogfish Head Brewery revived the Finnish Sahti, a traditional beer made from rye, barley, and juniper. Their interpretation is called Sah-tea.
In North America, spruce beer was used by American colonists to prevent scurvy. Though we don’t have to worry too much about scurvy these days, a good spruce beer is a unique, refreshing, and interesting beverage.

Finding Spruce for Your Spruce Beer Recipe

For the adventurous forager, spruce can be found in the evergreen forests of North America. Cuttings from new growth are best for brewing. Make a tea by boiling the branches in water for 30 minutes. Strain out the branches and add this homemade spruce essence to your mash or boil.
To get an idea of how much to add to your homebrew, mix a small amount of your homebrewed spruce essence into to a commercial beer that’s similar to the base style of beer you’re making.
If you’re feeling extra adventurous, you can cut down your own spruce tree and run the wort through the branches, like this guy. Shop Spruce Essence
If you don’t have a lot of time on your hands for lumber-jacking around the forest, commercially made spruce essence is less risky and more predictable.

Tips for Brewing A Spruce Beer Recipe

  • Add up to 4 oz. of fresh spruce tips late in the boil for woody, resiny flavor and aroma.
  • Less is more! Start with a small amount of spruce flavor for your first spruce beer. You can always add more in your next batch.
  • If you find you’ve added too much spruce to your beer, give it some time to age. You might be surprised how an “undrinkable” beer can change over several months.

Homebrew Spruce Beer Recipe
1/2 lb. crystal malt (40L) Shop Liquid Malt Extact
1/3 lb. roasted barley
1/3 lb. chocolate malt
1/4 lb. rye malt
1/4 lb. black patent malt
6 lbs. dark malt extract syrup
4 oz. molasses
2 oz. Hallertau hops at :60
1-4 oz. spruce tips (based on taste preference)
*alternatively, use spruce essence according to package directions
Whitbread (Safale S-04) ale yeast
Corn sugar for priming

Shop Beer FlavoringsDirections: Steep specialty malts in ~150°F. water for 30 minutes. Add the extract and molasses and bring to a boil. Add the hops and the spruce tips and boil for 30 minutes. Strain the hot wort into a fermenter containing enough clean water to make 5 gallons. Pitch yeast when wort cools to 70°F. or less.
Ferment at 65-70°F. then bottle with the priming sugar. Age 3-6 weeks before drinking.
This is a somewhat basic spruce beer recipe, but there has been some thought put into the balance of the flavor and body. Feel free to experiment and create your own spruce recipe.
—–
David Ackley is a beer writer, brewer, and self-described “craft beer crusader.” He holds a General Certificate in Brewing from the Institute of Brewing and Distilling and is founder and editor of the Local Beer Blog.

7 Tips For A Healthy Homebrew Fermentation

Healthy Homebrew FermentationIf malt is the heart, or the backbone, of beer, then yeast is its soul. While malt is responsible for flavor, color, and body, and hops for bitterness, yeast often contributes many subtle and sometimes incredibly complex nuances to beer. Without yeast, beer would not exist as we know it.
It stands to reason then that in order to make good beer we should do everything we can to make sure we are having a healthy homebrew fermentation with each batch we make.
Yeast is a living, breathing microorganism that responds to stresses or challenges it faces during storage and fermentation. In some cases, and for some beer styles, it’s actually beneficial to stress the beer yeast, but more often than not, it’s critical to make sure that the yeast is happy and that you have a healthy homebrew fermentation with little stress on the yeast.
In fact, good yeast management is one of the best ways to improve the quality of your homemade beer. Having a healthy homebrew fermentation is what it is all about.
Below are 7 tips for making sure that your homebrewing yeast is happy, healthy and well cared for:

  1. Shop Liquid Beer YeastUse fresh yeast – All living things die eventually, and beer yeast is no exception. Over time, the yeast loses its viability, so it’s important to use the freshest beer yeast you can when homebrewing. Otherwise, what few living yeast cells might remain in the package will have a very hard time fermenting your beer, possible resulting in a stuck fermentation. Dry yeast is best used within 1 to 2 years of the packaging date. Liquid yeast is best used within about three months of the packaging date. Check the yeast package for this information to make sure you’re brewing with a fresh yeast culture.
  1. Check your pitch rates – The pros recommend pitching a specific amount of beer yeast depending on the gravity and the style of beer being made. In general, a pack of dry beer yeast that has been stored under the right conditions has enough yeast cells for a beer of moderate gravity. Lagers and high-gravity beers require more yeast. If brewing with liquid yeast it’s usually recommended to use a yeast starter (see below) and/or to pitch multiple packs of yeast.
  1. Make a yeast starter – This is an easy and effective way to help insure that you’ll have a healthy beer fermentation. A yeast starter will help to guarantee that there are enough healthy yeast cells for fermentation. Read our blog post on yeast starters to learn how to make one.
  1. Shop Stir PlateUse a stir plate – A stir plate helps make yeast starters healthier by infusing oxygen into the starter, giving the yeast what it needs in order to grow and multiply. It’s a really cool device that spins a magnetic stir bar inside a flask or jar, driving out CO2 and at the same time making oxygen available for the yeast. It’s a really good investment that will pay off through many happy, healthy fermentations.
  1. Use yeast nutrient – Though yeast nutrient is not essential to making beer, every professional brewer I know uses it. Yeast nutrient simply provides some of the nutrients that support a healthy fermentation. It is typically added during the last 10 to 15 minutes of the boil, usually right along with Irish moss or another kettle coagulant. It can also be added to the secondary fermenter to help resolve a slow or stuck fermentation.
  1. Oxygenate the wort – After yeast is pitched, it goes through an aerobic growth phase called respiration. Oxygen is critical to this step of the process. For this reason, aerating the wort by stirring it very vigorously can go a long ways in helping your beer have a healthy fermentation. Just give the wort a good stir right before you pitch the yeast. Even better, invest in an oxygenation system to pump pure oxygen right into the wort.
  1. Shop Wort AeratorControl fermentation temperature – After making sure that the yeast that goes into your beer is up to the task, keep it happy by maintaining a steady fermentation temperature within the recommended range for whatever strain of beer yeast you’re using. Ales do best in the ballpark of 65-70˚F., while lagers require temperatures between 45 and 55˚F. Either way, some techniques for controlling homebrew fermentation temperature will serve you and your yeast well for many batches to come.

Using some or all of the techniques above will encourage your brews to have a healthy homebrew fermentation and help you make the best beer possible.

What techniques do you use to keep your homebrew yeast happy?
—–
David Ackley is a beer writer, homebrewer, and self-described “craft beer crusader.” He holds a General Certificate in Brewing from the Institute of Brewing and Distilling and is founder of the Local Beer Blog.

The Ultimate Home Wine Making Starter Kit For Beginners!

Home Wine Making Starter Kit For BeginnersOkay, you’ve just gotten a wine making starter kit, but before diving head first into the fun of making some wine, it might be a good idea to get an understanding of what’s actually in the kit and what it’s used for – an introduction.
Of course, all of the wine making starter kits that you can buy are going to be slightly different, depending upon the brand and upon what type of wine you wish to make.  Here is a breakdown on some of the items found in one of these typical wine making starter kits, and how each item functions to produce your best homemade wine.

  • Tuff-Tank and Carboy:  The main purpose of these items is to ferment, hold, and store your wine throughout the wine making process.  Specifically, the Tuff-Tank is used for primary fermentation, and the carboy is used for secondary fermentation. These two items are the centerpiece of a home wine making starter kit.
  • Air Locks:  Just as the name suggest, these items keep air from penetrating your homemade wine and protects the wine against oxidation and other undesirable contaminants from spoiling your hard work and effort.
  • Racking Tubes and Hoses These function to help aid in the racking process: to transfer wine from one vessel to another while leaving the undesired lees behind in the first vessel.  Racking occurs on average between 2-4 times throughout the wine making process.
  • Hydrometer and Hydrometer Jar These items are a very important part of any of wine making starter kit.  The wine hydrometer helps you keep an eye on the fermentation process; telling you what the alcohol content of the wine is along the way.  The hydrometer jar allows you to measure the alcohol content of just a small sample of wine rather than measuring the entire contents of your carboy.  Fill the hydrometer jar to the desired level, and submerge the hydrometer into the hydrometer jar to determine how far along your fermentation has gotten.
  • Stirring Spoon: This is a somewhat more obvious piece of wine making equipment found in a wine making starter kit. It lets you stir your wine in order to maximize the surface area and contact time between the wine and the lees, increasing the overall quality of your finished homemade wine.
  • Wine Bottle Brush and CleanPro SDH Cleaner: You need to be working in an environment that is as sanitary as practically possible. The bottle brush and SDH cleaner will allow you to do just that. The cleaner functions as a sanitizer for all the equipment in your home wine making starter wine kit, giving you a clean environment for each and every batch. Buy Wine Kits
  • Capsules and Corks:  To close up the bottles of wine in a more traditional fashion, many home wine making kits will supply corks.  Finally, the capsules add style and sophistication to the presentation of your finished wine.
  • Wine Making Juice: Most starter kits for beginners do not come with the wine concentrate. They consist of the wine making equipment, only. Our wine making starter kit includes the wine ingredient kit for your first batch, as well. You get your choice of dozens of wine types to start off with: Cabernet Sauvignon, Chardonnay, etc.

These are the basics of a home wine making starter kit. You can find more information about our wine making starter kit on our website.
—–
Ed Kraus is a 3rd generation home brewer/winemaker and has been an owner of E. C. Kraus since 1999. He has been helping individuals make better wine and beer for over 25 years.

10 High Gravity Beer Recipe Kits For Brewing This Winter

High Gravity Beer Recipe KitsAs the weather gets colder, it’s time to ward off the winter chills with some high-gravity brews.
High-gravity simply means that there are more fermentable sugars in the wort prior to fermentation, leading to more alcohol after the fermentation. You literally get more bang for your buck with these high gravity beer recipe kits!
The extra alcohol creates a warming sensation that’s pretty nice when it’s cold out. More booze also means that these beers will age well, and you probably won’t drink them as quickly. And, high-gravity homebrew also makes a great gift!
Many of these beers are called “Imperial” or “Double”. The trick is having the bigger version still emulate the base style. But just because high gravity beer recipe kits are bigger doesn’t mean they’re harder to brew. Just like the normal gravity beer recipe kits, these are still extract and partial mash brews complete with easy-to-follow instructions.
**Remember, all orders at Adventures in Homebrewing over $50 come with free shipping, so you’re already there with just one of these high gravity beer recipe kits! Plus, order two or more beer recipe kits (any combination, any brand) and save 10% on all of them! Your discount will be automatically applied when the second homebrew recipe kit is added to your shopping cart.Shop Steam Freak Kits

  1. Double IPA: The top three most highly rated beers on BeerAdvocate.com are all Double IPAs. You can brew your own hop bomb with this adventurous kit from Brewer’s Best! Six ounces of hops pull in 100+ IBUs! (ABV: 7.8% – 8.3%)
  1. Belgian Dark Strong: This kit uses Dark Belgian Candi Sugar to create a rich, high-gravity brown ale with the characteristic Belgian flavor. Bitterness is moderate at 25-30 IBUs. (ABV: 7.3% – 8.3%)
  1. Imperial Blonde Ale: This high gravity beer recipe kit is a beefed up version of the easy-drinking American craft beer style. Some wheat dried malt extract enhances body and mouthfeel, while a pound of honey malt contributes a nutty and sweet honey character. (ABV: 7% – 8%)
  1. Imperial Pale Ale: It’s a big pale ale, just a little more malt forward and balanced than the Double IPA above. The mix of specialty malts include Caramel 80, Victory, and Carapils, giving this brew a strong malty complexity to balance out the close to 70 IBUs. (ABV: 8% – 8.5%)
  1. Russian Imperial Stout: Big and roasty, it’s the ideal cold weather brew. Our customer review says it all: “This is a damn good beer.” (ABV: 7.75% – 8.25%)
  1. Von Baron Belgian Tripel: Over nine pounds of malt extract and dark belgian candi sugar make this a complex, malty brew fit for cold nights. Light amber in color, with just a hint of citrus flavor. (ABV: 6.75%- 7.25%)
  1. Barnstormer Barleywine: Another malt-forward brew from Steam Freak with over 10 pounds of malt, this barleywine is perfect for special occasions. Be sure to age a bottle (or a few!) to see how the flavor develops! (ABV: 9.75% – 10.25%)Buy Brew Kettles
  1. Bourbon Barrel Imperial Porter: This one’s really making my mouth water. This high gravity beer recipe kit comes with American oak spirals and Kentucky Bourbon flavoring to replicate that barrel-aged flavor. Tip: Mix the bourbon flavor with real Kentucky Bourbon for an extra punch! (ABV: 7.5% – 8%)
  1. San Diego Double IPA: This high gravity beer recipe kit from Steam Freak. It’s an IPA with more hops and more malt – more everything! It’s an extremely well balanced beer with a lot that’s designed to shock the senses. (ABV: 7.75% – 7.75%)
  1. Le Belge Trappist Tripel White: This brew has a golden color with a toasty malt finish. The alcohol is up there, so it’s a sipper. The flavorful balance of specialty grains and hops hides the alcohol well. (ABV: 8.75% – 9.25%)

What’s your favorite high gravity beer recipe kit? Tell us in the comments below!
—–
David Ackley is a beer writer, brewer, and self-described “craft beer crusader.” He holds a General Certificate in Brewing from the Institute of Brewing and Distilling and is founder of the Local Beer Blog.

Sierra Nevada Celebration Ale Clone Recipe

Bottle Of Sierra Nevada Celebration AleOne of my all-time favorites is Sierra Nevada’s Celebration Ale, and I’d like to have it year-around. That’s why I started digging for a Celebration ale clone recipe.
Celebration ale a full-bodied IPA brewed with two-row malt, caramel malt, and the season’s freshest hops. In true Sierra Nevada style, Cascade and Centennial hops are in the spotlight. A touch of Carapils malt adds a frothy white head that lasts and lasts, providing a billowing pillow for the spicy hop aroma that emanates from the glass.
As a big time mega craft brewer, Sierra Nevada has access to the very first hops of the harvest. Given the changes in the growing season from year to year, Celebration is a little different each year it’s brewed. If you grew your own hops this year, you may want to play around with your own crop. If adding your own fresh, un-dried hops to the boil, read this short article about wet hopping. Otherwise, we can still obtain abundant hop flavor and aroma using pellets.
The following Celebration ale clone recipe is adapted from the October 2000 issue of Brew Your Own magazine. Use it to enjoy Celebration Ale year round!

Celebration Ale Clone Recipe
(All Grain, 5 Gallon Recipe)
Specifications:
OG = 1.064
FG = 1.014
IBUs = 60
SRM = 12
ABV = 6.4%
Ingredients:
11.5 lbs. two-row malt
1 lb. Crystal 40L malt
.5 lb. Carapils malt
1 oz. Chinook hops at :60 (11 AAUs)Shop Steam Freak Kits
1.75 oz. Cascade hops at :30 (8.5 AAUs)
1 tsp. Irish moss at :15 mins
.66 oz. Cascade hops (dry hop)
.66 oz. Centennial hops (dry hop)
Wyeast 1056: American Ale Yeast or Safale US-05
.75 cups corn sugar (if bottling)
Directions:
Mash the grains with a single infusion at the higher end of the temperature range (~156°F) for big body and mouthfeel. Draw off and sparge to collect enough wort for a full-volume boil. Boil for 90 minutes, adding the hops according to the schedule. Add 1 teaspoon of Irish moss with 15 minutes left in the boil. Whirpool, chill, and transfer to a clean, sanitized fermenter, then ferment at 66°-70°F for seven days. Dry hop for five days in secondary. Bottle or keg at you would normally.

Partial Mash Option
Shop Conical FermenterIf you are not an all-grain brewer, no fear. Here is an alternate procedure for making a Celebration ale clone from extract in a partial mash.
Replace the two-row malt with 6.6 lbs. light LME and 2.75 lbs. two-row malt. Steep the two-row with the Crystal 40L and Carapils (all crushed) for 30 minutes in 1.5 gallons of water at 156°F. Strain out the grains and rinse them with 1 gallon of water at 170°F, collecting the runoff in the boil kettle. Mix in the liquid malt extract and bring to a boil.
Boil for 90 minutes, adding the hops according to the schedule. Add 1 teaspoon of Irish moss with 15 minutes left in the boil. Whirpool, chill, and transfer to a clean, sanitized fermenter, topping off with enough water to make five gallons. Ferment at 66°-70°F for seven days. Dry hop for five days in secondary. Bottle or keg at you would normally.
And there you have it… a Celebration ale clone recipe for brewing all-grain or extract in a partial mash, so know is the time to get started!
—–
David Ackley is a beer writer, brewer, and self-described “craft beer crusader.” He holds a General Certificate in Brewing from the Institute of Brewing and Distilling and is founder and editor of the Local Beer Blog.

The Trick To Avoiding Oxidation In Homebrew

Oxidation In HomebrewOne of several problems that can happen in beer brewing is oxidation. Blogger Bryan Roth explores oxidation, its effects, what causes it, and how to avoid it.
———-
The process of oxidation is detrimental to your beer, but it’s something that can be difficult to avoid. To some degree, oxidation in homebrew will occur whether you keg or bottle your beer.
Oxidation in homebrew is a chemical process that can destabilize it and cause stale, off-flavors. Most commonly, people describe the taste of oxidized beers as having flavors of wet cardboard, sherry, or fruit, but that’s not the only issue. Along with altering the taste of your beer, oxidation can also affect the quality of your beer. Having oxidation in your homebrew can cause it to be less stable, meaning it will not stay as fresh as long.

When Oxygen Is Good For Homebrew?

A tricky part of the oxidation concept is that oxygen is actually beneficial early in the brewing process, so there is a time when oxidation in the homebrew is good. Properly aerating your wort on brew day can be pivotal to a successful homebrew, as oxygen is critical for yeast health.
Shop Wort AeratorAfter you’ve boiled and cooled your wort and moved it into your primary fermenter, take a few minutes to rapidly stir or shake and rock your wort. At this early stage, building a frothy head on your wort is good, as pitched yeast will need the air for healthy growth and will remove the oxygen during the fermentation process. You can even purchase aeration devices to help this process.
After you’ve pitched your yeast and fermentation has begun, you’ll want to avoid shaking and agitating your beer as much as possible.

When Oxidation May Occur In Your Homebrew
Oxidation can take place at many points throughout the brewing process, from creating a large froth while stirring your mash to the moment you move your beer into a keg or bottle. For most homebrewers, their beer is at greatest risk of oxidation while racking from one carboy to another or into their final vessel of choice, whether it be bottle or keg.
In all these instances, it’s important to try and avoid splashing of your beer. You’ll be able to tell when you’re at risk whenever you see a growing froth on top of your wort or beer. If you’re racking, pay attention to your tubing: if you see a lot of bubbles moving through, check the fitting of your tubing Shop Chugger Pumpand siphon connections to make sure they’re tight. While moving beer from one carboy to another, allow your siphon tubing to rest on the bottom of the secondary fermenter or as close to the rising beer as possible. This will dramatically reduce the oxidation in your homebrew.

How to Avoid Oxidation In Homebrew When Kegging or Bottling
Homebrewers who keg their beer may have an easier time avoiding the effects of oxidation so long as they’ve been careful in other steps of the brewing process. Purging a keg with CO2 before and after filling it with homebrew will help keep the beer fresh.
Those who bottle, however, will still want to make sure to avoid unnecessary splashing or air bubbles while racking into bottles. Moving a homebrew from a carboy to a bottling bucket can help, as a spigot and properly fitted tubing will move the beer safely from one vessel to your bottle. Luckily, the yeast that will carbonate your beer will consume some of the oxygen that may make it into the bottles.
Shop Oxygen Absorbing CapsMany homebrewers also prefer to use oxygen absorbing bottle caps that will help mitigate oxidation. Be sure to also store your beer in a place where temperatures are controlled and preferably cool. Warm storage can promote oxidation in homebrew.
Bottled beers can’t help but become oxidized over time, so know that some beers styles may be impacted greater than others. Your IPA, for example, may have a shift in its hop flavor compared to a barleywine or imperial stout, which may actually find pleasant tastes from sitting in cool storage for a little longer than normal.
The important thing to remember when it comes to oxidation in homebrew is that once properly carbonated, many beer styles are meant to be consumed fresh. Don’t be afraid to pop your cap and enjoy it!
—–
Bryan Roth is a beer nerd and homebrewer living in Durham, North Carolina. You can read his thoughts on beer and the beer industry on his blog, This Is Why I’m Drunk, and send him suggestions on how to get his wife to drink craft beer via Twitter at @bryandroth.

My Wine Recipe Doesn't Call For Yeast

I have an old wine recipe that came from Germany, through the family, but the wine recipe doesn’t call for yeast of any kind… What does the yeast do and is it essential in home wine making?
Thanks, Connee

man making wine without yeast
Hello Connee,
Simply put, yeast is where the rubber meets the road. Without wine yeast you’ll have no fermentation, and with no fermentation you’ll have no alcohol! That’s why it is imperative that the starting wine must has yeast of some kind, even if the wine recipe doesn’t call for yeast.
 
What’s Going On?…
What’s happening when you make wine is sugar is being turned into alcohol through a process called fermentation. Yeast is what performs the fermentation. Each yeast is a single-celled, living organism that literally eats the sugars that are in the wine must and turns it into alcohol and CO2 gas. This is what wine making is all about.
 
Where Does The Yeast Come From?

Some older wine recipes – like the one you have – will have no yeast of any kind in the recipe. This is because the yeast are expected to be provided by the fruit, naturally. Fruit, whether it be grapes, peaches, or strawberries, already have wild yeast on them so there will be a fermentation of some kind; it will just be fermenting wine without yeast you’ve added.
Using the yeast that Mother Nature provided was an acceptable practice way-back-when because wine yeast was not readily available. And, if your wine recipe is really, really old, they may not have even known that yeast doing the job. The connection between yeast and fermentation was not put together until as recently as 1857. So as you can start to see, this may be why your wine recipe doesn’t call for yeast of any kind.
 
Is The Wild Yeast Good Enough?
Homemade wines made from wild yeasts are marginal at best. Typically, the yeast found out in the wild have trouble fermenting to an acceptable alcohol level. The flavor and aromas they put off can be objectionable. Wild yeast wines also have a harder time clearing up. This is primarily because the yeast do not collect and clump together like domesticated wine yeast do (flocculation). The clumping helps the yeast to drop out cleanly and quickly. Domesticated wine yeast are bred to do this.
The only exception to this are some Old World wineries that rely on feral yeast from the vineyard. Feral yeast is maintained but out in nature. Great care is taken to keep the yeast strain maintained in the fields. Spent pulp from the fermentation is put back into the soils along the fines so that the yeast within the pulp can cover next year’s crops.
 
Yeast Today
Today things are different. Wine making yeast are readily available from wine making shops like us. These are the same strains of wine yeast used by professional wineries. They are able to ferment to an acceptable alcohol level and produce a much cleaner flavored wine. And, their cost is not that much different than buying a pack of baker’s yeast.
There is an entire array of wine yeast strains from which to choose. Each one has slightly different flavor characteristics or different qualities that make it well suited for a certain style of wine. You can find an example of some of these characteristic in this wine profile chart.
 
Here’s My Recommendations
My advice to you – without seeing the wine recipe – is to go ahead and follow it, but I would also add a packet of wine making yeast for every 5 or 6 gallons of must. You may also want to take a look at the article, Why Should I Use Wine Yeast that is listed on our website. This will give you a little deeper explanation about yeast and its role in wine making.
You may want to give up on using the wine recipe all together. While using a wine recipe that doesn’t call for any yeast can be done. Why risk your time an effort when there are so many more modern wine recipe available.
Happy Wine Making,
Ed Kraus
—–
Ed Kraus is a 3rd generation home brewer/winemaker and has been an owner of E. C. Kraus since 1999. He has been helping individuals make better wine and beer for over 25 years.

Shop Wine Making Kits
Shop Grape Concentrate
Shop Wine Press

Short-Boil Brewing: Put Time Back Into Your Day!

boiling pot of waterFor many, brew day is all about taking it easy. Setting up a chair and kicking back as the wort boils away can be as therapeutic as laying on the beach, listening to the tide come in.
But for me, when I’m home brewing I like to strike a balance between relaxing and being efficient with my day, even if that means rushing around like a mad cheetah at times. That’s where short boil brewing comes in…
One of the easiest ways I’m able to cut down on my brew day is focusing on the boil, especially since I brew extract batches. Instead of a normal 60-minute boil time, cutting down to 30 or even 20 minutes not only produces homebrew that’s still great to drink, but puts a little more time back in my day.
While not every beer style lends itself to short boil brewing (bocks, for example), it is easy to shave off minutes for lots of other kinds of beers, from stouts to IPAs. The key is using extract and some specialty grains for steeping, which can be placed in the water as it heats up. Since malt extract doesn’t need to be boiled for a specific amount of time, you’re simply mixing it in the hot water to sanitize the liquid as you create your wort.
My favorite use of short boil brewing is with IPAs because it forces me to use my favorite technique for the style: hop bursting. This process is exactly what it sounds like – you add a ton of hops, but boil them for a short period of time. This provides an intense burst of hop flavor and aroma.Shop Liquid Malt Extract
Hop bursting is perfect for short boil brewing because you’ll extract little bitterness from the isomerization of hops, but get left with all the flavor. The biggest catch for a shortened boil is that you’ll want to use a lot of hops to make sure you still get some hop bitterness to balance the sweet malt, but that can be a good thing, too.
Here’s an IPA recipe I call “Little Hop Monster” that I’ve developed through short boil home brewing. Try it out to get you started on your next (shortened) brew day. Feel free to substitute hops for whatever you like, but I enjoy the intense tropical fruits of these American hop varieties:

Little Hop Monster IPA
(five-gallon batch, extract with specialty grains)
Specs Shop Brew Kettles
OG: 1.050
FG: 1.010
ABV: 5.2%
IBUs: 48
SRM: 8
Ingredients
0.5 lb. Crystal 60
0.5 lb. Crystal 40
6 lb. light DME
2 oz. Amarillo hops at 10 minutes left in the boil
2 oz. Simcoe at 10 minutes
1 oz. Amarillo at 5 minutes Shop Hops
1 oz. Simcoe at 0 minutes
1 oz. Amarillo – dry hop
1 oz. Simcoe – dry hop
1 pack of Safale US-05 

Directions
In this short boil recipe the boil time can last from 20 to 30 minutes. Steep the grains as you bring the water up to boil, removing your grain bag once the water hits 170°F. to 175°F. Add the malt extract, bring the wort to a rolling boil, then add hops according to schedule above. Proceed with the rest of the brew as usual.
Shop Accurate ScalesShort boil brewing may not be a home brewing method for everyone, but it certainly has its place. With having time saved as its reward it may be something you’ll want to give a try.
—–
Bryan Roth is a beer nerd and homebrewer living in Durham, North Carolina. You can read his thoughts on beer and the beer industry on his award-winning blog, This Is Why I’m Drunk, and send him suggestions on how to get his wife to drink craft beer via Twitter at @bryandroth.

5 Beer Recipe Kits For Home Brewing In Winter

Home Brewing In WinterIn a lot of ways, winter is high brewing season. For many, it’s time to get the brew kettles out and the beer recipe kits on the way. Not only do the lower temperatures encourage us to hibernate, they support more moderate fermentation temperatures and open up beer styles that are more suitable for home brewing in winter. If you have a cold basement, winter is the perfect time to take advantage of brewing lagers, steam beer, and other styles that require lower fermentation temperatures.
Winter is also a good time for brewing some hearty, high gravity beer styles. These more substantial styles give rise to the idea of a “winter warmer” – a beer with higher alcohol content that offers a warming nip in the colder months.
As you’re planning your seasonal brew calendar, consider one of these 5 beer recipe kits for home brewing in winter:

  1. BrewCraft Ultimate: Russian Imperial StoutA big, Shop Steam Freak Kitsroasty imperial stout is the perfect cold weather beverage, featuring notes of coffee, chocolate, and dark fruit. Some imperial stouts can be pretty hoppy, but generally the dark roasted malts take center stage. Some brewers like to brew an imperial stout in the winter, then let it age all year for consumption the following winter.
  1. Brewers Best Vienna LagerIf you’re unable to brew lagers during the warmer months, winter is a great opportunity to give it a try. You’ll need to be able to keep fermentation temperatures in the 40-50˚F range, so a cold basement might work out. This Vienna lager beer recipe kit is a great choice for home brewing in wine. It’s a smooth, malty lager, well worth the wait of an extended lager fermentation.
  1. Brewcraft Premium: Black IPABlack IPAs are one of the more robust styles of beer, combining the roasty flavors of a stout with the hop-forward bitterness and flavor of an IPA. This beer recipe kit offers a complex dark malt flavor and a range of spicy and citrusy American hop character, fairly stout at 7.3% ABV. Getting this beer recipe kit and home brew it in the winter will add a clean, crispness that bring out the citrus character, even more.
  1. Steam Freak Barnstormer Barleywine – Similar to with Shop Temp ControllerImperial Stouts, some brewers like to let their barleywines age for a before consuming (of course you’re welcome to open some bottles early!). This barleywine clocks in at 10% ABV and 96 IBUs – it’s definitely a sipper!
  1. Steam Freak Spring Loaded BockA bock is a high gravity German lager, rich and malt-forward, high gravity yet silky smooth. Expect a traditional bock to be in the ballpark of 7% ABV, with just enough hops to balance out the malt and the alcohol.

What are some of your favorite styles for home brewing in winter months? Have you brewed any of these beer recipe kits?
—–
David Ackley is a beer writer, brewer, and self-described “craft beer crusader.” He holds a General Certificate in Brewing from the Institute of Brewing and Distilling and is founder of the Local Beer Blog.