When (And When NOT) To Be Paranoid About Home Brewing Sanitation

Man going overboard on home brewing sanitation.You’ve heard it again and again – cleaning and sanitation are two of the most important aspects of homebrewing. It’s true – lax cleaning and sanitation can easily spoil a batch of homebrew – but there are some things about beer and brewing that inherently prevent spoilage. Knowing what they are can save some time and headache.
Now this advice may go against conventional wisdom, but in an effort to save you some stress, here’s a breakdown of when – and when not – to be overly concerned about home brewing sanitation.
 
When to Be Paranoid About Home Brewing Sanitation

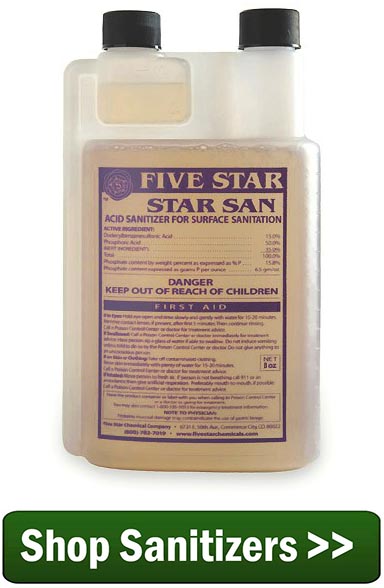
  • Yeast handling – Anytime you’re handling yeast is a good time to be concerned about sanitation. In fact, it’s when you should be most paranoid about sanitation. That said, by pitching a large number of yeast cells into a wort, that yeast will likely outcompete any other microorganisms – but there’s no sense in giving those spoiling microbes a leg up. Whenever you’re harvesting yeast or preparing a yeast starter, go the extra mile to make sure that anything that might come in contact with the yeast has been thorough cleaned and sanitized.
  • Post boil, post chill – One of the reasons we boil wort is to sanitize it. Maintaining a high temperature effectively sanitizes the wort, giving the beer yeast a clean slate for it to ferment. But once the temperature of the wort drops, it becomes susceptible to wild yeast and bacteria. After the wort has been chilled, everything it touches needs to be thoroughly sanitized: fermenters, airlocks, racking tubing, thermometers, hydrometers. This is why it’s not recommended to return wort used for hydrometer reading back to the main batch.
  • Bottling – To continue from the previous point, you don’t want to go through all the hard work of brewing a batch of beer just to put it in a dirty bottle. Make sure all the bottles are extra clean and don’t forget to check the spigot of the bottling bucket.

 
When NOT to Be Paranoid About Home Brewing Sanitation

  • During a normal mash – Clean the mash tun, yes, but you don’t really need to sanitize it. That said, a mash that’s left alone for a long time can go sour. In fact, some brewers use what’s called a sour mash in brewing sour beer. But a normal, 60-90 minute mash will not have enough time to spoil. Of course, it might be a good idea to clean and sanitize your mash tun after the mash to prevent mold growth.
  • When boiling – There’s really no need to sanitize your brew kettle. The high temperature of the boil will be more than sufficient for sanitizing.Shop Sanitizers
  • When using an immersion wort chiller – There’s no need to sanitize your immersion wort chiller. Make sure it’s clean, yes, but placing it in nearly boiling wort will be plenty hot for sanitizing. Just make sure you clean it well afterwards.
  • After fermentation – Once your beer has made it through fermentation, you’re not exactly out of the woods, but your beer is in a much safer place than it was before fermentation. For one, the alcohol content in the beer will protect it from spoilage organisms to some degree. Also, the lower acidity of the beer will inhibit wild bacteria. Plus, the hops have a preservative effect as well. So when checking final gravity readings, for example, it’s still a good idea to clean and sanitize your gear, but don’t stress about sanitation – you’re almost in the clear!
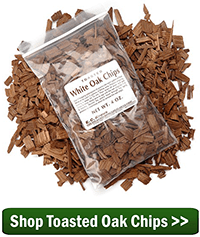
  • When dry hopping – One of the most common stress points is when adding dry hops. Shouldn’t they be sanitized before throwing them in the beer? Some brewers do this, but it’s not really necessary. The hops have naturally preservative properties, and as long as they’ve been stored properly, there’s little to know chance that they’ll contaminate your beer.

This isn’t a license to throw good cleaning and sanitation habits out the window. You’re certainly better off going overboard than missing a spot and spoiling a batch. But in terms of being paranoid about sanitizing, simply make sure your yeast are the only ones fermenting your beer. That’s what home brewing sanitation is all about. Then all you have to do is relax, don’t worry, and have a homebrew!
—–
David Ackley is a writer, brewer, and craft beer marketing consultant. He holds a General Certificate in Brewing from the Institute of Brewing and Distilling and is founder of the Local Beer Blog.

When to Aerate A Wine

Primary FermentersAt what point do you aerate your fruit wine?
—–
Jason,
Aeration should only be done during the primary fermentation. This is the first 3 to 5 days of when the wine is in a primary fermenter and most active.
The only reason aeration is done is to give the wine yeast more ability to multiply and establish a solid colony. When a packet of wine yeast is put into a 5 or 6 gallon batch of wine, it has the monumental task of growing itself 100 to 200 times that little packet. That’s what causes all the beige-colored sediment you at the bottom of a fermenter. To readily do this the wine yeast need air. Without the air the colony size may suffer resulting in a sluggish fermentation.
Ironically, after the yeast colony is well established and the fermentation is starting to slow down, air is the enemy. For the rest of the wine’s life you want to keep air exposure time short and splashing to a minimum. The major concern here being oxidation of the wine.
What all this means for the home winemaker who is making 5 or 10 gallons is that the primary fermenter should be left exposed to air. This can mean doing something as simple as leaving the lid completely off a bucket fermenter. Cover it with a thin tea towel, nothing more. Or for a winery dealing with 500 gallon vats, this could mean continuously pumping and recirculating the wine back out on top the fermentation surface, much like a fountain.
There is a second element to this as well. Regardless of how much you are fermenting, you will always want to make an effort to keep Buy Aeration Systema dried cap from forming on the surface of the fermentation. The pulp will want to rise during a primary fermentation. If left undisturbed it can dry and form a solid cap, choking the wine yeast off from the much needed air.
To prevent this from happening you will want to punch the cap back down into the wine. For most home winemakers with their 5 and 10 gallon batches, once a day is plenty. You can use something as simple as a potato masher for this purpose or you can stir it until the cap is dispersed. For larger batches you may need to punch down the cap several times a day.
Hope this information helps you out.
Happy Winemaking,
Ed Kraus
—–
Ed Kraus is a 3rd generation home brewer/winemaker and has been an owner of E. C. Kraus since 1999. He has been helping individuals make better wine and beer for over 25 years.

Barrel-Aging Your Homebrew – Without a Barrel!

Barrel-Aged BeerAs with wine, beer will often benefit from barrel-aging. Depending on the type of wood used to make the barrel and whether the barrel was previously used or not, barrel-aging homebrew offers an additional realm of complexity, with flavors ranging from oak, vanilla, and toast, not to mention the characteristics of the wine or spirits that previously occupied the barrel.
Though homebrewers can certainly obtain barrels for aging their beer, an easier and more cost effective method is to let the beer age on wood chips. Oak is the wood of choice, and brewers can get French or American white oak, each of which offer a slightly different flavor profile. Additionally, these oak chips may be toasted, which will lend the beer notes of coconut or vanilla. Plain, or non-toasted oak offers more of a “raw” wood flavor. The oak should be sap clear. This is typically done by allowing it to sun-dry for 18 months to 3 years.

So what types of beers work best for oak-aging?
Generally, the best beers for oak-aging are more robust beer styles. Imperial and barleywines are good choices, as the higher gravity lends itself to longer aging. The intensity of the flavor in more robust beers can also more easily stand up to the oak flavor without getting covered up. Some of these stronger styles may be aged for months before developing the appropriate balance. That’s not to say I haven’t had great oak-aged saisons and IPAs. It can be done, but achieving the right balance is a more delicate operation.
To avoid over-oaking your homebrew, you might try one of two different strategies:

  • Option 1: Add 1-2 ounces of oak chips to your beer in the secondary fermenter. Taste the beer periodically, every week or so, and rack the beer off the oak chips when the taste is to your liking.
  • Option 2: Remove 1 gallon of beer by racking it into a 1-gallon glass jug with 2-4 ounces of oak chips. This will result in strongly oaked beer, which can then be blended back into the main batch at the ratio that tastes good to you.

What about mixing in wine or spirits when barrel-aging homebrew?shop_toasted_oak_chips

If you’re into craft beer, you’ve probably come across beer aged in all kinds of different barrels: red wine, white wine, bourbon, tequila, brandy. If you’d like to add the flavor of a wine or spirit to your wood-aged beer, simply soak the oak chips in about a cup of your wine or spirit of choice for a week or more. Then strain out the oak chips and place them in your secondary fermenter. If desired, you can blend in some of the reserved wine or spirit to taste. The best way to do this is to pull out a small sample of beer and then dosing it with small amounts of the wine or spirit. Then you can calculate how much to blend back in to the larger batch. Err on the side of caution – you can always add more, but you can’t take it out.
Barrel-aging homebrew – with or without wine and spirits – introduces a new skill set to the brewer’s palette: tasting and blending. Barrel-aging may be more of an art than a science, so for best results, taste your beer as it ages on the oak and if needed, blend together multiple oaked and un-oaked batches to get the flavor your want.
Do you barrel-age your homebrew? What are some of your favorite beer styles for barrel-aging?
—–
David Ackley is a writer, brewer, and craft beer marketing consultant. He holds a General Certificate in Brewing from the Institute of Brewing and Distilling and is founder of the Local Beer Blog.

How to Spot a Good Wine Store

When you’re not making your own wine and shopping Adventures in Homebrewing for all your homebrew needs, you’re likely out looking for inspiration and new wine adventures from your local wine store. Note the emphasis on local – most often our favorite wine store or liquor store is the closest one to our house or work. You’ve probably not thought much about it because of the convenience, but is it really the BEST wine store you could be taking your business? “Best” of course is relative and open to opinions, but there are a few common elements of wine stores that serve as good indications to their wine knowledge and professionalism.
wine bottles in wine store
Aesthetically Pleasing
What is the first impression that your wine store gives off? Sleek, clean, and well organized? Or cluttered and chaotic? Be sure to pay attention to the details while you’re browsing – are things easy to find and well-labeled? Are the bottles dusty? Is the selection past its sell-by date? Are bottles being stored properly? If you answered “no” to any of these questions, it may be time to take a second look at where you’re shopping.
A good wine store is clean and well-organized – you want to feel good about shopping there and the owner should want to create an environment that encourages customers to stay and browse. Wine should be stored properly, out of direct heat or sunlight, and organized by region, type, etc. (some even by taste!) to help you easily find what you’re looking for.
Decent Selection
Do they have at least one of each type of wine from each region? Is it only box wine and wine coolers? Did you just now realize your favorite wine stores doesn’t have a bottle over $30? The various types and styles of wine are seemingly endless, so no store will ever be able to stock them all, but it is beneficial to both shop owner and consumer that they offer an array of options at different price points. The best curated stores have hand-picked selections that will make the dedicated customer or casual shopper satisfied with their purchase, regardless of the wine occasion.
You know you’re shopping at the right place if the owner (or employee) is passionate and knowledgeable about the different labels – being able to make recommendations is key for making happy customers and keeping them coming back. If you don’t remember the last time your local wine store suggested a wine to you, or if you haven’t bought anything that didn’t have a screw top recently, it may be time to find a new place to shop.
Prices for all Shoppers
We all want to be adventurous with our taste in wine and want to be able to afford to do so – it doesn’t have to be difficult to find a great bottle of wine for cheap and your local wine store should help to enable your journey to your next favorite label. VinePair says that if loosen the purse strings and be open to spending $20 or more – you’ll expand your options and find new, better wines to experience.
A good wine store will have a large variety of stock at every price point – they’ll offer loyalty programs, daily or weekly deals, and bulk discounts – excited for their customers to discover new wines. For both customer and owner, it is important to note the distinction between reasonably priced wine and cheap wine.. they are two very different things. There are a vast number of great wines between $15 and $35 and your wine store should help you on your journey to finding your favorites.
Breaks You from Your “Comfort Zone”
Sticking to what you know is comfortable, even if the quality of your go-to wine isn’t great. A good wine store will do things to encourage you to break away from what you know and be open to potentially discovering new tastes. They’ll offer events and wine tastings, bring in experts to talk about how the wines are made and what meals they pair best with, and be a warm/inviting space for shoppers to expand their pallet. Attending wine tastings is fun, insightful, and a great way to find new wine stores. They usually have a bottle discount on the wine their tasting too.
We didn’t set out to bash your local wine store, but rather we wanted to point out some common traits shared by passionate store owners and employees that might make you reconsider your current wine shopping experience. Just because something is local to you does not mean it is the best for you – we want our customers to be educated on how to find good wine and discover their new favorites through amazing tasting and shopping experiences. You are here because of our shared love of wine, and I’m here to help you recreate your newly purchased favorite with all of your winemaking needs.
Happy wine shopping,
Ed Kraus
—–
Ed Kraus is a 3rd generation home brewer/winemaker and has been an owner of E. C. Kraus since 1999. He has been helping individuals make better wine and beer for over 25 years.

Summer Beer Recipe: Making Radler Beer

Radler BeerHow would you react if someone suggested that you cut your beer with lemonade or soda? Would you raise your eyebrows in shock? Gasp with horror? Well, that’s how you make a radler beer.
In many parts of the world, mixing beer is nothing to be afraid of. In fact, many years ago in the US, it wasn’t uncommon to hear of people drinking shandy – a mix of beer with soda or another non-alcoholic beverage. Though shandy all but disappeared in the late 20th century, in recent years it has made a comeback as beer drinkers continue to search out new and exciting alcoholic beverages.

What is a Radler Beer?
In Germany, one of the popular beer-soda hybrids is known as radler. Radler means “cyclist”, and legend has it that radler was invented by an innkeeper who when faced with a beer shortage, blended his beer with a lemon soda and marketed it as a thirst-quenching, low-alcohol alternative for bicyclists who passed by his establishment.
Making radler at home is a fun experiment for blending homebrew. There are a couple ways to do it:

  1. Brew a beer and a lemon soda, bottling them separately, and then blend them together in the glass, or:
  2. Brew the beer and the lemon soda, blending them in secondary and bottling or kegging them together.

If you’re just starting out with radler, I’d recommend the first option. This way, you can control the ratio and blend the two together just the way you like it. But if you’re serving for a large group, the second option may be more convenient.
Traditional radler is made with about a 50/50 blend of pilsner beer and lemonade or lemon soda. A popular variation is made with hefeweizen in place of the pilsner.
To make your own radler beer, follow the instructions below.Shop Steam Freak Kits

How to Make a Radler Beer

  1. Brew a batch of your favorite pilsner or hefeweizen. Some beers you might try include American Platinum Lager, High-Flyin’ Derwitzer Wheat, or Pilsner Urkel. If you’re feeling adventurous, you can even try using a pale ale or IPA as your base beer.
  2. Bottle or keg this beer as you normally would.
  3. When the beer is finished and you’re ready to make a radler, brew up a batch of sparkling lemonade:

Mix 1/2 cup sugar with 1/2 cup water in a small saucepan. Heat and stir until the sugar is dissolved. Mix in 3/4 cup lemon juice. Cool the mixture in the refrigerator. When ready to serve, mix in 1 can club soda.

  1. When ready to serve, blend the beer with the lemon soda into a glass at about a 50/50 ratio. Adjust to taste. Optionally, serve with ice and a slice of lemon and enjoy your delicious summer sipper!

Buy Shop Conical FermenterThis is just a basic radler beer recipe. There are many ways to make a radler beer. The options are only limited by your imagination.

Have you every tried a radler beer? How do you make your radler beers? Do you have a favorite radler beer recipe? Share it in the comment section below…
—–
David Ackley is a writer, brewer, and craft beer marketing consultant. He holds a General Certificate in Brewing from the Institute of Brewing and Distilling and is founder of the Local Beer Blog.

Mary's Wine Has A Pectin Haze, But Does That Mean It's Ruined?

I made 5 gallons of pear wine from fresh pears and added a half gallon of citrus pomegranate from concentrate which was cloudy thus my wine is cloudy. I added Kitosol 40 after second racking and it partially cleared the wine. Can I add more Kitosol or this is as clear as it will get?
Name: Mary
State: Indiana
—–
Hello Mary,
Sounds like you might have a problem, Mary. Let’s see what we can do to help you out.
The reason pomegranate juice is cloudy is because it has an abundance of pectin in it. Pectin is not a particle that clears out with fining agents such as Kitosol 40 or Bentonite. It is something that is organically bonded to the wine. It’s not a particle; it’s actually part of the juice. This is know as a pectin haze.
When a wine fermentation occurs the wine yeast produce, among other things, pectic enzymes. During the fermentation the pectic enzymes break-down the pectin that may be in the wine must causing the juice to become clear. The activity of the fermentation itself, helps to energize this organic process. This is why it is possible make a clear pomegranate wine. That’s why a peach wine can start out cloudy and end up clear.
Most fruit wine recipes will call for additional pectic enzyme to be added on top of what the wine yeast will produce, as well. This helps to insure that you have a wine that is clear of a pectin haze. If you take a look at another blog post, “Why Do Wine Recipes Call For Pectic Enzyme“, you can read a little more about pectic enzyme and what it does.Shop Pectic Enzyme
In your case, you added pomegranate juice to the pear wine after the fermentation was complete, so you do not have any fermentation activity to help the pectic enzymes along in clearing up the pectin haze in your wine. This means you need to boost the pectic enzyme level in the wine. It also means you will need to be patient. It may take some time for your pear wine to become clear, if it’s able to clear at all.
Here’s what you can do. If you did not add pectic enzyme to the wine originally, then add two times the dosage recommend on the container the pectic enzymes comes in. If you added a dose of pectic enzyme to the wine already, than add another full dose. Be sure to blend it in completely. It may take some time for the wine to clear, months even. And even at that, there is a possibility that the pectic enzyme many not be able to clear up the pectin haze at all, since it is without the energy of an active fermentation.
Beyond this, you can add another pack of Kitosol 40. It may clear up your wine even more by dropping out yeast particles and other proteins that may still be lingering in the wine, but when it comes to the last bit of clearing, it is going to be up to the pectic enzyme to do the job.Shop Wine Clarifiers
In a worst case scenario, the pectin that is making the wine cloudy does not affect the wine’s flavor in any way. A pectin haze only affects the wine visually. So at a bare minimum you should have just as good of wine as ever that you can enjoy taste-wise.
Mary, I hope this information helps you out and you end up with a perfect clear pear/pomegranate wine.
Happy Winemaking,
Ed Kraus
—–
Ed Kraus is a 3rd generation home brewer/winemaker and has been an owner of E. C. Kraus since 1999. He has been helping individuals make better wine and beer for over 25 years.

A Quick Guide To American Hop Varieties

American Hops With American FlagAmerican hop varieties display a wide range of flavor and aroma characteristics, from citrus and floral to piney and resinous.
Hops are generally categorized as bittering, finishing, or dual-purpose hops. Higher alpha-acid hops usually lend themselves to bittering, whereas the lower alpha-acid hops are preferred for flavor and aroma. Dual-purpose hops work well in both situations.
Here’s a quick guide to some of the most popular American hop varieties:

  • Amarillo: Amarillo is one of the relatively new American hop varieties that has become very popular among craft brewers for its fruity hop character. Similar to Cascade, it features strong fruity notes when used as an aroma hop, often described as “tropical”.
  • Cascade: Perhaps the most popular American hop of all, Cascade is well known for its use as a finishing hop in Sierra Nevada’s Pale Ale and countless other American ales. It has a distinctly spicy, citrus character that gives very fragrant grapefruit notes when used in later additions.
  • Centennial: Generally considered a dual-purpose hop (meaning it works well both early and late in the boil), Centennial has a citrus and floral character that makes it work well when combined with Cascade and similar hop varieties.
  • Chinook: ChinookBuy Beer Hops is a dual-purpose hop with distinct piney and spicy hop notes. Maybe you could try an all-Chinook IPA?
  • Cluster: According to Ray Daniels, Cluster “is believed to be the oldest of all the American hop varieties still grown today.” It’s a dual-purpose hop with alpha-acids in the mid-range. If you want to brew a pre-Prohibition style American lager, Cluster may be a good choice.
  • Columbus: High alpha-acid content makes Columbus an excellent bittering hop, but it also works well for later additions and dry hopping. Oskar Blues’ award-winning Deviant Dale’s IPA is dry-hopped with Columbus.
  • Fuggle (US): US Fuggles are a low alpha-acid hop derived from the English variety of the same name. When used as a finishing hop, it gives beer a pleasant woody hop aroma.
  • Liberty: Liberty is derived from the Hallertau strain of the German noble hops. It’s a lower alpha-acid hop that works well as a finishing hop in American-style pilsners and lagers.
  • Magnum: US MagnumBuy Hop Bags is a clean, high alpha-acid bittering hop comparable to the German Magnum.
  • Mt. Hood: Mt. Hood as another aroma hop comparable to the German noble hops, named for the region in Oregon where it’s grown.
  • Willamette: Willamette (“Will-AM-ette”) is a low alpha-acid aroma hop bred from the UK Fuggles. It works well in a wide variety of American ales and lagers.

For more great resources on other hop varieties, check out Ray Daniels’ Designing Great Beers.
What are your favorite American hop varieties? Are there any you’d like to see us carry?
—–
David Ackley is a beer writer, brewer, and self-described “craft beer crusader.” He is a graduate of the Siebel Institute of Technology’s “Start Your Own Brewery” program and the Oskar Blues Brew School in Brevard, NC.

6 Ways to Recharge Your Homebrewing Mojo

Homebrewer With Mojo2I get it – we all get bogged down by the rhythms of modern life. Sometimes, it’s hard to make time for homebrewing, and before long, it’s been months since your last brew day.
That’s when you remember, “but I love brewing!” and ask yourself, “how do I get back into it?” Well, here are six ideas to get back into the swing of homebrewing:

  1. Brew your favorite beer – What’s the best beer you’ve ever tasted? How would you like to have five gallons of that beer on hand? Whether it’s a commercial beer or a homebrew, chances are you can make a clone. Create your own clone recipe or choose from some of these clone recipe homebrew kits.
  1. Make it social – Brewing’s more fun with others. Invite some homebrewers you know over for a brew day, or maybe introduce one of your friends to the hobby. Make a party of it. Serve some food, some beer, watch the big game. More hands on deck means less work and more fun.
    Shop Steam Freak Kits
  1. Go to an AHA Rally – The American Homebrewers Association has been hosting homebrew rallies at craft breweries all over the country. Take a little road trip, try some homebrews, make some friends. Want to take it a step further? Go to the National Homebrewers Conference.
  1. Try something different – If you’ve been stuck in a homebrewing rut, maybe it’s time to mix things up. If you’re an extract brewer, maybe it’s time to give all-grain a try. Or maybe experiment with brewing a lager, mead, sour beer – maybe even give winemaking a try. Try something different and you may revive that curiosity that got you into homebrewing in the first place.
  1. Get a new toy – Nothing inspires quite like a new homebrewing gadget. Maybe it’s time you got yourself a propane burner, a stir plate, or a pH meter.
  1. Enter a competition – Sometimes, the best motivation is a deadline.Shop Temp Controller Search for homebrew competitions in your area and sign up. Plan out how much time you’ll need to brew, ferment, and age the beer before sending it in. Read these tips for succeeding in homebrew competitions and put that brew date on the calendar!

Have you ever found yourself in a homebrew funk? What did you do to get out of it?
—–
David Ackley is a beer writer, brewer, and self-described “craft beer crusader.” He holds a General Certificate in Brewing from the Institute of Brewing and Distilling and is founder and editor of the Local Beer Blog.

When To Add Oak Chips To Homemade Wine

Toasted Oak ChipsHowdy Ed,
…To balance the tannins, we French oak chipped the must at the start of fermentation [Petite Sirah] and at the half way point applied the Aussie method of Rack and Return to decrease the seeds in the must. Sieving out the seeds also removed the oak chips. My question is, at what stage should we re-oak the juice?
Jamie O. — CA
—–
Hello Jamie,
I would not automatically assume that you will need to add more oak chips to your homemade wine. In fact, I would not consider adding more French toasted oak chips to the wine until it has cleared and maturated to some degree while in bulk. See what tannins and other proteins drop out on their own, first.
There is nothing wrong with adding toasted oak chips during the fermentation, but you want to use a moderate dosage. Don’t go to overboard. It is possible to add to much. If you want to add oak to the wine during the fermentation, you may also want to consider using oak powder instead of oak chips. Oak powder does not strain out like the oak chips. Having said that, I do prefer using toasted oak chips after the fermentation.
If it is only protein stability that you are concerned about, you also have the option of treating the wine with bentonite, instead of more oak chips. Among other things, bentonite will collect and drop out excessive tannins. This will help to make the wine more heat stable while aging in bottles.
If it is the flavor effects of toasted oak chips you are primarily looking for, it would be best to wait until the wine has aged in bulk for a month or so after the fermentation has completed. This is when I would add oak chips to your homemade wine. I don’t know how many gallons you have, but you can store it in carboys or vats. At this point, you want the wine to be off any yeast sediment and the head-space should be eliminated, as well.
Shop Toasted Oak ChipsBuy waiting you are allowing the wine to get to a point where you can start to distinguish its developing flavor profile. Adding oak chips at this point will not only help you to stabilize the wine further, it will allow you to monitor the oak balance of the wine. Since the wine is already maturating, you can do this with a little clearer perception of the final outcome.
Monitor the wine by sampling along the way. Depending on the dosage you will want to sample every 1 to 4 weeks.
I recommend 1/4 pound of toasted oak chips for every 10 gallons of wine. At this dosage a typical amount of time for oaking is about 30 to 90 days. Sample the wine every 2 weeks. Here is some more information on how much and how long to use oak chips.
What you are looking for is balance. You want the reduced harshness of oak aging to be in line with woody character the oak is adding.
Best Wishes,
Customer Service at E. C. Kraus
—–
Ed Kraus is a 3rd generation home brewer/winemaker and has been an owner of E. C. Kraus since 1999. He has been helping individuals make better wine and beer for over 25 years.

Midas Touch: Is It Beer, Wine, or Mead? How About All 3!

Dogfish Head Midas Touch Clone Beer RecipeIf you haven’t figured it out yet, we’re talking about Dogfish Head’s Midas Touch. First a little back-story on how this beer came into being:
Maybe it’s human nature, but for some reason we always seem to have a way of trying to put things into neat little categories. Is it a West Coast IPA or an East Coast IPA? A Belgian ale or a Belgian-style ale? Is it craft beer or crafty beer?
We even try to establish clear definitions of beer itself. What is beer? Is it limited to just water, barley, hops, and yeast, in accordance to the German Reinheitsgebot? Or are other ingredients permitted, like wheat and rice? What about beers with no malt or no hops at all?
This obsession with categorizing beer could be a modern affliction. When we look at ancient recipes, the lines between beer, wine, and mead were often quite blurry.
That’s exactly what was discovered when archeologists uncovered the remains of over 150 vessels in what could be the tomb of the fabled King Midas – who actually ruled in Turkey some 2700 years ago. Biomolecular archaeologist Patrick McGovern, who specializes in ancient ales and wines, discovered through rigorous testing of the vessels that the beverage they once contained was actually a combination of beer, wine, and mead. He was able to isolate specific compounds that indicated that barley, grapes, and honey were all likely combined into a single beverage.
Like any good biomolecular archeological zymologist, McGovern set about to recreate this ancient beverage. He solicited the help of a number of craft brewers to develop the recipe, ultimately choosing Sam Calagione’s recipe as the best. This beer was eventually released by Dogfish Head as Midas Touch, and has since won a number of awards at major beer competitions.
The staff at Brew Your Own Magazine were generous to share a clone recipe in the November 2002 issue. Enjoy the recipe below for a taste of ancient ale!

Dogfish Head Midas Touch Clone (via BYO Magazine)
(5-gallon batch, extract)


Specs
OG: 1.078
FG: 1.010
IBUs: 10
ABV: 9%
Ingredients
3.3 lbs. Briess light LME
1.5 lbs. Briess light DME
3 lbs. honey
Shop Steam Freak Beer Recipe Kits2 lbs. SunCal Chablis grape concentrate
0.5 oz. Willamette hops (5% AA) at :60
1 tsp. Irish moss at :60
0.5 oz. Willamette hops (5% AA) at :15
1/2 teaspoon dry saffron at :15
Wyeast 3787: Trappist High Gravity ale yeast
3/4 cup priming sugar
Directions: At least 24 hours prior to brewing, prepare a yeast starter. On brew day, heat 2.5 gallons of clean, chlorine-free water and mix in the malt extract. Bring to a boil, and add the bittering hops and the Irish moss and boil for one hour. In the last 15 minutes of the boil, at the flavoring hops and the saffron. At the end of the boil, mix in the honey and let stand for 5 minutes. Chill wort and strain into a fermenter with about two gallons of clean, pre-boiled, pre-chilled water. Use a sanitizer stirring spoon to mix in the grape concentrate, then top off to 5.5 gallons. Aerate the wort, pitch yeast, and ferment at 68-70˚F until complete. Bottle or keg and allow the beer to condition for 3-4 weeks.
Do you have a Dogfish Head Midas Touch Clone Beer Recipe? Looking for more Dogfish Head clone recipes? Check out this Dogfish Head 90-Minute IPA Clone!
—–
David Ackley is a writer, brewer, and craft beer marketing consultant. He holds a General Certificate in Brewing from the Institute of Brewing and Distilling and is founder of the Local Beer Blog.