3 Homebrews to Serve at Your Holiday Feast

Homebrew Holiday Beer In Front Of FireplaceHomebrewing is without a doubt a culinary activity. Chances are that if you’re a homebrewer, you also enjoy cooking and experimenting in the kitchen. One of my favorite things about homebrewing is translating seasonal flavors from the kitchen into seasonal beer recipes. In the winter, many spices from holiday cooking make it into the brew kettle: ginger, cinnamon, cardamom. Pumpkin and cranberry are classic elements of a holiday meal, and what would the season be without peppermint?

All of these holiday flavors can be incorporated into beer recipes. Below, find three of my favorite holiday beer recipes. Brew each one for a three-course homebrew tasting event!

Cranberry “Lambic”

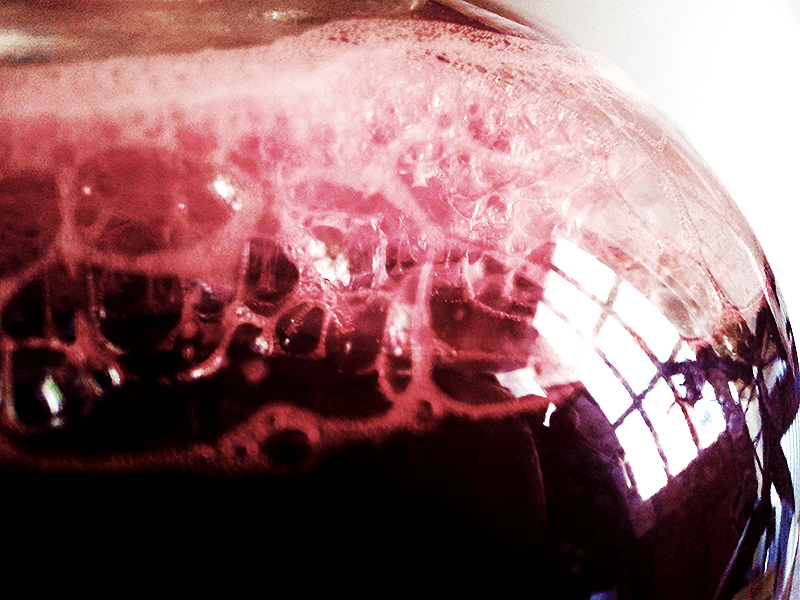
This beer resembles the wild-fermented lambics of Belgium, often made with fruit. But instead of waiting for years for the wild microbes to develop the characteristic sourness, this recipe uses cranberry juice concentrate in the secondary fermenter! Serve this homebrew as an aperitif or see how it plays along with the cranberry relish! Cranberry Lambic Recipe >>
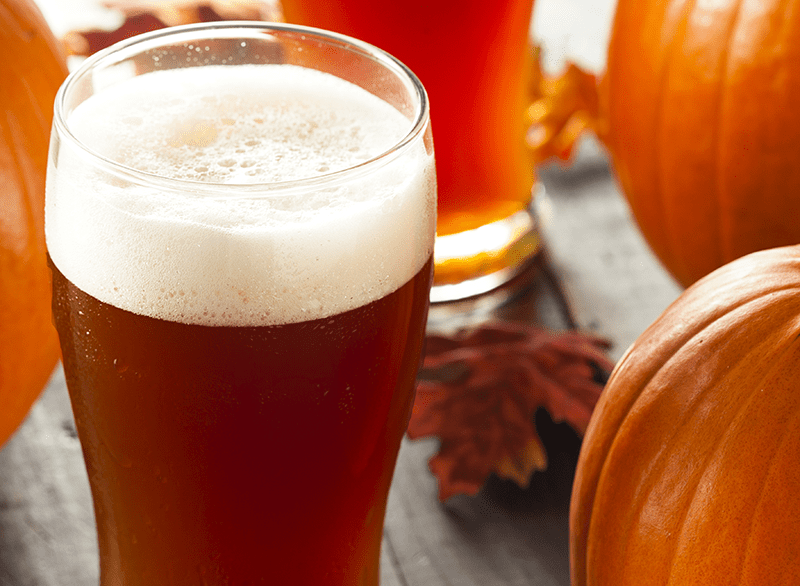
Pumpkin Porter

This heartier brew can easily accompany some of the heavier dishes at the holiday meal. Canned pumpkin, sweet roasted malts, and variety of holiday spices combine in a wonderfully sweet, roasty, and spicy brew. Be sure to save room for dessert! Pumpkin Porter Recipe >>

Peppermint Stout

And for a final holiday treat, consider this chocolaty-smooth stout recipe recipe featuring notes of peppermint. Feeling adventurous? Try adding a candy cane at the very end of the boil!

Specs 
OG: 1.057
FG: 1.014
ABV: 5.6%
IBUs: 36
SRM: 34

Ingredients 
3 lbs. Dark DME
3 lbs. Dark DME (late addition)
Shop Steam Freak Kits1 lb. Munich malt
0.75 lb. Chocolate wheat malt
0.25 lb. Roasted barley
0.5 oz. Northern Brewer hops at :60
1 oz. Northern Brewer hops at :30
0.5 oz. Northern Brewer hops at :10
5 grams dried peppermint at flame out
1 packet Safale S-04 

Directions: Steep crushed grains in one gallon of water at 150˚F for 30 minutes. Strain wort into brew kettle. Add half the DME and enough water to make 3.5 gallons. Bring wort to a boil and boil for one hour, adding hops according to the schedule above. At the end of the boil, remove kettle from heat, mix in the DME and the peppermint, and chill wort. Transfer wort to a clean, sanitized fermenter and add enough clean, chlorine-free water to make 5.5 gallons. Pitch yeast and ferment at 68˚F.

What are some of your favorite holiday beer recipes? 
—–
David Ackley is a writer, brewer, and craft beer marketing consultant. He holds a General Certificate in Brewing from the Institute of Brewing and Distilling and is founder of the Local Beer Blog.

Understanding the Effects of a Malolactic Fermentation in Wine

Wines Going Through Malolactic FermentationMy Cabernet Franc and Carmenere, made from juice, both need to have their acid levels increased. Both wines went through malolactic fermentation. What type of acid is best to use? I have acid blend but it contains malic acid. Would using malic acid defeat the purpose of the malolactic fermentation in this wine?

Name: Dennis D.
State: Ohio
—–
Hello Dennis,

There are three main reasons for wanting a malolactic fermentation in wine (MLF):

  • To Make The Wine Stable: If the wine is induced into an MLF before bottling, you don’t have to worry about an MLF occurring in the wine bottles, spontaneously. Having a malolactic fermentation in the wine, naturally, while it’s in the wine bottle would be the last thing you’d want.
  • To Lower The Acid Of The Wine: If the wine’s acidity is too high and the wine is tasting too sharp or too tart, then a malolactic fermentation can very possibly improve the wine by lowing its acidity level.
  • To Change The Flavor: A malolactic fermentation in wine lowers the malic acid content and raises the lactic acid content. The net result is a lowering of the wine’s overall acid level, but also, because of the exchange of malic to lactic acid, the wine takes on a different flavor character. The wine will tend to be less fruity and more earthy. This may, or may not, be an improvement depending on the wine and your personal taste preference.

If your malolactic fermentation caused the wine to be too low in acid, I am going to assume that you did not put the wine through the MLF to lower its acidity level, but rather, you did it to either make the wine more stable or to change its flavor profile.Shop Malolactic Culture

With that said, if you add malic acid back to the wine you are increasing its potential to become unstable again, especially sense, I assume, you put a malolactic culture in the wine to initiate the MLF. The malolactic culture is a bacteria that consumes malic acid. If you add more malic acid to raise the acidity of the wine, you could be feeding a renewed MLF.

This is why it is very important that the wine be treated with sulfites, such as sodium metabisulfite. This is needed to destroy the bacteria culture, or your MLF will very likely start back up again–fueled by the new malic acid.

If you put the wine through a malolactic fermentation for reasons of flavor, then again, adding malic acid is going to be counterproductive. The harsher malic acid was fermented into half carbon dioxide gas and half lactic acid. The lactic acid is not as harsh as malic. So if you replace your acid deficiency with malic acid you are going to go backwards.

There are some other things that go on with a malolactic fermentation in wine. It’s not just an exchange of acid that’s altering the wine’s character. One major example, is the production of diacetyl. This is a substance that causes the wine to have a buttery flavor and aroma and can give the wine a more creamy texture. These effects are there to stay regardless if you add back malic acid or not. So there could be an argument for using malic acid to raise the acid level if all you where looking for was the diacetyl effect on the wine.Shop Acid Test Kit

After going through all of this, I think it starts to becomes clear that, for the most part, adding malic acid back to a wine that just went through a malolactic fermentation, does not make too much sense. You are better off using a blend of tartaric acid and citric acid, instead. I would suggest 2 parts citric acid and 1 part tartaric acid.

If you would like to read more about using a malolactic fermentation in wine—why they are used, how they affect a wine—you might want to take a look at: Malolactic Fermentation: Is It Right For You And Your Wines?

Happy Winemaking,
Ed Kraus
—–
Ed Kraus is a 3rd generation home brewer/winemaker and has been an owner of E. C. Kraus since 1999. He has been helping individuals make better wine and beer for over 25 years.

How To Tell Your Significant Other You Want To Be A Brewer

wanting-to-brew-beerCan’t figure out how to share your homebrewing passion with your significant other? Guest beer blogger Heather Erickson shares some tips:
—–
As a single, 30-something year old girl, the mention of my future goal of wanting to someday be a beer brewer sends all potential soul mates into a frenzy. They are intrigued. They are enthralled. In fact, I think a lot of the time, this fact about me is what keeps them coming back for more. While I might not have an issue with breaking the news to a skeptical significant other, you might. Below are my tips on how to gently break it to your love that you want to brew beer:

  1. Include them in your passion.
    My dating adventures over the past half decade have exposed me to a lot of fun activities, things I would have never tried if my significant other at the time wasn’t passionate about it. I’ve tried fly fishing, mountain climbing, marathon running, and even cooking (yes, I said cooking). My advice? Take them to a brewery, engage them in a beer tasting, allow them to get to know what you love about beer. Invite them on a brewery tour, go shopping at a home brew shop, include them at your next brew day.  Maybe even pick up a homebrew equipment kit to try out together. Once they understand why you love brewing beer, they will be much more open to your future career path.
  1. Find something they like about beer.
    Shop Home Brew Starter KitI understand that I am somewhat of an anomaly: a girl that loves everything about beer maybe more than life itself. While I usually reach towards craft beer, I do admit that there is a time and a place for a pint of yellow fizz. Surprisingly, I have come across many men in my date-able range that haven’t known that much about beer, whether it was about the craft or just trying to figure out what they like to drink. The teacher in me has taken them on and tutored their palettes to explore everything that is beer. Through lots of drinking – er, I mean, “research” – most have found at least one beer that they liked to drink. Even my good friend who can’t stop drinking Cherry Coke has found beer that she enjoys. My advice? Take your +1 on a journey, a palette journey to be exact. Find out what they like and who knows, you might find some new beers you do too. Pick up the book North American Clone Brews to replicate the beer at home that they enjoyed the most.
  1. Be patient.
    Now that your significant other knows about beer and why you like it, be patient. Any further prompting or pushing might just end up with them in the opposite direction. A huge misconception that I have come across is that the fact that I want to be a beer brewer means that I will be drunk all the time. Completely not the case. Drinking? Yes. Out of control drunk? Not at all. My example on this one is how my patience has paid off with my mom.Shop Steam Freak Kits Hearing that your only child, a girl at that, wants to dive into the world of beer brewing might have been a bit hard to take. Over the past three years, I have included Mom in all that is beer. From beer festivals to home brew shops, to even beer dinners, she has slowly become accustomed to my beer world. So much so, that for Mother’s Day, she made sure to pick a place for us to eat that would have a sufficient tap list for me. How’s that for acceptance? My advice? Include your honey in everything. Allow them to be a part of your dreams. They don’t have to love beer as much as you do. Over time, they will grow to accept your passion.

Beer brewing. While some consider it a work of art, others consider it a scientific process. Regardless of how you see it, be sure to include your partner in everything you do. The best cheerleaders to have in your corner are the ones that you love.
—–
Heather Erickson is a homebrewer with five years experience and has competed in the GABF Pro-Am Competition.

How to Clean Wine Bottles

Cleaned and sanitized wine bottles.Preparing wine bottles for bottling wine is sometimes glossed-over or minimized by some home wine makers. That’s not a good thing. That’s a bad thing! Starting out with clean and sanitized wine bottles is paramount to having healthy wine. The alternative can lead to a spoilage and embarrassment. Learn more on how to clean wine bottles.

Cleaning Your Wine Bottle
Even if the wine bottles are new, out-of the-box they should be thoroughly rinsed to wash off any box dust that may have made its way inside.

If the wine bottles have been used then there is the dirt and grime to deal with as well. This can be cleaned off with regular dish soap. Clean the wine bottles as if you were cleaning the dishes. A wine bottle brush comes in very handy during this step. You may also find that it helps to have two wine bottle brushes to entice others to pitch in as well.

If the wine bottles are extremely filthy with dried crud and dirt, you may want to clean them in two steps. The first step would be to clean the pieces of dirt. The second, to clean the surface grime and rinse. Having this second bath of water will help to leave the serious filth behind.

Sanitizing Your Wine Bottles
Many beginning wine makers confuse “cleaning” and “sanitizing” to mean the same thing, but they are very different.

Think of “cleaning wine bottles” as getting rid of what you can see and “sanitizing wine bottles” as getting rid of what you can’t.

When you are sanitizing a wine bottle you are destroying the mold, germs and bacteria that may exist on the glass. You are making the glass as sterile as possible. Sounds serious, but it’s really very simple.shop_wine_bottles

There are several products that can sanitize your wine bottles with little effort on your part. Some that we recommend are: Basic A, One-Step and Star-San. You mix any of them with water to create a sanitizing solution. In addition to the wine bottles, these solutions can be used to sanitize gallon glass jugs, wine carboys, and even plastic fermenters.

All three products are oxygenating-type cleansers. What this means is that the sanitizing of the wine bottles is actually being done while the solution dries or evaporates from the wine bottle’s surface. And, no residues are left on the wine bottles.

What this means for you is that these cleansers are quick and require no rinsing. Just submerge the wine bottles and let them drain and dry. One product that works perfect for drying is a Bottle Tree. Just as the name sounds, it is a single column with pegs. Each peg holds a wine bottle. Not only is it handy it’s also a great space-saver.

It should also be noted that the traditional solution of sodium metabisulfite and water can be used for sanitizing wine bottles, but only if the wine bottles are new, or the wine bottles were washed right after being emptied. Cruddy, scavenged wine bottles with “questionable backgrounds” should always be treated with a cleanser similar to the three mentioned earlier, not sodium metabisulfite.
—–
Ed Kraus is a 3rd generation home brewer/winemaker and has been an owner of E. C. Kraus since 1999. He has been helping individuals make better wine and beer for over 25 years.

How And Why To Chill Your Wort Quickly

Wort ChillerAfter boiling your homebrew beer for an hour, you may think that you’re done. Not quite. There are still a couple more steps that can go a long way towards improving the quality of your homebrew. One of these is chilling the wort after the boil, and there are several benefits for doing it quickly. Here’s some information on why you should chill your wort quickly and how to chill your wort quickly.

There are three main reasons why we chill the wort in the first place:

  1. To reach yeast pitching temperature – The ideal pitching temperature for your beer yeast will vary depending on the style of beer you’re brewing and the yeast strain itself, but in most cases it’s in the ballpark of 70°F. Pitching too warm could cause some strange off-flavors or even worse, kill the beer yeast. Just follow the instructions on the yeast package and you’ll be fine.
  1. To coagulate protein – This is an important reason as to why you should chill your wort – to produce a quick, sharp “cold break”. Chilling the wort quickly will help the protein in the wort clump together and settle out. This reduces the amount of protein in the final product and helps to achieve a clearer, better looking brew. The faster the change in the temperature, the better the cold break. The cold break can be aided by adding 1 teaspoon of Irish Moss during the last 10-15 minutes of the boil.
  1. To reduce the risk of contamination – Warm, sugary wort is the perfect place for wild bacteria and yeast to grow. The more quickly we can get the wort from the kettle to the fermenter, the better. But don’t let this make you panic! If you chill the wort quickly and do your best to reduce exposure to the air, your beer will turn out fine.

So, now that we’ve learned reasons why to chill a wort and why it helps to do it quickly, what’s the best way to accomplish this? How do we chill a wort quickly? Homebrewers have a couple of options:

  • The wort chiller – The fastest and most effective way to chill wort quickly is with a wort chiller. An wort chiller is basically a coil of copper with a couple of hoses attached. One hose is the cold water inlet and attaches to a faucet. The other is the hot water outlet. By putting the wort chiller directly into the wort and running cold water through it, the water will pick up the heat from the wort on its way through the coil and out the other hose. This method can bring the wort to pitching temperature in as little as 20Shop Brew Kettles minutes, saving a lot of time and achieving a really good protein break. You’re likely to use a few gallons of water as you do this, so see if you can recover the hot water coming out of the wort chiller and use it for cleaning later on. There are also plate wort chillers. With these, the beer is being ran through a cold plate that is being cooled with running water.
  • The ice batch – Chilling a wort with an ice bath works best for homebrewers boiling three gallons or less (otherwise it takes too long). Simply submerge the kettle in a sink filled with ice, then fill the sink with cold water. A deep sink works best – see if you can get the top of the ice bath to be even with the top of the wort. You may need to change the water a few times to get down to pitching temperature. You can also cock the drain plug so that water is slowly draining, while water is running at the same rate from the faucet.

Now, you know how and why to chill a wort quickly. So the next time you brew, focus on making sure you chill your wort quickly. You’re likely to notice a difference in both appearance and taste.

What method do you use to chill your wort?
—–
David Ackley is a beer writer, brewer, and self-described “craft beer crusader.” He holds a General Certificate in Brewing from the Institute of Brewing and Distilling and is founder of the Local Beer Blog.

Can I Make A Second Wine With Left-Over Pulp?

Grape pulp that could be used for second run wines.I am currently fermenting a 5 to 6-gallon batch of wine from fresh raspberries, and still have the pulp in a straining bag in the plastic fermenter. SG about 1.045. Can I make a second wine from this pulp? Please explain how, and the ingredients/amounts.

Sam K.
—–
Hello Sam,

What you are referring to is a process called making seconds. This is where you take the spent pulp from a fermentation and use it to make a second wine. It is a practice that is mostly related to making wine from grapes, not raspberries or any other kind of fruits. There is a reason for this…

When you make wine using actual wine grapes, you are using around 80 pounds of grapes for every 5 gallons of wine. When making wine from raspberries and most all other fruits, you are using somewhere in the neighborhood of 10 to 20 pounds for every 5 gallons of wine. There is a lot less pulp involved in the later case. This smaller amount is typically not enough pulp to go around for a second batch of wine, whereas with grapes you’ll have quite a bit of pulp. The picture above shows a winery dispensing the grape pulp after fermentation.

Yes, you could use the spent raspberry pulp to make a second wine, smaller batch – say, one or two gallons. Only you can make a decision as to whether or not it is worth your time and effort.

How To Make Second Wines

All you need to do to make a second wine is to:

  1. Take the pulp and add water until you reach the desired batch size – usually the same size as the original batch.
  1. Use a wine hydrometer to determine how much sugar to add to the wine must to achieve the desired alcohol level.Shop Acid Test Kit
  1. Add acid blend to the wine must based on acid test readings taken with an acid testing kit. The directions that come with the acid testing kit will help you to determine how much acidity your wine should have.
  1. Add a dose of yeast energizer to the must. Follow the amount that is recommended on the jar it came in.
  1. Add the wine yeast – preferably a Champagne-type wine yeast. Go through all the fermentation stages just like you did with the first run and you’ll have your second run wine. If you need directions on how to make the wine, you can use the 7 Easy Steps To Making Wine that is listed on our website.

And that’s how to make a second wine. It should be noted that the wine will be harsh directly after the fermentation, but will improve remarkable after a month or two of aging.

Best Wishes,
Ed Kraus
—–
Ed Kraus is a 3rd generation home brewer/winemaker and has been an owner of E. C. Kraus since 1999. He has been helping individuals make better wine and beer for over 25 years.

Take Your Love of Wine to the Next Level

Hey there wine enthusiast! There is no argument that shopping for wines made by the pros is the easier route for a great wine experience, but have you considered taking your love of wine to the next level and making your own? Have you entertained the idea of what delicious recipes you could concoct on your own? With wine making, you’re in total control ; you get to decide what kind of fruit you want to include, if you want to include fresh fruit or pre-made fruit juice, and embrace the science of it all to come up with your perfect recipe.

Winemaking is a fun passion project – it is a wonderful pastime and an excellent way to make friends. If you are interested in the captivating art of wine making, we’d like to share with you a few resources that might help to demystify the experience.

Need a place to start? Why not read up on the subject? Check out some books that will help you master the art of wine making.

The Art of Winemaking: A classic beginners book that uses simple language and terminology to help newbies master “the art of wine”. With over fifty wine recipes, one can make wine from a variety of different fruits. Whether you are a traditionalist looking for new ideas or a beginner who has suddenly acquired a lot of fruit, one is certain to find answers here. This book gives you endless opportunities and guidelines to experiment with wine making awesomeness.

The Winemaker’s Answer Book: This book has every solution to every problem a person might have when they are making wine. A very easy book to follow and a great tool for beginners – this book will help the most perplexed beginner become an expert after reading the book.

Winemakers Recipe Handbook: Want to make different varieties of wine? Well this book is the right fit for you. Winemakers Recipe Handbook has over 100 easy-to-use recipes for you to make.

Now that you’ve read up on wine making, let’s check out some of these essential materials you’ll need.

Wine making kits – You will have all the supplies you need to make wine when using wine making starter kits. There are three different wine making kits on our website: The SunCal wine making kit comes with SunCal concentrates and The Art of Making Wine book; the Your Fruit! wine making kit doesn’t include fruit, but does include two winemaking books; and the California Connoisseur wine making kit includes California Connoisseur wine making juice.

Wine barrels – An efficient way to store your finished wine for aging. All of Adventures in Homebrewing’s wine barrels are Hungarian oak that includes a medium toast, its own oak stand, and a fitted hardwood oak bung. The advantages of having an oak barrel is that for red wines, the barrel aging offers controlled oxidation to house several classes of complex chemicals that can add to the texture and flavor of white and red wines.

Wine bottles and corks – There are different colors and sizes of wine bottles to choose from and a lot of cork options as well. There are wooden corks, synthetic corks, superior grade corks, extra first grade, and first grade corks; so many to choose from right?

Wine filtering systemsWine filtering systems are optional depending on what kind of wine you decide to make, the source of the juice, and if your wine will be aged. You can enhance your wines appearance, shorten its aging time, and lighten its body and color. Filtering your wine also makes you wine more stable. There are two major take home filtering systems which is “Gravity Feed” and “Pressurized” filters. Gravity Feed filtration systems are performed with gravity as the only pressure. Pressurized filtering system filters the wine by forcing it through wine filter pads under pressure.

We hope that we’ve piqued your interest in the art and enjoyment of winemaking. If you’re looking for more information, check out the rest of our blog: https://blog.homebrewing.org.

Recipe of the Week: Amber Rye Ale

Glass Of Amber Rye Ale On Table
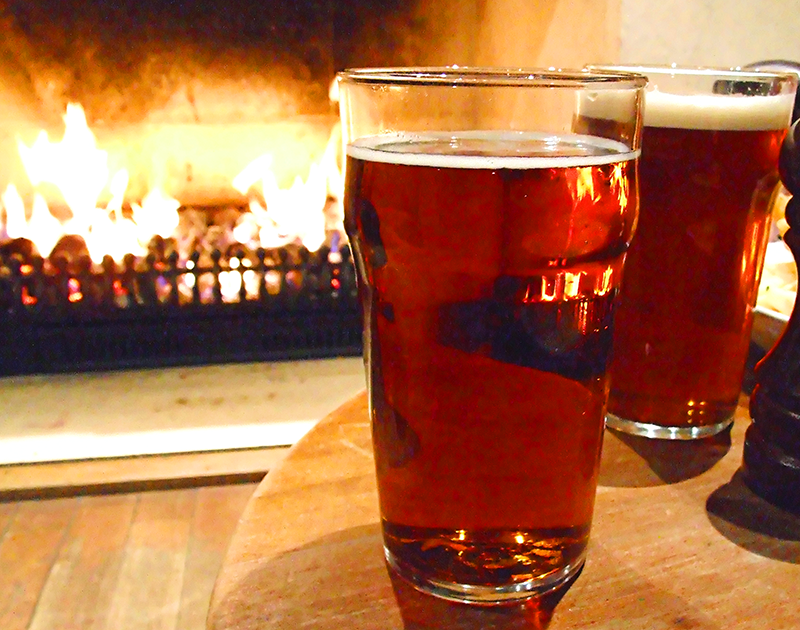
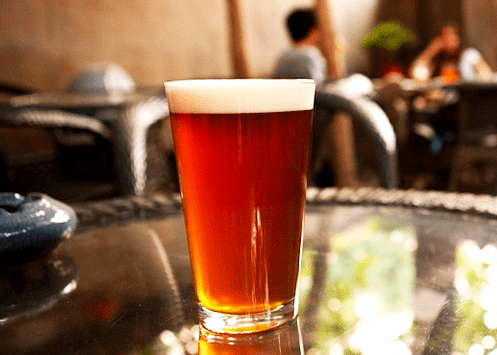
Sometimes a beer recipe can be better than the sum of its parts. This week’s amber rye ale beer recipe is a mash-up of two excellent beer styles that are great for fall brewing: amber ale and rye ale. The amber ale brings a malty flavor, medium to medium-full body, and a rich amber color, while the rye brings a distinctive spicy grain note. The hop flavor on this beer is noticeable with a spicy hop character, but the bitterness is balanced at just over 30 IBUs. It’s an American-style ale of moderate gravity that should make a balanced beer to enjoy throughout the fall season.

The beer recipe below uses a pound of rye malt combined with Munich malt, caramel, and chocolate malt for layers of malty flavor. Chinook hops provide the classic American citrus and pine hop profile that plays so nicely with the rye. A classic American ale yeast is used, Wyeast 1056: American Ale, sometimes referred to as the Chico strain. If you’d prefer to use dry yeast, try Safale US-05 or Mangrove Jack’s. There should be little to no yeast esters in this style, so do your best to keep fermentation temperatures in the recommended range for your selected yeast strain.

This amber rye ale beer recipe is a partial mash. It’s very similar to brewing extract with specialty grains, but you’re actually extracting some fermentable sugars from the “mini-mash.” Review partial mash brewing instructions for more information on how to brew this recipe.

Happy brewing!
Rye’s Guy Amber Ale beer Recipe (partial mash)
(5-gallon batch)

Specs
OG: 1.054
FG: 1.015
Shop Barley GrainsABV: 5%
IBUs: 32
SRM: 14

Ingredients 
3.3 lbs. Light Liquid Malt Extract
3.3 lbs. Amber Liquid Malt Extract
1 lb. Munich malt
1 lb. Rye malt
4 oz. Caramel 60L malt
3 oz. Chocolate malt
1 oz. Chinook hops at :45 (13 AAUs)
1 oz. Chinook hops at :5 (13 AAUs)
1 pack Wyeast 1056: American Ale yeast

Directions 
The night before brewing, pitch the Wyeast 1056 into a 2L yeast starter. On brew day, mix the crushed malts with 3 quarts of water at 160˚F in a large stockpot. Hold temperature at 152˚F for 60 minutes. Raise temperature to 170˚F and strain through a colander into your brew kettle. Rinse grains with 3 qts. water at 170˚F. Add malt extract and enough water to make 3 gallons of wort and bring to boil. After 15 minutes, add one ounce of Chinook hops. Boil for 40 minutes, then add another ounce of Chinook hops. Boil for five minutes and remove kettle from heat. Chill wort with an ice bath or immersion wort chiller. Pour wort into a sanitized fermenter and top off with enough cool, clean, chlorine-free water to make 5 gallons. When wort is 70˚F, pitch yeast starter into the wort. Ferment at 68˚F for 5-7 days, then transfer to a secondary fermenter for 10-14 days. Bottle or keg for 2.4 vols CO2.

Do you have a favorite amber rye ale beer recipe? Share in the comments below!
—–
David Ackley is a beer writer, brewer, and self-described “craft beer crusader.” He holds a General Certificate in Brewing from the Institute of Brewing and Distilling and is founder of the Local Beer Blog.

How To Fix A Stuck Fermentation

A Fixed Stuck FermentationDo you have any information on how to fix a stuck fermentation or should I dump this batch of wine out?

Name: A. J.
State: WI
—–
Hello A J,

Having a stalled or stuck fermentation is a problem that can happen from time to time, particularly when making wine from fresh fruits. But having a stuck fermentation does not mean that the wine is ruined or has gone bad. It just means that the environment in which the wine yeast currently is in is not suitable for a continued fermentation.

If you have a fermentation that has stalled, the first thing you need to do is take a hydrometer reading to confirm that the fermentation is, in fact, stuck and not simply done already. While the typical fermentation will carry on for one, sometimes two, weeks, we have seen fermentations finish as quickly as 3 days. By taking a hydrometer reading you can confirm whether or not there are still sugars in the wine that need to be fermented.

If the hydrometer indicates that all the sugars are gone, then the fermentation is done, regardless of how many days it has been fermenting. You do not have a stuck fermentation. There is no reason to add more sugar or more wine yeast. This solution to the problem is to simply move on to the next step of the wine making process as listed in any wine recipe you are following.Shop Hydrometers

If you do find that you have a stuck fermentation, your job as a winemaker is to figure out why – to figure out what caused the stuck fermentation. There are many reasons why this problem can occur: the wine must’s temperature is too cool, or there’s too much alcohol already in the wine for the yeast to continue, etc.

Because there are several potential reasons for a fermentation to become stuck, we have put together The Top 10 Reasons For A Fermentation Failure. It goes over the 10 most common reasons for having a stuck fermentation – from the most likely to the least likely. There are other reasons besides these 10, but in our experience, these 10 causes cover well over 95% of the stuck or non-start fermentations we run across.

Once you know the cause of a stuck fermentation then you will know how to fix the stuck fermentation. Most of the 10 reasons have very simple solutions that involve simple techniques to remedy. The trick is to determine what caused the problem before trying to fix it.Buy Yeast Energizer

As a final note, realize that a stuck fermentation is not the end of your wine. It is only a delay in the wine making process, a challenge to be overcome. Once the problem is fixed, the fermentation will start up again and your wine will turn out just as nothing ever happened.

Happy Winemaking,
Ed Kraus
—–
Ed Kraus is a 3rd generation home brewer/winemaker and has been an owner of E. C. Kraus since 1999. He has been helping individuals make better wine and beer for over 25 years.

Fall Homebrew Recipe: Pumpkin Porter (Extract)

Pumpkin Porter RecipeWith fall already here, it’s time to get to work on some seasonal brews! And no other beer screams fall like a good pumpkin porter! Below you will find a pumpkin port recipe that’s simple and delicious!

Pumpkin beers are popular this time of year, but brewing one involves figuring out the answers to several questions:

  • What kind of pumpkin, fresh or canned?
  • How to prepare the pumpkin?
  • Should I mash the pumpkin?
  • What kind of spices to use?

As the brewer, it’s up to you to figure out the method that works for you, and it may just come down to how much time you have available. Fresh pumpkin can be used, but it takes time to peel the pumpkin, remove the seeds, chop it up, and bake. Some homebrewers recommend roasting the pumpkin for an hour at about 350˚F for flavor development. In terms of when to add the pumpkin, I suggest mashing it with the rest of the grains. Just be sure to use plenty of rice hulls to avoid a stuck mash.

As for spices, you’re certainly welcome to come up with your own spice blend, but a premixed pumpkin pie spice blend will already have a good balance between the different flavors. Whatever you do, use a light hand on the spices. Cinnamon is usually pretty safe, but it’s easy to go overboard with spices like cardamom, nutmeg, and clove. Start with just a pinch in a five-gallon batch, added at the very end of the boil. If using a pre-mixed spice blend, use half an ounce at the most.

For the pumpkin porter recipe below, I’ve gone with some of the easier methods. Canned pumpkin instead of fresh saves a lot of time and energy, and a premixed pumpkin pie spice blend takes some of the guesswork out of getting the balance right.

Pumpkin Porter Recipe (Extract)

Specs 
OG: 1.061
FG: 1.013
ABV: 6.3%
IBUs: 21
SRM: 22

Ingredients
2 lbs. canned organic pumpkin
0.25 lb rice hulls
6.6 lbs. Munich malt extract
1 lb. Caramel 40L malt
Shop Steam Freak Kits0.5 lb. Victory malt
0.5 lb. Chocolate malt
1 oz. Willamette hops at :60
1 oz. Willamette hops at :30
1 tsp. Irish moss at :10
0.25 oz. pumpkin pie spice (ginger, cinnamon, cloves, nutmeg) at :0
Wyeast 1056: American ale yeast

Directions
Put the canned pumpkin on a baking sheet lined with aluminum foil and bake at 350˚F for 60 minutes, then mash with the specialty grains and about 1.5 gallons water at 152˚F for one hour. Use a strainer to strain wort into the brew kettle, rinsing the grains and pumpkin with about 1/2 gallon of water at 170˚F. Add the liquid malt extract and enough water to make 3.5 gallons. Bring wort to a boil, then add hops, Irish moss, and spices according to schedule above. Whirlpool, chill, and transfer to a clean, sanitized fermenter. Top off with enough clean, chlorine-free water to make 5.5 gallons. Pitch yeast at 70˚F.

Ferment at 68-70˚F for one week, then transfer to secondary for two. Prime with corn sugar, then bottle.

Do you have a favorite pumpkin porter recipe? What’s your secret?