When to Plan Your Hop Garden

Hops growing in a field

When to Plant Hops

One of the basic ingredients in beer is also very easy to grow. Hops will thrive in most moderate climates. Learning how to plant and care for Hops is easy and rewarding with your own homebrew hops garden.

The hop plant is a hardy perennial plant. It will grow vines annually from the rootstock. These vines will grow up to 25 feet each season and die back after the harvest. The rhizome is part of the rootstock but posses the buds for propagation. Under good conditions, each hop vine will produce 1/2 to 2 pounds of dried flowers.

You may be asking, “can I plant hops where I live?”

The answer is yes…. probably. Hops are hardy in U.S. Department of Agriculture plant hardiness zones 3 through 8. Most of the US in in one of these zones. Here is a USDA Map of the United States that shows exactly where the hardiness zones are. The temperatures are the average minimum temperatures for each area:
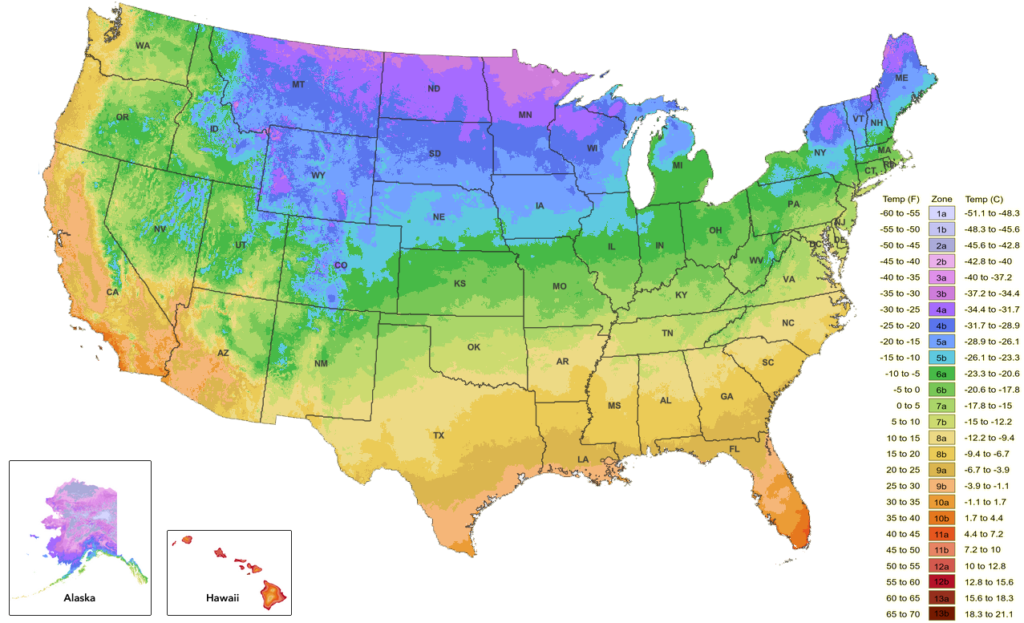
Even parts of Alaska and Hawaii are suitable for growing your favorite hops.

What Time of the Year to Plant Hops

Planting months can very from coast to coast. California can probably plant earlier that Maine, but early May for most of the country would be as late as you would want to plant.

Hop Rhizomes are typically cut in March or early April. As with all crops, this depends on the weather. If the farmer’s field is too wet, they have to wait for the water to drain. The problem can get worse if the field is still covered in snow. The farmer needs to wait for the snow to melt and then the fields to drain. It is also possible that not all varieties are going to be harvested at the same time. If some of the fields have better weather than others, they will cut rhizomes at different times.

Adventures in Homebrewing ships their Hop Rhizomes as soon as they arrive from our farmers, which is typically early April. As long as your planting area is out of frost danger, we recommend planting in the ground as soon as you receive them. If your mounds are ready and mulched properly, rhizomes can survive days as cold as 20°.

If you have to store the rhizomes for a bit after you receive them, store them in the refrigerator until you are ready to plant.

Although most varieties will thrive if you are in a temperate region, there are a few variables you should consider when deciding on a variety of hops. If you are planting your hops simply for their aesthetic value, then you are really free to choose any variety you please. If you are in an area that sees a shorter growing period, you may want to plant a vine that will develop more quickly, allowing you to enjoy your plants for the longest possible period. Growing your own hops is rewarding and exciting. Adventures in Homebrewing can help you get started on this great part of the hobby with your own homebrew hops garden. Shop Hop Rhizomes.

Cheers!

Why Allowing Your Homemade Wines To Breathe Is Important…

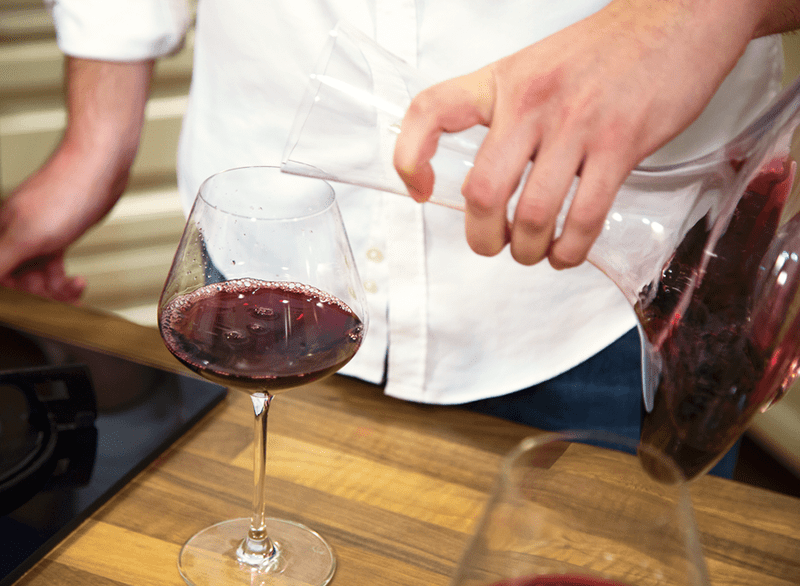
Man Allowing Wine To BreatheI made my first wine and it came out great. I made a Cabernet Sauvignon from one of your homemade wine kits. I started it in January and aged it with oak chips for 6 month. Then bottled. It still tastes a little young. Something I do not understand is that it taste better after I let it sit out for a few hours. Why does it improve when left out?
Jason
—–
Hello Jason,

Thanks for the great question! I believe you have stumbled upon something that is, in large part, ignored by most home wine makers. What we are talking about is allowing the wine to breathe.

It is important to understand what is meant when we say breath in this context. We are not talking about taking breaths as a living thing would, but rather, we are talking about decanting the wine and allowing it to react to the air. The wine is being freed from the suffocating confines of a wine bottle and cork.

To let the wine breathe the bottle is normally poured into a carafe. The wine is simply allowed time to sit. But unlike the hours you mentioned, the wine only needs to be given maybe 10 or 15 minutes when using a carafe. If you are just popping the cork from the wine bottle the effect will take longer and not be quite as dramatic. Using a carafe significantly cuts down how long you need to let the wine breathe.

When allowing a wine to breathe some chemistry takes place. First, fumes release from the wine. Any off, volatile gases that may have built up while in the wine bottle are given the time to release and dissipate. Also, the natural bouquet or aroma of the wine is also allowed time to develop and blossom.

The second process is the wine starts a subtle, oxidative exchange with the air. This reduces the harshness of the wine’s tannin structure. It rounds-off the rough edges of the wine’s flavor. This gives the wine a more mellow character.

Both of these processes can dramatically alter the character of the wine. The operative word here is “can”. Sometimes allowing a wine to breathe can cause just as much damage as it can help. In some cases, it may make no difference at all.

For example, older wines that have fully aged tend not to do to well when allowed to breathe. Their tannin structure is more fragile and more susceptible to collapsing. This will cause the wine to take on a flat or flabby character.

The better wine candidate is a younger, red wine. One with a lot of body and tannin, but has not yet had enough time to take fully advantage of aging. This brings us back to the Cabernet Sauvignon you made: a lot of tannic structure with layers of flavors waiting to be developed.

To sum up, allowing your wines to breathe is something I suggest you experiment with, but you don’t need to let your wine sit out all night. It’s not necessary. A half hour is the maximum amount of time I would recommend. And, don’t automatically allow all wines time to breath, only do so with fuller-bodied, red wines that can still use some aging.

Happy Winemaking,
Ed Kraus
—–
Ed Kraus is a 3rd generation home brewer/winemaker and has been an owner of E. C. Kraus since 1999. He has been helping individuals make better wine and beer for over 25 years.

7 MORE Random Wine Making Facts

Sharing Wine Making FactsA few days ago we posted the blog, “7 Random Wine Making Facts…”. It had such a great response I decided to put some more wine making facts into a post.

These are trivial little pieces of information that randomly shoot off into different areas of wine and winemaking. Some of them you may already know, but do you know them all?

  1. A single packet of wine yeast multiplies itself many times over during a fermentation. That little 5 gram packet of wine yeast you put into your fermentation will typically regenerate itself by 100 to 200 times. Most of the growth happens during the first 3 to 5 days of fermentation. This is what it takes to have a vigorous fermentation.
  1. All grape juice starts out clear. If you go out into the vineyard and lightly squeeze a wine grape of any color: red, blue, purple, black, green, yellow… you will get the same color grape juice, clear. Squeeze the same grape harder and roll it between your fingers, and you will notice that the juice coming from the grape is no longer clear. The color starts to release from the skin and join in with the grape juice. The color of the grape juice comes from the grape skin, not the grape juice itself.
  1. All wine contains vinegar. This wine making fact throws many for a loop, but no matter whose wine it is, who made it, or where you got or bought it, the wine has vinegar in it. This is because vinegar, also known as acetobacter, is a natural byproduct of a wine fermentation. The wine yeast actually produces low levels of vinegar while fermenting. Most wines have a level of vinegar on the order of .02% to .06%. Small indeed, but enough to contribute to the wine’s overall character in subtle ways.
  1. Here’s a handy piece of math that may interest you. Take your wine hydrometer and get the starting Specific Gravity (S.G) minus the ending Specific Gravity (before and after fermentation), and times it by 131. This equals the alcohol in the wine. As an example, let’s say your wine hydrometer reading at the beginning of fermentation is 1.100, and your ending hydrometer reading is 0.996. You take 1.100 minus 0.996. That equals 0.104. Times 0.104 by 131. That gives you an alcohol reading of 13.62%. Could be handy!
  1. One grape vine produces about a gallon of wine. This is a very general wine making fact, but gives you a good ballpark, rule-of-thumb to go by when thinking about planting some grape vines. Some variables that affect this amount are: the type of grapes planted, the climate, the soil, and how well you maintain the trellising and punning.
  1. Grape vines do not produce a full crop until their 4th year. This wine making fact relates to #5, above. When starting a vineyard, you need to plan ahead. The first two years will have no substantial harvest. During the third you will have enough grapes to do a test run of your wine making. It won’t be until your forth season that you will have a full-fledged, complete and usable harvest.
  1. You can freeze your wine making fruit. One problem with making garden fruit wine is getting enough of the fruit all at one time to make a complete batch. No worries. Just freeze the fruit until you do have enough. Freezing the fruit will help to break down its fiber. This makes it easier to extract the flavor into the wine.

There you have it, 7 ‘more’ random wine making facts. Can you think of any? We’d love to hear them and share them with other home winemakers. Just comment below and we’ll pass it along.
—–
Ed Kraus is a 3rd generation home brewer/winemaker and has been an owner of E. C. Kraus since 1999. He has been helping individuals make better wine and beer for over 25 years.

How To Add Yeast To A Wine Must

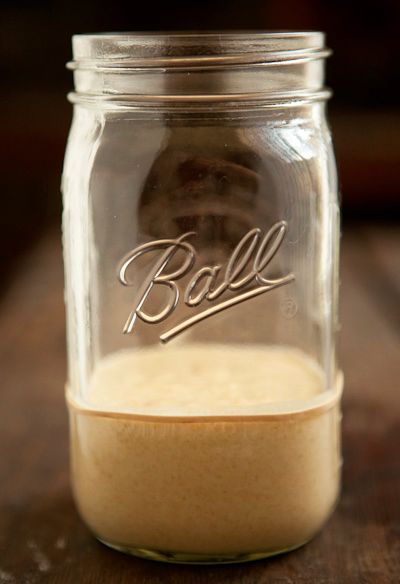
Wine yeast is an essentialYeast Starter For Adding To Wine Must ingredient of any wine recipe. It is the critical ingredient that does all the work. Wine yeast consumes the sugars in the wine must and converts them into alcohol and CO2 gas. Without the yeast you would have no wine.

There are three different ways to add yeast to wine must. Each method has its own advantages and disadvantages. Here’s a brief overview of each of them:

Add The Yeast Directly To The Wine Must:
This is the most common method. Simply open the packet of wine yeast and sprinkle it directly on top of the wine must. There is no reason to the stir the yeast into the liquid. It will dissolve into the wine must just fine on its own. Sprinkle the yeast and let it be. The obvious advantage to this method is that it takes no effort. The disadvantage is that you do lose some of the yeast’s ability to ferment effectively at the very beginning of fermentation. The result is a delay in the startup of fermentation – usually a matter of 3 or 4 hours.

Re-hydrate The Yeast. Then Add To The Wine Must:
The wine yeast that you get in little packets has been dehydrated. All the moisture has been taken from the cells to make them inactive while in storage. Re-hydrate means to add water back to the yeast. When this process is done before adding the yeast to the wine must, you get a fermentation that takes off more quickly.

It’s no coincidence that this is the method you will find directed on the side of most packets of wine yeast. The producers of these yeast packets would prefer you use this method. The problem is that if you do not follow the directions “exactly” you can easily kill the wine yeast.

Typical wine yeast re-hydration directions will read something like:

“Put the yeast in two ounces of water that is between 104°F. and 109°F. for a period of 15 minutes.” Buy Red Star Wine Yeast

This method works well if you follow it without wavering in time or temperature. But if you don’t use a thermometer to verify the water’s temperature, or if you leave the wine yeast in the water for longer than directed, you can easily kill most or all of the wine yeast.

Make A Yeast Starter. Then Add To The Wine Must:
This method is often confused with re-hydration, but it’s not the same thing. Re-hydration is getting the wine yeast back to its original state by adding water with it.  But a yeast starter is actually letting the yeast ferment on a small amount of must before adding it to a batch of wine. A yeast starter usually take one or two days to get going before it is add to the entire batch.

Making a yeast starter is fairly straight-foreword. If the wine must is already prepared you can use it as the starter. One pint of wine must in a quart Mason jar and a packet of wine yeast works perfectly for a five gallon batch of wine. If your batch is larger, multiply the starter’s size proportionately.  Add a 1/4 teaspoon of yeast nutrient along with the yeast packet and cover it with a plastic wrap secured with a rubber band. Prick a pinhole in the plastic wrap to allow the gasses to escape.

Regardless of the starter size or how it was made, you want the wine yeast to maximize its level of activity before adding it to the wine must. You will see the yeast starter begin to foam up. I usually tell people to pitch the starter into the wine must once you see this foaming start to slow down. In other words, once the foaming has peaked. This is usually 12 to 18 hours after starting.

When you make the yeast starter you can sprinkle the packet of yeast direction into it, but the purist will re-hydrate the wine yeast in water, first, before doing so.

The advantage with the method of adding yeast to a wine must is that you will get the quickest and most thorough fermentation. Your yeast will also be under little stress, so the chance of the yeast producing any off-flavors is very minimal. The disadvantage is that it is more work, and you do need to plan ahead since the starter needs a day or two to get going.

How you decide to add yeast to your wine must is entirely up to you. Any of these methods will work. Just consider the advantages and disadvantages of each one, and go with what works best for you.
—–

4 Reasons For Having A Cloudy Wine…

Drop of WineI have made this wine several times — has always turned out very well. However, this time (same recipe), the wine’s not clearing. I have changed the carboy 3 times since early November, still not clearing. (Did the flashlight test). The temperature in the room stays perfect for it — just don’t understand it… It smells wonderful! Any advice, would be greatly appreciated!

Name: Laura
State: MN
—–
Hello Laura,

Sorry you’re having such a stubborn time with a cloudy wine, but don’t give up on it just yet. Having a cloudy wine is usually not a catastrophic event, but more like to be just an annoyance with a solution.

But before we can solve the problem we have to identify the problem. The cloudiness is only a symptom. We need to know why the wine is still cloudy? Until we have the answer to that we don’t know what action to take.

  1. Your wine may still be fermenting.
    The first thing to look at is the specific gravity of the wine. This will tell us how much sugar is still left in the wine, if any. This is easily checked with a wine hydrometer. If the specific gravity indicates that there is still sugar in the wine, then the probable reason you have a cloudy wine is because your wine is still fermenting very slowly, but enough to keep things stirred up.It is important to note that the slightest amount of fermentation can cause a lot of cloudiness in a wine, so do not rule this reason out just because you have not seen any bubbles come out of the air-lock. If the hydrometer indicates that the fermentation has not completed, then this is most likely the reason you have a cloudy wine. The only way to solve this problem is to get the fermentation to complete… to make sure the wine yeast are happy and provided with the environment needed to finish the job. One article that you might want to take a look at is, “The Top 10 Reasons For Fermentation Failure“. You can go over these reasons and see if any of them ring true to your situation.
    Shop Hydrometers
  1. Your wine may have a pectin haze.
    This could be particularly true if your wine recipe does not call for a pectic enzyme to break down the pectin cells in the fruit. While the fermentation activity itself will quite often break down the pectin, there are many times it will not. This is why it is usually advisable to add pectic enzyme to any fruit wine recipe — whether it calls for it or not. There is no downside to doing so.One way to test for a pectin haze is to take a 4 ounce sample of the wine in question and add ¼ teaspoon of pectic enzyme to it. Allow the mixture to sit for a few hours or until  the wine has become clear. If the wine does not clear then you do not have a pectin haze. If the wine does clear, then pectin haze is why you have a cloudy wine.The only thing you can do to the wine at this point would be to add a double-dose of pectic enzyme to the entire batch of wine (use the dosage listed on the container it came in). Then give it several weeks time, if not months, to clear. Patience is crucial in the particular instance.
  1. Tannin falling out of the wine.
    Tannin is the bitter zest found mostly in the skin of a fruit. Any wine can only hold so much tannin before it will start to release it as a precipitate. One way to test for this is to heat a pint sample of the wine in a sauce pan and see if it clears. If it does then tannin is the issue. You can find more information on our website on the subject. You might want to look over the article: “Maintaining Temperature Stability In Your Wines“.
  1. Your wine has a bacterial infection.
    If you added sulfites such as Campden tablets or sodium metabisulfite before and after the fermentation, this is not likely to be your problem. But if you didn’t, then there is a likelihood that a bacterial infection of sorts is the reason why you have a cloudy wine.Shop Campden TabletsYou mentioned that the wine smelled great, so I doubt that this is your problem. Wines with this type of fault will smell bad before they taste bad. A simple way to test for this is to smell the wine. If you notice a fingernail polish type smell or an odor of sauerkraut, then this is likely to be what’s going on.A bacterial infection has taken over the wine.Of all the the reasons for having a cloudy wine, this is the worst one. An uncontrolled bacterial infection means the wine is un-salvageable and that you should cut your losses and dispose of the wine. Hopefully, this is not the case.

Another blog post that may help you with your cloudy wine is “Clearing A Cloudy Wine…“. This is about another fellow winemaker with similar problems to what your are describing.

Hope this information helped you out. Best wishes and happy wine making,
Ed Kraus
—–
Ed Kraus is a 3rd generation home brewer/winemaker and has been an owner of E. C. Kraus since 1999. He has been helping individuals make better wine and beer for over 25 years.

My Wine Hydrometer Is Reading No Alcohol Content

Zero Percent With HydrometerMy hydrometer says my wine has no, what can I do? …and what did I do wrong? It’s a cab, I let it ferment and it’s clear but when I checked the alcohol level it said 0%, what can I do?

Thanks Mike A.
—–
Hello Mike,

We get your question a lot: My wine is done fermenting, but the hydrometer is reading no alcohol content. What happened?

Well, I’ve got some great news. It is extremely likely that there is not a problem with the wine. It fermented just fine, and it does have plenty of alcohol in it.

It is much more likely that you are interpreting the hydrometer readings incorrectly. It happens all the time and stems from the fact that the wine hydrometer is a backwards instrument when it comes to reading alcohol content. All that’s needed is a little clarification, and I think you’ll see what I mean.

To determine the alcohol content of any wine you must take more than just one reading with the hydrometer. You must take two readings and compare them – one before the fermentation begins and another one after. For example, a typical beginning reading on the wine hydrometer’s alcohol scale would be 13%. The typical ending reading might be 0%. If this were the case, the wine would have 13% alcohol.

Shop HydrometersIt is the beginning reading minus the ending reading. Or, another way to look at it: it is the distance that the fermentation travels along the alcohol scale, not its current reading.

Another point is that the scale is actually not call an alcohol scale. It is called a Potential Alcohol scale. At any given time this scale can tell you how much alcohol can be made with the sugars that are still currently available in the wine must. What it cannot tell you is how much alcohol is in the wine with just that one reading.

In your case, the potential alcohol scale is reading close 0% alcohol content because there is no sugar left to make more alcohol. The sugar has already been consumed by the wine yeast and fermented into alcohol.

If you would liked to read more about why your wine hydrometer is reading no alcohol content, the link will take you to some more detailed information about this: Hydrometer Scales And What They Mean.

Happy Wine Making,
Ed Kraus
—–
Ed Kraus is a 3rd generation home brewer/winemaker and has been an owner of E. C. Kraus since 1999. He has been helping individuals make better wine and beer for over 25 years.

If Your Wine’s Not Foaming During Fermentation, Then Read This!

Foaming Fermentation FermentationI started a batch of wine. When I added my yeast it did not get foamy but you could hear it working and see it bubbling. I’m wondering what could cause this or if you think there might be a problem with it.

Thanks
Rick, Holly Springs, MS
—–
Hello Rick,

The fact that there is no foaming during the fermentation could be an indication that you have an issue. It never hurts to look over the Top 10 Reasons For Fermentation Failure and see if any of the reasons apply to your situation. These 10 reasons cover well over 95% of this issues we come across.

But it is much, much more likely that you do not have anything to worry about. The amount of foam does vary from one fermentation to the next, regardless of the amount of activity that is actually going on through the air-lock. In all likelihood you are simply being fooled by the foam – or lack of it.

There are several factors that can cause this variation in foaming during the fermentation. I’ll quickly go over the two big ones:

  • The Fruit You Are Using: Proteins and other gelatinous materials that are in the fruit are the main components that cause a fermentation to foam. You have strawberries and peaches at the high end of the protein spectrum and apples and cranberries at the low end. This mean you can expect the foaming to vary based on the fruit you are fermenting.

To really know how things are going with your wine’s fermentation you really should not depend on the amount of foam you see. As you can start to see, it really doesn’t mean that much. You need to rely on a wine hydrometer. By taking hydrometer readings during the wine’s fermentation, you can track how fast or how slow your wine is fermenting.

If you take a couple of hydrometer readings a couple of days apart and there is no change, then you know your wine is not fermenting. If the hydrometer readings are different, then you know you have progress and you don’t need to be concerned.

Just because there is no foaming during the fermentation doesn’t mean you have a problem. It is the wine hydrometer that has the final say as to what’s going on, so take your hydrometer readings, and don’t be fooled-by-the-foam.

Happy Wine Making,
Ed Kraus
—–
Ed Kraus is a 3rd generation home brewer/winemaker and has been an owner of E. C. Kraus since 1999. He has been helping individuals make better wine and beer for over 25 years.

8 More Random Wine Making Tips And Tricks

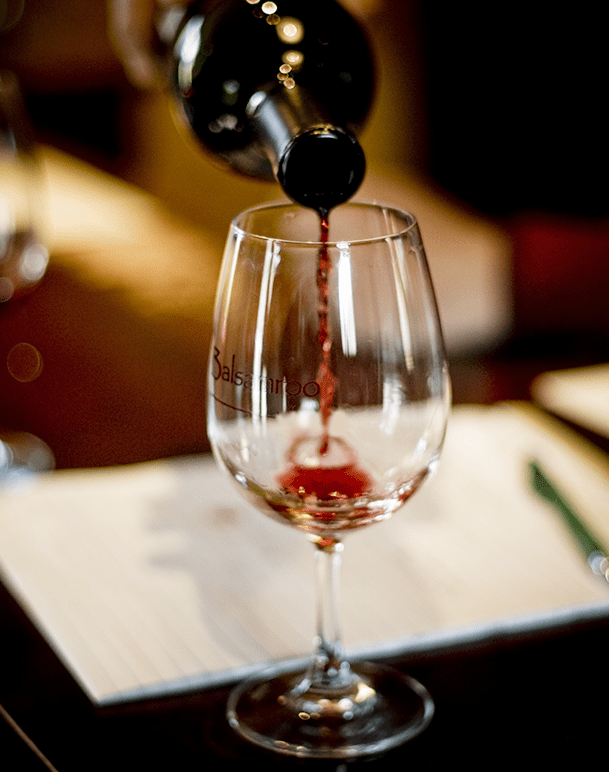
Wine Pouring Into Glass With NotesYesterday, I posted 10 wine making tips and tricks. It received such a great response that I decided to post some more of them. These are quick, little tips that I have used over the years and have always been useful. I hope you find them useful as well…

  1. Try using glycerine in your air-locks instead of water. Glycerine does not evaporate like water, and it is perfectly safe if it accidentally gets drawn into your wine. In fact, any way already has some glycerine in it, naturally!
  1. Using a fermentation bag is a great way to keep pulp under control during a primary fermentation. Just pour your crush fruit into the bag and suspend it in the wine must during the primary fermentation. When it’s time to rack the wine, simply pull the bag out; allow to drain; and then discard pulp. This wine making tip is primarily for making fruit wine, but it will save you a lot of time.
  1. When Campden tablets are called for in a wine recipe, you can use sodium metabisulfite instead. Potassium metabisulfite has the same active ingredients as Campden tablets, but comes in a much-easier-to-manage, granulated form. You can also use our Campden tablet measurer which is a little spoon that measures out one Campden tablets worth of potassium metabisulfite at a time.
  1. IfBuy Oak Powder you’ve ever made wine from fresh elderberries, then you know that it can leave a sticky, gooey mess in your fermenter – one that is next to impossible to get out. This tacky mess seems to defy even the strongest cleaners available. Well, we have ran across a product that seems to be able to cut through this mess and take it right off. It’s called Goo Gone ™. It’s a citrus based cleaner that has the right mojo to take off the elderberry resin. You can find it in any full line grocery store, in the household cleaning section. I have no affiliation with this product or its manufacturer. I just think it’s great stuff.
  1. Sometimes it’s hard to tell just how clear your wine is when it’s still in bulk. Trying to determine if it is clear enough for bottling can be a difficult task. Heavier, darker wines often need to have a sample drawn off and put into a glass before you can really begin to determine anything. The same goes for any wine that is in a vessel which is not made of a clear material. One simple wine making tip that has worked well for me in the past, is to turn off all the lights in the room, and shine a strong flashlight through the side-wall of the vessel. What you are looking for is to see how clearly the beam of light illuminates through the wine. Some diffusing will occur with darker wines because of its color pigmentation. But, you do not want to see a murky or milky appearance to the light.
  1. The number one reason that a wine fails to clear up after fermentation is that it is still fermenting. A very slight fermentation can keep a lot of sediment stirred up. If your wine is not clearing, the first thing I recommend you do is check the wine with a hydrometer to see if residual sugar is the problem.
  1. Use our air-lock during the more active period of a secondary fermentation to keep up with the higher volumes of CO2 gas that is being released. As the fermentation slows down, switch to an S-shaped airlock like our triple ripple airlock, to help detect slighter amounts of fermentation. The triple ripple airlock is great for displaying even the slightest amount of activity.
  1. When making elderberry wine, plan on it tasting horrible when it’s first done. But, also plan on it tasting incredible once it has had time to age. Elderberry wine is very high in tannic acid which makes it taste very harsh in the beginning. But, it is this same tannic acid that also allows this wine to take extreme advantage of the aging process. The net result is a wine of stellar quality. All you need is the patience to let it sit for a year or so.Shop Airlocks

Bonus Wine Making Tip: Not sure what size cork, screw cap or plastic stopper you need for your odd-size jugs and bottles? Get a a sample pack of closures. It contains one sample of each of the various sizes and types of bottle closures that we carry. Each is clearly labeled for easy identification when you order.
—–
Ed Kraus is a 3rd generation home brewer/winemaker and has been an owner of E. C. Kraus since 1999. He has been helping individuals make better wine and beer for over 25 years.

7 Random Wine Making Facts

Sharing Wine Making FactsHome wine making holds a lot of mystery for some, particularly if they’ve never made wine. And for those who have, there are still some dark, mysterious corners with some unanswered questions.

With this in mind I’ve put together seven random wine making facts that many home winemakers still don’t know.

Look them over and see how many of them you know and how many of them are shinny, new ‘pearls of wisdom’ for you?

  1. Five 750ml wine bottles equals 1 US gallons. They don’t exactly equal a gallon. More like .99 gallons… just 1.2 ounces shy, but close enough for figuring out how many bottles you’re going to need. If you have 10 gallons of wine, you’re going to need 50 bottles.
  1. One pound of cane sugar will raise the potential alcohol of 5 gallons of wine must by 1%. This is a real handy wine making fact. If you are getting ready to ferment 5 gallons of wine must, and it has a potential alcohol of 9%, just add 3 pounds of cane sugar to get it to 12%. Again, this is not exact but very, very close.
  1. 2 cups of cane sugar equals 1 pound. If you don’t have a scale you can weigh your cane sugar by the cup. This is a little trick that came from cooking class, but is certainly helpful when making wine. It also ties in well with wine making fact #2.
  1. All wines contain sulfites, whether you add it or not. This is because sulfites are a minor byproduct of the fermentation. A normal wine fermentation will produce sulfites on the order of 10 to 15 PPM (parts-per-million). When we add sulfites as a home winemaker or as a winery, we are shooting for about 45 to 75 PPM
  1. Home wine making was illegal until 1979. When prohibition was repealed in 1933 all was still not right in the world. It was still illegal to make your own wine or beer at home. It wasn’t until 45 years later, in 1978, when California Senator, Alan Cranston introduced a bill that was passed and later signed by President Jimmy Carter in 1979, that it was federally legal for U.S. citizens to make there own wine at home.Shop Wine Making Books
  1. About half the sugar in a wine must is turned to CO2 gas, the other half to alcohol by weight. That is to say that if you add a pound of sugar to a wine must and it ferments completely, you will have added 1/2 pound of alcohol to the resulting wine. The other half floats away as CO2 gas. This division can vary a little depending on the wine yeast and fermenting conditions, etc. but almost always between 47% and 53%.
  1. Use Honey In Place Of Sugar: This is a great wine making fact if you’re into a little experimentation, you can try using different honeys in place of any sugar called for in a wine recipe. Once the sweetness of the honey is fermented away, you are left with its herbal qualities. For every pound of sugar called for in a wine recipe, you will want to use 1-1/4 pound of honey in its place.

Did you know some of these wine making facts. If you didn’t, well now you do. Do you have a random wine making fact you’d like to share with us. Just leave it as a comment below, and we’ll see how many everyone can come up with.
—–
Ed Kraus is a 3rd generation home brewer/winemaker and has been an owner of E. C. Kraus since 1999. He has been helping individuals make better wine and beer for over 25 years.

My Air-Lock Is Going Backwards

Air-lock that is bubbling backwards.Can you give me any information on how barometric pressure would affect the fluid level in an air lock. Some days they show negative pressure and a day or two later they are making bubbles again. I can’t tell if fermentation is done or not.

Thank you
Jerry
—–
Hello Jerry,

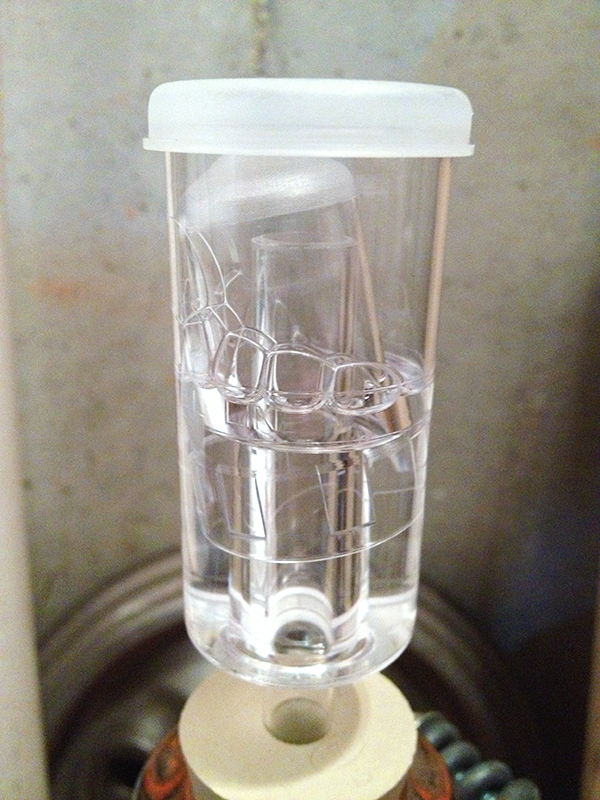
An air-lock is what seals the outside world from your wine during and after fermentation. It is a barrier that allows gases from the fermentation to escape while keeping little bugs and other intruders out.

You attach an air-lock to a fermenter with a rubber stopper. The stopper has been drilled with a hole into which the air-lock is inserted. These rubber stoppers can be purchased in many sizes, therefor you are able to use the air-lock on anything from a gallon glass carboy to a huge plastic fermenter.

The air-lock is filled half way with water. This is what actually creates the environmental barrier. As the fermentation creates gases inside the fermenter, the pressure rises and the gases escape by bubbling through the water in the air-lock.

Bubbles or air going backwards in an air-lock can be caused by a couple of things:

As you mentioned already, barometric pressure can play some role in this. If the barometric pressure increases you could notice a slight backwards movement or pressure on the water, but this would be nothing significant. It would not be enough to create more, than say, one bubble going backwards.

What is most likely causing the air-lock to bubble backwards is a temperature change of the wine. As a wine cools down it contracts or shrinks – much more so than the glass or plastic of the fermentation vessel.

Shop Wine AirlocksContracting wine sitting in glass jugs or even a plastic fermenter would cause a vacuum to occur in the head-space. This would cause reverse bubbling action within the air-lock, or a sucking in of air. Then as the wine warms back up you would see bubbles going through the air-lock in the right directions. This would make the wine appear as if it were slightly fermenting again, regardless if it was or not.

Your best defense against having an air-lock bubble backwards is to keep the fermentation temperature stable. This will give you a more healthy fermentation, as well. Yeast like to ferment at a steady 70° to 75°F.

Happy Wine Making