Brew & Review: Steam Freak Special Bitter – Pt. 4

Homebrew being kegged with priming sugarFinally – one of my favorite parts of homebrewing! It’s time to package the Steam Freak Special Bitter. I will be kegging this homebrew with priming sugar.
After about ten days in the secondary fermenter, it’s time to move the beer to the keg. I enjoy this stage because you can finally start to taste what the finished beer will be like. I decided to keg this batch so I can take it on a camping trip in a couple weeks. Because I like to experiment, I also thought I’d try kegging this homebrew with priming sugar. This is essentially what British brewers do when they make “real ale,” or cask conditioned ale. Instead of forcing CO2 into the beer from a CO2 tank, carbonation is created by the yeast in the beer, which is given a small dose of priming sugar when it goes into a keg. Makes sense for an English special bitter, right?
Even though I primed the keg, the keg filling procedures are very similar to kegging procedures you would do otherwise.

  1. Clean the keg.
    If you did a good job rinsing the last batch, this should be easy. A quick soak in One Step should get the job done. Turn the keg upside down to get the top. For a dirtier keg, or if you haven’t disassembled it in a while, take the keg apart and give all of the dip tubes and posts a good scrub inside and out. Be sure to run the clean solution through your picnic tap, too.
  2. Sanitize the keg. 
    Basically repeat the procedures above with a sanitizing solution. Fill the keg with water and soak for a few minutes in a Star San or Iodophor solution. Turn the keg upside down to get all parts. Run the solution through your picnic tap. Drain and allow to dry. Reserve some of the solution to soak the lid.
  3. Shop Homebrew Kegging SystemsCheck for leaks. 
    Once the keg is sanitized, fill the keg with CO2, just 5-10 psi. Check for leaks by spraying soapy water around each of the fittings. Apply keg lube or replace o-rings as needed to seal leaks.
  4. Vent the keg and refill with CO2 3-4 times.
    This will purge air from the keg and fill it with carbon dioxide, which will help prevent your beer from going stale.
  5. Prepare a priming sugar solution just like you would for bottling, but use about half the sugar.  
    Mix about 2.5 oz. of priming sugar with two cups of water. Boil for about 15-20 minutes. Cool, and then pour into your sanitized keg. If you want to force carbonate the beer, then skip this step.
  6. Siphon the beer into the keg.  
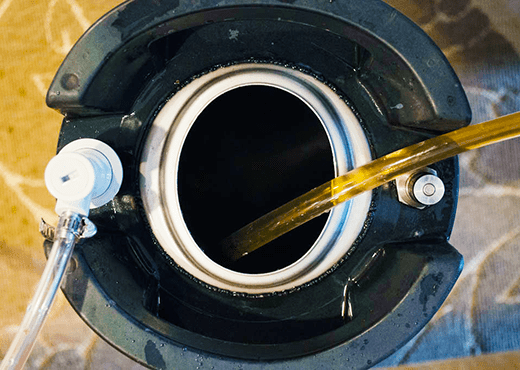
    Siphon the beer from the fermenter into the keg. The priming sugar should mix well as the beer flows in. Close the keg and apply just enough pressure to get a good seal.
  7. Wait.
    Just like with bottling conditioning, when kegging your homebrew with priming sugar your need to set the keg in a room at about 70˚F and give it about two weeks to carbonate.
  8. Chill keg, check carbonation and serve. 
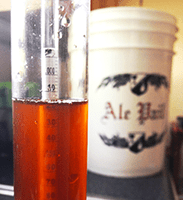
    Chill the keg to serving temperature. For an English bitter, this will be about 50˚F. Give the yeast in the keg a little time to settle. Take a sample of beer. (Your first pour or two will likely have some yeast sediment.) How’s the carbonation? Too much? Vent the keg to release some pressure. Too little? Give the keg a little more time to condition or add a little CO2 pressure from your tank. Without a hand pump, you’ll need CO2 pressure to serve the beer from the keg. Just 5-10 psi should do it!

Kegging your homebrew with priming sugar is a natural way of preparing it. Also realize that you can force carbonate your keg as well. Each has it’s merits.
Curious how the Steam Freak Special Bitter turns out? Stay tuned for a tasting!
Read the other posts of this review! Part 1 | Part 2 | Part 3 | Part 4 | Part 5 |
—————————————————————————————————————–
David Ackley is a beer writer, brewer, and self-described “craft beer crusader.” He holds a General Certificate in Brewing from the Institute of Brewing and Distilling and is founder of the Local Beer Blog.

Recipe of the Week: Sierra Nevada / Ninkasi Brewing Double Latte Clone

Man Holding Two Glasses Of Ninkasi Brewing Double LatteIf you’ve had the chance to pick up one of Sierra Nevada’s Beer Camp Across America 12-packs, then you’re in for a treat when you open up the collaboration beer they made with Ninkasi Brewing Company. Many of the people I’ve talked to and reviews I’ve seen have mentioned their Double Latte, a coffee milk stout, as one of the best beers in the 12-pack. In fact, it’s got a rating of 99% on RateBeer. Being the adventurous homebrewer that I am, I was determined to track down a clone recipe.
Ninkasi’s Double Latte is a unique beer, combining a milk stout with a coffee stout. The Sierra Nevada blog post about the collaboration offers some information about what inspired the beer:

“We wanted a beer with a strong coffee flavor,” said Jamie Floyd, Ninkasi co-founder and founding brewer, “but we also wanted to add some sweetness and body to balance it out.”

Highly kilned crystal and caramel malts add notes of raisin and cocoa, while the use of black malt amps up the roasted flavors and contributes a mild astringency, which helps offset the sugary sweetness.

In Sierra Nevada’s video clip with Ninkasi brewer, Jamie Floyd, he explains that the beer is a “foreign-style stout with milk sugar and coffee.” We also find out that the hop schedule emphasizes the bittering hops and that the beer uses exclusively Nugget hops. The Sierra website offers further information about the malt bill: Two-row pale, caramel, brown, chocolate.
Combine that with the stats on the beer, and we start to get a good idea of how to put the recipe together.
Sierra Nevada / Ninkasi Brewing Double Latte Clone Beer Recipe
Shop Barley GrainsSpecs
OG: 20.4 (Plato) = ~1.084
FG: 6.8 (Plato) = ~1.027
ABV: 7.6%
IBUs: 60
Ingredients
12.5 lbs. two-row pale malt
1.5 lbs. chocolate malt
1 lb. crystal 80L malt
.5 lb. special roast malt
2 oz. black malt
Shop Hops1 lb. lactose sugar (late addition)
1.25 oz. Nugget hops at :60
.25 oz. Nugget hops at :15
Wyeast 1056: American Ale Yeast (also known as the Chico strain)
Half gallon of cold brewed coffee (added during secondary fermentation)
Directions
Step 1: Brew the Beer
Mash the crushed grains at 154˚F for 60 minutes. Sparge to collect about 7 gallons of wort. Boil for 90 minutes, adding hops according to schedule above. Add the lactose sugar during the last 5-10 minutes of the boil. Whirlpool, chill wort, and transfer to a clean, sanitized fermenter. Aerate wort and pitch yeast at about 70˚F. Ferment at 68˚F.
Step 2: Prepare the Coffee 
Fill a half-gallon jug (a growler works perfectly) with about 6-8 oz. of ground coffee, then top with cold, filtered water. Place in the fridge for 24-48 hours. No need to strain – the coffee will settle to the bottom so you can easily pour the coffee off the grounds.
Step 3: Mix the Coffee into the Fermenter
Gently pour the coffee into your secondary fermenter, then siphon your beer on top of it. Allow 10-14 days in the secondary fermenter, then proceed at you would normally. Bottle or keg for ~2.2 vols CO2.
Have you attempted a clone recipe of this fantastic beer? Do you want to make one? What would you suggest?
—————————————————————————————————————-
David Ackley is a beer writer, brewer, and self-described “craft beer crusader.” He holds a General Certificate in Brewing from the Institute of Brewing and Distilling and is founder of the Local Beer Blog.

Brew & Review: Steam Freak Full Steam Special Bitter – Pt. 3: Fermentation

Steam Freak Beer Recipe KitThough most of the heavy lifting has been completed with this beer recipe kit, the key process of making beer has just begun: fermentation. Fermentation is what converts the sugary wort into beer, and yeast is the handy microorganism that does all the work. So we can just sit back, relax, and let the yeast do its thing, right? Not so fast.
Primary Fermentation
The first 24-48 hours is critical to the outcome of a beer. With sufficient aeration, the yeast should reproduce in number and then rip through the fermentable sugars. Our job as brewers is to make sure that the yeast are pitched into ideal conditions and that the fermentation temperatures stay in check.
Though my basement was the ideal environment for fermenting a lager this winter, its now a little on the warm side. Since I don’t yet have a temperature-controlled fermentation space, I monitored the fermentation temperature of the Full Steam Special Bitter beer recipe kit and when I saw that it started to push 75˚F, I set the fermenter in an ice bath. As mentioned before, this first 24-48 hours period is when yeast can go nuts.
If left unchecked, yeast can start giving off some unpleasant off flavors. During this early phase of fermentation, they will give off heat that can raise the fermentation temperature by 5-10˚F. Luckily, the yeast that came with this beer recipe kit, Safale S-04, is a pretty clean strain. Also, some ester production is generally acceptable English ales, but I wanted to make sure things didn’t get out of control. After 48 hours I was able to remove the fermenter from the ice bath and allow it to just hang out in my 70-75 degree basement.
Siphoning Beer Recipe Kit Into Secondary Fermenter
Secondary Fermentation
Enter the age-old debate: secondary fermentation or no? I’m just in the habit of doing a secondary, so for me the answer is usually yes. In my experience, it helps clear the beer, plus you end up with less yeasty “floaters” in the bottle.
After five days of primary, I checked the gravity of the beer by cleaning and sanitizing my auto-siphon and pumping about 3/4 cups of beer into a hydrometer test tube: 1.020. A little higher than I would have liked, and I detected some diacetyl, so I decided to leave the beer in primary for a couple more days to let the yeast keep working.
Taking A Hydrometer Reading of Beer Recipe Kit
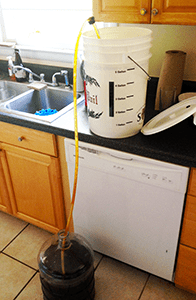
Two days later, I checked the gravity again…a touch lower at 1.018. I decided to go ahead and transfer. If you’ve never racked to secondary before, an auto-siphon is the easiest way to transfer your beer. Just put it in the bucket, attach your tubing, and pump the siphon once or twice to start the flow. Just make sure your primary fermenter is higher than the secondary, and you’ll have no issues moving the beer from one container to the other. Don’t forget to clean and sanitize all of your equipment before transferring!
I will check the gravity of this beer recipe kit again on bottling day and hope it drops a little more, but 1.018 isn’t so high that I’m going to worry about it too much. Besides, the gravity sample tasted great: caramel malty sweetness with just enough hop bitterness and flavor to balance it out. I’m looking forward to it when it’s cold and carbonated!
Read the other posts of this review! Part 1 | Part 2 | Part 3 | Part 4 | Part 5 |
—————————————————————————————————————-
David Ackley is a beer writer, brewer, and self-described “craft beer crusader.” He holds a General Certificate in Brewing from the Institute of Brewing and Distilling and is founder of the Local Beer Blog.

Brew & Review: Steam Freak Full Steam Special Bitter – Pt. 2

Special Bitter Beer Ingredient KitIt’s brew day! I finally get to brew the Special Bitter beer recipe kit that I introduced last week.
Before I start making the beer recipe kit, I need to get my equipment in order. Everything listed below comes in a homebrew equipment starter kit.
Brew Day Equipment for Extract Brewing

  • Five-gallon brew kettle
  • Fermenting bucket with lid and airlock
  • Long spoon for stirring
  • Hydrometer
  • Thermometer
  • Brewing specific cleaner (such as Basic A or One Step)

Additionally, every brewer needs:

When I started making the beer recipe kit, the first thing I did was read through the instructions. It always helps to know what you’re getting yourself into before you get started!
The basic extract brew day goes something like this:

  1. Clean and sanitize everything you’ll be using to make your own beer. Take care to clean everything so that no visible debris remains, then soak in your sanitizer of choice. I find it helpful to reserve some cleaning and sanitizing solution for later in the brew day.

Multitask: When making a beer recipe kit it often helps to think from the end of the process first. I knew that I’d need 2.5 gallons of water to mix into the wort at the end of brew day, so while cleaning my gear I started the day by boiling some water for 20 minutes to sterilize it and drive off any chlorine that may be in it. This will improve the overall flavor of the finished beer. I then chilled the water using my immersion wort chiller and poured it into a sanitized carboy so it would be ready when I needed it at the end of the brew day. You’re welcome to use bottled water for the dilution if you’d like to skip this step.

  1. Heat about 2.5 gallons of water to 155-165˚F. Meanwhile, if using liquid malt extract, soak your canisters of malt extract in a large bowl or pot of hot water. This will make it easier to pour out the extract in step 4.
  2. Tie Off Grain Bag
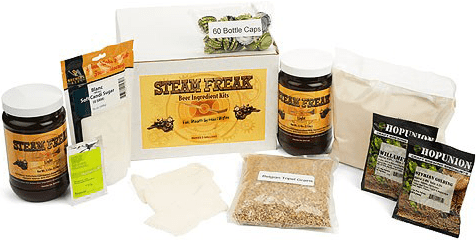
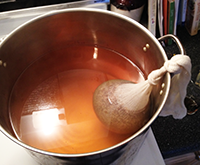
If applicable, steep your crushed grains in the hot water using the grain steeping bag for about 20-30 minutes. Just like making tea. I recommend tying the grain bag to one of the handles on the kettle to keep it from touching the hot bottom. After the steep, remove the grains from the kettle, letting the liquid drain from the bag. I tossed my “spent grains” in the compost heap. The water is now wort.

Enjoying A Brew While BrewingDon’t forget to enjoy a brew while brewing!

  1. Soaking Malt Extract
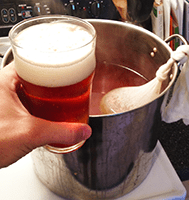
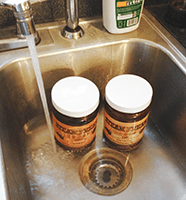
After the steep, remove the kettle from the heating element and mix in the liquid malt extract. Having soaked the canisters of LME in hot water, I was able to pour the contents into the kettle pretty easily. Keeping the burner turned off during this step helps to keep the extract from sticking to the bottom of the kettle.

At this point, I added a teaspoon of gypsum to the wort. Though the directions didn’t call for this, I know for a fact that my water is very soft. English pale ales are often brewed with hard, sulfate-rich water, similar to what is used at Burton-on-Trent in England (home of Bass Pale Ale). The added minerals in the water should help accentuate the hop character of the beer. (Ray Daniels suggests adding as much as 4-5 teaspoons of gypsum to very soft water when brewing an English bitter.)

  1. Heat the wort to a strong boil. Keep a close eye on it to avoid a boil over!

At this point, it’s critical to keep your eyes on the kettle. This is the most likely time for a boil over. Usually the wort will start foaming up as it approaches the boiling point. Avoid the boil over by either tossing a small glass of cold water in the wort (have one at the ready), or by taking the kettle off the heat. Usually, if you can avoid the first boil over, you’ll be safe for the rest of the boil. This is true when boiling any wort, not just when making a beer recipe kit.

  1. Sprinkling Hop Pellets Into Wort
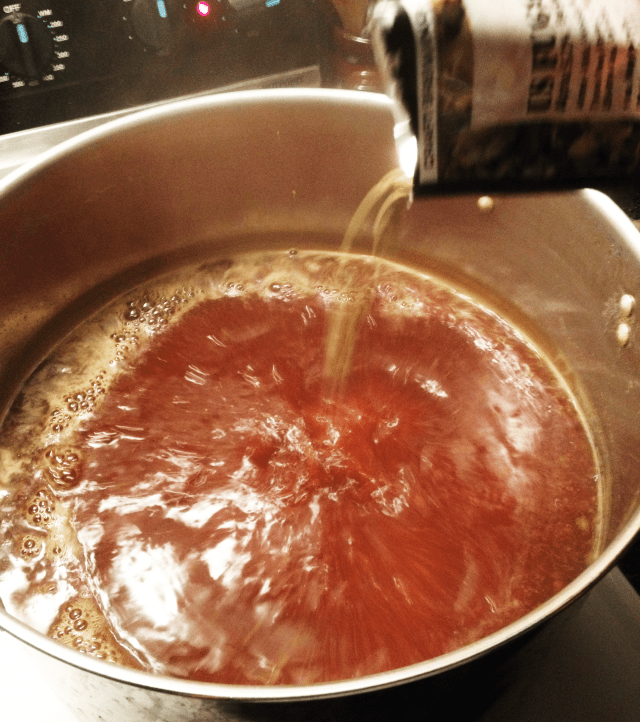
From the start of the boil, add hops depending on your homebrew recipe. For the Full Steam Special Bitter, the recipe called for 1 oz. of Willamette hops. All you have to do is pour in the bag of hops and give them a quick stir. Since this is a 60-minute boil, I call this the 60-minute hop addition. We’ll then count down as the boil progresses. With 30 minutes left in the boil, I added the Fuggles hops.
  2. At the end of the boil, kill the heat, give it a quick stir to create a whirlpool, and chill down the wort as quickly as possible. An immersion wort chiller will usually do the job in about twenty minutes.
  3. Once it’s down to about 70˚F, pour the wort into your fermenting bucket or carboy and mix in the water from earlier. Do your best to leave most of the hops and “trub” at the bottom of the kettle. It’s important from here on out that everything that touches your wort is thoroughly sanitized.
  4. Aerate the wort by stirring with your stirring spoon. This is to provide oxygen for the yeast to feed on and to mix the wort with the water.
  5. Take a hydrometer reading, correcting for temperature if necessary. Carefully suspend your sanitized hydrometer in the bucket, or use a sanitized measuring cup to pull a sample of wort to pour in a hydrometer testing jar. This will help you measure alcohol content after your beer has fermented.

Hydrometers are calibrated for a specific temperature. A reading more than a few degrees outside the calibrated temperature can affect your hydrometer reading, so when making a beer recipe kit note the temperature or the wort and use a calculator like this one to adjust for temperature. The resulting figure is know as the original gravity. The OG for the Full Steam Special Bitter came out right at 1.050, exactly where it was supposed to be!

  1. Pitch yeast. Some brewers like to rehydrate dry yeast. I usually don’t rehydrate Safale S-04 and just follow the instructions on the packet: “sprinkle into wort.” Couldn’t be easier than that!
  2. Seal the fermenter and attach an airlock filled halfway with sanitizer solution.
  3. Put the fermenter in a closet or other dark room at a constant temperature. A temperature of 65-70˚F is ideal for this style of beer.

All in all, making this beer recipe kit went pretty smoothly. The beer smelled amazing as it was brewing. Now all I have to do is wait for a few days while the beer ferments.
Stay tuned for updates from fermentation and bottling!
Read the other posts of this review! Part 1 | Part 2 | Part 3 | Part 4 | Part 5 |
—————————————————————————————————————-
David Ackley is a beer writer, brewer, and self-described “craft beer crusader.” He holds a General Certificate in Brewing from the Institute of Brewing and Distilling and is founder and editor of the Local Beer Blog.

Brew & Review: Steam Freak Full Steam Special Bitter – Pt. 1

Special Bitter Beer Recipe Ingredient KItA special bitter is a style of English pale ale and a great beer for enjoying year round. Over the next few weeks I will “brew and review” one of the Steam Freak beer recipe ingredient kits from the E. C. Kraus web store: the Full Steam Special Bitter.
I’m excited to brew this kit for a number of reasons:
1) At about 5% ABV, it’s a nice, easy-going beer for the summer.
2) It will be a good opportunity for me to practice and share extract brewing procedures.
3) Extract brewing is generally quicker than all-grain, so I’m really looking forward to making excellent beer with a shorter time commitment.
Continue reading

Brewing Beer for Weddings & Bachelor(-ette) Parties

Homebrew Being Taken To Wedding
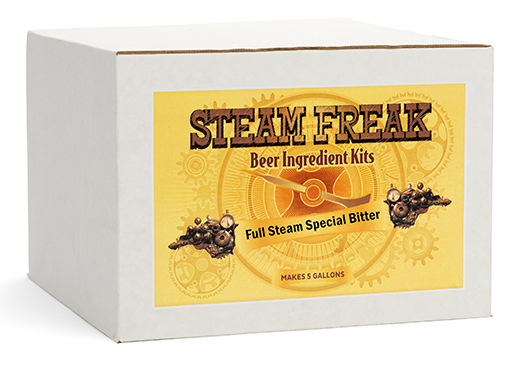
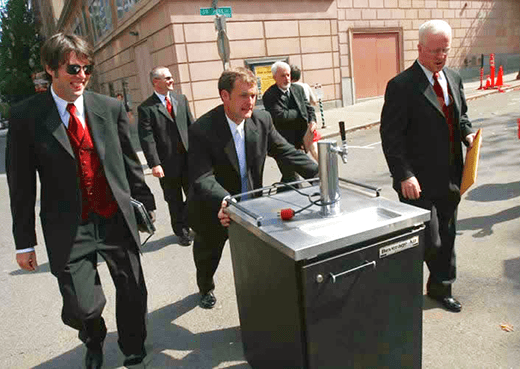
I recently attended a good friend’s wedding in northern Virginia. I’d been planning for weeks to bring some homebrew to serve at his bachelor party. In addition to bringing a keg of honey basil saison, I bottled several bottles of the homebrew to give away as gifts. It was a huge success, and the keg was kicked in a matter of hours.
Are you planning on brewing some beer for a wedding? Learn from my experience so you can make it a celebration to remember.
Tips for Sharing Homebrew at Weddings and Bachelor(-ette) Parties
Brew seasonally – You probably don’t want to serve an imperial stout at your friend’s wedding in August. Consider the weather and climate of the wedding and brew accordingly. Try a saison or Belgian wit in the summer. A pale ale is a good choice year round.
Continue reading

Filling A Growler From A Homebrew Keg

Growler Filled With Homebrew Beer
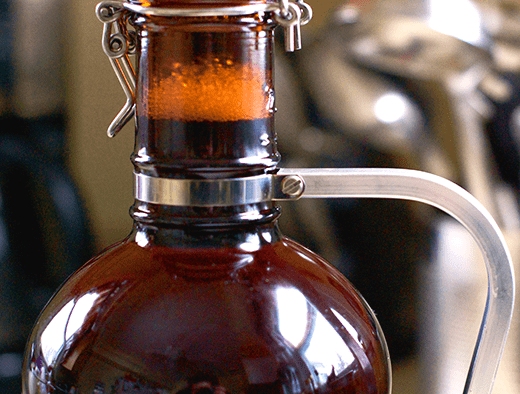
A surefire way to impress your friends is with your own homebrew draft system. But once in a while you may want to take some of your kegged beer on an adventure to a friend’s house, to the beach, or to a homebrew club meeting. Maybe you and a friend want to trade some homebrew. Maybe you want to submit some of your kegged beer to a homebrew competition.
Filling your homebrew keg is a piece of cake, but filling a growler from a homebrew keg can be a challenge. How do you trap all that precious carbonation inside the growler without it foaming out and going flat?
Just follow these six easy steps for filling a growler from your homebrew keg:

  1. Clean your growler. If it’s already clean, this may be as easy as a hot water rinse. A dirtier growler may need to be soaked in One Step. If you plan on storing it for any length of time (more than a day or two), you should sanitize it as well. Do forget to clean the cap, too! Continue reading

English Ordinary Bitter Beer Recipe (Extract)

Ordinary Beer Beer
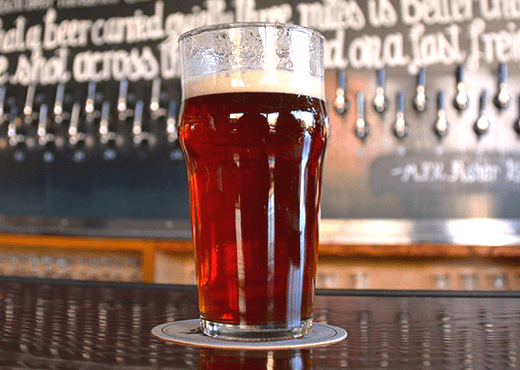
The extract beer recipe blow is for making an English ordinary bitter which is a style of English pale ale. English pale ales are divided into categories based on strength and bitterness, with ordinary bitter being the most sessionable, followed by special bitter and extra special bitter, or ESB. In general, English pale ales tend to be less hoppy and more yeast driven than American pale ales. An English ordinary bitter would be a great beer to have on hand year round.
The BJCP Style Guidelines for Standard/Ordinary Bitter call for the following specs: Continue reading

Tips for Labeling Your Own Beer Bottles

Labeling your beer bottles with personalized labels.Have you ever thought about upgrading your bottled homebrew with a customized beer label? It’s not very difficult!
Whether you want to bring a bottle of homebrew to a homebrew club night or dress up some homebrew beer as gifts, there are several options at your disposal for labeling your own beer bottles.
“Quick Fix” Beer Bottle Labels
If you just need a quick and easy way to label your beer bottles, try one of these “quick and dirty” methods:

  • Post-it® note with rubber band – When I just need to label my beer bottles for a bottle share, I write the name and description of the beer on a Post-it® note and put a rubber band around it. It’s not pretty, but it works! Continue reading

Introducing Steam Freak Buddy Light (A Bud Light Homebrew Clone Recipe)

Bud Light Clone Beer Recipe KitWith summer, comes yardwork, and with yardwork, comes sweat. Everyone needs a cold one after a long, hot day in the yard. What some drinkers affectionately refer to as “lawnmower beer” is criticized by others as lacking in flavor and body. But sometimes, that’s exactly what you need – something light and easy that won’t make you fall off your rider.
The Steam Freak Buddy Light Kit fits the bill perfectly. Light in color with low hop bitterness, it’s a clone beer ingredient kit for making the ever-popular Bud Light American light lager. Apparently Peyton Manning is a fan. You will likely find that this version is even better than the real thing!
This is an extract ingredient kit that does not require a lot of apparatus to brew. In fact, brewing an extract beer recipe is pretty straight forward.
Save as much as 25% by buying this clone beer ingredient kit compared to the individual items! After you brew a batch of this, you may actually look forward to mowing the lawn!
Steam Freak Buddy Light   
(extract with specialty grains, five-gallon batch)
Specifications 
Style: American Light Lager
Target OG: 1.037
Target FG: 1.008
ABV: 4%
IBUs (Bitterness): 10
Ingredients  
3.3 lbs. Light Liquid Malt Extract
1.0 lbs. Light Dried Malt Extract
8 oz. Cara-Pils Dextrine
1 oz. Hallertau
1 Fermentis Safale US-05
Also included in this kit:
Grain Bag
Bottle Caps
Priming Sugar
Beer Ingredient Kit Directions: Preboil and chill about 2 gallons of water. Clean and sanitize all equipment. Place crushed specialty grains in the included grain bag and steep in three gallons of clean water for 30 minutes at 150ºF. Remove grains and discard. Mix in malt extracts while stirring. Bring wort to a boil. Add hops and boil for thirty minutes. Stir wort to create a whirlpool and chill to about 70F. This can be done with an ice bath or a wort chiller. Pour wort into a sanitized fermenter, leaving sediment behind in the brew kettle. Mix in enough preboiled water to make five gallons and stir with a sanitized spoon. Pitch yeast by sprinkling directly into wort. Seal fermenter with a sanitized lid and airlock and ferment at about 60ºF for two weeks. Bottle and condition for two weeks.
*Due to the challenges of fermentation temperature control for lagers, the Steam Freak beer ingredient kit includes a popular dry ale yeast with this beer recipe kit. Do your best to ferment the beer at the low end of the yeast’s temperature range: 59-65ºF is ideal. Safale US-05 will still ferment as high at 75ºF with decent results, but lower temperatures will produce a cleaner beer with less yeast characteristics. If you are able to ferment at lager temperatures, you might consider Wyeast 2007: Pilsen Lager.
—————————————————————————————————————–
David Ackley is a beer writer, brewer, and self-described “craft beer crusader.” He holds a General Certificate in Brewing from the Institute of Brewing and Distilling and is founder and editor of the Local Beer Blog.