Pellet Hops vs Whole Leaf – Which is Better?

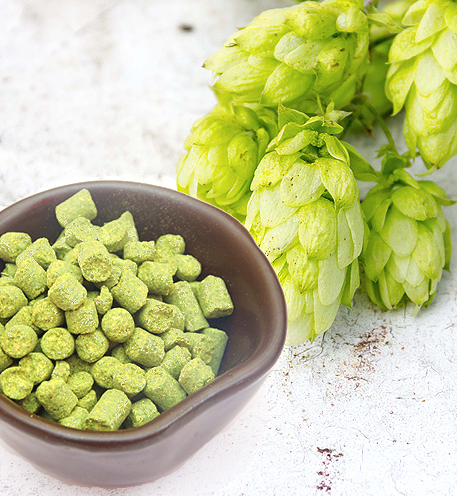
pellet hops and whole leaf hopsAmong the “this or that” debates of homebrewing, the question of whether to use pellet hops or whole leaf hops is primarily a matter of personal preference. But, there are a few things to consider when deciding what kind of hops to use when brewing.

Pellet Hops vs Whole Leaf

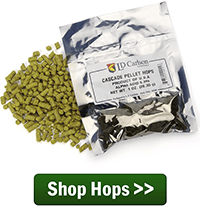
The term “whole leaf” is a bit of a misnomer when it comes to talking about hops. Brewers use the flowering part of the hop plant, often called a cone or a strobile. When hops are harvested, the pinecone-shaped flowers are picked by hand or with a machine. Then the hops are dried in an oast. Next, if the hops are being processed into pellets, the hop cones get milled and pressed into pellets. Finally, the hops are pressed into bales, vacuum packaged, sealed, and stored cold.
One of the main arguments against using pellet hops in your beer is that heat generated during the pelletizing process can degrade the quality of the hops, but most any modern hops farm will take precautions against this. You can be confident that any of the major hop producers you buy from have taken care to prevent any degradation due to pelletizing of the hops.
Without further delay, below are several of the pros and cons of pellet hops vs whole leaf.

Pellet Hops: Pros Shop Hops

  • Less plant material means less wort gets lost in the kettle trub, improving brewhouse efficiency.
  • Pellet hops offer slightly higher hop utilization, meaning more IBU bang for your buck.
  • Pellet hops store well.
  • Pellet hops are readily available.

Pellet Hops: Cons

  • The processing of the pellets may damage some of the aroma compounds in the hops. That said, with modern harvesting and processing techniques, actual damage is likely negligible. Hop pellets are used by brewers all over the world.
  • Since the hop material is shredded, it can sometimes clog spigots and tubing. A bazooka screen can be installed inside the brew kettle to protect against this.

Leaf Hops: Pros Shop Bazooka Screen

  • Whole leaf hops can be used as a filter bed when drawing wort from the brew kettle.
  • Whole leaf hops are the best option if brewing a wet hop beer.
  • Some think whole leaf hops offer better flavor and aroma characteristics. Sierra Nevada uses exclusively whole leaf hops. Randy Mosher, author of Radical Brewing, also prefers whole leaf hops.

Leaf Hops: Cons

  • Whole leaf hops take up more space in storage and in the brewing kettle.
  • Whole leaf hops offer slightly less hop utilization than pellet hops.
  • Whole leaf hops may not always be available or their selection may be more limited.

There you have it. There are some of the pro’s and con’s of pellet hops vs whole leaf hops. As you can see they are somewhat minor, even thought there is a minority who believe whole leaf is the only way to go. In the end, both can be used to make excellent beer.Shop Hop Bags
So what’s your preference – pellet hops or whole leaf?

—————
David Ackley is a beer writer, homebrewer, and self-described “craft beer crusader.” He holds a General Certificate in Brewing from the Institute of Brewing and Distilling and is founder of the Local Beer Blog.

Brewing A Coffee Stout Beer Kit – Part One

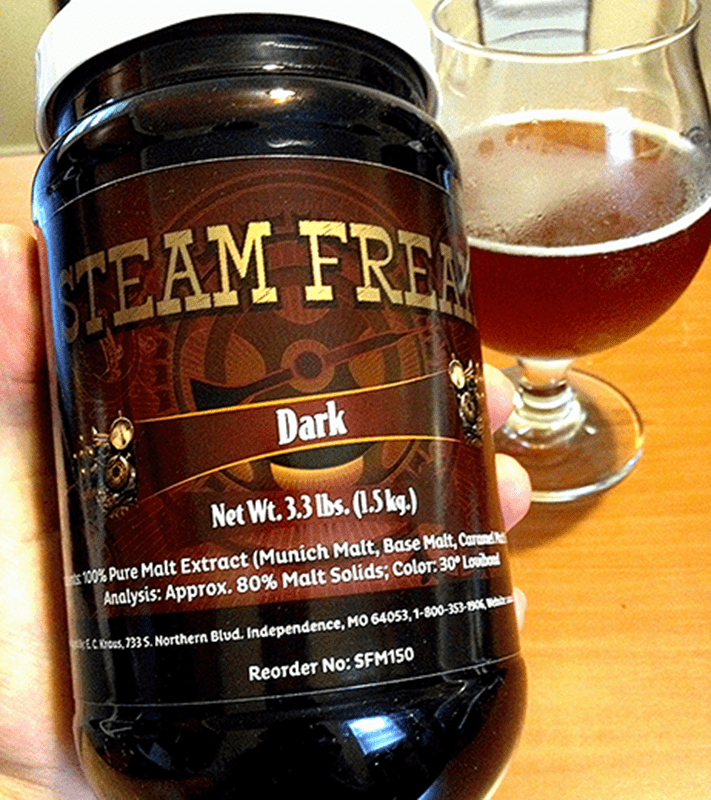
Coffee Stout Beer KitCoffee and beer have become a natural combination in the beer world. There are versions by Sam Adams, New Belgium, and nearly every other craft brewer out there. In the Sierra Nevada Beer Camp Across America 12-pack, a coffee milk stout was one of the most highly rated beers in the variety pack.
In brewing, coffee is most often paired with stout. It’s a style that’s robust enough for winter, and if you enjoy coffee as much as I do, it’s a beer you can drink again and again.
Which leads me to why my next brew is the Steam Freak’s Captain Cogsworth Coffee Stout Beer Kit. Here’s the recipe from the ingredient kit I’ll be brewing:

Steam Freak Captain Cogsworth Coffee Stout Beer Kit
(Extract with specialty grains, five-gallon batch)
Specifications
Style: American Stout with Coffee
Target OG: 1.060
Target FG: 1.016
Target ABV: 5.5%
IBUs (Bitterness): 46
SRM (Color): 36
Ingredients
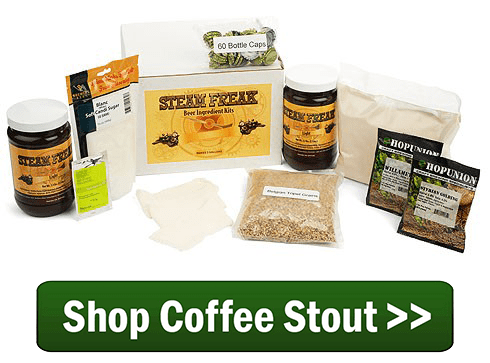
6.6 lbs. Dark Liquid Malt Extract Shop Coffee Stout Beer Kit
1.0 lbs. Dark Dried Malt Extract
4 oz. Caramel 60°L malt
4 oz. Roasted barley
8 oz. Chocolate malt
1 oz. Northern Brewer hops at :60
1 oz. Tettnanger hops at :30
1 packet Fermentis Safale US-05
Also included in this kit:

Planning How To Brew This Beer Ingredient Kit

You might be wondering how exactly the coffee should be added to this coffee stout beer kit recipe. Should it be added to the boil? To the fermenter? There are several ways to do it. Each will give the beer a different coffee character. I’d advise against adding the coffee to the boil, unless throwing it in at the very end. It probably won’t ruin the beer, but adding the coffee during the boil might give the beer too much of a bitter, astringent taste.
The E. C. Kraus kit directions recommends adding the coffee at bottling time. Though making hot coffee will be the quickest and easiest way, cold brewed coffee offers an opportunity for rich coffee flavor while minimizing added bitterness. To do this, I’ll need to prepare the coffee in advance.
To make cold brew coffee, mix the ground coffee with water about 24 hours in advance. You generally mix cold brew coffee with 1/2-1/3 less water than you would making a regular batch. I’ll plan on mixing the 3 oz. of coffee that comes with this coffee stout beer kit with about 18 oz. of pre-boiled, pre-chilled, filtered water.
Shop Fridge MonkeyI’m no barista, but I like to think I have a pretty good nose for coffee. I opened the bag of coffee to give it a whiff – boy am I excited to brew this batch! Stay tuned to see how this coffee stout beer recipe goes!

Part I – Brewing a Coffee Stout
Part II – Brew Day, Partial Mash
Part III – Adding Coffee, Priming
Part IV – Final Tasting Notes
———————————–
David Ackley is a beer writer, brewer, and self-described “craft beer crusader.” He holds a General Certificate in Brewing from the Institute of Brewing and Distilling and is founder and editor of the Local Beer Blog.

5 Yeast Strains For Brewing High Gravity Beers

Yeast for Brewing High Gravity BeerWhen brewing high gravity beers (i.e. high alcohol beers), the beer yeast needs to work a little harder to convert the extra sugar into alcohol. Not all beer yeast strains are cut out for the job. Some get tired, some can’t handle the extra booze. (Sounds like some people I know!)
Here are five beer yeast strains to consider using when brewing high gravity beers.

High Gravity Yeast Strains

  • Wyeast 3787: Liquid Beer Yeast: Trappist High Gravity – Wyeast 3787 is great for brewing high gravity Belgian style beers such as Dubbels, Tripels, and Belgian Strong Ales. This beer yeast strain tolerates alcohol content up to 11-12% ABV or higher and produces the fruity flavors and aromas characteristic of Belgian ales.
  • Red Star Pasteur Champagne Yeast – When going where a normal high gravity beer yeast won’t (say, higher than 12% ABV), a champagne or wine yeast can help reach those higher levels of alcohol content. If going for a super high gravity beer, pitch a standard beer yeast strain for the primary fermentation, then add more fermentable ingredients, such as simple syrup or dissolved candi sugar, along with a pack of champagne yeast during secondary fermentation to achieve that higher alcohol content.

Tips for Brewing High Gravity Beers

  • As important (if not more so) than picking the right beer yeast strain, is pitching enough healthy yeast to completely ferment the wort. A beer yeast starter will help ensure that there are enough yeast cells to get the job done. Use a yeast pitch calculator to figure out how many packets of yeast or the volume of yeast starter you need.Shop Nutrients
  • Also use yeast nutrient and be sure to aerate the wort well prior to pitching the beer yeast.
  • If you’re trying to get above ~10-12% alcohol by volume, consider adding more fermentable ingredients to the secondary fermenter, combined with an additional yeast pitch using a different yeast strain.

Are you brewing high gravity beers? What tips do you have for achieving a higher alcohol content?
———————————–
David Ackley is a beer writer, brewer, and self-described “craft beer crusader.” He holds a General Certificate in Brewing from the Institute of Brewing and Distilling and is founder and editor of the Local Beer Blog.

What Is Beer Yeast?

Beer YeastTo answer the question: what is beer yeast? We must first back up and discuss what yeast is, in general. Yeast is the single-celled micro-organism responsible for turning sugar into alcohol. Yeast can be found almost anywhere, in the air, hanging out on fruit, even in this guy’s beard. Without yeast, there would be no beer! Even though yeast’s role in fermentation wasn’t discovered until the 1800s, brewers have been unknowingly using it to make beer for thousands of years.
There are hundreds of different kinds of yeasts, but when it comes to brewing beer, we’re interested in one in particular: Saccharomyces cerevisiae. Strains of Saccharomyces cerevisiae, commonly referred to as brewer’s yeast or beer yeast, are further divided into two broad categories:

  • Ale yeast – a top fermenting beer yeast, performing best between 55°-70°F, ferments fairly quickly
  • Lager yeast – a bottom fermenting beer yeast, performs best around 45°-50°F, takes longer to ferment

(Top vs. bottom fermenting refers to where in the fermentation vessel the beer yeast is most active.)
Within each of these two categories are many beer yeast strains that produce flavor characteristics that define a particular style of beer. One of the strongest examples of this is in Bavarian wheat beers. The banana and clove character in hefeweizens comes from the yeast!Shop Homebrew Starter Kit

The Role of Beer Yeast in Fermentation
In brewing, there are four stages in the fermentation process:
            Pitching > Respiration (lag phase) > Fermentation > Settling
In the first step, healthy, viable yeast cells are added to the wort. Next, in the respiration phase, yeast consumes dissolved oxygen in order to grow and multiply. The goal is to have a large colony of yeast cells so that they can quickly and effectively ferment your beer. (This is why you aerate your beer prior to pitching yeast.) Next comes the fermentation step. At this point, the yeast cells consume sugar and produce alcohol and carbon dioxide. Finally, when the fermentation is complete, the yeast cells settle out to the bottom of the fermentation vessel.

Liquid vs. Dry Yeast
Homebrewers have a few choices to make when selecting a beer yeast strain for their brew. Beer yeasts are available in both liquid and dry form. Dry beer yeast packets are easy to use, easy to store, relatively inexpensive and contain lots of viable cells. Many homebrewers recommend that dry yeasts be rehydrated prior to pitching; some don’t think this is necessary. Popular dry yeast producers include:

Liquid beer yeast have their own benefits. For one, they don’t need to be rehydrated, saving some time on brew day. The other benefit is that there is a greater variety of liquid yeasts than dry. The main drawback is that liquid beer yeasts tend to cost a little more than dry yeasts, but many homebrewers swear that liquid yeast cultures make better beer.
When picking a beer yeast, consider the following: First, are you brewing an ale or a lager? What style of beer are you brewing, and what strain is best for that style? Finally, would you rather use liquid or dry yeast?
In the future we’ll try to come up with a clearer answer to the question: what is beer yeast? But for now, happy brewing!
What’s your favorite homebrewing yeast strain? Share in the comments!
———————————–
David Ackley is a beer writer, brewer, and self-described “craft beer crusader.” He holds a General Certificate in Brewing from the Institute of Brewing and Distilling and is founder of the Local Beer Blog.

What Causes A Homemade Wine To Taste Too Sour?

Just drank homemade wine that was too sour.May I know what causes a fresh fruit wine to taste too sour? I’ve tasted a homemade fresh fruit wine that is sooo sour, and what is the remedy to remove the taste?
Thanks very much!
Shirley S.
—–
Hello Shirley,
In almost all cases, the reason for a homemade wine tasting too sour is because it has too much fruit acid it it.
All fruits have various acids in them that contribute to a tart/sharp/sour taste. If the fruit is too acidic, or too much of the fruit is used in the wine recipe, you can end up with a wine like you are describing.
This type of wine fault is also enhanced by the fact that during a fermentation almost all of the the sugars are fermented into alcohol. This doesn’t make the wine more acidic, but it does allow the sour flavor to stand out much more.
Acidity can be a problematic area if you are just leaning how to make your own wine. With your future batches I would suggest that check the acidity level both before and after the fermentation.
If the wine is flat tasting this means there is not enough acid. You may need to add more acid to bring the wine back into balance. This is normally done with the addition of acid blend.
If the wine is too acidic, there are a few ways you can go about reducing it, including dilution. A very good article on the subject is Getting A Handle On Wine Acidity. It has some wine making tips for reducing the acidity of a finished homemade wine that is too sour, as well as other information.
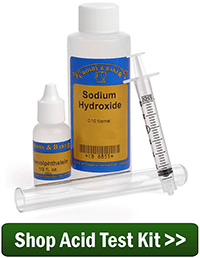
Shop Acid Test KitFollowing trusted wine recipes will normally keep you out of trouble. A further step you can take is to get an acid testing kit. It will come with directions that will tell you what reading to shoot for and what to do to get it there – even before the fermentation starts.
Acidity is one of the fundamental flavor components of any wine. It has to be right before even having a chance of the wine tasting any good. If there’s not enough acid in the wine it will taste flat and lifeless; and if there’s too much you end up with a homemade wine that too sour.
Best Wishes,
Customer Service
———————————–
Ed Kraus is a 3rd generation home brewer/winemaker and has been an owner of E. C. Kraus since 1999. He has been helping individuals make better wine and beer for over 25 years.

12 New Budget-Friendly Homebrew Kits from Black Rock Brewery

Black Rock malt extract beer kitsWe’re excited to share that we’ve added twelve new homebrew beer kits to our lineup of malt extract beer kits! These kits are very easy to brew – ideal for anyone new to homebrewing or for seasoned homebrewers looking to simplify their brew day.
Each kit is fully hopped and comes with straightforward directions to guide you through the homebrewing process. You’ll just need to add water and 2.2 lbs. of corn sugar to complete the recipe. If you’ve never brewed before, we recommend you browse our “New to Brewing” articles to learn what it takes to get started. These are no-boil kits, so the only equipment you really need is a beermaking starter kit.
The twelve new malt extract beer kits from Black Rock Brewery include:

  • Pilsner Blonde – A European-style golden lager. Dry with full hop flavor. 14-18 IBUs, 2-4 SRM.
  • Apple Cider – Not a beer of course, this kit is made using New Zealand’s finest apples. 0 IBUS, 2-4 SRM.
  • Miner’s Stout – An everyday stout. Dark and roasty with flavors of chocolate and coffee, but not too bitter. 25-35 IBUs, 40+ SRM.
  • Bock A German classic, bock is a dark, malt-forward lager with flavors of toast and caramel. 14-18 IBUs, 23-28 SRM.
  • Nut Brown AleAn English-style amber ale with flavors of caramel and toffee and a hint of biscuit. This beer kit is a great choice for beginning homebrewers. 19-23 IBUs, 11-14 SRM.
  • New Zealand Company BitterA New Zealand take on the English bitter. Rich, strong, and well-balanced with a pronounced hop character, but not overhopped. A sessionable pale ale. 26-34 IBUs, 11-14 SRM.
  • Pale AleA light, golden ale with a subtle, floral hop character from the finest New Zealand hops. Easy drinking, yet full of flavor. 14-18 IBUs, 2-4 SRM.
  • Whispering WheatAn easy-drinking and refreshing wheat ale. Crisp and slightly sweet. A great beer for warmer weather. 14-18 IBUs, 2-4 SRM.
  • Mexican LagerA smooth lager in the Mexican style, perfect for your next fiesta. 14-18 IBUs, 2-4 SRM.
  • LagerA crisp, clean, pale golden lager. Moderate hop bitterness and aroma. 18-22 IBUs, 2-4 SRM.
  • Dry LagerA pale lager with a crisp, dry finish. Not quite as bitter at the lager above. 14-18 IBUs, 2-4 SRM.
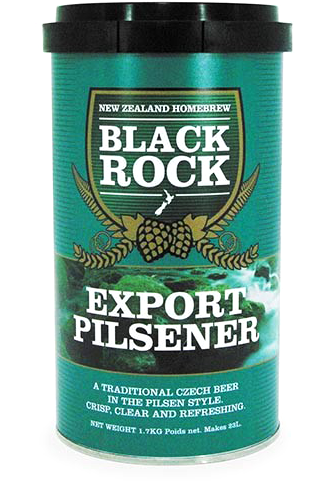
  • Export PilsnerA Czech-style pilsner lager, similar to Pilsner Urquell, with more hop bitterness than the other lagers listed here. 35-40 IBUs, 6-7 SRM.

 If you’re new to homebrewing, any one of the malt extract beer kits would be a good place to start!

What other kinds of beers are you interested in making?

———————————–
David Ackley is a writer, brewer, and craft beer marketing consultant. He holds a General Certificate in Brewing from the Institute of Brewing and Distilling and is founder of the Local Beer Blog.
Choosing the Right Yeast Strain for Your Homebrew – Pt. 2

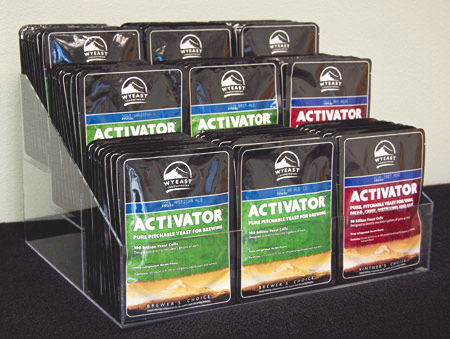
Wyeast DisplayIn part 1 of this series, we discussed several of the choices that come up when choosing the right yeast strain for your homebrew: dry yeast vs. liquid yeast, ales strains vs. lagers strains, flavor, attenuation, and flocculation.
In this blog post, I’ll introduce several of the most popular yeast strains used by homebrewers.

 Homebrewing Yeast Style Guide
This is by no means a comprehensive list of every yeast you could use to brew your own beer, simply a guide for some of the most commonly brewed beer styles. Click here to browse our complete selection of homebrewing yeast strains.

German Ale Yeast Options

  • Wyeast 1007: German Ale Yeast – A very versatile yeast strain, traditionally used for German Altbier, but often used for American ales; ferments clean with low ester production and finishes dry; requires fairly low fermentation temperature for neutral flavor.
  • Wyeast 3056: Bavarian Wheat Blend – Used for brewing German weizen, a wheat beer characterized by yeast-derived banana and clove flavors; this is a relatively neutral strain.
  • Wyeast 3068: Weihenstephan Weizen – An alternative to 3056 (above), this strain of weizen yeast is sourced from the Weihenstephan brewery in Germany, which claims to be the oldest brewery in the world. It is a vigorous fermenter producing characteristic banana/clove flavors, which can be controlled by adjustments in fermentation temperature and wort density (high – more banana, low – more clove). A lower pitch rate will enhance banana character.
  • Wyeast 2565: Kolsch – The preferred yeast for Kolschbier, ferments at cooler temperatures than most top-fermenting ale yeasts, enhancing smooth, lager-like character with a hint of apple. Can also be used to ferment lager styles when temperature control is a challenge.

German Lagers Yeast Options

  • Fermentis Saflager 34/70 – Dry yeast, sourced from the Weihenstephan brewery in Germany, produces a malt-forward beer with plenty of body.

Belgian Ales Yeast Options

  • Wyeast 1388: Belgian Strong Ale – A high-attenuating, alcohol-tolerant, liquid yeast strain recommended for fermenting golden strong ales. Yields a dry beer with a mild tartness.
  • Mangrove Jack’s M27: Belgian Ale – A dry Belgian ale yeast, tolerant of warmer fermentation temperatures and high alcohol. Use it for saisons, tripels, and quadrupels.

American/English/Irish Ales Yeast Options
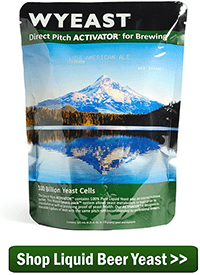
I lump these strains together because there is a lot of crossover between English and American styles. Indeed, many of the “American” yeast strains we know and love simply migrated from Europe. Where applicable, I’ve provided some more specific guidelines for some of the more distinctive beer styles, like Irish Stout.Shop Liquid Beer Yeast

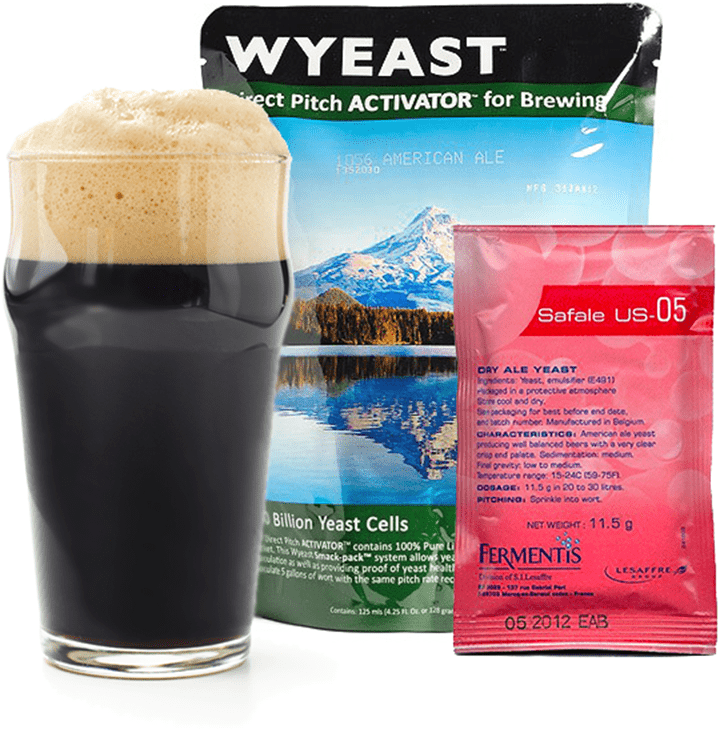
  • Wyeast 1056: American Ale – Extremely popular style for American pale ales and IPAs, originally sourced from Sierra Nevada Brewery; tends to be very neutral, but may produce citrus notes at the low end of the fermentation temperature range.
  • Fermentis Safale US-05 – Same strain as Wyeast 1056, above, but in dry form; sometimes called the “Chico” strain; acceptable for a wide range of American style ales.
  • Wyeast 1084: Irish Ale – the classic strain for Irish stouts, this yeast has a slightly lower attenuation, making it ideal for full-bodied beers.
  • Danstar Nottingham – A versatile, fast-working, high-flocculating, high-attenuating dry ale yeast; many homebrewers’ go-to strain for American and English ales; tolerance at lower temperatures allows it to be used for lagers.
  • Fermentis Safale S-04 – Dry yeast; classic English ale strain with neutral flavor characteristics; works quickly and flocculates well.

 
Cider Yeast Options

  • Mangrove Jack’s M02 – Dry yeast for fermenting apple cider; high attenuation and flocculation. Imparts fruity esters to give cider depth of flavor and enhance fruit character.
  • Wyeast 3766: Cider – Liquid strain of cider yeast for fermenting a crisp, dry cider. Also works well for pear and peach wine.

These are some of the most popular strains of homebrewing yeast – what are some of your favorites?
———————————–
David Ackley is a beer writer, brewer, and self-described “craft beer crusader.” He holds a General Certificate in Brewing from the Institute of Brewing and Distilling and is founder and editor of the Local Beer Blog.
Choosing the Perfect Yeast Strain for Your Homebrew – Pt. 1

Wyeast DisplayYeast: that magical micro-organism that turns sugar into alcohol and carbon dioxide. Simply brew up a batch of sweet wort, pitch the yeast, and in a few weeks you have beer!
But not all yeast is created equal. In fact, there are many different strains used for brewing beer, all with different characteristics that influence the flavor, aroma, body, and mouthfeel of your beer. How do you choose the perfect strain for your beer?
In this two-part post, I’ll first outline some of the considerations for picking a yeast strain, then I’ll share many of strengths and weaknesses of the top yeast varieties available to homebrewers.
We’ll start from a broad level, and then narrow down the options.

Yeast Selection: Dry vs. Liquid Yeast
Choosing between dry and liquid yeast is largely dependent on personal preference. Dry yeast is easy to work with and it stores well. Liquid yeast, while offering a great variety of strains to work with, is less stable and usually requires a yeast starter. For some, the extra work is worth it, but for many, dry yeast gets the job done just as well. For simplicity, I’d suggest that beginning brewers start with dry yeast, and then start experimenting with liquid yeast when they’re ready. From that point, you can make the best choice about whether to use liquid or dry yeast on a batch-by-batch basis.

Yeast Selection: Ales vs. Lagers
As far as rules go, this is where you pretty much have to stick to one or the other. Ales, which ferment warm, require top-fermenting ale yeast; lagers ferment cooler and require bottom-fermenting lager yeast. But even this rule can be bent on occasion. For example, the Brulosopher reports having good results brewing lagers with Kolsch yeast. This may be a good option if you’d like to brew a lager, but don’t have a temperature-controlled fermentation chamber. Otherwise, start by sticking to ale yeast for ales and lager yeast for lagers, at least until you get a few batches under your belt.

Yeast Selection: Picking the Right Strain
The perfect yeast selection for you beer will be largely dependent on the style you are making, but there is certainly some crossover. Some styles have more to do with the malt and the hops than the yeast, so a neutral-flavored yeast strain can work in a variety of situations. For example, German Kolsch yeast may be used to brew an American Blonde Ale. English yeast strains might be used to brew American beers, and vice-versa. Even when you purchase a homebrew ingredient kit, don’t feel like you have to stick with the yeast provided. For example, you may get an American Pale Ale kit, but want to try a Belgian strain – go for it! Hold on to the yeast you got with the kit and use it for your next brew.
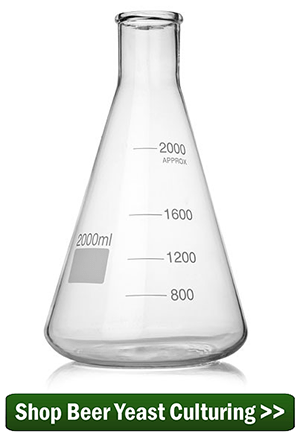
The main consideration will be choosing a yeast strain based on specific qualities that you want in your beer. Among the most important areShop Beer Yeast Culturing :

  • Flavor, which often goes hand-in-hand with fermentation temperature. For example, a German hefeweizen is defined by banana and clove flavors produced by German weizen yeast, and the levels of banana or clove can be regulated by adjusting the fermentation temperature.
  • Attentuation, or the amount of sugars that will be fermented in the beer. A high attenuating strain will leave a beer with a dry finish. Conversely, a yeast with low attenuation will leave some fermentable sugar and more body. This said, be aware that attenuation can also be controlled with ingredient selection, mash temperature, and a number of other factors.
  • Flocculation, or the tendency of the yeast to clump together and settle out at the bottom of the fermenter. This can have an impact on beer clarity.

Above all, the question of what kind of yeast is perfect for your brew will be dependent on how it affects the beer you’re making. So when choosing a yeast, think about the flavor characteristics you’re going for in your beer, including residual sweetness and mouthfeel, and choose the best yeast that fits those parameters.
In part two of this post, I’ll share many of the different yeast strains available to the homebrewer and share some style suggestions for each one.
Do you have some favorite yeast strains? How do you choose the perfect yeast for your homebrews?
———————————–
Read Part 2 >>
———————————–
David Ackley is a beer writer, brewer, and self-described “craft beer crusader.” He holds a General Certificate in Brewing from the Institute of Brewing and Distilling and is founder and editor of the Local Beer Blog.

An Ode to Beer’s Main Ingredient

Yeast Starter In FlaskTim from One Mind Brewing shares some tips and tricks about working with his favorite brewing ingredient: yeast.
My name is Tim, and I’m a brewaholic. I love beer, I love brewing beer, and I love everything about the process. Today I want to ramble about the most important ingredient. What is it you ask? Well, to get there first we must ask a simple question.

What makes beer?
The single most important ingredient when it comes to making beer is yeast. To those who might argue and say that without water there is no beer, my retort is simple: With water and no yeast you still have no beer, so to me, the yeast is the most important ingredient!

Getting the Most From Your Beer Yeast – Pitching Rates
The beer yeast is a huge part of what makes beer. Without adequately pitched yeast, flavor profile and alcohol content are difficult to control at best, and horrific at worst.
You may have noticed the word “adequately” in there. It’s probably the most important word, because without an adequate yeast pitch it’s entirely possible you’ll still end up with beer — even likely. But it’s much harder to get the exact result you want without consistent yeast pitching across all of your homebrew batches.
But what is adequate, exactly? Well, there are a few sources online to help with that. My go-to source for preparing a dry yeast starter is Mr Malty, because there is a dry yeast option. For preparing liquid beer yeast starters though, I prefer yeastcalculator.com. Both options are fairly intuitive, but I’ll share some tips below.

Preparing a Beer Yeast Starter – Parameters
If you’re new to calculating pitch rates, don’t worry about the additional “steps” as mentioned in the calculators. It’s not really necessary if you’re using fresh yeast and making a moderate gravity brew. The important parts here are: the date on the beer yeast to determine viability; the starting specific gravity of your beer (OG, as measured with a Hydrometer or Refractometer); the volume of the starter; and the aeration method of the starter. There is also a starter calculator off to the left to help you with how much DME to use for your starter, though that becomes rote quickly if you do the same size starters regularly.

Do I Have to Have a Stir Plate?
It is important to note that you do not absolutely need a stir plate or any specialized equipment other than a jug or a growler to do a yeast starter in. However, you will get far better results out of a stir plate.

Preparing a Beer Yeast Starter – Aeration
Back to the calculator. The first two options for “Method of Aeration” are pretty self-explanatory. If you’re not going to shake the starter periodically, put none. If you are, then select “intermittent shaking.” Then you’ve got Troester vs. Zainasheff. My understanding is that Zainasheff’s method is to scale up from unstirred starters, while Troester’s method was devised with science. Cell counts from stir plate starters, rather than guesswork based on unstirred. If you’re ready for a headache or have a much better understanding of it than I do, read more about it here. That said, I opt for the Troester method with my stir plate.Shop Stir Plate

Putting Your Yeast Starter to the Test
The real fun part about yeast starters is learning (trial and error means you get to brew MORE!) what pitch rates result in what flavor profiles. While there are some resources online to assist, you really do have to try it to know for sure with your own setup what works best for you. For example, I wanted a Hefeweizen with a more pronounced banana flavor/aroma. After a bit of research, I stumbled upon this lovely thread regarding open fermentation to get more ester production. I blogged about it on my blog and used WLP300 for that one. I’m going to try open fermenting with WLP565 (Belgian Saison) in the near future as well as a few others, though those aren’t set in stone just yet. There are many, many ways to experiment with beer yeast and flavor profiles. Your only limit is your imagination. Well, that and your bank account I suppose.
To really be able to appreciate it, experimentation needs to be done in a controlled way. The best way to control it is to do things in reproducible ways. The most important variable is controlling your yeast pitch rates and the fermentation temperature. If you have a fermentation chamber, great. If not, a simple swamp cooler will suffice. The hard part is really going to be reproducible yeast pitch rates for new brewers.
Without doing yeast cell counts in a lab, the best we can do on a homebrew scale is to keep the way we are preparing our beer yeast starter consistent and use the same equipment every time. Your exact numbers may not match what the calculators say, but as long as you’re consistent within your process, the results will be reproducible on your system. That’s the important part for experimentation, at least as far as I and my taste buds are concerned.
Remember: The difference between science and screwing around is writing it down. So don’t forget to take notes while you brew!
So know you should have enough information for preparing your own beer yeast starter. If you have any questions about yeast starters, feel free to reach out!
—————————————————————–
Tim Daniel is a brew blogger from One Mind Brewing. He’s an avid brewer who loves sharing tips and tricks with others. You can visit him on Facebook, as well.

Making and Using Potions to Flavor Your Homebrew

Man making potionEvery homebrewer gets the urge at some point to add a little something special to their beer. I’m guessing it has to do with the fact that you can easily find a stout at the store, but a mint chocolate stout? Now that’s something special!
One popular way of adding flavors to homebrew is what Randy Mosher calls a potion. This is essentially a mixture of alcohol and whatever flavoring ingredient you want in your beer. Another term for this is an extract. That’s what this post is about, how to make and use these potions or extract to flavor your homebrews.
So what kinds of potions can you make?
Though you can make a potion out of just about anything, here are a few of the most common:

  • vanilla
  • cacao/chocolate
  • orange peel
  • mint
  • cardamom
  • coffee
  • licorice

The main benefit of using a potion or extract is that it’s easy to adjust how much of the flavor you want in the beer. It can be difficult, for example, to figure out how much flavor three vanilla beans might bring to your vanilla porter. With an extract of vanilla bean, all you have to do is take a sample of beer and use a dropper to measure how much of the potion is needed to reach the intensity of flavor you want. Then you scale up to figure out how much to add to your batch.
The main drawback of using a potion is that it takes some foresight. To fully extract the flavor from your ingredient of choice, you will need to let it soak in alcohol for at least a week, ideally three or four. This means that if you plan to add your potion at bottling time, it should be prepared on brew day or even several days before. Just be sure to use a digital scale to measure how much of the ingredient you added to the jar. Save this information in your brewing notes so you can recreate the potion if you want to.

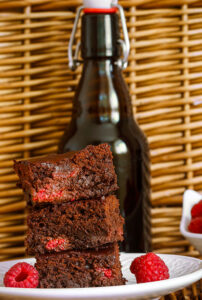
Beer with chocolate cake and raspberriesHow to Add a Potion to Your Homebrew

  1. Choose a flavoring ingredient that will blend well with your beer style.
  2. Buy some cheap vodka or similar alcohol.
  3. Put the ingredient in a mason jar and pour in enough liquor to fully cover the ingredient.
  4. Let sit for about three weeks.
  5. When it’s time to add the potion to your beer (usually bottling day), take a measured sample of beer for a taste test.
  6. Use a measured dropper or pipette (ideally in fractions of a milliliter) to add small amounts of potion to the beer until desired flavor is reached.
  7. Scale up to figure out how much potion to add to your homebrew.

Example:
Let’s say you find that 1 mL of potion is ideal for eight ounces of beer. There are 80, eight-ounce servings in five gallons of beer, so add 80 mL of potion to your homebrew.
Sounds easy enough, right?
Making flavor extracts for your homebrew is just one more way to add a lot of fun to the process. It’s one more avenue for a lot of creativity. What kind of beer would you make with your homemade potion?
—————————————————————–
David Ackley is a beer writer, homebrewer, and self-described “craft beer crusader.” He holds a General Certificate in Brewing from the Institute of Brewing and Distilling and is founder of the Local Beer Blog.