Making and Using Potions to Flavor Your Homebrew

Man making potion
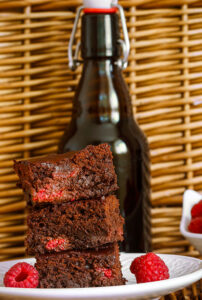
Every homebrewer gets the urge at some point to add a little something special to their beer. I’m guessing it has to do with the fact that you can easily find a stout at the store, but a mint chocolate stout? Now that’s something special!
One popular way of adding flavors to homebrew is what Randy Mosher calls a potion. This is essentially a mixture of alcohol and whatever flavoring ingredient you want in your beer. Another term for this is an extract. That’s what this post is about, how to make and use these potions or extract to flavor your homebrews.
So what kinds of potions can you make?
Though you can make a potion out of just about anything, here are a few of the most common:

  • vanilla
  • cacao/chocolate
  • orange peel
  • mint
  • cardamom
  • coffee
  • licorice

The main benefit of using a potion or extract is that it’s easy to adjust how much of the flavor you want in the beer. It can be difficult, for example, to figure out how much flavor three vanilla beans might bring to your vanilla porter. With an extract of vanilla bean, all you have to do is take a sample of beer and use a dropper to measure how much of the potion is needed to reach the intensity of flavor you want. Then you scale up to figure out how much to add to your batch.
The main drawback of using a potion is that it takes some foresight. To fully extract the flavor from your ingredient of choice, you will need to let it soak in alcohol for at least a week, ideally three or four. This means that if you plan to add your potion at bottling time, it should be prepared on brew day or even several days before. Just be sure to use a digital scale to measure how much of the ingredient you added to the jar. Save this information in your brewing notes so you can recreate the potion if you want to.

Beer with chocolate cake and raspberriesHow to Add a Potion to Your Homebrew

  1. Choose a flavoring ingredient that will blend well with your beer style.
  2. Buy some cheap vodka or similar alcohol.
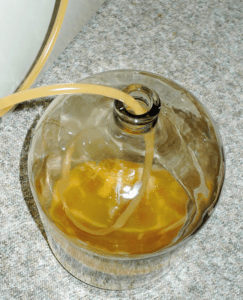
  3. Put the ingredient in a mason jar and pour in enough liquor to fully cover the ingredient.
  4. Let sit for about three weeks.
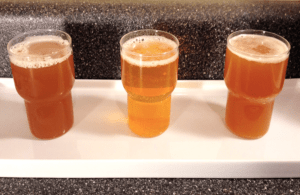
  5. When it’s time to add the potion to your beer (usually bottling day), take a measured sample of beer for a taste test.
  6. Use a measured dropper or pipette (ideally in fractions of a milliliter) to add small amounts of potion to the beer until desired flavor is reached.
  7. Scale up to figure out how much potion to add to your homebrew.

Example:
Let’s say you find that 1 mL of potion is ideal for eight ounces of beer. There are 80, eight-ounce servings in five gallons of beer, so add 80 mL of potion to your homebrew.
Sounds easy enough, right?
Making flavor extracts for your homebrew is just one more way to add a lot of fun to the process. It’s one more avenue for a lot of creativity. What kind of beer would you make with your homemade potion?
—————————————————————–
David Ackley is a beer writer, homebrewer, and self-described “craft beer crusader.” He holds a General Certificate in Brewing from the Institute of Brewing and Distilling and is founder of the Local Beer Blog.

Our 10 Most Popular Homebrewing Posts on Pinterest

Pinterest is a visually oriented social network for people to discover and share interesting content. Over the past several months, we’ve been putting together various collections of pins including beer recipes, homebrew techniques, homebrewing books, and more. I, for one, have found dozens of great beer recipes on Pinterest.
As an indication of what other people have found most helpful and interesting, these are some of our most popular homebrewing posts on Pinterest. The links below take you to the pin on Pinterest. Just click the image for each one to take you to the blog post.

  1. Making Hard Cider at HomeAre you gluten-free? Have a significant other who doesn’t like beer (yet)? Cider is quickly rising in popularity, both commercially and for homebrewers. This blog post is a walk-through for making a basic hard cider.
  1. 10 Tips for a Successful Secondary Fermentation – Secondary fermentation is a period where beer conditions and ages. It’s a good time to add dry hops or spices to give you’re a beer a little something special. Learn just a few of the things you can do to make your secondary fermentation a good one.
  1. A Simple Guide to Making Fruit Beers – Most, if not all, homebrewers like to experiment by adding interesting ingredients to their beer. Want to make a cherry porter or an apricot pale ale? Learn what your options are in terms of adding fruit to homebrew.
  1. The Difference Between Two-Row and Six-Row Barley – Barley malt is a key ingredient in beer, but there are two different types of barley. Do you know the difference between two-row and six-row barley?
  1. 6 Tips for Improving Mash Efficiency – If you’re an all-grain brewer, you mash efficiency determines your original gravity, which affects alcohol content and body. Additionally, a consistent mash efficiency makes it easier to formulate recipes and plan ingredient purchases. Check out these six ways to improve your mash efficiency.
  1. Heat Up Your Homebrewing with Chili Peppers! – Yet another popular beer addition is hot peppers. This chipotle porter recipe is one of my all-time favorites. In this blog post, guest blogger Bryan Roth shares some tips for using hot pepper in your homebrew.
  1. Sierra Nevada Celebration Ale Clone Recipe – One of my all-time favorite commercial beers is Sierra Nevada’s Celebration Ale. It’s a fresh hop IPA that comes out every year around Thanksgiving. The beer is made using Chinook, Centennial, and Cascade hops as soon as they come out of the field.
  1. Braggot Beer Recipe – Braggot is a mead/beer hybrid, traditionally flavored with a variety of herbs and spices. This recipe includes both an all-grain and an extract version of a braggot recipe by Randy Mosher.
  1. 5 Rookie Mistakes Made By Beginning Homebrewers – If you’re a new homebrewer, there’s a wealth of information that can help you avoid some common pitfalls and potentially ruin a batch. Learn from these five rookie mistakes and you’ll be well on your way to making great beer!
  1. How to Fill Your Homebrew Beer Keg – Serious homebrewers like to put their beer on draft, but the new equipment and pressurized gas side of the equation can make people uncomfortable. It’s easier than you think! This post walks you through exactly what you need to do to fill your keg with homebrew.

Are you active on Pinterest? Follow E. C. Kraus on Pinterest for all the latest homebrewing updates.
———————————————————————-
David Ackley is a beer writer, homebrewer, and self-described “craft beer crusader.” He holds a General Certificate in Brewing from the Institute of Brewing and Distilling and is founder of the Local Beer Blog.

Cloning Ithaca Beer Co.'s Flower Power–Pt. 6: A Conditioning Taste Test

kegged, original, and bottled samples of Ithaca Brewing Co. Flower Power IPAOne of the hardest parts of homebrewing is the waiting – especially after the beer has been bottled or kegged. But this is an important time for the beer. You could call it a “self discovery” phase. Brewers call it conditioning.

About Conditioning
Conditioning is an important phase of the brewing process. Commercial breweries typically employ both a warm and a cold conditioning period. This can be compared to homebrewers doing both a secondary fermentation (warm, at normal fermenting temperatures), followed by a cold conditioning phase (“cold crashing” or lagering). These two phases can be applied to both ales and lagers.
So what happens during the conditioning phase?

A few things:

  • The final stages of fermentation, where the last remaining sugars are converted to alcohol and CO2
  • Yeast “cleans up” the beer by reducing certain flavor compounds (see diacetyl), and continues to do so after bottling/kegging (less so if the beer has been filtered)
  • Settling of various compounds (proteins, yeast, etc.) to aid in beer clarity.

While the beer is still conditioning, it is often referred to as “green beer”.

So back to the Flower Power clone and my struggle with patience…
I was curious to see how the beer is progressing, so I did a taste test with the kegged beer, the bottled beer, and the original Flower Power. I was especially antsy because people always says that IPAs be enjoyed fresh (e.g. Stone’s “Enjoy By” IPA). But how fresh is too fresh? At what point does an IPA reach its peak?
The trouble with this line of thinking is that there are just too many variables at play to develop a hard and fast rule. Among the many variations that can affect flavor perception include:

  • hop varieties
  • hop quantities
  • shop beer recipe kitsmalt variety
  • original gravity
  • final gravity
  • water source
  • yeast selection
  • yeast pitch rate
  • fermentation temperature
  • yeast flocculation
  • kegged or bottle conditioned
  • age

Not to mention variations in the brewing process. So with the knowledge that this experiment is inherently flawed, let’s see what we have.

Appearance
The most remarkable difference between the three beers is the clarity. Not surprisingly, the original Flower Power is much clearer than the clones. That’s a commercial beer and it’s probably filtered. Interestingly, the kegged beer is much murkier than the bottled beer, making it appear quite a bit darker than the original Flower Power. This makes sense because when beer is served from the keg, it’s served from the bottom, where all the yeast and whatnot settles. Bottles, on the other hand, are served from the top, away from all the sediment. Given enough time, I suspect that the kegged beer should meet or surpass the bottled beer in clarity, and when that happens, the color should more closely resemble the original Flower Power.

Aroma
The Flower Power exhibits more sweet orange hop aroma, while the clone has more of a grapefruit and pine character. Interestingly, the bottled clone seems to offer slightly more malt aroma.

Flavor
Because the original Flower Power has had significantly more time to age (bottles were purchased four months ago) it’s hard to make comparisons. Still, the weeks and months that go by don’t seem to diminish the hop character in the Flower Power. With the clones, the flavor profile is remarkably similar to the original, but it’s obvious that they need more time to condition. The bitterness is slightly harsh and I detect a slight solvent/alcoholic character. While it’s tempting to overthink the situation and try to identify potential faults, I’m going to do my best to “Relax, don’t worry, have a homebrew,” just like Charlie Papazian likes to say, and give the beer more time to condition.
So, we’ll give the Flower Power clone another week or two and then do another side-by-side. Until then, I’ll be enjoying my Captain Cogsworth Coffee Stout!
—————————————————————–
Review the whole Flower Power clone brewing process below:

—————————————————————–
David Ackley is a beer writer, homebrewer, and self-described “craft beer crusader.” He holds a General Certificate in Brewing from the Institute of Brewing and Distilling and is founder of the Local Beer Blog.

Leigh Erwin: Making a Gewurztraminer

making a gewurztraminer wineHi everyone!
Time for a Day 8 check-in on my Gewurztraminer!
Backing up a little bit, I think everything is moving along OK with my new wine. I could tell the wine yeast were starting to do their thing 24 hours or so after adding them into my wine base/water/bentonite solution, though it never was “roaring” by any means.
I kept an eye on the temperature with a liquid crystal thermometer, and I did notice once it was pushing 80°F, so I unplugged the heating pad for a bit. Since it is a little cool down here in our finished basement where my new “winery” is located, I didn’t want to leave it unplugged forever, so I basically ended up unplugging and plugging in the heating pad periodically throughout the week, in an attempt to keep it between 68-77°F per the instructions.
One thing I thought of later was that I probably shouldn’t have left the lid on the primary fermenter with a fermentation lock like I do when I’m in secondary fermentation. I don’t think leaving the lid on is going to hurt it per se, but perhaps that’s why the yeast were never “going crazy” as I would have expected? Oh well, next time I’ll try to remember to leave the top off (but covered with a towel or something similar).
So, Day 8 is supposed to indicate the start of secondary fermentation, but only if the specific gravity is at the target <1.010 level. I was not sure if the fermentation was there yet, as I could still hear the pitter patter of little yeasty feet, but it’s been a while since I’ve actually made any wine, so I could be wrong.
shop fermentersAfter sterilizing all the appropriate equipment, I checked the temperature of my wine and it was at about 64.5°F. A little cool for primary fermentation of this Gewurztraminer, so perhaps I shouldn’t have been leaving the heating pad unplugged so much. Anyway, this lower temperature made me think that maybe the wine wouldn’t be quite ready to move on to secondary fermentation yet, as when the temperature is lower, fermentation tends to progress more slowly.
Anyway, I measured the specific gravity of the wine with a hydrometer and it read 1.016 on the specific gravity scale. So close to 1.010, but not close enough. Since it’s been a little on the cool side during primary fermentation, I’m confident that plugging in the heating pad and leaving the wine for another day or two should do the trick.
I’ll check again around the same time tomorrow and see if we’re ready to move forward with secondary fermentation.
————————————————————
leigh_erwin_bioMy name is Leigh Erwin, and I am a brand-spankin’ new home winemaker! E. C. Kraus has asked me to share with you my journey from a first-time dabbler to an accomplished home winemaker. From time to time I’ll be checking in with this blog and reporting my experience with you: the good, bad — and the ugly.

Checking on My Mead: Secondary Fermentation

Mead in a glassThree months ago I made my very first mead. I gathered some tips and advice before brewing, and was pleasantly surprised by how easy the process was.
As recommended by Michael Fairbrother, I racked my mead to the secondary fermenter after three months in primary. Here it will sit for a while longer (if I can stand the wait), but how long should the mead stay in secondary? Let’s go ahead and transfer, take a gravity reading, and give the mead a taste.
Procedures for Racking to Secondary

  1. Clean and sanitize the new fermenter (for a one-gallon batch, I’m using a one-gallon glass jug), racking tube, auto-siphon, new bung and airlock
  2. Rack to fermenter – Take care not to aerate the mead. This can cause oxidation, which essentially makes the mead go stale.
  3. Withhold about 3/4 cup for testing (and tasting!)
  4. Take a hydrometer reading and do a taste test!

*If you are serious about making mead or small batch brewing, these tools can make sampling and testing so much easier: Wine thief, Refractometer.
Notes on the Mead

As you can imagine, after three months in the fermenter I was pretty excited to check out my mead. Here’s what I found:

  • Appearance is pretty clear in the bucket. No floaters, very little yeast sediment, just a little yeast stuck around the sides of the bucket. Hydrometer sample has just a little haze, but not much.
  • Upon opening the bucket, I got a waft of apple aroma – in beer this would be a no-no, but I suspect it’s normal in making mead. This didn’t really carry over to the taste.
  • Taste – First I got the honey character, somewhat fruity but without the sweetness, followed by the gentle burn of alcohol, then graham cracker finish. Very nice!
  • Gravity – Spot on the 1.000 mark – perhaps just a touch of residual sugar in there.

So, moving the mead to secondary…when will it be “ready”?
According to the AHA website: “It is up to the meadmaker how long they want to bulk-age before bottling. A few weeks to a few months is a good place to start.”
Another enthusiast siteShop Wine Yeast recommends the following: “The length of secondary fermentation varies, and it is okay to rack the must as many times as necessary to separate the mead from the lees. When you are satisfied with your mead, it is time to bottle.“ The site continues: “Store your mead in a cool dark place and let it age. It can be hard to judge when a mead will reach its peak so have fun sampling your wares from time to time. Congratulations on brewing your first batch of mead at home!”
So it seems that aging mead is a pretty subjective process!
In my opinion, the mead already tastes great. I don’t think I will add any tannin, acid, or other flavorings. I’ll give it a few more weeks in secondary before I bottle, then note how the mead changes over time as I drink it!
I can’t get over how easy this mead was! I think it’s time to get another – larger – batch started!
Are you a mead maker? At what point do you find that your mead reaches peak flavor?
———————————————————————-
David Ackley is a beer writer, homebrewer, and self-described “craft beer crusader.” He holds a General Certificate in Brewing from the Institute of Brewing and Distilling and is founder of the Local Beer Blog.

Lowering The Alcohol Level Of Wine With Water

old man drinking wine
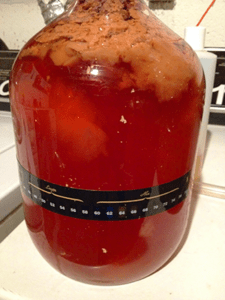
Can you tell me when to add water to my wine, is it during fermentation or after? I make wine using Cabernet Sauvignon and Zinfandel grapes mixing 50 /50, but it always comes out very strong,  I like that smooth taste, any suggestion?
Thanks Joe,
—–
Good Morning Joe,
Both of the grapes you mentioned are normally made using 100% grape — no water added. This isn’t the case with all grapes, just with wine varietals such as these. They will produce a wine anywhere from 11% to 13% depending on how the growing season went that particular year.
If you want to lower the alcohol level of your wine with water, the optimal time to add it would be before bottling. The wine is clear and stable and can easily be blended with water.
It is important that you use distilled water at this stage of the winemaking process. Tap or bottled drinking water has oxygen saturated in it. The oxygen in this water can promote oxidation in the wine if it is added.
How much distilled water you add is entirely up to you, but I would suggest that you keep the wine at an alcohol level of 8% or above. Wines below this have a harder time protecting themselves from spoilage. For the same reason, I would also urge you to add sulfites to the wine before bottling. This could either be by way of Campden tablets or potassium metabisulfite. Either of these will help to protect the wine.
The only way to know with certainty how much distilled water to add and still keep the wine above 8% alcohol, is to start by knowing how much alcohol is in the finished wine. This will require the use of a wine hydrometer. The hydrometer will allow you to determine how much alcohol is in your wine. You will need a reading taken before the fermentation and another one after the fermentation. By comparing the two hydrometer readings you can calculate the alcohol level of your wine.shop hydrometers
To know how much distilled water to add to get from your finished alcohol level to the one you desire. I would suggest you use a tool called the Pearson Square. It is a method of calculating ratios when blending two different wines. In your case you are blending wine and water. Use the Pearson Square in this way. The distilled water is 0% alcohol.
Lowering the alcohol level of a wine with water is something that is not typically done, however rested assured that if you use the methods above you will have no problems with getting your wine safely to an alcohol level you prefer.
Happy Winemaking,
Ed Kraus
———————————————————————-
Ed Kraus is a 3rd generation home brewer/winemaker and has been an owner of E. C. Kraus since 1999. He has been helping individuals make better wine and beer for over 25 years.

Now Offering: More Malted Brewing Grains

bowl of malted barleyAdventures in Homebrewing is proud to announce an expanded offering of malted brewing grains. We now carry nearly 100 different malts and specialty grains to add to your homebrewing arsenal. We have grain products from some of the best malt producers the world has to offer, including Briess, Weyermann, Crisp, and more. Want to brew an authentic German, Belgian, or English ale? Now you can build your beer recipe around malt from the region where your favorite beer is traditionally brewed.

Adventures in Homebrewing offers malted brewing grains from the following malt houses:

  • Briess – Briess is the largest maltster in America. We carry a variety of Briess 6-row and 2-row base malts, a complete range of Briess caramel malts, and several specialty malts, including chocolate malt, Vienna malt, smoked malt, and Carapils, just to name a few.
  • Dingeman’s – Mouterij Dingeman’s is a Belgian maltster producing some of the specialty malts you’ll need for your favorite Belgian beer recipes. Use Belgian biscuit malt, special B malt, and aromatic malt to bring authenticity to your Belgian beer recipes, or add them to other recipes for a touch of complexity.
  • Gambrinus – Canadian maltster Gambrinus is famous for its honey malt, also known as “Brumalt”. As the name implies, honey malt can lend a pleasing sweetness to just about any beer. It worked great in my Flower Power IPA!
  • Weyermann – Germany’s Weyermann is one of the most well-respected maltsters in the world. We now carry 31 malts from Weyermann, from their Bohemian pilsner and pale wheat, to a chocolate rye malt and Carafa Type I, Type II and Type III. Weyermann malts can be used in any style of beer, but will really excel when recreating the traditional beers of Germany.

Our expanded of malted and unmalted grains now give the homebrewer even more control and versatility over the beers they make. Whether you brew all-grain or extract, these grains can help bring a range of character and flavor to your homemade beer.
What are some of your favorite malts for homebrewing?
———————————————————————-
David Ackley is a beer writer, homebrewer, and self-described “craft beer crusader.” He holds a General Certificate in Brewing from the Institute of Brewing and Distilling and is founder of the Local Beer Blog.

Is My Apple Cider Infected?

Basket of apples
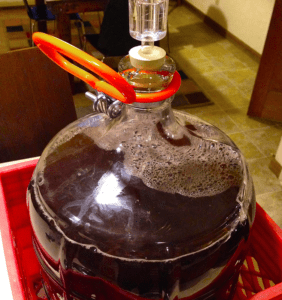
After being out of town for the holidays, I returned home, opened my fermentation chamber, and inspected the three ciders I have fermenting. Much to my horror, I noticed a strange growth in the blueberry/cardamom cider. Is it infected?
What’s worse, there were two components to the funkiness: a yeasty looking conglomeration near the top, floating among the blueberries, and some dusty looking business at the bottom. Surely this cider spin-off is doomed!
Or is it?
Whenever you suspect that a homemade beer or cider is infected, always give it a taste before dumping the batch. I was surprised to find that the blueberry/cardamom cider actually tasted…pretty amazing!
I’m not convinced that there isn’t some kind of microbial growth in there – this apple cider my be infected, but it would require a microscope to be sure – but a little mold or bacteria isn’t necessarily going to ruin a batch. Here’s what I did to salvage the apple cider.

Infected apple cider

One Way to Save an Apple Cider

  1. First, taste it. If it tastes ok, proceed. If not, dump the the infected apple cider and try again.
  2. Rack to another carboy, or in this case, another one-gallon jug. Use a straining bag at the base of the siphon to prevent sucking up any large chunks of funk.
  3. Increase ABV to inhibit any further growth. It just so happens a neighbor recently gave me some moonshine, so I mixed about a cup of that into the roughly 3/4 gallon of cider. Vodka would work just as well. Another option might be to add more fermentables – sugar – and increase the ABV that way. I figured the liquor would have a better shot at killing off whatever was growing in the cider.
  4. Cold crash – again, to inhibit growth of whatever infection might have been going on. I moved the jug of cider to the refrigerator in hopes that this will prevent any further growth.

So What Was Happening in the Apple Cider?Shop beer flavorings
I can only make a couple guesses. As far as the stuff on the bottom of the carboy, I’m guessing that was some kind of mold, but I can’t be sure. It looked a lot like what I saw on my first batch of cider that ultimately got dumped. As for the stuff on top, I’m guessing is was mostly yeast coagulating on the blueberries, though I’m wondering if pectin can coagulate like that. Besides, the cider is remarkably clear.
So What’s Next?
I don’t plan on taking any chances by aging this batch of apple cider, so I’m going to go ahead and bottle the blueberry/cardamom batch and enjoy it fresh. Meanwhile, the plain cider and the hopped cider seem to be nearing the end of their fermentations, so they’ll get bottled before too long.
Check back soon for the final taste tests!
———————————————————————-
David Ackley is a beer writer, homebrewer, and self-described “craft beer crusader.” He holds a General Certificate in Brewing from the Institute of Brewing and Distilling and is founder of the Local Beer Blog.

Basic Water Management for Extract Brewing: Part 3

Guest blogger Matt Chrispen shares the impact that various minerals can have on different styles of beer. To get the whole story start at Part 1 of this 3 part series.water splashed on bottle of beer
There is no hard and fast rule in the application of brewing minerals. Every person’s tastes differ. As such, we are exploring the art of “seasoning” the finished beer, like adding a little salt and pepper to your favorite dish. A little may be good, but too much could ruin the batch.
Below are some starting points for 5 gallons of extract beer. Some minerals are already concentrated in the malt extract, so we recommend using reverse osmosis (RO) or distilled (DI) water. When using tap or spring water, reduce the recommendations to taste. Fully dissolve mineral salts in water before the extract is added to boil.
Mineral Recommendations for Different Beer Styles

  • Lagers are historically brewed with soft water.
    • No mineral additions recommended.
  • Malty, Roasty Ales include browns, porters and stouts where malt flavors and sweetness are expected.
    • Add ½ tsp (~2 grams) of calcium chloride.
  • Hoppy Ales include most American pale ales, hoppy ambers, and IPAs.
    • Add ½ tsp (2 grams) to 1 tsp (4 grams) gypsum.
  • Mineral-Rich Ales include English bitters or Burton ales.

Personalizing Additions:
To determine how much mineral(s) might influence your beer, try the procedure below.

  1. Fill a clean 1-liter bottle or flask with RO water, and dissolving 2 grams of gypsum or calcium chloride. Shake to dissolve completely, creating a 2000 ppm solution of the salt.
  2. Pick a homebrew and split into four 3-ounce (89 ml) servings. Use gypsum for hoppy or calcium chloride for malty beers.
  3. Using a calibrated pipette or eyedropper, add 1 milliliter of solution into the first serving, 2 into the second, and so forth. Start with the first serving and work toward the fourth, taking notes.
  4. Decide which serving you prefer. Mark that down. If you preferred serving #4, open another beer and continue the process.
  5. Take the serving number (with equivalent number of additions) and do the math:
    1. The 1 milliliter dose equals 2 milligrams of the salt
    2. Multiply the preferred dose by 2, yielding the milligrams of salt added
    3. There are roughly 43 three-ounce samples in 5 gallons
    4. Multiply the milligrams dosed by 43, yielding milligrams needed for 5 gallons, and divide by 1000 to yield grams. 1 tsp = roughly 2 grams of gypsum or calcium chloride
    5. Use this amount of mineral salt in your next brew of that recipe!

What changes to you typically make to your brewing water?
———————————————————————-
Series: Part 1 | Part 2 | Part 3
———————————————————————-
Matt Chrispen is a passionate, experienced home brewer, craft beer fanatic, and collector of brewing gear. He also maintains a blog on advanced brewing topics at Accidentalis.com.
———————————————————————-
Sources:
A Brewing Water Chemistry Primer, Homebrewtalk.com, AJ DeLange
Water Treatment for Extract Brewers, Beerandwinejournal.com, C Colby
Water Adjustment in Highly Hopped Beers, Homebrewtalk.com, M Brungard
Calibration Series: Personalized Sulfate and Chloride in Beer, Accidentalis.com, M Chrispen
Bru’n Water, Water Knowledge, M Brungard
How to Brew, John Palmer

Leigh Erwin: New Winery Setup

homemade wine in fermenterI’m so excited! I FINALLY get to make wine again after a seemingly un-endless hiatus due to major life events and changes.
Once my husband and I moved into our new home, I made sure one of the first rooms I set up was the “winery” in the finished basement. It’s still a work in progress, and it’s kind of pathetic when I look at how many pieces of equipment and winemaking supplies I actually have. It’s slim-pickin’s over here. I think eventually I’ll be able to remedy that with the help of E C Kraus!
So, I ordered a couple of different winemaking kits, as I am hoping to be able to run a couple of wines at once. I also purchased a Copper Tun heating pad, as I noticed it’s relatively cool down here in the basement and there isn’t really any good system to keep the heat down here at the moment. In retrospect, I really should have purchased two heating pads if I want to run two wines at the same time, since it is a little too cold for most yeasts to function properly. I’ll have to put that high on my list of winemaking equipment to purchase in the near future.
I purchased both a white and a red wine, and since it’s been a while since I’ve had a chance to actually make wine, I decided to start with the white, since there are fewer steps and it’s theoretically easier than the red. The white I’ll be working on for the next several weeks is the Gewurztraminer from California Connoisseur.
Before I did anything, I read up on the water in the new city I live in, and turns out, like most municipalities, our water is chlorinated at some point during its treatment process. So, I poured off what I needed in a clean bucket and left it overnight to allow any residue chlorine to blow off.
Shop Wine KitsThe next day, after making sure I got all the moving dust off my equipment, I set up with my sterilizing solution (sodium bisulfite) and got to cleaning! I should note: I am using a brand new primary fermenter, so I will admit I didn’t sterilize it longer than I probably would have it had been used previously.
I added the water and bentonite to the Gewurztraminer wine base per the instructions. The temperature of the mixture was a little low (64oF.) so I turned on the heating pad and brought it up to 68oF. before measuring the specific gravity and adding the yeast.
The specific gravity ended up being 1.112 (1.113 after adjusting for calibration temperature of the hydrometer) prior to adding the yeast.
Finally, I added the yeast and crossed my fingers! Now I wait until Day 8 to see how things are progressing!
————————————————————
leigh_erwin_bioMy name is Leigh Erwin, and I am a brand-spankin’ new home winemaker! E. C. Kraus has asked me to share with you my journey from a first-time dabbler to an accomplished home winemaker. From time to time I’ll be checking in with this blog and reporting my experience with you: the good, bad — and the ugly.