4 Ways to Use Campden Tablets When Homebrewing

Campden Tablets To Be Used In HomebrewingAlthough Campden tablets are more commonly used in winemaking, they have their place in homebrewing as well. In fact, Campden tablets can be a useful tool in your arsenal of techniques used to make beer, cider, and mead. So, using Campden tablets in homebrewing should not be all that surprising.
Camden tablets are made of sodium or potassium metabisulfite, and release sulphur dioxide gas when they come in contact with a liquid. This gas is an effective sanitizer, usually used to stabilize raw fruit juices or to sanitize fermenters and barrels. Though you might be more likely to use Campden tablets when making cider than making beer, if you have a bottle of them you might be interested in finding additional ways to use them.
Without further ado, here are 4 ways to use Campden tablets when homebrewing beer:

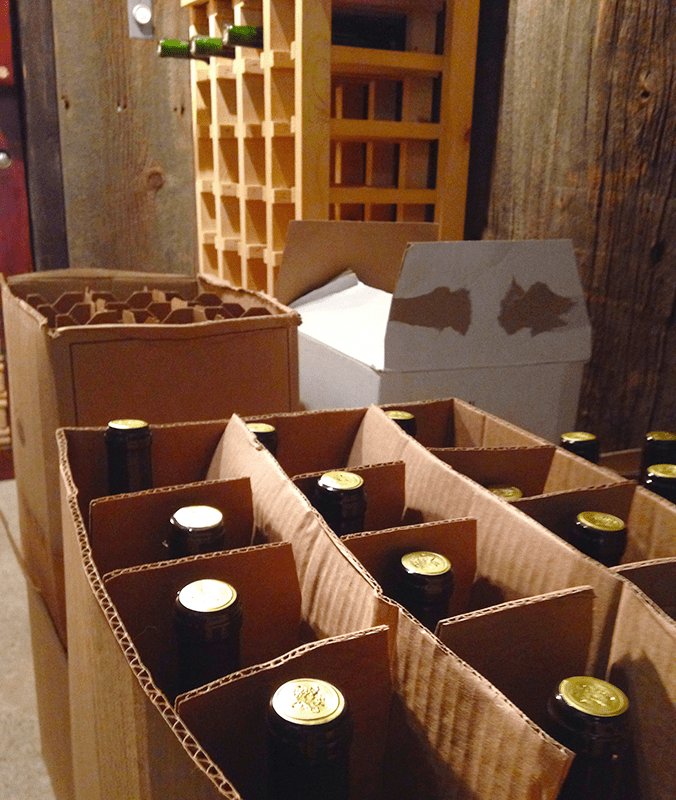
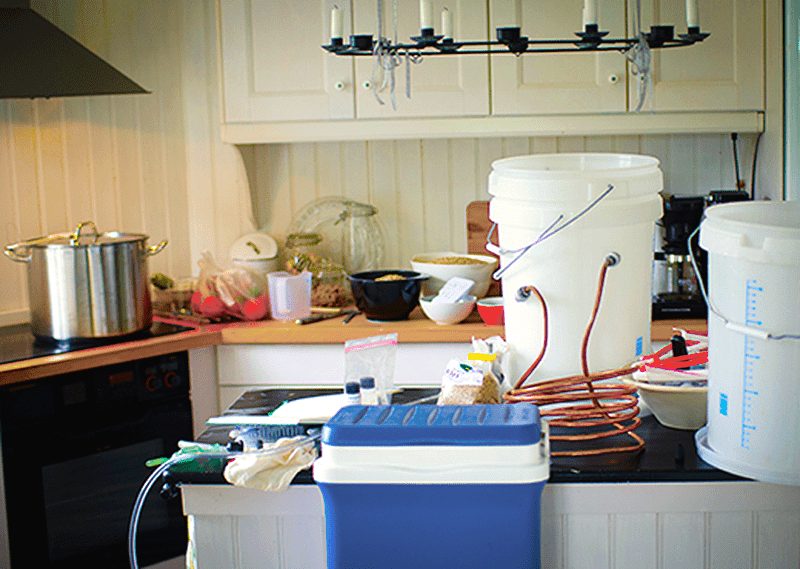
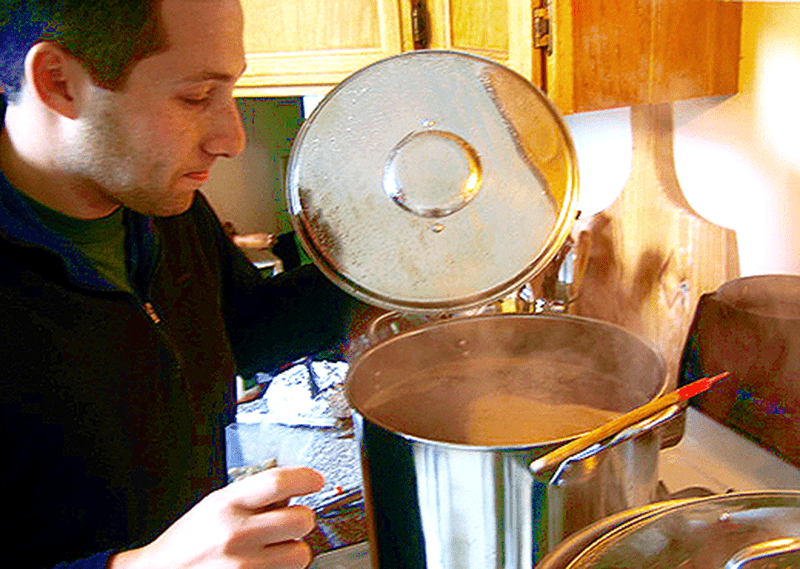
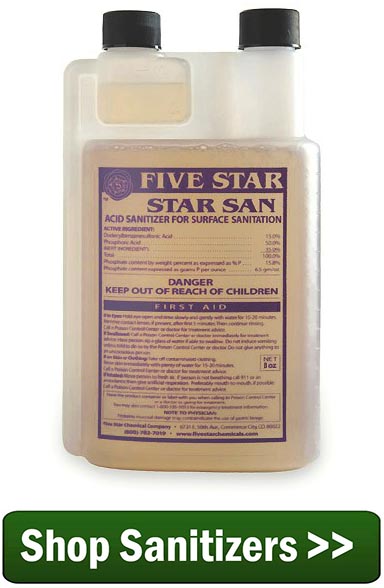
  1. Use Campden tablets to sanitize equipment – A sanitizing solution can be made by mixing 16 crushed Campden tablets per gallon of water. It’s a great way to sanitize brewing fermenters and barrels. Simply pour a few inches of the sanitizer solution into the vessel, seal it up, and allow the sulfur dioxide gas about Shop Campden Tablets20 or 30 minutes to fill the vessel and sanitize it. You can place some of your other homebrewing equipment in the fermenter for convenience. Dispose of the solution, allow your equipment to air dry, and carry on with your brew day.
  1. Use Campden tablets to remove chlorine and chloramine from brewing water – Chlorine, a major component of bleach, is a common source of off-flavors in homebrewed beer. It contributes to something called chlorophenols, which can give your beer an unpleasant medicinal flavor. Some municipal water supplies use chlorine to make it safe to drink, others use chloramine. While chlorine can easily be boiled out of the water, chloramine is harder to remove. In either case, adding half of a crushed Campden tablet to 5 or 6 gallons brewing water will break down chlorine into chloride, sulfate, and ammonia, all of which tend to be beneficial to beer in small amounts. A few minutes is all it takes.
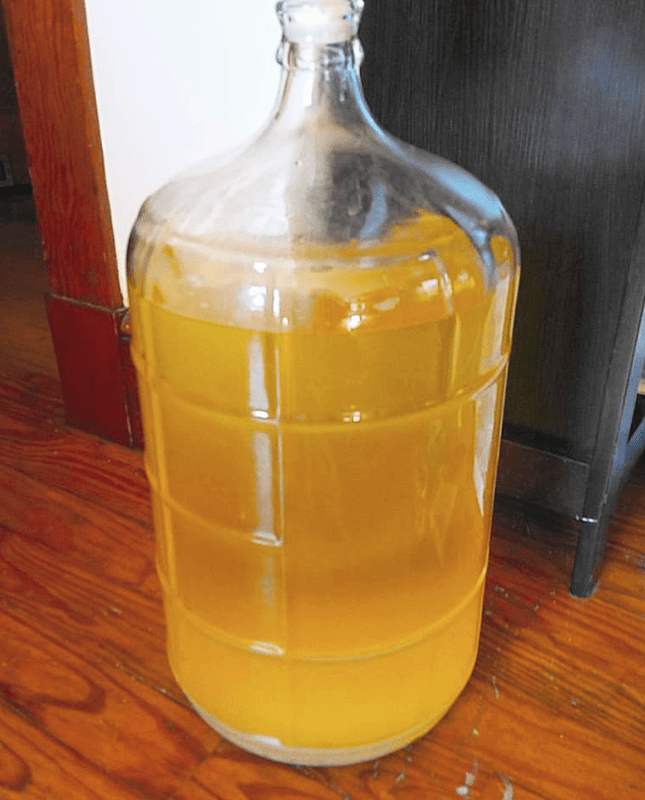
  1. Use Campden tablets to stabilize apple juice when making cider – Just like when making wine, Campden tablets can be used to kill off wild yeast and bacteria from raw apple juice. Use one crushed Campden tablet per gallon of apple juice, dissolving the tablet in a little water or juice before mixing it into the juice. Allow 24 hours for the sulfur dioxide to off-gas before pitching yeast.
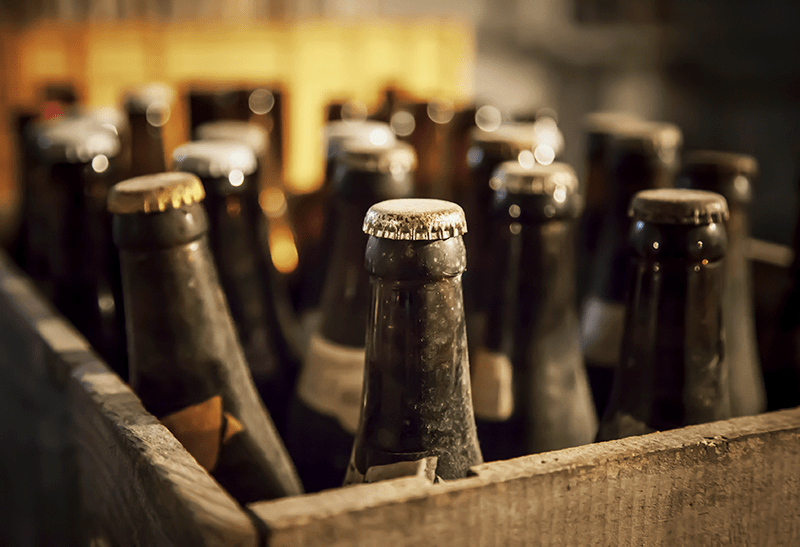
  1. Use Campden tablets to stave off an infection – This is more commonly used in making cider and wine. If your cider has become infected, add one or two crushed Campden tablets per gallon of cider dissolved in a little water to a secondary fermenter. Rack the cider onto the Campden tablets, then bottle immediately. This will preserve the cider, at least in the short term.Shop SanitizersIf it tastes good, go ahead and drink the cider and don’t let it age lest the infection returns.

I have gotten into the habit of treating all my brewing water with Campden tablets. It just doesn’t make sense not to use Campden tablets when homebrewing. There is no downside to it.
Have you found any other uses for Campden tablets when you’re homebrewing?
—–
David Ackley is a beer writer, homebrewer, and self-described “craft beer crusader.” He holds a General Certificate in Brewing from the Institute of Brewing and Distilling and is the founder of the Local Beer Blog.

10 "More" Brewing Spices For Your Creative Pleasure

Beer With SpicesAbout a month ago we outlined ten spices to try in your homebrew, but when it comes to using spices in beer, the world is quite broad and diverse. If you’re looking to exercise some creativity, here are ten more spices that you can use to give your homebrew a little something special.

  1. Cardamom – This spice is popular in Indian cuisine. Its flavor is reminiscent of chocolate with a hint of citrus, so it could make an interesting addition to a porter, stout, or chocolate stout. Homebrew author, Randy Mosher, recommends adding the crushed pods to a raspberry beer.
  1. Coffee – Though used more often as a beverage than a spice, coffee makes a great addition to dark beers (and dry rubs for that matter). If you like coffee, a coffee stout may be in order. Choose a fresh, high-quality coffee (one you would enjoy drinking) and add the beans directly to the fermenter. For optimal coffee flavor, you can also do a cold brew, as coffee that has been heated may be too astringent.
  1. Grains of Paradise – Said to be the secret ingredient in Hoegaarden witbier, grains of paradise are native to West Africa and similar in flavor to cardamom, but more peppery and resinous. Though grains of paradise are most often found in witbier, you might also find them in Belgian ales or Faro.
  1. Juniper BerriesBuy Beer FlavoringsMost well known for flavoring gin, juniper can also be used in brewing beer. Juniper is commonly found in traditional Nordic beers such as Sahti and Gotlandsdrika. Use 1-2 tablespoons of fresh berries late in the boil. Sometimes juniper branches are used in place of, or together with, the berries.
  1. Licorice – When using spices in beer you can’t forget licorice. It has traditionally been used in brewing for its sweet, pungent flavor and head retention properties. A licorice extract may also be used to contribute color to darker beers. Add about 1/4 oz. of dried root at the beginning of the boil for dark beers like porters, stouts, and Belgian dark ales.
  1. Nutmeg – A complex and intense spice, nutmeg is most often used in combination with other spices like cinnamon and coriander in holiday spiced ales or pumpkin beer.
  1. Saffron – For a truly special beer, try one of the world’s most expensive spices: saffron. Dogfish Head uses saffron in their famous Midas Touch. Used in gourmet cooking, saffron comes from the dried stigmas of the flower Crocus sativus. According to herbalist author, Stephen Buhner, it takes 4,320 flowers to produce one ounce of the spice!Shop Burton Water Salts
  1. Salt – Though not technically a spice, salt lives in your kitchen among several of the other ingredients on this list. Various brewing salts can be used to adjust your brewing water, but other cooking salts like Kosher salt or sea salt (do not use iodized), can be used specifically for flavoring. Salt is most notoriously used in brewing German Gose, a pale, slightly sour beer brewed with wheat, coriander, and salt.
  1. Spruce – Spruce can give an interesting, piney touch to amber ales and holiday beers. Try using spruce essence or even the branches themselves. For a beer that features the spruce flavor, check out this spruce beer recipe.
  1. Star Anise/Anise – Don’t forget either of these with using spices in beer. Both of these spices contribute a flavor reminiscent of licorice, though star anise tends to be less intense. Use it as you would licorice, in darker beers like porters and stouts.

As I mentioned the previous post about using spices in beer, less is more. I find that subtlety is often the key in brewing with spices. Often times a 1/4 ounce is plenty of spice for your homebrew. You can also add more for your next batch.
—–
David Ackley is a beer writer, brewer, and self-described “craft beer crusader.” He holds a General Certificate in Brewing from the Institute of Brewing and Distilling and is founder and editor of the Local Beer Blog.

Rochefort 8 Clone Beer Recipe (All-Grain)


Rochefort 8 Clone BeerBelow you will find a Rochefort 8 clone beer recipe for all-grain. It has all the information you need for brewing the Rochefort 8 from scratch. A worthy project to take on.

About Rochefort 8
The Abbaye Notre-Dame de Saint-Remy in Belgium houses one of the world’s most highly regarded Trappist breweries – Rochefort. This isn’t your typical microbrewery. The Cistercian monks of Rochefort have been brewing beer there since long before the term “microbrewery” was born – 1595 to be exact. The brewery at Rochefort produces three beers of varying alcohol content:

  • Rochefort 6 – Rochefort 6 is extremely rare, brewed just once a year. It has a light brown color with complex sweet, floral, and fruity flavors. 7.5% ABV.
  • Rochefort 8 – Rochefort 8 is a deeper brown color at about 9.2% ABV, brewed year round since about 1960. It has a drier and richer flavor than 6, sometimes described as fig-like.
  • Rochefort 10 – Rochefort 10 is the strongest of the three at 11.3% ABV, with spicy, earthy, and chocolate flavors.

All three beers consistently receive exceptional marks. (Just check BeerAdvocate and RateBeer.) Draft Magazine reviewed Rochefort 8 and had this to say:Shop Steam Freak Kits

A playfully bubbly head and heavy aroma of alcohol spice, black currant and sourdough belie this brew’s murky brown appearance. Dark fruits invigorate the taste buds: Plum, figs and raisins pool in the middle of the tongue over a solid bread crust foundation. Black licorice and pepper add sharp edges to the fruity sweetness while alcohol warms the back of the throat. Rochefort’s dry finish cuts through the rich flavors, and leaves dark fruit notes on the tongue long after the swallow. 94 points.

Sounds enticing, right?
After digging around for some clone recipes I stumbled across a site in which a number of European homebrewers collaborated to develop a Rochefort 8 clone beer recipe. They then tasted each of the brews and compared them to the actual Rochefort 8. I’ve scaled the winning clone recipe to a five-gallon batch, converted the measurements to English units, and made some minor adjustments based on the brewers’ feedback.Shop Barley Grains
Be sure to prepare a healthy yeast starter to get the level of attenuation needed for this brew.
Good luck!

Rochefort 8 Clone Beer Recipe (All-Grain)
(5-gallon batch)
Specs
OG: 1.080
FG: 1.010
ABV: 9.2%
IBU: 23
SRM: 35Shop Hops
Ingredients
10.5 lbs. Pilsner malt
1 lb. 9 oz. Caramunich malt (type II)
1 lb. 3 oz. Dark candi sugar
8.4 oz. Special B malt
8.4 oz. Flaked corn
2.5 oz. Carafa III
1 oz. Styrian Goldings hops at :75 (4.2 AAUs)
.67 oz. Hallertau hops at :30 (2.35 AAUs)
.33 oz. Hallertau hops at :5 (1.16 AAUs)
.33 oz. crushed coriander seed at :5
2 packs Wyeast 1762: Belgian Abbey II ale yeast
Corn Sugar For Priming

Directions Shop Beer Flavorings
At least 12 hours before brewing, pitch two packs of Wyeast 1762 into a 2L yeast starter. On brew day, mash grains in 3.5 gallons of water. Hold at 140-144°F for 30 minutes, then raise to 154°F for 60 minutes. Raise to 167°F for mash out, then sparge with 172°F water to collect about seven gallons of wort. Stir in Belgian candi sugar and boil for 90 minutes, adding hops and crushed coriander seeds according to schedule. Cool wort to 70°F and ferment at 69-74°F. Prime with corn sugar and bottle condition for 2-4 months or longer.
Do you have a Rochefort 8 clone beer recipe you’d like to share? Are you a fan of Trappist beers? Also consider brewing this Westmalle Tripel clone.
—-
David Ackley is a beer writer, brewer, and self-described “craft beer crusader.” He holds a General Certificate in Brewing from the Institute of Brewing and Distilling and is founder and editor of the Local Beer Blog.

How Long Does Homebrew Keep?

Example Of How Long Homebrew Will KeepThe question: how long does homebrew keep, depends on a number of factors: the style of beer, the alcohol content, storage conditions, whether the beer was bottled with good sanitation.
I think what we really want to know is this – does the beer still taste good? Is it safe to drink? Does the homebrew last in the bottle? Discovering a stash of homebrew at my parent’s house over the holidays brought me to explore these questions.
The short answer is this: it depends. Most commercial brews have a best by date of about three months from the bottling date. Some beers lend themselves to aging more than others, but whatever the case, drinking old bottles of beer is safe, even if it doesn’t taste very good. The beer will last, but sometimes, not the flavor.
So how long does homebrew keep? To guide you through how long you should let your homebrew age, if at all, here are some general guidelines…Shop Bottle Cappers

 
General Rules for Aging Homebrew

  • Once bottles have conditioned for a few weeks, most homebrewed ales are best enjoyed within a few months. That said, sometimes they still taste good after six months or longer. Lagers usually require a cold conditioning period of a few weeks to a few months before consuming.
  • Hoppy beers should be enjoyed fresh – don’t age them! You generally don’t age your pale ales and IPAs so that you can enjoy their lively hop flavors and aromas at their peak. This freshness does not last long in these beers.
  • Some of the best beers for aging are high-gravity beers like barleywine and Russian imperial stout. If brewed and bottled with good sanitation, these beers can keep for a year or longer! This bigger the beer the longer it will last.
  • When aging homebrews, maintain a steady temperature and avoid exposure to UV light. UV light can degrade the hops in beer and “skunk” your homebrew. Try in the corner of a basement, on the floor, to help your homebrew last longer.Shop Beer Bottles


Aging Homebrew: An Experiment

To illustrate, I have a few examples. When I went home for the holidays, I found a stash of homebrew from a year ago.

  • Spiced Cherry Dubbel – This beer, inspired by the book Radical Brewing, came out to 7.7% ABV. It was brewed with tart cherry and black cherry juice added to the fermenter. My notes indicate that the beer was a little strong on the cherry flavors, but still enjoyable, with little cinnamon flavor, if any.
  • Winter Wassail – This is a winter spiced ale made with cranberries and green apples, and it’s become something of an annual brew for me. The recipe can be found in the book the Homebrewer’s Garden. This particular batch came out to 7.4% ABV, with a fairly assertive acidity from the cranberries and green apples. It turned out almost like a sour beer, which in my opinion is a good thing, even though I might dial it down next time around.
  • Braggot”/Brown IPA Experiment – Shop Temp ControllerThis beer was a partigyle from the Winter Wassail above. That means I took the low gravity final runnings from the mash of that beer to make a different beer. To boost the gravity, I added honey, and just for the hell of it, some hops to a gallon of wort just to see what would happen. This was one of those “why not?” experiments. I remember the result being rather cidery and unimpressive.

So how did these beers keep over time?
Surprisingly, the Winter Wassail and Spiced Cherry Dubbel hardly changed at all. They both kept very well. If anything, they became a little more balanced, but for the most part, they were exactly like I remembered them. I was kind of shocked that the fruit flavors lasted at all, but I was pleased to discover no evidence of oxidation or infection.
On the other hand, the “braggot” concoction was unrecognizable. I actually had to go back to my notes to identify what it was. The beer was kind of bland, with a sort of spicy, sort of cheesy hop character, which just wasn’t pleasing at all. I Shop Fridge Monkeysuspect that the low alcohol content didn’t preserve the beer very well, and the hops, being the main flavor feature, degraded quite a bit. This homebrew did not keep at all, so I dumped it.
The conclusion here is when you ask, “how long does homebrew keep?”, you have to know what homebrew you’re talking about. All don’t keep the same. Some homebrews to last long at all, while some keep quite well.
What’s the longest that you’ve ever aged a homebrew? How did it hold up?
—–
David Ackley is a beer writer, homebrewer, and self-described “craft beer crusader.” He holds a General Certificate in Brewing from the Institute of Brewing and Distilling and is founder of the Local Beer Blog.

Batch-Saving Tips For Re-Bottling Wine

Re-Bottled Wine In CellarWe bottled Lambrusco wine in February. We tasted 2 months later and decided it was just not going to be sweet enough. Is it ok to remove the corks-put back into clean container and sweeten more with the wine conditioner and then re-bottle the wine?
Name: Barbara
State: Kentucky
—–
Hello Barbara,
Unfortunately, we get asked this question quite often. I’ll start off by giving you the short answer, “yes, re-bottling wine is possible”.
What you are asking to do may sound simple in principal, but there are some considerations that need to be thought through first:

  • It is important to know that you will not be able to reuse the wine corks that you’re are pulling out of the wine bottles. There is no way to sanitize the wine corks completely after wine has saturated into them. Also, the corks have been put through a corking once so they would be more difficult to press into the wine bottle without destroying them. For these reasons when re-bottling wine you will need to consider the original wine corks a loss and use new ones.
  • The wine bottles will need to be cleaned and and sanitized again, so this will be extra work beyond just decanting and re-bottling the wine. I recommend using Basic A for this purpose. The amount of time it will take you to empty all the wine bottles, sweeten the wine and then bottle the wine back up is too long to leave them sitting, exposed to air with the residue of wine in them.
  • Shop Wine CorksAfter stirring in the Wine Conditioner to sweeten the wine, you will also need to add a sulfite back into it, just as you did the first time you bottled the wine. You can use either Campden tablets, sodium metabisulfite or potassium metabisulfite. Both the glugging of the wine as it pours out of the bottle into a bucket and the stirring of the wine as the Wine Conditioner is being blended will saturate air into the wine. This is something that can cause your wine to oxidize. Oxidation can potentially cause the wine to turn brown or orange in color and give it a smell and taste that resembles raisins or caramel. By adding the sulfites you will easily drive the oxygen back out of the wine.
  • One last thing: when re-bottling wine I would also recommend adding a dose of ascorbic acid to this wine in such a situation. Ascorbic acid is good for raising the acidity level of a wine without raising the acid taste or tartness. The ascorbic acid will help by consuming free oxygen they may still be left in the wine. This will also help to hinder any oxidation of the wine.

Shop Wine Bottle CorkersHaving considered all the above, you can also sweeten the wine as you drink it. I realize that the esthetics of sweetening a wine in a carafe or a glass as-you-go is not all that sophisticated nor satisfying, but it will save you a lot of work and still get you your sweet wine. A bottle of honey works well for such an occasion.
Regardless of what path you decide to take, just realize the re-bottling wine is something that can be done. Just be sure to follow the precautions listed above.
Happy Winemaking,
Ed Kraus
—–
Ed Kraus is a 3rd generation home brewer/winemaker and has been an owner of E. C. Kraus since 1999. He has been helping individuals make better wine and beer for over 25 years.

10 Tips for Keeping Your Home Brewing Workspace Clean

Home Brewing WorkspaceMany brewers will tell you that they spend more time cleaning than brewing. While this may be true, there are a number of things that you can do to turn things around and make the cleaning process easier on yourself. Plus, a clean, organized home brewing workspace or area will go a long ways towards eliminating stress on brew day – and making sure your significant other is supportive of your brewing efforts!

Here are ten tips for keeping your home brewing workspace clean:

  1. Start clean. I find it’s best to start from a clean slate. Home brewing in a cluttered kitchen or basement gets annoying, especially when you find dishes or last week’s project in the way. Start with a clean, clear surface, and post-brew clean up with be that much easier.
  1. A brewer’s best friend: towels. Shop Bottle WasherAt the beginning of every brew day, I grab a stack of clean towels. They’re great for catching drips from the mash tun or boil kettle or wiping up spills (you will have spills). The sooner you can wipe up that spilled wort or beer, the less likely it is to become a sticky mess later on.
  1. Clean as you go. Just like with cooking, I’m a big fan of cleaning things up as you go along. Take advantage of wait time during the mash or boil to clean up some things from earlier steps. This saves time when brew day is done and helps to keep your home brewing workspace clean and clear.
  1. Rinse it – now. Most things that need cleaning in the home brewery benefit from an immediate rinse. Let that crud dry out and you’re just making things harder for yourself. Give it an immediate blast of water with a bottle or carboy washer then set it out to dry.
  1. Soak it. I find that most home brewing debris cleans up easily with an overnight soak in brewing cleanser. Give it a shake the next day, dump it, and rinse, and you’re usually ready to go for next time. Just be sure to inspect for your gear for any grime or deposits that need a little extra elbow grease.Shop Basic A
  1. Scrub it. For more difficult cleaning jobs, some scrubbing may be necessary. Using the right tool for the job is important. On plastics and other scratch-able materials, use a soft cloth to wipe down the surface. (Scratched surfaces can harbor wild yeast and bacteria.) For more durable materials, like glass and steel, brushes work well.
  1. Boil it. Boiling can be an effective means of cleaning your stainless steel homebrew equipment. Boiling can also sterilize it. This might work well for a stainless steel racking cane, thief, or brewing spoon, or for loosening up deposits on the bottom of your brew kettle.
  1. Compartmentalize. Keep your smaller gizmos and gadgets in a toolbox or similar compartmentalized storage box. This will help to keep your home brewing workspace clean and organized. It will also save time and energy when cleaning up after homebrewing.
  1. Stack it. Save space by stacking things like mash tuns, brew kettles, and buckets. Just be careful where you put your glass carboys – you don’t want them to fall.
  1. Hang it.Shop Bottle Tree Racking hoses, siphons, immersion wort chillers, and various other tools can take up a lot of space on a counter or table. Give yourself some room by hanging these items on a pegboard.

Keeping your home brewing workspace clean and clear can make all the difference between a stressful brew day and an enjoyable one. Looking for more home brewery organization tips? Check out these 5 Tips for Organizing Your Home Brewery.
—–
David Ackley is a beer writer, brewer, and self-described “craft beer crusader.” He holds a General Certificate in Brewing from the Institute of Brewing and Distilling and is founder and editor of the Local Beer Blog.

Insanely Simple Russian Imperial Stout Recipe (Extract)


Russian Imperial StoutStouts have always been big brews, but Russian imperial stout is the biggest of the big. From the high gravity, to the complex, roasty malt flavors, to the assertive hoppiness, a Russian imperial stout recipe is not for the faint of heart.
Actually an English style beer, Russian Imperial Stout was made to be exported to the Nordic and Slavic regions of Europe and was reportedly popular with the Russian monarchy. The high gravity and alcohol content helped with the beer’s stability over travel, but also provided warmth in the colder climates. Some fruity, yeast derived esters combine with a malt complexity to create a rich, complex brew sometimes reminiscent of strong port. The beer is often aged for flavor development.
As with many English beer styles, Russian imperial stout has been adopted by American brewers who often make roastier, hoppier versions of the style. BJCP guidelines for Russian imperial stout are as follows:

  • OG: 1.075 – 1.115
  • FG: 1.018 – 1.030
  • ABV: 8 – 12%
  • IBUs: 50 – 90
  • SRM: 30 – 40+

Tips for Brewing a Russian Imperial Stout RecipeShop Calcium Carbonate

  • To get the gravity needed hit 8-12% ABV, you need a large amount of fermentable ingredients, a minimum of 9-10 pound of malt extract. Even for the all-grain brewer, malt extract can help make the mash a little less of a chore.
  • You might consider using alkaline water to compensate for the astringency and acidity of the roasted grains. Some calcium carbonate (food-grade chalk) added to the mash/steeping water can help.
  • To balance out the alcohol and intense maltiness, a strong hop schedule is required. If brewing extract or partial mash beer recipe, consider adding half of your malt extract at the end of the boil to help improve hops utilization.

Shop Liquid Malt ExtractUse this insanely simple extract beer recipe below to craft your own Russian imperial stout. It’s been somewhat “Americanized” with high alpha hops and some assertive, American hop late additions. We also have a couple Russian imperial stout recipe kits from Brewcraft and Brewer’s Best if you’d like to go that route.
Happy brewing!

Motor Oil Russian Imperial Stout Recipe
(Five-gallon batch, extract with specialty grains)
Specs  
OG: 1.088
FG: 1.025
ABV: 8.3%
IBUs: 82
SRM: 39Shop Barley Grains
Ingredients
6.6 lbs. Light LME
6.6 lbs. Amber LME (late addition)
1 lb. Chocolate malt (crushed)
.5 lb. Caramel 80L malt (crushed)
.5 lb. Roasted barley (crushed)
1 steeping bag for specialty grains
1.5 oz. Bravo hops at :60
1 oz. Columbus hops at :10
1 oz. Cascade hops at :10
2 packs Safale US-05 ale yeast
Directions
Heat 2.5 gallons of water in the boil kettle to 155-165˚F. Place crushed grains in the steeping bag and steep for 20 minutes. Mix in 6.6 lbs of light LME. Bring wort to a boil. Add Bravo hops and boil for 50 minutes. Add Columbus andShop Home Brew Starter Kit Cascade hops and boil for ten minutes. Stir quickly to create a whirlpool, then cool wort to 70˚F using an ice bath or an immersion wort chiller. Pour wort into clean, sanitized fermenter, then top off to make 5.5 gallons. Use a sanitized spoon to mix well, then pitch yeast. Ferment at 70˚F for two weeks, then transfer to secondary for three to four weeks. Bottle and age for 2-4 months or longer.
Do you love to brew dark, heavy beers? Try this Uinta Dubhe Imperial Black IPA clone! Do you have a Russian imperial stout recipe? We’d love for you to share it: extract or all-grain!
—-
David Ackley is a beer writer, brewer, and self-described “craft beer crusader.” He holds a General Certificate in Brewing from the Institute of Brewing and Distilling and is founder and editor of the Local Beer Blog.

Clearing A Cloudy Wine…

Winemaker Clear A Cloudy WineWhat can I use to remove the cloudiness in my wine. Can you help? I’ve strained the wine 2 times and it is still cloudy.
Thanks John
_____
Hello John,
What needs to be determined is, “why is the wine cloudy“? Is it from pectin cells in the fruit? Is it from suspended yeast cells? Is it from starches in the fruit? Or, is it because the wine simply needs more time to clear up?
In any case, the cause of the cloudiness needs to be determined before you can take any action. Anything less is just taking a stab at the issue. Determine why the wine is cloudy then take appropriate actions.
The first thing that should be done is a specific gravity reading should be taken with a wine hydrometer. This will tell you if the wine has completed its fermentation. If the specific gravity is .996 or less, this would indicate that the wine fermentation has finished. If the specific gravity is above .996 but not fermenting then you have a stuck fermentation and you need to determine why it is stuck.
Shop BentoniteIf the wine is still fermenting, even slightly, this would most likely be the cause of the cloudiness. In this case, just let the wine finish fermenting. Be a little patient and the wine will most likely clear in due time.
If the wine hydrometer has indicated that the wine has completed its fermentation, you will want to see if the top half of the batch is more clear than the bottom half. If so, this would indicate that the wine just needs a few more days to clear up. After a wine has completed fermenting it usually needs a week or two to clear up. Most homemade wine instructions will indicate this time period.
If you’re sure it’s been more than two weeks since the wine has completed fermenting, and it’s still cloudy, then it may be time to start using wine making products such as fining or clearing agents.
Treating the wine with bentonite would be the first step I would suggest. It’s an effective fining agent that most likely will solve your problem completely. But, if you see only marginal improvement, you should switch to Sparkolloid for a second treatment. In general, Sparkolloid will take out what bentonite doesn’t and vice versa.Shop Sparkolloid
If the bentonite clears the wine almost completely, but there’s still a slight murkiness, then you should switch to a polishing clarifier such as our Kitosol 40. You might want to check out the article, Using Finings To Improve Your Wine. It will give you more detail about fining agents and other wine making products you can use to clear your wine.
Happy Wine Making
Ed Kraus
—–
Ed Kraus is a 3rd generation home brewer/winemaker and has been an owner of E. C. Kraus since 1999. He has been helping individuals make better wine and beer for over 25 years.

Use 3 SMaSH Beer Recipes To Understand Ingredients

Making SMaSH Beer RecipesFor those of you who have never heard of SMaSH beer recipes, SMaSH is an acronym used in homebrewing for single malt and single hops. A SMaSH beer is a beer brewed using only one variety of malt and one variety of hop. This is significant since most beer recipes involve several different malts and several different hops. But SMaSH beer recipes only involves one malt and one hop.
After perusing Dave Miller’s Homebrewing Guide for some new beer recipes, it occurred to me that a very short list of ingredients could be used to brew a range of very different brews. With a single type of malt extract, a single hop, and a single yeast strain, you could brew a bitter, an ESB, and an IPA, simply by changing the proportion of ingredients used. This offers an opportunity for brewers to take advantage of bulk pricing on homebrew ingredients (which we offer here at E. C. Kraus), while still being able to brew a variety of beer styles.
The three SMaSH beer recipes below (all single malt, single hop, five-gallon batches) will require a total of:

Feel free to amend the beer recipes with other ingredients you may have on hand, such as different hops or some specialty grains. Alternatively, treat these brews as an experiment to get a strong sense of what each ingredient can contribute to a beer. All 3 SMaSH beer recipes assume brewing with a five-gallon kettle. Follow the instructions for extract brewing to brew each recipe. Don’t forget your caps and priming sugar! Shop Dried Malt Extract

British Bitter SMaSH Beer Recipe
An ordinary bitter is a session beer, meaning the alcohol content is low enough that you can have a couple pints without feeling too buzzed.
Specs
OG: 1.038
FG: 1.006-1.009
ABV: 3.8-4.2%
IBUs: 31
SRM: 3.6
Ingredients
4.5 lbs. light DME
1.5 oz. Kent Goldings hops at :60
1 oz. Kent Goldings hops at :10
1 pack Safale S-04 ale yeast

E.S.B. SMaSH Beer Recipe Shop Hops

An ESB, or Extra Special Bitter, is a stronger version of an ordinary bitter. Feel free to increase the hops if you enjoy hop bitterness, flavor, or aroma. Feel free to steep some crushed caramel malt for extra color and flavor.
Specs
OG: 1.050
FG: 1.008-1.014
ABV: 4.8-5.6%
IBUs: 31
SRM: 4.4
Ingredients
6 lbs. light DME
2 oz. Kent Goldings hops at :60
0.5 oz. Kent Goldings hops at :10
1 pack Safale S-04 ale yeast

English IPA SMaSH Beer Recipe Shop Steam Freak Kits

An English IPA is the bitterest and most hoppy of the English pale ales, though usually less aggressive than American IPAs.
Specs
OG: 1.050
FG: 1.008-1.014
ABV: 4.8-5.6%
IBUs: 45
SRM: 4.4
Ingredients
6 lbs. light DME
2 oz. Kent Goldings hops at :60
2 oz. Kent Goldings hops at :20
1 pack Safale S-04 ale yeast Shop Fermenter

What are some of the homebrew ingredients you use in every batch? What are some ideas you have for brewing SMaSH beer recipes?
—–
David Ackley is a beer writer, brewer, and self-described “craft beer crusader.” He holds a General Certificate in Brewing from the Institute of Brewing and Distilling and is founder of the Local Beer Blog.

3 Wine Making Starter Kits: Which One's Right For You?

One Of The Wine Making Starter kitsMy husband asked me to write you and ask about which of your wine making starter kits he should get to make wine with. He does not really know the difference between them and would like you to advise on how to get started.
Brenda
—–
Dear Brenda,
We have three different complete home wine making starter kits for beginners. Each has a collection of the necessities you will need to start making wine. The equipment in these wine making starter kits are of the same quality items you can purchase from us individually, only this way they are packaged together at a reduced price. This makes these kits a great value for someone starting out.
Each of these starter kits were carefully put together with simplicity in mind. We wanted to make it as easy as possible for you to make your first batch of wine without a lot of confusion and frustration. Truth is, what want you coming back to make more.
We also spent a lot of time selecting the equipment that goes into these wine making starter kits. We wanted to make sure that everything is of high quality – not cheap stuff – but equipment that will last you for many batches of wine.
We also want your first batch of wine to turn out exceptional. That’s why we did not go for the cheapest wine making juices you can find. These a remarkable wine making juices that will make wine you can be proud of. Again, we want your wine to turn out so good that you cannot resist coming back for more.

  1. Your Fruit! Wine Making Starter Kit As the name implies, this is a fruit wine making starter kit. It has all the equipment and ingredients you will need to make wine using fruit you already have. It makes 5 gallons at a time. It includes two books that contain well over a 100 different wine recipes. The wine making instructions you will use with this kit are very easy to follow. With this kit you can make wines from raspberries, peaches, dandelions, blackberries, strawberries, rhubarb, watermelon… The list is very extensive. You can also use the wine recipes on our website’s Recipes Page with this starter kit. If you are wanting to make wine from your own fruit then of the three wine making kits, this is the one your want.
  1. The SunCal Wine Making Starter Kit This kit contains all the equipment and ingredients you will need to make wine using your choice of any one of our SunCal concentrated grape juices. Very simple directions are provided. Start off with your choice of wine. Each can makes 5 gallons. You will also have additional yeast and other wine making ingredients for making additional batches. All you need is more SunCal concentrate.
  1. Connoisseur Wine Making Starter Kit This kit will allow you to make wine, starting with your choice of Connoisseur wine ingredient kit. These ingredient kits contain the grape juice concentrate and all the additional ingredients you will need, pre-measured and ready to go. After you make your first batch, you will have all the wine making equipment you need to make wine using any of our 200+ boxed ingredient kits. If you are wanting to make a large variety of different grape wines, then of the of the three wine making kits, this is the one you want to get.

Each of these home wine making starter kits are designed with simplicity in mind. They give you exactly what you need, whether it be making wine from fresh fruits or from packaged wine juices. So now I ask: which of these wine making starter kits is right for you?
Happy Wine Making,
Ed Kraus
—–
Ed Kraus is a 3rd generation home brewer/winemaker and has been an owner of E. C. Kraus since 1999. He has been helping individuals make better wine and beer for over 25 years.