Irish Red Ale Beer Recipe (Extract & All-Grain)

Made from an Irish red ale beer recipe
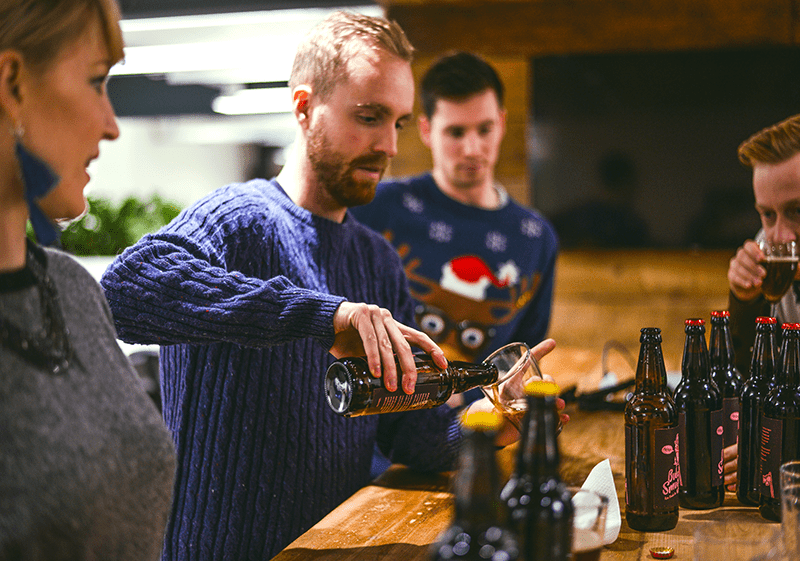
Why not try something a little different? How about brewing an Irish red ale beer recipe? It’s a great option for those who prefer some malty sweetness over a dry, roasty flavor in their homebrews.
Almost every American beer drinker knows of Killian’s Irish Red, but some might dispute the authenticity of that beer, now made by Coors. Dig a little deeper at your favorite beer store to find other examples of Irish red ales. Believe or not, they make more than just stouts in Ireland! See if you can get your hands on a Smithwick’s or Murhpy’s Irish Red for a true Irish red ale. Countless microbreweries also have their own version of an Irish red ale.
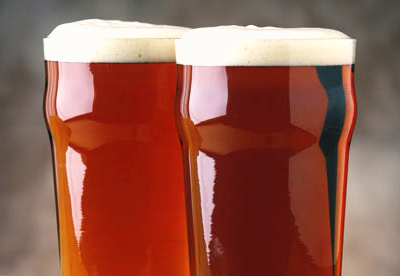
The Irish red ale beer recipe below yields a sessionable brew at just 4.8% ABV and about 17 IBUs. Looking for something your Irish drinking buddies would really be proud of? Feel free to increase the malt extract or base malt by as much as 50% for a higher gravity beer, and/or increase the hop additions to manipulate bitterness, flavor, and aroma as you see fit.
Happy brewing!
Shop Winemaking For Dummies
Irish Red Ale Beer Recipe (via Homebrewing for Dummies)
(5-gallon batch, extract with specialty grains)

Specs
OG: 1.049
FG: 1.012
ABV: 4.8%
IBUs: 17-18
SRM: 15

Ingredients Shop Temp Probe

6.6 lbs. golden light malt extract syrup
1 lb. crystal 60L malt
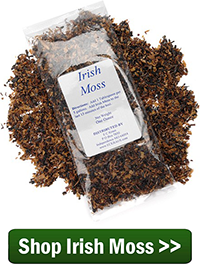
2 oz. black malt
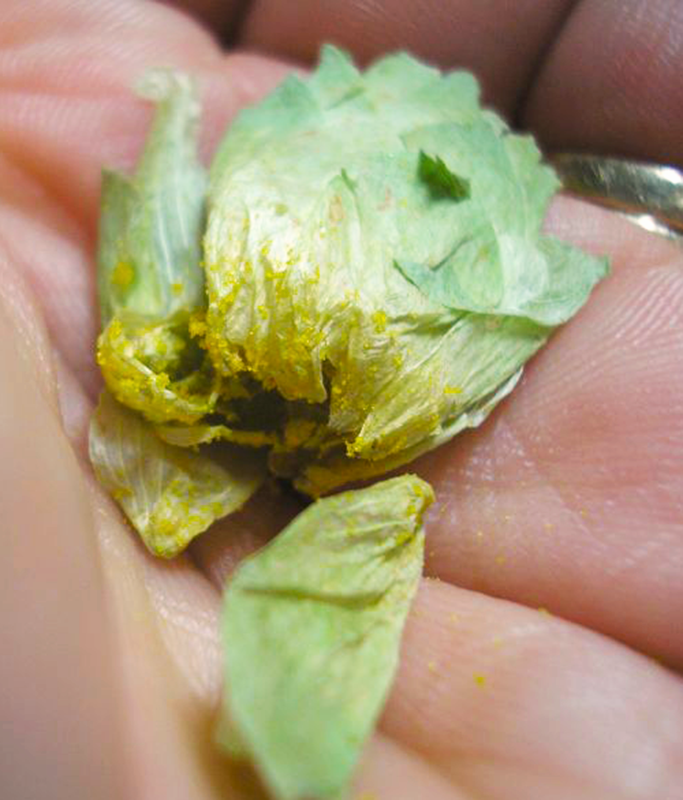
0.5 oz. Fuggles hops at :60
0.5 oz. Fuggles hops at :40
0.5 oz. Fuggles hops at :20
0.5 oz. Kent Goldings hops at :5
1 pack Wyeast 1084: Irish Ale Yeast

DirectionsShop Fermenter
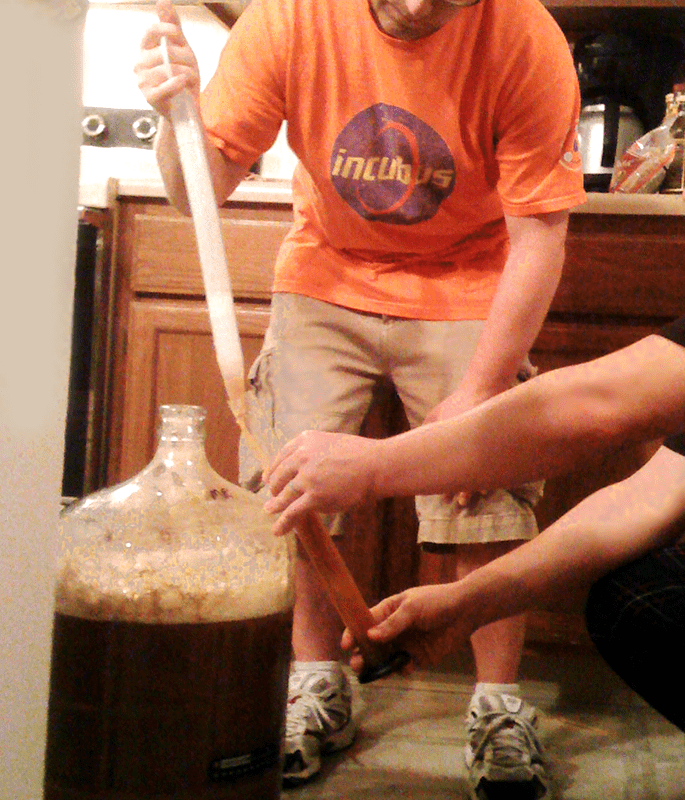
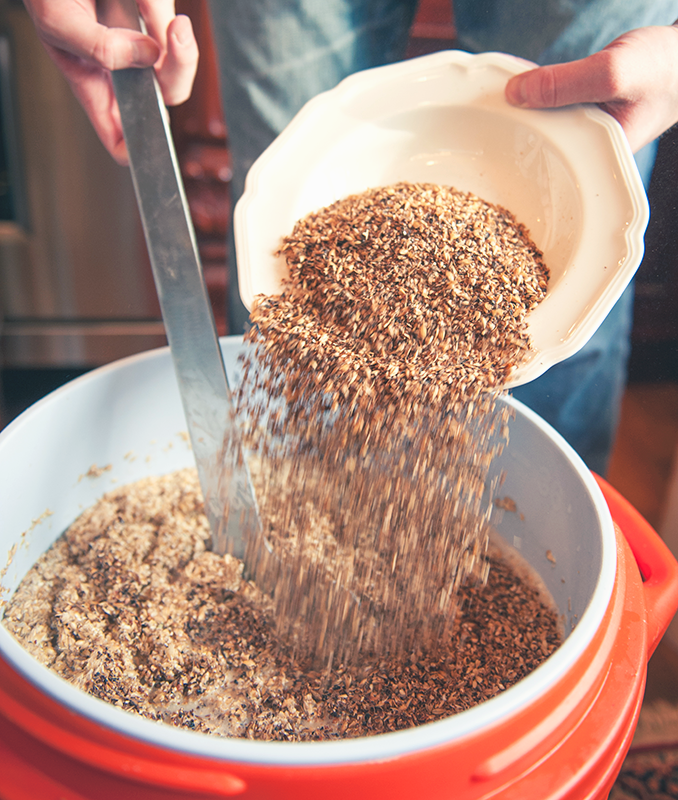
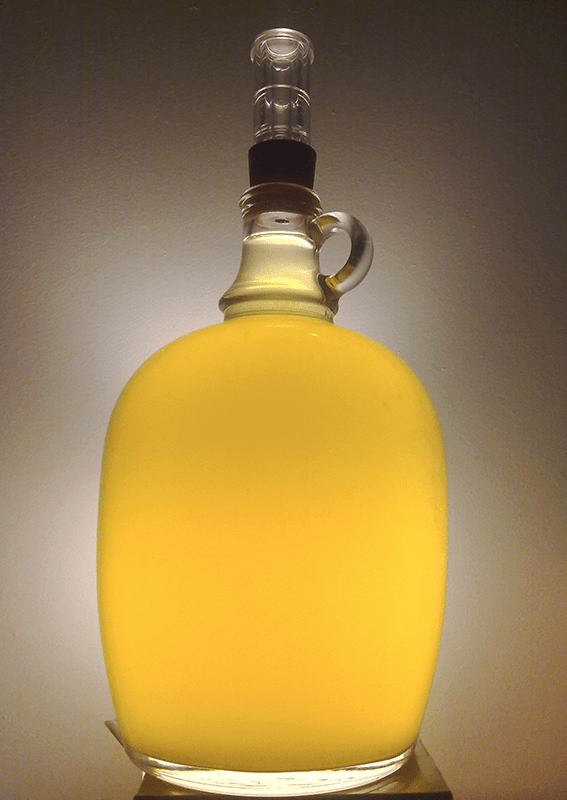
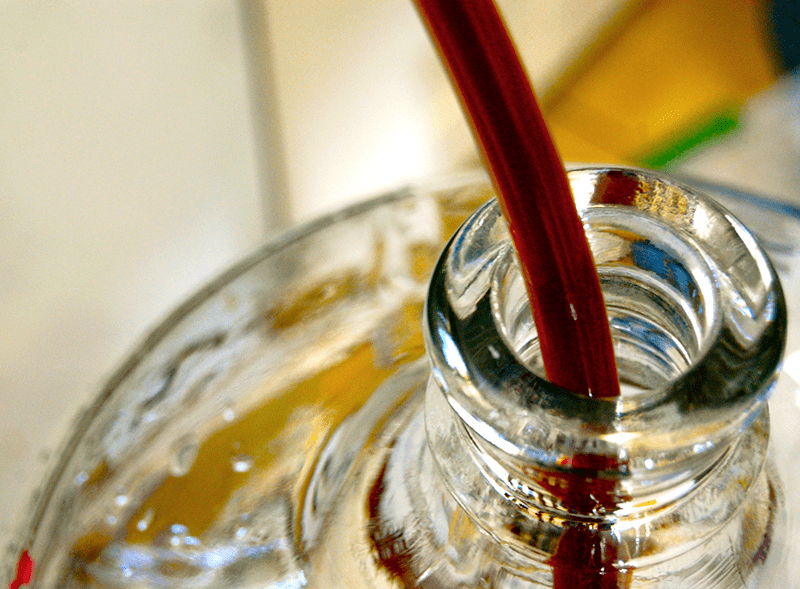
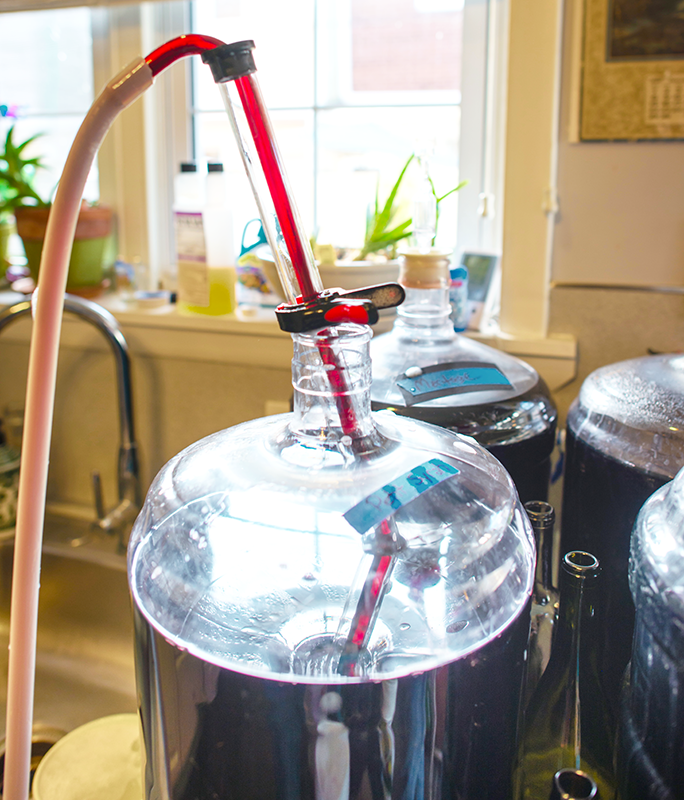
The day before brewing, prepare a 2L yeast starter. On brew day, heat three gallons of clean, chlorine-free water to about 150˚F. Place the specialty grains in a muslin grain bag and steep for 20-30 minutes. Remove specialty grains and mix in liquid malt extract. Bring wort to a boil and boil for 60 minutes. Add hops according to schedule above. At end of boil, cool wort to 65˚F and transfer to a clean, sanitized fermenter. Mix in enough clean, chlorine-free water to make five gallons and pitch yeast starter. Ferment at 65˚F until complete.

All-Grain Directions
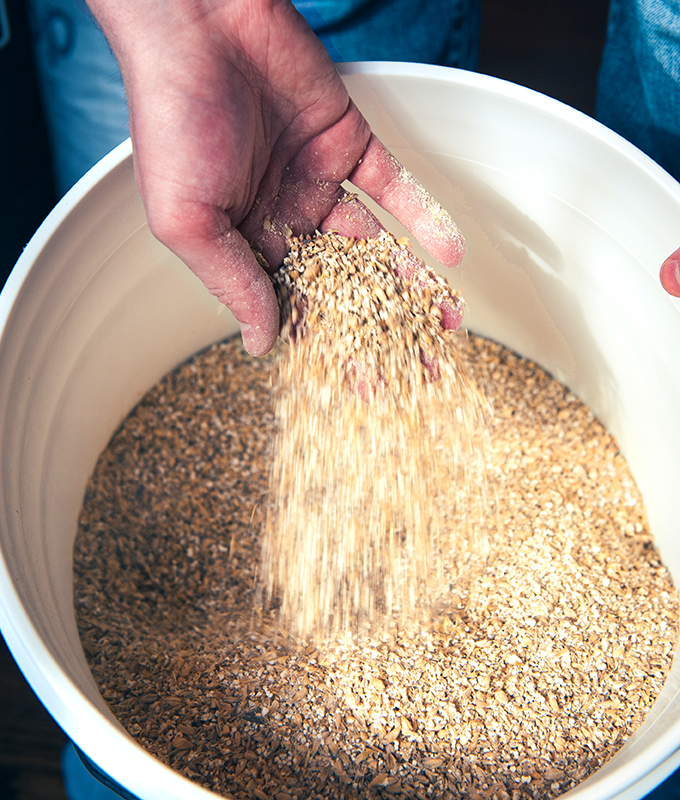
Replace the LME with 8.8 lbs. Maris Otter malt. Combine with the specialty grains and mash for 60 minutes at 150˚F. Lauter and sparge to collectShop Steam Freak Kits about 6.5 gallons of wort in the brew kettle. Proceed with recipe above, but reduce the 60-minute hop addition to .25 oz.
Brewing the Irish red ale beer recipe above is a lot of fun, but if you’re looking for a recipe kit, instead? Try the Steam Freak Dublin Docks Red Ale! It’s a partial mash kit that comes with all the ingredients (pre-measured) and specific instructions to take you through the process.

—–
David Ackley is a beer writer, homebrewer, and self-described “craft beer crusader.” He holds a General Certificate in Brewing from the Institute of Brewing and Distilling and is founder of the Local Beer Blog.

Secondary Fermentation: 3 Ways Your Beer Will Thank You For It!

Beer Going Into Secondary FermentationThere’s an old adage when it comes to making your own beer:
Ask ten homebrewers one question and you’ll get eleven different answers.
For such a unique, do-it-yourself hobby, there are all sorts of ways to approach homebrewing with just as many opinions and processes to consider. But for me, one area stands out as clear as a golden pilsner. I always rack my beer into a secondary fermentation.
It’s a step that may not be completely necessary for every beer you brew, but between habit and success, I’ve made a secondary fermentation a regular part of my brewing process. I believe it’s an effort worth the minimal investment in time – about an hour to transfer and clean up – especially since you just need a second fermentation vessel to pull it off.
So what is a secondary fermentation, anyway? It’s very simple. A secondary fermentation is done by moving your beer to a another fermenter towards the end of fermentation. This could be anywhere from the 3rd to 7th day. Ideally, leave your beer in secondary fermentation for at least one week, but feel free to add more time if additional ingredients are added for flavor.
Shop Carboys
So why should you consider putting your beer in a secondary fermentation?
Here are three good reasons to put your beer through a secondary fermentation:

  1. Manipulate the flavor of your beer
    Because primary fermentation can be rather vigorous and even violent, it’s not worth adding additives/adjuncts to your beer right away. A secondary fermentation offers the perfect time to add fruit, wood, or other flavorings to provide layers of complex flavor to your beer. You’ll be able to maximize taste and aroma without the threat of losing anything. Of course, this is the right time to dry hop, too, which allows all the oils of the hops to be transferred directly into your beer instead of getting boiled off in the wort on brew day. Get all the hoppy characteristics you look for without adding bitterness.
  1. Improve the taste Shop Steam Freak Kits
    Leaving beer on a collection of trub for too long can start to negatively impact the taste of your beer, maybe even creating off-flavors from autolysis. Racking your beer to a secondary fermenter can prevent this. On the flip side, moving a secondary fermentation will give the yeast one more chance to chew up the intricate sugars floating around in your beer, to clean up potential off-flavors (like diacetyl), and help flavors meld together.
  1. Get a clearer beer
    You can use Irish moss or Whirfloc tablets in the boil, but post-brew day, another easy way to clarify your homebrew is to get it off remaining yeast and trub from primary fermentation and allow it to condition a little longer in a new carboy. It also means less sediment to deal with once you’re ready to bottle your homebrew. If you make lots of darker beers, including porters or stouts, doing the two-stage fermentation may not be as necessary. But since I make many lighter beers like IPAs, wheat ales and even a blonde now and then, it matters a lot.Shop Irish Moss

The Bottom Line…
Putting your beer through a secondary fermentation does mean you have to spend a little more time with it (about an hour), and if you’re not thorough in sanitation there is chance for infection. However, in the grand scheme of things, your beer will more often than not look and taste better in the end.
—–
Bryan Roth is a beer nerd and homebrewer living in Durham, North Carolina. You can read his thoughts on beer and the beer industry on his award-winning blog, This Is Why I’m Drunk, and send him suggestions on how to get his wife to drink craft beer via Twitter at @bryandroth.

There's A White Scum On Top Of My Homemade Wine

White Scum On Top Of Homemade WineBill has made a few small batches of home wine, and all went well. This year we did a strawberry-rhubarb and on the third racking in a 5 gal jug, it developed a thin white scum over the center of top. We could get past the film to re-rack, but Bill is concerned it is ruined…is it? Has this white scum on top of his homemade wine ruined it?
Name: Gidget M.
State: PA
—–
Hello Gidget,
What this sounds like is something called flowers or flowers of wine. It starts off as patches of white scum or a white film. If left uncheck it can grow to cover the entire surface of the wine. It is actually a small bacterial growth on the wines surface.
Just because the wine has this white scum or film on top does not mean it is ruined by any means, but some actions should be taken to see that it does not get any worse.
Just as you have suggested, you need to rack the wine away from the bacterial growth. Draw the wine from the center of the fermenter, passed the white film on top, but not from the vary bottom, either. Once you get it racked, dose it with either Campden tablets, potassium metabisulfite or sodium metabisulfite. Any of these will easily destroy any bacteria cells that may still be in the wine.Shop Potassium Bisulfite
What allowed the white scum on top of your homemade wine to occur in the first place was having too much head-space in with the fermenter with the wine. This is okay during a fermentation, when CO2 gas is coming off the liquid, but after the fermentation the head-space needs to be eliminated.
It is the air in contact with the wine that can promote a bacterial growth such as the one you are experiencing. In the future, after the fermentation has completed, I would suggest that you keep whatever fermenter the wine is in topped-up. There are many ways you can top-up a fermenter. You can read more about this in the follow article: Topping Up Your Homemade Wines.
I would also recommend that you automatically add one of the three forms of sulfite mention earlier after the fermentation. This will dramatically help keep your homemade wines from getting this white scum or film.
Shop SanitizersGoing back to your strawberry/rhubarb wine, it is fine. Based on your description, it does not sound like the white scum or film advanced enough to affect the wine’s flavor in any significant way. If sulfites are added to the wine, flavor and aroma would be the only concern to take into consideration. Rack the wine, and add sulfites.
Once the wine has cleared and is ready to bottle, sample it and see what you think. The wine will be perfectly safe to drink. You are only noting the flavor and aroma.
Happy Winemaking,
Ed Kraus
—–
Ed Kraus is a 3rd generation home brewer/winemaker and has been an owner of E. C. Kraus since 1999. He has been helping individuals make better wine and beer for over 25 years.

6 All-Grain Brewing Tips For The First-Timer

Crushed grains for all-grain brewingSo you’ve finally decided to brew your first batch of all grain beer, congrats! Brewing with grains is a big step towards brewing just like the pros.
Thinking back on my beginning homebrew experiences, here are some handy all grain brewing tips for brewing your first batch of all grain homebrew. This are just little tricks and pointers that I’ve learned along the way while learning how to brew all grain beers.

All Grain Brewing Tips

  1. Brew with a friend – Brewing with others is often more enjoyable than brewing solo, but it’s also nice to have an extra set of hands. Better yet, if your friend has experience with all grain brewing, they’ll probably be able to give you some valuable tips and pointers that will serve you well for years to come.
  1. Have plenty of water ready – Due to the nature of mashing and lautering, all grain brewing requires that you have plenty of water. This will mean that you’ll have to plan ahead in order to boil off chlorine or otherwise treat your brewing water. When doing all grain brewing, a five gallon batch will likely need 8-10 gallons of water. Use a calculator like this one to get a good estimate of your water needs ahead of time.Shop All Grain Brewing System
  1. Try brew in a bag (BIAB) – Of all the all grain brewing tips, this one is my favorite. Brew in a bag is a great way for partial mash brewers to transition to all grain brewing. Instead of a mash tun, all you need is a mesh grain bag. With BIAB, your boil kettle should be big enough for a full-volume boil, so if your kettle is five gallons, maybe try a three-gallon batch of beer.
  1. Take notes – Everyone’s brewing setup is different, so while you can find all kinds of advice for how to brew, it’s important that you become intimately familiar with your own all grain equipment and procedures. Take good homebrewing notes so you can refer to them when troubleshooting or replicating a beer recipe.
  1. Don’t be afraid to use malt extract – Just because you’ve started into the world all grain brewing doesn’t mean you have to stick with it forever. Extract and partial mash will still serve you well if you ever find yourself looking for ways to save some time and effort. Even though I normally brew all grainShop Grain Mills, it’s still nice to brew from a homebrew recipe kit once in a while. Plus, adding malt extract to your all grain batches can also make it easier to make high-gravity beers.
  1. RDWHAH – Relax, don’t worry, have a homebrew. Char lie Papazian’s mantra has guided me through several brews that have bordered on frustration. Keeping a cool head will make the experience much more enjoyable. Remember that as long as you follow some basic principles, like good cleaning and sanitation, it’s actually pretty hard to mess up a batch. It’s no accident that I chose this one to be the last of the all grain brewing tips. Take it to heart, and the hobby will become much more fun and enjoyable.

What tips do you have for someone beginning their first batch of all-grain brew?
—–
David Ackley is a beer writer, homebrewer, and self-described “craft beer crusader.” He holds a General Certificate in Brewing from the Institute of Brewing and Distilling and is founder of the Local Beer Blog.

What Are Hop Oils? Explained!

Showing Hop OilsWhile the resins and alpha-acids found within hops are responsible for making beer bitter, essential oils within the hop cone contribute many of the flavor and aroma characteristics that we know and love in some of our favorite beers. If you drink a pale ale or an IPA with a wonderful citrus or pine aroma, you can thank the hop oils for delivering those delightful sensations.

What are hop oils? How are they used in home brewing?
In the anatomy of the hop flower (or strobile), volatile hop oils account for about 1-3% of the weight of the cone. That may not seem like very much, but when you think about it, it doesn’t take a lot of hop oils to give your homebrew a delicious hop flavor.
Hop oils are more delicate than the bittering compounds found in the resins of the hop. That’s why hops for flavor and aroma are typically added towards the end of the boil. Boiling hops for too long drives the hop oils away through evaporation.
Aside from late-boil hopping, dry-hopping is another technique for imparting hop aroma. The hops are essentially steeped in the fermented beer for a number of days until the desired flavor and aroma is reached. An alternative to dry-hopping (if you’re so inclined), is to build your own hop back device, which circulates beer through the hop material to extract those precious hop oils. Here’s more information about adding hops to beer.
Since hop oils begin to degrade immediately after they’re harvested, it’s important that hops are stored properly, preferably nitrogenShop Hops flushed, air tight, and frozen. In light of the fact that hops degrade so quickly, many people enjoy fresh or wet hopped beer, using the hops as soon as they’re harvested.

What are the types of hop oils and their characteristics?
Within the hop, there are several different types of hop oils. Their proportions vary depending both on the hop variety and on seasonal and local conditions. Learning a little about the characteristics of the different oils can help with understanding the flavor and aroma profiles that different types of hops can contribute to a beer. The four primary hop oils found in hops are listed below:

  • Myrcene – Myrcene is the most prevalent hop oil found in many hop varieties, often comprising 50% or more of the total oils in the hop cone. Myrene is commonly associated with floral or citrus aromas in beer. Citra is an example of a hop variety with very high myrcene content.
  • Humulene – Humulene is the second most common hop oil, though in some cases it may be in greater quantity than myrcene. It contributes woody, spicy, and herbal characteristics, and tends to withstand highShop Wort Aerator temperature better than myrcene. Many of the European and noble hop varieties exhibit higher levels of humulene. Some humulene-dominant examples of hops include Hallertau and Vanguard.
  • Caryophyllene – Though usually lower in quantity than myrcene and humulene, caryophyllene has a distinctive woody and herbal aroma, and often contributes an herbal character to beer. Northern Brewer and Perle hops often have higher levels of caryophyllene hop oil.
  • Farnesene – Farnesene usually represents less than 1% of the oils in the hop, though may be as high as 10% or more of the total oil content. But just because it is lower in quantity, doesn’t make it any less potent than the other hop oils. Farnese usually contributes a woody or herbal character. It is well-represented in Czech Saaz, and Tettnang.

Because hop producers don’t usually label homebrewing hops with individual oil levels, it’s best to consult a resource such as YCH Hops to get a general sense of the oil content in your hops. You can also try the sniff test, rubbing the hops together between your hands, or make a tea from the hops.Shop Steam Freak Kits
This is just a basic overview of what hop oils are. Of course, the best way to learn about the flavor and aroma characteristics of different hop varieties is to brew beer with them. You might consider trying this simple experiment, and do a side-by-side comparison of several different hops.

Interested in learning more about hop oils?
Designing Great Beers is a great resources if you’d like to learn more about the specific types of hop oils.
—–
David Ackley is a beer writer, homebrewer, and self-described “craft beer crusader.” He holds a General Certificate in Brewing from the Institute of Brewing and Distilling and is founder of the Local Beer Blog.

Tasty Belgian Beer Recipes You Should Try

Belgian Beer With Head Being Cut
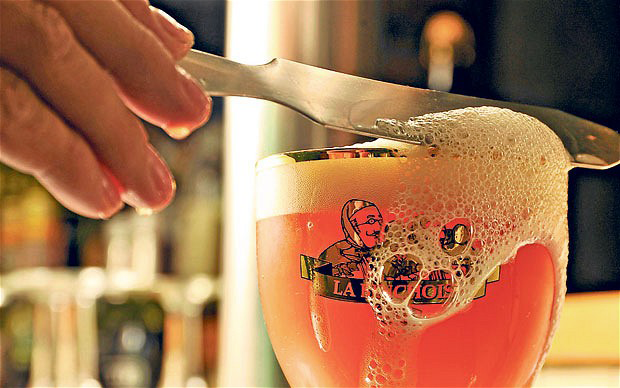
Belgian beers have become all the rage in the United States. Some might even credit them as inspiring the American craft beer movement. Belgian-style beers are characterized by the use of Belgian beer yeast, which produces a wide range of fruity and spicy notes that often make Belgian beers wine-like in their complexity. If you’re a fan of Belgian beers, here are the 7 best Belgian beer recipes that you should try right away:
 

  1. Rochefort 8 Clone (All-Grain) – Rochefort is one of the Trappist breweries in Belgium. The monks at Rochefort have been making beer since medieval times and are credited with making some of the best beer in the world. Rochefort 8 is a dark brown, rich with flavors of dark fruit, and 9.2% ABV.
  1. Westmalle Tripel Clone (All-Grain & Extract) – Westmalle is another Belgian Trappist brewery, founded in 1794. Westmalle Tripel is golden in color with a complex fruity, herbal, and floral character.Shop Beer Flavorings
  1. Belgian Saison Beer Recipe (All-Grain & Extract) – This is a classic Belgian saison recipe, brewed with orange peel and coriander. Some flaked oats give the beer body while brown sugar helps give the beer a dry finish. Feel free to switch out the spices with others such as lemongrass or grains of paradise to create your own interpretation of the style!
  1. Blue Moon Clone Recipe (All-Grain & Partial Mash) – OK purists – I know Blue Moon isn’t actually a Belgian beer, but it’s modeled off of Belgian witbier. This Belgian beer recipe is a good option for those just starting to explore Belgian beer styles.
  1. Belgian Abbey Single (Extract) – At 4.5% ABV, this beer might be considered a Belgian table beer. In other words, a beer that’s low enough in alcohol to be served in a big pitcher on the table and consumed throughout the day. But this beer is still packed full of flavor. The Saaz hops play exceptionally well with the Wyeast Belgian Abbey Ale yeast.
  1. Belgian Lambic (Extract) – Belgium is known for a wide range of sour beers, including lambic. Belgian brewers would often ferment their beer with open fermentation, which would expose the beer to wild yeast and bacteria. In the case of lambic, the beer is made sour from aBuy Beer Recipe Kits lactobacillus bacterial culture. Homebrewers don’t have to practice open fermentation; Wyeast offers a lactic blend that eliminates the guesswork of open fermentation.
  1. Cranberry “Lambic” (All-Grain) – One problem with brewing sour beers is that rogue yeast and bacteria can cause problems when brewing non-sour beers. This Belgian beer recipe uses cranberries to create the sour sensations, but a traditional ale yeast that’s much more predictable.

Brew these Belgian beer recipes and soon you’ll be a master of brewing Belgian beer styles!
What styles or Belgian beer recipes would you like to see added to the list?
—–
David Ackley is a beer writer, homebrewer, and self-described “craft beer crusader.” He holds a General Certificate in Brewing from the Institute of Brewing and Distilling and is founder of the Local Beer Blog.

How to Take a Hydrometer Gravity Sample

How To Take Hydrometer SamplesTaking a gravity sample for a hydrometer reading is one of the basic aspects of homebrewing. Without it, it’s pretty hard to figure out the alcohol content of your beer. But you might be surprised how many homebrewers take gravity readings haphazardly.
How do you take a gravity sample without contaminating your beer?

When testing for original gravity…
This part is a little easier because you can take a gravity sample of boiling (sterile) wort, with little risk of contamination.

  1. Pull a sample of wort at the end of the boil using a clean, glass measuring cup or thief. You’ll need about 3/4 cup of wort for a sample to take your hydrometer reading.
  1. Place the measuring cup in an ice water bath to cool the sample to 60-70˚F. You can do this while you chill your main batch of wort.
  1. Pour the gravity sample into your hydrometer testing jar. Give it some time to settle.
  1. Take the temperature of the sample so you can correct using a hydrometer adjustment calculator, if needed for temperature correction.Shop Hydrometer Jars
  1. Suspend your hydrometer in the gravity sample and give it a spin. Take your reading. The spin is to release air bubbles that may have attached to the side of the hydrometer. These air bubbles can throw off the hydrometer reading by adding to the hydrometer’s buoyancy.
  1. If you want, taste the wort, then discard it. While it may be tempting to put the sample back in the wort, this as a great way to contaminate your homebrew. It’s not worth the six ounces or so of beer.

When testing for final gravity…
This part can be a little trickier. Since the wort is at fermentation temperature, it’s much easier for microbes to grab hold and contaminate your homebrew. To take a sanitary sample for your hydrometer reading, you have two options:

Option #1: The ThiefShop Hydrometers

  1. Use a clean and sanitized thief (plastic, glass, stainless steel) to collect a gravity sample of beer from the fermenter.
  1. Take your hydrometer reading and, if needed, correct for temperature.
  1. Taste the beer, or discard it. Again, it may be tempting to put the gravity sample back in the fermenter, but this as a great way to contaminate your homebrew.

Option #2: Sample from spigot or siphon

  1. If pulling a sample from the spigot, sanitize the spout by spraying the inside with a sanitizer solution. Air dry before collecting the sample. If using a siphon, be sure to clean and sanitize it before placing it in the beer.Shop Fermentation Sampler
  1. Take a gravity sample of beer into your hydrometer testing jar.
  1. Take your hydrometer reading and correct for temperature if needed.
  1. Taste the beer or discard it. Don’t put it back in the fermenter!
  1. If you pulled a sample from the spigot, rinse it out by spraying sanitizer solution into the spout.

What method do you use to take a hydrometer gravity sample?
—–
David Ackley is a beer writer, brewer, and self-described “craft beer crusader.” He holds a General Certificate in Brewing from the Institute of Brewing and Distilling and is founder and editor of the Local Beer Blog.

Increasing Beer Head Retention And Body

Increasing beer head retentionAre you looking for a more foam and body in your homebrew? Drinking a beer that has poor head or no head at all, or is thin and non-lasting can be a disappointment. As a homebrewing you want a beer with a foamy head that lasts and leaves behind some lace on the side of the glass.
Fortunately, there are some things you can do, like utilizing certain specialty and adjunct grains. By using these grains you will be increasing beer head retention and body.

What are specialty grains and adjunct grains?

It’s easy to get hung up on nomenclature, but it’s really quite simple. A specialty grain is anything other than the base malt used to make beer. They can contribute flavor or color to your homebrew. They are used in smaller proportions relative to the total grain bill. Examples of specialty grains include caramel malt and black malt.
Adjunct grains are a type of specialty grain, anything other that malted barley, that are used to make beer. They typically contributed additional fermentable sugar to the beer. Examples include wheat, rye, oats, spelt, corn, and rice. Specialty grains used for increasing beer head retention and body often have higher protein content than barley, which contributes to body. Specialty grains and adjunct grains are typically added to the mash or, in the case of extract beers, steeped as a specialty grain along with some Shop Barley Grainsbase malt.
Without further delay, here are some of the most commonly used specialty grains used for increasing beer head retention and body.

  • Caramel maltCaramel malt is high in unfermentable dextrins, or complex sugars. When these sugars remain in the beer, they help contribute to a full mouthfeel. Adding caramel malt, taking note of the color and flavor contributed by the grain, is one way to enhance the body of your beer.
  • Carapils — Like caramel malt, Carapils (Briess’s brand name dextrin malt) is high in dextrins, but unlike caramel malt, it is light in color, so it will do little to affect the color or flavor of your beer. Use up to about half a pound in a five-gallon batch for more body and increasing beer head retention.
  • Wheat — Imagine a thick, chewy hefeweizen. That creamy body and the billowy head on top of the beer are thanks to the wheat. There are a few choices when choosing wheat: White malted wheat, red malted wheat, torrified wheat, unmalted wheat, and flaked. You can also use a Midnight Wheat in darker Shop All Grain Systembeers. Use about 10% wheat to add some body to a pale ale. As much as 50% or more can be used in wheat beers such as hefeweizens and berliner weisse. Malted, flaked, or torrified wheat can be added directly to the mash; raw, unmalted wheat will need to be cooked first.
  • Oats — Oats are another adjunct grain used for increasing beer head retention and body. It’s most often found in beers like saisons, wits, and oatmeal stouts. Flaked oats are pressed between hot rollers to make the sugars more accessible, but if you’re not too concerned about gravity points, straight oats from the store work well too. Use at most about 25% flaked oats in a grain bill. Most beer recipes will have 5-15% oats.
  • Rye — Like oats, rye can increase body, but might contribute to an oily character. People often describe rye as spicy, but there’s some debate over whether it’s mistaken for the spicy hops that are often paired with rye. Brewers can choose from flaked or malted rye – both give similar results and work wonders in a rye pale ale.Shop Grain Mills

Adding specialty malts to you beer recipe is a practical and natural way for increasing beer head retention and body in your homebrewed beers. Body and head retention should always be kept in mind when creating a beer recipe, trying to brew to style, and even when trying to please your own palate.
Looking for other ways to enhance body and head retention in your homebrew? Read: How to Make a Full-Bodied Homebrew Beer.
—–
David Ackley is a beer writer, homebrewer, and self-described “craft beer crusader.” He holds a General Certificate in Brewing from the Institute of Brewing and Distilling and is founder of the Local Beer Blog.

My Peach Wine Will Not Clear

Wine Will Not ClearI have a peach wine that has a haze to it. The wine will not clear. It has been chilled for 2 weeks after fermentation, racked 4 times and I have added fining agents. It cleared to this fine haze but will not clear any further. Is this a wine that is not going to completely clear and I just need to live with it? Oh yea, there was pectic enzyme added at the start. What are your thoughts? Thanks
Name: Echota
State: TN
—–
Hello Echota,
Base on information you have given, it sounds like the reason your homemade wine will not clear is because you have a pectin haze, even though pectic enzyme was added at the beginning.
Fining agents will take out the particles in a wine that can cause it to be cloudy, but a pectin haze is different. It is not caused by particles. It is caused by the actual make up of the liquid itself. The pectin chemically bonds to the wine, making it impossible to clear with just fining agents such as bentonite or isinglass.
The standard dose of pectic enzyme called for in most wine recipes is enough to breakdown and drop out a usual amount of pectin from the fruit, but in some instances the amount of pectin in a wine must can be unexpectedly large. This leads to the situation you are describing where your homemade wine will not clear, completely.
One way to know for sure if your wine is experiencing a pectin haze is to take aShop Pectic Enzyme sample of the wine, say a half-full quart mason jar, and add a ridiculous amount of pectic enzyme to it. If the wine clears without leaving any sediment, then you know that a pectin haze is the reason for you wine being cloudy.
If the wine clears, but leaves sediment behind, then you know it is a particle haze – not a pectin haze – and more time, gravity and fining agents is the answer to resolving this issue.
Clearing up a stubborn pectin haze in a wine after the fermentation has stopped is somewhat difficult, but it can be done. It’s simply a matter of adding more pectic enzyme to the wine.
The problem really lies with the fact that the fermentation is no longer fermenting. This causes the pectic enzyme to take longer to do it’s thing, so some patience will be needed. It could take as long as a month or two for the pectic enzyme to clear up the wine completely.
If you are using our liquid pectic enzyme the standard dose is 1/8 teaspoon for each gallon of wine. However, in this situation you want to add a double dose of 1/4 teaspoon per gallon of wine. This is in addition to any pectic enzyme you addedshop Bentonite at the beginning of fermentation. If you are using a powdered pectic enzyme the story is the same. Add double the recommended dosage listed on the package and give it time.
When ever a homemade wine will not clear you always want to look towards protein particles such as yeast cells, tannin, etc to be the cause. These are things that can be easily dropped out with fining agents and wine clarifiers. But whenever you get into a situation where that last little bit will not clear out of the wine, no matter what you try, then it’s time to start suspecting a pectin haze to the reason your wine will not clear.

Happy Winemaking!

5 Spot-On Clone Homebrew Recipes

Beer Made From Homebrew Clone RecipesUsing clone homebrew recipes to brew your favorite beers can be a fun and enlightening experience. Every brewer can learn a thing or two by making clone homebrew recipes to replicate the brews of a master. The subtle (or not so subtle) differences between your version and theirs can tell you a lot about your technique, your ingredients, and your equipment. There may be adjustments you need to make between the way they brew it and the way you brew it, since there are some inherent differences between homebrewing and professional brewing.
Are you up for the challenge? Here are five clone homebrew recipes worth trying at home:

  • Terrapin Rye Pale Ale Clone – Have you ever brewed with rye? Rye malt or flaked rye can bring an interesting dimension to your beer, a soft rye spice reminiscent of rye whiskey. This partial mash recipe is a clone of Terrapin Brewing Company’s Rye Pale Ale, which earned them a GABF gold medal in their first year at the competition.
  • Westmalle Tripel Clone – Regarded as one of the best tripels in the world, Westmalle Tripel is reportedly the first beer to use the name “tripel”. The Belgian monks of Westmalle Abbey know how to craft an excellent beer – do you?Shop Steam Freak Kits
  • Pliny the Elder Clone – One of the top 25 beers on BeerAdvocate’s Top 250 list, Pliny the Elder was making hop heads swoon when most other Double IPAs were still a glimmer in their brewer’s eye. This is one of the clone homebrew recipes for the hop-heads. It uses a pound of hops to hit over 100 IBUs! Can you handle it? An all-grain recipe with an extract version is included.
  • Anchor Steam Clone – San Francisco’s Anchor Brewing Co. has been brewing a California Common beer for over 100 years: Anchor Steam. A moderate yet firm hop bitterness characterizes this pale ale/lager hybrid, making it a great choice for a year round session beer. Challenge your fermentation temperature control by holding this beer at 60-65˚F throughout fermentation.
  • Uinta Dubhe Clone – Ever since tasting their beers at a GABF beer and cheese tasting, I’ve been a huge fan of Uinta. This five-gShop Fridge Monkeyallon clone homebrew recipe of Uinta’s Dubhe is a massive black IPA made with 21+ lbs. of grain, 3/4 pound of hops, and toasted hemp seeds – I’m thinking of calling mine “Hop Sludge”. The recipe is derived from an interview with the brewers, so it should be pretty close to the real thing. Just be warned: at over 9% ABV, it’s definitely a sipper!

Interested in developing some of your own clones? Check out these tips for creating clone homebrew recipes from beer blogger Bryan Roth.
—–
David Ackley is a beer writer, brewer, and self-described “craft beer crusader.” He holds a General Certificate in Brewing from the Institute of Brewing and Distilling and is founder and editor of the Local Beer Blog.