Create Your Own Barleywine Recipe! It's Easy!

Barleywine Recipe
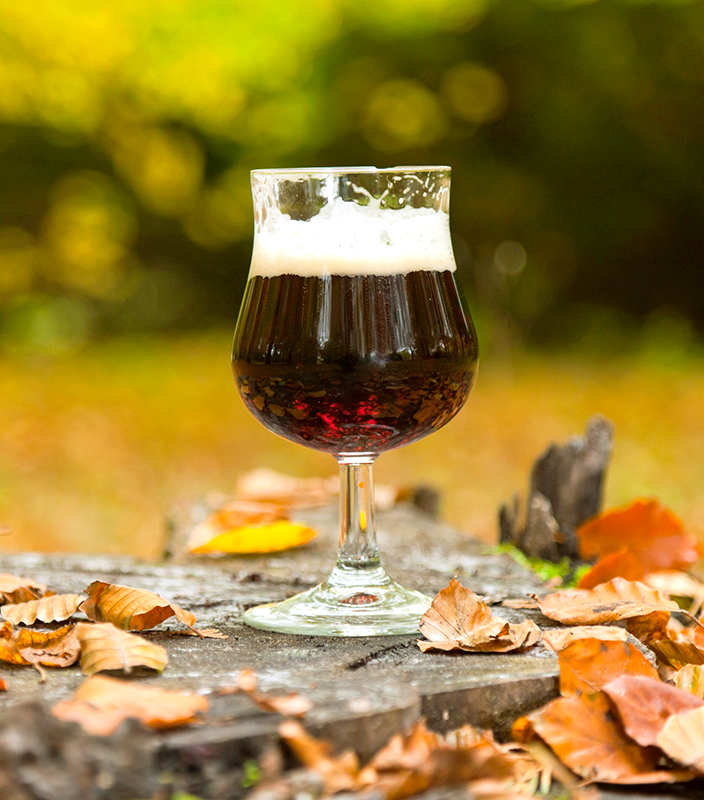
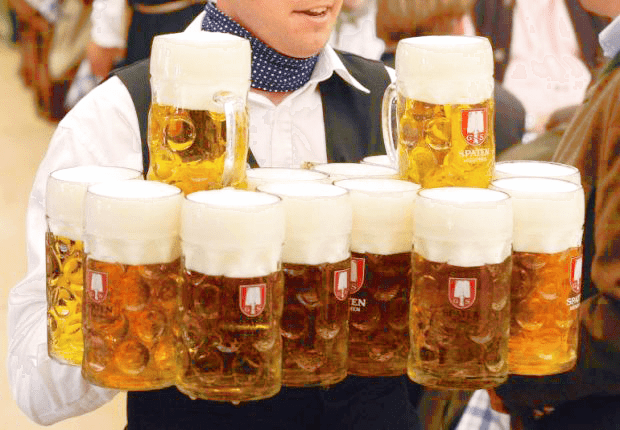
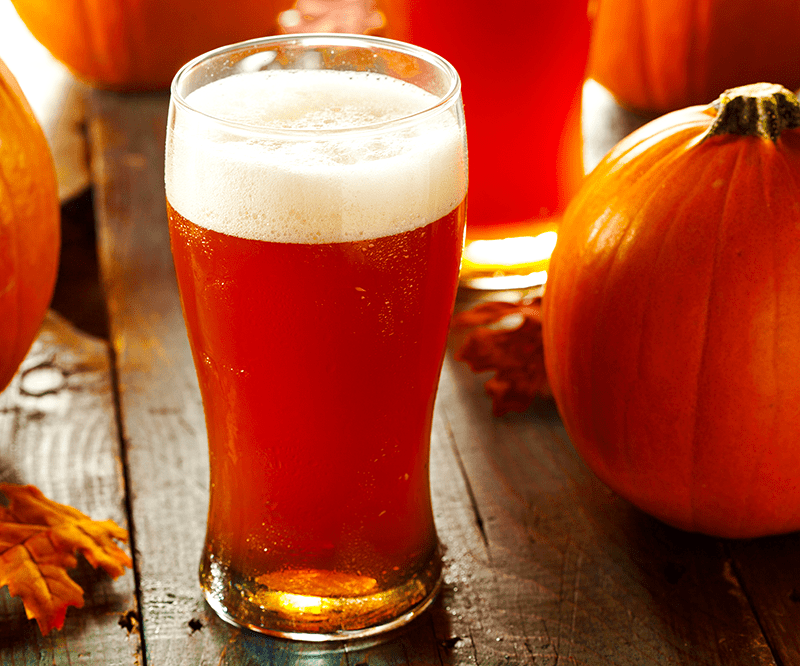
Barleywine is an English style of high gravity ale. A typical barley wine recipe will have loads of malt and extra hops to create a full bodied beer that approaches wine in its alcohol content. Because of the high alcohol content, barleywines are often consumed in the cold weather. They also age well. Brew a barleywine recipe now and be sure to save some bottles for future winter holidays and special occasions!
Looking for a ready-to-brew barleywine recipe kit? Steam Freak Barnstormer Barleywine may be just what you’re looking for! If you’d like to create your own barleywine recipe, consider the tips below.

Creating a Barleywine Recipe: Vital Stats
First, think about whether you’d like to create an American or English barleywine recipe. Traditional English barleywines tend to be a little more malt forward than the American versions. English barleywines will still have a significant amount of bittering hops and will focus on English varieties (like Kent Goldings and Fuggles), while American barleywines tend to use American hop varieties (like Cascade) and will probably have more significant late boil hop additions.
Here are the BJCPs statistics for comparison:
English Barleywine Recipe Profile:
OG: 1.080 – 1.120
IBUs: 35 – 70
FG: 1.018 – 1.030
SRM: 8 – 22
ABV: 8 – 12%
American Barleywine Recipe Profile:
OG: 1.080 – 1.120
IBUs: 50 – 120
FG: 1.016 – 1.030
SRM: 10 – 19
ABV: 8 – 12%Shop Steam Freak Kits

Malt
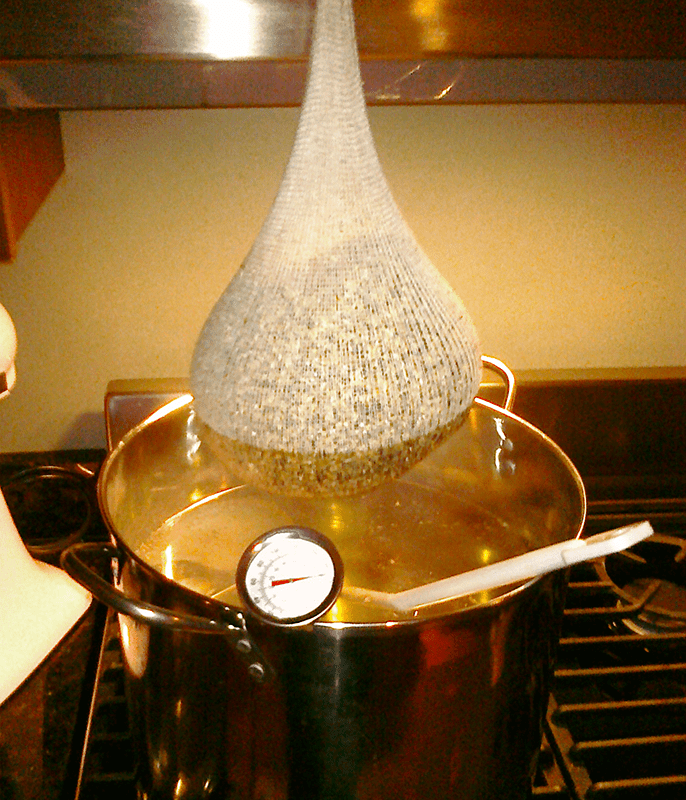
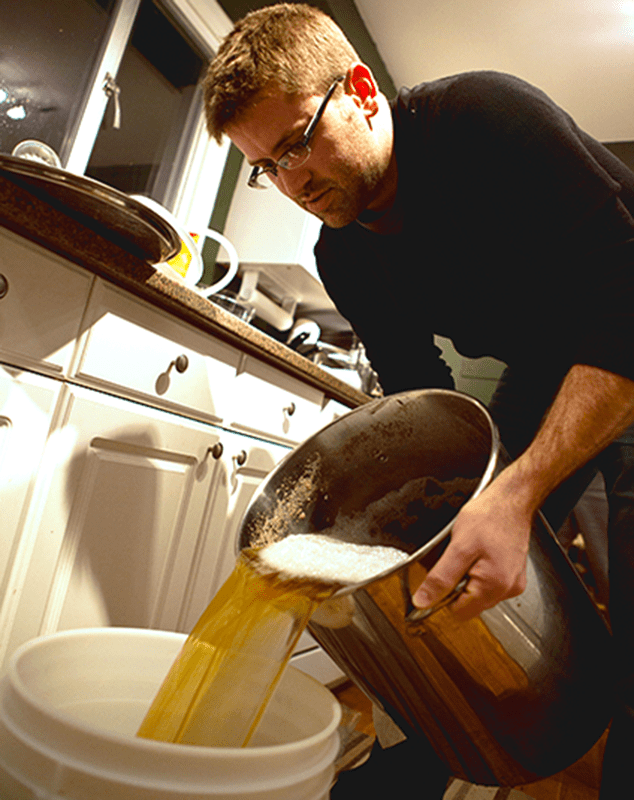
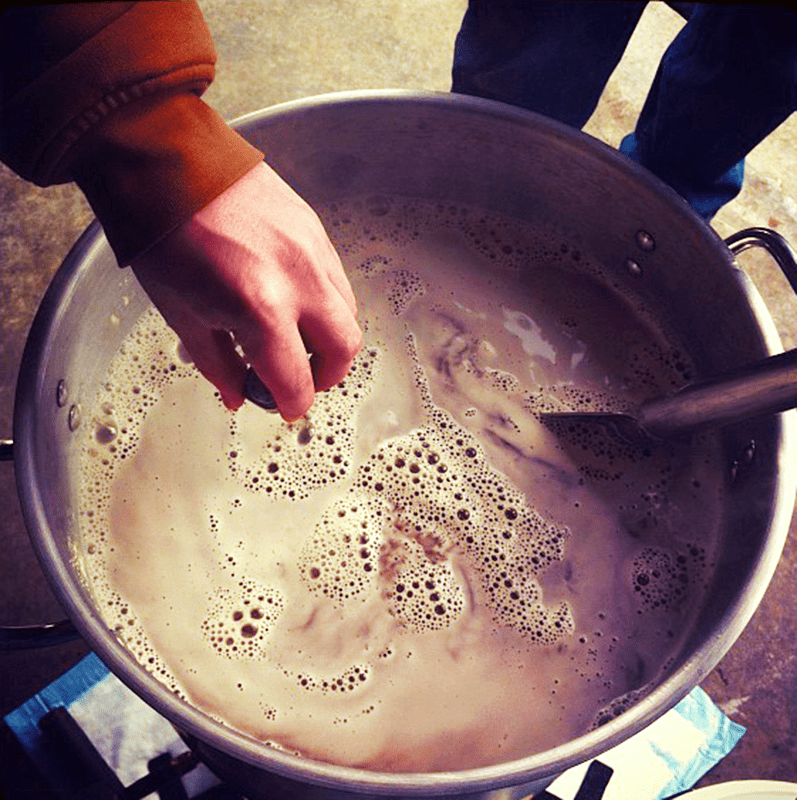
Barleywine ale requires a significant amount of fermentable ingredients to achieve the higher levels of alcohol. Many all-grain brewers will supplement a normal volume of grain with additional malt extract and/or sugar in their barleywine recipes. This allows them to perform a mash that fits in their all-grain system and still collect a decent volume of wort of the appropriate gravity. Aim for an OG of at least 1.090.
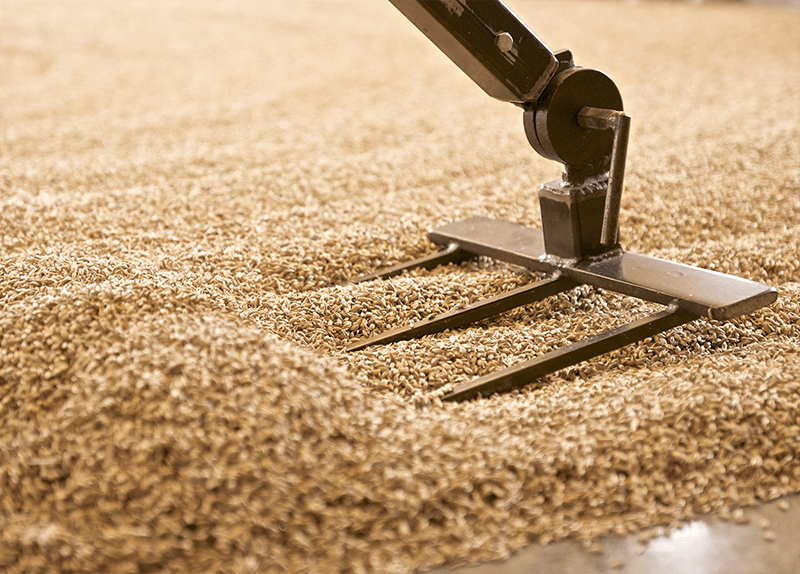
All-grain brewers: Using a pale ale malt as a base, add up to 10-15% specialty malts for color and flavor complexity. A Munton’s mild ale malt would be a good choice of base malt for a traditional barley wine. To create a more fermentable wort, mash the grains at the low end of the range, at about 150°F.
Extract brewers: will need three cans of liquid malt extract to achieve the gravity needed for this brew. Try a combination of light, Munich, and amber LME and steep some crystal malt to get the malt complexity that’s characteristic of barleywines.Shop Liquid Malt Extract

Hops
To balance the enormous malt bill, barleywines are balanced by a generous dose of bittering hops. Higher alpha acids hops, such as Chinook, work well for this purpose. At least an ounce will be needed in the early part of the boil, probably two. If bittering with a lower alpha acid hop, such as East Kent Goldings (a traditional English variety), use at least three ounces for a five gallon recipe. Four or five ounces of bittering hops would be better.
In barleywines, hop flavor and aroma vary quite a bit. An American-style barley wine will likely have more hop flavor and aroma than an English one. Think about your taste preferences and add late addition hops accordingly. Centennial and Cascade are popular choices to add to an American barleywine recipe. Fuggles and Willamette are also good options.
Dry hopping isShop Hops common and traditional for English ales. Consider adding 1-2 oz. dry hops (or more based on your preference) up to a week in advance of bottling.

Beer Yeast
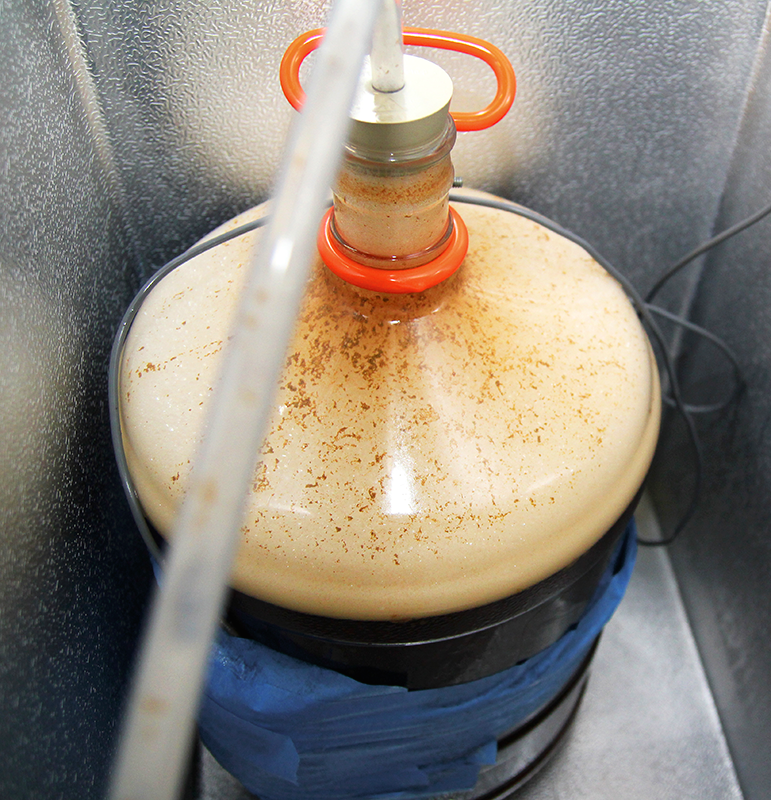
Be prepared for a long fermentation. Barleywines are also typically aged. If you want your barleywine to be ready for Christmas or New Year’s, plan to start your barley wine recipe at least two or three months in advance of when you plan to serve it. Many American and English ale yeasts will work. The best yeast for a barleywine recipe, I have found is Wyeast 1728: Scottish Ale. You may also want to consider Wyeast 1056: American Ale, or even a combination of the two.
For brewing a high gravity beer, it’s essential to pitch enough beer yeast to complete the fermentation. Be sure to prepare a yeast starter (you’ll probably need about three liters) and aerate the wort well prior to pitching. Alternatively, use three packs of liquid beer yeast in order to have enough yeast cells. It may be necessary to pitch a second yeast (possibly a different strain) when racking into secondary fermentation, so it might be a good idea to have some Safale-S04 or Safale-S05 on hand.Shop Liquid Beer Yeasat
Ray Daniels points out the traditionally, brewers would rouse, or stir up the yeast throughout the secondary fermentation to make sure that it remained active:
“One favored method of rousing was to take the large secondary fermentation casks for a “walk.” Periodically, each cask would be taken out and rolled around the brewery courtyard a few times to achieve the necessary awakening of the yeast.”
Sounds like a good way to get some exercise!
Do you have experience with brewing a barleywine recipe? What tips do you have to share? We’d love to hear them!
—–
David Ackley is a beer writer, brewer, and self-described “craft beer crusader.” He holds a General Certificate in Brewing from the Institute of Brewing and Distilling and is founder and editor of the Local Beer Blog.

Partial Mash Brewing: 5 Reasons To Love It!

Partial Mash BrewingSometimes partial mash brewing gets a bad rap. Some think that the only way to make good beer is by brewing all-grain. On the contrary, you can make good beer with malt extracts and some specialty grains. I can think of several examples of good beer made with malt extract, and if you’re a homebrewer, chances are you can too.
Having recently gotten back into partial mash brewing in my home brewery, I’d like to share a few of the reasons I’ve enjoyed going back to this simpler method of brewing:

  1. It’s how most of us got started with homebrewing. Maybe you’ve been brewing for a while. Remember partial mash? Remember those first few batches you did way back when, the ones that came out surprisingly good? Without the ease and simplicity of partial mash brewing kits, you may not be brewing today. Try getting back into partial mash brewing, and whatever you do, don’t discourage would-be homebrewers by giving partial mash a bad name.
  1. Partial mash brewing takes less time. Partial mash brewing eliminates a couple key steps of the brewing process: the mash and the lauter. Combined, these steps can take well over an hour. Additionally, since a partial mash brew often has a smaller boil volume, it takes less time to bring the wort to a boil, and less time to chill it afterwards. Looking for other ways to save time while homebrewing? Check out these 8 Time-Saving Tips for Homebrewers.
  1. Shop Steam Freak KitsPartial mash brewing requires less effort. Because there’s less grain and less water, there’s less heavy lifting when doing partial mash recipes. Plus, with the easy availability of partial mash brewing kits, there’s no need to stress over building a beer recipe.
  1. Partial mash means easy cleanup. Partial mash brewing may only leave you with a pound of so of spent grains. It’s much easier to dispose of a pound than ten or more pounds of wet grain. Better yet, it’s a perfect amount of spent grains to put into spent grain bread or dog treats. Plus, if using a grain bag, you don’t have to clean out a mash tun.
  1. You still end up with great beer! At the end of the day, a partial mash brewing kit still gives you five gallons of great beer. With a few tricks up your sleeve – stellar cleaning and sanitation, late extract additions, yeast starters, fermentation temperature control – you’ll be able to make great beer every time.Shop Home Brew Starter Kit

Partial mash brewing offers quite a few advantages over all-grain. If you’ve been brewing all-grain for a while, maybe it’s time to circle back and give partial mash another chance.
Do you brew partial mash vs all-grain? Why or why not? Share in the comments below!
—–
David Ackley is a beer writer, brewer, and self-described “craft beer crusader.” He holds a General Certificate in Brewing from the Institute of Brewing and Distilling and is founder and editor of the Local Beer Blog.

Base Malt Guide: Descriptions & Comparisons

Base MaltBase malt is the term we use to refer to the majority of the malted grains used to make beer. Base malt typically forms between 70% and 100% of the malt used in a given homebrew recipe. Base malts are certainly used by all-grain brewers, but also by partial mash and extract brewers who may want to add some diastatic power to their mash or additional grain flavor to their beer. One or more types of base malt may be used in a beer, often complemented by a range of specialty malts for additional flavor, body, and other characteristics.

All base malts are typically:

  • Made from barley. (Though beers can be made from 100% malted wheat or rye, these are generally considered adjunct grains.)
  • Light in color.
  • Kilned at a low enough temperature to maintain the diastatic power of the malt.

Below is a base malt guide with descriptions and comparisons. It’s a list of the most popular base malts used in home brewing. Also provided is a brief profile of each one:

  • Two-row malt – Two-row base malt is made from two-row barley, which typically features plump kernels and a high starch to protein ratio. Light in color at 1.8˚L.Shop All Grain System
  • Pilsner malt – This base malt is the lightest colored malt available (1˚ Lovibond). It works well for very light lagers and ales. Its profile makes it a suitable base malt for brewing just about any style of beer, but it is a must when making a pilsner lager.
  • Pale or mild ale malt – As a comparison, pale malt is kilned at a slightly higher temperature than pilsner malt, giving it a slightly darker color (2.5˚L) and a maltier flavor. It’s a good option for just about any ale recipe, especially pale ale, IPA, brown ale, porter, and stout.
  • Vienna malt – Vienna malt is another step above pale malt in terms of darkness (3.5˚L). It’s a great option for Vienna lagers, Oktoberfest, and other amber lagers.
  • Munich malt – This base malt is the darkest malt that still has diastatic power. Its flavor profile is has rich, malty flavor reminiscent of bread crusts. As much as 100% Munich malt may be used in some types of German-style dark lagers, such as bocks and Munich dunkel. 10-20˚L.

Shop Barley GrainsThis is not a complete base malt list, but these are by far the most common ones with some descriptions and comparisons. As you can see each one has its own profile, including comparisons and contrast with each other. With these simple variations alone, you can begin creating a world of beers.
Want to learn more about the differences between the different base malts? Try this experiment: Brew five, one-gallon, single-malt beers using the same amount of malt, the same yeast, and the same hopping schedule. How are the beers different?
—–
David Ackley is a beer writer, brewer, and self-described “craft beer crusader.” He holds a General Certificate in Brewing from the Institute of Brewing and Distilling and is founder and editor of the Local Beer Blog.

Brewing A German Bock Beer Recipe

Bock BeerBock is a traditional German beer typically served in late winter and early spring. A higher-gravity lager, the added alcohol provides a warming kick to help throw off the winter chills.
As a lager, this beer style requires good control of fermentation temperatures to brew it successfully. Expect to ferment for 2-3 weeks at about 50°F, followed by a lagering phase between 32-35°F for two months or more. If you have this capability, read on to develop and brew your own German bock beer recipe!

Choosing a Bock Style
There are a few kinds of bock to choose from, varying somewhat in regards to gravity and color. The traditional bock beer must be at least 1.066, according to German law. It is malt forward and medium bodied, generally a copper or light brown color. A Maibock or Helles bock is similar but golden in color, with a touch more hop bitterness. Maibocks are traditionally served in May.
Dopplebock originated in the Germany monastery that predated Paulaner Brewery. Their famous Salvator defines the style, such that other dopplebocks commonly use -ator in their name (e.g. Spaten Optimator, Troeg’s Troegenator, Ayinger Celebrator). Dopplebocks are higher in gravity that traditional bocks, at least 1.074 according to German law.
Finally, Eisbock is the strongest variety of bock, with an original gravity typically 1.092-1.116. If you’ve never brewed a bock before, start with a traditional bock or Maibock, as the higher gravity beers can be a challenge.
The guidelines that follow are for brewing a traditional bock beer recipe:

Bock Beer Recipe Malt
Though bock originated in the German town of Einbeck, it soon found a home in Munich. In Designing Great Beers, Ray Daniels suggests that brewers in Munich likely used as much as 100% of what we now know as Munich malt. Many homebrewers will combine a significant portion of Munich malt with pilsner malt and some specialty grains, such as chocolate malt or crystal 120°L, in their bock beer recipes.
In Germany, bocks must have an original gravity of at least 1.066, so an all-grain bock beer recipe will likely need about 12 pounds of grain for a five gallon batch. One option would be to supplement a grain bill with enough malt extract to reach the appropriate OG.
In either case, mash in the higher end of the temperature range (~155°F) to achieve a beer that will have enough body and residual sugar to be appropriate for the beer style.
For partial mash brewers, use two to three cans of Munich malt extract. Perform a mini mash with some Munich malt and specialty malt for improved flavor and body.

Bock Beer Recipe HopsShop Steam Freak Kits
Bocks are malt forward beers with little to no hop flavor or aroma, so hops will only be used to provide enough bitterness to keep the beer from being overly sweet. 20-27 IBUs is the range provided by the BJCP for Traditional Bock. Consider using traditional German hops such as Hallertau or Tettnanger for an authentic bockbier.

Bock Beer Recipe Yeast
When brewing a German bock beer recipe, Ray Daniels recommends the Bavarian strain of lager yeast (Wyeast 2206) for this beer style. He also recommends using a yeast starter pitched into well-aerated wort only when it has been cooled to fermentation temperature (45-55°F). A long (approx. two month) lagering period as low as 32°F will help develop the clean, malt forward flavor as appropriate for the style.

German Bock Beer Recipe
(5 Gallon, Partial Mash)
Total Batch Size: 5 Gallons
Recipe Type: Partial Mash
Approx. Original Gravity: 1.069
Total Boil Time: 60 min.Shop Heating Belt
Anticipated IBUs: 24-30
Estimated ABV: 7.2%
Fermentables:
6.6 lbs. Steam Freak: Munich Liquid Malt Extract
1.5 lbs. Dried Malt Extract (Light)
1 lb. Munich malt
0.25 lb. Chocolate malt
Hops:
1.5 oz. Pelletized Hallertau (60 min. Boil Time)
0.5 oz. Pelletized Hallertau (20 min. Boil Time)
Yeast:
Wyeast 2206: Bavarian Lager Yeast
Bottling:
5 oz. Priming Sugar (Corn Sugar)
52 Bottle Caps Shop Conical Fermenter
Directions:
This is a “partial mash” style of bock beer recipe. To make this beer recipe you will need to follow the Partial Mash Directions. Be sure to prepare a yeast starter in advance and pitch yeast into well-aerated wort that has been cooled to fermentation temperature (45-55°F). Lager for 6-8 weeks at 32°F, then bottle.
Til next time…Cheers!
—–
David Ackley is a beer writer, brewer, and self-described “craft beer crusader.” He holds a General Certificate in Brewing from the Institute of Brewing and Distilling and is founder and editor of the Local Beer Blog.

7 Skills For Becoming A Better Homebrewer

Person Becoming A Better HomebrewerWhat skills are needed for becoming a better homebrewer? Do you need to be the boldest out of your friends or have the biggest beard? I don’t think so.
Homebrewing is a hobby that (in addition to providing you with great beer!) offers an opportunity to develop a wide range of skills. Not only do these skills make you a better brewer, but they can be transferred to other hobbies and activities as well. So in a sense, becoming a better homebrewer is a path towards self-improvement.
Below you can learn about 7 key skills I’ve needed to master to help me become a better homebrewer:

  1. Attention to detail – Together, cleaning and sanitation comprise the critical first step in homebrewing. If you can’t keep your equipment clean or skip steps on the sanitation process, sooner-or-later you’ll get an infected homebrew and have to dump a batch. While you can avoid some of the more “science-y” aspects of homebrewing, don’t skimp on cleaning and sanitation.
  1. Resiliency – Homebrewing is not for people who give up easily. At times, you may encounter frustration. Just remember to breathe and keep in mind that you’re doing this for fun!
  1. Problem solving – Becoming a better homebrewer means being Shop Liquid Malt Extracta better problem solver. Occasionally, something will not go as planned with a batch of beer. Homebrewing tests your ability to break down a multi-step process to identify the source of a problem. Even when things go right, you will be tested to identify the nuances in process and ingredients that affect a beer’s color, flavor, aroma, and other characteristics.
  1. Creativity – Homebrewing is a great avenue for exploring your creative side. Just about any ingredient can be used when making beer. Want to brew some unusual concoctions? Try a chipotle smoked porter, oak barrel IPA, or a maple Scotch ale to flex your creative muscle.
  1. Consistency – This skill is essential for professional brewers, but it can be important for homebrewers as well. Anyone can brew one good batch of beer, but can you do it over and over? Take good homebrewing notes and test your consistency by perfecting some of your favorite beer recipes.
  1. Curiosity – Homebrewing offers an endless path for learning, whether it’s about yeast propagation, water chemistry, or calculating IBUs. If you’re inclined to dive deep into a hobby, then homebrewing is for you.Shop Home Brew Starter Kit
  1. Good attitude! – This one can’t be stressed enough. Above all, homebrewing should always be fun. That’s not to say it won’t be challenging at times. But sometimes becoming a better homebrewer requires that you remind yourself of the reasons you started homebrewing in the first place. If you ever need a refresher on how to keep your cool, check out Hops, Malt, and Zen: How I Learned to Relax, Not Worry, and Enjoy Homebrewing.

What skills would you add to the list for becoming a better homebrewer?
—–
David Ackley is a beer writer, brewer, and self-described “craft beer crusader.” He holds a General Certificate in Brewing from the Institute of Brewing and Distilling and is founder of the Local Beer Blog.

Mead Making Tips From Michael Fairbrother

Mead Making Tips From Michael FairbrotherThe BeerSmith blog featured a video interview back in 2015 that had some very good insights to making mead. It was with the founder of Moonlight Meadery, Michael Fairbrother, how to brew your own mead. As I’m planning on making my first mead, I thought I’d share some of the mead making tips I learned from the video.
Below are some of Michael’s key mead making tips. There’s enough clear-cut information here that you will be able to create your own mead recipe:

Water

  • Use clean, filtered, or reverse osmosis water for your mead.

Honey

  • Use fresh, non-pasteurized honey whenever possible for best flavor. See the honey locator at honey.com to find fresh, raw honey near you!
  • Different honeys have different flavors: tupelo honey tends to be spicy, and citrus honey might have notes of orange.
  • Michael recommends using cranberry, blueberry, blackberry, and avocado honeys, among others.
  • Michael does not recommend buckwheat or heather honey, as these tend to be heavy.
  • Michael suggests a honey to water ratio of 25:75 for a semi-sweet mead. Use more honey for a sweeter mead, less honey for a drier mead.Shop Wine Yeast

Yeast

  • One of Michaels biggest mead making tips is do not use champagne yeast.
  • Michael uses Lalvin 71B wine yeast for all of his meads.
  • Pitch about 1 gram of yeast per gallon for a healthy fermentation.

Equipment
If you’re a homebrewer or winemaker, you probably already have all the equipment you need for making mead.

  • Use a fermenting bucket for primary fermentation. It’s easier to stir the must and helps prevent some kind of blow-off situation.
  • After primary fermentation, move the mead to a carboy and minimize headspace.Shop Fermenter

Yeast Nutrients

  • Always rehydrate your yeast nutrient in a pint of water.
  • For best results, divide your yeast nutrient by four and pitch it four times during primary fermentation: at 0, 24, 48, and 72 hrs into fermentation. This will help the mead develop more quickly.

Fermentation

  • Primary fermentation – Michael usually lets his mead sit for three months before racking to a secondary fermenter.
  • Ferment at about 62°F. This is one of Fairbrother’s favorite mead making tips. The cooler temperature will result in a longer fermentation, but with a cleaner tasting mead.

AdditivesShop Bentonite

  • Michael recommends using bentonite or a wine filter to get good clarity.
  • Sulfites or sorbates can be used to keep the mead stable after fermentation.
  • Flavorings – Moonlight’s most popular mead is made with apple, honey, cinnamon, and vanilla.
    • Fruit – Adding fruit to a mead makes a melomel. The fruit is typically added right at the beginning, though it can be added to the secondary as well.
    • Spices – Add spices to your mead to make a metheglin. Add the spices during secondary fermentation. Taste the mead throughout the secondary fermentation and rack the mead to another fermenter when the balance tastes right. This may be just a few days for some of the more aggressive spices.

Shop Mini Jet Wine FilterResources
These are great mead making tips for the beginner. You can also fine more information in the book Mead Making, available in the E. C. Kraus web store.
Are you a fan of making mead? What kinds of honey do you use, and what is your favorite style of mead to make?  Do you have any mead making tips? Or, maybe a mead recipe you’d like to share?
—–
David Ackley is a beer writer, brewer, and self-described “craft beer crusader.” He holds a General Certificate in Brewing from the Institute of Brewing and Distilling and is founder and editor of the Local Beer Blog.

Oktoberfest Beer Recipe (Extract and All-Grain)

Oktoberfest BeerBelieve it or not, summer is coming to a close and fall is quickly approaching. It’s time to celebrate the bounty of the growing season and get ready for the brewing season ahead. That’s where these Oktoberfest beer recipes come in!
The first Oktoberfest was held in 1810 to celebrate the marriage of Crown Prince Ludwig and Princess Therese. Since then, the Oktoberfest in Munich has grown, attracting some 6 million visitors every year, and now holds the title of the world’s largest fair. The tradition has spread throughout Germany, and into the US and other parts of the world.
Here’s a little about the Oktoberfest beer style. Contrary to what the name implies, Oktoberfest actually begins in September. Oktoberfest beer is technically a Märzen, an amber lager brewed in March to be stockpiled through the summer. At the Oktoberfest celebration, all remaining Märzen would be consumed prior to the beginning of the new brewing season. Today, only a handful of Munich breweries are allowed to serve beer at Oktoberfest and dub their brews “Oktoberfestbier”.
To brew an authentic Märzen or Oktoberfestbier, it should be lagered, or stored at colder temperatures to develop a smooth flavor. My very first home brew recipe kit was a German Oktoberfest beer recipe. Even though I wasn’t able to lager it, you can bet I drank every last drop. If you can’t lager your Oktoberfest, don’t worry – you can still make a delicious Oktoberfestbier!
The following two Oktoberfest beer recipes are suitable for any level of brewer:

Oktoberfest Beer Recipe (Extract)
Shop Steam Freak KitsInstructions: This simple extract recipe comes from our beer recipe database. Either steep the specialty grains at around 150°F as you heat the brewing water, or perform a partial-mash following these directions.
Batch Size: 5 Gallons
Recipe Type: Partial Mash
Approx. Original Gravity: 1.053
Total Boil Time: 35 min.
Est. IBU: 24-26
Fermentables:
6.6 lbs. Steam Freak Munich LME
Specialty Grains:
8 oz. Carapils® Malt
8 oz. Caramel (Crystal) Malt 40°L
Hops:
1.00 oz. Pelletized Mt. Hood Hops (35 min. Boil Time)
1.00 oz. Pelletized Hallertau Hops (15 min. Boil Time)
Yeast:
Lallemand’s Munich
Bottling:
5 oz. Priming Sugar (Corn Sugar)
52 Bottle Caps

Oktoberfest Beer Recipe (All-Grain)
Shop FerMonsterHere, I’ve adapted the beer recipe above for all-grain brewing. If you can’t lager your beer, do your best to keep fermentation temperatures low and under control.
Batch Size: 5 Gallons
Recipe Type: All Grain
Approx. Original Gravity: 1.053
Total Boil Time: 35 min.
Est. IBU: 24-26
Fermentables:
5 lbs. Briess Munich Malt
5 lbs. Briess Pilsen Malt
8 oz. Carapils® Malt
8 oz. Caramel (Crystal) Malt 40°L
Hops:
1.00 oz. Pelletized Mt. Hood Hops (35 min. Boil Time)
1.00 oz. Pelletized Hallertau Hops (15 min. Boil Time)
Yeast:
Lallemand’s Munich
Bottling:
5 oz. Priming Sugar (Corn Sugar)
52 Bottle Caps
Shop FermentersInstructions: Mash the grains at 154°F for 45 minutes. Raise to 170°F and sparge, drawing off 5.5 gallons of wort. Boil 60 minutes, adding hops at the times listed above. Remove from heat, cool, and pitch yeast. If possible, do a primary fermentation at 55-60°F for two weeks, then lager for one month or longer at 40°F.
Do you have a Oktoberfest beer recipe you’d like to share? It doesn’t matter the recipe can extract, partial mash or all grain. What’s your favorite commercially made Oktoberfest beer? Sam Adams? Do you have a clone Oktoberfest beer recipe for that? Share below!
—–
David Ackley is a beer writer, brewer, and self-described “craft beer crusader.” He holds a General Certificate in Brewing from the IBD and is founder of the Local Beer Blog.

Homebrew Experiment: Adding Gypsum To Beer To Affect Flavor?

Adding Gypsum To BeerI recently dove head on into the world of water treatments for homebrewing. I’ve always made changes to my brewing water to control mash pH, but I decided it was time to look at water from a historical/regional perspective to see exactly how does gypsum affect beer flavor. Gypsum, also known as calcium sulfate, is a major component in many of the brewing water profiles used around the world. But, does adding gypsum to beer really make a difference in flavor?
Let’s back up for a moment to review one of the ways water and its mineral content, or hardness, can impact your homebrew’s flavor. Different regions of the world have different mineral compositions in their brewing water supply. These differences can be significant. Just look at the levels (ppm) of these common minerals in Burton-on-Trent (UK) vs. Plzn:

Burton-on-Trent

Plzen

Calcium

294

7

Carbonate

200

15

Chloride

36

5

Magnesium

24

2

Sodium

24

2

Sulfate

800

5

*Source: Homebrewing for Dummies

In these two examples, it’s believed that the high sulfate water of Burton-on-Trent led to the development of bitters and pale ales, whereas the soft water of Plzen in Bohemia (now the Czech Republic) was suited to the creation of crisp, clean lagers. Homebrewers have the ability to mimic regional brewing water profiles by adding gypsum to beer along with others such as calcium carbonate.
Having just brewed and English Bitter, I was curious how a Burton brewing water profile might affect the flavors in the beer. After doing some research, I came across an experiment to help gauge the effects of a mineral salt on a beer. It goes like this:Shop Gypsum

  1. Prepare concentrated solutions using the mineral salt in question. For my test, I’m using gypsum. I started with filtered or distilled water and add measured amounts of the salt in one-gram increments into 500ml or 1L volumes of water.
  1. Measure out equal beer samples. Be sure to use a consistent volume and record it in your notes.
  1. Add 1 ml of each solution to the different samples. After doing the first round of taste tests, you might try adjusting the concentration of the solution.
  1. Take notes on how the flavor changes and find your ideal adjustment. Be sure to have some water and possibly some unsalted, relatively bland crackers or bread between each sample to cleanse your palate.
  1. Calculate how much salt would be needed for a full volume batch of beer.

So how did my experiment go? Did adding gypsum to beer affect its flavor?
Initially, the concentration of gypsum I was adding to the beer was too low to make any difference. I started with a 1 gram gypsum/500 mL water solution. Adding 1 mL of said solution to a 125 mL sample of beer only increased the effective concentration of by 1.6 ppm – an imperceptible change for my palate. As you can see, it would take a very concentrated amount of gypsum/water solution to simulate the Burton water profile. What I ended up doing was stirring about .5 gram of gypsum into a .5 L sample of beer to come close to the level of Burton water in the English bitter. Using this concentration of gypsum absolutely affected the beer’s flavor. The hops went from a background bitterness to a full floral sensation that covered the whole mouth. I will definitely use more gypsum in future pale ales.
Shop Digital pH MeterUsing the method above you can begin to get a stronger understanding of how to adjust your brewing water. Just remember different salts affect beers in different ways, and different styles may lend themselves to different mineral concentrations. Experiment, test, record your results!
While the above experiment does give us some ideas as to how adding gypsum to beer affects its flavor, it does leaves some questions. In particular, how does mashing and boiling the hard, gypsum-infused water throughout the brewing process affect the perception of different flavors?
What is your take on the subject? Share in the comments below!
—–
David Ackley is a beer writer, brewer, and self-described “craft beer crusader.” He holds a General Certificate in Brewing from the Institute of Brewing and Distilling and is founder of the Local Beer Blog.

Controlling Fermentation Temperature Of Your Homebrew

Controlling Fermentation Temperature Of HomebrewThere’s a tendency among homebrewers, myself included, to put an emphasis on recipe development. However, there are many factors beyond the beer recipe which affect the final beer. Just like with cooking, when the chef’s technique and process can have a profound effect on the food, a brewer’s skill and expertise can make or break what might start out as a good recipe.
One of the most important factors affecting a beer is fermentation temperature. There should be some attempt at controlling fermentation temperature. This is because allowing a beer to ferment outside of recommended temperatures can produce undesirable off-flavors, or worse, stop the fermentation, all together.
For example, the hefeweizen yeast strain of beer yeast is know for producing banana and clove flavors that, when in moderation, are desirable for the style. But when the same yeast strain ferments too hot, the banana flavors get produced in excess and result in a banana bomb! This is only one example of why controlling fermentation temperature is important. The same thing can happen with many other beer yeast strains. These flavor and aroma characteristics, called phenols, must be controlled so that they don’t overwhelm your beer.

So what’s the right temperature for fermentation?
Generally speaking, ales ferment at a warmer temperature than lagers. Most ale yeasts perform best between 60 and 70°F, while lager yeast tend to work well between about 40 and 50°F. Conditioning post fermentation temperatures may be even lower, in some cases approaching freezing.Shop Carboys

So my house is at 70°F – I should be fine to make ales right?
Not exactly. Yeast cells give off heat as they run around consuming all that sugar in your beer. This can raise the fermentation temperature 5-10 degrees above the ambient temperature in the room — and possibly push you out of the comfortable range for your yeast strain. So, controlling fermentation temperature isn’t necessarily about controlling your room thermostat.

How to go about controlling fermentation temperature
There are a few techniques for controlling fermentation temperature that are used by homebrewers:

  1. Cold room – Find a room, garage or shed that stays well within the recommended temperature range for the yeast strain you’re using. For this reason, many brewers wait until winter for making certain styles of beer.
  2. Bucket/ice/towelShop Temp ControllerBrewers on a budget can gain some level of temperature control by placing the fermenter in a large container of water and periodically adding ice or frozen water bottles to it. A wet towel or t-shirt can be wrapped around the fermenter to provide a wicking effect. Just like how sweating cools the body, the towel can cool the fermenter.
  3. Fermentation Chamber – This is far and away the best way to control fermentation temperature. You are essentially taking a chest freezer or refrigerator and attaching to it a power interrupt thermostat that can sustain higher temperatures evenly.

Additional Tips for Controlling Fermentation Temperature

  • Each beer yeast should be packaged with a recommended temperature range. Do your best to keep your temperature controlled to stay within that range.
  • This said, not everyone will have the ability to get their fermentation temperatures as low as they would like. Beginning Brewers often start with ales because it is easier to ferment ale at room temperature than it is to ferment beers at cooler lager temperatures.Shop Thermometers
  • Some beer yeast strains do better at warmer temperatures and benefit from a certain level of esters and phenolics. If you have trouble getting your fermentation temperatures low, you might want to stick with Belgian styles, as esters and phenolics are generally desirable. I’ve heard of Saison strains working well even into the high 90s.

What tips do you have for controlling fermentation temperature?
—–
David Ackley is a beer writer, brewer, and self-described “craft beer crusader.” He holds a General Certificate in Brewing from the Institute of Brewing and Distilling and is founder and editor of the Local Beer Blog.

Roasted Pumpkin Beer Recipe (All Grain & Partial Mash)


Made From Pumpkin Beer RecipePumpkin beer is a distinctly American creation. Rumor has it that even Thomas Jefferson even had a pumpkin beer recipe he brewed.
As we get into the final days of summer, these popular pumpkin beers start flying off the shelves. But you’re a homebrewer. Why buy someone else’s pumpkin beer when you can brew your own?
The pumpkin beer recipe below uses a number of fall spices and a hefty amount of pumpkin to produce a fairly high-gravity, creamy, sweet, and spicy brew. Just like pumpkin pie in a glass! This pumpkin beer recipe works best as an all-grain or partial mash. You’ll need a kettle as well as a separate mash tun for “stewing” the pumpkin and the grains.

Pick a Base Style
Balanced and malt forward beers work best. Porters, ambers, and brown ales make for good base styles. A lager, such as an Oktoberfest could also be interesting. Either pick a Steam Beer or use the pumpkin beer recipe below.
Roasted Pumpkin Ale Recipe:

OG: 1.070
FG: 1.015
ABV: 7.2%
IBUs: 28-32Shop Home Brew Starter Kit
8 lbs. Two-row malt
2 lbs. Munich malt
1 lb. Caramel 60°L
1/2 lb. Victory® malt
8 lbs. Pumpkin, peeled and roasted
1 oz. Northern Brewer hops @ :60
1 oz. Willamette hops @ :10
1 tsp. Irish moss @ :10
1/4 oz. fresh ginger, peeled and grated
1 stick cinnamon
1 tsp. allspice
1/4 tsp. ground cloves
1 tsp. nutmeg
English or American Ale yeast (Suggestions: Safale S-04, Safale S-05, Wyeast 1056, Wyeast 1099)
5 oz. corn sugar for priming
Shop Barley Grains
Preparing the Pumpkin
If you’re so inclined, you can use a whole pumpkin in this pumpkin beer recipe. Choose a variety that’s suitable for pumpkin pie, about 10 pounds in size. Clean out the pumpkin, setting aside all the pulp and seeds. Peel the rind from the pumpkin, reserving the meaty flesh. Bake the pumpkin at 350°F for 1 1/4 hours, then mash into a pulp.
If you’re short on time, canned pumpkin will work in a pumpkin beer recipe, too. Leave behind the preservatives and artificial coloring and go with 100% pumpkin.

Procedure – All Grain
Using 1 quart of water for every pound of pumpkin and grain, mash the pumpkin with the crushed grains for 60 minutes at 150°F. Sparge with water at 170°F, collecting 5.5 gallons of run-off. Bring to a boil, then add the bittering hops. At the 30 minute mark, add the spices. Add the flavoring and aroma hops according to your beer recipe. At the :10 minute mark, add the Irish moss. Whirlpool, cool, and transfer to a clean, sanitized fermenter. Pitch yeast when the wort reaches 70°F.
Primary fermentation for one week, secondary for two. Prime with corn sugar, then bottle.

Procedure – Partial MashShop Hops
Using 1 quart of water for every pound of pumpkin and grain in the pumpkin beer recipe. Mash the pumpkin with the specialty grains at 150°F for 30 minutes. Strain out the pumpkin and the grains, collecting the wort in the brew kettle. Add water (up to about 75% of your brew kettle capacity). Bring wort to a boil, then add the bittering hops. At the 30 minute mark, add spices. Add the flavoring and aroma hops according to your beer recipe. At the :10 minute mark, add the Irish moss. Whirlpool, cool, and transfer to a clean, sanitized fermenter. Pitch yeast when the wort reaches 70°F.
Primary fermentation for one week, secondary for two. Prime with corn sugar, then bottle.
Feeling extra adventurous? Serve the pumpkin beer with a scoop of vanilla ice cream to make a pumpkin beer float!