What’s The Difference Between Ale And Lager Beers?

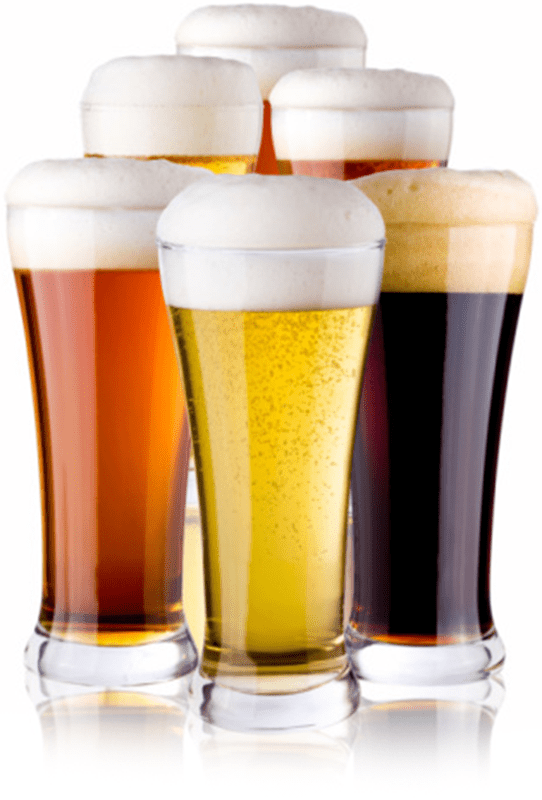
Assorted Beers In GlassesHow many times have you heard the question, “What’s the difference between ale and lager beers?” In fact, on a recent brewery tour, I overheard someone ask “What’s the difference between a lager and a pilsner?” A harmless question, but when the tour guide didn’t know the answer, it was all I could do not to smack myself in the forehead with the nearest five-gallon keg!

Now, naming conventions have changed over the years, so it’s easy to get confused. Let’s see if we can shed some light on the topic of ales vs lagers.

Ales vs. Lagers: What’s the Difference?

Let’s start top level. It’s generally agreed that there are two kinds of beer lagers and ales. (There are some hybrid styles that fall somewhere in the middle, but for now, let’s stick to the two main ones.) Within each broad category, there are dozens of different types of ales and lager beer styles. For example, pilsner is simply a style of lager, which can be further broken down into Czech-style or Bohemian pilsner, American-style pilsner, etc. One good way to get a sense of ale and lager beer styles is to look at a chart like this one.

When it comes to brewing, the difference between ale and lager beers becomes apparent. The two primary factors that make the difference are brewing yeast and fermentation practice.

Lagers are typically made using a bottom-fermenting beer yeast, which prefers cooler fermentation temperatures. As a result, lagers take more time to ferment and require homebrewers to have firm control over fermentation temperatures. Lager beer styles generally ferment at around 40°-50°F, which usually requires a dedicated room or refrigerator. For these reasons, most beginning homebrewers start with ales because they will ferment at room temperature.

Shop Steam Freak KitsAles are typically brewed using top-fermenting beer yeasts and slightly warmer temperatures. As a result ales ferment faster and are much easier to manage in terms of fermentation temperature.

Both ale and lager beer styles can run the gamut of color, gravity, and bitterness. Sometimes people think that ales are dark and heavy, while lagers are light in color and body. Don’t let the macro brand cheap lagers fool you! Lagers can be dark, hoppy, and high-gravity.

Here are some traditional lager beer styles that you may want to try to get a sense of the depth in the lager category:

  • Czech/Bohemian Pilsner – Compared to American light lagers, Czech pilsners have a much more assertive hop presence achieved through the use of noble hops. Steam Freak Pilsner Urkel is a clone of the classic Czech pilsner, Pilsner Urquell.
  • German Bock – A bock is a high-gravity lager (6-7% ABV) with a prominent malty character that’s both sweet and complex. Dopplebocks range from about 7-10% alcohol by volume. The Steam Freak Spring Loaded Bock features deep, rich malty flavors with subtle hop aroma.
  • SchwarzbierShop Home Brew Starter Kit – One of my all-time favorite beer styles, black lagers are chocolatey, roasty, and smooth. Here some more details on brewing a Schwarzbier.

As the craft beer movement continues to grow, many of the style guidelines get increasingly blurry. It could even get to the point where the difference ale and lager beer no longer even matters. Imperial pilsners and triple bocks may not fit perfectly into the BJCP guidelines, but they’re all the more reason to love lagers!

What are your favorite lager beer styles?
—–
David Ackley is a beer writer, brewer, and self-described “craft beer crusader.” He holds a General Certificate in Brewing from the Institute of Brewing and Distilling and is founder of the Local Beer Blog.

Using Potassium Sorbate When Wine Making

Potassium Sorbate For Wine MakingThanks again for being there.  You’re greatly helping an amateur wine-maker get by the label “amateur”.

Three part question, all using potassium sorbate when wine making.  This is a question recognizing that potassium sorbate does not stop fermentation, but is used to keep wines from starting to ferment again after the fermentation has been completed.

1).  When should the potassium sorbate be added to the wine — is it sufficient to add to the wine at day of bottling or should it be added earlier (like 7 to 10 days before bottling)?

2).  Will the answer to part 1) change if the wine has a sweetener added?  Is the potassium sorbate ALWAYS added to the wine AFTER the sweetener, or does it not matter as to the sequence?

3).  Does using a wine filter at time of bottling impact any of the above? Or is the filter process just the filter process?

Thanks, Steve S.
—–
Dear Steve,

Thanks for the great questions about using potassium sorbate when wine making. Let me see if I can put a dent in this subject.

First, A Little Background On Potassium Sorbate And Wine:

Potassium sorbate is one of those wine making ingredients that often gets used incorrectly or confused with other ingredients such as sodium metabisulfite.  I’d like to go over exactly what potassium sorbate will do for your wine and maybe that will clear up how it should be used.

Potassium sorbate does not destroy wine yeast. Let me repeat this for more emphasis:

“Potassium Sorbate Does Not Destroy Wine Yeast.”

What potassium sorbate does do is keep wine yeast from increasing in numbers. It stops the wine yeast from reproducing itself into a larger colony.

Shop Wine BottlesAs an example, if you add potassium sorbate to an active fermentation you will see the fermentation become slower and slower, day after day. This is because some of the wine yeast is beginning to naturally die off and new cells are not being produced to take their place. Eventually the yeast colony will either run out of sugars to ferment, or they will all die off from old age.

If you add sugar to a finished wine to sweeten it, and the wine is still laden with residual wine yeast, it does not matter if you add potassium sorbate or not. The wine yeast will ferment in either case. The only difference the potassium sorbate will make is whether the fermentation is going to become a full-blown one or just sputter along, almost unnoticeable, until the aging yeast cells can do no more.

What This Means For The Home Wine Maker:

What this all means for you is that before you add a sugar to a wine to sweeten it, you need to make sure that it is completely done clearing out as much of the wine yeast as possible. You want to give the wine plenty of time to drop out as many of the yeast cells as possible. Then rack the wine off these yeast cells. This is key to eliminating any chance for re-fermentation when sweetening a wine.

Whether or not the sugar is added to the wine before or after the potassium sorbate is immaterial. Just adding them both on the same day is sufficient. And to take this a step further, you can bottle the wine right after adding them. The only requirement is to be doubly sure that both the sugar and potassium sorbate are completely dissolve and evenly disbursed throughout the wine.Shop Wine Filter System

As a side note, you should always add sulfites such as potassium metabisulfite to the wine at bottling time, regardless if you are sweetening it or not.

As to your question about wine filtration… running a wine through a wine filter can only help not hurt during this process. This is simply due to the fact that wine filtration will get more of the yeast cells out of the wine. All three of the pressured wine filter systems we offer have sterile filtrations pads at .50 microns available to them. This will typically get 90% percent of the residual yeast cells that are left.

Happy Wine Making,
Ed Kraus
—–
Ed Kraus is a 3rd generation home brewer/winemaker and has been an owner of E. C. Kraus since 1999. He has been helping individuals make better wine and beer for over 25 years.

Rye Porter Beer Recipe (All-Grain)

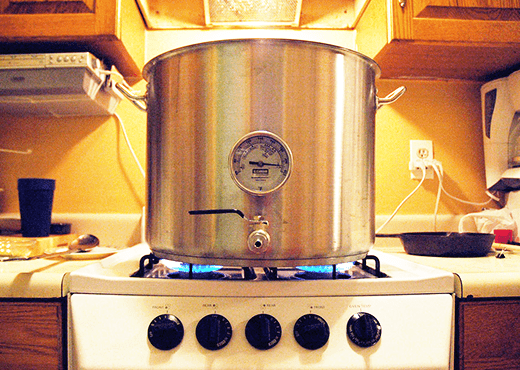
All-Grain Brew Kettle On Stove Brewing Rye PorterSometimes it’s fun to brew outside of the BJCP style guidelines and to combine different beer styles to make something new and different – a hybrid beer style if you will. Today’s all-grain, rye porter beer recipe combines the roasted malt flavors of a porter with the spicy, tangy rye flavors of a rye pale ale.

First, let’s review some tips for brewing with rye:

  • Homebrewers can use either malted rye or rye flakes in a beer recipe, or both.
  • Rye contributes a distinctive flavor, but also body and mouthfeel.
  • Many American-style rye beers use 10-20% rye in the grain bill.
  • If using more than about 15-20% rye, consider using rice hulls to prevent a stuck mash.
  • Rye will sometime contribute haze to a beer. Review these tips for brewing a clear beer.

The rye porter beer recipe below is modeled after Sly Rye Porter from Yazoo Brewing Company (Nashville, TN), a beer the brewery describes as “a rich, chocolatey English Porter with a clean finish. Using only the finest malts, a portion of malted rye gives a spicy, slightly dry finish.”

Good luck!Shop Barely Grains

Rye Porter Beer Recipe (All-Grain)
(5.5-gallon batch)

Specs
OG: 1.057
FG: 1.014
ABV: 5.6%
IBUs: 31
SRM: 31

Ingredients
7.5 lbs. pale ale malt
1 lb. caramel 40L
1 lb. rye malt
Shop Hops1 lb. flaked rye
.75 lb. chocolate malt
.25 lb. carafa III malt .5 oz. Challenger hops at :60 (4 AAUs)
1 oz. Cascade hops at :15 (7 AAUs)
1 oz. Cascade hops at :5 (7 AAUs)
1 pack Safale US-05 American ale yeast or Wyeast 1272: American Ale II

Directions:
Optionally, start with a protein rest at 122˚F for 20 minutes. Raise mash temperature to 152˚F and hold for 60 minutes. Raise temperature to 168˚F for mash out. Sparge with enough water at 168˚F to collect about 6.5 gallons of wort. Bring wort to a boil and boil for 60 minutes, adding hops according to schedule above. Chill wort and transfer to a clean, sanitized fermenter. Pitch yeast when wort is at 70˚F or below. Ferment at 68˚F until complete.

This rye porter beer recipe has more of an American twist, using American ale beer yeast and Cascade finishing hops. It’s a tasty homebrew with a smooth body, a rich chocolate malt flavor, along with an intriguing hint of spicy, slightly tangy rye grain. This all-grain beer recipe has a touch more hop bitterness than the Sly Rye, with the Cascade finishing hops bringing in a spicy and citrusy hop character that work well with the rye.

Have you ever brewed a darker beer with rye? How did it go?
—–
David Ackley is a beer writer, brewer, and self-described “craft beer crusader.” He holds a General Certificate in Brewing from the IBD and is founder of the Local Beer Blog.

Keeping Track Of Your Homemade Wines Without Wine Bottle Labels

Keeping Track Of Homemade WinesI would like to track my wine bottles without using wine bottle labels which can be difficult to remove for my next batch of wine. Is there an easy way to mark my bottles that can be removed the next time I use them?

Name: Curtis B.
State: CO
—–
Hello Curtis,

There are several ways you could go about tacking your homemade wines without using wine bottle labels. Most home winemakers will use a color code. Each batch of wine will be assigned a color. Then that color is used on the wine bottle.

The simplest way to get the color on the wine bottle is to use different colored heat-shrink neck capsules. We have nine different colors, which is enough for most home winemakers. These neck capsules are a PVC plastic that will shrink to the neck of the wine bottle when heated. They also help seal the bottle more tightly.

We also have assorted colors of sealing wax. You can do the same with them. Just heat the wax up in an old tin can. Then dip the neck of the wine bottle into the molten wax. Instead of dipping the wine bottles, you can inset the wine cork about an 1/8″ into the neck of the bottle and pour the colored wax in the inset to form a colored disk over the cork.

In either case, keeping track of your homemade wines is just a matter of keeping your colors straight. You can do this with a color chart or “legend” that keeps track of what batch of wine each color represents. You can put it on the wall near your wine rack and problem solved.

If you don’t like using colors to track your batches of homemade wine, you can use wine bottle ID tags. These can be picked up at any commercial wine shop. This is basically a tag that has some writing space and a hole big enough for the neck of the wine bottle to fit through. Write on the tag what the wine is, and hang it over the neck of the wine bottle.

Shop Heat Shrink CapsulesThe down fall with the ID tags is that you have to write on each one. With a typical batch of wine being 25 or 30 bottles, this can become cumbersome. The second issue is that they do not secure to the wine bottles. Shut a door to fast or blow across the wine rack with the exhaust from a vacuum cleaner and your tagging could be all blown off the bottles. And this doesn’t even take into consideration what little kids could do if they got a hold of them.

I hope this gave you some ideas for keeping track of your homemade wines. With a little imagination, I’m sure there’s other ways to track them without using wine bottle labels, but these are the best ways I have discovered.

Happy Winemaking,
Ed Kraus
—–
Ed Kraus is a 3rd generation home brewer/winemaker and has been an owner of E. C. Kraus since 1999. He has been helping individuals make better wine and beer for over 25 years.

Getting Started: Essential Home Brewing Equipment List

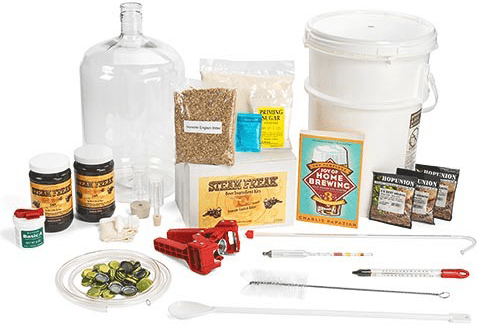
Home Brewing EquipmentI’m frequently asked by craft beer fans what they need in order to start brewing their own beer. Is there a home brewing equipment list that one could follow? Luckily, Adventures in Homebrewing has taken the guess work out of this question by offering a Starter Home Brew Kit, which includes a bunch of equipment and one ingredient kit for the homebrewer’s first batch of beer. The only thing not included is a large kettle, which you may have on hand already. (If you don’t, we can hook you up with a brew kettle, too!)

Now, let’s take a closer look at the list of home brewing equipment included in the Steam Freak beer brewing kit:

  • Home Brewing Book:
    Before even getting to the actual equipment, every brewer needs some literature to guide them through their first batch. The Complete Joy of Home Brewing is the perfect accompaniment for the beginning brewer. After getting a batch or two of homemade beer under their belt, homebrewers can upgrade to more advanced books. I recommend Marty Nachel’s Homebrewing for Dummies and Ray Daniels’ Designing Great Beers. More >>
  • 6 Gallon Primary Fermenter (Comes with airlock, stopper, and faucet):
    A 6 Gallon Fermenter is ideal for primary fermentation. Even though you will be brewing a five-gallon batch, the extra space allows for krausen, or foam, to build during the height of fermentation. The airlock and stopper allow carbon dioxide – a byproduct of fermentation – to escape from the fermenter, while the faucet makes it easy to transfer to the carboy for secondary fermentation. More >>
  • 5 Gallon Plastic Carboy (Comes with airlock, stopper, and faucet):
    The carboy is where the beer sits for a 10-14 day conditioning phase, known as secondary fermentation. A curved racking cane will make it easier to transfer from the carboy back into the fermenter for bottling. More >>
  • Home Brew Hydrometer:Shop Brew Kettles
    This nifty tool should on any home brewing equipment list. It allows brewers at every level to determine the alcohol content of their beer. Carefully place the sanitized home brew hydrometer in the unfermented wort to take the first measurement – referred to as the original gravity (OG). After fermentation, take another – called the final gravity (FG). The difference between the two is used to calculate the alcohol by volume (ABV)! More >>
  • Thermometer:
    Your fermentation temperature matters. Too cool, and the yeast won’t ferment; too warm and you are promoting bacterial growth and possible death of the yeast. More >>
  • 6′ Length of 3/8″ Vinyl Hose:
    Any home brewing equipment list is going to have this. The heat resistant hose facilitates transferring from one fermenter to the other. More >>
  • Bottle Capper  
    When it’s time to bottle your brew, you’ll need something to cap the beer bottles. The double lever capper is easy to operate and ensures a firm seal on every bottle. More >>
  • Cleaner/Sanitizer:
    Brewing can get a little messy, but with several cases of beer at the end, it’s well worth the effort. A cleaner is ideal for cleaning your home brewing equipment before and after brewing a batch of beer. More >>
  • Beer Bottle Brush: Shop Steam Freak Kits
    Homebrewers typically save beer bottles for when their home brew is ready. The beer bottle brush helps to clean the insides of the bottles, helping to make sure nothing contaminates the beer you’ve worked so hard to make. More >>
  • Beer Ingredient Kit:
    Choose from over 30 beer ingredient kits for your making your first batch of beer. The Steam Freak Ingredient Kits include all home brewing ingredients for a five gallon batch, recipe instructions, and caps. More >>

So what are you waiting for? Order a kit already and start brewing! It has a home brewing equipment list that is perfect for the first-timer. And, it’s something you can easily build upon as you progress in this wonderful hobby.
—–
David Ackley is a beer writer, brewer, and self-described “craft beer crusader.” He is a graduate of the Siebel Institute of Technology’s “Start Your Own Brewery” program and the Oskar Blues Brew School in Brevard, NC.

Wine Myth #64: The Older The Wine, The Better The Wine.

Couple Shopping For WineLet’s clear some things up. In general, wine does improve with age… but only to a point. Like many facets of life, there always seems to be some misinformation that makes its way to the realm of common knowledge. This seems to be the case with the myth: the older the wine the better it tastes.

Different wines age differently. Some wines age gracefully for 10 or 15 years. Other wines show improvement for a year or two and then plateau. Then there’s that very small group where no aging at all is ever going to do any good: might as well drink it now, because it ain’t gettin’ any better.

While all wines do vary in the way they age, one thing that is common among them all is that they each wine has its own life cycle. This fact can be partially surmised just by taking notice of the descriptors used to describe the aging qualities of a wine.

For example, a newly bottled wine is called young. Then later after some aging characteristics become evident, the same wine might be called mature. Then if the wine is not drank and left to set beyond its prime, one might refer to it as fallen-over.

Words like: young, mature and fallen-over, should give you a good sense as to how a wine goes about progressing through life. It improves for a period of time, just like everyone expects. Then it peaks in quality. Then it eventually declines. It’s the “decline” part that fails to make it into the realm of “common knowledge.” With each passing year the wine is actually becoming worse instead of getting better.

A wine doesn’t necessarily fall-over over night, but it will do so slowly over an extend period of time. For a big wine that has taken 5 or 10 years to peak in quality, we may be talking about a decline over several decades. For a wine that has peaked in a matter of a few month, we may talking about a decline over 2 or 3 years. Regardless, it is good to understand that:

There comes a time in any wine’s life
when it is begging to be drank!

Shop Wine BarrelsThis older-the-wine-the better myth has partially been perpetuated by the wine industry itself, although not intentionally. Many wines go up in price as they become older. This gives the perception that it is worth more because it is becoming better. With each passing year you can see the price of many vintages going higher and higher. In reality, this has less to do with the wine becoming better and has more to do with the wine becoming rarer.

If a certain vintage has been deemed to have aging potential, wine collectors will gravitate towards it and deplete its inventory level on the open market. When this happens it then becomes a simple issue of supply-and-demand. The fewer bottles left, the higher the price that can be commanded for that particular vintage.

The point here is: don’t judge a wine by its age. While wines do get better with age, they can also get worse.
—–
Ed Kraus is a 3rd generation home brewer/winemaker and has been an owner of E. C. Kraus since 1999. He has been helping individuals make better wine and beer for over 25 years.

Home Brewing With Wheat

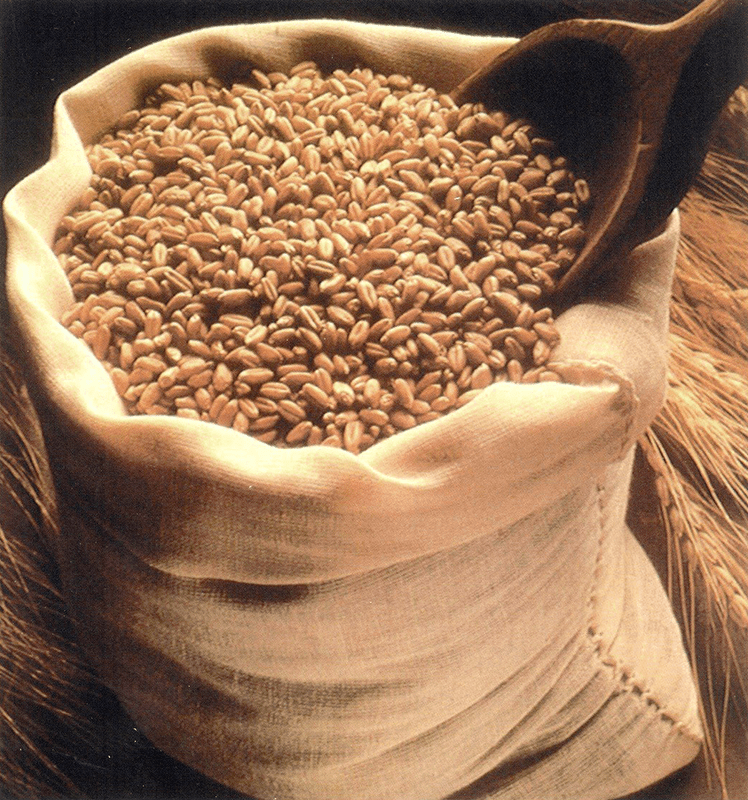
Malted Wheat For Home BrewingWheat has been used in making beer for hundreds, probably thousands of years. In Germany, it was once such a popular ingredient that the government implemented Reinheitsgebot, which put a restriction on brewing with wheat to make sure there was enough wheat for making bread.

Modern home brewers have no such restriction. There are several styles of beer we enjoy today that call for the use of wheat:

  • American wheat beers, weizens, witbiers, and weissbiers are brewed with high proportions of wheat in the malt bill (sometimes 50 percent or more).
  • There are a number of other beer styles where we might see a smaller proportion (20 percent or less) of wheat used for body or flavor, such as in Belgian saisons.
  • Wheat may also be used in small amounts (up to 10 percent) to improve body or head stability in other styles, such as pale ales or stouts.
  • Lambics are often brewed with about 30% unmalted wheat.

Home brewing with wheat malt vs. barley malt

When home brewing with wheat, it’s important to think about some of the differences between wheat and barley:

  • Flavor – Compared to barley, wheat has a flavor that’s more, well, wheaty or bread-like. It’s often used to help make beers smoother in both flavor and mouthfeel. These characteristics often make wheat a good base malt for fruit beers.
  • No husk – Wheat also has no husk and a smaller kernel, which come into play when brewing all-grain beers. The lack of husk makes it a little more challenging when lautering, but on the other hand, no husk means less tannins.
  • Protein – Finally, wheat generally has a higher protein content than barley. This is why wheat is often used to improve head stability. The flip side is that the higher protein content can make the beer more hazy.

Different ways to go about home brewing with wheat:

  • Wheat extractShop Liquid Malt Extract – The easiest way to start home brewing with wheat is to us wheat malt extract. Use it in the same way you would any other dry or liquid malt extracts. Steam Freak Wheat LME is typically 65 percent wheat and 35 percent barley, whereas the Munton’s Wheat DME is 55 percent wheat and 45 percent barley. These ratios are important to keep in mind in terms of flavor and when converting an extract recipe to all grain.
  • Malted Wheat – Malted wheat needs to be mashed. Since wheat has no husk, it’s often recommended to us rice hulls along with it to improve filterability through the grain bed. We carry both Red Wheat Malt, which has an assertive wheat flavor, and White Wheat Malt, which is a little more subtle.
  • Flaked Wheat – Flaked wheat is unmalted wheat which has been processed through hot rollers. This process gelatinizes the starches so you don’t have to worry about converting sugars in the mash.
  • Torrified WheatTorrified wheat has been ruptured (sort of like popcorn) to make the starches in the grain more accessible. It should be mashed with a standard base malt for conversion to take place.
  • Unmalted Wheat – Raw, unmalted wheat is sometimes used for flavor, body, and head stability, but won’t contribute much in the way of fermentable sugars unless it is cooked in the brewhouse.

Do you like to home brew with wheat? What are your favorite styles of wheat beer?

—–
David Ackley is a beer writer, brewer, and self-described “craft beer crusader.” He holds a General Certificate in Brewing from the Institute of Brewing and Distilling and is founder of the Local Beer Blog.
Why You Should Be Using Sulfites In Your Wine Making Endeavors

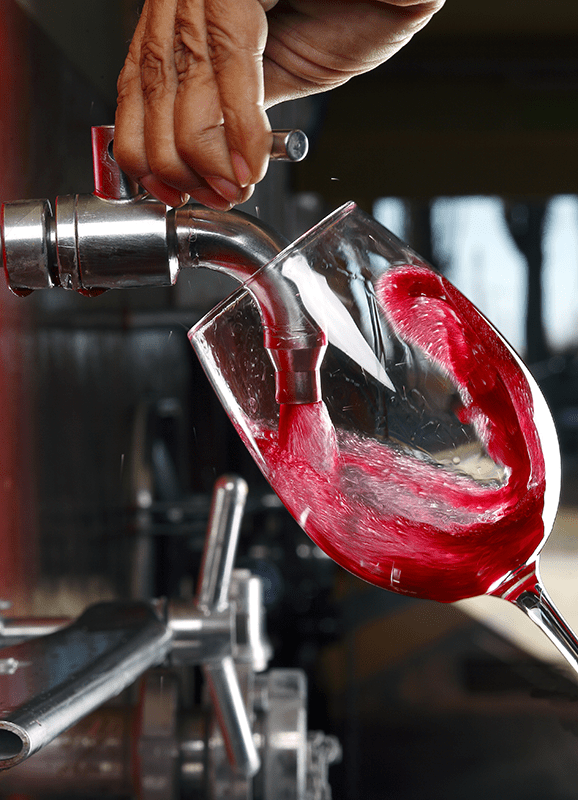
Wine with sulfitesSulfites are a very important part of wine making. They are commonly used in both commercial wine making and home wine making. They can be used in granulated form such as potassium metabisulfite or sodium metabisulfite. Also for the home winemaker, sulfites can be used in tablet form called Campden tablets.

There are several reasons for using sulfites in the wine making process. They are extremely versatile and thus valuable in many ways. They act as a sanitizer in both the wine and on the equipment. Sulfites are also a protector against the damaging effects of oxygen.

Very briefly, when sulfite granules are added to a wine, sulfite gas is released and over time is passed through the liquid and escapes into the air.

One reason for using sulfites in wine making is sanitation.  For example, you may want to consider adding it directly to your juice prior to making the wine. Any fruit juice can be riddled with natural yeasts, bacteria, or other microscopic critters that could wreak havoc on the quality of your finished wine if left up to their own devices.  Adding sulfites directly to the wine will destroy unwanted organisms in the wine must so you don’t run the risk of ruining your wine before you’ve even begun.

Another reasons for using sulfites in wine making is to preserve your wine throughout the storage and aging process. Too much oxygen exposure to your wine can be problematic. It can cause it to become oxidized and lose many of its desired aromas and flavor characteristics while taking on undesired aromas, flavors, and colors.

By adding sulfites to the wine right before the bottling process, the sulfite gas molecules that are released into the wine have a opportunity to “push out” the excess oxygen into the atmosphere.  Think of it as the sulfite gas acting like a big bully and pushing the oxygen out of its way so the sulfite can sit in the wine and not oxygen. In short, when using sulfites in your wine making in this way, you prolonging the life of your wine, thus allowing you to enjoy it for longer than if you hadn’t used the sulfites.

shop_potassium_bisulfiteThere is a big myth floating around out there that sulfites cause headaches in people after drinking red wine, giving winemakers the idea of making sulfite free wine. So far, there is no credible evidence to support this idea, and it’s more likely that the histamines, tannins, or some other compound in red wine are causing some people to get headaches.

It’s also important to point out that many dried fruits such as prune and apricots have significantly higher doses of sulfites than any wine – typically more that 10 times – so if you do not get headaches from eating such dried fruits, then they are not allergic to the sulfites in wine.

The point is: using sulfites in your wine making is a good think note a bad thing. Take advantage of it, and claim all the benefits they have to offer.
—–
Ed Kraus is a 3rd generation home brewer/winemaker and has been an owner of E. C. Kraus since 1999. He has been helping individuals make better wine and beer for over 25 years.

What’s A Stuck Beer Fermentation, And How To Avoid It!

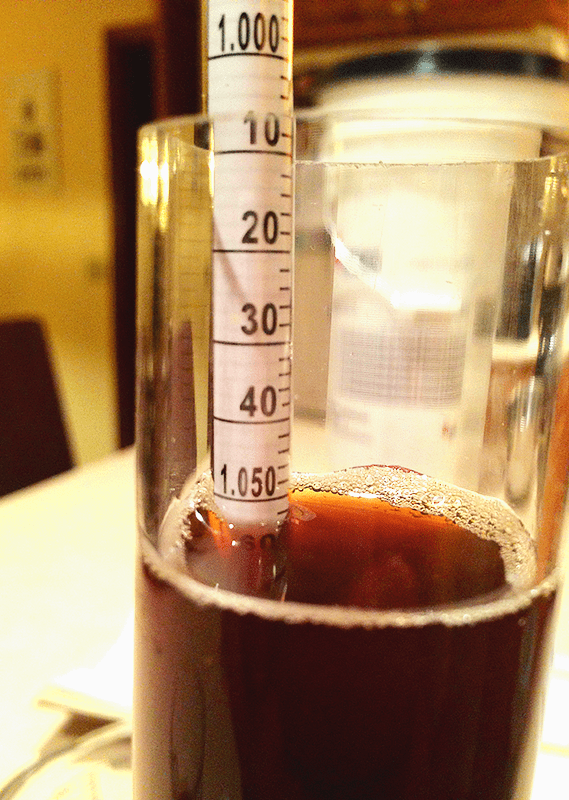
Stuck Beer Fermentation Hydrometer ReadingSo you’re sitting there with your beer in the secondary fermenter and expecting to bottle when what do you know – that beer you expected to finish around 1.010 on the hydrometer is still hanging out at 1.050. The beer yeast brought the gravity down by a mere ten points! What we have here is a stuck beer fermentation.

This is where meticulous note taking comes in handy. When things don’t go the way you want them to, your notes can point you towards the source of the problem.

Let’s see if we can figure out what went wrong.

What Is a Stuck Beer Fermentation and Why Does It Happen?

Fermentation is a process conducted by beer yeast, a living organism. Yeast requires certain conditions for the fermentation to take place, and if those conditions aren’t met, the fermentation can stop well before it should. Most beers will finish at 1.020 or lower, so if your beer stops fermenting at 1.030 or higher, you may have a stuck beer fermentation.

Here are a few of the reasons why your beer is not fermenting:

  • Not enough yeast – The yeast was under-pitched, so that is there weren’t enough yeast cells to fully ferment the wort.
  • Wort too hot when yeast was pitched – If the wort was too hot, it could have shocked or killed the beer yeast.
  • Wort in wrong temperature range – If your fermenter is too hot or too cold, it could kill the yeast or put them in a dormant state.
  • Under-aerated wort – Yeast needs oxygen in order to reproduce to a level where there are enough healthy cells to ferment the wort.
  • Old beer yeast (not viable) – If your beer yeast sat on the shelf for too long or was stored improperly, the yeast could have deteriorated. Check the dates on the yeast packets when you buy them and make sure they are stored in the refrigerator.
  • Yeast quit due to alcohol content – This could happen if brewing a very high gravity beer. Beer yeast commonly have a certain alcohol tolerance based on the strain. If you’ve exceeded the tolerance, then this could cause a stuck beer fermentation.
  • Lack of nutrition – Malt provides nutrition for yeast growth, so a stuck beer fermentation sometimes happens when brewing beers with lots of simple sugar adjuncts.Shop Beer Yeast Culturing

How to Prevent a Stuck Beer Fermentation

The first step towards fixing a stuck fermentation is prevention. These are three of the best ways to prevent a stuck fermentation:

  1. Use only fresh, healthy beer yeast – When buying yeast, check the date on the yeast packet to make sure it’s fresh.
  1. Prepare a yeast starter – Yeast starters are highly recommend when using liquid yeasts. (Check out our step-by-step guide to Yeast Starters.)
  1. Chill your wort to the appropriate pitching temperature – This will prevent any temperature shock. Check the yeast package for appropriate pitching temperature and allow the yeast to come to room temperature before pitching. (Read our post Why and How to Chill Your Wort for more information.)
  1. Thoroughly aerate your wort – Pour the wort vigorously into the fermenter and/or stir well with a sanitized stirring spoon.
  1. Use yeast nutrient – If brewing a high gravity beer or a beer with high amounts of simple sugars, yeast nutrient can give the yeast an extra boost.

How to Fix a Stuck Beer Fermentation

This is the hard part. It’s very difficult to revive yeast that isn’t doing its job, and it may take some detective work to figure out the best course of action. These are a few of the approaches one could take to fix a stuck beer fermentation:

  1. Check that the fermentation temperature is correct – Consult the yeast package for the optimal temperature range.Shop Liquid Beer Yeast
  1. Stir – Using a sanitized spoon, give the wort a good stir to see if you can revive the yeast that has settled out and get it back in to suspension.
  1. Pitch more yeast – You may want to pitch more yeast. (This is when having an extra packet of dry yeast in the refrigerator comes in handy!) It may help to try a different strain of yeast, especially for brewing high gravity beers.
  1. Pour your wort onto a yeast cake from another (recent) brew – This is a little unconventional, but it should do the trick. Pour your stuck wort over a yeast cake from a beer that you just racked to secondary. Just make sure what you’re mixing is relatively similar, if not identical. For instance, pouring a saison onto a witbier yeast cake will probably work out fine, but pouring a hefeweizen onto a Irish stout yeast cake will majorly affect your brew.

Now that you are familiar with a stuck beer fermentation and understand better the potential reasons why your beer is not fermenting, hopefully, you’ll never have to deal with one.

Have you ever had a stuck beer fermentation? Were you able to fix it? How did you do it?
—–
David Ackley is a beer writer, brewer, and self-described “craft beer crusader.” He holds a General Certificate in Brewing from the Institute of Brewing and Distilling and is founder of the Local Beer Blog.
Degassing Wine With A Drill Mixer

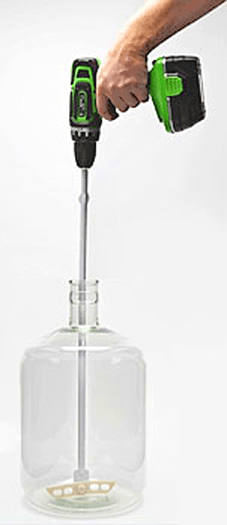
Illustration of Degassing Wine With A DrillThank you so much for all the information–it has been a lifesaver at times! My question is on degassing wine with a drill Mix-Stir in the carboy. How fast should I be using it with my drill? It seems like I just keep making more and more foam if I speed it up and I don’t know if that’s a good thing or not. It also takes forever. Should I slow the drill down? And when should I stop-is it okay to have just a few bubbles left? Thanks so much from a “Newbie”, and keep up the good work.

Name: Eileen M.
State: Florida
—–
Hello Eileen,

When degassing wine the a drill mixer, you want to run the drill as fast a possible. The only thing that should be slowing you down is the foam that is wanting to come up and out of the wine. Like pouring a glass of hot soda pop over ice, this may require a little patience on your part. But other than that go as fast as you can. No reason to keep things slow. Degassing the wine quickly will not hurt the wine in any way.

Having said this, the one thing you definitely do not want to do when degassing with a drill is splash the wine. Splashing is different than mixing the wine. When the Degassing/Mixing Paddle is submerged into the wine it is only agitating the wine within itself. When you are splashing the wine you are disrupting the surface of the wine.

Splashing the wine can allow air to saturate into the wine. This would be a bad thing since air in the wine will promote wine oxidation. Splashing is not so much an issue when you are first starting the degassing process because so much CO2 gas is coming off the wine that air can not saturate. But it does become a consideration as you finish up degassing the wine with a drill mixer.

As to your question about how long you should be degassing the wine or how far you should go, you want to get it to a point where there is only a small amount of foam being produce. Don’t worry about getting all the gas, just get to a point where it’s relatively hard to make foam. If a remnant amount of CO2 gas is still in the wine, that’s okay. This amount will have opportunities to leave during racking and bottling.

Shop Wine Bottle CorkersJust realize that degassing wine with a drill mixer is a safe and efficient way to go about it. Just get the paddles in the wine before spinning it, and you’ll have no issues whatsoever.

Happy Winemaking,
Ed Kraus
—–
Ed Kraus is a 3rd generation home brewer/winemaker and has been an owner of E. C. Kraus since 1999. He has been helping individuals make better wine and beer for over 25 years.