 I would like to track my wine bottles without using wine bottle labels which can be difficult to remove for my next batch of wine. Is there an easy way to mark my bottles that can be removed the next time I use them?
Name: Curtis B.
State: CO
—–
Hello Curtis,
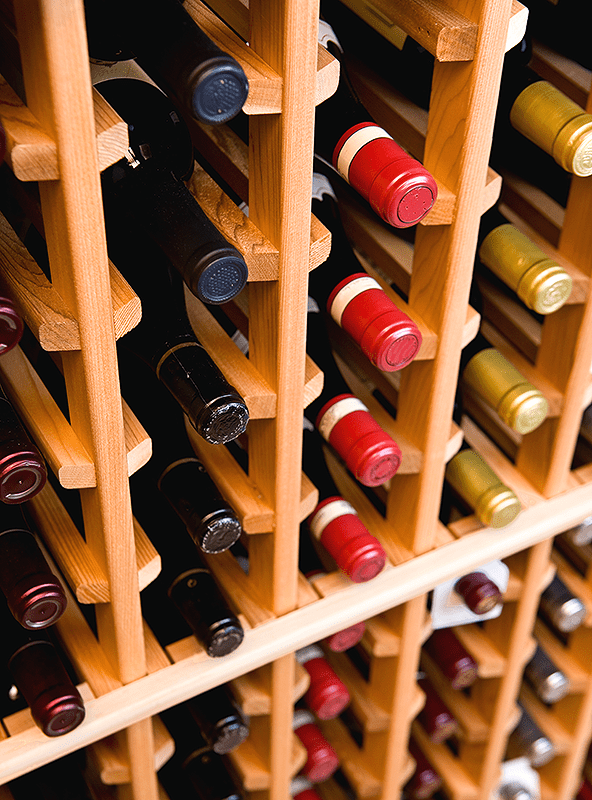
There are several ways you could go about tacking your homemade wines without using wine bottle labels. Most home winemakers will use a color code. Each batch of wine will be assigned a color. Then that color is used on the wine bottle.
The simplest way to get the color on the wine bottle is to use different colored heat-shrink neck capsules. We have nine different colors, which is enough for most home winemakers. These neck capsules are a PVC plastic that will shrink to the neck of the wine bottle when heated. They also help seal the bottle more tightly.
We also have assorted colors of sealing wax. You can do the same with them. Just heat the wax up in an old tin can. Then dip the neck of the wine bottle into the molten wax. Instead of dipping the wine bottles, you can inset the wine cork about an 1/8″ into the neck of the bottle and pour the colored wax in the inset to form a colored disk over the cork.
In either case, keeping track of your homemade wines is just a matter of keeping your colors straight. You can do this with a color chart or “legend” that keeps track of what batch of wine each color represents. You can put it on the wall near your wine rack and problem solved.
If you don’t like using colors to track your batches of homemade wine, you can use wine bottle ID tags. These can be picked up at any commercial wine shop. This is basically a tag that has some writing space and a hole big enough for the neck of the wine bottle to fit through. Write on the tag what the wine is, and hang it over the neck of the wine bottle.
 The down fall with the ID tags is that you have to write on each one. With a typical batch of wine being 25 or 30 bottles, this can become cumbersome. The second issue is that they do not secure to the wine bottles. Shut a door to fast or blow across the wine rack with the exhaust from a vacuum cleaner and your tagging could be all blown off the bottles. And this doesn’t even take into consideration what little kids could do if they got a hold of them.
I hope this gave you some ideas for keeping track of your homemade wines. With a little imagination, I’m sure there’s other ways to track them without using wine bottle labels, but these are the best ways I have discovered.
Happy Winemaking,
Ed Kraus
—–
Ed Kraus is a 3rd generation home brewer/winemaker and has been an owner of E. C. Kraus since 1999. He has been helping individuals make better wine and beer for over 25 years.
Hi there, when we make multi batches we number them and put the number on the end of the corks with a sharpie. We don’t always use capsules when it is for our own stock, so it works for us. A bit primitive but so are we 🙂 Good Luck and Cheers!
I started my wine making experience with large blank labels that I got by the sheet and ran through my printer to mark them. They turned out to be too sticky and I had a very hard time removing all the residual glue left behind. I now use the standard return address labels which by the way come in a very convenient 30 per page, and run them through the printer with type of wine and bottling date. These come off very easily with a little soaking in hot water, when washing out the bottles. Cheers.
I like to go ahead and label my bottles as I go. I too do not like to clean the labels off. I print mu own lables and have found that white glue (Elmer’s) thinned with water makes a good contact with the glass bottle and when wet with warm water for about 30 seconds comes off very easy with almost no glue left on the bottle. If any is lefe rub under the running water for about 5 seconds and you are through. Hope this can help Mil
Spray the sheet with workable fixative Krylon 1306 available from the art store before you apple the strip to the bottle This will keep printer ink from smearing if you get the label wet
If you store the bottles in the original box package then number the box. Use excell and make columns for box, vol, date, carboy, bottle number,, date opened or shared, ID- your initials or the person to whom you shared bottle, comments
Be sure to mark the bottle off of inventory when you remove it from the storage box
Avery makes removable labels that can be printed with the info. I’ve used those before.
Here is the method I use for identifying the wines in a rack. I purchase sheets of various colored paper. Inexpensive kind. On a piece of plain white paper, I mark A line down the center and then make crossing lines at about the 1" line. I then put the colored paper in my printer and copy the lines to the colored paper. Cut the colored paper on the lines, reverse them and tape them as a band around the neck of the bottle. For more band variety, use colored markers to put lines on the slips of paper. Five sheets of paper and an inexpensive pack of hi-liters gives a lot of choices.
You can use a permiment marker to write on shrink caps. That will allow for keeping track of more information on the bottle.
Colored shrink wraps are the way to go unless you are going to have many different types or different recipe variations. I made 9 different types of banana wine a couple years ago and I used a pack of Avery .75" round stickers over the shrink wraps.
http://www.amazon.com/gp/product/B000BMBU9C/ref=as_li_ss_tl?ie=UTF8&camp=1789&creative=390957&creativeASIN=B000BMBU9C&linkCode=as2&tag=bookley02-20
I have also written on the shrink wraps themselves (with a stinky Sharpie marker) but the $4 stickers are a whole lot easier.
Banana? how’d that turn out?
I have been labeling my wine by printing the name of the wine, date of bottling and one or two other pieces of info, by setting up a simple Word file, and entering the same info in three "columns" with two rows of text each, across the sheet (making three labels at a time) then coping that info into as many "rows" as needed. Then print out the sheet, cut the "rows" into strips, stack the strips and cross cut w/ scissors. The trick is to make your row
A letter or number marked on the top of the cork works, in conjunction with one of the wine cellar apps for your smartphone.
I reuse bottles and find the non-water-soluble gums on the labels of kits of certain companies marketed by EC Kraus quite obnoxious – to the extent that I avoid buying those kits.
Hi, I’ve always just marked the corks with great success but recently found silver-ink sharpies write easily on the bottle, doesn’t rub off easily yet does come off with a little scrubby with warm soap and water.
For inexpensive labels I purchase 8.5/11 double sticky paper at Staples then have Staples print them for me. I can include images and type all in color, print eight labels (or more for beer labels) on a single sheet, and if you hit it right, Staples often has a sale and prints each sheet for 59 cents.
For really nice labels I have used Avery 22826 with staples printing it works out to only about 30 cents a label.
Best of all, all you have to do is soak these Avery labels about ten minutes and they come right off.
I’ve been using blue painters tape for my “label.” Yes, you do have to write on each label, but I use abbreviations and can put details e.g., AOH for American Oak heavy toast.
I thought I was the only one… use it on my carboys too until I’m ready for my “pretty” labels. Then I use 4×6 labels and a Dymo thermal printer. Only black and white, but can be as fancy as you want other than color.
My wife and I enjoy making and drinking our own wine. We print our own labels on plain paper with either our color laser or Pixma printer. We then cut them out and apply them to our reused bottles with milk, using a pastry brush to smooth them out. The protein in the milk holds them well and they come right off. Don’t use less than 2% milk. You can use a damp towel to wipe off the excess. We always apply a capsule after the labels dry.
I use the matte black shrink capsules and write the flavor and the year on it with a white ink pen. Easy peasy.
I use a hand held label maker with a 1″ wide label strip (Brothers P-Touch). Simply print the appropriate quantity of labels and stick them onto the shrink wrap. Removal is as simple as peeling the shrink wrap off of the bottle. My labels usually are 1.25″ to 1.5″ long with three lines of information.
First line: 12/14/16 #23 (Date and Batch number)
2nd line: Frontenac (Type of wine)
3rd line: 14% .999 .67 (Alcohol %, SG, Total acid)
These labels are very functional because they are simple, fast production, very easy to read, fairly inexpensive and easy to remove with the shrink wrap.
First of all I have an inventory book stating which winch wine rack and slot a particular wine is located, along with notes and such. The other thing I will do is use a gold or silver paint pen (found at places like Hobby Lobby, Michaels, etc) and write the pertinent information on the bottles. The paint washes off easily.
I have used several of the techniques discussed in the comments, but I will try a couple of the ones I hadn’t previously heard of. (Can’t wait to try the milk glue.) Thanks for the great suggestions!
I prefer the Avery removable labels on bottles that I “gift” or share. To remove ALMOST ANY label, I put Dawn Dish Soap and warm water on a silver metal pot scrubber, run warm water over the label, and scrub the label off. If recycling a commercially-labeled bottle, I remove residual glue by rubbing it with a few drops of paint thinner on a paper towel, and then rinse the bottle exterior in warm, soapy water.