Leigh Erwin: What's In Store

Wine Ingredient KitHi all!
Ah the drama of finding a new home never ends! We haven’t moved yet, but we’re oh so close!
That being said, I’m still in a holding pattern when it comes to my home winemaking. I thought I would take time today to figure out my next steps in terms of what wine I would like to make next, and what equipment I should get based on what I have already and what I feel would be really beneficial for me to have based on my experiences so far with home winemaking.
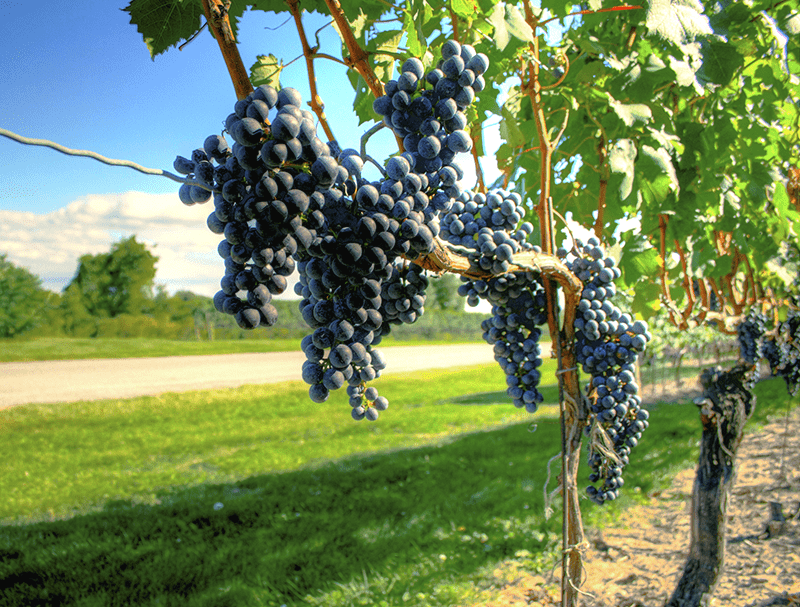
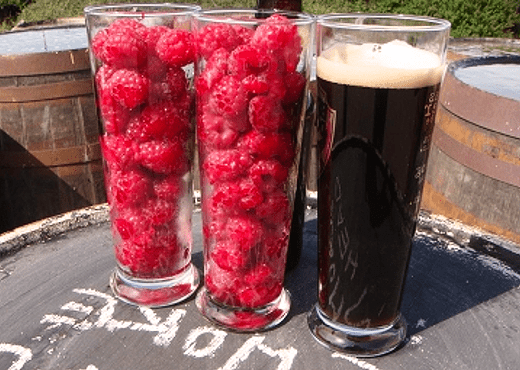
I’ve only made one red wine so far (recall: the Carmenere). This one actually came out pretty well, and we actually served some of it at our wedding (and people liked it!!). So far, it’s been my favorite of my homemade wines, so I think I’ll try my hand at another red to see what happens!
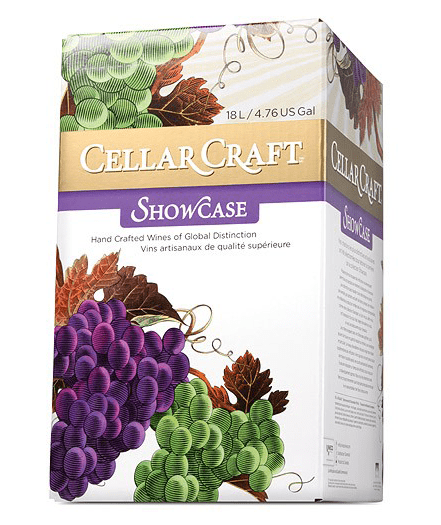
I’ll probably do another wine ingredient kit this time, rather than purchasing separate ingredients. It’s just easier that way, and while we’re settling into our new house (wherever that may be), it’ll just be more straightforward and simple.
In addition to the wine ingredient kit, there are a few pieces of equipment I would like to get, partially to help monitor my wines more closely as the process moves along, and also partially to start building up my own mini home winemaking empire (in my dreams, right?).
First of all, I really need a digital pH meter. I did buy that acid test kit, which will come in very handy, but I think having a pH meter will be equally, if not more, telling when I’m testing my wine for acid levels. I think more information is always better, so it wouldn’t hurt to have both. Besides, if I decide to make mead again, the acid test kit I bought is pretty much useless anyway, so I’ll definitely want the pH meter at that point.
If I’m going to be starting my wine from fruit in the near future, I’ll probably want a scale in the house as well. I suppose having a scale would be useful in the kitchen in general, so it’s really a solid investment. I like the look of the Escali:Mercado Dial Scale that I spotted on the ECKraus website, as it measures just about anything (grains,fruits, sugar, etc) and is affordable at just under $40.
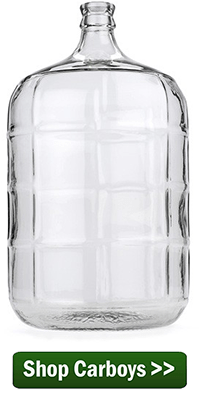
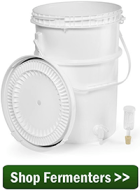
Finally, one day I’d like to get a stainless steel fermenter. I’ll definitely want to be making wine on a more regular basis in order to convince my husband to let me get one of these, but I don’t particularly care for the plastic fermenter and would like to upgrade eventually.
All these things will come in due time, but for now I am going to focus on my next wine ingredient kit.

————————————————————
leigh_erwin_bioMy name is Leigh Erwin, and I am a brand-spankin’ new home winemaker! E. C. Kraus has asked me to share with you my journey from a first-time dabbler to an accomplished home winemaker. From time to time I’ll be checking in with this blog and reporting my experience with you: the good, bad — and the ugly.

A Simple Recipe And A Holiday Wish

We would like to stop and take a moment to wish you the very best this holiday season. We sincerely hope that your Christmas is full of joy and excitement, and that the New Year brings you the brightest of days and provides you with all for which you strive.
In keeping with the holiday spirit I have listed below an eggnog recipe that I have used for many years. It has ‘Breakfast’ in its title, but have found that works equally well for lunch, dinner and bedtime cap.  I’d like to share it with you in hopes that it might bring a little warmth to your holiday season.
Holiday Breakfast Eggnog

  • 10 ounces of Apricot Brandy
  • 3 ounces of Triple Sec
  • 1 Quart of Eggnog
  • Mix together and sprinkle with Nutmeg

MERRY CHRISTMAS!
From Everyone At E. C. Kraus
———————————————————————————————————
Ed Kraus is a 3rd generation home brewer/winemaker and has been an owner of E. C. Kraus since 1999. He has been helping individuals make better wine and beer for over 25 years.

Cloning Ithaca Beer Co.’s Flower Power – Pt. 3: Brew Day

Brewing Flower Power Clone Beer RecipeAfter developing a recipe and experimented with brewing water adjustments for this beer, the actual brewing of the Ithaca Beer Co. Flower Power clone beer recipe was put on hold for a couple weeks while I was out of town. I finally got around to brewing the IPA last weekend and boy am I excited about this beer! Brew day didn’t exactly go off without a hitch, but there weren’t any major issues that should cause major problems down the line. Here’s how brew day went last weekend.

Preparing the Yeast Starter

The night before brewing I made a yeast starter with light DME and one pack of California ale yeast. I don’t have a stir plate or flask yet (they’re on the list!), so I just used a growler and gave the starter a swirl every few hours or so.

The Set Up

I usually try to get all my ingredients and gear together before I actually start brewing. This helps eliminate the multitasking that can often result in a mistake.
First I assembled the ingredients: malt, hops, yeast starter, and water amendments. Then I get all the equipment set up, plus a stack of towels at the ready. I’ll usually turn on some music and have a snack on hand just in case. At least a few days in advance, I’ll check the propane tank to make sure there’s enough fuel for the brew. Did you know you can weigh the tank to estimate how much fuel you have left? I’ll share how to do that in a separate post.

Clean and Sanitize 

The next step before brewing the Flower Power clone recipe– and in many ways the most important – is to clean and sanitize the brewing equipment. I won’t go over this in detail, but if you need a refresher you can check out this post for tips.

The Mash

I mashed my crushed grains in about 4.75 gallons of water. One thing I’ve been trying to dial in over the past few brews in my strike temperature – that is, the temperature of the water before it goes into the mash. Since the grain and the mash tun are often room temperature, you have to compensate by adding water that’s at least 10-15˚F hotter than your target mash temperature. Given that things are even colder in the winter, I aimed high. With a strike temperature of 180˚F, I was able to get the mash temperature right where I wanted it, in the mid-150s. You can use a calculator such as this one to estimate your strike temperature.
Here’s where I ran into a little problem – despite my efforts to get organized before brewing, after 60 minutes I realized I’d forgotten to add the honey malt! Doh! Luckily it’s not a big mistake. The honey malt is in the clone recipe mostly for flavor and color, and in theory the sugars should only take 30 minutes to convert. So I just mixed in the honey malt and added 30 minutes to the mash time. With the extra time added to the mash, I probably ended up with even better efficiency than I would have otherwise!

The Sparge  Shop Barley Crusher

I find I’m consistently low on the amount of sparge water I need. My calculations said 4-4.5 gallons would do the trick, but between grain absorption and volume loss in the mash tun, I was about a gallon short of my pre-boil volume. I just quickly heated up another gallon of water and made a note to adjust my calculations for next time.
At the end of the sparge I found I had six gallons of wort with a preboil gravity of 1.068 – right on target!

The Boil 

I think of the boil as the start of the home stretch. All it takes is watching the clock to make sure the hops get in on time. The four hop additions for this Flower Power clone beer recipe smelled amazing – Simcoe at :60, Chinook at :20, Citra at :10, and Ahtanum and Centennial at :0. And we haven’t even touched the dry hops yet!
My post-boil gravity was 1.075 – just a point shy of the estimated OG – but well within the margin of error. This beer should easily surpass 7% ABV.

The Chill & the Pitch

The colder ground water temperatures this time of year really help with cooling the wort quickly. My immersion wort chiller got the wort to pitching temperature in about 20 minutes. I pitched the yeast starter and now the beer is fermenting happily in the fermentation chamber!
Stay tuned to see how this Flower Power clone beer recipe turns out!
—————————————————————–
Review the whole Flower Power clone brewing process below:

—————————————————————–
David Ackley is a beer writer, homebrewer, and self-described “craft beer crusader.” He holds a General Certificate in Brewing from the Institute of Brewing and Distilling and is founder of the Local Beer Blog.

Leigh Erwin: A Vineyard Daydream

Growing Grapes For WineHi guys!  Leigh here!
While I’m sitting here looking at potential homes to buy, I got to thinking—is there enough space in these yards to grow enough of my own grapes for making my own wine?  How much space and how many vines do I actually need?
After doing some reading, turns out the answer kind of depends on how much quality I want to get out of my wine.  If I don’t care about quality, I can just pack a bunch in together and see what happens.  If I do care about quality, I need to pay a lot closer attention to the types of grapes I choose, how far apart they are from one another, and how many I need to plant. All of theses factors come into play when growing grapes for wine.
One of the biggest considerations I need to make is related to the type of grape I should plant.  Do I plant Vitis vinifera?  Or do I plant native varieties?  This really all depends on the climate (including temperature and humidity) as well as the soil.  Not all grapes grow well under the same conditions, so depending upon where I live could make a huge difference in what I plant.
There is a great little “post” regarding growing grapes for wine that I read on Homebrewing.org, which confirms this idea of picking the right grapes for where you live.  This post also mentions what to expect once you actually plant the grapes, and how many vines you should plant if you’re sticking with small batch winemaking.
Once you plant the vines, you can’t expect to be making wine immediately.  In fact, it takes a good 3-4 years before you end up with a decent crop for winemaking.  So, if you’re in a hurry to make wine with grapes, obviously you’ll need to buy someone else’s grapes for a few years while you’re waiting for yours to grow and mature.  All the while you need to make sure you set up trellises for when the grapes start putting out their long, dangly vines, and you need to regularly prune them. Shop Wine Presses
It is recommended that the vines be planted in a very sunny area, with good soil drainage and nutrient-poor soils.  When growing grapes for wine, stressing out the plant a bit is actually good for wines, as the plant will put all of its energy into reproduction (i.e. the grapes!!) resulting in super concentrated, higher quality fruit.
So, if I wish to continue making super-small batch wine like I am currently (i.e. using the 6 gallon fermenters and carboys), how much should I plant?  According to what I’ve read, it takes about 10 pounds of grapes to make a gallon of wine.  Therefore, in order to make a small batch of wine, you’d need to plant about 10-20 vines. I should probably keep that in mind when I’m looking for a new home, and hope the yard is big enough to squeeze 10-20 vines in!
Anyone else out there growing grapes for wine?

————————————————————
leigh_erwin_bioMy name is Leigh Erwin, and I am a brand-spankin’ new home winemaker! E. C. Kraus has asked me to share with you my journey from a first-time dabbler to an accomplished home winemaker. From time to time I’ll be checking in with this blog and reporting my experience with you: the good, bad — and the ugly.

Leigh Erwin: Using A Juicer

Juicer With ApplesHello readers!  Leigh here!  I’m back from my wedding/honeymoon adventures!
Remember how I thought we would have been moved by now?  Well, we’re not….yet.  We at least know now that we are not staying in the state where we live currently.  Because of this, I’m holding off on any major home winemaking purchases as I can’t really start any new wines right now and it’ll be a pain to have to move more than we really need.
I don’t want to lose the momentum I had earlier regarding my desire to make my own wines, so I’ll spend some time thinking about my next major steps and talking with you about what I would like to do and how I plan to do it.
One thing that just popped in my mind, actually, is related to one of the wedding gifts we received.  Someone had purchased a juicer for us so we can make our own homemade juice.  I’m certain they had random fruit juices to drink in mind, but I’ve been thinking—could I use this same juicer to make a bunch of juice to be fermented into wine? Does anyone have any experience with using a juicer for winemaking?
I did a little digging around the ECKraus website, and turns out there is someone else who had the exact same question that I did!  Can we use a juicer for winemaking?  To some up in one phrase, the answer was “sort of”.
Shop Grape ConcentrateWhen you use this type of a juicer for red wines (i.e. one not made with winemaking in mind), the resulting wine will be lacking in body and color.  Wines get most of the color from the skins, seeds, and pulp of the fruit, and the juicer will just end up separating all that.  However, the juicer could be used for white wines (white fruit) since you don’t need the skins and seeds for that process!
Cool!  So, while the gift giver did not have winemaking in mind, I’ll certainly be using my juicer for making white fruit wines until I upgrade to a more appropriate piece of equipment like a grape press.
——————————————————————————————————————–
leigh_erwin_bioMy name is Leigh Erwin, and I am a brand-spankin’ new home winemaker! E. C. Kraus has asked me to share with you my journey from a first-time dabbler to an accomplished home winemaker. From time to time I’ll be checking in with this blog and reporting my experience with you: the good, bad — and the ugly.

Judging Fruit Beers

Glasses Of Raspberries With Glass Of PorterIn the afternoon session of my recent BJCP beer judging experience, I was assigned to Category 20: Fruit Beer. Check out my previous post about Judging In A Homebrew Competition: English Brown Ales.
The Fruit Beer category is an odd bird. It basically allows the homebrewer to add fruit to any beer. As with about any style, the keys to success in the Fruit Beer category are balance and overall harmony with the base style. This creates some interesting combinations on the beer side, and presents some challenges for someone who is judging fruit beers, who will be confronted with a range of different beer styles. For example, you might come across a strawberry wheat beer, a blackberry porter, and a raspberry stout, and have to judge each beer based on its own merits.
Balance is the key with this style. Since just about any base style can be declared, someone who is judging fruit beers has to determine whether the base beer is in balance with the fruit. This is the case in the flavor as well as aroma. However, the judge must keep in mind that some fruits have very distinctive flavors and aromas. Typically hops are reduced in fruit beers to allow the fruit to come through.
Fruit can do some funny things to the appearance of beer. Though the appearance of the beer should be appropriate for the base style, sometimes fruit can contribute color or haze to a beer. It’s not necessarily a problem for the beer to take on some color from the fruit, but a clear beer generally gets higher marks for appearance than a hazy one. Pectic enzyme can help break down the pectins that are responsible for fruit-derived haze.
shop_beer_recipe_kitsFor about 80% of the entries that came across my table while judging fruit beers, the fruit was out of balance, much too heavy. On the flip side, the handful of beers that showed restraint in the fruit could have used a little more. It was evident how challenging it is to find the perfect balance when brewing fruit beer.
Interestingly, some of the more robust styles stood up to the fruit better than some of the lighter styles. Though there were some excellent strawberry blondes and strawberry wheats, the porters worked very well with blackberries and raspberries. This seems to indicate that the more delicate the fruit, the more delicate the base style should be.
Ultimately, one of my favorite beers of the bunch was a blackberry porter. Check out this article to make your own fruit beer.
Have you ever brewed an award-winning fruit beer? What’s your secret?
—————————————————————————————————————–
David Ackley is a beer writer, brewer, and self-described “craft beer crusader.” He holds a General Certificate in Brewing from the Institute of Brewing and Distilling and is founder and editor of the Local Beer Blog.

I Forgot To Add Campden Tablets To My Wine!

Upset Man With Hands On HeadI started a 5 gallon batch of raspberry wine yesterday and I had to wait until the batch cooled down to add the Campden tablets…and I forgot. I pitched the yeast last night and about an hour later I remembered that I forgot to add the Campden tablets the wine, so I added them at that point. Now this morning I still have no activity from the yeast. Did I kill the yeast? Should I put in more yeast? What can I do at this point?
Richard H. — GA
—–
Hello Richard,
From what you are telling me it seems like you killed most of the wine yeast.
When you add Campden tablets to a wine must it is to add SO2, or sulfur dioxide, to sanitize it. All the wild mold and bacteria are destroyed by the SO2’s presence. Given enough time, the sulfur dioxide will then dissipate out of the wine must as a gas and leave.
Campden tablets are added 24 hours before the wine yeast. This is so the wine yeast will not be destroyed by the Campden tablets, as well. In your case you added the wine yeast at the same time you added the Campden tablets, so it is most likely that some — if not most — the wine yeast was killed.  This is the bad news…
The good news is that a remedy is very simple. Add another packet of wine yeast. The wine should start fermenting just fine.
shop_campden_tablets
If you have been keeping your primary fermenter sealed up under an airlock, you will want to take them off and allow the wine must to breath for 24 hours before adding the wine yeast. This is to allow the time necessary for the SO2 gas to escape from the wine must. Once you have done this, you can then add the 2nd packet. It will be like nothing ever happened.
Richard, you are not the first person to come to me and say, I forgot to add Campden tablets to my wine and then added them along with the wine yeast. I’ve seen this scenario play out more than once with good results, so I am very confident that your wine will turn out just fine.
Happy Winemaking,
Ed Kraus
—————————————————————————————————————–
Ed Kraus is a 3rd generation home brewer/winemaker and has been an owner of E. C. Kraus since 1999. He has been helping individuals make better wine and beer for over 25 years.

Do Wine Fining Agents Need To Be Stirred?

Glass Of Wine In Reverse
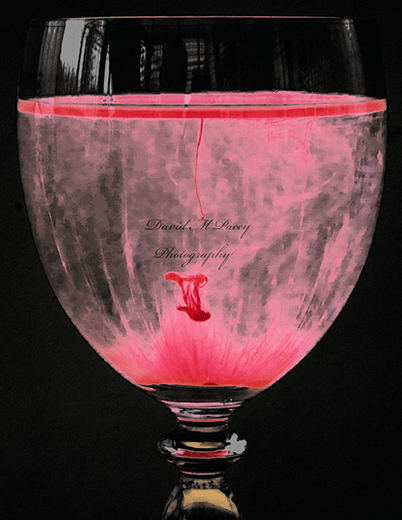
First of all, your wine making articles are great. One answer I have not seen in your posted articles is whether to stir fining or clearing agents multiply times after adding them in wine. Your article on using Bentonite as a wine clarifier states that it should be stirred several times once added. But what about other clearing agents such as Sparkolloid and Kitosol 40?
Kermit G. — LA
—–
Hello Kermit,
Most wine fining agents, such as the Sparkolloid and the Kitosol 40 you mentioned, do not need to be stirred repeatedly to do their job. All one needs to do is when adding these clarifiers is to stir them evenly throughout the wine. That is all that is necessary for them to do their job.
The reason for this is because these wine fining agents are light enough to stay suspended on their own for extended periods of time while in the wine . This gives the fining agents plenty of time to attract or absorb what they need to before settling out. In the case of liquid isinglass, it could stay suspended for weeks if not months. It is not until it actually attracts a group of particles that it will gain mass; lose buoyancy; and settle out. On its own, it’s just lingering.
However, this is not necessarily the case with bentonite. Some of the bentonite will settle out fairly quickly, not giving them enough time to collect as much as they possibly can. By stirring every few hours for the first day or two, you are increasing the clearing power of these heavier bentonite particles by keeping them suspended longer.
shop_bentonitePlease realize, that even if you did not stir the bentonite more than once, it will most likely clear the wine just fine. Bentonite is a very effective wine fining agent. It is capable of taking out a lot of the protein solids that are left behind after a fermentation. Any additional stirring would be just for added insurance.
Also realize, that it is possible to over fine a wine. A wine that has been treated over-treated with wine fining agents will start to lose body. The tannin structure of the wine will begin to diminished to some degree. And, in some more drastic cases, the color of the wine can be lightened a shade or two. Not good, if you’re trying to produce a big red wine.
Kermit, I hope this clears things up for you a bit [no pun intended]. In general, you don’t need to worry about stirring wine fining agents. They will do just fine on their own. However, if using bentonite giving it an extra stir or two during the first day or so isn’t a bad idea.
Happy Winemaking,
Ed Kraus
—————————————————————————————————————–
Ed Kraus is a 3rd generation home brewer/winemaker and has been an owner of E. C. Kraus since 1999. He has been helping individuals make better wine and beer for over 25 years.

Leigh Erwin: What I've Learned

Mead In Caboy With HoseHi everyone!
My, oh my, that mead experience was somewhat of a fiasco.  I’m so done talking about it, though today I will mention just a few things I learned from that experience, and what I hope to do next in my home winemaking adventures.
First: Don’t freak out if things aren’t going “on schedule”.  The wine isn’t necessarily ruined because it hasn’t cleared up in the amount of time the instructions said they would.  Just take a breather and be excited!  We get to troubleshoot and really make this wine our own!
Second:  Read all instructions.  Carefully.  Twice.  No, maybe multiple times.  If not, you could end up making silly errors that didn’t need to happen (i.e. you might set-up your wine filter system slightly wrong and only do half as good a job as you would have if you paid attention during the instruction reading session).
Third: Learn from your mistakes and try again.  This wine was certainly a test for me, and I definitely will not give up just because things got a little difficult.  In fact, I’m looking forward to the day I can try mead again.  I’ll probably take a little break from it for now, as I think we both need our time apart.
So what’s next for Leigh on the home winemaking front?
Well, after we get back from our honeymoon, we’re probably going to move, so really the next step is to come up with a game plan for the next batch of wine and set up shop in the new house.  It’ll be interesting to see what kind of a space we end up with and how many winemaking goodies I can fill it up with!
shop_fermentersI’m hoping we end up with a decent sized yard, as I would like to plant a couple of vines and play around with those.  Depending upon where we end up living, I may buy some native varieties instead of vinifera due to the relative ease of care, but we’ll see.  I’ll probably get a quick little soil analysis and evaluate what I think can grow there, and then plant.  I don’t plan on having an entire vineyard, but it could be a lot of fun to grow a few plants to have my own grapes for blending with other things!
I can definitely see myself making some other fruit wines in the near future.  It was interesting with the honey, but I think it might be fun to try something else other than grapes or mead next.  Only time will tell, I suppose!
——————————————————————————————————————–
leigh_erwin_bioMy name is Leigh Erwin, and I am a brand-spankin’ new home winemaker! E. C. Kraus has asked me to share with you my journey from a first-time dabbler to an accomplished home winemaker. From time to time I’ll be checking in with this blog and reporting my experience with you: the good, bad — and the ugly.

5 Gallons Of Apple Juice, Three Hard Cider Recipes – Part 1: Pasturization & Pitching

Baskets Of Apples
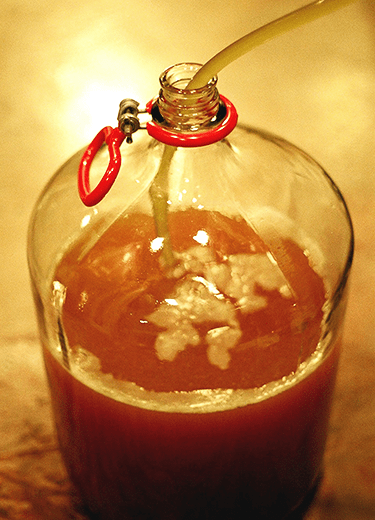
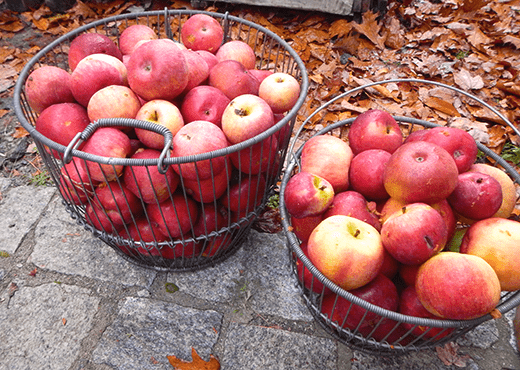
One of the benefits of joining a homebrew club is that you’re often exposed to group events and discounts. My local homebrew club does an annual cider pressing at a local cidery. This year I picked up five gallons of juice. Here’s my game plan for making hard apple cider.
From my five gallons of apple juice I want to make three different hard ciders: one plain, one with hops, and one with fruit and/or spices. I plan to ferment the five gallons together, then split them up at secondary fermentation into three different fermenters: one three-gallon glass carboy and two one-gallon glass jugs. (I already have the appropriate bungs and airlocks from previous experiments.)
As for the other ingredients, I opted not to use any additional sugar at this time. Upon recommendation from a friend, my yeast of choice making these hard apple ciders was Wyeast 1098: British Ale Yeast.
The first step when making hard cider from soft (non-alcoholic) cider is to stabilize the juice. One dilemma I had to sort through was how to stabilize the juice.
Campden Tablets vs. Pasteurization
Last year, I tried making hard apple cider using the standard method of adding Campden tablets to the juice. The Campden tablets stabilize the juice by releasing sulfur dioxide, which kills off any microbes that my have been living on the fruit. Yes, it smells a little like rotten eggs, but none remains at the end of the cider making process. Typically, the cider maker will add one tablet per gallon of juice, wait 24 hours while it does its thing, then pitch the yeast.
shop_carboysFor some reason, this didn’t work out for me last year. Either the juice was especially funky, or I left the apple cider in the primary fermenter for too long and with a more head-space than it should have had. The cider got moldy and I had to dump the whole thing.
This year, I’m doing things differently. In an attempt to prevent infection, I’m pasteurizing the juice. Yesterday afternoon, I picked up the juice. Last night I pasteurized the juice by heating it to 180˚F. Why 180˚F? 180˚F is hot enough to kill off wild microbes, but not quite boiling. Boiling the apple juice could result in a pectin haze. The pectin haze wouldn’t affect flavor, but I’d like to get a clear cider if I can. (I may still end up with some haze. In this case, pectic enzyme could come in handy.)
In theory, this pasteurization process should have killed off any yeast or bacteria that may have been living on the apples. During this run of making hard apple cider I had been thinking about adding sugar to boost the potential alcohol content, but my hydrometer showed the juice had a specific gravity of 1.050. Since apple juice will usually ferment completely dry, this should come out to about 6.5% ABV. That’s right where I want it, so no sugar needed.
Yeast Nutrient for Hard Cider
I added 1 tsp. of yeast nutrient per gallon of juice. I mixed this in while pasteurizing the juice.
Yeast Starter for Hard Cider
Cider FermentingWhile pasteurizing the juice (see above), I pulled off a half gallon for use in a yeast starter, pasteurized it separately, cooled it down and pitched the yeast. This gave the yeast a couple hours to grow and multiply before being pitched into the main batch. That’s not much of a head start, but it’s better than nothing.
I’m no cider master, but I have a good feeling about where this one is headed. I’m learning that making hard apple cider may not be as difficult as I first had suspected. Today, it’s fermenting away at 68˚F!
Stay tuned to see how it turns out!
Series: Part 1 | Part 2 | Part 3
—————————————————————————————————————–
David Ackley is a beer writer, brewer, and self-described “craft beer crusader.” He holds a General Certificate in Brewing from the Institute of Brewing and Distilling and is founder of the Local Beer Blog.