Torpedo Extra IPA Clone Recipe (All-Grain & Extract)


Seirra Nevada Torpedo Extra IPA Clone
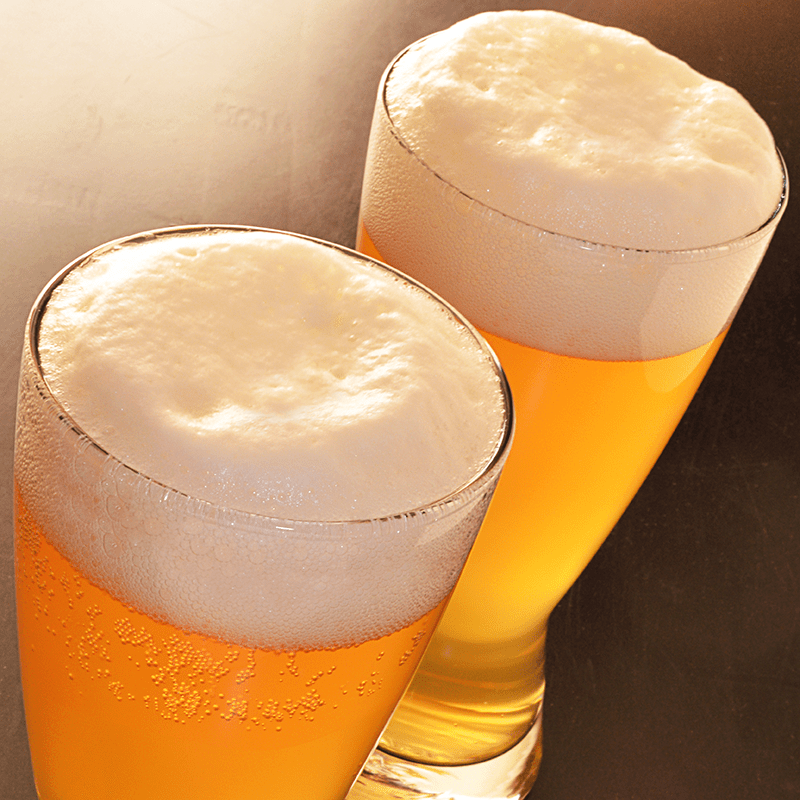
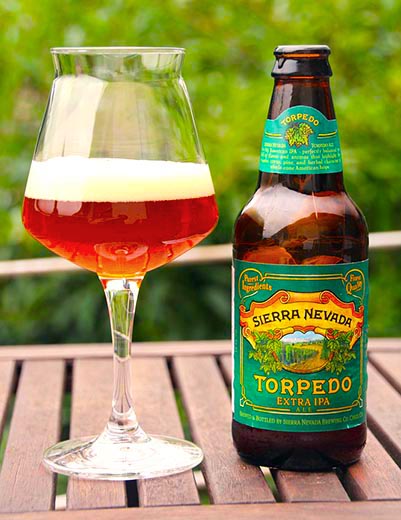
If you’re a fan of Indian Pale Ales, you’ve probably had Torpedo Extra IPA from Sierra Nevada. At 7.2% ABV and 65 IBUs, it’s a fairly aggressive IPA that showcases American ingredients.
When searching for a Torpedo Extra IPA clone recipe, I stumbled upon this thread on HomeBrewTalk.com. The original poster contacted Sierra Nevada and got some details on the beer recipe. (If there’s ever a beer you’d like to clone, many commercial brewers are willing to help you out!)

Grain Bill
The grain bill is straightforward with about 90% American two-row malt as the base. Caramel 60L malt provides some malty sweetness to support the hops and some color. A small amount of Carapils malt will contribute some body. The grains should be mashed around 155-156˚F, which will help make for a full-bodied brew. Err on the lower side for good fermentability.

Hopping
Sierra Nevada’s Torpedo features three types of American hops: Magnum, Citra, and Crystal. Magnum provides most of the bitterness, while Citra and Crystal join in for flavor and aroma additions.
The key to producing a Torpedo Extra IPA clone recipe is the dry hops. Torpedo is named for a dry-hopping technique developed by Sierra Nevada in which beer is circulated through a “Hop Torpedo,” sometimes called a hopback or Randall. There are many ways to build your own hop torpedo, but for best results you should have a pump to force the beer through the torpedo. If you want to forgo the hop torpedo, traditional dry hopping procedures will work fine.

YeastShop Steam Freak Kits
As for yeast, a standard American ale yeast will do the trick. In fact, Wyeast 1056 and Safale US-05 are often referred to as the “Chico” strain. They’re reportedly the same yeast used by Sierra Nevada in their American ales. If using liquid yeast, I recommend preparing a two-liter yeast starter from two packets of yeast to have enough yeast cells to do the job.
Ready to give it a try? Here’s an all-grain recipe, with an extract option below! Good luck!

Torpedo Extra IPA Clone Recipe (All-Grain)
(5.5-gallon batch)
**recipe assumes a mash efficiency of ~70%
Specs
OG: 1.073
FG: 1.018
ABV: 7.2%
IBUs: 65
SRM: 10
Ingredients
14 lbs. American two-row malt
1 lb. Caramel 60L malt
.5 lb. Carapils malt
.75 oz. Magnum hops at :75 (11 AAUs)
.5 oz. Magnum hops at :30 (7.3 AAUs)
.5 oz. Magnum hops at :5 (7.3 AAUs)
1 oz. Crystal hops at :5 (4.3 AAUs)
.5 oz. Crystal hops dry hopped for 7-10 days
.25 oz. Citra hops dry hopped for 7-10 days
.25 oz. Magnum hops dry hopped for 7-10 days
2 packets Wyeast 1056: American Ale Yeast or 1 packet Safale US-05

Directions:Shop Home Brew Starter Kit
Mash the crushed grains in about five gallons of clean water at 156˚F for 60 minutes. Sparge to collect 7.5 gallons of wort. Boil for 90 minutes, adding hops according to schedule above. Whirlpool, chill wort, and transfer to a clean, sanitized fermenter. Pitch yeast at 70˚F or below. Ferment at 65-70˚F. Add dry hops to the secondary fermenter and allow to sit for 7-10 days. Bottle or keg for ~2.3 vols CO2.

Extract Option: Replace the 14 lbs. of two-row malt with 8.4 lbs. light DME. Steep the specialty grains for 30 minutes in clean water at 156˚F. Add half the DME and enough water to make a three-gallon boil. Proceed with the recipe above, adding enough clean, chlorine-free water to the fermenter to make five gallons.
Do you have a Torpedo Extra IPA clone recipe you’d like to share? We’d love to see it. Just post it in the comments below.
—–
David Ackley is a beer writer, brewer, and self-described “craft beer crusader.” He holds a General Certificate in Brewing from the Institute of Brewing and Distilling and is founder and editor of the Local Beer Blog.

5 Tips For Using A Wine Press

Using A Wine PressHere are five tips for using a wine press. This are basic tips that will help you get the most out of your press. Learning how to make wine using a wine press is very straight-forward. Even so, this tips should help you avoid the pitfalls we see most often.

  1. You Can Press More Than Just Grapes With A Wine Press:
    While wine presses are sold with the intent of being used for making grape wine, they work perfectly fine for pressing other fruits. Everything from tiny elderberries on up to apples can be pressed with a wine press.
  1. Before Using A Wine Press, All Fruits Must Be Crushed:
    While you can press a variety of fruits with a wine press, it is important that the fruit be crushed beforehand. This is true whether you are pressing grapes, blueberries or pears. Depending on the amount of fruit you are dealing with: you can crush the fruit by hand; you can use a blunt object such as the butt end of a 2X4; or you can get an actual grape crusher to do the work for you.
  1. Before Using A Wine Press, The Stems Should Be Removed:
    This primarily applies to pressing grapes. Some stems are alright, but excessive stems left in with the pulp can cause your resulting wine to have excessive tannin. This can give it an astringent flavor. The astringency can age-out over time, but the result of that would be a dark, dusty sediment forming in the bottom of your wine bottles. To remove the stems you can pick the grapes from them, but if you have a larger amount you may want to invest in a grape de-stemmer that does the process for you. A grape de-stemmer typically will crush the grapes as well, so you can handle both process with one piece of wine making equipment.
  1. Whites Are Pressed Before Fermentation, Reds After:
    Shop Wine PressesThis one often throws a lot of beginning winemakers off. Many assume that the grapes are always pressed before fermenting. In the case of making a white wine, they would be right. The grapes are de-stemmed, crushed, pressed and then fermented. However, when making a red wine, you want to de-stem, crush, ferment and then press. Having the pulp in during the fermentation is what gives a red wine its ‘red’. It is also what gives these wines more body than most whites. If the pulp were not in a fermentation you would end up with a blush wine.
  1. Choose A Wine Press That’s The Right Size For You:
    Wine presses come in all sizes. In general, they all press with the same amount of pressure and extract the juice with the same amount of efficiency. It is simply a matter of how much wine press do you need. Too much press and you won’t be able to fill the pressing basket all the time. Not enough press and you’ll be using a wine press all weekend. All the wine presses we list on our website also have listed how many pounds of fruit they will hold and the approximate number of gallons of juice you can expect with each pressing.

I am sure there are others, but these are the main tips for using a wine press. If you have a tip on how to make wine using a wine press, please leave it in the comments below. We’d love to hear your ideas.
—–
Ed Kraus is a 3rd generation home brewer/winemaker and has been an owner of E. C. Kraus since 1999. He has been helping individuals make better wine and beer for over 25 years.

Choosing the Right Beer Glass Types for Your Homebrew

Beer In Assorted GlassesDoes it matter which type of beer glass you serve your beer in? Well, often times, no – no one wants to be a snob – but once in a while you want to get the full effect of your brew. This is where the different beer glass types come into play.
Proper beer glassware enhances the positive aspects of your homebrew, with different types of beer glasses highlighting different qualities.
Try this: take a very fragrant beer like an IPA or barrel-aged stout and pour some of it into a regular pint glass and some into a tulip or wine glass. Smell the two and compare the aromas – you’ll probably notice a significant difference. This experiment also works with wine and liquor.
So what are some of the different beer glass types and their uses? Below we’ve put together a somewhat comprehensive list of the glasses you’ll run across when drinking your brews. This is a menagerie of glasses that you may want to consider having on hand when serving you your own homebrews.

Goblet Beer Glass
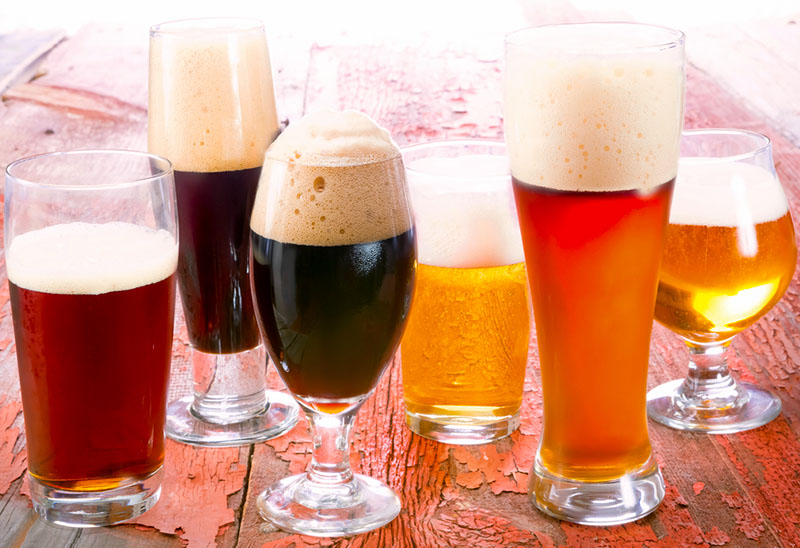
Goblet – Ideal for Belgian ales and Berliner weiss, the goblet features a wide mouth for easy access to the beer’s complex flavors and a structure that supports head retention.

Flute Beer GlassFlute – A flute is a narrow beer glass that tapers towards the bottom. The shape gives the viewer a good look at carbonation and helps release the pleasing aromas of gueze, lambic, swarzbier, and Vienna lager.

Pilsner Beer GlassPilsner – The pilsner glass is similar to the flute, but it has a wider mouth. The change in shape showcases color, supports head, and encourages aromatics of – not surprisingly – pilsners, but also blonde ales, bocks, and witbier.Shop Homebrew Starter Kit

Pint Beer GlassPint Glass – Of all the beer glass types, this is the all-around go-to glass. It is versatile as it is common and is ideal for many of your favorite beers, including amber ale, altbier, English bitter, brown ale, IPA, porter, and pumpkin beer.

Snifter Beer GlassSnifter – The snifter, just like what you would use for brandy or cognac, is a smaller version of a goblet with a lip that turns inward, capturing desirable aromatics. Snifters are smaller than most other glasses, making them a good fit when drinking higher gravity beers. Use a snifter when enjoying barley wine, Belgian dark strong ale, double IPAs, imperial stouts, and tripels.

Stange Beer GlassStange – A stange is a relatively narrow beer glass type with no taper. It concentrates aromas into a narrow channel and gives the drinker a good look at the beer. Stange glasses are appropriate for a number of styles, including altbier, bock, gose, lambic, and rye beer.Shop Steam Freak Kits

Stein Beer GlassStein – In German, “stein” means stone. For years prior to the widespread use of glass, these large mugs were made of stone. Go to Germany today and ask for a “Mass stein” – they’ll give you a full liter of suds. Steins work great for Oktoberfestbier.

Tulip Beer GlassTulip – The tulip is on of the great all-around beer glass types for evaluating your homebrew, regardless of style. The glass’s shape gives a good sense of color, enhances aromas, and holds a big head. The tulip works especially well for saisons and other Belgian styles.

Weizen Beer GlassWeizen Glass – The weizen glass is designed for wheat beers. Its size allows for a large serving of the refreshing beer and a big, wheaty head while also helping to enhance aromas. Use a Weizen glass for all types of wheat beer.Shop Malt Extract Kits

So there you have it, the different beer glass types and their uses! Don’t get too hung up on choosing the appropriate glassware – and definitely don’t shame other people for using the “incorrect” beer glass. The most important thing is to always appreciate the beer!
—–
David Ackley is a beer writer, brewer, and self-described “craft beer crusader.” He holds a General Certificate in Brewing from the Institute of Brewing and Distilling and is founder and editor of the Local Beer Blog.

7 Reasons For Boiling A Wort

Boiling A Wort BWHave you ever wondered what was the reason for boiling a wort?
The boil is an aspect of homebrewing that can be taken for granted as a step simply for throwing in the hops, but there are actually several reason for boiling a wort:

  • To sterilize the wort
  • To stop the enzymatic activity of the mash
  • To concentrate the wort
  • To boil off unpleasant aroma compounds
  • To coagulate proteins so they will drop out
  • To extract bitterness from the hops
  • To adjust wort color and flavor

All these reasons play a significant part in the final outcome of the beer. It’s color, bitterness, flavor, intensity, over all character are partially a factor of the boil. Let’s briefly cover each reason for boiling a wort.

  1. To sterilize the wort
    As homebrewers, we want as much control over our beer as possible. Beer yeast is (usually) the only thing we want growing in our beer. Boiling the wort kills off any microorganisms that may be in the wort or other ingredients. Sterilization requires a minimum of about 20 minutes of boiling.
  1. To stop enzymatic activity
    A brewer can control the ratio of fermentable and unfermentable sugars, mouthfeel, and other factors by their command over the mash. Changes in temperature and pH can make a big difference in the enzymatic activity during the mashing process. By heating the wort to a boil, the enzymes in the mash stop their activity and the mix of sugars in the mash is fixed.
  1. To concentrate the wort 
    Shop Brew KettlesThe wort collected after the mash is never the brewer’s intended original gravity. By boiling the wort and knowing one’s boil-off rate, a brewer can execute a precise original gravity for their beer. In many cases a 60-minute boil is sufficient for reaching a desired gravity, but sometimes a longer boil will be required.
  1. To boil off unpleasant aroma compounds
    Dimethyl sulfides, commonly referred to as DMS, are compounds produced while boiling a wort and their presence in beer is considered a fault. You might recognize DMS as an aroma similar to cooked vegetables. One of the major reasons for boiling a wort is to get rid of these offensive compounds. A long, vigorous boil will vaporize the DMS. For this reason it’s important to boil the wort uncovered. Aldehydes can also be boiled off.
  1. To coagulate proteins
    There are a number of materials in malt, particularly protein, that are suspended in wort. The boil helps these proteins coagulate into larger chunks, which form during the hot break and will settle out during the cold break. Irish moss can aid in this process.
  1. To extract bitterness from hops 
    The part of hops that are responsible for bitterness are called alpha acids. In order to contribute bitterness to beer, these alpha acids must be isomerized (a change in chemical structure), which only happens during boiling of the wort.
  1. To adjust wort color and flavor shop_home_brew_starter_kit
    In some cases, boiling wort can help achieve a darker color and a rich, caramel flavor in the wort. The chemical process responsible for these changes is called the Maillard reaction.

So there they are, 7 reasons for boiling a wort. Can you think of any other reasons we boil wort? Please share them with us!
—–
David Ackley is a beer writer, brewer, and self-described “craft beer crusader.” He holds a General Certificate in Brewing from the Institute of Brewing and Distilling and is founder and editor of the Local Beer Blog.

How To Siphon Wine Without Disturbing The Sediment

Man Siphoning Wine From CarboyCan I add potassium sorbate to individual bottles as I fill the bottles with wine. I am making cyser and want to back sweeten with a little more honey and add the potassium sorbate to individual bottles. It is a 5 gallon recipe and was started in November. I want to bottle now, readings are telling me its safe. There is no residue of yeast at the bottom, but I really don’t want to siphon the wine into the carboy and stir anything that I cant see up. What say you.
Name: Suzanne K.
State: Virginia
—–
Hello Suzanne,
I understand your concerns about disturbing the sediment when siphoning, but what you are thinking of doing is not very is not very practical.
The amount of potassium sorbate required for each wine bottle is such a small amount that it would be very hard to measure it accurately enough for each single bottle. You would be much better off by siphoning into another fermenter, off any sediment (also referred to as “racking”), then mixing in the potassium sorbate to the entire batch along with any sweetening.
The fact that you are not seeing any sediment at the bottom of the fermenter is a very good sign, and makes me think that there isn’t any, since sediment is easy to spot in a lightly colored wine.
But if you are worried about disturbing the sediment when siphoning – seen, or not – the trick is to siphon gently. That’s how to siphon when without stirring up sediment. Have someone hold the siphon hose into the top half of the wine as someone else starts the siphon. Always draw your siphon from the upper part of the wine. As you get towards the end, you may want to tilt the container so as to corner the last bit of wine.
If you want to learn how to siphon wine without disturbing the sediment, the first thing you have to is understand that it’s not so much about a siphoning technique or experience as it is having the right pieces of equipment. There are several items on the market that will make racking the wine or wine much easier to do than just using a plain piece of hose. These handy little items are the key to siphoning the wine without stirring things up.

  • Racking Canes:
    One of them is called a racking cane. It is a rigid piece of tubing that allows you to point to where you are drawing from. It attaches to the end of your siphon hose like a wand. At the very bottom end of the tube is a diversion tip that makes sure that you do not draw from the very bottom of the container. On the top end is a hook or curve that points down toward the fermenter being racked into.The Auto Siphon
  • Auto Siphon:  
    Quite often, starting the siphon is what causes a lot of the sediment to get stirred up. This is when most of the fumbling around happens, and consequently, the unintentional disruption of the sediment. One great invention for resolving this issue is The Auto Siphon. It allows you to start a siphon with virtually no movement at all. It’s like a racking cane and pump all in one. You just attach it to the siphon hose like a racking cane, and then slowly slide the inside tube up one time and then down one time to start the siphon.
  • Racking Tube Clamps:
    Auto Siphon ClampAs an extra precaution, to make absolutely sure you do not disrupt any of the sediment when racking, you can use a racking tube clamps. These act as a third hand to keep things secured, in one position, and not moving around. You can get a Auto Siphon clamp or a racking cane clamp, depending on which you are using to draw the wine.

Suzanne, use these items and you’ll never have any problems with sediment getting stirred up.
How about anyone else. Do you have any tips or ideas on how to siphon a wine without disturbing the sediment?
Happy Winemaking,
Ed Kraus
—–
Ed Kraus is a 3rd generation home brewer/winemaker and has been an owner of E. C. Kraus since 1999. He has been helping individuals make better wine and beer for over 25 years.

Using Torrified Wheat For Head Retention

Homebrew With Torrified WheatI’ve been home brewing for just over a year and I’ve heard that adding torrified wheat as an adjunct can improve the head retention in beer and lace work within the glass. However, not once in my circle of friends has any experience of quantity and outcome. I generally brew all grain pale ales using Maris Otter as the base. Is there a recommended amount of torrified wheat to use that will add a creamy head without causing any degradation in clarity?
Name: Kevin Holmes
State: Essex, United Kingdom
—–
Hi Kevin,
Thanks for your homebrewing question about using torrified wheat for head retention in brewing!
In the context of homebrewing, a good torrified wheat definition would be a type of brewing grain that has been heated in order to break down its cell walls. The idea is that this gives water and enzymes in the brewing mash fast, easy access to the wheat’s proteins and starches, resulting in a quick conversion and a higher yield of fermentable sugars. It’s worth noting however that torrified wheat does not have any diastatic power of its own.
You are correct in your understanding that using torrified wheat in your homebrews can improve head retention in a beer. The torrified wheat percentage needed in a grist is approximately 5-10%. This amount can make a big improvement in head formation Shop Barley Grainsand retention. Briess recommends using up to 40% torrified wheat in a beer recipe, with the upper limit being for a weizen, Belgian witbier, or other wheat beer. If mashing with a significant proportion of wheat, rice hulls are recommended in order to avoid a stuck mash.
Please note that these same benefits can come from brewing with malted wheat, instead of torrified wheat. Both the red wheat and white wheat varieties are great alternatives for producing head retention. But unlike torrified wheat, malted wheat also has a significant amount of diastatic power (160-180 DP), worth considering if using a high proportion of wheat in a grain bill. Again, as little as 5-10% can improve head formation and retention. Personally, I have had good results using as little as half a pound of wheat malt in a 5 gallon pale ale recipe. The improvement in head retention was certainly noticeable.
If you’re looking for ways to improve head performance, other than using torrified Shop Barley Crusherwheat or malted wheat, you may also want to look into using Carapils malt (sometimes called dextrin malt). If for some reason you want to avoid using wheat, this is the way to go. Briess recommends using 1-5% of Carapils in your grain bill for improved body and head retention, without significantly impacting your beer’s color or flavor.
Kevin, thanks again for your great question about using torrified wheat in brewing for head retention. Anyone else have suggestions for controlling head retention in their beers?
—–
David Ackley is a beer writer, brewer, and self-described “craft beer crusader.” He holds a General Certificate in Brewing from the Institute of Brewing and Distilling and is founder and editor of the Local Beer Blog.

Anchor Steam Clone Recipe (All-Grain & Extract)

Anchor Steam Beer In Fritz Maytags HandHere’s an Anchor Steam clone recipe for both all-grain and extract brewing. This is a fun one to make and will please the palates of most beer drinkers.
First brewed in 1896, San Francisco’s Anchor Steam defined the style known as California Common. It’s an interesting cross between a pale ale and an amber lager, offering the best of both worlds: toasty malt flavor with a touch of caramel malt, balanced by firm hop bitterness, flavor, and aroma. Probably the most unique characteristic of Anchor Steam: it’s fermented at ale temperatures using a lager yeast.
Because “steam” beer is trademarked by Anchor Brewing, everyone else calls the style California Common. However, you will still hear the style referred to as “steam beer”. Why steam beer?

“Anchor Steam Beer derives its unusual name from the 19th century
when “steam” was a nickname for beer brewed on the West Coast of
America under primitive conditions and without ice. While the origin
of the name remains shrouded in mystery, it likely relates to the
original practice of fermenting the beer on San Francisco’s rooftops
in a cool climate. In lieu of ice, the foggy night air naturally cooled the
fermenting beer, creating steam off the warm open pans.”

So, Anchor Steam is actually open fermented. I wouldn’t recommend trying open fermentation at home, but if you’re feeling adventurous, go for it! You might need to build your own open fermenter. Shop FerMonster
For the rest of us, our regular carboys and fermenters will work just fine. One last characteristic to keep in mind for an Anchor Steam clone recipe: this beer uses only Northern Brewer hops.
Ready to brew? Let’s do it! Check out the all-grain and extract recipes below.

Anchor Steam Clone Recipe (All-Grain)
(5 Gallon Batch)
Specs
OG: 1.050
FG: 1.012
IBUs: 33-36
ABV: 4.9%
SRM: 10-11
Ingredients
7.75 lbs. Briess 2 Row Brewer’s Malt
1 lb. Caramel 40L Malt
1 lb. Victory Malt
.4 oz. Northern Brewer hops at :60 (3.1 AAUs)
1 oz. Northern Brewer hops at :15 (7.8 AAUs)
.4 oz. Northern Brewer hops at :0 (3.1 AAUs)
1 tsp. Irish Moss at :15
Wyeast 2112: California Lager Yeast
5 oz. corn sugar for priming
Shop Homebrew Starter KitDirections: Prepare a 4L yeast starter. Single infusion mash at 150F, using 1.5 qts water per pound of grain. Sparge to collect 7 gallons of wort. 60-minute boil. Chill wort, pitch yeast starter, and ferment at 60-65F for one week, then transfer to secondary for two weeks. Bottle with priming sugar and condition for two weeks.

Anchor Steam Clone Recipe (Extract)
(5 Gallon Batch)
Specs
OG: 1.050
FG: 1.012
IBUs: 33-36
ABV: 4.9%
SRM: 10-11
Ingredients
4 lbs. Light Dried Malt Extract
1.5 lb. Briess 2-Row Brewer’s Malt
1 lb. Victory Malt
1 lb. Caramel 40L Malt
Shop Steam Freak Kits.5 oz. Northern Brewer hops at :60 (4.7 AAUs)
1.25 oz. Northern Brewer hops at :15 (10.1 AAUs)
.5 oz. Northern Brewer hops at :0 (4.7 AAUs)
1 tsp. Irish Moss at :15
Wyeast 2112: California Lager Yeast
5 oz. corn sugar for priming
Directions: Prepare a 4L yeast starter. Mash the crushed grains in 5 quarts water. Hold temperature at 150F for one hour. Strain wort into brew kettle and sparge grains with one gallon of water at 170F. Add malt extract and bring boil volume to 3.5 gallons. 60-minute boil. Add hops according to schedule. Chill wort, pitch yeast starter, and ferment at 60-65F for one week, then transfer to secondary for two weeks. Bottle with priming sugar and condition for two weeks.
Have you ever brewed an Anchor Steam clone recipe? Did you use all-grain or extract? How did it go? Share in the comments below!
—–
David Ackley is a beer writer, brewer, and self-described “craft beer crusader.” He holds a General Certificate in Brewing from the Institute of Brewing and Distilling and is founder and editor of the Local Beer Blog.

Make More Beer in Less Space with High Gravity Brewing!

High Gravity Wort BoilingAre you feeling restricted by the size of your brew kettle? Do you want to brew 10, 20, or 30 percent more beer without buying any new homebrewing equipment? Fortunately, there’s a way you can by using a process called high gravity brewing.
Many home brewers start out with a five-gallon brew kettle. It works great for brewing extract and partial mash beer recipe kits – and it’s easy on the budget. But if you’re trying to advance to all-grain brewing – whether with brew-in-a-bag or with a mash tun cooler – it can be hard to brew a full five-gallon batch of beer with the five-gallon kettle. Luckily, there’s a way to “cheat”: brew a higher gravity beer and dilute it down with water after the fermentation.
Just like we do with extract and partial mash brewing, it’s perfectly acceptable to dilute your wort or beer with water to make it go further. Alternatively, you can use this high gravity brewing process to take your five-gallon batch of beer (or any size batch for that matter) and dilute it to make more.

Here or some basic high gravity brewing tips:

  • Water should be pre-boiled to sterilize and de-aerate it, and then chilled to match the temperature of the wort or beer.
  • Keep your dilution rates to a reasonable level. Around 20% is okay, and up to 40% would be fine with certain beer styles, doubling the batch size is not realistic.
  • Blending down your wort pre-fermentation may lead to higher ester production. Depending on your beer recipe, you may prefer to blend after fermentation.
  • When diluting your beer after fermentation, avoid splashing. Splashing can introduce air back into your beer, which negatively impacts shelf life.

Shop Brew KettlesThe high gravity brewing process couldn’t be easier. To amp up your five gallon recipe to a six gallon recipe, simply increase your ingredients by 20%. (If desired, use a brewing calculator to calculate hop changes to account for the change in hop utilization.) Depending on your beer recipe, you may need to tweak your yeast pitch rate, but in most situations you won’t need to worry about it. After fermentation, add your gallon of pre-boiled, pre-chilled water to either the secondary fermenter or the bottling bucket, taking care not to splash. Siphon the beer into the water to mix it together.
If you’d like to experiment, you can even bottle part of your batch at the original strength and the rest at the diluted rate. It takes a little extra time to figure out the blending ratios, but luckily there’s an easy formula!

Blending Formula For High Gravity Brewing

Use this formula to calculate how blending or diluting the wort or beer will change your gravity, IBUs, alcohol content – even beer color:
A1 * B1 = A2 * B2

A1 = gravity, IBUs, ABV, or color (SRM) of the first beer
B1 = volume of the first beer
A2 = gravity, IBUs, ABV, or color (SRM) of the second beer
B2 = volume of the second beer

It doesn’t matter which recipe is the “first” or “second” beer, as long as you don’t mix up your stats between the two.
So, for example, the beer you want to make has an expected ABV of 5% (A1). You want to end up with six gallons of the beer (B1). At what ABV (A2) should you brew your five-gallon batch (B2) in order to add one gallon of water and end up at 5% ABV?Shop All Grain System

5 * 6 = x * 5

x = 6% ABV

The calculation also works for gravity. You want your wort to have an OG of 1.040, but you have five gallons of wort at 1.050. How much water should you add to reach 1.040? (Use gravity points: 1.040 becomes 40.)
40 * B1 = 50 * 5
Answer? Your target volume of wort should be 6.25 gallons, so you should add 1.25 gallons of water.
The advantages of high gravity brewing are many: less equipment, less space, more variety… But beyond this, it’s easy to do and doesn’t require any significant, additional effort on your part.  So I say, why not give the high gravity brewing process a shot and see what you come up with!
—–
David Ackley is a beer writer, brewer, and self-described “craft beer crusader.” He holds a General Certificate in Brewing from the Institute of Brewing and Distilling and is founder and editor of the Local Beer Blog.

Brewing With Chili Peppers For Fun And Torture

Beer With Chili PeppersBeer drinkers are an eclectic bunch. Some are hop-heads and some prefer malt bombs, but mixed in with the plethora of sects is a smaller group – those who like it hot.
You may have noticed commercial breweries experimenting more by brewing with chili with peppers, recently. Stone has the painfully hot Crime and Punishment and Twisted Pine has the infamous Ghost Face Killah. But there’s no need to go to the extreme with your homebrew!
If you’re looking for unique heat or some layered vegetable flavor, there are lots of ways to go about adding chili peppers to your beer – and lots of peppers to use – when brewing with chili peppers.

What Kind of Homebrew?
Before you find the kind of pepper you want to use, it’s important to determine the style of homebrew you’d like to make. The homebrew you use as your base beer will help you pick what kind of chili peppers to use and how much heat you want to feature.
For example, you could brew something light, like a lager, which could help really showcase aspects of a pepper, all the way up to a stout, which can balance the spice and heat with its own sweet maltiness and roasted characteristics. Here’s a chipotle porter recipe as an another example.
The first time I tried brewing with chili peppers I used a blonde ale base because I wanted the pepper to be front and center. It was perfect for my love of hot food, but a little too much heat came through for other drinkers. Find a style that you enjoy and that will allow you to feature the right amount of heat.

Which Peppers to Use?
Once you’ve got a beer style picked out, consider these three popular chili peppers to reach your desired level of intensity:

  • Anaheim: This pepper may be ideal for those who don’t want a ton of spicy heat, as it falls relatively low on the Scoville heat scale. As a mild pepper, it mixes a little bit of sweetness with low-level heat. Anaheim peppers will be good for lighter-bodied brews with a touch of heat.Shop Steam Freak Kits
  • Jalapeño: Chances are you’re familiar with this pepper, which is often found in spicy food dishes. Jalapeños offer stronger heat than Anaheim peppers and fall about midway on the Scoville scale. Chipotle peppers – smoked jalapeños – also make an excellent option when brewing with chili peppers. The smoke adds another layer to the pepper heat and flavor. Consider jalapeños to be good for just about any beer style, depending on your tolerance for heat.
  • Habañero: Among the hotter peppers easily found at grocery stores, habañero peppers aren’t for everyone, thanks to a heat level many times that of a jalapeño. If you love spicy heat, adding this chili pepper to heartier beers like porters or stouts that can withstand the heat.

When to Add Chili Peppers to a Brew

Like other unique ingredients (such as herbs and fruit), you’ve got options for when to add peppers in your homebrew. You can leave them whole if you want to minimize heat or slice them in half to expose seeds and the vegetable’s membrane, which contain capsaicin, the compound that makes a pepper hot.
Other timing options when brewing with chili peppers:

  • Late-boil: This will add heat, but little aroma to your beer. Add peppers at the very end of the boil and let them sit in the wort for 10 to 15 minutes.
  • Primary fermentation: If you want a bit more balance, adding peppers during primary fermentation will offer some heat, pepper flavor, and aroma. Just make sure to sanitize or gently blanch peppers them before putting them in your carboy or bucket.
  • Secondary fermentation: To get the most flavor, aroma, and heat from your peppers, try adding them after primary fermentation. This offers the option of starting with a pepper or two, and then you can taste the beer to find out if you want to add more during the secondary process.
  • In the bottle: For pepper enthusiasts only! Adding a pepper straight into a beer bottle will leave no doubt as to what you’re drinking!Shop Home Brew Starter Kit

How Adding Chili Peppers Impact Your Homebrew
When brewing with chili peppers you’ll definitely get a pepper flavor in your beer, but it’s important to know that how you use peppers may also affect the head retention of a beer.
If you’re using seeds and other exposed parts of the chili pepper, oils from the vegetable may seep into your beer, greatly reducing head retention. In my experience with a jalapeño blonde ale, carbonation wasn’t a problem, but little to no foam remained in my glass a few minutes after it was poured.
Think you can stand the heat? A good place to start for first-timers is with selecting a homebrew recipe kit. Find a brew you like and think will support the pepper heat and give it a shot. It’s an easy way to test pepper flavors and discover the kick they can add to your homebrew!
—–
Bryan Roth is a beer nerd and homebrewer living in Durham, North Carolina. You can read his thoughts on beer and the beer industry on his blog, This Is Why I’m Drunk, and send him suggestions on how to get his wife to drink craft beer via Twitter at @bryandroth.

5 Cool Tips For Brewing Beer In The Summer

Keeping Cool While Brewing Beer In The SummerThroughout the home brewing process, sometimes it’s easy to get a little stressed. With all the different steps, temperatures to hit, and precious beer on the line, we all want to make sure the batch turns out the way we want it to. On top of it all, the summer heat has a way of boosting that stress level.
But the most important thing is to have fun. What’s the point if brewing isn’t enjoyable? Besides, the more we can relax and enjoy the process, the less likely it is that we make a costly mistake.
Here are five ways you can keep your cool when brewing beer in the summer and enjoy your brew day:

  1. Brew with a friend: An extra pair of hands makes brewing much easier… and more fun too! Share some homebrews, divvy up the responsibilities, and talk some shop. If you’re visiting someone’s house, just remember to bring something – ingredients, beer, or food – to contribute and to say “thanks” to your host.
  1. Clean up first: I don’t know about you, but I always prefer brewing in a clean space. The more clear surfaces you have available, the less you’ll have to balance things precariously and the less chance you have of spilling something.
  1. Shop Steam Freak KitsRead all directions and plan the process ahead of time: Just like in grade school, read all beer recipe directions before beginning. All of our Beer Box Recipe Kits come with step-by-step instructions to guide you through the brew day. Here are 10 recipe kits just right for brewing beer in the summer. If you’ve built your own beer recipe, plan out in advance what temperatures and what volumes of water you want for your batch. Planning out a road map for your brew day will help eliminate at least some of the guesswork later on. The more details the better.
  1. Measure out all ingredients beforehand: Taking a few minutes to weigh out your grains and hops will give you a little extra time to pay attention to those things that will almost definitely go wrong. If you measure out things like Irish moss in advance, you’re much less likely to forget about them in the heat of the moment.
  1. Take your time: What’s the rush?! It’s always easier to make mistakes and get flustered under pressure of a deadline. If it means devoting a whole day to brewing, so be it. If you can plan it so that you have no where else to be, you’ll be much more likely to enjoy where you are and what you’re doing.

Shop Home Brew Starter KitJust like Charlie Papazian always says, “relax, don’t worry, have a homebrew!” This couldn’t be more true when brewing beer in the summer. Remember that even if your brew day doesn’t go perfectly, your beer will probably still come out pretty well. Embrace the process and keep in mind there is nothing you’d rather be doing than brewing your own beer!
—–
David Ackley is a beer writer, brewer, and self-described “craft beer crusader.” He is a graduate of the Oskar Blues Brew School in Brevard, NC, and founder of the Local Beer Blog.