2 Tasty German Pilsner Beer Recipes (Extract & All-Grain)

Made Using A German Pilsner Beer RecipeThough pilsners originated in what is now the Czech Republic in 1842, very pale lagers quickly spread from Bohemia throughout Germany and other parts of Europe. These golden lagers are dry and bitter, featuring pilsner malt and a distinct note of noble hops.
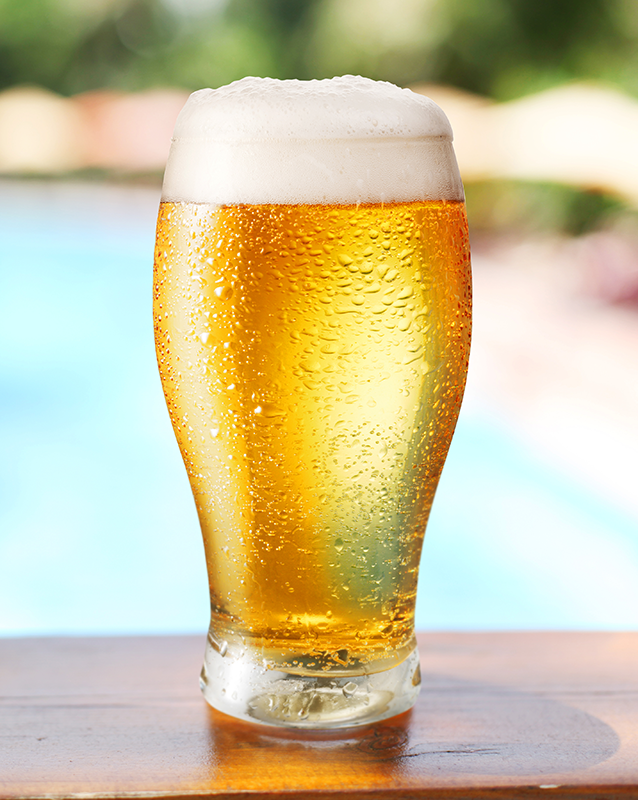
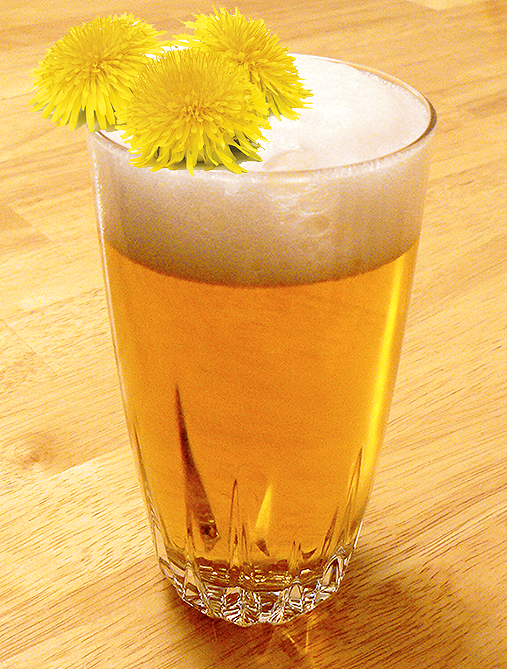
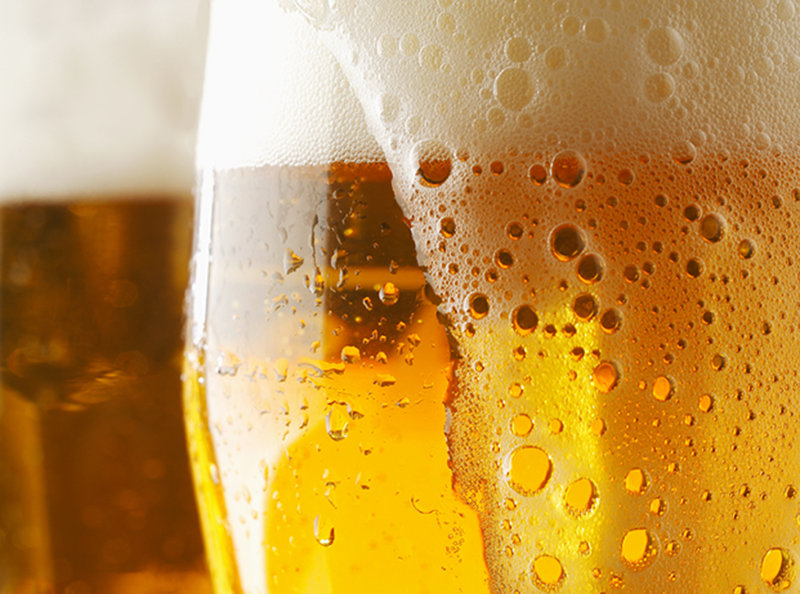
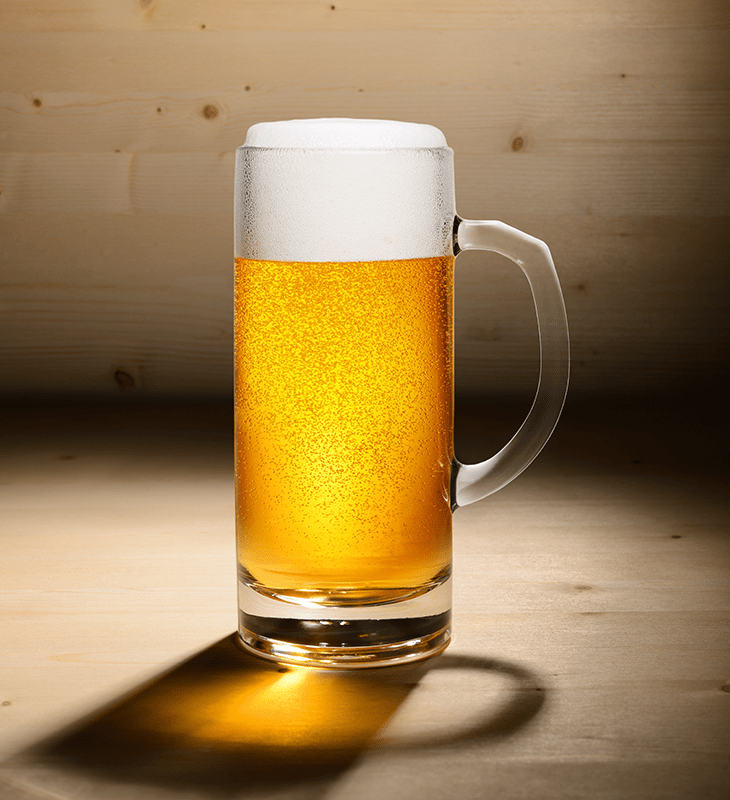
Most German pilsner beer recipes fall in the ballpark of 4.5-5.2% alcohol by volume. Bitterness can range a good amount, anywhere from the mid-twenties to the mid-forties in IBUs. The color of the German pilsner is very pale or golden, and it should be clear. Carbonation is fairly strong, producing a solid white head of foam on top of the beer.
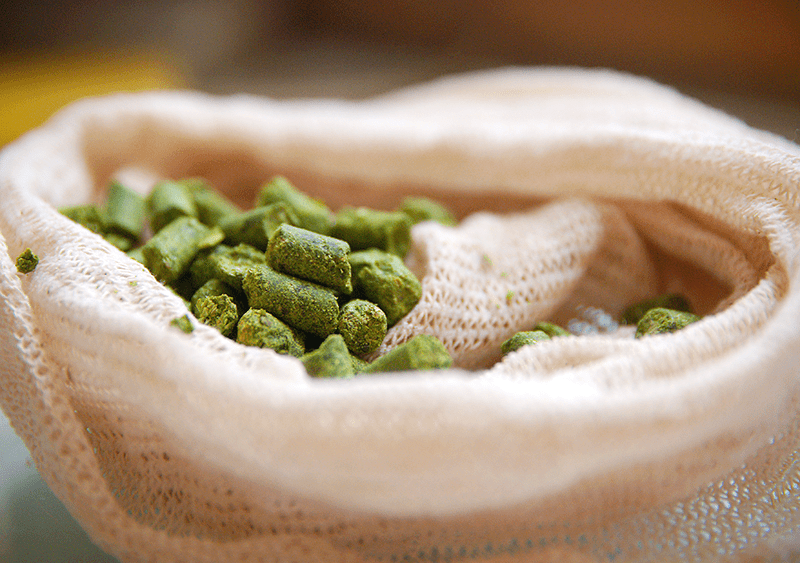
A German pilsner is a great beer for someone who enjoys hops. It’s not uncommon for this style of beer to push 40 IBUs. Whatever you do, when making your own be sure to use German or Bohemian noble hops, such as Saaz, Tettnang, and Hallertau. Noticeable hop flavor and aroma are considered authentic in a German pilsner.
To brew a German pilsner beer recipe, you will need temperature-controlled fermentation space. A standard lager fermentation starts at 40-50˚F, with a secondary fermentation period as low as freezing. Brewing a lager also requires patience, as the lagering period can take two months or more.
And yet German pilsner are well worth the wait: light on the palate, yet assertively hoppy, a great beer for summer!
Shop Beer Recipe KitsTo brew your own German pilsner beer recipe, consider the Steam Freak Atlantic Airship Pilsner recipe kit or try one of the beer recipes below!
German Pilsner Beer Recipe (Extract):
Polka Dot Pilsner, from Radical Brewing by Randy Mosher
(5-gallon batch)
Specs
OG: 1.046
FG: 1.012
ABV: 4.4%
IBUs: 40
SRM: 4
Ingredients
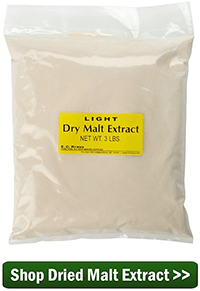
5.5 lbs. light dry malt extract (DME)Shop Dried Lager Yeast
2.5 oz. Saaz hops at :60 (7.5 AAUs)
2.5 oz Saaz hops at :15 (7.5 AAUs)
1 oz. Saaz hops at flameout (3 AAUs)
Wyeast 2278: Czech Pilsner Yeast
Directions
Mix DME with 3 gallons of hot water and bring to a boil. Boil for 60 minutes, adding hops according to schedule. Whirlpool, chill wort, and transfer to a sanitized fermenter. Add enough pre-boiled, pre-chilled water to make five gallons. Mix well and pitch yeast. Ferment at 50˚F for 10-14 days. When most of the fermentation activity has stopped, transfer to a secondary fermenter. Lager at 35-40˚F for 6-8 weeks. Bottle or keg for 2.5 vols. CO2.

German Pilsner Beer Recipe (All-Grain):
Matt Welz’s German Pilsner, via Brew Your OwnShop Barley Grains
(5-gallon batch)
Specs
OG: 1.050
FG: 1.009
ABV = 5.4%
IBUs: 30
SRM: 2.2
Ingredients 
10 lbs. Pilsner malt
6.4 oz. Carapils malt
1.4 oz. Hallertauer hops at :60 (6 AAUs)
1 oz. Hallertauer hops at :15 (4.2 AAUs)Shop Temp Controller
0.5 oz. Hallertauer hops at flameout (2.1 AAUs)
Wyeast 2278: Czech Pilsner Yeast
Directions
Mash crushed grains for 90 minutes at 149°F. Boil for 90-minutes, adding hops according to schedule. Whirlpool, chill wort, and transfer to a clean, sanitized fermenter. Ferment at 50°F, increasing temperature to 60°F towards the end of primary fermentation. Transfer to a secondary fermenter and lager at 35-40˚F for 6-8 weeks. Bottle or keg for 2.5 vols. CO2.
—–
David Ackley is a beer writer, brewer, and self-described “craft beer crusader.” He holds a General Certificate in Brewing from the Institute of Brewing and Distilling and is founder and editor of the Local Beer Blog.

Paulaner Hefe-Weizen Clone Recipe (Extract & All-Grain)


Paulaner Hefe-Weizen Clone RecipeOne of my all-time favorite beers is Paulaner Hefe-Weizen. This Weissbier will always have a special place in my beer fridge as one of the first beers that got me drinking better beer.
When studying abroad in Europe in 2006, this Bavarian-style weizenbier was widely available as a delicious alternative to the mass-market lagers I’d grown accustomed to in the States. And that’s why I happy to post this simple Paulaner Hefe-Weizen clone recipe.
It’s no surprise that Paulaner makes great beer. The Paulaner Brewery was established in Munich, Germany, by monks in 1634. Today, Paulaner is one of the most iconic German brands of beer and is readily available around the world.
Paulaner Hefe-Weizen pours a golden yellow with a thick, creamy, off-white head. Flavors of sweet malt blend with wheat and notes of citrus. It’s a crisp, refreshing beer, perfect for drinking outdoors and an excellent pair to goat cheese.Shop Dried Malt Extract
The following Paulaner Hefe-Weizen clone recipe is a very simple. It comes from the book Clone Brews. It’s an extract beer recipe that should be very easy to brew for even the beginning homebrewer. See below for an “all-grain option” of this beer recipe. If you’re interested in building your own all-grain hefe-weizen recipe, check out Brewing with Wheat for some tips and advice.

Paulaner Hefe-Weizen Clone Recipe (Extract w/Grains)
(five-gallon batch)
Specs
OG: 1.053-1.054
FG: 1.011-1.012
ABV: 5.4%
IBUs: 10
SRM: 4-5Shop Grain Mills
Ingredients
4 oz. Munich malt
6 lbs. Dried wheat malt extract 1 oz. Hallertau hops at :60 (3 AAUs)
Wyeast 3056: Bavarian Wheat Blend Beer Yeast
1.25 cup wheat dried malt extract (for priming)
Directions 
Steep Munich malt in 1/2 gallon of water at 150˚F for 20 minutes. Strain wort into a brew kettle. Add enough hot water to make 1.5 gallons and bring to a boil. Remove kettle from heat, then add the wheat DME. Add water to bring the boil volume to 2.5 gallons, bring to a boil, and add the Hallertau hops. Boil for 60 minutes. At the end of the boil, chill wort and transfer to clean, sanitized fermenter. Add enough cool, pre-boiled water to make 5 gallons. Mix well with a sanitized stirring spoon to aerate. Ferment at 68-72˚F for 7 days or until fermentation is complete. After fermentation, bottle with 1.25 cups wheat DME. Bottle condition for two weeks before drinking.
Shop Steam Freak Kits
All-Grain Option 
Replace the wheat DME with 5.25 lbs. wheat malt and 4.75 lbs. two-row pale malt. Mash grains at 150˚F. Reduce hops by a third and increase boil time to 90 minutes.
Have you ever brewed a Paulaner Hefe-Weizen clone recipe? How did it turn out?
—–
David Ackley is a beer writer, brewer, and self-described “craft beer crusader.” He holds a General Certificate in Brewing from the Institute of Brewing and Distilling and is founder of the Local Beer Blog.

How to Clear Your Beer with Gelatin

Gelatin to clear beer.Using gelatin is a very effective way to clear beer. But what is it, and how does it work?

What is Gelatin?
Gelatin is derived from animal collagen. Now, hold on to your stomachs for a second. Collagen is a protein found in connective tissue like tendons, bones, cartilage, and skin. It’s processed (heated) to form gelatin, which is then purified for use in the food industry.
Now, before you go all PETA on me, keep in mind that collagen is found in many foods – meat (in its natural state), desserts, and candy – as well as cosmetics. But if the idea of an animal-based product in your beer freaks you out, remember that whatever gelatin you add to the beer will settle out completely. Still, if you’re a strict vegetarian or vegan you may want to avoid using gelatin to clear your beer altogether. For the rest of us carnivores, gelatin is perfectly acceptable way to get a bright, clear beer.

How Does Gelatin Work?
When mixed with water, gelatin creates a thin, positively charged solution. When added to the beer, it attracts negatively charged particles – yeast and protein – which clump together. Their collective mass helps them settle to the bottom of the fermenter or keg.
Gelatin works best in combination with other finings, like Irish moss, a fining agent that gets added during the boil. Essentially, Irish moss will help protein coagulate at the end of the boil. Whatever doesn’t settle out in the cold break will then have another opportunity when the gelatin is added at the end of fermentation.
Ready to improve the clarity of your homebrew? Find step-by-step instructions for using gelatin in your homemade beer below:Shop Irish Moss

How to Use Gelatin to Clear Your Beer
About two days before bottling or kegging:

  1. Bring 1 cup of water to a boil, then allow to cool to about 150˚F or below.
  2. Measure out the recommended amount of gelatin for the batch size of beer you’re making (typical dosage is 1 tsp. per 5 gallons) and dissolve in the water.
  3. Pour the gelatin/water mixture into your fermenter and wait two days for the beer to clear. You may wish to cold crash to accelerate clearing.
  4. Bottle or keg as usual.

Some homebrewers add gelatin directly to the keg or bottle the beer immediately after adding, but personally, I’d rather give it a chance to settle out in the fermenter before bottling or kegging. Either way, gelatin is an effective tool for improving the appearance of your homebrew.
Do you use gelatin to clear your beer? What other techniques do you use to improve beer clarity?

—–
David Ackley is a writer, brewer, and craft beer marketing consultant. He holds a General Certificate in Brewing from the Institute of Brewing and Distilling and is founder of the Local Beer Blog.

Ready! Start Brewing Summer Beers Now!

The result of brewing summer beers.It’s helpful as a homebrewer to always be thinking ahead. Laying out a brewing calendar and deciding what beer styles would be best for the upcoming season.
Now that summer’s just around the corner, do you have your brews lined up for the warmer months? Do you know what summer beers you’ll be brewing?
To help get your mental brewing calendar flowing, here are twelve beer recipe kits that will quench your thirst in the summer heat! These are excellent kits for brewing summer beers

Best Beer Styles For Brewing Summer Beers

  • Witbier – Belgian witbier is a wheat-based ale that uses orange peel and spices to give it a citrusy flavor. The wheat gives the beer a bit of sweetness, making it an easy drinker. If you like Hoegaarden or Blue Moon, this one’s for you! This is a beer style that’s always in my plans for brewing summer beers.
  • Weizenbier – German weizen is a wheat beer with notes of tropical fruit and cloves. These characteristics are derived entirely from German weizen yeast, and may also feature notes of vanilla or bubblegum. The wheat gives the beer a somewhat creamy texture, but the light body keeps the beer from being too filling.
  • Kölsch – This German-style ale is a clean, crisp, golden-colored ale with a touch of light malt flavor and a hint of apple or pear. Though similar in appearance and mouthfeel to light lagers, German noble hops give the beer a more assertive bitterness and a decent amount of hop flavor.
  • American Pale AleShop Beer Recipe KitsGood old American pale ales are always in season. APAs tend to feature some notes of caramel malt, but the main feature is always the hops. American hops tend to showcase flavors and aromas of pine, citrus, and spice and usually a bracing bitterness as well. Sierra Nevada Pale Ale is the benchmark.
  • American Cream Ale – Cream ale is a great beer for the summer. It’s very similar to light lager, but it’s fermented at ale temperatures, making it easier to produce for the average homebrewer.
  • English Bitter – If you like hops, but find American Pale Ale a little too aggressive, try an English Bitter. This English Pale Ale is a little more balanced between the malt and hops, and tends to have a slightly lower alcohol content as well.
  • Light Lager – Here’s a good option for tailgating, a cookout, or any event with red plastic cups. Also makes a great lawnmower beer!
  • PilsnerGerman lager is somewhat more refined, with more pronounced hop bitterness, flavor, and aroma. Dry and crisp, pilsner works well in just about any summertime situation.Buy Home Brew Starter Kit
  • Saison – Saison features a fruity, citrusy aroma with some floral and spicy notes – definitely a flavorful option for summer drinking! It’s usually an enticing, bright orange color with lots of carbonation. Saison usually finished dry with a touch of refreshing acidity.

What are some of the beer styles you’re thinking about putting on your summer brewing calendar? Are any of the above fit into your plans for brewing summer beers?
—–
David Ackley is a beer writer, brewer, and self-described “craft beer crusader.” He holds a General Certificate in Brewing from the Institute of Brewing and Distilling and is founder and editor of the Local Beer Blog.

5 Tips For Getting More Beer from Every Batch

Pellet Hops In Muslin BagWhen homebrewers make a five-gallon beer recipe, they expect to end up with a full five gallons of beer. To avoid the frustration of ending up with less beer than you bargained for, check out these five ways you can be sure to end up with your proper allotment of homebrew — to minimize the loss and maximize the beer:

  1. Pour all the trub from the kettle into the fermenter. Many homebrew books call for creating a whirlpool in the brew kettle during the chill-down phase, making it easier to leave behind the hops and protein material in the kettle. The thing is, depending on your beer recipe and your equipment, you could easily leave a half-gallon or more of wort in the kettle. To maximize the amount of beer you end up with, try pouring everything into the fermenter, where the hops and the protein will eventually settle out. (I highly recommend reading the Great Trub ExBEERiment to see how this might affect your finished beer.) If you still want to keep the trub out of your kettle, try pouring the wort into the kettle through a strainer to minimize your beer losses.
  1. Top up to 5.25 or 5.5 gallons in the fermenter. Many extract beer recipes call for adding enough water to make five gallons of wort prior to fermentation. But it’s important to remember that the trub in the fermenter can take up as much as half a gallon of wort or more. To account for these losses, add enough clean, chlorine-free water to the fermenter to make a total of between 5.25 and 5.5 gallons of wort. Remember, you are not trying to have more than 5 gallons of liquid, you are trying to make up for the volume the trub is displacing.
  1. Boil your hops in a straining bag. This can be particularly effective for your hoppier homebrews like IPAs. Instead of pitching the hops directly into the boiling wort, try putting them into a muslin bag This way they can be easily removed from the wort post-boil. This works well for dry-hopping, too.
  1. Cold crash. shop_brew_kettlesDropping the temperature of your fermented beer prior to bottling will help yeast, hops, and other material settle into a compact layer at the bottom of the fermenter, maximizing the amount of beer you get from every batch. When fermentation is completely, drop the temperature to 30-40˚F for a few days or longer. This cold maturation phase also helps improve beer flavor. Bottle condition at room temperature as usual.
  1. Use a refractometer. Every time you use a hydrometer to test your beer’s gravity, you lose about a half-pint. With a refractometer, all you need is a couple drops. Please note that a refractometer works best before fermentation. After fermentation begins, you will need a calculator to compensate for the alcohol present in the beer.

What are some ways you maximize your homebrew yields? Do you have any quick tips on how to lose less of your homebrew beer?

—–
David Ackley is a beer writer, brewer, and self-described “craft beer crusader.” He holds a General Certificate in Brewing from the Institute of Brewing and Distilling and is founder and editor of the Local Beer Blog.

How Patience Makes Better Homebrew

Man watching home brewing timeline and fermentation times It was a rookie mistake.
I was excited for my latest batch of homebrew – a saison – and paid more attention to the timeline and fermentation times than the beer itself. After two weeks in primary and two more in secondary, I figured it was ready to carbonate, so into bottles it went.
Then I opened a bottle a week later and noticed a lot of foam. I waited another week, and half the beer was gone by the time I poured it into my glass. It was a gusher, forcing ounce upon ounce of white foam up the neck of the bottle and into my sink.
That’s when it really hit home: patience is a virtue for everyone, but for homebrewers, it’s a necessity.
In most cases – especially this one – it’s a matter of paying attention to the beer instead of any preset home brewing timelines. Forget about fermentation times; focus on the beer. Yes, you can have expectations for the length of a brew day, but sometimes it’s important to take a step back and take stock of how time – or lack thereof – can impact your beer.

Time is more than the calendar

In the case of my saison, it was important for me to set aside my own expectations. The lesson? Ignore human timeframes when it comes to home brewing.
Even if you’re making a batch for a special event or occasion, build in extra time for unforeseen problems, or just to allow the beer to do its own thing. The best way to confirm that a beer is finished is to take your hydrometer and check its final gravity. Taste the sample to add another layer to your test.
To be extra thorough, give it another day or two after it has reached final gravity just to be safe.

Slow working yeast

Another aspect to consider is the yeast doing the work inside your carboy. While some yeasts offer fast attenuation like Safale S-04 or Lallemand’s Nottingham, several need more time to offer the depth of flavors you seek from your brew.
If you’re making a porter or bitter, Wyeast 1028 (London Ale) is a great option. It’s even flexible enough to build up a beer to as much as 11 percent ABV, but requires plenty of time to get there. Other slow-moving options include Wyeast 1728 (Scottish Ale) and Wyeast 1099 (Whitbread Ale). All these strains can enhance the layer of flavors in your beer, but let them take their time in doing so. The fermentation times will typically be longer.

Wait on your bottles

While I suffered the impact of bottle bombs with my saison, one hidden truth I’ve found with many of my batches is that the best tasting beer usually comes when I’ve almost run out.
Even when I’m lucky to have a fully carbonated homebrew after one week in the bottle, I’ve started a habit of setting aside at least a six-pack to drink later than I normally would. Drinking an IPA as fresh as possible is a good idea, but a porter or honey-basil ale probably won’t get hurt by resting for a few more weeks. Remember to consider the temperature of your storage area and ingredients you’ve used in the beer, including yeast, when setting aside bottles to age longer than the rest of your batch.
There are many lessons to learn when it comes to home brewing, but one of the most important I’ve taken away is to not get hung up on having a beer ready in an absolute set timeframe. Don’t focus on whether or not your home brewing timeline is what was expected. Don’t worry if your fermentation times are longer than they should be. The beer will be ready when it’s ready.
—–
Bryan Roth is a beer nerd and homebrewer living in Durham, North Carolina. You can read his thoughts on beer and the beer industry on his award-winning blog, This Is Why I’m Drunk, and send him suggestions on how to get his wife to drink craft beer via Twitter at @bryandroth.

Dandelion Beer Recipe: A Springtime Treat

Dandelion Beer RecipeYou may have heard of dandelion wine, but have you ever made dandelion beer? Here some info on making one – including two dandelion beer recipes!
Though most people consider the dandelion an obnoxious weed, the whole plant is actually edible: roots, leaves, and flowers. Dandelion is medicinal as well, sometimes taken in the form of tea for its detoxifying qualities.
For those interested in traditional and rustic pseudo-beers, a dandelion beer may give a hint as to what an early American settler would have made in the absence of hops, using the ubiquitous dandelion to help provide bitterness and flavor.
A number of American craft brewers have given dandelion new life by putting it in some of their specialty beers:

  • New Belgium made a Dandelion Ale as part of the Lips of Faith series. Their version used pilsner malt, dandelion greens, grains of paradise, and Belgian ale yeast.
  • Magic Hat recently release Pistil as a spring ale, their recipe produces a light, 4.5% pale ale brewed with flaked oats, Apollo hops, Northern Brewer hops, Cascade hops, and dandelion leaves.
  • Fonta Flora, a newer brewery in Morganton, North Carolina, brewed a dandelion brettanomyces saison.

As you can see, there are many ways to interpret the style of dandelion beer. The key component, as with any beer, is balance.
A Note on Harvesting Dandelion Shop Beer Flavorings
It should be easy enough to find dandelions. Just be sure that the location you’re pulling the dandelions from hasn’t been sprayed with pesticide or herbicide, is far enough away from any cars and pets so as to avoid contamination.
A Traditional Dandelion Beer Recipe
This recipe, from Sacred and Herbal Healing Beers, is a traditional dandelion beer recipe from 1931. Though the fermentable sugar in this case is from sugar, feel free to use malt extract instead for more body. Sugar beers tend to finish a little thin. The flavor is hard to describe: floral, yet not in the way hops can be floral. I served this beer at a homebrew festival a couple years ago – it’s strange, but some people really liked it. Be warned – the beer will stain a plastic fermenter, so I recommend a glass carboy.

Ingredients (two-gallon batch)
2 oz. dried dandelion
2 oz. dried nettle
1 oz. dried yellow dock root
1 gal. water (plus 1 gallon preboiled and cooled for topping off)
2 lbs. sugar
2 tbsp. dried ginger Shop Carboys
Beer Yeast

Directions
Boil the dandelion, nettle, and yellow dock root in water for 15 minutes. Place the sugar and ginger in your glass fermenter, then strain the “tea” over the sugar. Allow to cool to room temperature, then add enough preboiled, cooled water to bring the total volume to two gallons. Rehydrate your yeast (if using dried) and stir into the wort. Ferment til complete, then bottle.

A Modern Dandelion Beer Recipe
The Dandelion Bitter from the Homebrewer’s Garden offers a recipe a little closer to what most of us consider beer.
Specs
OG: 1.045 – 1.056
FG: 1.014 – 1.018
Color: orange-brown
Ingredients (five-gallon batch) Shop Liquid Malt Extract
1/2 lb. toasted malt
1/2 lb. 60L crystal malt
1 can light liquid malt extract
2 lbs. light dried malt extract
1 lb. dandelions: leaves, blossoms, and roots at :60
1 oz. Kent Goldings hops at :15
1/2 oz. Willamette hops at :2
1/2 oz. Willamette hops (dry hops)
Wyeast 1028: London Ale Yeast or Safale S-04
2/3 c. corn sugar for priming

Directions
Clean the dandelions thoroughly. Steep crushed malts in 1.5 gallons water at 150-160˚F for 30 minutes. Strain into a brew kettle and rinse grains with 1/2 gallon of water at 170˚F. Stir in the malt extracts and bring to a boil. Boil for one hour, adding dandelions and hops according to schedule above. Pour 1.5 gallons of preboiled, prechilled water into a fermenter. Strain hot wort into the fermenter.Shop Home Brew Starter Kit Rinse hops with 1/2 gallon of boiled water. Top up to five gallons. When wort is 70˚F or below, pitch yeast. Ferment at 65-70˚F. At the end of primary fermentation, add the Willamette dry hops. After secondary fermentation, bottle with priming sugar and condition for two weeks.
Have you ever brewed a dandelion beer? Or, do you have a dandelion beer recipe you’d like to share with us? How did it turn out?
—–
David Ackley is a beer writer, brewer, and self-described “craft beer crusader.” He holds a General Certificate in Brewing from the IBD and is founder of the Local Beer Blog.

Cool Tips For Brewing Lager Beer

Result Of Brewing Lager BeerLagers differ from ales in that they are fermented at a much cooler temperature. Simple right? But the exact procedures and temperature schedule for fermenting lager beer may vary. Below are some general guidelines for fermenting lager beer at home.
While ales typically ferment at room temperature (65-75˚F) all the way through the fermentation, a lager’s fermentation schedule is completely different. Lagers ferment at about 45-55˚F, and then go through an extended lagering phase at temperatures 10-15°F below the primary fermentation temperature.
If you’re brewing lager beer without a fridge, this usually means you’re brewing lagers in the winter, placing the fermenter in a cool basement, possibly rigging up a swamp cooler to help keep the fermenter in the desired temperature range. Alternatively, a spare refrigerator or chest freezer can be made into a fermentation chamber with the simple addition of a temperature controller. This allows the homebrewer to control the lager fermentation temperature to within a degree of the desired target, and to brew lagers year-round.

Shop Temp ControllerMany of you want to know how long it take s to brew a lager beer. The typical lager fermentation temperature schedule looks something like this:

  • Primary fermentation – About 1-2 weeks at 45-55˚F. The exact time will vary on a number of factors, including the gravity of the beer, fermentation temperature, and the health of the yeast. It’s up to the brewer to judge when this period is complete, using either visual cues, gravity samples, or plain sixth sense to decide when to move on to the next step. When in doubt, follow guidelines as stated by a trusted homebrew beer recipe.
  • Diacetyl rest (optional) – If you are fermenting at a warmer temperature, using a yeast strain known for diacetyl production, or if diacetyl is detected, a diacetyl rest can help the yeast “clean up” any buttery off-flavors due to diacetyl in the beer. Once fermentation noticeably slows down, simply allow the fermentation temperature to rise 10-15˚F and hold for 1-2 days.
  • Lagering – The lagering phase is sometimes called cold maturation. This period, which can last four weeks or longer, helps with flavor development and with clearing the beer.

After the lagering period, bottle or keg as you would normally. If bottling, store the bottles at room temperature until ready to drink. Occasionally, the cold phase can inhibit yeast from creating carbonation in the bottle. If this is the case, you can open each bottle, add a few grains of dry lager yeast, and recap with new, sanitized caps. When in doubt, just go with your standard bottling procedure and be patient.Shop Dried Lager Yeast

Here are some additional tips if you’re just starting out with brewing lager beer :

  • Choose a yeast strain depending on the style of lager beer you’re brewing. For example, I’m brewing a German schwarzbier, so I’ll be using Bavarian lager yeast. Of course, there aren’t any rules that say you can’t use a Czech strain in a German beer, or a German strain in an American beer. As you brew more and more lagers, you’ll get a better sense of how individual yeast strains perform.
  • Pitch plenty of yeast. As a rule of thumb, a lager fermentation requires about twice as much yeast as an ale of the same gravity. This is to help them plow through the rigorous lager temperature schedule more solidly. Use a yeast pitching calculator to figure out how much yeast to buy and whether to make a yeast starter.
  • Determine your fermentation temperature. If you can get specific when brewing lager beer. You can do this by using a temperature controlled fermentation temperature chamber, that’s great. Choose your temperature based on yeast producers recommendations and the experience of others. Aim in the middle of the range if you’re unsure.
  • Shop Temp ProbeDo a diacetyl rest. Just to be safe, I recommend a diacetyl rest. Allow temperature to rise at the end of primary fermentation. With a fermentation chamber, this can be easily done be increasing the temperature about 10- 15˚F for a two-day diacetyl rest. Then drop the temperature for the lagering phase. I know it’s one more step in the lager fermentation temperature schedule, but it’s well worth it.
  • Be patient. Brewing lager beer takes quite a bit longer than brewing an ale, but it’s worth the wait. Use the following temperature schedule and timelines for the final lagering phase (depending on temperature): 3 – 4 weeks at 45°F, 5 – 6 weeks at 40°F, or 7 – 8 weeks at 35°F. Higher gravity lagers will need a longer lagering phase to fully mature.
  • A note on pitching temperature: Some brewers recommend that you pitch yeast at the primary fermentation temperature, some say pitch warm then bring the temperature down, the idea being that this will help kick off fermentation. Do what works for you.

Shop Steam Freak KitsThis is the basics of brewing lager beer at home –how to approach a lager fermentation temperature schedule, timeline, diacetyl rest, etc. Realize that there are many variations on this, but there is enough information here to produce an excellent lager beer.
If you’re used to brewing ales, maybe it’s time to try a lager. Here are 3 Homebrew Lager Recipes you can try.
—–
David Ackley is a beer writer, homebrewer, and self-described “craft beer crusader.” He holds a General Certificate in Brewing from the Institute of Brewing and Distilling and is founder of the Local Beer Blog.

What to Do When You're Having Beer Brewing Problems

Man CryingOK, let’s be honest. Not every batch you brew will be the best beer ever. (I’ve certainly made my share of sub par homebrews!) So let’s say a batch doesn’t turn out quite the way you want it to. You may even suspect infection. What do you do? Dump it right away and try again? Try to blend it with another batch? Pass it off on your friends? How do you go about handling beer brewing problems.
Here are my suggestions:
1. Wait – As homebrewers, one of the hardest things to do is wait for beer to be ready. More often than not, what we suspect as a fault may just need some time to mellow out. That off-flavor may just be a symptom of green beer. Did you add too much chipotle to your chipotle porter? Just give it some more time to see how it develops. Some beers take many weeks – if not months – before they’re ready to drink.
2. Take notes – Regardless of whether this batch is salvageable or not, it’s a valuable learning experience for the future. Be sure to write down not just the recipe and what you did on brew day, but also flavor characteristics and how they change over time. The more information you can glean from handling a homebrewing problem, the sooner you will become a better brewer. Two or three years from now when you want to brew another chipotle porter, these notes will be invaluable for creating a well-balanced recipe.
3. Consider blending – I’m a big advocate of blending homebrew. Commercial breweries blend beers all the time. Chances are, your favorite pale ale is actually a blend of several batches of the same beer. This helps the brewery ensure that they deliver a consistent product within a small range of specifications. But while commercial brewers have enormous tanks for blending, it’s a little trickier for the typical homebrewer.Shop Liquid Malt Extract
What I suggest is brewing a batch to blend with the original beer, but instead of blending them in the fermenter, blend the two beers in the glass. This way, you can play around with the blending ratio, and if you ultimately decide the problem batch isn’t worth saving, you’ll only lose one batch instead of two. From there, you might be able to infer how you would adjust the recipe in the future.
4. If at first you don’t succeed, try, try again – Although a botched batch of homebrew can be discouraging, don’t give up! You’ve undoubtedly learned quite a bit from your mistakes. Apply this experience to your future batches and they are bound to turn out that much better!
What other advice do you have for handling beer brewing problems?

—–
David Ackley is a writer, brewer, and craft beer marketing consultant. He holds a General Certificate in Brewing from the Institute of Brewing and Distilling and is founder of the Local Beer Blog.

Wine Recipe Idea: Bananaberry Wine

Bananaberry WineYou can never have too many fruit wine recipes, so here’s one I thought you might like to try.
Part of the fun of making your own wine comes from the fact that you get be a little creative when making them – to let your experimental-side flourish a little. That’s exactly how this particular wine recipe came into being.
Last year I was thinking about different fruits and how their flavors differ and how some attack the palate in completely different ways than other. After thinking through the different fruit wines I have made and tasted, I came up with this fruit wine recipe.
My goal was to end up with a fruit wine with an array of flavors that complimented one another… a homemade wine that was pleasant and well balanced.

Bananaberry Wine Recipe

  • 6 lbs. Peeled & Sliced Bananas
  • 3 lbs. Crushed Blackberries
  • 6 lbs. Chopped Strawberries
  • 10-1/2 lbs. Cane Sugar
  • 3/4 teaspoon Pectic Enzyme
  • 5 teaspoon Yeast Nutrient
  • 2-1/2 tablespoon Acid Blend
  • 1 Pkg. Wine Yeast: Lalvin D-47 (recommended)
  • Water to total batch to 5 gallons

Shop Wine Making Kits

Making this wine off-dry, with a little bit of sweetness with bring out its fruitiness much more clearly. Essentially, you can do this by adding sugar and potassium sorbate at bottling time to taste. You can find more details about making the wine sweeter by taking a look at Making Sweet Wines listed on our website. You don’t necessarily need to make the wine sweet — unless you want to — but taking it away from being completely dry will open up the fruit flavors, significantly.
For the basic directions on how to make this wine, follow the 7 Easy Steps To Making Wine at the following link to our web site:
Happy Wine Making,
Ed Kraus
—–
Ed Kraus is a 3rd generation home brewer/winemaker and has been an owner of E. C. Kraus since 1999. He has been helping individuals make better wine and beer for over 25 years.