 “Session” beers are all the rage these days. Though super high-gravity beers have their place, beer drinkers seem to be trending back to beers that are easily drinkable – something you can enjoy a few pints of without necessarily getting a headache the next day. Such is the case with this IPA session beer recipe.
Homebrewing geeks may be familiar with the beer writer Ron Pattinson and his blog, Shut Up About Barclay Perkins. Ron dives deep into brewing history, going to great lengths to dig up old beer recipes and statistics on how beer was actually made many decades ago. Believe it or not, historical beer recipes didn’t always fit very snuggly into the BJCP Style Guidelines.
This was certainly the case when looking at beer recipes from during WWI and WWII. Such was a time when barley was rationed and brewing ingredients came at a premium. This certainly affected the brewing industry in the UK, where English barley malt was supplemented with imported malts and adjuncts like corn and sugar.
Today’s IPA session beer recipe is modeled after a beer from the Whitbread Brewery of London (Incidentally, Whitbread yeast is derived from that brewery. Safale S-04 is the dry yeast version). The beer has a much lower gravity than what we would normally consider for an IPA, with an ABV of just 4.7%. Still, it’s a bitter beer at 75 IBUs. The use of about 20% simple sugar should make this beer pretty dry on the finish.
Curious what kind of beer people were drinking nearly 100 years ago? Give this recipe a try!
Whitbread 1917 IPA Recipe
(5-gallon recipe, all-grain, via Shut Up About Barclay Perkins)
Specs
OG: 1.047
FG: 1.010
ABV: 4.7%
IBUs: 75
SRM: 6.2
Ingredients
 4.8 lbs. English pale malt
2 lbs. American six-row malt
1.78 lbs. light brown sugar
2.5 oz. Kent Goldings hops at :90 (12.75 AAUs)
1.25 oz. Kent Goldings hops at :20 (6.375 AAUs)
Wyeast 1099: Whitbread Ale Yeast or Safale S-04
All-Grain Directions:
Mash the crushed grains in about 1.5 gallons of clean, chlorine-free water for two hours. Lauter and sparge, collecting about 6.5 gallons of wort in the brew kettle. Bring to a boil and boil for 90 minutes, adding hops according to schedule. Mix in the brown sugar at the end of the boil. Chill wort to fermentation temperature and ferment at 70˚F until complete. Bottle or keg and enjoy!
Partial-Mash Directions: Replace the English pale malt with 3.1 lbs. light dry malt extract. Mash the crushed six-row malt in 2 qts. of water, then sparge. Add enough water to make a 3-gallon boil and mix in the malt extract. Bring to a boil. Increase the 90-minute hop addition to 3.5 oz. and the 20-minute hop addition to 1.5 oz. Continue with the recipe above.
Do you have a IPA session beer recipe you’d like to share? Just post it in the comments section below.
—–
David Ackley is a beer writer, brewer, and self-described “craft beer crusader.” He holds a General Certificate in Brewing from the Institute of Brewing and Distilling and is founder and editor of the Local Beer Blog.
When To Measure The pH Of A Wine
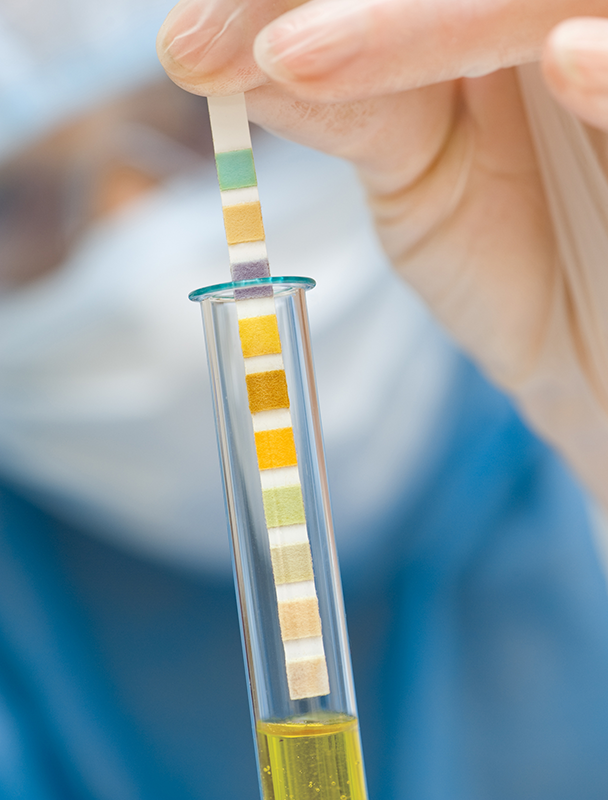 I got some pH test strips but do not know what the optimal pH of wine is. I was also wondering if pH can be adjusted at anytime during wine making process?
Thanks,
Joe
—–
Dear Joe,
Thank you for the great questions about the pH of a wine. pH is an integral part of any wine and needs to be correct for the wine to taste balanced. The pH also needs to be in a reasonable range for the wine to be stable. If the wine’s acidity is to low it can become more susceptible to spoilage and oxidation.
Fortunately, if you make your wines using box wine kits, the pH has already been taken care of for you. Measuring the pH is not necessary when making wine with these kits. You also do not need to measure the pH of your wine if you are making a wine from a trusted wine recipe.
Having said this, there are times when measuring the pH is needed… If you don’t have a wine recipe for the fruit at hand, or if the fruit tastes unusually sharp or tart tasting, you may want to measure the pH and make any necessary acid adjustments to the wine must. Anytime you are making wine from fresh wine grapes or have a wine must made up of 100% fruit juice such as apple wine, this is when to measure the pH of the wine.
In these situations you will want to take the pH measurement before you begin the fermentation begins. If the fermentation has already started, CO2 gas will throw off the pH reading. A second time that a wine can be tested is right before bottling, however the wine should be degassed first. For this, I would suggest using a degassing paddle. It attaches to a hand-drill. This will allow you to remove all the CO2 gas left-over from the fermentation so that you can accurately measure the pH of the wine.
When measuring the pH of a wine, you are generally looking for a reading between 3.4 and 3.8. The scale runs backwards, so a reading of 3.0 is more acidic than a reading of 4.0. To make any acid adjustments you will either dilute the wine must with sugar water or you will add acid blend.
The big take-away here is: before fermentation and before bottling is when to measure the pH of a wine. And, this is only need if you are making wine from fresh fruit.
Best Wishes,
Ed Kraus
—–
Ed Kraus is a 3rd generation home brewer/winemaker and has been an owner of E. C. Kraus since 1999. He has been helping individuals make better wine and beer for over 25 years.
10 Refreshing Wheat Beer Recipe Kits
 Wheat – it’s good in bread, but even better in beer! Here’s an overview of a variety of wheat beer recipe kits. Take a look, and see which one you want to try…
Wheat beers offer a refreshing alternative to some of the all-barley ales and lagers out there. Wheat beers often deliver a tasty counterpoint between malty sweetness and tart acidity from style-specific yeast strains, making wheat beers excellent thirst quenchers. Though brewing with wheat can sometimes be tricky for all-grain brewers, extract and partial mash wheat beer recipe kits eliminate those challenges.
Consider the options below to easily brew your own wheat beer at home! (Bonus – some of these kits ship for free!)
German Wheat Beer Recipe Kits
- Brewer’s Best Weizenbier – Weizenbier is a style of wheat beer from southern Germany, characterized by a high proportion of wheat and a banana/clove flavor derived from the yeast. A hefeweizen is a weizenbier served with yeast; a single-stage fermentation should keep some haze in the bottle.
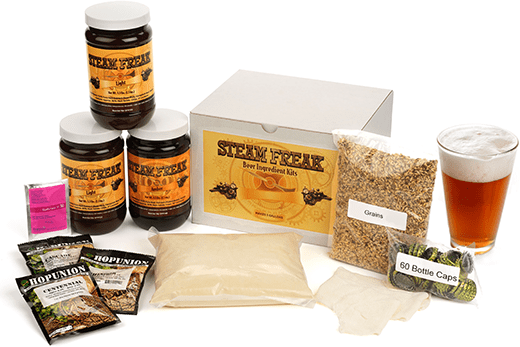
- Steam Freak High-Flyin’ Derwitzer Wheat – The Steam Freak line also offers a Bavarian-style wheat beer recipe kit. It’s a beginner level kit with 6.6 lbs. of wheat liquid malt extract, 8 oz. of steeping grains, 2 oz. of German hops, and an authentic weizen ale yeast. Expect a golden yellow brew at about 4% ABV with the classic banana/clove yeast profile.
- Brewer’s Best Kölsch – Though maybe not the first style that comes to mind when thinking of German wheat beers, Kölsch is often brewed with a portion of wheat, usually about 10-20% of the grain bill. This beer Ingredient kit uses Pilsner LME, wheat DME, and German hops to yield a pale, dry, refreshing beer with a moderate hoppy bitterness.
American Wheat Beer Recipe Kits
- Brewcraft American Wheat Ale
 – American wheat ale offers the light, flavorful, refreshing qualities of wheat, but taste of American hops and yeast. This Brewcraft Premium wheat beer ingredient kit makes a beer reminiscent of Bell’s Oberon.
- Brewer’s Best American Pale Wheat – The Brewer’s Best American Pale Wheat beer recipe kit yields a stronger, more robust version of wheat ale. A partial mash of pale malt and flaked wheat gives additional flavor, mouthfeel, and gravity to the brew, bringing it up to about 6.5% ABV. Hop bitterness is also more assertive at about 31-35 IBUs.
- Brewcraft Apricot Wheat Ale – If you’re a fan of Magic Hat #9, this is for you! This wheat beer ingredient kit in the Brewcraft Ultimate series uses apricot puree and natural apricot flavor to bring a refreshing apricot flavor to the beer. A great introduction to brewing fruit beers.
- Steam Freak Amber Waves American Wheat – A popular, easy to brew partial mash kit with moderate gravity and bitterness. 5.5% ABV and about 24 IBUs.
Belgian Witbier Beer Recipe Kit
- Brewcraft Premium Belgian Witbier – The Belgian’s take on wheat beer is called witbier, or white beer, and is commonly flavored with spices like orange peel and coriander. The Brewcraft Belgian Wit kit uses a partial mash of two-row malt, unmalted wheat, flaked oats, and a touch of acidulated malt for an authentic body, flavor, and mouthfeel with just a touch of acidity. Orange peel, coriander, and grains of paradise complete the spicy, fruity complexity in this delicious brew.
- Brewer’s Best Witbier –
 Brewer’s Best Witbier ingredient kit uses a partial mash of wheat and oats along with a classic witbier spice pack to craft a flavorful witbier of moderate gravity, about 4.5% ABV. Feel free to serve with a lemon or orange wedge!
- Steam Freak Blue Noon Belgian White – Just like you would suspect, this is an American version of a Belgian wheat. It has a beautiful balance of zest and hops that is set off by just the right amount of orange peel. Its calm demeanor make it a great session beer for this category.
Have you already tried some of the wheat beer recipe kits? Do you have a wheat beer recipe you’d like to share? Go right ahead in the comments section below…
—–
David Ackley is a beer writer, brewer, and self-described “craft beer crusader.” He holds a General Certificate in Brewing from the Institute of Brewing and Distilling and is founder and editor of the Local Beer Blog.
Bohemian-style Pilsner Beer Recipe (Extract)
 Bohemian-style pilsner is one of those beers that works in nearly every situation. It’s refreshing, easy-drinking, and pairs well with a variety of different foods. That’s why I’d thought I’d share this simple, but prize-winning, pilsner beer recipe.
Pilsner was developed in the area formerly known as Czechoslovakia, in a place called Plzen. Plzen, incidentally, is home to Pilsner Urquell, one of the most iconic pilsner breweries, founded in 1842. Pilsner Urquell was the original pilsner lager, a style that spread all over the world and is probably the most consumed style of beer in the world (though the American pilsners are quite different than Czech).
Characterized by a pale yellow color, Bohemian-style pilsners feature a pilsner malt flavor with a pronounced hop bitterness. At 35-45 IBUs, it’s about as bitter as an American pale ale, however, unlike the pale ale, Bohemian pilsners have low to medium hop flavor and no fruity esters in the aroma. And instead of the citrus/pine hop flavors we see so often with American hops, the Bohemian-style pilsner beer recipe tends to exhibit the qualities of the noble hops: spicy, earthy, and herbal.
As a lager, it’s important that Bohemian Pilsner be fermented at lager temperatures, usually around 45°-55° F. This means you will have to get a handle on controlling your fermentation temperatures.
The beer recipe below comes from Marty Nachel’s Homebrewing for Dummies. It won 1st Place at the AHA Nationals.
Yellow Dogs Pilsner Beer Recipes (Extract)
(five-gallon recipe)
Specs
OG: 1.050
FG: 1.013
ABV: 5%
IBUs: 39
SRM: 6
Ingredients
6 lbs. light liquid malt extract
1 lb. amber dry malt extract
1 oz. Chinook hops at :60 (11.5 AAUs)
1 oz. Saaz hops at :15
1.5 tsp. Irish moss at :15
1 oz. Saaz hops at :5
1 packet Safale US-05
Directions
To make this Pilsner beer recipe you will need heat 2.5 gallons of clean, chlorine-free water to about 150°F. Remove the kettle from the heat source and thoroughly mix in the malt extract. Bring wort to a boil, then add hops according to schedule. At the end of the 60-minute boil, chill wort using an immersion wort chiller or ice bath. Transfer wort into a sanitized fermenting bucket containing about 2.5 gallons of pre-chilled, distilled water. Top off with enough water to make 5 gallons. Stir well and aerate.
Rehydrate the lager yeast in warm water before pitching. Gradually add small amounts of cooled wort to your yeast mixture until the yeast is within 10-15 degrees of the wort. Pitch yeast and ferment at 54˚F for two weeks, then transfer to secondary. Drop the fermentation temperature about 10 degrees over 5 days and lager for 2-3 months. After the lagering phase, bottle or keg as usual.
Do you think this Bohemian-style pilsner beer recipe would be something you’d like? Interested in more tasty lager recipes? Check out these 3 Homebrew Lager Clones.
—–
David Ackley is a writer, brewer, and craft beer marketing consultant. He holds a General Certificate in Brewing from the Institute of Brewing and Distilling and is founder of the Local Beer Blog.
How Does A Refractometer Work?
 Refractometers are an invaluable tool for any grape grower, large or small. Refractometers can let you know when its time to pick. And, they can do it with only a few drops of grape juice taken from throughout your vineyard. The alternative would be to extract enough juice from the grapes to take a reading with a wine hydrometer. This could take up to 200 berries – crushed and pressed.
For more info on refractometers and how to use them to time your grape harvest, take a look at another recent blog post, Refractometers Let You Know When To Pick!
 How a refractometer actually works is quite interesting. They can tell you what percentage of sugar is in a drop of liquid just by how much light bends or refracts as it passes through it. To see refraction in action put a straw in a glass of water. The straw in the water doesn’t seem to connect with the straw that’s out of the water. That’s refraction.
If you were to dissolve some sugar syrup in the glass of water, the straw would seem to be even more disconnected, and as you continued to dissolve more and more sugar, the “two straws” would seem to get farther and farther apart. This is the whole premise that a refractometers works upon to tell you what level of sugar is in your grapes.
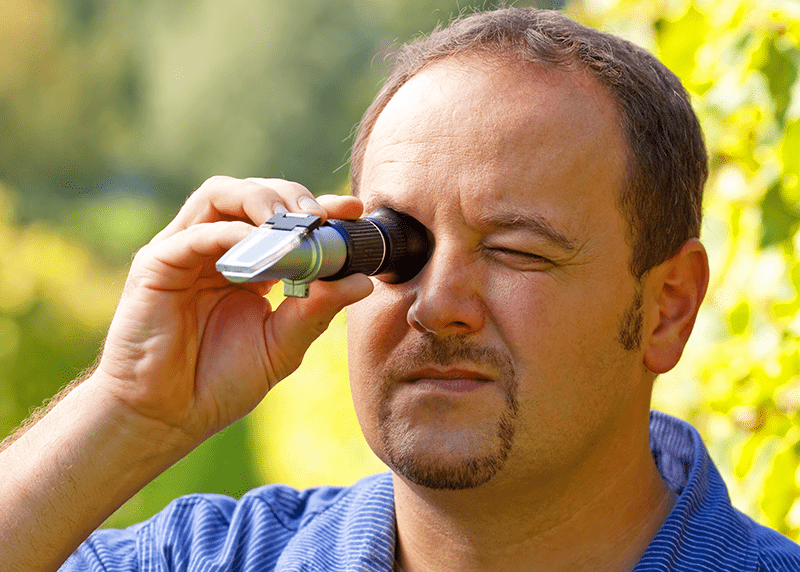
 A drop of grape juice is put between the refractometers prism and light-defusing plate. How much the light bends as it passes through the prism and down the barrel of the refractometer, tells you how what percentage of sugar is in the sample. As you look into the eyepiece you will be able to observe the refraction against a scale.
Because of how a refractometer works – it’s simplicity and quickness – anyone who has a vineyard of any size will find it extremely useful. With just a few random samples, you can get an accurate picture of how your grapes are doing.
Whether you have two acres or just two vines, visit our website and see the refractometers we have to offer for keeping track of your vineyard this season.
—–
Ed Kraus is a 3rd generation home brewer/winemaker and has been an owner of E. C. Kraus since 1999. He has been helping individuals make better wine and beer for over 25 years.
Controlling Esters in Your Homebrew
 Esters are one of many byproducts of fermentation and they’re an important flavor element of many beer styles that are produced by the beer yeast. When things go well, the esters lend a subtle complexity to beer with aromas usually described as fruity, sometimes banana. But when yeast is stressed, ester production may go overboard, and in addition to a number of other compounds, may contribute to some unpleasant, solvent-like off-flavors. This is the double-edged sword of homebrew yeast esters.
The key to getting good ester production from your yeast is keeping them happy and healthy. This means pitching an appropriate number of yeast cells and maintaining a fermentation temperature that is within a target range. There’s no one-size-fits-all solution to achieving the right level of ester production. The right fit will be determined by the yeast strain, the beer style, and the gravity of the beer. For example, what’s appropriate in a Belgian tripel would be out of place in an Irish stout – though it could make for an interesting Belgian stout!
But regardless of the style of beer you’re brewing, you’ll want to make sure that homebrew ester production is balanced. It really comes down to yeast strain selection, temperature control, and pitch rate.
Yeast Strain Selection
First, pick a yeast strain that is typical for the style of beer you’re brewing. If you aren’t brewing to style, then select a strain that embodies the flavor and aroma characteristics you’re going for. American ale strains tend to have relatively low ester production and so are often described as “clean.” English ales often exhibit some mild fruity character, so English ale yeast strains produce slightly more fruity esters. Belgian yeasts and other expressive strains, like German hefeweizen yeast, are known for higher levels of ester and phenol production. Lagers, in general, tend to have very little ester production.
Using Temperature to Manage Flavor and Aroma
After you’ve picked your yeast strain, decide how estery you want the beer to be. Higher fermentation temperatures tend to increase ester production. Many brewers who consider esters a key flavor component of their Belgian ales deliberately ferment their beers in excess of 75˚F. I’ve even heard of a brewer who won’t ferment a saison below 90˚F!
On the other hand, if you want to brew a clean ale that lets the malt and the hops shine through, you won’t want to ferment at such extreme temperatures. You will want to do what you can to keep homebrew ester production low. All beer yeast is packaged with temperature guidelines. If you want to avoid excessive esters, stay away from the high end of that range. This may mean getting a fermentation chamber or at the very least setting up a swamp cooler for your fermenter.
Pitch Rate
A key to keeping homebrew esters in check is pitching an adequate amount of yeast. Underpitching tends to drive fruity ester production, so use a yeast pitch calculator to make sure your yeast starter is big enough. On the other hand, underpitching may work to your benefit. Some brewers deliberately underpitch hefeweizen yeast to increase the banana esters the style is known for.
Learning how to best control homebrew esters will largely come from experience, but there is a decent amount of information online about the characteristics of different beer yeast strains. Next time you brew a beer, do a little research on other brewers’ experience with your yeast strain of choice. With the right yeast selection, fermentation temperature, and starter size, you’ll be well on your way to brewing a well-balanced beer with the perfect level of esters!
—–
David Ackley is a writer, brewer, and craft beer marketing consultant. He holds a General Certificate in Brewing from the Institute of Brewing and Distilling and is founder of the Local Beer Blog.
Beers for People Who Don’t Like IPAs
 Despite the fact that IPAs are the best-selling craft beer in the US these days, not everyone is into hoppy beer. Some would prefer a malty beer style. In many cases, people who are new to craft beer may prefer to start with something more approachable before moving on to things like Heady Topper. Heck, I like IPAs and sometimes I’m just in the mood for something different.
One of the reasons people homebrew is so they can drink beers they can’t get at the store. With so many IPAs on the shelves, it’s nice to brew a malty beer or … to mix things up.
If for whatever reason you’re not into IPAs – you don’t like the bitterness, or you’re just ready for a change – consider one of these malty beer styles for your next homebrew:
The Malt Bomb
Well, the opposite of a hop bomb is a malt bomb. These beers feature – you guessed it – malt as the main flavor ingredients. You could try a caramel-rich Irish Red Ale, a bready, toasty German Bock, or a clone of Sierra Nevada and Ninkasi’s Double Latte Coffee Stout.
Belgian Ale
Belgian beers offers a level of complexity you don’t always get from IPAs, mainly due to the use of Belgian ale yeast. If you’re into dry, complex white wines, you might like to try a Hennepin Clone or an Abbey Single. This rich and fruity Rochefort 8 clone is a near perfect copy of one of the most highly regarded beers in the world.
Wheat Beer
This is not necessarily a malty beer style, but the effect is the same. Wheat tends to give beer a sweet, bready flavor and a smooth mouthfeel. On a hot day they sure go down easy! In my mind, Paulaner Hefeweizen is the quintessential German wheat beer. You could also try an American wheat or a Blue Moon clone if you’d like something more citrusy.
Fruit Beer
Adding fruit is a great way to bring some complexity to beer, and may be just the thing a new craft beer enthusiast needs in order to make the jump. Try the chocolate-berry combination of a Blackberry Porter, the tropical fruit flavors of a Hibiscus Mango Blonde Ale, or the tartness of a Cranberry “Lambic”.
Lawnmower Beer
If you’re looking for something a step or two above macro lager, consider brewing your own American Cream Ale or Honey Blonde Ale. If tailgate quaffability is what you’re after, try brewing this Buddy Light Clone.
Drink up and brew a malty beer style! As they say, variety is the spice of life!
What’s your favorite malty beer style?
—–
David Ackley is a writer, brewer, and craft beer marketing consultant. He holds a General Certificate in Brewing from the Institute of Brewing and Distilling and is founder of the Local Beer Blog.
How To Determine Your Wine's Alcohol Level
 This is the question every budding home wine maker wants to know, “How can I tell how much alcohol is in my wine?” The problem is, this question is usually asked about the time they’re ready to bottle their wine. Unfortunately, for the amateur winemaker, this is far to late in the process to make any accurate determinations.
What Needs To Happen
The easiest way to know how much alcohol is in your wine is to take two readings with what’s known as a wine hydrometer: one reading is taken before the fermentation has started and the other reading is taken after the fermentation has finished. By comparing these two hydrometer readings you can determine – with great accuracy – how much alcohol is in your wine.
Very simply put, a hydrometer is a long, sealed glass tube with a weight on one end. By observing how high or low it floats in a liquid you can determine a reading.
“And what are we reading?” Essentially, we are trying to figure out how much sugar is in the wine or wine must. The higher the wine hydrometer floats, the more sugar there is in the liquid, and the opposite holds true as well.
During a fermentation, sugar is what yeast turns into alcohol. If we know how much sugar there was in the wine must before the fermentation, and we know how much sugar there is in the wine after the fermentation, we then know how much sugar was consumed by the yeast during the fermentation. From this information we can determine how much alcohol was made during the fermentation and is now in the wine.
It all sound complicated when it is all explained in detail this way, but in practice it is very easy to accomplish. All you need to do is:
1. Take a wine hydrometer reading at the same time you add the yeast to your wine must. The hydrometer has a scale along it called “Potential Alcohol”. At this point in the wine making process, you should be getting a reading of around 10% to 13%. The reading is the point where the surface of the liquid crosses the scale. This reading indicates how much alcohol the wine can have if all the sugars are fermented. Write this number from the gravity hydrometer down and save it for later.
2. Take another reading with the hydrometer once the fermentation has completed. This reading should be somewhere around +1 to -1 on the Potential Alcohol scale. By comparing these two gravity hydrometer readings you can determine your wine’s alcohol level. Take the first number you wrote down and from that, subtract the second number.
The Calculations
As an example, if your reading before the fermentation was 12% and the reading after the fermentation was 1%, this means that your wine has 11% alcohol (12 minus 1). If your first reading was 12% and your second reading was -1%, that means your wine has 13% alcohol (12 minus -1).
Another way to think of it is you are monitoring how far along the wine hydrometer’s Potential Alcohol scale the fermentation is traveling. It started at 12 and ended up at -1. That’s’ 13 points along the scale.
Further Information
You can find more information about using a hydrometer to make wine in the book, “First Steps In Winemaking.” Also, the article, “Getting To Know Your Hydrometer” has lots of additional information about using your hydrometer when making wine.
—–
Ed Kraus is a 3rd generation home brewer/winemaker and has been an owner of E. C. Kraus since 1999. He has been helping individuals make better wine and beer for over 25 years.
Recipe of the Week: Stone IPA Homebrew Clone
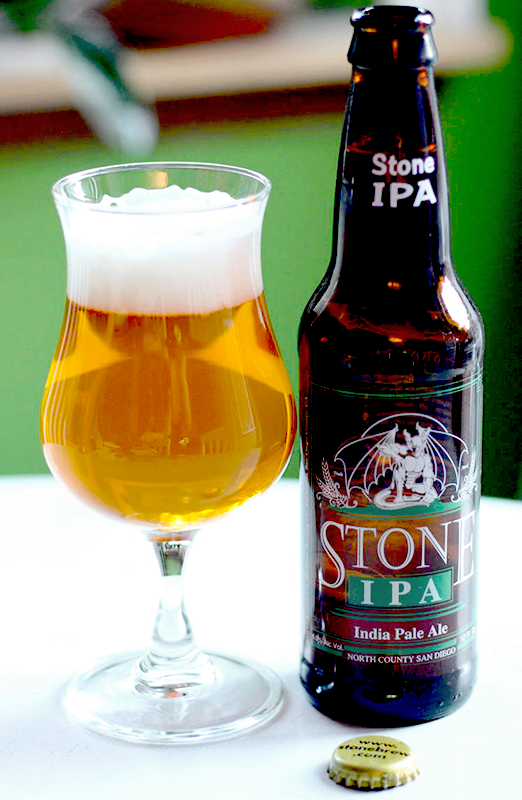 Stone Brewing Company is one of the original heavy hitters of the craft beer industry. They quickly made a name for themselves with such high-octane, style-defying brews as Arrogant Bastard, Ruination, and Smoked Porter. But it’s some of their more “straightforward” beers – their top-selling Stone IPA, for instance – that really sets them apart as a leader in the craft beer world.
If you’re a fan of brewing IPAs, you may have heard of Mitch Steele, Stone’s Brewmaster. He literally wrote the book on IPA. And, if you’ve ever tasted any of Stone’s IPA options, you can tell he knows what he’s doing. Read his 5 Tips on Brewing IPAs to learn some guidelines for brewing this hoppy style.
This Stone brewing company IPA clone recipe comes from Brew Your Own Magazine. At 77 IBUs, it’s a heavy-hitter with loads of citrusy and piney hop character. This is one you’ll likely want to brew over and over!
Stone Brewing Company IPA Clone Recipe (via BYO Magazine)
(5-gallon batch, extract with specialty grains)
Specs
OG: 1.065
FG: 1.012
ABV: 6.9%
IBUs: 77
SRM: 8
Ingredients
5 lbs. light DME
1 lb. 10 oz. light LME (late addition)
1 lb. two-row pale malt
1 lb. crystal 15L malt
0.5 oz. Magnum hops at :60 (7 AAUs)
0.64 oz. Perle hops at :60 (4.5 AAUs)
2 oz. Centennial hops at :15
1 tsp. Irish moss at :15 mins
1 oz. Centennial whole leaf hops (dry hopped for 3-5 days)
0.5 oz. Chinook whole leaf hops (dry hopped for 3-5 days)
Wyeast 1968: London ESB ale yeast (1.5L starter) or 1 pack Safale S-04
priming sugar (if bottling)
Directions
Mash crushed grains in 0.75 gallons of water at 149˚F. Hold for 45 minutes, then transfer wort to a kettle. Add enough water to make 4 to 4.5 gallons of wort, then mix in dry malt extract (reserve liquid malt extract for later) and bring to boil. Keep an eye out for boil overs! Boil for 60 minutes, adding hops and Irish moss according to schedule above. In the last 15 minutes of the boil, mix in the liquid malt extract. At the end of the boil, chill wort and transfer to a clean, sanitized fermenter. If needed, top up with clean, chlorine-free water to make five gallons. Pitch yeast and ferment at 68˚F for about 7 days. Transfer to a secondary fermenter. During the last few days of secondary, add the dry hops and allow them to steep for 3-5 days. Bottle or keg as usual.
Stone IPA is a great beer – what are some of your favorite IPAs?
—–
David Ackley is a writer, brewer, and craft beer marketing consultant. He holds a General Certificate in Brewing from the Institute of Brewing and Distilling and is founder of the Local Beer Blog.
Extract vs. Partial Mash Brewing: What’s the Difference?
 Beginning homebrewers have some options when learning to brew – quite of few of them actually. But one of the main decisions is whether to start with extract brewing, partial mash, or all-grain. Because all-grain is typically for more seasoned brewers, most beginners start with either extract or partial mash brewing. In this post, I’ll lay out some of the key differences between the two kinds of homebrewing.
First, some basics…
When looking at the difference between extract, partial mash, and all-grain, the main difference lies in the source of fermentable sugars. All-grain brewers (and the pros) extract everything they need from malted grains through a process called mashing. It requires strict attention to parameters like temperature, pH, and water chemistry – something that can be a little overwhelming if you’re just cutting your teeth on homebrewing.
Luckily for beginners, there’s a way around all this work. It’s called malt extract. Basically, professional brewers have already done the mash, then taken the resulting liquid (wort) and condensed it into either a liquid syrup or a spray-dried powder. These two types of malt extract are referred to as liquid malt extract (LME) and dried malt extract (DME). There are a few different flavors to choose from, so extract offers plenty of options for beginners.
Extract Brewing vs. Partial Mash Brewing
Both techniques use malt extract to supply a majority of the fermentable sugars, but the key difference between the two brewing methods is in the use of malted grains. The main difference is that extract brewing gets nearly all of its fermentable sugars from extract, whereas for partial mash, the brewer will do a mini-mash – the same procedures as an all-grain brewer, but on a much smaller scale – and then supplement with malt extract. For a five-gallon batch, the mini-mash may be just be a pound or two of grain, compared to ten pounds or more for all-grain.
Extract sometimes (but not always) will use a small amount of specialty grains in a beer recipe. These are steeped, like a tea, to extract color and flavor from the grains, but the contribution of fermentable sugar is negligible.
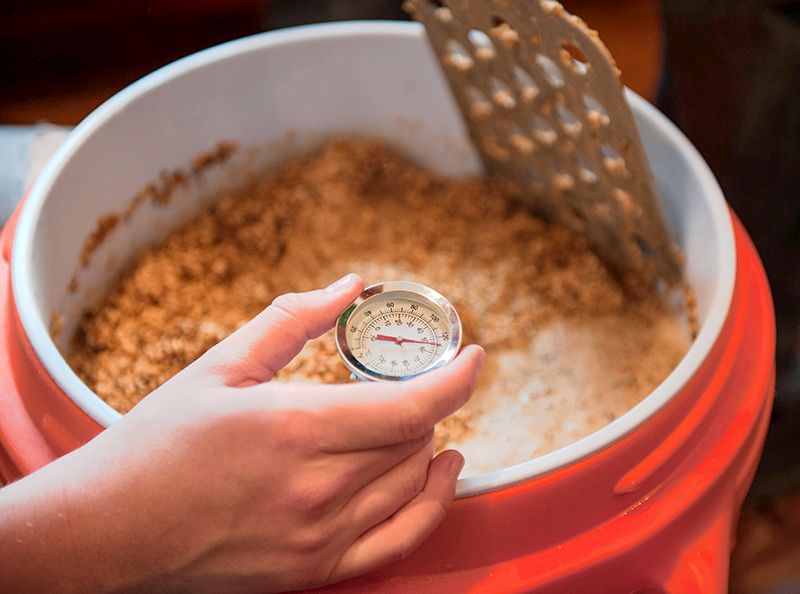
With partial mash, on the other hand, the brewer actually performs a mash. That means mixing both base malt and specialty grains with water with the purpose of extracting fermentable sugar from the malt. The brewer stills gets a good amount of sugars from malt extract, but he/she is also trying to extract sugars from the grains. To do this, the brewer needs a few additional tools: a thermometer, a method for checking pH, gypsum, and chalk. To learn more about partial mash, read these step-by-step instructions.
Benefits of Extract Brewing
- Fewer grains – easier cleanup
- Shorter brew day
- Focus on the overall brewing process instead of getting bogged down by mashing
- Lots of recipe kits to choose from
Benefits of Partial Mash Brewing
- Learn more about brewing the way all-grain brewers do it
- The mash allows the brewer to use a wider range of different malts and grains, giving them more flexibility for recipe development and adaptation
- There are also lots of partial mash recipe kits to choose from
Whether you decide to start out with extract or partial mash brewing is entirely up to you – there’s no right or wrong way to do it, and there’s no reason you can’t switch back and forth from batch to batch. Whatever you do, make sure you’re having fun and the rest will take care of itself!
—–
David Ackley is a writer, brewer, and craft beer marketing consultant. He holds a General Certificate in Brewing from the Institute of Brewing and Distilling and is founder and editor of the Local Beer Blog.