American Brown Ale Recipe (Extract & All-Grain)

Pouring A Brown Ale Beer
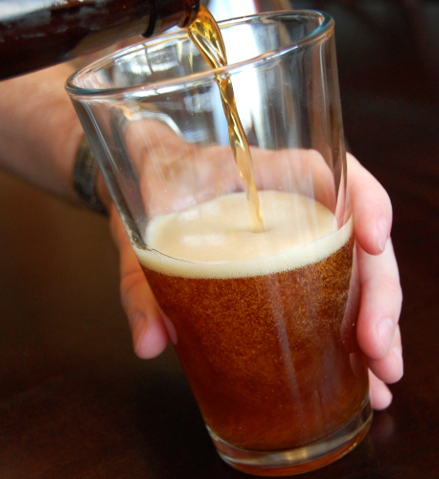
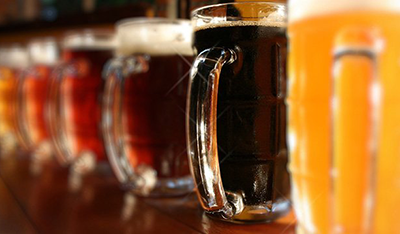
Today I’d like to share with you a homebrew beer recipe I recently brewed with a friend. It’s a hoppy brown ale with deep chocolate malt flavors and a hint of spicy, citrusy hop flavor and aroma. We just doubled the ingredients for the five-gallon recipe (below) to make it a ten-gallon batch.
We modeled this American brown ale recipe after some of the popular American-style brown ales being made by our local craft breweries. It’s a little on the hoppy side for what some consider a brown ale, but for a lot of craft beer fans, that’s a good thing!
This beer recipe features some complex roasted malts to bring in a range of caramel, biscuit, and chocolate flavors along with some lower-alpha hops that work great as aroma hops and provide a clean bitterness. To further enhance the aroma and clean bitterness, we utilize a technique called “first wort hopping.” All that means is to add some of the hops before the wort comes to a boil, which helps keep more of the aromatic hop compounds in the beer.
We hope you’ll enjoy this American brown ale recipe! Both all-grain and extract versions are given below. Give it a try and let us know how it turns out!

American Brown Ale Recipe
(5-gallon batch, all-grain)

Specs 
OG: 1.058
FG: 1.011
ABV: 6.2%
IBUs: 42
SRM: 23

Ingredients  
10 lbs. two-row malt Shop Steam Freak Kits
1 lb. caramel 60L malt
0.5 lb. chocolate malt
0.5 lb. crystal 77L malt
1 oz. Willamette hops (FWH)
1 oz. Kent Goldings hops at :60
0.5 oz. Willamette hops at :30
1 oz. Kent Goldings hops at :10
1 tsp. Irish moss at :10
1 packet Safale US-05 ale yeast

Directions 
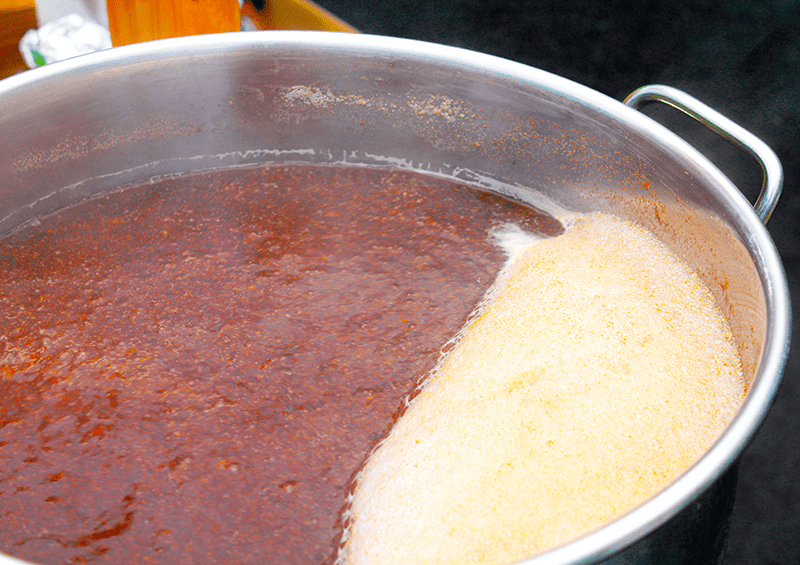
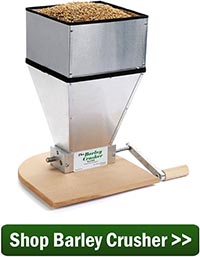
Mash crushed grains at 152˚F for one hour. Sparge to collect 7.5 gallons in the brew kettle. Add first wort hops (1 oz. Willamette) to the wort and bring to a boil. Boil for 60 minutes, adding hops and Irish moss according to schedule above. Chill wort and transfer to a clean, sanitized fermenter. Ferment at 68-70˚F.
 
American Brown Ale Recipe
(5-gallon batch, partial mash)
Specs 
OG: 1.058
FG: 1.011
ABV: 6.2%
IBUs: 42
SRM: 23

Ingredients 
6 lbs. light dry malt extract Shop Conical Fermenter
1 lb. six-row malt
1 lb. caramel 60L malt
0.5 lb. chocolate malt
0.5 lb. crystal 77L malt
1.5 oz. Willamette hops (FWH)
2 oz. Kent Goldings hops at :60
0.5 oz. Willamette hops at :30
1 oz. Kent Goldings hops at :10
1 tsp. Irish moss at :10
1 packet Safale US-05 ale yeast
Directions 
Steep crushed grains for 30 minutes at 152˚F in one gallon of water. Strain wort into brew kettle, then add enough water to make 3.5 gallons. Thoroughly mix in the dry malt extract, then add the first wort hops (1.5 oz. Willamette) to the wort and bring to a boil. Boil for 60 minutes, adding hops and Irish moss according to schedule above. Chill wort and transfer to a clean, sanitized fermenter. Ferment at 68-70˚F.
—–
David Ackley is a writer, brewer, and craft beer marketing consultant. He holds a General Certificate in Brewing from the Institute of Brewing and Distilling and is founder of the Local Beer Blog.

Being Sanitary Is Less Work With 'Basic A' Wine Making Sanitizer.

Basic A Wine Making SanitizerOne of the most important aspects of making your own wine is keeping things clean and sanitary.
It’s important because wine is like a living thing. It needs to be protected from wild molds, bacteria, etc. Without proper care your wine can become overtaken by these foreign organisms and eventually spoiled.
Using a wine making sanitizer to cleanse your wine equipment is often overlooked or treated lightly by many home wine makers, and understandably so. It takes time and effort to be sanitary. Simply put: it’s extra work! Who wants to spend their time sanitizing their wine making equipment when all they really want to do is make some wine!
We understand. That’s why we set out to develop a product that addresses both of these issues: the ‘sanitizing’ and the ‘work’. What we’ve come up with is a wine sanitizer called ‘Basic A’ . It’s a very quick and effective sanitizer. But even more importantly, it’s very simple to use and requires very little effort on your part.
Basic A is not a chlorine. It’s an oxygenating cleanser. What this mean is that all the sanitizing is done while the wine equipment is air-drying. It’s actually the evaporation of the solution that causes the sanitizing action to happen. It’s a no-rinse cleanser.
Basic A wine making sanitizer is safe. So safe and eco-friendly that you don’t need to worry about any residues being left behind… because there aren’t any!
It works on any non-porous surface: glass, plastics, metals, porcelain and others. Just give Basic A one minute of contact time with your: fermenters, carboys, bottles, air-locks and other wine making materials, then allow to air-dry. No rinsing is required! It doesn’t get any easier than that.
Basic A wine making sanitizer comes in an 8 ounce jar that is sufficient for making 10 gallons of solution. Complete directions are included. Just dissolve 1 tablespoon to each gallon of warm water and you’re all set to go.
—–
Ed Kraus is a 3rd generation home brewer/winemaker and has been an owner of E. C. Kraus since 1999. He has been helping individuals make better wine and beer for over 25 years.

Complete, Step-by-Step Extract Brewing Instructions

Extract BrewingExtract brewing is the easiest way to brew your own beer. Many homebrewers begin with extract beer brewing and later progress to all-grain. Some even go back to extract brewing because it’s easier and much less time consuming than all-grain brewing.
So what is extract brewing?
Professional brewers extract fermentable sugars from barley malt through a process called mashing. When extract brewing you can skip this step by using malt extract, which is a condensed form of liquid wort. (Wort is the term for unfermented beer.) Malt extract is available as a liquid malt extract or dry malt extract (LME or DME), and LME is either hopped or unhopped. Much like malt, malt extract is categorized by color, ranging from Pilsen, Pale, and Amber, to Munich and Dark.
By using malt extract, beginning homebrewers can save easily an hour or more on brew day. Plus, they can still make perfectly good beer with significantly less equipment.
Further below you will find some extract brewing instructions. Here is the basic list of equipment you will need to follow those instructions (5-gallon batch):

Shop Home Brew Starter KitMost homebrew supply shops carry homebrew equipment kits with everything you need to get started. Adventures in Homebrewing also carries extract brewing kits with everything you need to brew your first batch of beer. You can also find an extract brewing recipe, and purchase all the ingredients, à la carte.
Extract Brewing Instructions:

  1. Thoroughly clean and sanitize everything you’ll be using to make your own beer. Many homebrewers consider this to be the most important step!
  1. Heat your clean, chlorine-free water. If you can smell chlorine in your tap water, you’ll want to boil your water for 30 minutes first. Or, you can use bottled spring water from the grocery store. The exact amount of water you use isn’t critical for extract brewing process; shoot for 3 gallons or so. Give yourself at least a couple inches from the top of your brew kettle.
  1. Meanwhile, if using liquid malt extract, soak your canisters of malt extract in a large bowl or pot of hot water. This will make it easier to pour out the extract in the next step.
  1. When your brew kettle of water is hot (not boiling), turn off the burner (for gas stoves) or remove the kettle from the heating element (for electric).
  1. Slowly stir in your malt extract until completely dissolved, taking care that it doesn’t stick to the bottom of your brew kettle. Your water is now wort!shop_liquid_malt_extract
  1. Heat your wort to a strong boil. Keep a close eye on it to avoid a boil over!
  1. From the start of the boil, add hops depending on your extract brewing recipe. (If you’re using hopped extract, you may not need to add any hops.)
  1. At the end of the boil, turn off the heat, give the wort a good stir, and move your kettle to a nearby sink for an ice bath. Fill the sink with cold water and replace as needed. The idea here is to cool your wort so that you can add the beer yeast. Yeast is a living organism (and responsible for creating alcohol!), so you don’t want to kill it by pitching it into wort that is too hot.
  1. When your wort is at about 90°F or so, carefully pour the wort into a sanitized fermenter. If using a carboy, you may want to siphon it using a sanitized siphoning hose. If you added hops to the boil, do your best to leave those behind. It’s important from here on out that everything that touches your wort is thoroughly sanitized.
  1. Top off your wort with water to make 5 gallons. Fermenting buckets usually have lines on the side that show you your volume.
  1. Aerate the wort by stirring vigorously. This is to provide oxygen for the yeast to feed on. This is the only step in the extract brewing instructions where adding oxygen is desirable.
  1. Take a hydrometer reading, correcting for temperature if necessary. This will help you measure alcohol content after your beer has fermented.
  1. Add the beer yeast according to the packaging instructions. Give it a good stir with your spoon.
  1. Put the fermenter in a closet or other dark, temperature constant room.
  1. Close the lid with air-lock attached (if using a bucket) or close with a rubber stopper and air-lock (if using a carboy).
  1. Fill your air-lock about halfway with clean water and place it firmly in the drilled hole of the rubber stopper.

If you follow these extract brewing instructions, within 24 hours you should see bubbles coming out of the airlock. After a week or so, you’ll be ready to bottle your beer!
—–
Ed Kraus is a 3rd generation home brewer/winemaker and has been an owner of E. C. Kraus since 1999. He has been helping individuals make better wine and beer for over 25 years.

It's All About The Grape!

Napa Valley Grapes MalbecI was talking to one of our customers on the phone, yesterday. We got to talking about the different homemade wine kits he’s made over the last few years. He mentioned how he used to make wine using ingredient kits from our European Select and Legacy brands, but now he only likes to make wine from our top-end kits such as Cellar Craft Showcase.
He was thinking about making wine from fresh grapes this year and he wanted to know which I thought would make a better wine: our top-end wine ingredient kits or wine he made from fresh grapes?
I told him the answer’s simple. As an individual winemaker, you will almost always get a better wine using our top-end homemade wine kits. There are several reasons for this, but the most important and basic one has to do with the grape. A common mantra throughout the wine industry is:
No wine can be better than the grapes used to make it.
Or, as some people like to put it, you can’t make a silk purse out of a sow’s ear. If you have mediocre grapes, the best you can hope for is mediocre wine. Only stellar grapes are capable of making a stellar wine and that’s what you get with our top-end wine ingredient kits.
Unless you are fortunate enough to live in Napa or Sonoma, the grapes that are going to be available to you are most likely not going to be of the same caliber as grapes used to make our high-end homemade wine kits. Although, I am certain that there are many exceptions to this, the fact remains that the odds are way out of your favor when going on the open market to find wine grapes.
The grapes used in our high-end wine ingredient kits such as: Cellar Craft Showcase or Atmosphere, are grown in select regions of the world. They come from the same fields used to produce many high-dollar wines found on the commercial market.
Shop Wine KitsI told him that this doesn’t mean he shouldn’t make wine from fresh grapes. The experience is wonderful and it’s a time that can be shared with family and friend. Wine making from fresh grapes has it’s rewards regardless of the quality. All this really means is don’t expect to make a killer wine with everyday wine grapes… expect everyday wine.
Here’s what the difference between wine ingredient kits and fresh grapes boils down to: If you’re looking for ultimate quality, go with the homemade wine kits. If your looking for the ultimate experience go for the fresh grapes.
—–
Ed Kraus is a 3rd generation home brewer/winemaker and has been an owner of E. C. Kraus since 1999. He has been helping individuals make better wine and beer for over 25 years.

Tips for Brewing with Rye

Sack Of Rye For Brewing BeerHave you ever wanted to brew a Rye IPA or a Rye Saison? Though rye beers are easy to brew, it just helps to know a few techniques before you get started. Here’s some tips for brewing with rye.

How is rye different from other brewing grains?

While most beer is made primarily from barley, other grains can be used to add complexity of flavor or to affect the mouthfeel of the beer. Rye, like wheat, is higher in protein than barley so it helps to give beer a smooth, chewy, filling mouthfeel. It does not have a husk, so sometimes rice hulls are used to help with lautering. Rye also has a unique flavor, one that some describe as spicy, tangy, or rustic. It seems to pair well with spicy hops and phenolic yeast strains.

How to Add Rye to Your Homebrew
Brewers have a few choices when adding rye to their brew. Rye malt is the standard ingredient for brewing with rye. It can be crushed just like other malted grains, though rye tends to have a smaller grain size, so it may be necessary to mill the rye separately on a smaller setting to get a good crush.
Flaked rye has been heated and pressed through rollers. Flaked grains don’t need to be milled, so they can be added directly to the mash or steeping bag.
Chocolate rye malt is a specialty grain that combines the roasty, chocolatey flavors of a darker specialty malt with the spicy notes of rye. It’s a fun way to add some complexity to darker beers! Use up to about a half-pound or so in a five-gallon batch.Buy Barley Grains
Similar to chocolate rye malt, Cararye malt is a rye malt that’s been kilned just enough to develop some amber color and sweet caramel flavor. Recommended usage is up to 15% of the grain bill.
When brewing with rye it is important to understand that it has a higher protein content than other grains and no husk. Because of this rice hulls are recommended when brewing with more than about a pound of rye. This will improve filtering ability of the grain bed and will help reduce the likelihood of a stuck mash. Rice hulls will not affect flavor or color, but they will greatly improve the filtering ability of the grain bed. For an all-grain batch of homebrew with more than 10% rye, 0.5-1 pound of rice hulls are recommended. They do not need to be milled.

Rye Homebrew Recipes
Ready to make some rye beers of your own? Here’s some beer recipes to help you start brewing with rye…

Have you ever tried brewing with rye? What’s your favorite style of rye beer? 
—–
David Ackley is a writer, brewer, and craft beer marketing consultant. He holds a General Certificate in Brewing from the Institute of Brewing and Distilling and is founder of the Local Beer Blog.

What Beer Should I Brew First?

Assortment Of Craft BeersAs a new homebrewer, choosing what beer you should brew first can be a daunting task. After all, there are so many different beer styles to choose from, how do you choose where to start?
Though there are no hard and fast rules when it comes to homebrewing, some of these guidelines may help you with selecting your first brew:

  • Start with a recipe kit. For your first batch, I recommend starting with a homebrew recipe kit, or at least a tried and true beer recipe. In homebrewing, the process is just as (if not more) important than the beer recipe, so maybe for the first homebrew beer let someone else handle the recipe formulation. The beer is more likely to turn out better, and you can focus on learning the process. Once you have the process down, you can start playing around with different ingredients.
  • Brew a beer you want to drink – every day. A batch of homebrew makes 45-50 bottles of beer. So with that in mind, choose a beer style that you drink a lot of. Many people enjoy pale ales as their go-to beer style. In that case, you might try a Sahara Nevada Recipe Kit. That’s not to say you aren’t allowed to brew something more unusual, but that will only increase the odds of you having to pawn off five gallons of strange brew on your friends and co-workers. Save the chipotle smoked porter and chocolate stout for a little later in your brewing career. This might also eliminate high-gravity beers like barleywines and imperial stouts.
  • Ales are easier than lagers. Since lagers require temperature-controlled fermentation, it’s usually best to make your first home brew beer an ale. Ales include IPAs, porters, brown ales, and stouts. Once you build your own fermentation chamber, then you can go crazy with the lagers. (You can read more about the difference between ales and lagers on our blog.)shop_home_brew_starter_kit
  • Darker beers tend to be more forgiving. Many people recommend that beginners start with darker beer styles, as the roasted malts help round out a beer that’s rough around the edges. Consider brewing a brown ale, porter, or stout for your first batch of homebrew.

Some good options for your first batch:

  • Sahara Nevada Pale Ale – A clone of the ever popular Sierra Nevada Pale Ale (5.5% ABV).
  • Babbage Brown Porter – A dark beer that’s not too heavy (5.5% ABV)
  • Belgian Saison – If you like Belgian ales, this kit’s a great one to start with. Very bright, spicy, and aromatic (5.5% ABV)
  • English Brown Ale – A malty brown ale with a nutty, slightly fruity aroma (4.5% ABV).
  • Steam Stoker Stout – Dark brown, nearly black in color. Flavors of chocolate and coffee with a moderate hop character (6.5% ABV).

I hope this information helps you out when asking yourself, “what beer should I brew first?” It’s a decision to be made, for sure, but don’t let it stop you from getting started either. Jump right in, the water’s fine.
—–
David Ackley is a writer, brewer, and craft beer marketing consultant. He holds a General Certificate in Brewing from the Institute of Brewing and Distilling and is founder of the Local Beer Blog.

When To Pick Your Grapes: The Big Compromise (Pt. 4)

Time To Harvest Grapes
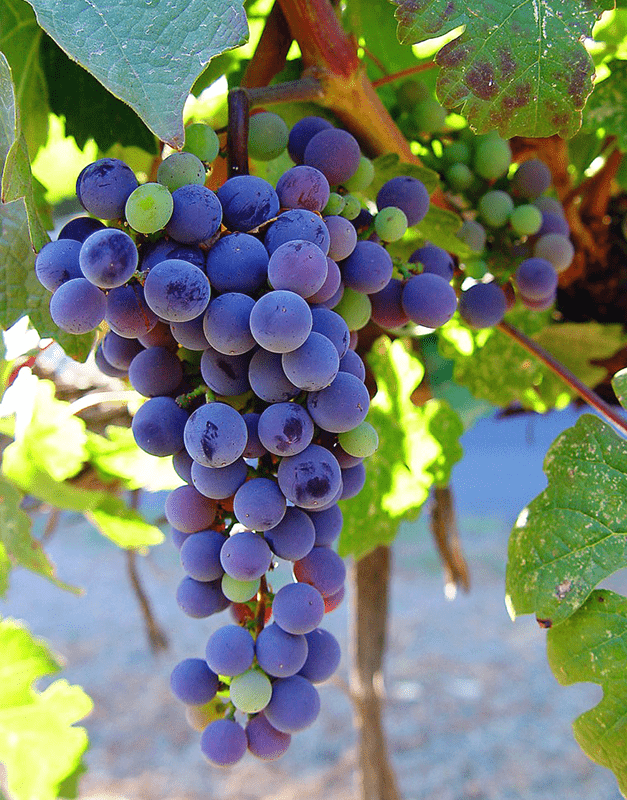
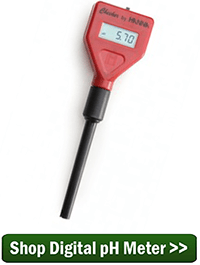
This is the last part of a 4 part series on knowing when to pick your grapes. Part 1 went over the importance of knowing when to harvest. Part 2 covered how to take the readings from the grapes and what they mean. Part 3 went over what kind of readings to expect.

What’s One To Do?
Unless you have some high-dollar real estate in California wine country, it’s not likely you will hit the best Brix, pH and TA readings all at the same time. Some years the climate will just not cooperate, and you will most likely need to make compromises.
Of course, you can get lucky in a particular year with just the right weather at the right time, but counting on getting lucky is a fool’s bet. You must learn to make the optimal best out of the meteorological cards you are being dealt.
A good rule of thumb is to try to harvest when the ratio of Brix to TA is between 31:1 and 34:1. This will always get you a good compromise between alcohol content and tartness.
As an example, lets say you do a titration and discover that the TA is .85% – still a little high – and your refractometers Brix reading is 23. This gives you a Brix to TA ratio of about 27:1. You get this by taking the Brix and dividing it by the TA (23/.85)… not time to harvest.
Two weeks later you take another reading with your titration kit and get a TA of .73% (a little lower) and your refractometers reading says a Brix of 24 (a little higher). These readings get you a ratio of about 33:1… time to harvest.
The only exception to this general rule has to do with pH. If the pH looks like it is going to go out of ideal range, then go ahead and harvest right away. The pH getting out of range trumps the Brix to TA ratio. This means for white wines, if it looks like it’s going to go higher than of pH 3.3. then harvest. For reds, if it goes higher than 3.5, then harvest. Shop Acid Test Kit
Proper pH is more important than Brix and TA simply because you can’t directly adjust pH later on without effecting the tartness of the wine, but you can directly adjust Brix and TA without effecting the pH too much.

The Wine Hydrometer
In part one of this four part series I mentioned that a wine hydrometer should be purchased, just as a way of double-checking your refractometers reading before actually picking the grapes.
So it’s late in the season. You’ve been taking all your readings, and all the numbers have finely come into their best alignment, and you have come to the conclusion that its time to harvest. Stop! Now should be the time to take a reading with your hydrometer just as a means of making sure it is time to pick.
To do this you will need to crush up a couple of handfuls of grapes taken randomly throughout the vineyard and extract the juice. You need enough juice to get the hydrometer to float. A hydrometer jar is good in this regard because it is tall and slender and does not require a large amount of grape juice to get the wine hydrometer off the bottom.
Shop HydrometersIf your hydrometer’s reading taken from grapes throughout the vineyard matches your refractometer’s reading taken from one grape, then you’re ready to harvest. This is when to pick your grapes to make wine. Get to pickin’ and crushin’.

Read More >>
Part I: The Importance Of Timing
Part II: Taking Reading
Part III: What Readings To Expect
Part IV: The Big Compromise
—–
Ed Kraus is a 3rd generation home brewer/winemaker and has been an owner of E. C. Kraus since 1999. He has been helping individuals make better wine and beer for over 25 years.

“Copperhead” Hoppy Red Ale Beer Recipe

Hoppy Red Ale BeerThis beer started out as many good beers do: attempting to copy, or “clone”, someone else’s good beer. One of my favorite local nano-breweries produces a very hoppy red ale that I have fallen in love with. They list the grains and hops used on their menu, but neither the amounts nor the process.
It wasn’t very difficult to determine the grain bill amounts and the hops to use for the hoppy red ale beer recipe, but the hop schedule was pretty much a guess. I was able to match the IBUs they listed, but like I said, I wasn’t really sure of the hop schedule.
My clone beer tasted fairly similar, although not exactly the same; more copper than red, which is why I call it Copperhead. But it turns out that I started to like this beer better than the one I had been trying to copy. I assume that’s because there is a bit of pride in developing this beer, but also, it’s a fair bit lighter than the professional counterpart, and therefore I can drink more of it and not get as full.
This is the tweaked recipe from the third batch I brewed of this beer. This is absolutely the best beer I’ve ever brewed, and it’s a beer I love to drink. It can even be made into a session beer. This recipe makes a 5-gallon batch. Enjoy!

“Copperhead” Hoppy Red Ale Beer Recipe
(5 Gallons, All-Grains)

Specs 
OG: 1.069
FG: 1.017
ABV: 6.8%
IBUs: 80+
SRM: 12

Ingredients

Grain Bill:
11 LB     Pale Two Row
14 OZ    Crystal 20L
8 OZ      Special B Shop Barley Crusher
4 OZ      CaraRed 
Hops:
.5 OZ     Warrior (60 minutes)
1 OZ      Simcoe (20 minutes)
1 OZ      Columbus (10 minutes)
1 OZ      Citra (Flame Out)
2 OZ      Citra (Dry hop – 7 days)
Yeast:
Wyeast 1272 American Ale II (use two packs or make a starter)
Directions
The process is fairly straightforward. Mash all grains at 154°F for 60 minutes, using 1.25 quarts of water per pound of grain. Sparge to about 5.5 gallons and then boil for 60 minutes using the hop schedule above, cool, and add to fermenter. Ferment at 68°F. After 4 to 7 days, when fermentation has slowed substantially, add the final Citra hops and let sit for a week. After two weeks total in the fermenter, I like to clear with gelatin, and then package and enjoy.
If your mash reaches a good efficiency, your starting gravity should be about 1.069. I generally come in a little less than that. If you have room in your fermenter, and want to make this a session beer, you can simply add enough water to bring the OG down to 1.050. This beer is flavorful enough that it can handle that much dilution. It does change the beer, but the result is still a VERY drinkable somewhat-red-to-copper hoppy ale.
Hope you enjoy this hoppy red ale beer recipe! Cheers!
—–
John Torrance is a database developer, gadget lover, and avid home brewer living in Lafayette, Colorado. When he’s not actively brewing, he’s generally daydreaming about what he’s going to brew for his next batch.

4 Tips for Pairing Wine and Cheese

The marriage of wine and cheese is a food relationship we are all thankful for (along with peanut butter and jelly, bacon and eggs, hamburgers and fries etc.). A study published in Journal of Food Science showed that people actually perceive wine as tasting better when consuming it with cheese. These delicacies have many similarities in the variances between styles and types: textures, densities, and tastes – wet, dry, bitter or sweet. Both are unique to their maker and, while the sky’s the limit, it can be helpful to follow some loose guidelines for pairing the right bottle of wine with the right cheese to create an indulgent experience. Check out a couple of wine and cheese pairing tips we’ve picked up along the way.
pairing-wine-and-cheese-eckraus-blog
Tip #1 Taste the wine first.
Before you begin your combination adventure, try the wine. For those who don’t know already know their favorite wine, pick a bottle (hopefully recommended by your local wine store), take a sip, think about what you’re tasting – note about the flavor, smell, and texture. Sure you could pick any cheese, but think about your favorites and how a particular cheese could make this wine even better.
Tip #2 Pair funky cheese with sweet wines.
Sweet wines like Moscato and other desert wines pair perfectly with smelly and bold cheeses. The sweetness of the wine helps to balance out the “funky” smell in cheese and the smelly cheese helps to balance out the sweetness in the wine. Opposites attract!
Tip #3 Aged cheese pairs best with bold reds.
As cheese ages, the flavor becomes richer due to the fat content increasing over time. Aged cheese pairs well with bold reds because the high fat content counterbalances the high tannins in the wine.
Tip #4 Feeling overwhelmed? Go with a nutty cheese.
Sometimes we’re stumped with choices for pairing wine and cheese – be it unfamiliarity with both or simply facing too many options to choose from. When it doubt, it is always safe to go for a firm nutty cheese like brie, swiss, or cheddar. Nutty cheeses pair well with both reds and whites and they’re delicate enough to have the fat content that counterbalances high tannins.
Some other great wine and cheese combinations that you may not have known:

  • Pinot Grigio & Mozzarella
  • Sauvignon Blanc & Goat Cheese
  • Chardonnay & Gruyere
  • Riesling & Ricotta

Pairing different wines and cheeses should be fun and not daunting, at the end of the day you’re indulging in one of the greatest food relationships known to man. Be adventurous, creative, and find a style that works best for you. Have a favorite wine and cheese combination that we didn’t mention? Let us know!
—–
Ed Kraus is a 3rd generation home brewer/winemaker and has been an owner of E. C. Kraus since 1999. He has been helping individuals make better wine and beer for over 25 years.

When To Pick Your Grapes: What Readings To Expect (Pt. 3)

Evaluating Wine Grapes For HarvestThis is part 3 of a 4 part series about when to pick your grapes. Part 1 went over the importance of knowing when to harvest. Part 2 covered how to take the readings from the grapes and what they mean. 

Ideal Readings
Here’s a quick run-down of what would be optimum readings you would want from the grapes for producing most wines. As an amateur vintner these are the numbers you should be striving to achieve.
The refractometers sugar reading should be around 20 to 26 Brix. This will potentially produce a wine between 10% to 13% alcohol. White wines should lean more towards the 20-22 Brix range, whereas Reds should be closer to 24 to 26 Brix. Red’s have more flavor, so they can handle more alcohol and still stay in balance.
As for pH readings with a digital pH meter, you would like your whites wines to reach 3.2 to 3.3. Remember the scale is reverse. You’ll be starting out earlier in the year around 2.8. You would like Red wines to be somewhere around 3.4 to 3.5. From a preservation standpoint, Reds don’t need to be as acidic as Whites because they have more alcohol to ward off any microbial growth.
Shop Acid Test KitTitratable acidity (TA) readings, as measured by a titration kit, should be .65% to .75% for white wines and .60% to .70% for reds. Again, the difference in these two is stated in the reason above.

The Reality Of Readings
The above readings would be great if you could attain each of them every year, but the reality is that in most parts of the U.S. hitting all these numbers in the same year is a struggle. You can plant in good soil and cultivate with care, but all that can be for not if the climate does not cooperate.
In cooler climates the refractometers reading quite often never reaches the appropriate range before the weather becomes too cool. In other areas pH may become to high before the refractometers readings can become adequate. Or, it may rain too much right before harvest, causing the grapes to plump up too much. This can dilute the sugar, acid and flavor to disastrous levels.
It’s only in regions where temperatures are moderate enough to provide a long growing season with moderate rain that grape growers have very little problems achieving these numbers. Such is the case of the inner valleys of California: Napa, Sonoma, etc. These areas benefit from the even, Mediterranean climate that the Pacific winds provide.Shop Digital pH Meter
For other regions it is usually a compromise to get these three numbers into alignment. And, that is what we will discuss in the next part of this series.

Read More >>

Part I: The Importance Of Timing
Part II: Taking Reading
Part III: What Readings To Expect
Part IV: The Big Compromise
—–
Ed Kraus is a 3rd generation home brewer/winemaker and has been an owner of E. C. Kraus since 1999. He has been helping individuals make better wine and beer for over 25 years.