Making Wine Without Sulfites

A Wine Made Without SulfitesI have a sister who has a serious bronchial reaction to drinking wine made with sulfite. I have a neighbor who’s making wine without sulfites to kill the yeast at the end. He simply waits until it dies of starvation. My sister has no reaction to his wine. I have discovered that boiling the must before starting the yeast without using sulfite is sufficient to start the process. Now I would like to find a method of killing the yeast when I want to stop the process. I thought perhaps I could use a high temperature to kill the yeast at the end, but I don’t know how high that temperature would have to be. Can you help me?

Name: Frits D.
State: Arkansas
—–
Hello Frits,

There seems to be a little bit of confusion. The reason that sulfites are added to any wine after the fermentation is to keep the wine from spoiling – to keep it fresh – not stop a fermentation. A fermentation should run its course until the sugars are all gone, starvation as you say. Sulfites can slow a domesticated wine yeast, but it can not consistently stop it completely, and therefor is not dependable for this purpose.

With that being said, making wine without sulfites is simple. The hard part is keeping the wine from degrading or spoiling after it has been made.

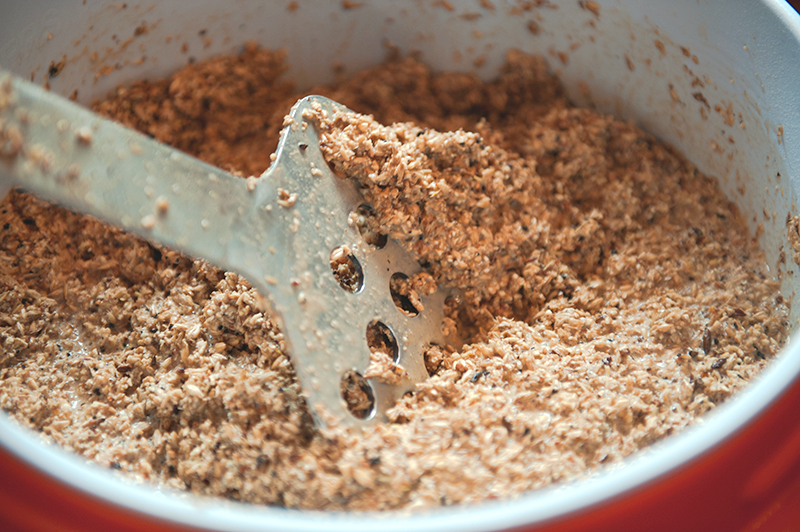
To start off the fermentation, I do not recommend boiling the juice or wine must. When you heat a juice you are promoting oxidation. This can cause the wine to turn color, usually orange or brown. It can also affect the wine’s flavor by adding a caramel to raisin note to it.

The one time I think you should add sulfites is before the fermentation — even if you are making wine without sulfites. Any free sulfite that is in the wine at this point will be long gone by the time the fermentation has completed. The sulfite will readily dissipate as a gas. Why not take advantage of that fact?Shop Wine Kits

This applies to making wine from fresh fruits and juices. If you are making wine from a juice concentrate, then no treatment or sulfite is required at all. For this reason, you may want to consider taking this avenue. Currently, we have over 200 different juice concentrates to choose from.

As for keeping the wine from spoiling after the fermentation, one solution is to always keep the wine refrigerated. It’s simple and effective. The bad part is you need to dedicate most, or all, of a refrigerator to this method. This is one reason why hardly anyone is making wine without sulfites.

A second option that will significantly reduce the risk of spoilage is filtering the wine with ultra-fine filtration. This mean filtering down to 0.5 microns. This is a lot finer than letting the wine drip through a coffee filter. That would only be 20 to 25 microns. Filtering down to 0.5 microns requires the use of an actual wine filter, one that can force the wine under pressure through extremely fine pads. You are literally filtering out over 99% of the wine yeast along with mold spores and bacteria.

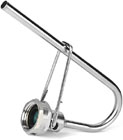
The Mini Jet wine filter would be the way to go for this purpose. It is important to realize that before using any wine filter, the wine should be finished dropping out sediment, naturally. It should look visually clear before filtering.

Shop Mini Jet Wine FilterAlso, keep in mind that you will want to be vigilant towards keeping the winemaking area sanitary. All the equipment and anything else that comes into contact with the wine needs to be as clean and sterile as possible. There are a whole host of cleansers and sanitizers you can use to do this safely. This is a critical part to making wine without sulfites.

As a final note, there is no such thing as making a wine without any sulfites at all. In part, because sulfite is actually produced during the fermentation. It’s a natural byproduct of the fermentation. The best you can do is to keep the sulfites to a level low. You can expect to see a fermentation produce a wine with 10 to 15 PPM (parts-per-million). When adding sulfites as normally directed the wine will end up with 50 to 75 PPM.

As you can see, making wine wine without sulfites can be easily done. It’s the extra care that needs to be taken to keep the wine fresh and free from spoilage that makes it difficult. But, if you are willing to be sanitary, filter the wine and/or store the wine under refrigeration… it can be done!

I hope this information helps you out.

Happy Winemaking,
Ed Kraus
—–
Ed Kraus is a 3rd generation home brewer/winemaker and has been an owner of E. C. Kraus since 1999. He has been helping individuals make better wine and beer for over 25 years.

Westmalle Tripel Clone Recipe (Extract & All-Grain)

Glass Of Belgian TripleTrappist beers are those made at Trappist monasteries; beers made in the Trappist style are called abbey beers. Most are characterized at malt-forward dry ales that are conditioned in the bottle. Belgian yeast strains often produce distinctive fruity or spicy qualities. Belgian beer fans go to great lengths to procure bottles from the eight Trappist breweries.

Westmalle Abbey is a monastery in Malle, Belgium, outside of Antwerp. It was founded in 1794, where brewing began in 1836. Westmalle’s Tripel is probably their most popular commercial brew.

The beer writer Michael Jackson describes the Tripel as: dry with an herbal aroma and fruity and floral flavor against a solid backdrop of malt. He recommends pairing Westmalle Tripel with asparagus, noting that “perhaps the citric note in Westmalle Tripel finds an affinity with that lemon-grassy flavor that also lurks in the plant.”

The Westmalle Tripel clone recipe below comes from the 2008 issue of Brew Your Own magazine. Simulate Westmalle’s water profile by using hard (mineral rich) water.

Westmalle Tripel Clone Recipe
(partial mash recipe, 5 gallon batch)

Specs:
OG = 1.082
FG = 1.012
IBU = 35
ABV = 8.5%
Boil Time: 90 minutesShop Dried Malt Extract

Ingredients:
5.5 lbs. pale malt
1 lb. caramel 10L malt
4 lbs. unhopped light DME
1 lb. clear candi sugar
1 oz. Styrian Goldings hops (3 AAUs) at :90
.75 oz. Tettnang hops (3 AAU) at :60
.5 oz. Fuggle hops (3 AAU) at :30
.5 oz. Saaz hops (2 AAU) at :5
2-3 packs Wyeast 3787: Trappist High Gravity

Directions, Partial-Mash: Prepare a 2L yeast starter the day before brewing using 2 packs of Wyeast. (Alternatively, use three packs without a starter.) On brew day, conduct a mini-mash with the crushed grains using about 3 gallons of clean water. Hold at 152°F. for 90 minutes. Sparge with 3.75 gallons of water at 170°F., collecting wort into boil kettle. Mix in DME and candi sugarShop Steam Freak Kits and bring to a boil. Add hops according to schedule. At end of boil, stir to create a whirlpool, remove from heat and chill wort. Pour wort into sanitized fermenter containing enough clean water to make 5.25 gallons. Pitch yeast at 70°F.. Ferment at 68°F. for two weeks, then condition at 50°F for 3-4 weeks. Prime and bottle, allowing to condition for at least 8 weeks. Age up to a year and serve in your favorite Belgian chalice glass!

Directions, All-Grain Option: Replace the 4 lbs. DME with 6 lbs. pale malt. Use 18 qts. of water for the mash and 20 qts. to sparge. Add the Belgian candi sugar when bringing wort to a boil and follow remainder of recipe above.

This Westmalle Tripel clone recipe is absolutely worth brewing. It’s a great introduction to Abby beers and Belgian beers in general.
—–
David Ackley is a beer writer, brewer, and self-described “craft beer crusader.” He holds a General Certificate in Brewing from the Institute of Brewing and Distilling.

An All-Grain Brewer’s Worst Nightmare — How To Fix A Stuck Mash

Stuck MashA stuck mash can really throw a wrench into your brew day. Things are going great: you planned your beer recipe, purchased all your homebrewing ingredients, mashed in, and pH and temperature are right where you want them. Then you start the sparge and collecting the wort from your mash tun, and all you get it a trickle – then it stops completely. What’s supposed to take an hour extends into two hours or more as you try to figure out how to separate the wort from the grain… what to do!

The best thing to do, of course, is everything in your power to avoid a stuck mash. No one wants a sparge that takes too long. In the event a stuck mash occurs, however, more drastic action is required. With that said, here are tips for preventing a stuck mash and tips to fix a stuck mash.

Tips for Preventing a Stuck Mash

  • Clean your mash tun between each use. This goes beyond just a soak in PBW. Take apart the various components of your mash tun and get in there to scrub ‘em out well.
  • Don’t over-crush. When crushing the malted grains, make sure they aren’t crushed too finely. If there’s a lot of flour in the grist, it can really gunk up the wort outlets.
  • Some grains tend to get sticky, especially wheat, rye, and oats. Add rice hulls to your mash to make sure that wort can flow without getting clogged. The hulls won’t affect the flavor, color, or gravity of your beer.Shop One Step Cleanser
  • Watch you water-to-grain ratio. The recommended ratio is 1-1.5 quarts of water per pound of grain. Some all-grain beer recipes call for a thinner or thicker mash. If your equipment tends to give you a stuck mash, lean towards the higher end of the range. Take good notes so you can build upon your previous experiences!
  • Take your time. When your mash is complete, draw off the first runnings slowly, allowing the grain bed to set. Draw off too fast and the grain bed can compact on itself, creating a stuck mash.

How to Fix a Stuck Mash

  • Stir it up. If you’re lucky, a quick, vigorous stir will be all it takes to fix your stuck mash. You’ll have to reset the grain bed, so draw off the wort slowly, gradually increasing the rate of flow.
  • Clear that clog. Shop FermentersIt the stir didn’t fix things, chances are good that there’s a clog in your mash tun. Dump the mash into a spare fermenting bucket. Since you will eventually boil the wort, the bucket doesn’t have to be sanitized, but it should be clean. Take apart your equipment, clear the clog if there is one, return the mash to the mash tun and start over.
  • Use a colander. If you still can’t get your wort to flow, you probably need a new mash tun! To save your brew, pour the mash through a clean strainer and into your brew pot. The wort in the brew pot can be run through the strainer and the collected grains multiple times to improve clarity. This process is called a vorlauf.

To be sure, having a stuck mash can be a real pain. But don’t let them stop you from making great beer! If the sparge is taking too long you now know what to do to fix the stuck mash. Once it’s fixed, relax, have a homebrew, and take steps to prevent having stuck mashes in the future.

Do you have a stuck mash horror story? Share in the comments!

Basic Wine Making Equipment List For Beginners

Connoisseur Wine Making Kit
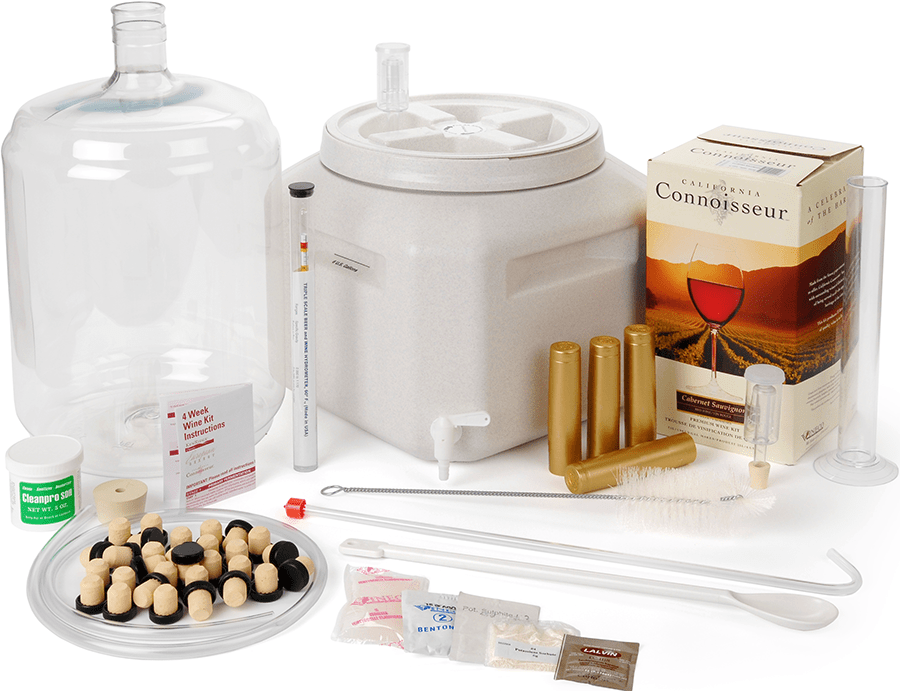
If you want to jump right into making wine without using a pre-made wine making kit, it can be done just fine. But there are certain pieces of fermentation equipment that you should have. With that in mind I’ve put together a basic wine making equipment list for beginners.

  • Primary & Secondary Fermenters/Carboys:  These can be made of plastic or glass, with both having pros and cons to using either one, and are used for the fermentation of your wine. A primary fermenter is used for the first 5 to 7 days of fermentation. The secondary fermenter is used to finish the fermentation.
  • Air Lock & Rubber Stopper:  The rubber stopper is used to attach the air-lock to the top of the secondary fermenter. The rubber stopper has a hole in the center to which the air lock is placed. The air-lock allows gases to escape from the secondary fermentation without allowing: air, bugs, mold, bacteria and other little nasties from getting in.
  • Spoon: You need a long stirring spoon so that you can reach in the fermenters and stir the wine.  May not seem all that important now, but once you get in the middle of making your wine having a long-handled spoon will be one piece of wine making equipment you’ll be glad you got. Stirring allows you to mix the wine making ingredients and break up any pulp that may rise to the top during the primary fermentation.
  • Siphon Hose and Racking Cane:  These are pieces of equipment that are needed for the transfer of your wine from one fermentation vessel to another, and also from carboy to bottle.  The siphon hose ensures a smooth transfer from one vessel to the next, while the racking cane allows you to point where you are drawing the wine from.Shop Wine Bottle Corkers
  • Wine Thief:  The wine thief is great for taking small samples of wine out of your fermenter in order to test for various things like pH, specific gravity, or to just give the wine a little taste! If your fermenters happen to have a spigot on them, this will be one of wine making equipment you can scratch off your list. Just take your samples for testing from the spigot.
  • Wine Hydrometer:  Once you take a sample of wine out from the fermentation, you can test the specific gravity of the wine in order to determine if the fermentation is complete, or if you need to make a few adjustments before moving on.  The wine hydrometer will help you measure specific gravity with ease, and is a piece of equipment you really can’t go without.
  • Acid Test Kit:  Using a sample of wine, you can test its acid level with an acid test kit to determine if it’s where you want it to be, or if you need to make a few adjustments. Wines too high in acid taste sharp or tart. Wines too low in acid taste flat and insipid. If you have a reliable wine recipe you are following or are making wine from a wine ingredient kit this may not be necessary, but otherwise, you should absolutely have this on your wine making equipment list.
  • Wine Bottles and Corks:  Shop FermentersYou’ll need lots of clean wine bottles and wine bottle corks so you can put your finished wine into bottles and seal them for storage and later consumption! You can get by with using mushroom corks, but if you want to use a standard wine bottle cork you will need a wine bottle corker to press them into the wine bottle.
  • Cleaners/Sanitizers:  Keeping your wine making equipment free of contaminants is important. Residual amounts of mold or bacteria can potentially grow and spoil a wine. This is why you should sanitize any equipment that come into contact with the wine. Cleaners such as Basic A work will for this purpose.

There are plenty of pieces of home winemaking equipment that we didn’t mention that could also help you in your craft, though acquiring what’s on the list above will allow you to get off on the right foot and create a fantastic homemade wine!

7 Homebrewing Tips That Will Save You Time!

Using Homebrewing Tip Number OneWhile many of us consider homebrewing a worthwhile expense, some people are just plain busy to brew. I don’t recommend cutting corners, but there are a few ways to make sure the hobby doesn’t take up a ridiculous amount of time. By cutting down on the time an labor, you are putting yourself in a position to brew more often. With that in mind, here are some homebrewing tips that are sure to save you time:

  1. Brew with a friend – This is my favorite homebrewing tip of all. That’s why it’s first. Enlist the help of a friend and share the workload with another pair of hands. This is especially helpful when it comes to cleaning and bottling. And, you’re introducing a new face to the hobby.
  1. Brew with extract – Eliminate the mash process, and you’ve just saved yourself an hour. Don’t let anyone tell you can’t make good beer with malt extract – the quality of malt extracts these days is very good. Many award-winning home brewers have won medals using malt extract – and so can you – so don’t take this homebrewing tip too lightly.
  1. Brew smaller batchesBrewing smaller batches will: A) Shorten the amount of time it takes for water to heat up, and B) Reduce the time it takes to bottle the beer. The trade-off, of course, is that you end up with less beer. This is a great idea if your time is booked up with no big breaks.
  1. Brew bigger batches – On the other hand, if you get a whole weekend off, brew a larger batch. You’ll end up with more beer and won’t have to brew as often! By going for volume, the time spent to produce a bottle of beer will be less.Shop Propane Burners
  1. Use a gas burner – This is a time-saving, homebrewing tip that many overlook. A gas or propane burner, whether on the kitchen stove or outdoors, will heat up water and wort much faster than an electric stove. A good gas burner can save an hour or more on brew day over an electric one!
  1. Prepare a yeast starter – Among its many benefits, a yeast starter will ensure that fermentation happens sooner and more rapidly. A faster fermentation means the beer gets in your glass that much more quickly!
  1. Rinse your bottles – This is one I think most homebrewers learn quickly, but I’ll mention it anyway. By rinsing your bottles when you’re done drinking from them, you reduce the likelihood of scum growing inside. This makes it much easier to clean your bottles, come bottling day. I will often just give them a quick soak in cleaner and then run them in the dishwasher on the sanitize cycle. The heat will sanitize the bottles and the dishwasher will allow you to do other things.

These are just 8 time-saving homebrewing tips. I’m sure there are many others. What methods have you figured out to save time when making your beer at home?
—–
David Ackley is a beer writer, brewer, and self-described “craft beer crusader.” He holds a General Certificate in Brewing from the Institute of Brewing and Distilling.

Don’t Be Passing Out The Heartburn, When You’re Passing Out The Wine!

Courteney Cox Try To Get HeartburnI made wine from muscadines and gave a bottle to a friend they said that it gave them heartburn. Can you tell me what is in wine that would do that and can I make the next batch better..??

Thank you
Chuck
—–
Hello Chuck,

That’s a heck of a note. You give a friend a nice bottle of your own personal stock. You probably had put customized wine bottle labels on the bottles to make them look nice, only to have your friend belch and say, “Your homemade wine gave me heartburn.

Seriously, we don’t know for sure that your friend’s heartburn was caused by the wine or not. They may not have realized that it was something they ate, or it could have been the fact that they decided to guzzle the whole bottle during a single episode of Modern Family. We just don’t know. I’m also noting here that you did not say it gives you heartburn.

For some folks, alcohol can give them heartburn. There’s nothing we can do about that. However, another trigger is acid. All wines have acid. It comes from the fruit, such as your muscadines, and possibly from acid you added to the wine in the form of acid blend. The wine needs a certain level of acid to taste correct – to keep it from tasting flat – but too much acid can cause the wine to taste too tart and to burn a little more than necessary while going down. Too much acid in your homemade wine can give someone heartburn.

The only thing you can really do to help your wines – and your friend – is to take complete control of your wine’s acidity. This can easily be done with an acid testing kit. Simply put, this kit will tell you how much acid is in your wine; how much acid your wine should have; and how much acid blend you’ll need to add to the wine, if any, for a properly balanced wine.

shop_acid_test_kitHow it works is you take a reading with the acid testing kit before the fermentation to get the wine must into the proper range. Then you also take another reading before bottling to see if a final adjustment is needed.

The acid testing kit is particularly important when learning how to make white wines. By tradition white wines are typically higher in acid than reds. One has to be careful not to go over the edge, so to speak, when getting these white wines into a proper acidity range.

In short, take control of the wines’ acidity. Start using an acid testing kit, and the next time you pass out your homemade wine, you won’t here the cries of, “your homemade wine gave me heartburn.”

Happy Wine Making,
Ed Kraus
—–
Ed Kraus is a 3rd generation home brewer/winemaker and has been an owner of E. C. Kraus since 1999. He has been helping individuals make better wine and beer for over 25 years.

How to Make Mulled Wine this Holiday Season

The holidays are here! mulled wine

That means cold weather, cozy nights, and non-stop festivities until the new year. If you’re looking for a recipe to show off and impress guests, we have the perfect wine for you.

Start the season by making a batch of mulled wine. It’ll warm your fingers, toes and the hearts of others – ‘tis the season after all.

What is Mulled Wine and How Do I Make It?

Historically, mulled wine has been used to repurpose harvest leftovers, warm the body during the cold months, and “heal” with its spices. The holiday drink we know and love today is really a product of Victorian England, with authors like Charles Dickens writing about mulled wine in “A Christmas Carol”. 

As a time-honored tradition, mulled wine will keep guests warm and satisfied throughout the holidays. It may sound complex, but it’s surprisingly easy to make, and a guaranteed crowd-pleasing cocktail. 

First things first. Make sure your pantry is stocked with these items: 

  • Your favorite wine – this is also a great time to show off your skills with your own handcrafted wine!
  • Mulling spices (details on these later)
  • A large pot or slow cooker 
  • Something to serve your drinks in
  • Optional: A snack pairing
  • Optional: Mulled wine pairs well with a partner – feel free to add extra booze. 
    • Spirits like brandy, cognac and gin will spice things up!

WARNING: Mull with caution 

  • Do NOT BOIL your mixture. This can spoil your drink. 
  • Whether you are buying or making your wine, make sure it’s not too heavily oaked to avoid bitterness.

What Type of Wine Should I Use?

As you’re getting your list together you may be wondering what type of wine is the best to use. Thankfully, almost any variety will do. The only catch is that some mulling spices pair better with certain wines than others. 

Tip: if you’re purchasing wine from a store, it’s perfectly fine (and encouraged) to use cheaper wines for mulling. More expensive, complex wines often lose their intricate notes in the mulling process.

What Spices Should I Use?

If you’ve taken a look at a few recipes, you’ve probably noticed some common spices:

  • Cinnamon
  • Oranges
  • Star Anise 
  • Honey 
  • Some sort of extra liquor

All of these are staples, but they are not set in stone. Have fun with your recipes and explore adding different fruits and spices to your wine. And if you’re short on time, some retailers sell premade mulling spice mixes like this one

Mulled Red Wine 

The classic mulled wine is a dry, red variety- Syrah, Merlot, Cabernet, pick your preference. You can make mulled red wine as simple or complicated as you’d like (though we prefer simple so you have time to prep other things). 

Spices:

  • Cinnamon
  • Cloves
  • Oranges
  • Honey
  • Star Anise

Here’s an easy mulled wine recipe to get you started!

Mulled White Wine 

While using white wine isn’t as common, some lean towards a lighter taste (think Viognier, Chardonnay or Pinot Grigio depending on the recipe). With this variation of mulled wine, winter fruits such as pomegranate, cranberries and oranges stand out in flavor and presentation.

Spices:

  • Cinnamon
  • Oranges
  • Honey
  • Star Anise
  • Lemons
  • Cranberries
  • Pomegranates 

For an extra kick, try spicing things up with this Apple Mulled White Wine recipe.

How to Serve Mulled Wine

You’ve made your very first batch of mulled wine. Congrats! Now, let’s find something to serve it in and with.

Mugs vs Glasses

Since mulled wine is mostly served warm, many opt for serving in mugs because they keep it warmer longer. However, if you’re focused on a nice presentation use glass mugs, double-wall glasses or special mulled wine glasses. Add a little flare by topping it off with a fresh piece of fruit used in your recipe, or a cinnamon stick. Going the extra mile here will make a lasting impression on your guests and elevate your drink.

Mulled Wine Pairings

Looking for the perfect dish or appetizer to serve with your impressive creation? Here are some ideas to pair with your mulled wine.

  • Cheese board 
    • If you are pairing with something sweet, consider Roquefort, Bleu Cheese, Gorgonzola, or Comté – they’ll bring out the cinnamon and clove notes!
  • Spiced nuts
  • Fondue 
  • Mince pies  – if you’re feeling fancy!

It’s official. You are now a mulled wine connoisseur! We hope you enjoy sipping your cocktail as you share your recipe with friends and family. 

Cheers!

Tips For Brewing A Porter Beer Recipe

Porter Beer IngredientsHere’s a few insights and tips for brewing a porter beer recipe. There’s also a 5 gallon recipe for brewing an English-style porter from malt extract.

A porter beer is an ale featuring dark malts with a somewhat subdued hop flavor. Often chocolate and slightly roasty malt character is the primary flavor characteristic. A porter beer is traditionally an English beer, but American interpretations of porter might be a little more hop forward. Alcohol content ranges typically from 4.5-6% ABV, though “robust” porters can reach 6.5% or higher. It is believed that these stronger versions morphed into what we now know as stouts.

Building a Porter Beer Recipe

Malt
With all the malts available to homebrewers these days, there are many ways to get a deep brown color in the beer. Some prefer to use a pale ale malt as base, then add color and flavor with primarily chocolate and black malt. On the other hand, you can scale back on the darker malts and use some caramel malt to achieve the right color mix. The same goes for malt extracts. Use the porter beer recipe below as guidance, but by no means feel like you have to follow that grain bill!

Whatever combination of brewing grains you use, try to focus on the chocolate malt and crystal malts for your color. Roasted barley is more appropriate for stouts.

Hops
An English-style porter recipe should feature English hop varieties such as Goldings and Fuggles. American porters may use American varieties, like Cascade.

Mild porters may have as little as 18 IBUs, while the strong, robust porters could have up to 50 IBUs. In any case, remember that the main feature in the porter is the dark malts. Dry hopping is not unheard of, but try not to go overboard with the flavor and aroma hops if you want to brew a traditional porter beer.

YeastShop Steam Freak Kits
English ale yeast such as Wyeast 1098: British Ale will work well in an English porter recipe. I’m a big fan of the Safale-S04, great yeast in terms of quality, economy, and ease of use. For an American yeast, Safale-S05 and Wyeast 1272: American Ale II are two good options.

If you just want to hurry up and brew, check out our Babbage Brown Porter beer recipe kit. Otherwise, read on for some good porter beer recipe suggestions!

Brown Porter Beer Recipe (5 Gallons, Extract)
from the E. C. Kraus Beer Recipes

Style: Brown Porter:
Total Batch Size: 5 Gallons
Recipe Type: Partial Mash
Approx. Original Gravity: 1.052
Total Boil Time: 45 min.
Anticipated IBU: 28-32

Fermentables:
6.6 lbs. Briess: Sparkling Amber

Specialty Grains:
8 oz. Carapils® Malt
8 oz. Black Malt
4 oz. Chocolate Malt

Hops:
2 oz. Pelletized Willamette (45 min. Boil Time)
1 oz. Pelletized Fuggle (20 min. Boil Time)

Yeast:
Fermentis: Safale S-04

Bottling:
5 oz. Priming Sugar (Corn Sugar)
52 Bottle Caps

Shop Home Brew Starter KitDirections:
Steep grains in 152°F. water for 30 mins. Remove from heat, stir in malt extract and bring to a boil. Add Willamette hops and boil for 25 minutes. Add Fuggles hops and boil for 20 minutes. Cool the wort and pitch the beer yeast when the wort has reached 70°F. or lower. Ferment for 5-7 days at 60°F.-70°F., then rack to a secondary fermenter for 10-14 days. Bottle beer with priming sugar. Beer will be ready to drink in two weeks.

Do you have a good home brew porter beer recipe? What’s your secret?
—–
David Ackley is a beer writer, brewer, and self-described “craft beer crusader.” He holds a General Certificate in Brewing from the Institute of Brewing and Distilling and is founder and editor of the Local Beer Blog.

How Do I Know When A Wine Fermentation Is Done?

Listening To See If Fermentaiton Is DoneI started a batch of Merlot, it has been in the secondary fermenter under airlock for the last month. It is clearing very nice. How do I determine when the fermentation is done?

Thanks,
Brandon
—–
Hello Brandon,

Thanks for the great question.

Knowing that your fermentation is done before moving forward in the winemaking process is important. If the wine gets all the way to the point of bottling, and the fermentation has not finished, one of two things can potentially happen: either the wine corks will begin to pop out of the wine bottles; or worse yet, if the corks are very snug, you could have bottles exploding.

During a fermentation sugar is being metabolized into both alcohol and CO2 gas. This gas is the same stuff that puts the fizzy in beer, soda pop and champagne, and it’s also the stuff that comes through the airlock and creates the bubbling action.

A lot of beginning winemakers will use the airlock to make a determination. They see that the airlock is not longer bubbling and figure this is when the fermentation is done. In reality, the fact that the bubbling stopped is only an indication that the fermentation may be done, but is is not an absolute indicator. It does not necessarily mean that all the sugars are gone from the wine must, and it definitely doesn’t mean that the fermentation can’t start up again. It just may be dormant at the moment.

Shop FermentersIt is very possible for a fermentation to stop and start back up again sometime later. This is known as a stuck fermentation. It is usually caused by some environmental change that the wine yeast does not like – temperature being the most common factor. The important thing to know is that it is possible to bottle a wine that has stopped bubbling and have it start fermenting again after bottling – in the bottle! This CO2 has no place to go and builds up pressure in the wine bottle and well… there’s-your-trouble.

This begs the question, if the bubbling action through the airlock is not a solid indicator as to when a wine fermentation is done, then what is? The key to all of this is knowing if there’s still sugar in the wine must. If there is then there’s still a potential for more fermentation. Fortunately for us winemakers, there is an easy solution. Use a wine hydrometer.

A wine hydrometer is what can tell you if there’s still sugar in the wine must. It’s very simple to use and gives a reading instantaneously.

A wine hydrometer is a long, closed, glass cylinder.  It has a weight in one end and scales to read along its side. The readings are taken by seeing how high or low it floats in the wine. By observing where the surface of the wine crosses the scale on the wine hydrometer you can get your actual reading.

Shop HydrometersBy learning how to use a wine hydrometer, you can assure yourself that you will never bottle a wine too soon. You will be able to determine in moments where your fermentation stands.

You may be asking yourself at this point, “What if I want sugar in my wine”? If you like your wine with some sweetness to it, not a problem. Learn about making sweet wines on our website. It’s simple enough to do. You just have to know how to do it properly.

Brandon, hope this information helps you out. The hydrometer is the answer to the question: when is a fermentation done?

Happy Winemaking,
Ed Kraus
—–
Ed Kraus is a 3rd generation home brewer/winemaker and has been an owner of E. C. Kraus since 1999. He has been helping individuals make better wine and beer for over 25 years.

5 Home Brewing Gadgets That Won’t Break The Bank!

It doesn’t take much to start making your own beer at home: a large pot, some fermenting buckets, and you’re pretty much good to go. There are a few pieces of equipment though that make a world of difference in terms of ease and time. These are a few of the home brewing gadgets that I don’t brew without – each for $40 or less:

  • The Auto SiphonAuto Siphon – The standard racking cane/siphoning hose setup will get the job done, but it’s hard to get a good flow going – if you’ve used them you know what I’m talking about. But with a pretty minor investment, the auto siphon will make racking beer from primary to secondary a piece of cake. We carry the auto siphon in both 3/8” and 1/2” hose sizes. Either will allow you to start a siphon flow by slowly pumping the auto siphon one time. It’s a home brew gadget that I’ll keep at the top of my list!
  • Assorted Funnel SetThe Funnel Set – Sure, you can get by without a funnel, but anytime you’re pouring liquid or dry ingredients from one container to another, these handy gadgets help make sure that they don’t end up all over the floor. Our funnel set lets you fill containers large and small without a hassle, plus it comes with screens for straining. As you can see will have an assortment of sizes with strain screens that snap into the two largest sizes.
  • Escali Digital ScaleThe Digital Scale – If you like to tweak and develop your own beer recipes, a digital scale is a home brewing gadget that is a “must”. It’s perfect for weighing out hops, grains, sugars, and other additions, and it helps ensure consistancy from brew to brew. Our Escali digital scale measures in ounces, grams, and pounds, has a capacity of 11 pounds or 5 kilograms, is accurate to the .05 oz., and it gives the homebrewer much more control over their craft.
  • Assorted Brush SetThe Complete Brush Set – Sound cleaning and sanitation are key to making good beer. The complete brush set includes five different brushes so you can make sure your bottles, carboys, and even airlocks are free of debris that could contaminate your beer. This brush set includes two different sized bottle brushes, a gallon jug brush, a carboy brush, and a smaller brush that’s perfect for scrubbing on the inside of airlocks and spigots. Buying the whole set saves about 20% over buying each brush individually. Anything that makes cleaning and sanitizing easier is money well spent in my book.
  • Stainless Steel Carboy and Bottle WasherThe Carboy and Bottle Washer – Again: cleaning and sanitation is essential. This home brewing gadget makes rinsing carboys and bottles a breeze. Pressing the carboy or bottle down on the lever releases a jet of water, a high pressure blast that’s much more effective than a regular rinse. We carry the washer in both stainless steel and brass. The thread fits standard outdoor and utility faucets, so get the Kitchen Faucet Thread Adapter to make it work in the kitchen.

What home brewing gadgets do you find essential? Let us know in the comments section!

Til next time…Cheers!

—–
David Ackley is a beer writer, brewer, and self-described “craft beer crusader.” He holds a General Certificate in Brewing from the Institute of Brewing and Distilling and is founder of the Local Beer Blog.