How to Brew a Hefeweizen: Tips from a Beginning Homebrewer

HefeweizenAre you a fan of wheat beers? Guest blogger and beginning homebrewer Josh Short shares some of the lessons he learned from his recent brew day.
————————————————————–
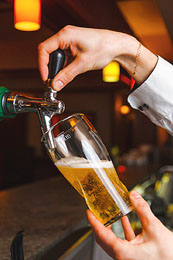
Summer is almost here and it’s time to brew something refreshing that even the biggest non-beer-lover will enjoy. No double IPA here — let’s brew a hefeweizen.
Hefeweizen is a south German style of beer. “Hefe” translates to “with yeast” and “weizen” means “wheat.” Hefeweizens have a low-hop bitterness, usually around 6-10 IBUs, and are unfiltered, meaning that the yeast stays in the beer when it’s served. Most hefeweizens have hints of cloves and bananas, which come from the hefeweizen yeast strain, and a cloudy golden, yellow-orange appearance.
I brewed a hefeweizen recently and wrote down some tips and tricks to help you as a beginning homebrewer. Hopefully I can keep you from burning your house down!

  • Read your directions and then read them again. Write down each step and tape it to your microwave since it’s probably above your oven and it’ll always be close-by.
  • Clean your kitchen. Yes, I’m sorry, but do all the dishes so you have an empty sink and make sure all your countertops are clear.
  • Lay out all your materials and go through each step to make sure you have everything you need:
  • This step is optional, but if you’ve made a few batches before or want to be adventurous it is a fairly simple way to enhance the flavor to your brew. When you’re heating up water for the boil, grab some specialty grains and steep them in your water at 150 degrees for 15 minutes before adding your malt extract. I used half a pound of pilsner malt and half a pound of malted wheat. Make sure to take in the amazing aromas the steeping grain will give off! Here’s some additional information since it probably won’t be in your kit instructions:
    • Most likely your grains will already be cracked. If they are not, run them through a corona mill or roll over them with a rolling pin or beer bottle on a cutting board.
    • Pour grains into steeping bag and tie off the end. Do this over a cutting board because the grains might leave a fair amount of dust on your counter.
    • Place bag into 150 degree water for 15 minutes.
    • Watch the color of the water turn a golden color and enjoy the aroma. Don’t be frightened if flakes of grain escape from the steeping bag. It’ll settle to the bottom of your fermenter and you leave the bottom inch or so in the fermenter when you siphon it to the bottling bucket in a few weeks.
    • After 15 minutes, remove steeping bag and place it aside in a small pot. You’re done with the grains and the pot, so put it to the side and let it cool and drain into pot before discarding. There are a ton of ways to recycle the spent grain but for a beginner, focus on the brewing for now.
  • Before adding the malt extract, turn your sink faucet to hot and run one can of your liquid malt extract (LME) under it for two to three minutes. This makes it much easier to pour from the can.
  • Once you get your first set of malt extract and hops into your brew pot, pat yourself on the back because there’s no stopping now! Find a place to lean on near your oven because you’re going to be there for a bit.
  • Now that you are boiling your malt extract and hops, DO NOT LEAVE THE OVEN’S SIDE! Stand/Lean/Sit there and watch the boil. If you see it all starting to rise very quickly, turn the burner off, grab your oven mitt and move the pot to another burner. You just prevented a boil over. This shouldn’t happen if you are attentively watching the pot.
  • Once you are done brewing and have moved your cooled wort into the fermenter, take your dry yeast packet and sprinkle it over your wort. You can prepare your yeast in a number of ways which are noted in other posts, but as a beginner homebrewer this method works just fine.
  • When inserting your airlock, gently twist it back and forth into the hole in the fermenter lid. Do not jam it straight down as I did unknowingly during my first batch, splitting the plastic airlock into pieces!
  • Wait patiently while the beer ferments. In as little as two weeks, you’ll have two cases of delicious beer for you and friends!

I hope the tips above will help you keep your kitchen intact! Feel free to leave comments and questions below. Cheers!

—————————————————————————————————————-
Josh Short is a beer blogger “on a mission to learn the art of craft beer.” Check out his blog, Short on Beer, to join him on his journey.

5 Reasons Why You Should Take Part In A Homebrew Festival

Homebrew Festival
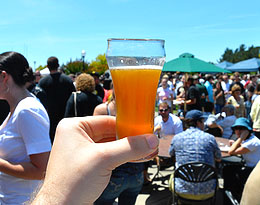
Homebrew festivals are quickly becoming a popular way to share the art of homebrewing with others. There are several possible formats. Some festivals just ask brewers to donate the beer, while others require a small fee to participate. Some homebrew festivals raise money for good causes, and many include a competition where the winning brewers can earn prizes, exposure, or even the opportunity to brew their winning beer with a professional.
But the thrill of the festivals themselves are usually motivation enough for me to participate. Here are five of the reasons why I take part in homebrewing festivals every chance I get:

  1. Because they’re fun! What’s better than getting together with a bunch of other beer lovers and sharing some brews?! I’ll usually bring a friend along to help me serve so we can take turns trying other people’s beers. You’ll also get to enjoy some good people-watching. (Be prepared for a lot of beards!)
  2. Great networking – Homebrew festivals are ideal for meeting people with interests similar to your own. Be open, be friendly. Who knows — you could meet a potential collaborator — or the business partner for that brewery you’ve always wanted to start!
  3. Get feedback on your brews – Homebrew festivals are the perfect opportunity to get honest, constructive feedback on your beer. You’ll soon figure out which of your brews are crowd pleasers and which are not. When I serve my beer brewed with dandelion and nettle leaf at a festival later this month, I should learn a thing or two about what people think about my off-the-wall creation.
  4. Find inspiration – At homebrew festivals, you’ll get the chance to try lots of different kinds of beers. This is a great occasion for figuring out what you want to brew next. Loved that guy’s Double IPA? Maybe it’s time to brew your own. Enjoyed the Wyeast 3068 in that other brewer’s hefeweizen? Now you know what you should use in that wiessbier you were planning on brewing.
  5. Try unusual beers – A lot of the beers you’ll try at homebrew festivals will be unlike anything you can find at the supermarket. Homebrewers are an extremely creative bunch and will pull out their best to try to win the crowd. Whiskey fennel ale? Beer brewed with beets? Homebrew festivals may be the only chance you’ll get to try crazy concoctions like these.

Yes, you’ll probably give away a fair amount of beer at a homebrew festival, but isn’t sharing your creation what it’s all about? Trust me, there’s nothing quite like passing your homebrew across the table to an eager beer fan, watching their face light up as they sip your brew, and answering them when they ask, “You made that yourself??”
Not sure how to find a homebrew festival in your area? It’s easy. Just go to Google and type in “homebrew festival” (in the quotes, followed by your nearest city, or maybe even your state. Example: “homebrew festival” kansas city
Have you ever participated in a homebrew festival? How did it go?
——————————————————————————————————-
David Ackley is a beer writer, brewer, and self-described “craft beer crusader.” He holds a General Certificate in Brewing from the Institute of Brewing and Distilling and is founder of the Local Beer Blog.

American Homebrewers Association: Big Brew 2013

Homebrew BeersIn celebration of the fun, social hobby that is homebrewing, the American Homebrewers Association (AHA) schedules a Big Brew event every year in conjunction with National Homebrew Day. It’s an event in which homebrewers around the world brew the same beers at the same time and celebrate the joy of homebrewing. This year, the Big Brew takes place on Saturday, May 4th, with a world-wide, simultaneous toast happening at noon CDT. Last year, over 7,000 homebrewers around the world brewed more than 11,000 gallons of beer!
Sounds like fun, right? Read on to learn how you can participate!
You can join in the AHA’s Big Brew in one of the following ways:

  1. Join a registered Big Brew event near you. Meet new people, make some friends, and celebrate one of America’s favorite, fastest growing hobbies.
  2. Register your own Big Brew event. Can’t find a Big Brew event near you? Organize your own and register it with the AHA! Coordinate with your local homebrew supply shop and area homebrewers to make the event a good one!
  1. Invite some friends and family over for a brew day! Share your passion for homebrewing with those closest to you!
  2. Don’t forget to raise your glass at 12pm CDT for the worldwide toast to homebrewing!

Homebrewing is one of the greatest social activities there is. Brewing with a friend makes the hobby immensely more enjoyable. Not only do you have an extra set of hands to help out, but brewing with a buddy or two is a great opportunity to share your homebrew, get some feedback, and wax philosophical over some beers!
Check out the AHA’s How to Celebrate page for more ways to get involved in the 2013 Big Brew!
Big Brew Recipes
Part of the fun of the Big Brew is that homebrewers around the world all brew the same beer. This year, the AHA selected three winners from the Great American Beer Festival Pro-Am competition for the Big Brew. Click the links below for extract and all-grain recipes and visit the Adventures in Homebrewing web store to find the ingredients you need.
Each recipe is for a five-gallon batch of homebrew:

  • More Fun Blonde – a Belgian blonde ale by Jay Shambo and New Belgium Brewing Company. (Recipes: extract, all-grain)
  • Pointon’s Proper – an English style dark mild ale, by Scott Pointon and RAM Restaurant & Brewery. (Recipes: extract, all-grain)
  • Classic American Pilsner – an American-style Pilsner by Kyle Sisco and Minneapolis Town Hall Brewery (recipes: extract, all-grain)

Are you new to homebrewing and in need some equipment for the Big Brew? Check out our Beermaker’s Necessities Kit, containing all the equipment you need to brew a batch of beer. Each kit includes a Brewer’s Best Extract Kit of your choice. Don’t forget to check out our Guide to Extract Brewing for step-by-step instructions for the beginning homebrewer!
——————————————————————————————————-
David Ackley is a beer writer, brewer, and self-described “craft beer crusader.” He holds a General Certificate in Brewing from the Institute of Brewing and Distilling and is founder of the Local Beer Blog.

Who Else Wants Real Ginger Ale?

Real Ginger Ale
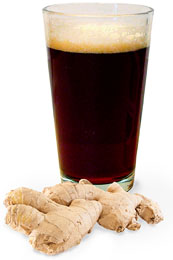
Before hops were a common ingredient, beer was flavored with all kinds of herbs, spices, vegetables, flowers, and roots. One such ingredient was ginger, the intensely flavored root frequently used in cooking Indian food and ginger bread cakes. In one of my favorite new brewing books, Sacred and Herbal Healing Beers, Stephen Buhner notes that ginger was used by the ancients for its medicinal properties that improve circulatory function, digestion, nausea, and a number of other ailments.
Ginger was also used when hops weren’t readily available. Marty Nachel notes that “The original ginger ale really was Ale. The concoction was a standard beer in colonial America because the colonists used ginger and other spices in the absence of hops to offset the malty sweetness of beer.” According to Sanborn Brown’s Wines and Beers of Old New England, “There were times in the country’s history before the introduction of lager beer when the commercial sale of ginger beer exceeded both hopped beer or cider.”
Some American craft breweries are reviving the use of ginger in beer making. Hardywood Park Craft Brewery, in Richmond, VA, makes a Gingerbread Stout that scored 100 out of 100 points in Beer Advocate Magazine. Believe it or not, you can brew your own ginger ale. It’s a great way to bring a little creativity and old-world tradition into the home brewery!
It’s easy to brew your own ginger ale! I like to use a brown ale as a base, but you can technically do it with any base beer you’d like.
How to Brew a Ginger Ale

  1. Start with a brown ale extract kit or your favorite brown ale recipe
  2. Peel and chop or grate fresh ginger root. Charlie Papazian recommends between .25 – 1 oz. per gallon of beer. (I’ve gone as high as 2 oz. — this comes out very spicy!) Tip: When in doubt, start with less, and if it’s not enough, you can always use more in a later batch.
  3. Brew your brown ale as you would otherwise, adding the ginger to the last 15 minutes of the boil. Either put the ginger in a small straining bag, or…
  4. As you transfer to the primary fermenter, strain the ginger out of the wort. You can pour the ginger into the primary fermenter if you’d like, but I recommend doing a secondary fermentation so you can separate the ginger from the wort prior to bottling day.
  5. Continue with fermenting and packaging as you would normally.
  6. When the beer is ready to drink, give it a taste. If the ginger is too strong, let it age a while to give the ginger a chance to balance out.

Have you tried brewing with ginger before? How did it turn out?
——————————————————————————————————-
David Ackley is a beer writer, brewer, and self-described “craft beer crusader.” He holds a General Certificate in Brewing from the Institute of Brewing and Distilling and is founder of the Local Beer Blog.

What Makes Belgian Beer Belgian?

Belgian Beer
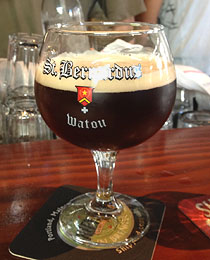
One could easily write a book on this subject and still not have a complete answer to this question. Belgium has a very long, creative, and artisanal brewing tradition that makes it difficult to lump all Belgian beers into a single category. Whereas in Germany, the Reinheitsgebot required brewers to only use barley, water, and hops, there was no such law in Belgium. Brewers in Belgium were allowed to experiment and continue to do so. As a result, there is a huge variety of beers being made in Belgium, and essentially no restrictions on what can go into them.
That said, there are a few broad characteristics of Belgian beers:
• Belgian yeast strains – Though some Belgian beers (such as Lambics and Saisons) are fermented using spontaneous or “wild” fermentation, most Belgian beers are brewed using very specific yeast strains. Belgian brewers will often ferment these beers at higher temperatures to encourage spicy, fruity, or phenolic flavors and aromas that are produced by stressing the yeasts.
• More malty than hoppy – You’re not likely to find a hop bomb in Belgium (the Belgian IPA is an entirely American construction). Belgian beers are traditionally brewed featuring combinations of wheat, barley, spelt, oats, and other grains.
• Use of spices and herbs – Prior to the widespread use of hops, beers were commonly flavored with a blend of herbs and spices called a gruit. Many of these ingredients survive to this day, the most popular being the coriander/orange peel combination in Witbiers. Saisons also frequently use a variety of spices and herbs.
• Bottle conditioned – Many Belgian beers go through a secondary fermentation in the bottle, which carbonates the beer. As a result, bottled Belgian beers will often have yeast sediment at the bottom. Generally speaking, it’s preferable to leave that sediment behind (despite what Hoegaarden recommends).
Want to brew Belgian beer at home? Try some of these ingredients and brew kits to make your own authentic Belgian-style ales:
Ingredient kits:
Brewcraft Belgian Wit (White) Bier Recipe Kit – All ingredients are pre-measured and included for brewing this iconic style. Belgian Witbiers are cloudy, pale in color, and flavored with coriander and orange peel.
Brewcraft Belgian Tripel Recipe Kit – Belgian candi sugar helps raise the alcohol content of this Belgian ale. Look for complex flavors of banana and citrus with a touch of spice.
Yeasts:
Wyeast 1388: Belgian Strong Ale Yeast – Wyeast 1388 is ideal for strong golden ales. It’s very alcohol-tolerant and finishes dry, fruity, and somewhat acidic.
Wyeast 3787: Trappist High Gravity Yeast – This yeast is a good all around Belgian yeast strain, featuring a fruity flavor and aroma. This is a very active yeast, so be prepared for high krausen. Tolerant up to about 12% ABV.
Adjuncts and Additives:
Dark Candi Sugar – This is an invert sugar that helps raise the alcohol content of Belgian ales without adding malt character or body. Also contributes some color. (275º Lovibond)
Light Candi Sugar – Light candi sugar helps to raise the alcohol content of Belgian ales without adding malt character or body. Unlike the Dark Candi Sugar, this will not add color to your beer.

A Simple Guide to Malted Barley

Malted Barley GrainMalted barley is used in brewing beer as it is a good source of sugars (especially maltose). These sugars are fermented during the process of making beer. During the malting process, the grain germinates a bit, which allows the beer to make full use of the nutritional qualities of the seed.
There are certain enzymes that are released during the germination process, and these enzymes break the protein matrix to create simpler carbohydrates that ferment more easily. If the germination process is allowed to continue, a plant will start to grow, and the starch that is required by the beer would be consumed by the plant. Not a good thing. This is why it is important to stop the germination process at precisely the right point.
From the point of view of a brewer, there are two types of malted barley: the one that needs to mashed, and the one that doesn’t.  In mashing, barley is soaked in hot water which lets the enzymes grow and convert starch into sugars. There are light colored malts like Pilsner beer malt and pale ale malts that are mashed to convert starch to sugar. Some of these malts are roasted or kilned to add different tastes.
Apart from the light colored malts, there are some malts that don’t need mashing. These are called specialty malts and are used to add unique flavor, color and aroma to the beer. They sometimes go through a special heating process where their starch gets converted to sugar, which is why they have complex sugars that have a caramel like sweet taste. They are sometimes known as caramel malts or crystal malts and they come in various colors and roasts. You can find more information on this in another blog post, What Are The Different Malts Used In A Homebrew Recipe?
Although barley is still the number one choice of most brewers, you can use other grains as well, like flaked rice, flaked corn, flaked oats, and flaked rye. When you are brewing at home, there is a lot to experiment, and the options are practically unlimited.

________________________________________________________

Read More About Malted Barley And Other Beermaking Topics,
FREE  EMAIL NEWSLETTER:


________________________________________________________

Save Time! Keg Your Homebrew!

Home Kegging System
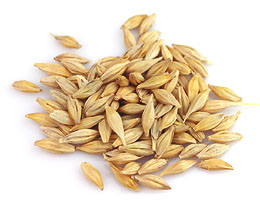
Once you’ve started brewing at home and made your first batch of home brew, you’re going to have to find something to store it in. The two main options are either kegging beer or bottling beer. Many people initially dismiss kegging their own beer, because the concept of having a keg in their house seems a bit much. But just like anything else that goes with making your own brew, bottling or kegging is largely a matter of personal preference.
Kegging does bring its own benefits.
While the equipment needed to keg beer might seem like a lot at first, with the kegs and valves tanks and taps, it’s really not when you consider how much equipment you need to bottle beer. The actual beer bottles are what most home brewers find the most trouble coming up with, either because they simply don’t have any lying around, or because they’ve lost some to damage along the way.
When you use kegs however, no matter when you’re ready to brew and store your beer, you’ll have one on hand. Even if it’s just a matter of emptying the small amount left in it and giving it a quick clean, typically there’s not nearly the running around when you’re kegging as there is when you’re bottling.
Another way kegging your beer can save you time is the simple fact that the entire process is much shorter. You’ll be filling one large container rather than dozens of small ones. Imagine half a day of bottling cut down to half an hour of kegging, and you can see how much more convenient it can be.
Bottling and kegging your own home brew both come with their own benefits, and these are a few that come with kegging your own (aside from the fact that it’s just cool to pull a draft for your friends!) But if kegging your own beer has always seemed like something that was simply too overwhelming, consider the benefits it can bring before you write it off altogether.

Homebrewing Is Even Easier With Home Beer Kits

Beer Ingredient KitBrewing at home isn’t necessarily hard. You need fairly little homebrewing equipment, and there are many different malts and beer yeasts available to help you perfect your own beer recipe over time. But for those that are just starting out, finding all those different homebrewing ingredients and supplies can seem a bit intimidating; and it’s for this reason you can find home beer kits available.
These beer ingredient kits are created for individuals who are just starting out in brewing their own beer, and they’re created under the assumption that the individual has never even done it before. Included inside the box is everything from the hops to the malted barley grains to the malt extracts that you’ll need; you’ll find everything but the equipment! You can buy beer recipe kits in many different flavors and colors, all with different beer recipes. These can be extremely helpful when you’re just starting out making your own beer, and you’re not yet sure of what flavors you like.
Once you’ve tested out several different beer ingredient kits and are ready to start branching out on your own and experimenting, you can still go by what you’ve learned trying out the different kits. By having started with blends that you know are already tasty, you’ll have that foundation from which you can build your own. Of course you can always continue on using the beer recipe kits, and making great tasting beer!
When using beer ingredient kits, remember that you’ll still typically need to have basic beer-making equipment on hand, as only really the beer making ingredients are included in these recipe kits. There is another great blog post about this, The Minimum Equipment You Need To Brew Beer Yourself. If you don’t have the equipment yet, don’t worry too much about it as beginner homebrewing equipment kits are also often available. Using both types of beer kits can really boost the convenience factor of brewing your own beer, and leave you wondering why you didn’t do it sooner!

________________________________________________________

Read More About Beer Ingredient Kits And Other Homebrewing Topics,
FREE  EMAIL NEWSLETTER:


________________________________________________________

The Advantages Of Bottling Beer

Bottle Homebrew
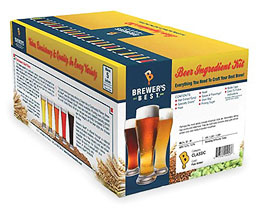
When it comes to storing your homemade beer, you’re going to need more than just a couple of pitchers. You’ll need to decide whether you’ll be bottling beer, or kegging beer, and both come with their own advantages.
One of the biggest advantages home brewers find with bottling their own beer is that initially, the cost of storage can be much cheaper. Rather than having to invest in a stainless-steel keg (or several, if you want to make different kinds of beer) beer bottles can be picked up more cheaply than kegs; and you can reuse them, saving you on cost, too.
Once you start brewing your own beer, you’ll also most likely want to give everyone a taste, and provide samples to all your friends and family. When the homebrew is sitting at home in a keg, you need to wait to have them over to do it. But when it’s bottled, you can take your own six pack with you the next time you go over, and even give it away as a gift.
Even home brewers that choose to keg their own beer sometimes still turn to bottling for certain types of beer. In cases such as Russian imperial stouts, or other beers that need to be stored for a long period of time before being consumed, brewers don’t always want to have a whole keg “on hold” that entire time. By placing this long-standing beer in bottles, it can be stored easily; while the beer that’s ready for consumption can be placed in the keg, and drank easily!
Definitely, both bottling and kegging your own beer come with their own advantages. But when you want to give your brew away, take it with you camping, or are just looking for the most affordable way to do it, bottling might be the best choice for you. Here’s a great blog post you might want to tak a look at on bottling your own homebrew, How To Bottle Your Beer.

________________________________________________________

Read More About Bottling Beer And Other Homebrewing Topics,
FREE  EMAIL NEWSLETTER:


________________________________________________________

How Long Does Homebrewing Take?

Time To Brew BeerWhen people are first learning how to brew beer, one of their first questions is always, how long does the homebrewing process take? How long it takes to make the beer, and how long it will be before you can start drinking your homemade beer are two different things. But altogether, from the time you first start mixing your own beer, to the time you’re cracking open your first bottle, it should only be a matter of weeks.
The day you actually mix together your beer yeast, hops, malt extract, and other homebrewing ingredients to actually start making your own beer, you should probably set aside at least four hours to do it, as a first-timer. This will include the sterilization time beforehand and the cleanup afterwards; and it will also get shorter as you start brewing more of your own beer and becoming more experienced at it. But the first few times it can take an entire afternoon or more.
Once the beer has been mixed or mashed, it will then need to sit in a fermenter for about a week. This will give the beer its alcohol content, as well as a certain level of carbonation. You won’t need to do much during the fermentation stage, but you will during the bottling stage, which is next.
Bottling your own beer really only requires a siphoning hose, some beer bottles, bottle caps and a bottle capper, but it does also require about two to three hours of your time. For a 5 gallon batch of homebrew you will be bottling 50 to 55 twelve ounce beer bottles. It’s at this stage that many home brewers are the most impatient so, many choose to keg their beer, instead. This can take as little time as half an hour.
When you keg your beer you also won’t need to let it sit as long before drinking it. While beer needs to sit in beer bottles for a week or two before it reaches full carbonization, kegs can be carbonated in as little as a day.
All in all, from the time you start mixing your own special blend, to the time you’re enjoying a nice cold one, brewing your own beer should take anywhere from three to four weeks.
A great blog post that will give you a little more information on the homebrewing process is, The 3 Different Methods Of Homebrewing. There you will get a good overview of the three basic ways you can approach homebrewing as a beginner, and discover which is the best way for you.