Is Reusing Yeast Cake From A Homebrew Fermentation Okay?

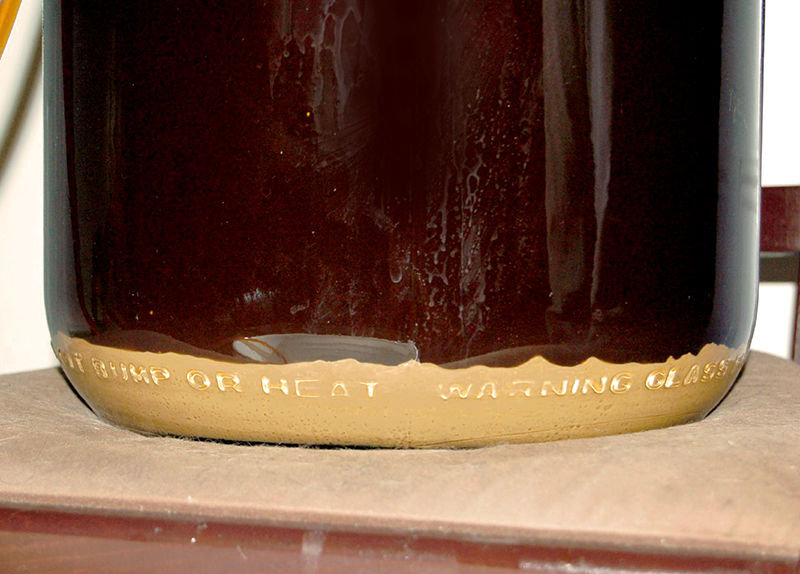
Reusing Yeast Cake When Homebrewing.After bottling a batch of beer, many homebrewers have looked at that inch-deep layer of yeast and wondered, “Hey, isn’t there something I can do with all that yeast?” As a matter of fact, there is!
When we think about reusing yeast cake, our natural inclination is to pour another batch of wort right onto it and let ‘er rip. Why not save a few bucks, right? While it is possible to be successful with this strategy, there are a number of factors to consider when reusing yeast cake. Among others, these include:

  • Is the style of homebrew appropriate for the yeast being used? If pitching wort onto an existing yeast cake, the styles of the two beers should be relatively similar. Many American and English ale yeasts can be used interchangeably to produce a variety of ales, so you could probably get away with using an ale yeast to make another ale. The same thing with many of the European lager strains. The main exception is with very distinctive yeast strains,Shop Conical Fermenter especially those for Belgian ales and German hefeweizen. You’d be safe if reusing yeast cake from an English pale ale to ferment an American stout, but you obviously wouldn’t want to use a Belgian strain to ferment an English pale ale (though you may end up with a very tasty Belgian pale!).
  • How long has the beer been sitting on the yeast cake to be reused? The longer the beer has been sitting on the yeast, the greater the number of yeast cells that may be mutated or dead. Dead and mutated yeast cells can contribute off-flavors to your beer, so if you plan on reusing yeast cake, use one that has only been in primary for a short amount of time (7-10 days).
  • What was the gravity of the original beer? High gravity fermentations and the alcohol produced from them stress yeast more than lower gravity fermentations. And yeast stress leads to – you guessed it – off-flavors. You’d be better off pitching a high gravity wort onto the yeast cake from a low – to mid – gravity fermentation.
  • How hoppy was the original beer? Shop Liquid Beer YeastThe amount of hops in the first beer can influence the second. You generally want to pitch a hoppier beer onto a yeast cake from a less hoppy beer (e.g. pitch an IPA onto the yeast cake of a pale ale), otherwise you may end up with excessive hop bitterness or flavor.
  • What color are the two beers? As with hops and bitterness, the color of the first beer can influence the second one. To avoid a change in beer color, pitch a darker wort onto the yeast cake from a lighter beer. For example, pitch a stout onto the yeast cake of an amber ale.

Other issues that come into play when reusing yeast cake include accurately predicting the number of yeast cells being pitched and whether there was anyShop Temp Probe infection in the original batch. For these reasons, it may be worth starting with a batch of fresh beer yeast. If you really want to reuse yeast cake, consider harvesting and washing the yeast to reduce the impact of dead yeast cells, beer color, and bitterness, and then use an online calculator to get an estimate of how much yeast slurry to pitch into the second beer. And as always when working with beer yeast, practice impeccable sanitation techniques to avoid contaminating the yeast.
Have you ever pitched onto an old yeast cake? How did it work out?

—–
David Ackley is a beer writer, brewer, and self-described “craft beer crusader.” He holds a General Certificate in Brewing from the Institute of Brewing and Distilling and is founder and editor of the Local Beer Blog.

Spring Forward with These 3 Single Hop Beer Recipes

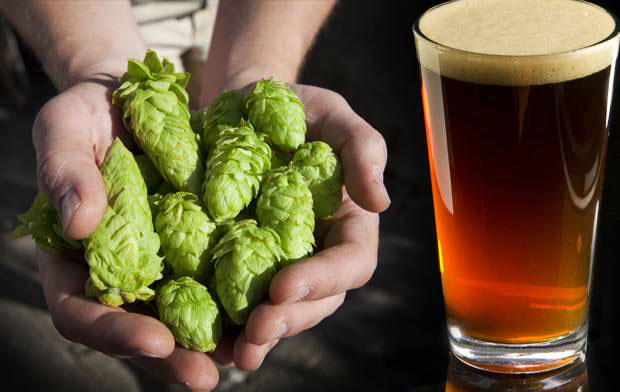
Making Single Hop Beer RecipesAs temperatures rise, spring offers a great time to transition away from malty stouts and porters and towards beers that suggest the beginnings of the growing season. As an ode to the flowers and the trees starting to bloom this month, consider paying tribute to every brewer’s favorite flower: the hop with these 3 single hop beer recipes!
If you’re a hop aficionado, you’ve likely come across some single hop beers in your drinking explorations. Making beers that showcase a particular hop variety is a great way to learn the strengths and weaknesses of different hops. The warmer temperatures of spring suggest a lighter, paler beer, the perfect backdrop for experimenting with different hops.

Choosing Hops for Your Single Hop Beer Recipes

If you’ve shopped around for hops before, you’ve probably noticed that they are often labeled bittering hops, flavor/aroma hops, or dual-purpose. Single-hop beers will give you the chance to put these conventions to the test.
Super alpha hops have been developed to highlight their bittering potential, but you might be surprised how many of them work well aromatically. Bravo, Magnum, and Simcoe come to mind. Use restraint with these hop varieties in your single hop beer recipes – a little can go a long way.
Conversely, low alpha and noble hops are often celebrated for their aroma characteristics, but some brewers find that they provide a clean bitterness. East Kent Goldings is a versatile hop in this regard, often used as the single hop in traditional English beer styles.

Tips For Formulating Your Single Hop Beer Recipes
Of course, there are no hard and fast rules for single hop brewing, but you might want to consider the following as you develop a recipe for your single hop brew:

  • Select a beer style that really showcases the hops. A golden ale, pale ale, or IPA are often good choices.
  • Develop a simple grain bill that won’t cover up or distract from the hops. Try a base malt plus small amounts of one or two specialty grains for color and/or flavor.
  • Choose a clean yeast strain, like Wyeast 1056, that will let the hops shine through.
  • If brewing multiple single hop brews, consider using a constant base recipe, simply changing the hops for each one.
  • You may wish to brew small batches to get the most experimentation out of your raw materials.
  • Don’t be afraid to throw all these suggests out the window – feel free to try a single hopped stout or Belgian IPA!

Single Hop Beer RecipesShop Hops
Ready to try some single hop brewing? Give one of these recipes a try!

East Kent Bitter
(five-gallon batch, all-grain)
Specs
OG: 1.045
FG: 1.011
ABV: 4.4%
IBUs: 31
SRM: 9
Ingredients
8 lbs. Maris Otter malt
1 lb. Crisp Crystal 45L
1 oz. East Kent Goldings hops at :60
.5 oz. East Kent Goldings hops at :30
.5 oz. East Kent Goldings hops at :15
1 oz. East Kent Goldings hops, dry hopped for 5 days
Wyeast 1099 or Safale S-04 Shop Barley Grains

Bravo IPA
(five-gallon batch, extract with specialty grains)
Specs
OG: 1.058
FG: 1.014
ABV: 5.7%
IBUs: 51
SRM: 8
Batch Size: 5 Gallons
Boil Volume: 6.5 Gallons
Ingredients
6 lbs. light dry malt extract
1 lb. Munich 10L malt
.5 lb. Caramel 40L malt
.33 oz. Bravo hops at :60
1 oz. Bravo hops at :15
.67 oz. Bravo hops, dry hopped for 5-7 days
Wyeast 1056: American Ale Yeast or Safale US-05 Shop Bazooka Screen

Amarillo Wheat Ale
(5-gallon batch, extract with specialty grains)

Specs
OG: 1.053
FG: 1.013
ABV: 5.25%
IBUs: 23
SRM: 5
Batch Size: 5 Gallons
Boil Volume: 3 Gallons

IngredientsShop Hop Bags
3.3 lbs. light liquid malt extract
3.3 lbs. wheat liquid malt extract
.5 lb. torrified wheat
.5 lb. caramel 10L malt
.5 oz. Amarillo hops at :60
1 oz. Amarillo hops at :15
1 oz. Amarillo hops, dry hopped for 7 days
Wyeast 1056: American Ale Yeast or Safale US-05
Do you have any favorite single hop beer recipes? We’d love you to share in the comments below!
—–
David Ackley is a beer writer, brewer, and self-described “craft beer crusader.” He holds a General Certificate in Brewing from the Institute of Brewing and Distilling and is founder and editor of the Local Beer Blog.
How Much Wine Yeast Do I Use?

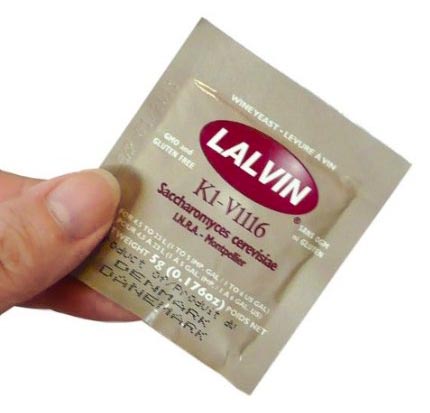
Packet Of Wine YeastI completed a wine recipe for 1 gal of Dandelion Wine. My Question is: The packet of wine yeast I received was enough for 5 gals of wine. In my logic I decided to just use on 1/5 of the yeast. I poured all the yeast out on a dish and divided it into 5 equal portions. Then I used just 1/5 of the yeast for my 1 gal of wine. Was this correct? I don’t know how much wine yeast to use.
Thanks,
Bill
—–
Dear Bill,
Thank you for this great question on how much wine yeast to use. You’ve done what many home winemakers have done. It make perfect sense and is very logical. However, the amount of wine yeast you should use is one whole packet, even if you are just making 1 gallon of wine. There are a couple of reasons for this:
What you are adding to the wine is not an amount of wine yeast as much as you are adding a starting colony of yeast. The wine yeast in the packet represents the minimum number of yeast cells recommend to start a viable, active fermentation, regardless of batch size. When adding a packet of yeast to 5 or 6 gallons of wine, the yeast will typically multiply to around 100 to 150 times what you start with.
Shop Wine YeastIn the case of a one gallon batch of wine, the yeast will multiply to many times its original size, but not quite as many times as it does when pitched into a larger batch. The yeast will reproduce itself into great enough numbers to complete the job at hand.
So, when you add a whole packet of wine yeast to 1 gallon of wine, you are not adding too much yeast. You are simply adding the minimum amount required to support a healthy, active fermentation. Adding less then a packet could result in a slow starting fermentation that will take extra time to finish the job. It may also over-work the yeast which can result in off-flavors.
There is also the issue of what to do with the rest of the wine yeast anyway. These packets of yeast are packaged under sterile – not food-grade – conditions. They are sealed with nitrogen gas to maintain this sterile level of freshness while in the package.
Once they are opened, they are no longer sterile. The seal has been compromised. So, storing an opened package of wine yeastShop Wine Making Kits for any length of time is really not a good idea, particularly when you weigh it against how much a packet of wine yeast costs.
So the answer to the question: “how much wine yeast to use?”, is very simple. Always use the whole packet up to 5 or 6 gallons. If you are making more wine than this, add a second packet.
Happy Wine Making,
Ed Kraus
—–
Ed Kraus is a 3rd generation home brewer/winemaker and has been an owner of E. C. Kraus since 1999. He has been helping individuals make better wine and beer for over 25 years.

5 Beer Recipe Kits Perfect For Beginners

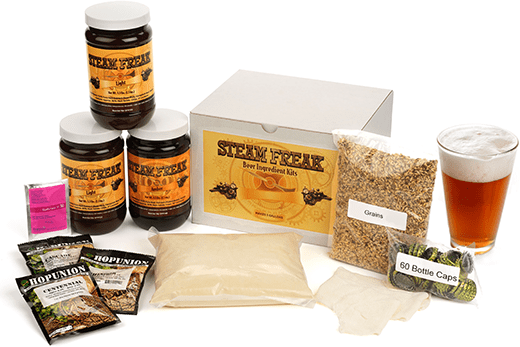
Steam Freak Ingredient KitsHomebrewing is not especially difficult… at least it doesn’t have to be. For the beginning homebrewer, extract beer recipe kits are the easiest way to get into the hobby, requiring the least amount of time and energy and still resulting very remarkable beer.
As an absolute beginner, try to focus on the most important steps (like cleaning and sanitation) and just try to get the process down. As you continue to brew, you’ll have plenty of opportunities to try new and exciting brewing methods.
To get you started on that first batch, here are five excellent, easy-to-brew beer recipe kits:

  1. Munton’s Connoisseur Kit: India Pale Ale 
    IPAs are one of most popular styles of craft beer today, delighting hop heads from coast to coast. With this beer recipe kit, the hoppy bitterness is already present in the malt extract, so there is no need for a 60-minute boil with multiple hop additions. Add 2.2 pounds of dried malt extract to make a full 5-6 gallons of beer. Yeast packet included.
  1. Steam Freak: “Steam Stoker” American Stout
    Stouts, with their robust, roasted flavor, are very forgiving for the beginning homebrewer. Steeped specialty grains offer flavors of caramel, chocolate, and coffee, supported by bitterness and spicy, floral hop flavor from Nugget and Willamette hops. Steam Freak beer recipe kits include caps, priming sugar, yeast, and complete instructions to guide you through the brewing process.
  1. Munton’s Connoisseur Kit: Nut Brown Ale
    Many brewers start with a brown ale. It’s the perfect middle of the road beer to break into brewing. The Nut Brown Ale is a malt-forward, English-style beer with a subtle nutty flavor. Just like the IPA above, this one is super-easy to brew.Shop Home Brew Starter Kit
  1. Brewer’s Best: American Pale Wheat
    This beer recipe kit is as easy to make as it is easy-drinking. It produces a remarkable wheat beer with a beautiful light-copper cooler. It’s moderately hoppy from a combination of Cluster and Liberty hops, with an enjoyable, crisp finish.
  1. Steam Freak: Samuel Smith Taddy Porter Clone
    This beer recipe kit replicates the popular Samuel Smith brand of robust porter. Steep the specialty grains for improved body and flavor, then mix in the dark liquid malt extract. English hops (included in the kit) are boiled to provide bitterness, flavor, and aroma as characteristic for the style.

Looking for a beginner homebrewing equipment kit? Our Steam Freak Beermaking Starter Kit has everything you need. This starter kit is the ultimate way to start brewing.
—–
David Ackley is a beer writer, brewer, and self-described “craft beer crusader.” He holds a General Certificate in Brewing from the Institute of Brewing and Distilling and is founder and editor of the Local Beer Blog.
Springtime Is A Great Time For A Cherry Wine Recipe

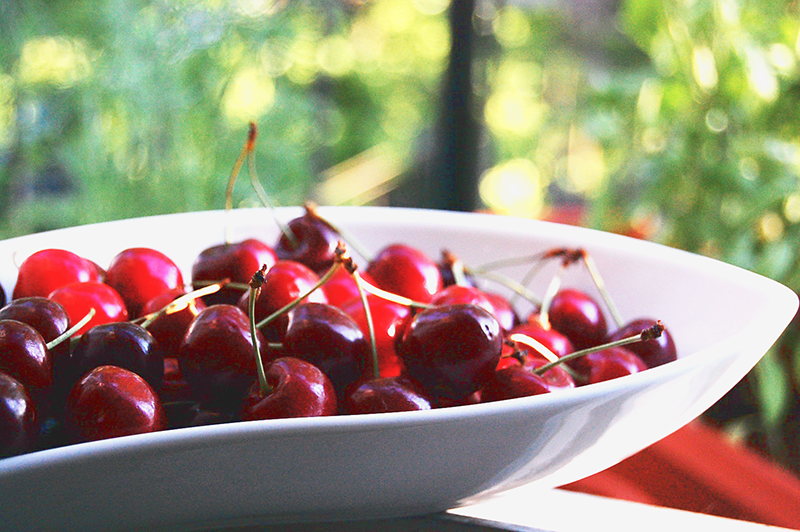
Cherries for making cherry wine.One of the most rewarding wines I’ve ever made was a sweet cherry wine. In general, cherry wine tends to be rich and robust in its overall character. The tartness is mellow from the malic acid that dominates the cherry family. The tannins are firm giving the wines made with it a wonderful structure and body.
The one I made a couple of years ago from the sweet cherry wine recipe below turned out exceptional. It took a few months to age, but once it came around, turns out, it was well worth the wait.
The cherry flavor came through nice and fruity and lingered into a rich, earthy aftertaste. It had layers of flavor that you do not always expect in a fruit wine. Some of this I attribute to the brown sugar called for in this wine recipe. Some of it I attribute to the fruit acids. The Lalvin RC-212 that was used in this cherry wine recipe could have helped out in this department, as well.
Shop Fruit Wine BasesSince spring is here it won’t be long before cherries will be in full-swing, so I thought this would be a great time to share it on the blog. The cherries you use can make a difference. As its name implies, you want to be sure to use sweet cherries as opposed to sour cherries. According to my notes, I used a mix of Bing and Lambert cherries, but there are many other varieties of cherries that I’m sure would work.

Sweet Cherry Wine Recipe
(Makes 5 Gallons)
18 lbs. Sweet Cherries (pitted)
9 lbs. Cane Sugar
3 lbs. Brown Sugar
1 tbsp. Yeast Energizer
Pectic Enzyme (as directed on the package) Shop Campden Tablets
2-1/2 tsp. Tartaric Acid
2-1/2 tsp. Citric Acid
1 Packet Lalvin RC-212 Wine Yeast
10 Campden Tablets (5 before fermentation, 5 before bottling)

This is a fairly straightforward sweet cherry wine recipe, so for the most part all you need to do is following the basic 7 wine making steps on our website. The only thing different that you should take note of is that the cherries need to be pitted. You do not want the pits in with the fermentation. Also, you do not want to over process the cherries. This can cause the wine to be too bitter. Cutting the cherries in half as you pit them is sufficient. If you are using a cherry pitter, all you need to do is lightly crush the cherries after they are pitted.
I also like to pre-dissolve the brown sugar whenever it’s called for in any wine recipe. This can easily be done by taking 2-parts water and 1-part brown sugar and heating it on the stove until liquid. You will need to stir continuously at first so that the sugar does not burn on the bottom of the pan. Shop Wine Making Kits
Even if you only make 2 or 3 batches of wine each year, I would urge you to give the sweet cherry wine recipe a go. It makes a remarkable wine that it hard not to like. It’s also pretty easy to make. And as always, you can make it as sweet or as dry as you like, by back-sweetening the wine to taste.
Happy Wine Making,
Ed Kraus
—–
Ed Kraus is a 3rd generation home brewer/winemaker and has been an owner of E. C. Kraus since 1999. He has been helping individuals make better wine and beer for over 25 years.

Immersion Wort Chiller: 5 Steps For Proper Care

Immersion Wort ChillerYou may have read when learning how to use you immersion wort chiller that there’s no need to sanitize your it since you’re dipping it in near-boiling wort. And this makes sense. I usually do little (if anything) to clean my immersion wort chiller before using it to chill my wort. I usually give it a good rinse after use and let it hang dry til the next time I use it. But I’ve been wondering – is this really the best way to care for an immersion wort chiller? Are there reactions I should be worried about or routine maintenance I should be doing?
Let’s explore the topic of how to care for an immersion wort chiller.
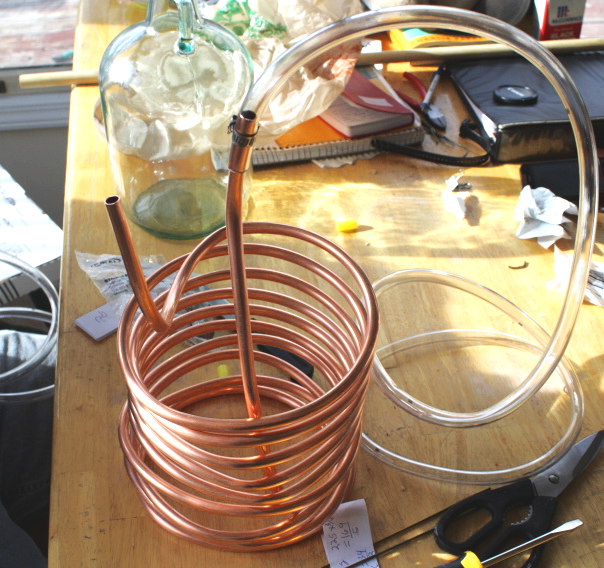
To understand the requirements for maintaining immersion wort chillers, we need to understand their design and what they’re made of and how they work. Most wort chillers are made of copper, though you will encounter wort chillers made from stainless steel. They’re basically a copper coil with vinyl hoses on each end. Some wort chillers can use up to 50 ft. of coil. To rapidly chill your wort, you dip the wort chiller in the wort at the end of the boil, then run cold water through the chiller. As the water passes through the chiller, heat is transferred through the copper coil and pulled away by the water, which can then go down the drain or into your yard or washing machine.
My concern was mostly with the copper portion that comes in direct contact with the wort. Copper is used for wort chillers because it is an excellent material for conducting heat. But copper, though a key part of the human diet, can also be toxic in high amounts.
Wort Chiller On A TableAs it turns out, copper develops a protective oxide layer through repeated use. Though a shiny copper coil would look pretty, it’s actually preferable for it to be a dull copper color. This oxide layer helps prevent reactions with your wort. Luckily, even if it were exceptionally clean, the copper wouldn’t react in the wort in such a way to cause any concern. Just leave that oxide layer in place to be safe. This goes for any style of wort chiller, whether it be a counterflow chiller or plate chiller.
What you should keep an eye out for is a blue-green or black build-up on your copper wort chiller. The blue-green layer is called verdigris (it’s what makes the Statue of Liberty green) and it is toxic. That’s not something you want in your homebrew!Shop Wort Chillers

So what’s the best way to care for your immersion wort chiller?

  1. Rinse the wort chiller of protein and hop debris after every use. In most cases, this will be all that is needed to clean your chiller.
  1. Drain the water from inside the immersion wort chiller after every use. This will help prevent corrosion inside the wort chiller.
  1. Allow the wort chiller to air dry between uses. Don’t soak it overnight.
  1. To be safe, don’t reuse the chilling water for cooking or drinking. Since you can’t see inside the chiller, you can’t be sure whether there’s any verdigris inside.
  1. If you see any blue-green verdigris or heavy oxidation (black), clean your immersion wort chiller by wiping it down with a rag soaked in vinegar. It’s not recommended to use bleach, hydrogen peroxide, or oxygen-based cleaners, because these will just accelerate blackening.Shop Brew Kettles

As it turns out, caring for your immersion wort chiller is pretty easy!
If you’d like to learn more about caring for your metallic homebrew equipment, I highly recommend John Palmer’s Metallurgy for Homebrewers article in Brew Your Own magazine.
—–
David Ackley is a beer writer, brewer, and self-described “craft beer crusader.” He holds a General Certificate in Brewing from the Institute of Brewing and Distilling and is founder and editor of the Local Beer Blog.

Dandelion Wine Recipe: Take Back Your Yard!

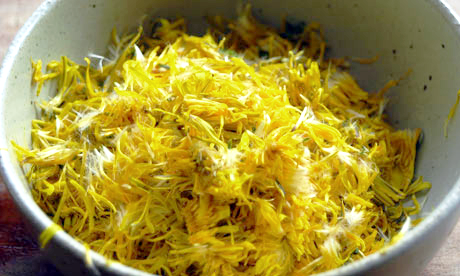
Dandelion petals for dandelion wine recipe.How about making some dandelion wine with the dandelion wine recipe below?
Most of the changes that spring brings are well received, like: warmth, sunshine, longer days, but there are a few changes that are not as welcomed. For most, the dreaded dandelion falls into this latter category. That’s why for some, making a bit of dandelion wine might strangely feel like a bit of revenge. Below is a dandelion wine recipe to help exact your revenge.
Dandelion wine is one of those traditional wines that has long served as a symbol of country winemaking – that classic wine creation that comes from the little ol’ winemaker everybody knows. Even though dandelion wine has a deep-rooted past in American culture, there are plenty of home winemakers still making it today and enjoying every bit of it.
So, what does dandelion wine taste like, you ask? This dandelion wine recipe makes a light-bodied wine with a beautiful yellow color. It’s flavors are herbal and muddled with an incredible bouquet that is bright and full of herbs and flowers.Shop Fermenter
The trick to making a good dandelion wine is to use the dandelion petals, only. Stay away from any of the green. The greens will add a vegetable-like character to the wine that will seem foreign and out of place.
Spring is the perfect time to make some dandelion wine, so here’s a 5 gallon dandelion wine recipe to get you going. It’s not that different from other country wine recipes. The types of ingredients are basically the same. A double-shot of nutrient is needed to make up for the lack of nutrients that you would normal get when making a wine from fruit. Plenty of acid blend is need as well for the same reason. Dandelions are not high in nutrients or acid.
You can vary the amount of dandelion petals quite a bit without affecting the rest of the dandelion wine recipe, but as a warning, adding to many petals could give you a wine the has a very hard time aging out into something you’d really want to drink. More petals is not necessarily better. While the wine recipe asks for 6 quarts, you could reasonably go up to 10 quarts.
Shop Yeast Nutrient
Dandelion Wine Recipe
(Makes 5 Gallons)

Making this dandelion wine is pretty straight-forward. You will want to be sure that the dandelions are herbicide and pesticide free. For this reason it is best to Shop Wine Making Kitspick them from an area you are familiar with. Once you have petals together, you will want to wash them in cold water – remove any ants or other insects – then blanch them by pouring boiling water over them and letting them steep in the water for 5 minutes. Don’t use any more boiling water then necessary. Be sure to use all the water from the blanching in the dandelion wine recipe, itself, as part of the 5 gallons.
Once you’ve gotten this far you can use the 7 Easy Steps To Making Wine as the instructions for making this dandelion wine recipe.
Anyone else have a dandelion wine recipe they’d like to share? Just leave it in the comments below!
—–
Ed Kraus is a 3rd generation home brewer/winemaker and has been an owner of E. C. Kraus since 1999. He has been helping individuals make better wine and beer for over 25 years.

Home Brewing With Hops: A Simple Resource Guide

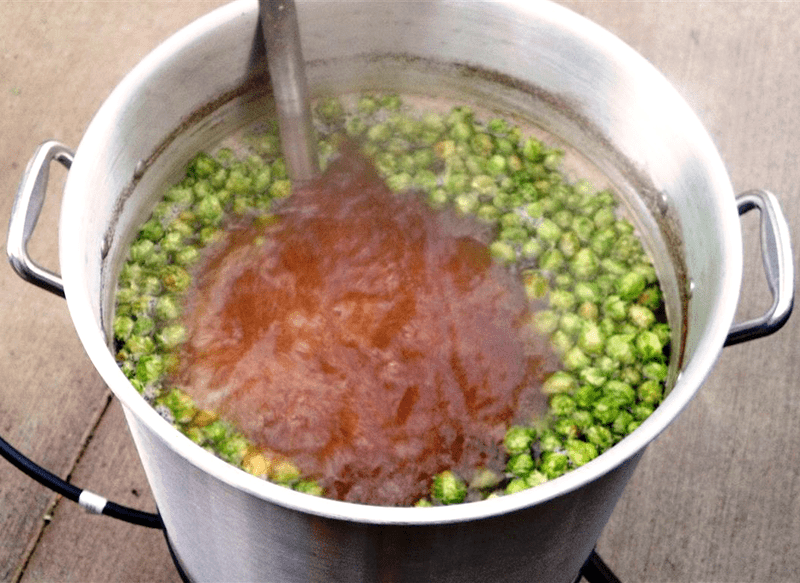
Beer Wort Boiling HopsWithout hops, most beers would be unrecognizable. Hops are both a preservative and a bittering agent, and their oils are responsible for much of the flavor and aroma found in beer. Whether you prefer a malty beer or you’re a full-blown hop-head, home brewing with hops is a critical part of making beer at home.
Here are a number of resources to get you started on your journey of learning all about home brewing with hops:

About Hops

  • The Anatomy of the Hop – Hops, as used in homebrewing, are the flower of the humulus lupulus This post explains what it is about the hop flowers that make them so valuable to brewers.
  • What are Noble Hops? – You’ll often hear the term “noble hops” if you enjoy brewing traditional beers from Europe. Learn what makes these kinds of hops so high and mighty.Shop Hops
  • A Quick Guide to American Hops – What makes American hops different from other hops? What are some popular American hop varieties you can use in your American IPA, American pale ale, or American stout?

About Hop Bitterness

  • How to Calculate the IBUs of Your Homebrew – International Bittering Units (IBUs) are a measurement of the bitterness in beer. It’s a factor of how much alpha acid is extracted and isomerized into the wort.

About Hop Flavor and Aroma

  • Understanding Hop Oils – Hop oils are the seemingly magical ingredients that give beers a wide range of flavor and aroma characteristics, from citrus and pine, to grapefruit and herbal. Learn more about hop oils and how to maximize their contribution to your homebrew.Shop Bazooka Screen
  • How to Dry Hop in a Homebrew Keg – Some homebrewers like to dry hop right in the keg. Learn how to do this so you don’t end up with a bunch of hops in your pint glass.

Shop Steam Freak Kits
Hoppy Extract & Partial Mash Beer Recipe Kits

 
Hoppy All-Grain Beer Recipes

Hoppy Home Brewing ResourcesShop Home Brew Starter Kit
Want to learn even more about hops? If after mastering the topics above you still want to learn more, I suggest the following:

Is there something you want to learn about home brewing with hops that isn’t covered here? Share in the comments below!
—–
David Ackley is a beer writer, homebrewer, and self-described “craft beer crusader.” He holds a General Certificate in Brewing from the Institute of Brewing and Distilling and is founder of the Local Beer Blog.

Using A Hydrometer To Adjust Wine Sweetness

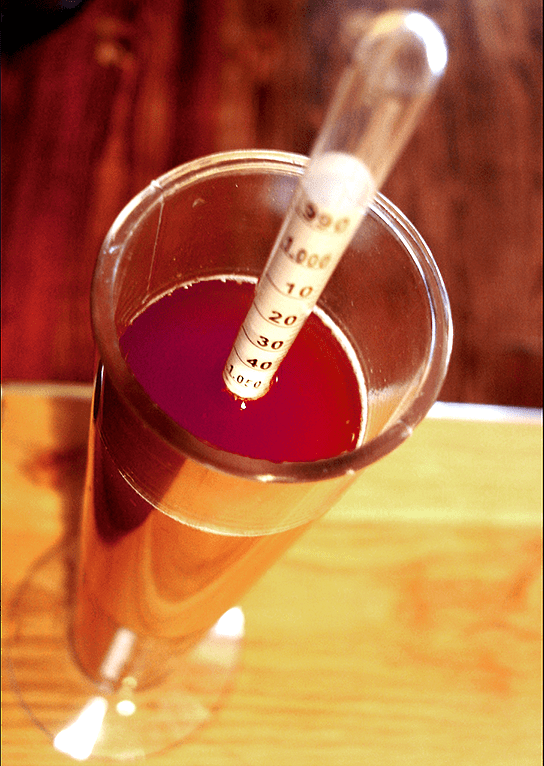
Adjusting Wine Sweetness With HydrometerMost wine recipes give a SG [specific gravity] for starting fermentation and at the completion of fermentation. My wine usually ends up dry, so when I bottle it I usually stabilize it and back-sweeten most of it. I’ve been just adding sweetener a little at a time and tasting until I think it is about right, but that’s a little hard to hit and very unscientific.
What about using a hydrometer to adjust wine sweetness and is there an approximate hydrometer reading for what they call dry, semi-dry and sweet?
What about white table wines, red table wines, sweet table wines, dessert wines etc do all of these different wines fall under the same category of dry, semi-dry or sweet?
Thanks
Glen L. – IA
—–
Hello Glen,
While there are certain ranges on the specific gravity scale that one could consider sweet verses dry, these ranges are so narrow on the typical wine hydrometer that it would be very hard to accurately apply them to sweetening a wine. In fact, I could not really tell you what the ranges would be because I have never paid that much attention to them.

There are also a couple of other reasons why using a hydrometer to adjust wine sweetness is not all that practical:

  • Shop Wine ConditionerYou could have two different wines sweetened to the same specific gravity reading and they could have very different impression of sweetness. What is coming into play is how the other flavor components of the wine work with the sugar to form the wine’s character. As an example, if the wine is rich and earthy as opposed to crisp and fruity, then more sugar may be needed in the former case than in the later wine to achieve the same impression of sweetness. This is all subjective, of course, but the principle rings true.
  • A wine’s body or lack of body could cause two wines that taste equally dry to have two different readings on the wine hydrometer. Body raises the specific gravity without raising sweetness. In this case, if you have a full-bodied wine and a thin, crisp wine and you sweeten them both to the same reading on the specific gravity scale the hydrometer, the full-bodied will have less residual sugar than the thin crisp wine. Part of the SG reading is being made up with body, not sugar.

So as you can start to see, depending on hydrometer readings to adjust your wine’s sweetness may not be as accurate as just tasting the wine. After all it is how the wine tastes to us humans – and more specifically, you – that matters most, not what the hydrometer says.
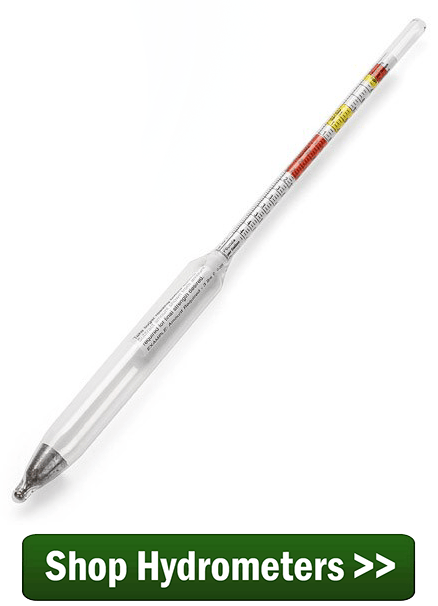
Shop HydrometersThe wine industry does use a sweetness scale to give customers a clue as to how sweet a wine might be before they purchase it. The scale goes from 1-9 with 1 being the driest, and it is based on percentage of sugar by weight in the wine. While this scale may be used as a marketing tool, I find it hard to imagine any commercial winemaker setting out to target a particular number, rather they would do just as you are doing – going by how the wine tastes and how sweetness is working in concert with the wine’ other characters.
Happy Wine Making,
Ed Kraus
—–
Ed Kraus is a 3rd generation home brewer/winemaker and has been an owner of E. C. Kraus since 1999. He has been helping individuals make better wine and beer for over 25 years.

Best Beer Styles for Spring Homebrewing

Spring Homebrewing Season Beer StyleAfter a long, dreary winter, I for one as a homebrewers can’t wait to get out of the house in the spring time and fire up the brew kettle. What do homebrewers brew in the spring? Generally some lighter-bodied beers that exemplify the qualities of the spring season. As if to salute the growing season, these beers tend to showcase the lively flavors of floral hops and fruity yeast varieties.

Below are some of the best beer styles for brewing this spring:

  • SaisonSaison is a dry, Belgian-style farmhouse ale typically characterized by fruity and spicy flavors from the use of estery Belgian ale yeast and spices like coriander. Many versions use specialty grains, like oats, wheat, and rye, and can range from a sessionable 4.5% ABV up to 7% or higher. Sometimes honey or sugar are added to help achieve a dry finish. High carbonation and sprightly acidity make saison a supremely refreshing beer to brew in the spring.
  • Bière de Mars – It’s not too late to pull off this high-gravity cousin of the saison this spring. Bière de Mars is a malt-forward Franco-Belgian ale with notes of toffee, dry, fruity flavors, and minimal hop aroma. Like saison, Bière de Mars may utilize adjunct grains, sugar, and spices to achieve the appropriate style characteristics. It’s a no-brainer for spring time brewing.Shop Beer Recipe Kits
  • Maibock – Maibock, or “May bock”, is Germany’s answer to spring weather. It’s a higher-gravity lager just like traditional bock, but paler and a little more bitter. Check out Growler Magazine for a wonderfully simple maibock recipe.
  • Rye Pale Ale – Like barley, rye is a cereal grain that can be used in making beer. It’s often added in smaller doses to contribute a subtle spicy notes to pale ales, IPAs, and sometimes Beglian-style beers. Try this clone of Terrapin Brewing Company’s Rye Pale Ale.
  • Tripel – Belgian Tripels are the true champagne of beer. Bright, golden, effervescent, with notes of fruit and spice, triples are high-gravity Trappist-style beers that showcase the complexity of Belgian ale yeast. Try a Belgian Tripel recipe kit or try this Westmalle Tripel clone when brewing this spring.
  • Belgian WitbierShop Homebrew Starter KitBelgian wit, or white beer, is the perfect beer for drinking the spring sunshine. Brewed in the style of Hoegaarden or Allagash White, witbier is a sessionable beer at just 4-5% ABV. The color is very pale, often cloudy and creamy due to the use of oats and wheat. Citrus peel and coriander make the beer bright, fragrant, and refreshing. Try the Brewer’s Best Witbier kit or Blue Noon, a clone of the ever-popular Blue Moon.

These are some of my favorite beers for brewing in the spring – what’s your favorite spring time brews?

—–
David Ackley is a beer writer, brewer, and self-described “craft beer crusader.” He holds a General Certificate in Brewing from the Institute of Brewing and Distilling and is founder and editor of the Local Beer Blog.