Are Older Wines Better Wines?

bottles of wine in a cellar
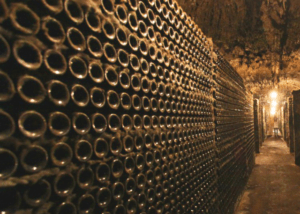
When you see pictures of French wine caves and elaborate wine cellars in the homes of movie stars, it’s easy to get the impression that old wines are better than wines that have been recently bottled. But the truth isn’t nearly so cut and dry. In fact, many wines are at their best in their first few years, and even the best-aged wines reach a point where time diminishes their flavor rather than enhancing it. The secret to an ideal experience is knowing which types of wine actually do taste better with age and how long to leave them in the bottle.
Wines That Get Better with Age
For some wines, aging in the bottle softens them and allows their full complexity to be enjoyed. Most, but not all, of these are full-bodied reds. According to Better Tasting Wine, the following wines should be allowed to age in the bottle for maximum enjoyment:

  • Old World Cabernet Sauvignon (Bordeaux, Meritage, California wines made in the French style) — 20+ years
  • French Merlot (St. Emilion, Pomerol) — 15 to 20 years
  • Syrah (Shiraz) — 5 to 15 years
  • Riesling — up to 15 years
  • White Bordeaux (made from Semillon) — 20+ years
  • Champagne (top quality) — 20+ years
  • Sauterne — up to 100 years

Wines to Drink Young
For purposes of wine, young is generally defined as five years old and younger. One of the most notable wines that are at its best as soon as it is bottled is the French Beaujolais Nouveau. The new vintage of this product of Burgundy, made with Gamay grapes, is released each year on the third Thursday of November to much excitement and headlines. However, Beaujolais isn’t the only wine that can be enjoyed to its fullest while young. Better Tasting Wine lists several types that are best when consumed in less than five years:

  • Pinot Noir
  • Red Zinfandel
  • Chardonnay
  • Sauvignon Blanc

So don’t worry if you don’t have the time or the space to age wines for decades. You can enjoy plenty of quality wines right out of the wine store. Salut!

Homebrewing Is Even Easier With Home Beer Kits

Beer Ingredient KitBrewing at home isn’t necessarily hard. You need fairly little homebrewing equipment, and there are many different malts and beer yeasts available to help you perfect your own beer recipe over time. But for those that are just starting out, finding all those different homebrewing ingredients and supplies can seem a bit intimidating; and it’s for this reason you can find home beer kits available.
These beer ingredient kits are created for individuals who are just starting out in brewing their own beer, and they’re created under the assumption that the individual has never even done it before. Included inside the box is everything from the hops to the malted barley grains to the malt extracts that you’ll need; you’ll find everything but the equipment! You can buy beer recipe kits in many different flavors and colors, all with different beer recipes. These can be extremely helpful when you’re just starting out making your own beer, and you’re not yet sure of what flavors you like.
Once you’ve tested out several different beer ingredient kits and are ready to start branching out on your own and experimenting, you can still go by what you’ve learned trying out the different kits. By having started with blends that you know are already tasty, you’ll have that foundation from which you can build your own. Of course you can always continue on using the beer recipe kits, and making great tasting beer!
When using beer ingredient kits, remember that you’ll still typically need to have basic beer-making equipment on hand, as only really the beer making ingredients are included in these recipe kits. There is another great blog post about this, The Minimum Equipment You Need To Brew Beer Yourself. If you don’t have the equipment yet, don’t worry too much about it as beginner homebrewing equipment kits are also often available. Using both types of beer kits can really boost the convenience factor of brewing your own beer, and leave you wondering why you didn’t do it sooner!

________________________________________________________

Read More About Beer Ingredient Kits And Other Homebrewing Topics,
FREE  EMAIL NEWSLETTER:


________________________________________________________

My Wine Smells Like Vinegar!

Vinegar Smell In Wine
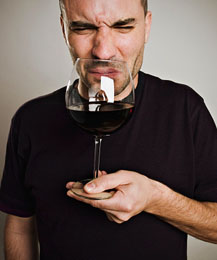
I took the stopper out of the carboy briefly to clean.  I noticed a vinegar smell!  Is the 6 gallons of wine junk?  Or should I sample to confirm?  Help!  Air lock may have gotten low !!!!!
Name: Danny V
State: WI
Hello Danny,
I guess my question to you is, does it really smell like actual “vinegar” or is it just an odd odor? I ask this because many times a person will smell something unusual in their newly fermented wine and immediately assume it to be vinegar.
In reality, a wine fermentation can put a lot of strange odors in a wine, but most of them are temporary and will leave during a siphoning (racking) of the wine or when sulfite is added to the wine. The SO2 gas from the sulfite will expel the odor.
With this knowledge at hand, if you still believe it to be vinegar, then sulfite such as sodium metabisulfite or Campden tablets, needs to be added to the wine, immediately. Vinegar is caused by a bacteria. The sulfite will kill the bacteria very easily. By doing this you can be assured that your wine will not become any worse.
As far as saving the wine or making it better, there’s really no hope. Vinegar is essentially a volatile acid with an Unagreeable taste and smell. The only way to remove it would require to heat the wine. This would allow the volatile acid to leave as a vapor, but would destroy the wine in the process.
In the future, not only is it essential that you keep the air lock from going dry, but it is also essential that the wine be treated with sodium metabisulfite to handily destroy the vinegar bacteria. A dose should be added 24 hour before the wine yeast and again, right after the fermentation has complete. A third dose should be added right before bottling the wine, as well. By doing these simple steps, you should never have to deal with vinegar again.
I would also suggest you take a look at the article, There’s Vinegar In My Wine!. This is an article on our website that goes into the subject matter in much greater detail. There you will learn more about what vinegar is, how to control it, and how to test for it in a wine.
Best Wishes,
Ed Kraus
———————————————————————————————————
Ed Kraus is a 3rd generation home brewer/winemaker and has been an owner of E. C. Kraus since 1999. He has been helping individuals make better wine and beer for over 25 years.

Why are Campden Tablets, Acid Blend, Yeast Nutrients and Pectic Enzymes so Important to Wine Making?

When you first start getting into wine making, you’re going to be recommended various brands of Campden tablets, acid blends, yeast nutrients and pectic enzymes. Before you can make an informed purchasing decision on any of these products, you’re going to need to know what they do in the first place. Here’s a brief rundown of why these ingredients matter:
Campden Tablets
Think of Campden tablets as your wine’s immune system. Campden tablets are used in the making of wine and other alcohols to inhibit the growth of wild yeast and to destroy unwanted bacteria in the wine. In short, these tablets prevent your wine from spoiling. While you do want certain yeast to grow inside your wine, allowing wild yeast free reign is a sure way to ruin your wine.
Acid Blend
Acid blend is actually a generic term; it can refer to anything from a blend of citric acids to a blend of tartaric or malic acids. Every brand will have its own acid blends that can be used to acidify your wine. This is necessary to create a balanced wine.
Yeast Nutrients
Yeast nutrients can help to ensure that your yeast thrives and produces the alcoholic content that you’re looking for. Yeast nutrients can be used to prevent a stuck fermentation, which is what happens when your yeast lacks the nutrients it needs and the wine can no longer ferment. Remember, your yeast is a living thing, and you won’t get the results you’re after if you don’t feed it.
Pectic Enzymes
Pectic enzymes, or pectinase, are a series of enzymes such as polygalacturonase, pectolyase and pectozyme. These enzymes can help to break down pectin. What this essentially means is that it helps to break down the plant matter and get a richer bounty of flavors from the grape, and it can help to break down the cloudy appearance that you see in some wines.
These four ingredients weren’t always used, but more recently, you simply don’t want to make wine without these products on hand to help you get the results that you’re after.
Check out our store for any winemaking ingredients you’ll need for your own homemade wine.

The Advantages Of Bottling Beer

Bottle Homebrew
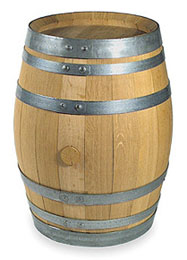
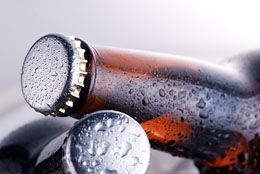
When it comes to storing your homemade beer, you’re going to need more than just a couple of pitchers. You’ll need to decide whether you’ll be bottling beer, or kegging beer, and both come with their own advantages.
One of the biggest advantages home brewers find with bottling their own beer is that initially, the cost of storage can be much cheaper. Rather than having to invest in a stainless-steel keg (or several, if you want to make different kinds of beer) beer bottles can be picked up more cheaply than kegs; and you can reuse them, saving you on cost, too.
Once you start brewing your own beer, you’ll also most likely want to give everyone a taste, and provide samples to all your friends and family. When the homebrew is sitting at home in a keg, you need to wait to have them over to do it. But when it’s bottled, you can take your own six pack with you the next time you go over, and even give it away as a gift.
Even home brewers that choose to keg their own beer sometimes still turn to bottling for certain types of beer. In cases such as Russian imperial stouts, or other beers that need to be stored for a long period of time before being consumed, brewers don’t always want to have a whole keg “on hold” that entire time. By placing this long-standing beer in bottles, it can be stored easily; while the beer that’s ready for consumption can be placed in the keg, and drank easily!
Definitely, both bottling and kegging your own beer come with their own advantages. But when you want to give your brew away, take it with you camping, or are just looking for the most affordable way to do it, bottling might be the best choice for you. Here’s a great blog post you might want to tak a look at on bottling your own homebrew, How To Bottle Your Beer.

________________________________________________________

Read More About Bottling Beer And Other Homebrewing Topics,
FREE  EMAIL NEWSLETTER:


________________________________________________________

3 Quick Wine Making Tips!

Wine Making Tips For Making Wine
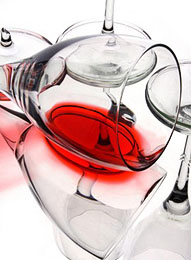
Home winemaking can be quite an investment in time and money, therefore it’s very important to be meticulous and careful throughout the entire process.  Of course, home winemaking is also quite a joy and is a wonderful hobby, and following a few important wine making tips will lower your chances of disaster in the bottle!
Below you’ll find some of the most crucial wine making tips that you should consider abiding by in order to maximize your chances of creating a delicious wine to enjoy or share:
1. Follow the instructions!
Unless you have been making wine forever and know the wine recipe so well you can recite it from memory, one of the most important wine making tips you should follow is to follow the wine making instructions!  Until you’re so comfortable with the wine recipe that the process becomes second nature to you, or you’re attempting to create a new wine you haven’t tried before, it’s important adhere to this wine making tip, to read and follow the directions, and know ahead of time the steps you’ll have to take to make a great wine.
2. Understand the stuff you’re putting into your wine!
Another great wine making tip is to understand the wine making ingredients that you’re using to make your wine.  Why do I need yeast nutrients?  What is the deal with this pectin enzyme?  If you’re just throwing ingredients in without understanding how they are contributing to the wine making process, it becomes very difficult to troubleshoot when things go unexpectedly.  If you follow this wine making tip and know the exact role of each wine making ingredient, you’ll have a better chance of saving a potentially trouble wine by adjusting the amounts of whatever ingredient is best in any situation.
3. Use clean, sanitary equipment!
You can ruin your wine immediately by starting the process in an unsanitary carboy or using other dirty wine making equipment.  A critical wine making tip is that you always use clean equipment throughout the entire home winemaking process.  Goodness knows what could be growing on a dirty piece of equipment.  This nasty stuff can infiltrate your wine, reacting with the compounds in the wine and creating undesirable and often unpalatable off-aromas and flavors.  There is a whole host of cleaning equipment and cleaning supplies available for you to purchase, so there is no excuse for being dirty and ignoring this wine making tip!
Here’s to hoping these tips will start you on the right foot toward producing a fantastic wine.  You can also read more wine making tips on this blog. Take a look at the the blog post, 101 Useful Tips For Making Your Own Wine.
———————————————————————————————————
Ed Kraus is a 3rd generation home brewer/winemaker and has been an owner of E. C. Kraus since 1999. He has been helping individuals make better wine and beer for over 25 years.

How Long Does Homebrewing Take?

Time To Brew Beer
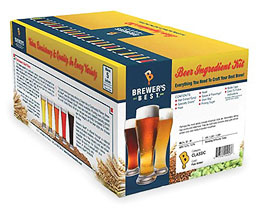
When people are first learning how to brew beer, one of their first questions is always, how long does the homebrewing process take? How long it takes to make the beer, and how long it will be before you can start drinking your homemade beer are two different things. But altogether, from the time you first start mixing your own beer, to the time you’re cracking open your first bottle, it should only be a matter of weeks.
The day you actually mix together your beer yeast, hops, malt extract, and other homebrewing ingredients to actually start making your own beer, you should probably set aside at least four hours to do it, as a first-timer. This will include the sterilization time beforehand and the cleanup afterwards; and it will also get shorter as you start brewing more of your own beer and becoming more experienced at it. But the first few times it can take an entire afternoon or more.
Once the beer has been mixed or mashed, it will then need to sit in a fermenter for about a week. This will give the beer its alcohol content, as well as a certain level of carbonation. You won’t need to do much during the fermentation stage, but you will during the bottling stage, which is next.
Bottling your own beer really only requires a siphoning hose, some beer bottles, bottle caps and a bottle capper, but it does also require about two to three hours of your time. For a 5 gallon batch of homebrew you will be bottling 50 to 55 twelve ounce beer bottles. It’s at this stage that many home brewers are the most impatient so, many choose to keg their beer, instead. This can take as little time as half an hour.
When you keg your beer you also won’t need to let it sit as long before drinking it. While beer needs to sit in beer bottles for a week or two before it reaches full carbonization, kegs can be carbonated in as little as a day.
All in all, from the time you start mixing your own special blend, to the time you’re enjoying a nice cold one, brewing your own beer should take anywhere from three to four weeks.
A great blog post that will give you a little more information on the homebrewing process is, The 3 Different Methods Of Homebrewing. There you will get a good overview of the three basic ways you can approach homebrewing as a beginner, and discover which is the best way for you.

Is Brewing at Home Really that Much Cheaper?

Homebrew Beer Ingredient KitMost people know that whenever you can do something yourself at home rather than just go out and buy it, it’s probably going to be cheaper. But is homebrewing one of those things? And if so, just how much money will you save?
First, consider that if you were to purchase a case of beer from the store, it will probably cost you at least a dollar a bottle and up. If you purchase a smaller pack, the unit price will also go up because manufacturers will typically provide small discounts the more you purchase at once. Those smaller packs can cost anywhere up to $2.00 or $2.50 a bottle.
Typically when brewing at home, you will make about five gallons of beer at a time, which is 54 bottles of beer. The amount you spend on the actual homebrewing ingredients for the beer will vary depending on the kind of beer you want to make; but typically home beer kits can cost between $30 for making a light American-style Pilsner to $60 for your heaviest of Imperial IPA’s. That means that every bottle of beer you make yourself will cost anywhere from $0.56 to $1.12 per bottle. And for those that are keeping track, that’s half the cost of even the best-discounted cases of beer you’ll find in any store.
Making your own homebrew with a homebrew ingredient kit will always be a cheaper option than buying a comparable beers at the store, but there are much bigger advantages to brewing yours too. Namely, the sheer satisfaction you’ll feel the first time you crack open a bottle of your very own blend – and every time after that, too. While there are many cost-saving benefits to brewing your own, home brewers quickly forget them after realizing all the other benefits that go along with it! So if you want to save a buck, okay brew some beer, but if you want to have some great tasting beer and have some fun in the process, okay brew some beer!
Here’s another blog post that will help you figure out how to get started: The Minimum Equipment You Will Need To Brew Beer Yourself. The post talks about the homebrewing equipment you will need to get you going.

________________________________________________________

Read More About Beer Ingredient Kits And Other Homebrewing Topics,
FREE  EMAIL NEWSLETTER:


________________________________________________________

Keeping Your Oak Barrel Sanitized: Quickly And Easily

Toast Oak Wine BarrelHi. I have a quick question. I made a Barley Wine that I let condition in an new Toasted Oak Barrel for 6 months then another 4 in bottles. It is fantastic stuff. Love it. I wanted to know how long I can leave Campden tablets dissolved in water to clean the oak barrel. Can I leave it in there until I use it again…what are your thoughts? Thanks
Name: Fernando Durand
State: FL
Fernando,
If I’m understanding you correctly, you want to know how long you can leave a sulfite solution in the oak barrel without having to replace the solution between batches of Barley Wine. This is a great question that I’d love to answer.
First it is important to point out that when using Campden tablets, sodium metabisulfite, or any other kind of sulfite with water, you also need to add an acid of some type or the sulfite will not be an effective sanitizer — preferably citric acid. The acid is what causes the sulfite in the liquid to be free and not become bound to the water, making it innocuous.
If you are using using a sulfite in a crystal powder form such as sodium metabisulfite or potassium metabisulfite, you will want to add two teaspoons of it for each gallon of solution. You want to use enough solution to fill the oak barrel completely. Along with the sodium metabisulfite you will add 1 teaspoon of citric acid per gallon, or half the amount of the sodium metabisulfite.
It you are using Campden tablets, the you will want to use 16 tablets for each gallon. You still will want to add the 1 teaspoon per gallon of citric acid as well to the oak barrel. Be sure to crush the Campden tablets thoroughly before attempting to dissolve it into the water.
Now going back to you original question, how long is this solution good for? The short answer is 6 month. For any time longer than this, you will need to replenish the sulfite in the solution. The citric acid will still be fine. No more needs to be added. But every 6 months a full dose of either Campden tablets, sodium metabisulfite or potassium metabisulfite needs to be added to the solution in the oak barrel.
Happy Winemaking,
Ed Kraus
———————————————————————————————————
Ed Kraus is a 3rd generation home brewer/winemaker and has been an owner of E. C. Kraus since 1999. He has been helping individuals make better wine and beer for over 25 years.

What's The Best Way To Add Sulfite To A Wine?

Sodium MetabisulfiteWhen racking [siphoning wine] I’d like to add 1/4 teaspoon of sulfites. What is the best method to do this? Should I add and mix the sulfites in the carboy before transferring it to the empty one to protect it from the oxygen exposure, or put the sulfites in the empty carboy so the wine will mix with it when being received?
Name: Roger C.
State: Connecticut
Roger,
I don’t know as it’s too critical either way. The important thing is that the the sodium metabisulfite gets dissolved complete and blended thoroughly throughout the wine.
The way I like to add winemaking ingredients such as the sodium metabisulfite, yeast nutrient, acid blend, etc., is to take a quart or so of the wine or wine must and dissolve the winemaking ingredient into it. Then blend the quart back into the rest of the wine batch.
It is easier to determine when the particular ingredient has dissolve completely in a smaller sample. Secondly, it is quicker to get something like sodium metabisulfite to dissolve in a quart than it is 5 gallons. In a quart you can be assured that when you agitate it in any way, that all the winemaking ingredient is responding by dissolving. In 5 gallons when you stir the batch you are usually only affecting some of the dose. It takes more effort and more time to do it this way.
Once I know if that the sodium metabisulfite or whatever has completely dissolve in the quart sample, I then blend it back into the rest of the batch. You don’t have to worry about dissolving any more. You are just worried about getting the quart sample evenly blended through out the wine.
Having said this, to answer your question more directly, you could take a quart of the wine while it’s siphoning and dissolve the sodium metabisulfite. Then pour it into the new carboy. You could do all of this while five gallons of wine is still siphoning.
Another blog post that is somewhat related to this subject is When Do I Add Campden Tablets To My Homemade Wine. I goes over a little bit about know how much sulfite to add to a wine throughout the wine making process.
Happy Winemaking,
Ed Kraus
———————————————————————————————————
Ed Kraus is a 3rd generation home brewer/winemaker and has been an owner of E. C. Kraus since 1999. He has been helping individuals make better wine and beer for over 25 years.