How to Make Spent Grain Bread

Spent Grain Bread Made From Recipe
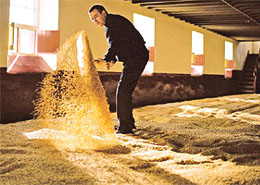
Many homebrewers have looked at the pile of spent grains after their mash and wondered, “Isn’t there something I can do with all these spent grains?”
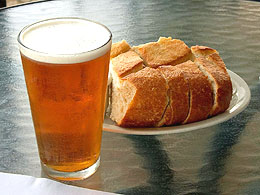
Well in fact, there is! In addition to composting your spent grains or making spent grain dog treats, you can reserve those grains and incorporate them into just about any bread recipe. Here’s how to make spent grain bread:

  • First of all, don’t use the spent grains if you’ve added any hops to the mash. This can result in unpleasantly bitter beer bread.
  • Unless you intend to use the grains right away, put them in the freezer. Warm, wet grains can get stinky pretty quick! You’ll only need about 2-4 cups of spent grains for a loaf of bread. Discard the rest, compost them, or freeze them until you want to cook with them.
  • Your bread will have a smoother texture if you can process the spent grains in a food processor. If you don’t have a food processor that’s ok – just proceed with the recipe.
  • Follow the recipe below on how to make spent grain bread!

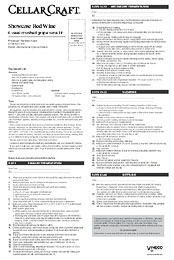
Recipe: Spent Grain Bread
(makes 1-2 loafs)
Ingredients

  • 1 cup warm water (you can also use a flat, malt-forward beer, such as porter or brown ale at room temperature)
  • 2 tbsp sugar, honey, or maple syrup
  • 2 tbsp vegetable oil or olive oil
  • 2 tsp active dry yeast (you can also use beer yeast!)
  • 2 tsp salt
  • 4 cups all purpose flour
  • 2 cups spent grain

Directions

  1. Mix together the liquid ingredients (water/beer & oil) in a mixing bowl. Mix in the sugar and yeast and set aside for 5-10 minutes.
  2. Place the spent grains in a large mixing bowl. Mix in the all purpose flour and salt and mix well. Don’t be afraid to get messy!
  3. Form a well in the middle of the dough and pour in the liquid ingredients. Mix well.
  4. Form the dough into a ball. The dough should be easily pliable, but not sticky. If your dough is sticky, knead in more flour.
  5. Oil a mixing bowl and place the dough in the bowl to rise. Give it 60-90 minutes.
  6. At this point, the dough should have risen. If it didn’t, you may need more yeast, or a fresh batch of yeast.
  7. Punch down the dough, roll it into a nice loaf and place it in a greased bread pan or on a greased baking sheet. Let the dough rise for another 60-90 minutes.
  8. Heat your oven to 350˚F.
  9. Bake the bread for about one hour. The bread is done when a toothpick stuck into the middle of the loaf comes out clean.
  10. Smother your bread with butter, make a sandwich, or make French toast – enjoy!

And there you have it, how to make spent grain bread. What do you do with your spent grains? We’d love to hear your ideas!
——————————————————————————————————-
David Ackley is a beer writer, brewer, and self-described “craft beer crusader.” He holds a General Certificate in Brewing from the Institute of Brewing and Distilling and is founder and editor of the Local Beer Blog.

Leigh Erwin: A Beginner's Wine Making Journey: Part 18

Home Wine Kit InstructionsHi, everybody!  Leigh here!
I decided to hold off on starting my new batch of wine (the CellarCraft Carmenere wine kit) until after I got back from vacation, as due to the timing of everything listed in the wine kit instructions, I wasn’t going to be able to get to a “holding point” before leaving on my journey.  Instead, I decided to take the time off to study the wine kit instructions more and figure out what I need to do and when, and if I have all the right equipment and ingredients to get this wine made.
Reading through the equipment requirements as well as the wine kit instructions for Day 1: Primary Fermentation, I do have a small concern.  In the equipment list, it noted that I needed an 8 gallon (30L) primary fermenter for this batch.  However, the only primary fermenter I have is a 6 gallon (23L) vessel.  Do I need to purchase a larger primary fermenter to complete this stage of the process?  I noticed that the final volume after adding the crushed grape pack is 24.5L, only 1.5L greater than the supposed capacity of my 6 gallon primary fermenter.
Head Space Need Per Wine Making Instructions
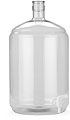
When I used my 6 gallon primary fermenter previous, I notice that the “full” line is actually a bit lower than the top of the fermenter.  I’m not certain if it was 1.5L of space, but I would like to think that it was.  From the line drawn on the 6 gallon point on the outside of the fermenter, it looks like there is plenty of space for 1.5 more liters of “stuff”.  I’ll have to ask the friendly folks as ECKraus about this, but I wanted to express my concerns to you all first, in case one of you has had experience with this and might be able to give me some advice.
Why not just buy an 8 gallon fermenter?  Well, in a perfect world, I would.  However, due to the lack of space in my current abode and the fact that I will be moving into a larger home at some point this fall, I really didn’t want to start too much of a collection of winemaking equipment until I moved.  The fewer items I have to move, the better!  Then, as I mentioned in previous entries, I’ll upgrade to glass and start growing my collection more then.  If I can get away with using the 6 gallon primary fermenter for this next batch of wine, I would rather do that for now.
After reading the wine kit instructions, the only other thing that “concerns” me (if I can even call it that), doesn’t really come into play until right before bottling.  Last time, I did not bother filtering my Pinot Grigio wine, as 1) it looked extremely clear to me and 2) I don’t have a wine filter!  This being a red wine with the potential for extra sediment, I think I may invest in a wine filtering system prior to bottling. Luckily for me, I have over a month to decide that at this point, so it’ll give me plenty of time to do some research to figure out which filter is right for me.
Thanks for reading, and certainly chime in if you have any experience with these wine kit instructions!

————————————————————————————————————-
Leigh ErwinMy name is Leigh Erwin, and I am a brand-spankin’ new home winemaker! E. C. Kraus has asked me to share with you my journey from a first-time dabbler to an accomplished home winemaker. From time to time I’ll be checking in with this blog and reporting my experience with you: the good, bad — and the ugly.

Too Much SO2 In My Wine

Smelling Too Much SO2 In The Wine.I’m new and I think I just ruined my first 3 gallons of peach wine. I had everything ready to go to bottle and I went back to the internet to check the amount of potassium metabisulfite to add. I was sure I read 1 teaspoon per gallon prior to bottling, but noticed a really strong SO2 odor when I dumped the small amount of wine left in the 3 gallon carboy while cleaning up. I went back to check the amount again and found anywhere from 1/16th to 1/4 of a teaspoon is what I should have used. I had already corked the bottles at this point and now I don’t know if it can be salvaged. Will it break down if I leave it to age longer?
Name: Chris
State: IL
—–
Hello Chris,
Having too much SO2 in a wine can be a problem. It will not break down in the bottle or anything like that, but what it will do is dissipate into the air and go away. It is just a matter of giving it the SO2 an opportunity to do so.
Depending on the acidity of your wine, about half of the SO2 you added will permanently bond to the wine. This bound sulfite will do nothing to protect the wine. It is just there, and will remain there.
As doses of potassium metabisulfite or Campden tablets are added throughout the wine making process, the amount of bound sulfite builds up. If it builds up too much you can actually taste it in the wine. Fortunately, it takes quite a bit of over-dosing to get to that point. Because the perceptible taste of SO2 can be different from one wine to the next, I do not know for sure if you will be able to test the bound SO2 in your wine or not at the dose of 1 teaspoon of potassium metabisulfite per gallon.
The other half of the SO2 that doesn’t bond to the wine is know as free SO2. This is the half that actually does the protecting of the wine. It slows any oxidative processes that may be wanting to occur. It also stymies any bacteria or mold that may be wanting to grow in the wine.
This is also the half that will give the wine a strong sulfur odor upon decanting when you have too much SO2 in the wine. Since the free SO2 is volatile, it wants to leave as a gas. It just needs the opportunity to do so. This is why doses of potassium metabisulfite are added throughout the wine making process, to replenish the free SO2 that has dissipated as a gas. Here’s more information on this.
With that being said, it should start to become clear to you that you can very easily remedy the problem of having too much SO2 in the wine, but it will requires you to:

  1. Decant the wine back into a bucket fermenter;
  2. Allow the sulfite gases to dissipate;
  3. Re-bottle the wine.

The fermenter needs to sit open to the air for the SO2 gases to escape. You can cover it with a very thin cloth towel to keep stuff from getting into the wine, but nothing more than that. You should let the wine sit like this for a couple of days.
Alternately, you can get a degassing mixer like The Whip to speed up the process. Using an item like this will allow you to degas any wine with too much SO2 in minutes.
This will allow you to rid the wine of the excessive free SO2 — the half you can smell — but it will not do anything to rid the wine of the bound sulfite — the half you won’t be able to taste anyway.
Ironically, it is very possible that all of the free SO2 will be removed with these steps, leaving the wine susceptible to oxidation and contamination. For this reason, I would strongly urge you to test the wine for SO2 before bottling again. This can be done with Titret Test Vials and a Titrettor Hand Tool.
There is one other option for someone that has too much SO2 in their wine. It is much easier to accomplish, but may not be satisfactory to you, especially if you would like to hand these bottles of wine out as gifts. That is to simply pour the wine into a carafe and let it sit for a few hours. You could also invest in an wine aerator. There are many different types on the market that can purchase at a commercial wine store. A good aerator would allow the excess SO2 to dissipate in minutes.
I hope this helps you out Chris. Having too much SO2 in your wine can be a big bummer. Just realize that there are solutions.
Best Wishes,
Ed Kraus
———————————————————————————————————
Ed Kraus is a 3rd generation home brewer/winemaker and has been an owner of E. C. Kraus since 1999. He has been helping individuals make better wine and beer for over 25 years.

My Wine Will Not Start Fermenting

A Wine That Will Not Start Fermenting
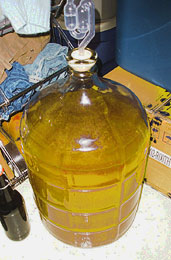
I am still new to winemaking, starting my second batch, my question is: I started my yeast in a separate bottle, started to ferment just fine, added it to my wine base, is not doing anything. I have warmed up my base, has now been @ 48 hours. Do I need to add more yeast? Am I loosing my base, now spoiled? Not sure what else to do to get yeast going.
Name: Andrea
State: Colorado
—–
Hello Andrea,
There are an endless number of reasons why a wine will not start fermenting. Most of them are environmental, meaning, the yeast are not liking the situation in which they have been put.
A lot of times it is simply the temperature of the wine must. You’ve stated that you have warmed the must up, but it is possible to have it too warm for fermentation as it is too cool. Because of this I would start off by suggesting that you actually use a thermometer to take a temperature reading of the wine must to make sure it is in the correct temperature range. This would be somewhere between 70°F. and 75°F.
You had a successful yeast starter. This tells us that the yeast is viable and not old or dead. It also tells us that there is something with the wine must, specifically, and not the wine yeast that is not allowing the wine to ferment.
This is about as far as your clues will take us as to why your wine will not start fermenting. Beyond incorrect temperature and old wine yeast there are many other possibilities.
Fortunately, we have put together a list of the Top 10 Reasons For Fermentation Failure. These are the most common reasons why a wine will not start fermenting. They are in order from the most common reason to the least common reason. This reasons are based on a lot of years of helping individual winemakers that are in the same exact situation you are.
I would suggest going over these top 10 reasons. See if any of the scenarios match up with your situation. It is not until you actually identify the reason why your wine will not start fermenting that you will be able to resolve this issue. Any action you take before then will only be a guess.
Best Wishes,
Ed Kraus
———————————————————————————————————
Ed Kraus is a 3rd generation home brewer/winemaker and has been an owner of E. C. Kraus since 1999. He has been helping individuals make better wine and beer for over 25 years.

Leigh Erwin: A Beginner's Wine Making Journey: Part 17

Winemaking KitHey all!  Beginner winemaking blogger, Leigh, here!
I am so excited to report that I received my next shipment from Homebrewing.org the other day!  As you may recall, my first wine was a California Connoisseur Pinot Grigio that is now hanging out in wine bottles (bottled a few days before Christmas), and my second wine was a SunCal Chardonnay that is currently spending some time kicking back in a carboy for a couple of months while everything settles out.  In fact, we’re about 2 weeks into that 2 month waiting game at the moment.  It’s looking good so far—no red flags at the moment, and it’s definitely starting to clear up little by little.  It’s since turned from a murky cloudy wine to a translucent wine that I can’t quite see through yet, but it’s definitely less cloudy than it was after I racked it two weeks ago.
Anyway, since I want this to be a continuous beginner wine making journey, and not wanting to wait 2 months before I did anything home winemaking related, I decided to go ahead and buy another wine making kit and a few more pieces of wine making equipment and get my third batch of wine started while the second one was spending some quality time with the carboy.
Since I’ve made two whites in a row, one of which is turning out quite nicely (in my beginner’s opinion) and the other looking nice but is not far along enough to cast judgment, I wanted to shift gears and try my hand at making a red wine.  I almost went with a Chardonnay using oak chips/oak cubes, but I ultimately decided to just launch right in and try a red.
I ended up purchasing the CellarCraft Showcase Red Wine kit: Carmenere, as Carmenere is one of my favorite red wines, and, well, it has a nice ring to it!  When the package arrived, I was surprised at how heavy it was—-51 pounds!  For a moment I felt really bad for the delivery person that had to carry that up a couple flights of stairs!
Opening up the package, right off the bat I knew this was a big step up from making the white.  What I mean is that there are many more ingredients needed for this particular wine, and many more steps along the way.
The difference between how I feel now and how I felt when I looked at the instruction sheet the very first time I made wine a few months ago, is that instead of feeling anxious, scared, or worried that I might screw up, now I feel a sense of excitement for the new challenge that sits before me. The beginner wine making fear is starting to subside.
So, things I’m most excited about for this 3rd batch of wine:

  1. Fermenting the wine with the skins!  I obviously didn’t pay close enough attention to the product description, as it had slipped my mind that this wine kit was coming complete with the grape skins for maceration!  Thinking back now, it makes sense to me, as this is how red wines are made, but for some reason at the time, it didn’t click.  Anyhow, these skins definitely helped contribute to the 51 pound weight of the entire package.
  2. Using oak chips and oak cubes.  This wine kit comes with both—both Hungarian oak as well—and I’m really looking forward to trying my hand at using them.  The kit also came with a little cloth pouch for the chips, which reminds me a lot of a tea bag (side note:  I love tea and drink a lot of it).
  3. Doing punch downs.  OK, well, it’ll be more like a stirring process than a real “punch down” as they say in the commercial industry since the scale is so small, but hey, that is what I will be doing, right?
  4. Following countless instructions.  I know that sounds odd, but I love following recipes, lists, and any other organized schedule of sorts.  These instructions come complete with 46 different tasks, so I shall prepare myself with a pen full of ink to check-check-check as I go!

So there you have it, my beginner wine making notes. Have any of you newbies ventured into red winemaking yet?  For the more experienced of the bunch, any tips or hints for someone who is making a red wine for the first time?

————————————————————————————————————-
Leigh ErwinMy name is Leigh Erwin, and I am a brand-spankin’ new home winemaker! E. C. Kraus has asked me to share with you my journey from a first-time dabbler to an accomplished home winemaker. From time to time I’ll be checking in with this blog and reporting my experience with you: the good, bad — and the ugly.

Homebrewing Terms You Should Know: Part 4 – Malt

MaltMaltster turning malted barley grain. is the backbone of your homebrew. Not only does it contribute flavor to your beer, but it’s also responsible for fermentable sugars, color, aroma, and mouthfeel. Below are a number of terms used when talking about malt and how it’s made:

  • Two-Row/Six-Row – There are two types of barley that are grown for brewing: two-row and six-row. The names refer to the way the grains grow on the stalk. Learn about the differences between two-row and six-row barley in this blog post.
  • Endosperm – The endosperm is the white, starchy part of the malt grain that contains the carbohydrates which are converted into fermentable sugars during the malting and mashing processes. It’s important to expose this part of the grain when crushing it in order to promote good brewhouse efficiency.
  • Germination – Germination, the second step in the malting process after steeping, is simply the act of sprouting. Barley grain must germinate before it can be turned into malt.
  • Acrospire – During the malting process, the barley grain begins to grow. The acrospire is the shoot that would turn into a barley stalk if it were allowed to continue growing. Maltsters monitor the length of the acrospire as an indication when the grain is ready for kilning.
  • Enzymes – One of the important characteristics of malt is that it contains enzymes. These enzymes (produced during germination) are what help the brewer convert starches into fermentable sugars during the mashing process.
  • Modification – During germination, modification is an indication of when activity inside the barley grain is complete. Some malts are referred to as “well-modified” or “less-modified.” Most commercially produced malt is well-modified.
  • Degrees Lovibond – Named for its inventor Joseph Lovibond, this is a number which describes the color of malt. Base malts, such as Pilsner malt, may be as low as 1 ºL, whereas heavily roasted malts can be as high as 300-500 ºL.
  • SRM – Beer color, which is largely influence by the types of malt in a beer recipe, is measured by SRM, or Standard Reference Method, units. 1 is very pale; 40 and higher is black. An SRM Calculator can easily estimate the color of your homebrew.
  • Base Malt/Grains – These malts form the majority of the grains you use in your homebrew. They are generally light in color and must possess Diastatic Power, a number which measures the enzyme content of malt. Examples of malt that can be used as base malt include 2-Row Brewer’s Malt, 6-Row Brewer’s Malt, Pilsner Malt, Vienna Malt, and Munich Malt (10L).
  • Specialty Malt/Grains – Specialty malt, such as caramel malt and roasted barley, are used to contribute color and flavor to your beer. Because they contain little to no enzymes, they need to be mashed with base malt in order to extract their fermentable sugar.
  • Adjunct Grains – Adjunct grains are those grains other than barley that are used to add gravity, improve body or head stability. Examples include wheat, rye, corn, and oats.
  • Milling – The process of crushing your malted grains for brewing.

These are most of the homebrewing terms you should know involving malted barley grains and the malting process. Are there any homebrewing terms you’d like to learn more about? Leave a comment below!
————————————————————————————————————
David Ackley is a beer writer, brewer, and self-described “craft beer crusader.” He holds a General Certificate in Brewing from the Institute of Brewing and Distilling and is founder and editor of the Local Beer Blog.

Why Did Stirring My Wine Result In An Eruption?

Upset Man Who Stirred Wine During FermentationI made my first 5 gallons of plum wine last fall and it turned out really well. Recently I decided to try making grape wine using frozen grape concentrate. I figured on only doing a gallon to start with before making a larger batch. I used a plastic gallon milk jug for the primary fermentation and after the second day decided to stir the wine. That turned out to be a huge mistake! As soon as I started to stir, there was a violent reaction and grape juice shot about 5 feet up the wall and made a big mess. Before it settled down I lost about a quart of the product and now I am not sure what to do. Can I just go ahead and top it off with water or do I need to start over? Also, what caused the violent reaction in the first place? Thanks for any advice you can provide.
Name: Larry C.
State: Idaho
—–
Hello Larry,
Your best option at this point is to do nothing. You could try to make up for your loss of wine, but you would need to do it at the same ratio of the original wine recipe you are using… not too practical.
Your best bet is to let the fermentation finish. After that you need to find a container that matches the size of the your remaining batch to keep it in while it’s clearing. You want to eliminate head-space in the container while the wine is clearing and waiting to go into wine bottles.
The reason stirring your wine resulted in an eruption of sorts was something called nucleation. Nucleation is the same exact principal that causes a 2 liter bottle of soda pop to spew when a Mentos candy is drop into it. A Mentos has millions of pores on its surface that cause the CO2 molecules in the soda pop to come together and form gas bubbles.
During a fermentation the yeast produces CO2 gas (carbon dioxide) along with the alcohol. This is what you see coming through the air-lock. But in addition to what goes through the air-lock is much more still saturated in the wine. The wine holds as much as it can until it is disturbed, much like carbonated soda pop.
Stirring the wine started a chain reaction of liquid CO2 expanding and releasing from the wine as a gas. The CO2 expands rapidly causing the wine to gush or spew.
What you used to stir the wine makes a difference as to how fast or violent the CO2 gas will erupt. The more porous the surface of the stirring device, the faster the eruption will occur. As an example, if you are stirring the wine with a glass spoon, you would get little to no reaction because of its smooth surface; if you are stirring the wine with a wooden spoon you would get a significantly larger reaction because of its porousness. The surface of a Mentos is so porous that all you have to do is drop it into the wine/soda pop to get the reaction you experienced.
In addition, the inner walls of the milk jug was probably working in concert with the stirring motion to cause this to occur. At least, that is my suspicion. The plastic used to produce milk jugs is porous, as well. Sloshing the wine against the inner walls of the jugs would help to cause the CO2 gas to release. In fact, it may have not even mattered what you stirred with. It could have been the inner walls of the jug that did it all. All it took was stirring the wine in any fashion to ignite the eruption.
Happy Winemaking,
Ed Kraus
———————————————————————————————————
Ed Kraus is a 3rd generation home brewer/winemaker and has been an owner of E. C. Kraus since 1999. He has been helping individuals make better wine and beer for over 25 years.

Beers of the World: Ireland and Scotland

One Of The Beers Of The World: Irish Stout
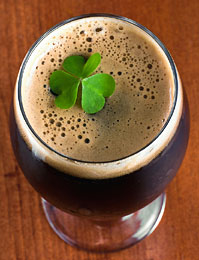
At one time, both Ireland and Scotland were part of the British Empire. (Today, the Republic of Ireland is a sovereign nation.) There is evidence of brewing in Scotland and Ireland dating back hundreds, if not thousands of years. More recently, both countries have contributed a variety of distinct beer styles to the world of brewing, a few of which are listed below.
From Ireland
When it comes to beers of the world, one of the most widespread styles of beer comes from Ireland, but Guinness isn’t the only player. Kilkenny, Beamish, and Murphy’s all brew traditional Irish beer.

  • Irish Stout – Mention Irish beer and the first thing that comes to mind is Guinness. Arthur Guinness founded his brewery in 1759 and soon defined the style known as Irish stout. Black malt and/or roasted barley give the beer a strong, coffee-like dryness. Guinness used a small proportion of soured beer to give its stout a slight pucker. Murphy’s makes another famous stout. Learn what it takes to brew your own Irish stout with our Simple Style Guide: Irish Stout.
  • Irish Red Ale – Though few truly Irish red ales make it to the shelves in the US (Smithwick’s is one), many breweries on this side of the pond have adopted the style. Killian’s (a Coors brand) has been a transitional beer for many a craft beer drinker. Irish red ales are copper in color with an emphasis on caramel and/or toasty malt flavor. Since they’re not too hoppy or alcoholic, Irish red ales are agreeable to a wide range of palates. If you’d like to try your hand at an Irish red ale, consider brewing the Steam Freak Dublin Dock Red Ale.

From Scotland
Another country noted for brewing beers of the world is Scotland. As recently as the early 20th century, Scotland had a vibrant brewing industry. During the colonial era, Scottish “export” beer was shipped throughout the British Empire, as far as America, Australia, and India. A variety of traditional styles that originated in Scotland are still brewed today.

  • Scottish Ale – Scottish beer is generally more malt forward and sweet than English ales, though there was a fair amount of cross pollination across borders. 60/-, 70/-, and 80/-schilling Scotch ales are named in respect to the price per barrel, which varied based on the alcohol content of the beer. 90/-schilling ales were sometimes intended for export, while 100/-schilling and stronger brews were often called “wee heavies. Read more about guidelines for brewing a Scotch ale at home.
  • Heather Ale – Though not widely brewed, a type of beer particular to Scotland is heather ale. There’s no strict definition for it in the BJCP guidelines, but there is evidence that a fermented beverage made from heather, barley, oats, and honey was brewed thousands of years ago in Scotland. Just a handful of breweries still make heather ale: Williams Bros. Brewing Co. in Scotland and Cambridge Brewing Company in Massachusetts are two. Brew your own heather ale with a Brewcraft Heather ‘n Honey Deep Brown Ale recipe kit.

Do you enjoy Irish and Scottish ales? What are some of your favorite beers of the world?
———————————————————————————————————-
David Ackley is a beer writer, brewer, and self-described “craft beer crusader.” He holds a General Certificate in Brewing from the Institute of Brewing and Distilling and is founder and editor of the Local Beer Blog.

Can I Make Wine From Grape Juice That Was Diluted With Water?

Wine Diluted With WaterI purchased a winemaking kit that came with fresh juice from a local winery. The process was not explained well in the class, and it turns out I added water to the fresh juice in error (instructions did not differentiate between fresh and concentrated juice). The juice does contain 50% water, and has been in the refrigerator since (about 2 months). Is this juice still usable to make a batch of wine? If so, is it worth it since it is watered down? I don’t even know if adding water to the fresh juice is okay to produce an okay wine? Thanks for any and all help!
Name: Keith S.
State: NY
—–
Hello Keith,
Yes, you can make wine from grape juice that has been diluted with water. It will just have a lighter-bodied wine..
The bigger issue is putting together a wine recipe that will work with grape juice and water. Along with the grape flavor, the acid was cut in half; the nutrients were cut in half; and the sugar was cut in half. These deficiencies will need to be compensated for within a new, adjusted wine recipe.
Acidity or tartness is a major flavor component of any wine. If the wine’s acidity is too low, it will directly result in the flavor of the wine. The wine will taste flat and insipid.
Lack of nutrients can effect how vigorous the fermentation will be — not enough nutrients, you can have fermentation that slowly drags on forever.
With this in mind, what I would suggest doing is adding 4.5 teaspoons of Acid Blend for every gallon of water in the juice. This should get the acidity level back up to a reasonable range. Alternatively, you can use an Acid Test Kit to measure your wine must’s acidity level and know exactly how much Acid Blend you will need to add to get to an optimal level.
You will also need to add 1 teaspoon of Yeast Nutrient for each gallon of water added. The Yeast Nutrient will work along side the nutrient from the grape juice to supply a rich form of nitrogen to the fermentation and help it to go faster.
The addition of Wine Tannin is optional, but I would suggest 1/4 teaspoon for each gallon of water that was added to the wine must. This will help with the body and pH balance of the wine. It will also help with the clarification of the proteins from the grapes after the fermentation has completed.
Finally, you will need to add sugar to the wine must. Sugar is what the wine yeast consume to produce alcohol. The simple math is that the less sugar you have in the fermentation, the lower your resulting alcohol will be. In general, a grape juice will have enough sugars in it to produce around 10% to 14% alcohol. Since your grape juice is diluted with water by half, it will only produce 5% to 7%, as is. This is why you will need to add sugar to the wine.
A simple calculation is to add 2 pounds of cane sugar (4 Cups) for every gallon of water that was added to the grape juice. This could be pushed up to 2-1/2 pounds (5 Cups) but no more.
It is important to point out that even though the grape juice was diluted with water by half, the flavor was not cut in half. This is because of the way we humans perceive things. According to our taste-buds, the flavor of the wine will be weaker, but only marginally. So don’t feel like you will have an inferior wine simply because the grape juice was diluted with water. Many lighter-bodied wines taste wonderful.
Happy Winemaking,
Customer Service at E. C. Kraus
———————————————————————————————————
Ed Kraus is a 3rd generation home brewer/winemaker and has been an owner of E. C. Kraus since 1999. He has been helping individuals make better wine and beer for over 25 years.

Leigh Erwin: A Beginner's Wine Making Journey: Part 16

Cloudy Homemade Wine in Plastic CarboyHey everybody!  Leigh here!  Just checking in with you all to update you on how everything is going in “new home winemaker land” over here!
Last time I caught up with you, my “Pinot Chardonnay” had just finished its primary fermentation, and I was to leave it alone, completely cut off from air, for 2 weeks while it finished up the remaining 30% or so of secondary fermentation that was left to complete.
Well, it was clear to me from looking at the carboy every day that fermentation was progressing along slower and slower, until it didn’t appear to be doing much at all anymore 2 weeks later.  Technically, the fermentation has been extremely slow for a few days prior, but I still wanted to wait the recommended 2 weeks just in case. Due to my schedule, I wasn’t able to rack the wine exactly at the 2 week mark, so I just waited until the next day and racked it on Day 15 instead!
Before getting down to business, I wanted to check the specific gravity of the wine to see where we were at.  I didn’t adjust for temperature this time, but the reading on the wine hydrometer was 0.995.  I recall a similar reading last time I made the Pinot Grigio wine, so I was confident the fermentation had finished up and so I didn’t bother correcting for temperature for this mid-point reading.
Even though I’ve only made one other homemade wine before, this next step felt so easy to me this time around.  I was not as worried as I was last time about “messing things up” and had confidence that I could rack the wine without too much trouble.  I did learn my lesson from last time—I triple checked that the spigot with in the OFF position before I started siphoning 6 gallons of wine into the vessel.  No losses!  Yes!  I technically ended up racking the wine twice, as if you recall, I currently only have one carboy.  First, I had to rack the wine into the sterilized primary fermenter, then I had to thoroughly clean and sterilize the carboy and rack the wine back into that from the primary fermenter.  It was all pretty easy, and I didn’t lose any wine this time!
Now, according to the instructions on the can, I wait 2 months before racking the wine again!  At that time, I may add some clarifying agents if the wine is still not clear enough, but I’ll just play that by ear!
So, what am I going to do while I wait for my homemade wine to do its thing for the next 2 months?  Why, start another batch of wine, of course!
Not wanting to wait 2 months to do something with my wine, I decided to go ahead and buy another winemaking kit and some more equipment and jump right into a new batch of homemade wine!
So, I placed a new order with Homebrewing.org, and lo and behold, it’s being shipped out to me already!  Same day!  Love the fast service!
Wine Making KitAnyway, this time, I purchased the Cellar Craft Showcase Collection: Carmenere Chilean.  So far I’m 3 for 3 in terms of testing out different juices/kits, which is pretty fun if you ask me!  This is going to be the first time I made a red wine, so I’m excited yet a little nervous.  A red?  That’s like, way more steps that I could possibly screw up 😉  haha.  Actually, in all honesty, I’m really excited to make a red wine at home for the first time, and you can count on me sharing every bit of that experience once I get the equipment and start her up.
I also purchased a Liquid Crystal Thermometer, because let’s face it, I’m tired of guessing the temperature of the wine.  True, since it’s in the same location all the time and we keep the ambient temperature relatively constant, the temperature of the room is likely the same temperature of the wine.  However, I like the idea of having that added bit of confidence knowing exactly what temperature my must/wine is at any given time.  I just bought a simple model thermometer for now, but once I upgrade equipment in a few months, I’ll likely get something a little more robust.
Finally, since I only have one carboy and my Pinot Chardonnay is taking up residence in that vessel for the next two months, I obviously need to buy another one!  I do want to upgrade to glass eventually, but with the prospect of moving in a few months (maybe even across country), the lighter my wine making equipment is now, the better.  So, Plastic Carboy With Faucetthis time I purchased another plastic carboy, though I upgraded slightly to the 6 Gallon Carboy with Barbed Faucet.  I really like the idea of siphoning and bottling from the carboy’s faucet, as I think it may be a little cleaner and easier, and it’ll also help me when it comes time to decide what type of wine making equipment I’d like to upgrade to in a few months.
Stay tuned for more new home winemaker adventures, and please feel free to comment if you have suggestions for me, or questions that we can hopefully figure out together!  Cheers!

————————————————————————————————————-
Leigh ErwinMy name is Leigh Erwin, and I am a brand-spankin’ new home winemaker! E. C. Kraus has asked me to share with you my journey from a first-time dabbler to an accomplished home winemaker. From time to time I’ll be checking in with this blog and reporting my experience with you: the good, bad — and the ugly.