
 I usually use a wine sweetener or conditioner but with the kit I got today it has a sweet reserve bag, can I still use the conditioner or will this make it too sweet
Name: Al W.
State: KY
—–
Hello Al,
A sweet reserve is included when a wine ingredient kit is making a style of wine that is normally as some sweetness. In other words, when you buy this particular type of wine at the store it is known to have some sweetness and is expected to be as such. Examples of this would an Ice Wine or a German Gewurztraminer. Either of these may come with a sweet reserve pack, but the amount of sweetness added can very greatly.
The fact that the wine ingredient kit you have in front of you has a sweet reserve pack means that some sweetness will be added to the wine, but whether or not it is enough sweetness for your personal taste is another question.
 I would suggest to you that you make the wine ingredient kit as directed. Follow the instructions that came with it step for step. When it comes time to bottle the wine, taste it and see what you think. Based on your own personal tastes, do you need to add more sugar to wine ingredient kit? You are the only one how can tell, because it’s all about making the wine the way you like it.
If you would like to make the wine sweeter it is just a simple matter of adding more sugar. It can be wine conditioner, or it can be cane or corn sugar. Whichever you choose, just remember that it should be in a simple syrup form before adding so that you are sure the sugar is dissolved and not just settling to the bottling of your fermenter.
You do not need to add anything else to guard against a re-fermentation. Wine ingredient kits that have a sweet reserve pack already come with ingredients for preventing this. If you followed the instructions it should already be in the wine.
I hope this information helps you out. Just be assured that there is absolutely nothing wrong with adding more sugar to a sweet reserve wine ingredient kit. Add sugar syrup to taste; it’s as simple as that!
Best Wishes,
Customer Service at E. C. Kraus
—————————————————————————————————————
Ed Kraus is a 3rd generation home brewer/winemaker and has been an owner of E. C. Kraus since 1999. He has been helping individuals make better wine and beer for over 25 years.
Leigh Erwin: A Beginner’s Wine Making Journey: Part 27
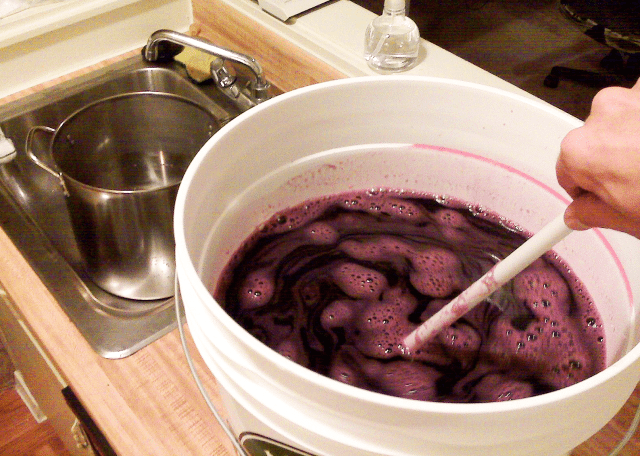
 Hey everyone! How are all your batches of homemade wine coming along? This is the first time in a few months where I don’t actually have any wines fermenting or otherwise hanging out in a carboy. I’ve now completed and bottled three different wines – a Pinot Grigio, a Pinot Chardonnay, and my first red, a Carmenere. My life is also starting to get extremely busy and will remain so for the next few months with a move and a marriage, so whatever I do next I need to be OK with if I screw it up due to me being mentally preoccupied with other things. By the fall, things should be much more relaxed and laid back, which will be time when I up my output and starting buying more winemaking toys…er, um…I mean, equipment! Priority #1 come this fall is the wine filtering system. Gotta get one this year!
So, what the heck am I going to make during the next few months that I won’t necessarily care about if I screw it up? Well, I do want to make the best wine that I can every time, but I do need to realize and accept the fact that things might not always be peaches and cream. That being said, I want to minimize my financial input for this next batch of wine, that way if I screw it up somehow during the milieu that is my upcoming wedding, honeymoon, and potential move across country, I won’t be losing as much money than as if I purchased a quality winemaking kit. That and I want to try to make different kinds of wine! Diversity is the spice of life!
 I recently discovered a really cool resource on the ECKraus website, and that is the Wine Recipes page. If you go to the page, you can select whatever type of wine you wish to make, click “find recipe”, and you’ll be provided with wine wine recipes based on that particular product and will let you know exactly what you need to buy in order to get it done! Additionally, you can just click on whatever item(s) you don’t already have and purchase them right then and there! It’s probably the easiest way to get the right wine making ingredients for the wine you want to make! The actual wine recipe with step-by-step instructions can be found by clicking the “download PDFs” link on that same page.
I asked my fiancé what type of wine he would be interested in trying next, and he reminded me that we do enjoy drinking Mead (honey wine) from time to time. Perfect! I’ll try to make Mead!
I was able to find bulk honey online—15 pounds of it for $45. Not too bad, in my opinion!
In terms of the other ingredients, I have yeast nutrient, acid blend, grape tannin, and sodium bisulfite. The only ingredients I seem to be missing are the yeast energizer and Pasteur Champagne wine yeast. I have other wine yeast, but I decided I wanted to follow the wine recipe as closely as possible, particularly since this will be the first time making Mead and I want to try and make the best Mead I can with the recommended wine making ingredients.
Time to put in a little order, it seems! I’m so excited—and partially scared—this might get a little sticky 😉
————————————————————————————————————-
 My name is Leigh Erwin, and I am a brand-spankin’ new home winemaker! E. C. Kraus has asked me to share with you my journey from a first-time dabbler to an accomplished home winemaker. From time to time I’ll be checking in with this blog and reporting my experience with you: the good, bad — and the ugly.
Gluten Free Beer Recipe: An Experiment With Sweet Potatoes And Buckwheat
 As I’ve mentioned before, my significant other has a gluten allergy. She actually cried when she called to tell me the diagnosis, upset that we wouldn’t be able to share beer experiences anymore. Fear not, I told her. We’ll find a way.
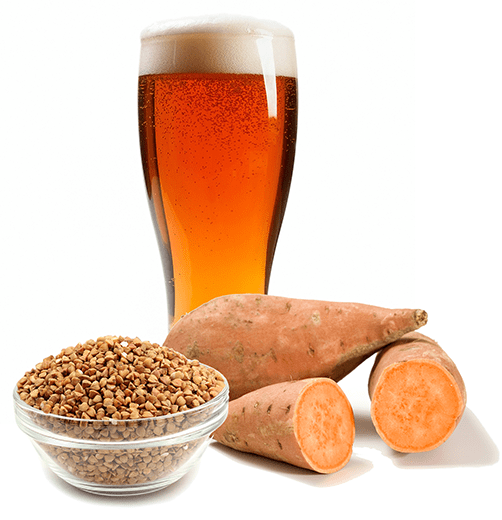
This has led me to experiment with gluten free homebrewing and a number of unusual gluten free beer recipes. The latest: a sweet potato buckwheat ale. Allow me to share with you how it went.
Malting the buckwheat
In my other life as an artisanal maltster, I came into a substantial amount of buckwheat, and I did what any artisanal maltster/homebrewer would do: I malted it to make beer out of it!
After a few small germination tests, I steeped the buckwheat in water three times for a total of about 30 hours. Around the end of the steeping process, small white shoots starting growing out of the pointy end of the buckwheat kernel. When making malt from any grain, this is a sign that changes are starting to take place within the kernel, breaking down the cellular structure and activating valuable enzymes. Though only about 40% of the buckwheat actually germinated, I made a note and proceeded.
After four days of germination, I washed the buckwheat and allowed it to dry, then placed it in the oven on the lowest temperature setting I could (170˚F). It took several hours to dry completely. It might have dried faster with regular stirring or a perforated dish that would allow the air to circulate.
Mashing the buckwheat and sweet potato
Once the malted buckwheat was dry, it was time to brew. From my other experiences with gluten free beer recipes and cooking, I knew that combining multiple starches tended to produce the best results. I’d heard of sweet potatoes being used in beer before, so I thought I’d give the combination a try.
Now I had read that sweet potatoes have a fairly high gelatinization temperature, so combined with the low germination of the buckwheat, I decided to use a three-step decoction mash to maximize my fermentable sugars. After milling the buckwheat and roughly chopping the sweet potatoes, I covered them with water and brought the temperature up to 120˚F. I removed about 1/3 of the mash, brought it to a boil, and then mixed it back in to the mash. I repeated this a total of three times. I then strained out the wort and lautered to collect about two gallons of wort.
I was a little disappointed to find my pre-boil gravity was only 1.020. I believe this was in part due to the low germination of the buckwheat, and partly due to a lack of extraction from the sweet potatoes. If I were to repeat the experiment, I would probably bake the potatoes and mash them before adding them to the buckwheat mash. To compensate for the low gravity, I added eight ounces of molasses to the wort that I collected in the kettle.
The boil
To get a good sense of the buckwheat/sweet potato qualities, I decided to moderately hop the beer with Willamette hops. They’re a good go-to hop for pale ales, brown ales, and a number of other beer styles, without being over the top in any one particular flavor quality. I did equal hop additions at :60, :20, :10, and :5. Because it’s generally good policy, I also added Irish moss and yeast nutrient at :15.
Fermentation
For yeast, I chose a dry American ale yeast for this particular gluten free beer recipe. It’s what I had on hand, easy to use, and fairly neutral in flavor. Again, the point was to allow the sweet potato and buckwheat come through.
So how did it turn out?
I had one today and it actually came out pretty tasty! Most importantly, the girlfriend likes it!
The beer pours a burnt amber color, somewhat cloudy, with a full, creamy head. To be sure, it doesn’t taste like a normal amber ale or pale ale. It has a distinctive buckwheat/sweet potato profile. The buckwheat flavor is somewhat sweet, somewhat nutty. (If you’ve had buckwheat pancakes before, you know what I’m talking about.) The hop bitterness is well balanced. There is the slightest tang on the finish, which I’m guessing comes from the molasses.
 Here is the recipe the way I brewed it. Again, I’d recommend baking the sweet potatoes in advance, then mashing them before adding them to the buckwheat mash. Diatase enzyme may also be beneficial. Have some molasses (or if you’re not gluten-free, DME) on hand to adjust your gravity as needed.
Gluten Free Beer Recipe: Buckwheat Sweet Potato Ale
(1-gallon batch)
Specs
OG: 1.043
FG: 1.012
ABV: 4.1%
IBUs: 40
SRM: 12-16
Ingredients
20 oz. malted buckwheat
28 oz. sweet potato
8 oz. molasses
.25 oz. Willamette hops at :60 (4% AA)
.25 oz. Willamette hops at :20 (4% AA)
.25 oz. Willamette hops at :10 (4% AA)
.25 oz. Willamette hops at :5 (4% AA)
1/2 pack Safale US-05
3 tablespoons honey for priming
So would I brew it again? Absolutely! Given enough time and buckwheat, I’d step this recipe up to a three- or five-gallon batch.
What do you think? Are you ready to give a gluten free beer recipe a try? Have you ever made a beer with sweet potato or buckwheat? Share in the comments below!
————————————————————————————————-
David Ackley is a beer writer, brewer, and self-described “craft beer crusader.” He holds a General Certificate in Brewing from the Institute of Brewing and Distilling and is founder and editor of the Local Beer Blog.
What is a Specialty Beer? 5 Specialty Beer Homebrew Recipes
 The Beer Judge Certification Program lists 23 different categories of beer styles, most of which have two or more subcategories. Almost every category name is fairly descriptive, but the last one stands out as rather broad. What is a “Specialty Beer”?
The specialty beer category covers any beer that does not fall cleanly in another category. This might include Rye IPAs, malt liquor, various “imperial” styles, indigenous style like Sahti, or beers made with unusual fermentable ingredients or techniques. Gluten-free beers fall into this category, as do variations on styles that bring them “out of spec.”
So what is not Specialty Beer?
It’s important to point out that there are several kinds of beer that you might think belong in the specialty beer category but don’t. These include Christmas/Winter Spiced Beer, Spice/Herb/Vegetable Beer, Fruit Beer, and Smoked/Wood-Aged Beer, among others. Be sure to check the guidelines before submitting your beer for competition to make sure it doesn’t belong in a different category. Also, keep in mind that the most important thing about brewing specialty beer is the balance. No single ingredient should overpower all the other flavors; drinkability is key.
Here are five examples of beers that fit into the specialty beer category. Which would you like to brew?
- Imperial Black IPA – This Uinta Dubhe clone recipe yields a rich, hoppy black IPA at more than 9% ABV and with IBUs that are off the charts.
- Poor Richard’s Ale – Is it a brown ale? A Scottish ale? A porter? Aside from English base malt, a heaping of flaked corn and molasses bring some interesting adjuncts into the mix. It’s modeled after what might have been brewed in the colonial era.
- Brewers Best Gluten Free Sorghum Ale – This recipe kit from Brewers Best uses Briess sorghum syrup as the primary fermentable, adds Belgian candi syrup for an extra punch, then mixes in some Cascade hops and spices for extra flavor. Your gluten free friends will love you for it!
- Peanut Butter Jelly Beer – Don’t knock it til you try it! This recipe uses a powdered form of peanut butter called PB2, which can be found at the grocery store, usually in the aisle with powdered protein shake supplements and the like.
So as you can start to see, what is a specialty beer? is a question with many answers. Do you have your own specialty beer you’d like to share?
—————————————————————————————————————
David Ackley is a beer writer, brewer, and self-described “craft beer crusader.” He holds a General Certificate in Brewing from the Institute of Brewing and Distilling and is founder and editor of the Local Beer Blog.
So You Wanna Go Pro? Tips for Entering the Craft Beer Biz
 Experience is key. Network, volunteer, get some education. Take biz classes too. Check out Sam Adams program. Get financed.
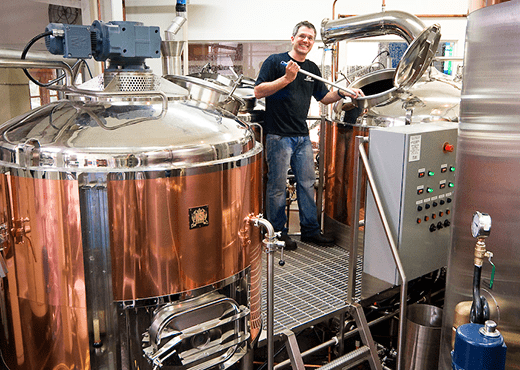
It’s not uncommon for home brewers to dream of taking their passion to the next level. Just look at these four homebrewers who went pro.
But making the jump from a home brewer to a professional brewer is no easy task. If you want to start working in the craft beer industry, you’ll need to get your foot in the door and gain some experience. Here are just a few tips for making the leap.
- Network – You’re much more likely to hear about that golden opportunity from someone you know than from an online job board. Plus, being in the know automatically sets you apart from droves of other competitors searching the online ads. Get out to every beer event in your town and start meeting people. You may be surprised how a relationship you build today can turn into an opportunity one, two, or several years down the road.
- Volunteer – If you don’t have any brewery experience, your best shot may be to volunteer or intern at your local brewery. Give your local brewery a call during business hours and ask about opportunities. Keep an eye on Facebook and Twitter. Also watch the ProBrewer classifieds for entry-level jobs and internships (but don’t forget about #1 above!).
- Get educated – If you’re starting out with little to no brewery experience, taking some classes will help put you on the right track and demonstrate your level of commitment to the craft beer career path. More and more local and community colleges are adding fermentation sciences classes. Are there any near you? The classic brewing programs like Siebel, UC Davis, and Doemens fill up fast, so go ahead and get booked. To expand on the topic of education, don’t forget about other courses that might be beneficial. In addition to brewers and cellar people, breweries need marketers, graphic designers, accountants, sales people, sustainability managers, IT technicians, and HR specialists. Making yourself valuable in these other areas may be your ticket into your dream job.
- Want to start your own brewery? Don’t quit your day job. – If your dream is to open your own brewery, get ready for some serious work. Plan on a year or two, maybe even longer, of business planning before you can start your own company. Check out the Siebel Start Your Own Brewery Course. You’ll learn that there’s a lot more that goes into running a brewery than making the beer. Once your business plan is put together, you’ll have to get financed. Consider the Sam Adams Brewing the American Dream program. Any way you cut it, make sure you have all your ducks in a row before you leave your regular job and take the dive into entrepreneurship.
Jumping into the craft beer business is something that a lot of people dream of, but don’t think that it’s all about drinking beer. If you’re serious about working in the beer business, buckle down, study up, and start working relentlessly towards those opportunities.
—————————————————————————————————————
David Ackley is a beer writer, brewer, and self-described “craft beer crusader.” He holds a General Certificate in Brewing from the Institute of Brewing and Distilling and is founder and editor of the Local Beer Blog.
Homebrew Beer Recipe: American Cream Ale (All-Grain & Partial Mash)
 The heat of summer, the sting of sweat in your eye, the smell of fresh cut grass. After mowing the lawn, everyone needs a good “lawnmower beer” to cool down! The perfect remedy: an American cream ale.
A cream ale is a very lightly colored ale with low to medium bitterness, a subdued malt character, and a dry finish. After all, you don’t want anything too heavy or bitter after cutting the lawn, you just need something cold with a bit of booze.
To lighten things up, a cream ale beer recipe will often be brewed a small proportion of adjunct grains, typically corn or rice. Flaked rice or flaked corn is an easy way to incorporate those ingredients. Sometimes, the addition of simple sugar as an adjunct can also be used to achieve the dry finish that’s characteristic of this style.
The BJCP Style Guidelines for Cream Ale call for the following specs:
- OG: 1.042 – 1.055
- FG: 1.006 – 1.012
- IBU: 15 – 20
- SRM: 2.5 – 5
- ABV: 4.2 – 5.6%
The American cream ale beer recipe below uses a majority of American pilsner malt for a light flavor, with a decent proportion of Vienna malt for a little color and a husky flavor. The flaked rice helps contribute a lighter body and a dry finish. Contrary to what the name might suggest, a cream ale has no dairy – the name refers more to the smooth mouthfeel than anything else.
Classic American ale yeast strains work well for this beer style. I’ve chosen Wyeast 1056: American Ale Yeast and Safale US-05 as two options. You may also use a Kolsch yeast or any other clean, neutral, well-attenuating ale yeast that you may have on hand. One key to this style is a cold conditioning period. It’s not absolutely essential, but it will help smooth things out.
I hope you enjoy the American cream ale beer recipe below through the heat of the summer! Look below the all-grain directions for a partial mash variation.
Gringo’s Cream Ale
(5.5-gallon batch, all-grain recipe)
Specs
OG: 1.050
FG: 1.011
ABV: 5.1%
IBUs: 18.5
SRM: 4
Ingredients
6 lbs. American pilsner malt
3 lbs. Vienna malt
1 lb. Flaked rice
.5 oz. Cluster hops at :60 (3 AAUs)
.25 oz. Willamette hops at :30 (1.125 AAUs)
.25 oz. Willamette hops at :15 (1.125 AAUs)
1 oz. oz. Willamette hops at :5 (4.5 AAUs)
Wyeast 1056: American Ale Yeast or Safale US-05
Directions
If using liquid yeast, prepare a 2L yeast starter. Mash crushed grains at 150˚F for 60 minutes. Sparge to collect seven gallons of wort. Boil for 90 minutes, adding hops according to schedule above. At end of boil, cool wort to 70˚F or below and transfer to a clean, sanitized fermenter. Ferment at 65-70˚F for two weeks. If possible, cold condition at 35-40˚F for three weeks. Carbonate to 2.4 vols CO2.
PARTIAL MASH VARIATION: Change the grain bill to 6.6 lbs. Pilsen liquid malt extract, 1 lb. Vienna malt, and 1 lb. flaked rice. Mash the crushed Vienna malt with the flaked rice, strain, then mix in the LME and add water to reach the desired boil volume. If boiling less than five gallons of wort, increase the first hop addition to 1 oz. Cluster hops and top off with clean water to make 5.5 gallons in the fermenter. Proceed as above.
————————————————————————————————————–
David Ackley is a beer writer, brewer, and self-described “craft beer crusader.” He holds a General Certificate in Brewing from the Institute of Brewing and Distilling and is founder and editor of the Local Beer Blog.
Leigh Erwin: A Beginner's Wine Making Journey: Part 26
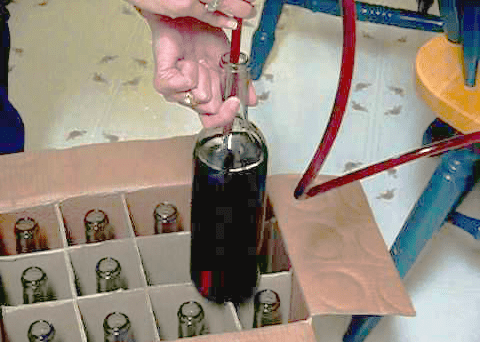
 It’s bottling day! Yay!
Finally, I am able to bottle my first homemade red wine—the Carmenere you may or may not have read about in some of my previous entries. You may or may not also recall, I was a little worried about this wine, particularly since I had a semi-major “mishap” one morning involving a massive leak and some quick thinking. Basically, I had installed the spigot on my plastic carboy a little too tight, but for some reason it took weeks before any leaking occurred (kind of odd, but whatever). When I noticed the small leak, I tried to tighten the spigot even more, since at the time I thought it might actually be too loose. BAD idea! Wine started flowing out and I had to think quickly to get the wine transferred into a new container as quickly as possible and as sanitary as possible in the short amount of time I had.
I ended up getting the wine transferred into my primary fermenter, since that’s all I had available at that time. I did lose a little bit of wine, but considering how much I could have lost in that situation, I don’t think I lost much at all.
I was a little worried about keeping the wine in the primary fermenter for a couple of weeks, as I was concerned about possible contamination during the fast transfer, and the fact that there is a lot more surface area for oxygen to play around with on the wine than if it were in a more narrow carboy.
So, after waiting a week longer than I was scheduled to bottle due to some travel plans, the moment of truth had finally come! First, I took a final specific gravity reading with my hydrometer, and it was holding steady at 0.997. Good news, since I am convinced all fermentation was complete due to the fact that the specific gravity hadn’t changed in a long time.
Now, the taste—-was it going to be skunked? A little off somehow due to all the “trauma” it went through a couple of weeks prior? To my surprise, the wine actually tasted pretty nice!!! BIG sigh of relief there! I didn’t taste anything that was particularly concerning, and it tasted like it has a lot of potential for aging in the next few months.
I had purchased a couple of cases of wine bottles from ECKraus (since I had been too lazy to go collecting used bottles from wineries), and bottled 26 bottles of Carmenere!
As always, I didn’t filter the wine, since I don’t have a wine filtering system yet, but alas, what can ya do, right? The wine did look pretty clear, though it probably wouldn’t have hurt to run it through a filter to be extra certain. Only time will tell how it comes out, I suppose.
As long as the flavor and aromas develop in a positive manner over the next few months, I plan on serving this wine (in addition to other purchased wines) at my upcoming wedding. What a fun way to share my wine with my family and friends! I’ll certainly taste a bottle or two prior to wedding day as a sort of “quality control”, but hey, I would always serve this wine after everyone is sufficiently toasted so that they don’t notice anything off about it (if it is).
How are your homemade wines coming along?
————————————————————————————————————-
My name is Leigh Erwin, and I am a brand-spankin’ new home winemaker! E. C. Kraus has asked me to share with you my journey from a first-time dabbler to an accomplished home winemaker. From time to time I’ll be checking in with this blog and reporting my experience with you: the good, bad — and the ugly.
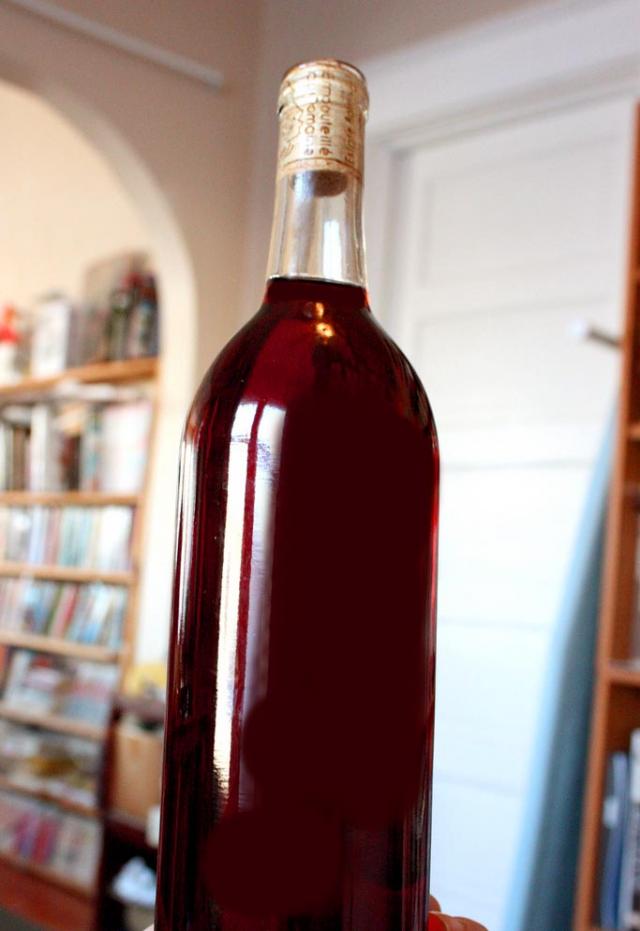
Wow! Each Bottle Of Homemade Wine Tastes Different!
 Hello,
I recently opened a few bottles of a French Cab that I made / bottled in June 2013. The first bottle had quite a bit of sediment in the bottom and the wine did not have a distinct smell or taste. The second bottle was clear but had absolutely no taste whatsoever!? The third bottle was also clear but also lacks a definitive wine taste but is measurably better than the first two. How is it that each bottle from a single batch can yield dramatically different results. The wine seemed very clear when I bottled it last year and smelled typical of previous batches I made in the past. This is my first batch that did not come out and I cannot figure out what I did wrong!?
Name: Kris
State: Ohio
—–
Hello Kris,
Thank you for this great question. It’s one that comes up from time-to-time, so I think it’s great that we cover it on the blog.
First of all, your expectation is correct in thinking that all your bottles of homemade wine should taste the same, and normally this is the case. But there are some variations in small-batch winemaking that can at times cause the bottles of wine to taste different from one bottle to the next.
One of the main reasons variation happens occurs at bottling time. It is because the wine was not racked before bottling. Hopefully, you racked your wine before bottling, but it you didn’t, this could be what is going on.
Wines that are bottled at the beginning of bottling can turn out different than wines bottle at the end. This is because wine at the top of the carboy may have different characteristics than wine at the bottom of the carboy. While you may not be able to see it, proteins and other compounds can be concentrating towards the bottom while lighter elements can be rising to the top.
This is one of the many reasons we recommend that you always rack the wine before bottling your wine. Not only does it get the wine off any sediment, it evens it out or homogenizes all the compounds in the wine. Even wineries will take steps to help insure that each wine bottle is being filled with the exact same wine.
Kris, here are some other things that can affect a wine on a per bottle level:
- Color of the wine bottle. Clear wine bottles let in more UV rays than green. And green wine bottles let in more UV rays than brown. UV rays are a catalysts for oxidation. So if you are using a mix of bottles for your batch, this could be a reason for the variation.
- Amount of light. Is there a light source that hits only part of the batch while it is being stored? More light means the potential for more oxidative effects. It’s always best to store your wines in the dark.
- Variation in temperature. Are some of the bottles closer to a heat source that other, heat vents, outer-exposed walls, etc? Just like excessive UV rays, warmer temperatures can promote oxidation.
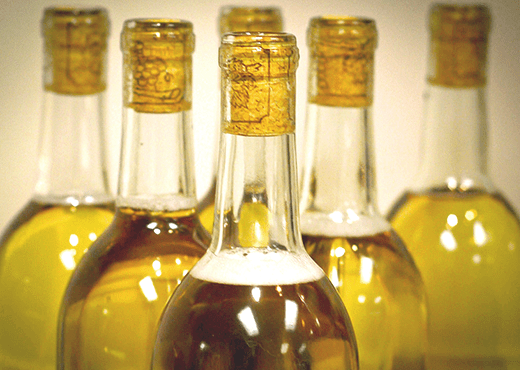
- Variation in corks. Corks are a natural product. They are produced from the bark of a corks tree. Because of this, no two corks are exactly the same. One cork my allow more air to pass than the other. This slight variation can cause one bottle of wine to age differently than the next.
I think you get the idea…
The reason your bottles of wine are varying could be because of any of these — or a combination of these — but having said this, I still have to go back to the fact that it is usually because the wine was not racked directly before bottling.
Best Wishes,
Ed Kraus
————————————————————————————————————–
Ed Kraus is a 3rd generation home brewer/winemaker and has been an owner of E. C. Kraus since 1999. He has been helping individuals make better wine and beer for over 25 years.
A Convenient Truth: Sustainable Brewing
 As homebrewers, we spend lots of time thinking about all the ingredients that we put into our beer. But what about the things that come out of our brew day?
Whether you’d like to save some money or shorten your brewing time, there are lots of benefits that can come from taking a more sustainable approach to your homebrew. Even if being an environmental steward isn’t at the top of your list when you brew, consider these steps that can save you in the long run.
Reduce
The easiest way to stay sustainable from the start is by focusing only on what you need. Don’t buy sensitive items in excess if you’re not going to use them. Grain and hops have eventual shelf lives, so be specific in the amounts you want and when you’ll use them.
It can also be fun to add a touch of personal flair to your beers by using ingredients you grow yourself instead of buying them. In addition to growing hops at home, herbs from backyard gardens can make for great additions. Rosemary, for example, can provide complementary pine aromas to IPAs and basil adds layer of complexity to farmhouse ales, wheat beers, and one of my favorites – honey basil ale.
You can also choose to make lower ABV session beers, which mostly require fewer ingredients, or even harvest and reuse yeast to reduce the amount of ingredients you use.
Reuse
Water plays such a pivotal role in the beer making process, but while the quality of water is important, I often find myself thinking in terms of quantity. Aside from the water we put into our beer, we use a lot of it for cleaning and cooling.
One way I like to save on water use for sanitizing is by using Star San. The commercial-grade sanitizer only needs 60 seconds of contact time to prepare items for use, but its healthy foaming action also offers additional sanitizing that doesn’t require a ton of water to create. By measuring out the amount of Star San you’ll need – a ratio of one ounce per five gallons – you can properly sanitize your equipment. Try using a spray bottle with of the sanitizer solution and even keep the Star San-water solution to use again later.
When it comes to cooling your wort, many homebrewers like to use an immersion wort chiller to prep their wort for yeast. If you’re hooking your chiller up to an outside hose, consider that the average amount of water that could pass through may average up to 10 gallons per minute. If you’re concerned about wasting water, either opt for an ice bath – you can make the ice in your freezer and store it for brew day – or capture the water running out of the chiller to reuse for laundry, watering the plants or grass, or other household chores.
Recycle
Here’s a neat project that combines recycling with energy efficiency. If you’ve got some extra sheet metal or aluminum and you brew outside with a propane patio stove or pressure cooker, it’s easy to make a propane fryer outfit much more efficient for boiling your wort.
If you’ve got the tools to manipulate the metal, create a heat reflector that also blocks wind. Make sure it’s tall enough to cover the legs and heat shield of the burner and also bend the material wide enough to place safely around your burner. It can also double as a windscreen to keep your flame burning. Having a heat shield in place will trap heat around the kettle, potentially allowing for faster boil times. For one homebrewer, it was as easy as recycling a galvanized trash can.
*If you create a heat reflector, make sure to only use it outside in properly ventilated areas. Always take care around burning flame and keep a safe distance from anything flammable.
As you prepare for your next homebrew, stop and give some thought to how you can be more sustainable in your actions. You’ll be able to produce the same quality beer you expect, but may find new approaches to make your homebrewing hobby both more efficient and more fun!
———————————————————————————————————————
Bryan Roth is a beer nerd and homebrewer living in Durham, North Carolina. You can read his thoughts on beer and the beer industry on his blog, This Is Why I’m Drunk, and send him suggestions on how to get his wife to drink craft beer via Twitter at @bryandroth.
Leigh Erwin: A Beginner's Wine Making Journey: Part 25
 Hi everyone!
So today I had to decide whether or not to go ahead and bottle my homemade Carmenere wine (batch #3 total) a week early, or hold off for another week or so. If you recall, I had a mini disaster with my Carmenere in that I lost a little bit of it and had to quickly transfer the rest into my primary fermenter due to a structural integrity failure of the spigot on the carboy the wine was in. It’s not the most ideal holding place for it, as the surface area of the wine touching the air is a lot greater than if it had remained in the taller, thinner carboy. Alas, at the time I had no other choice but to hope for the best.
Anyway, if I were to follow the remainder of the instructions to a T, then I would need to bottle the wine on a particular weekend that I am scheduled to go out of town. I had to decide then if I was going to bottle early or bottle late. Part of me wanted to bottle the wine early, as I’m nervous about storing the wine in the primary fermenter as opposed to a carboy, but the other part of me wanted to wait because 1) I don’t like to feel rushed, and 2) I don’t have all the proper equipment to do the bottling anyway! Whoops!
To put my mind at ease, I very quickly cracked the top of the primary fermenter to take a peek at the wine and also take a sniff, and everything looks OK so far. I didn’t want to leave the top open very long, as I didn’t need to introduce any more oxygen than what was already in there to begin with! Since I had that dramatic morning with the emergency wine transfer, I’ve sort of given up the hope that this will be a crazy good wine anyway. Sure, I suppose it still might end up being awesome, but I’m not going to lose any sleep over delaying bottling since if the wine is bad, it’s gone bad already and there probably isn’t much I can do about it with the resources that I have.
So, what I will do instead is come up with a list of things I need to purchase in order to get this bottling done when I return from out of town, and put an order into ECKraus.
Here’s what I am going to get:
-Wine Bottles: yes, I should have been saving up wine bottles to just reuse—which I had been!—but turns out I only saved enough for my Pinot Chardonnay and have barely anything left for the Carmenere. Next time, I’ll go to a local winery and pick up a bunch of empties from them, but in the meantime, I’ll just go ahead and order some new wine bottles this one time.
-Corks: I only bought enough wine bottle corks last time for one batch of wine, since I wasn’t sure how much trouble it was going to be putting them in. After bottling the Pinot Chardonnay, I realized that the process is ridiculously easy and I am going to go ahead and stock up.
-What I’d like to get eventually but won’t be ordering just yet—A wine filtering system. Yeah yeah, I know I keep saying I need one of these. Yes, I’ll get one eventually! I’m thinking for now I’ll try to be more careful to not mix up any of the sludge at the bottom of the container and I can decant the bottles later if necessary!
————————————————————————————————————-
My name is Leigh Erwin, and I am a brand-spankin’ new home winemaker! E. C. Kraus has asked me to share with you my journey from a first-time dabbler to an accomplished home winemaker. From time to time I’ll be checking in with this blog and reporting my experience with you: the good, bad — and the ugly.