
 Hi there everyone!
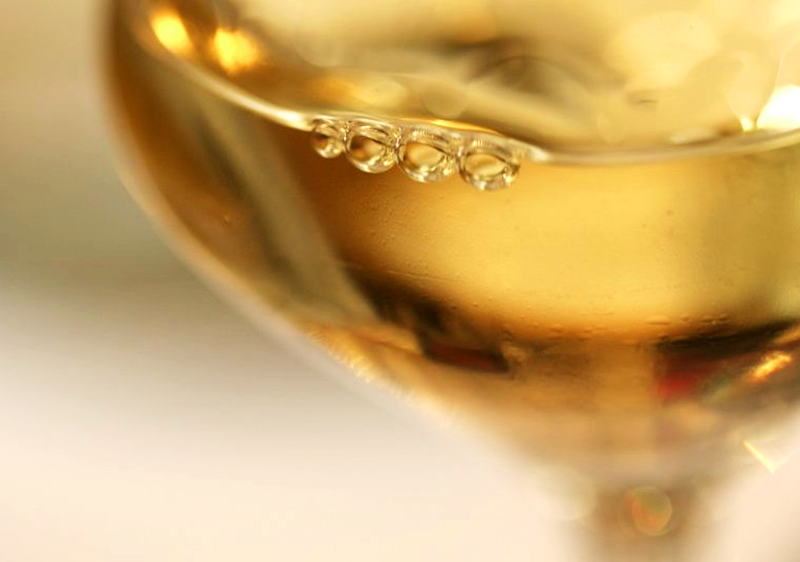
As I mentioned last time, the Gewurztraminer I’m currently making from a wine ingredient kit was going a little bit slower than the instructions that came with it said, but then again I’m not surprised since primary & secondary fermentation was a little bit slower due to some room temperature issues. All that’s straightened out now, so I anticipate things should start moving along on a more normal schedule.
I ended up ending the fermentation and moving to the next step when the specific gravity on my hydrometer was holding steady between 0.995 and 0.996. I know the instructions said it should be less than 0.995, but it was hovering very closely to that value and not moving or showing any gas activity for two days straight. I made the call to move forward, as I didn’t think it was going to change any more.
So, instead of starting the degassing stage on day 20 as the wine kit instructions anticipated, I’m starting it on day 22. Not too delayed, so I’m still happy.
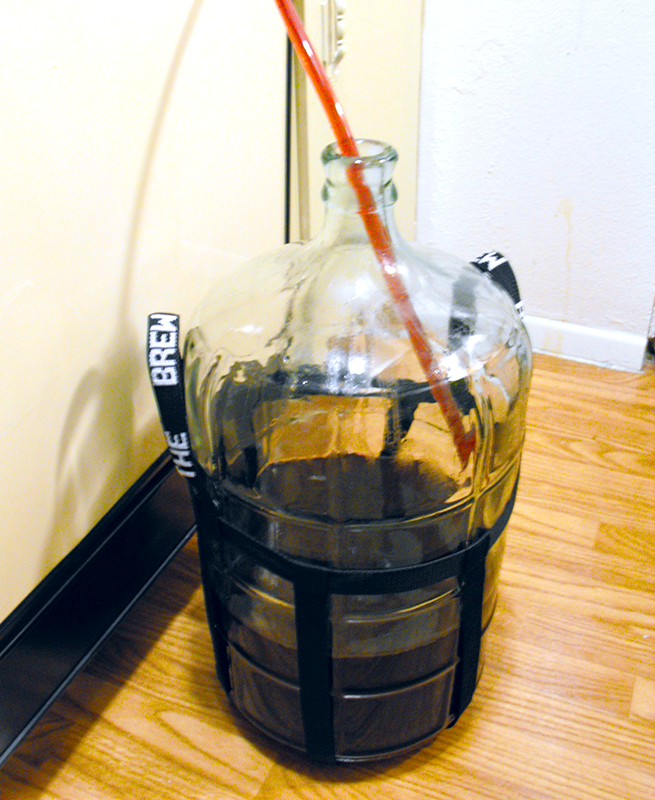
I ended up racking the wine twice — once to get it into a clean carboy, and then again to get it into the primary fermenter so that I could more easily stir the wine and get all the trapped CO2 gas out. The instructions mentioned to rack it once, but I’m thinking doing it a second time shouldn’t hurt it too much. We’ll see, I guess!
Per the instructions, I added the potassium metabisulphite and kieselsol and over the next two days ended up stirring the wine a total of 7 times (the instructions said to stir 6 to 8 times over the two days).
Prior to adding the stabilizing/clarifying ingredients that came with the wine ingredient kit, I moved the wine once more into another carboy. This time, moved it from the primary fermenter into a clear carboy so I could actually see when the wine was clear enough to move forward. The primary fermenter is opaque, so that would make it much more difficult to eyeball things and make a judgment call if need be.
I followed all instructions for the stabilizing/clarifying step, except for adding in the extra racking step at the beginning.
Also, for some reason, I seem to be missing an extra bung for the carboy, so I had to put some tinfoil over the opening and cover that with a measuring cup to try and keep the air out. Come to think of it, I seem to be missing my original primary fermenter that came with my first wine ingredient kit, so I’m thinking there is one box that didn’t quite make the 1600 mile move we recently made to our new home. Whoops! That’ll be in my next order from ECKraus for sure!
Now it’s a waiting game until bottling. By the way, I tasted the Gewurzt again and it tastes really nice. Hope it stays that way!
—————————————————————–
 My name is Leigh Erwin, and I am a brand-spankin’ new home winemaker! E. C. Kraus has asked me to share with you my journey from a first-time dabbler to an accomplished home winemaker. From time to time I’ll be checking in with this blog and reporting my experience with you: the good, bad — and the ugly.
Leigh Erwin: Racking A Rosso Fortissimo
 Hey all!
Just a quick update in case you missed my last entry: my Gewurztraminer wine ingredient kit seems to be going along well, though it’s just a little bit slower coming out of secondary fermentation than the instructions that came with it predicted. It probably has another day or two to go, so I’ll just check the specific gravity every day. By the way, it tastes great for this stage…
On the other hand, the Rosso Fortissimo wine ingredient kit, had a specific gravity of 0.999 which is less than the 1.000 recommended in the instructions that came with it, so it is ready to move into secondary fermentation. This is a process winemakers call racking. That’s where I left off my last post, so I’ll pick up from there!
I gave the Rosso Fortissimo a little taste while I was checking the specific gravity, and I think it’s tasting pretty nice for this early stage. I got a lot of bright cherry character, while my husband made note of some good tannin structure. We’ll see how it develops — but I’m optimistic at this point.
The next step for this wine was to transfer or rack it from the primary fermentation vessel to the secondary fermentation carboy. I had cleaned and sterilized all equipment prior to getting started, so I was all ready to go after checking the specific gravity.
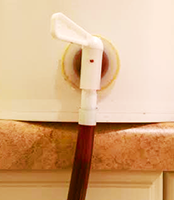 I was debating whether or not to use the siphon tube and hosing for the racking, or if I should just hook the hose up directly to the spigot at the bottom of the fermentation vessel. At first I thought I’d use the siphon tube, and had it all clean and sterilized, but then I decided at the last minute it would be a heck of a lot easier, quicker, and probably less messy to just hook the hose up directly to the spigot. I mean, what else would there be a spigot there for, right!
 The racking went really well, and I stopped it right at the point where I could see all the lovely dead yeasts and other gunk at the bottom of the fermenter. I’m sure a little bit snuck in the secondary fermentation carboy, but I’m sure it was minimal based on the stuff that was leftover in the first tank! There an excellent post about racking wine on this blog that’s worth noting. It explains how to minimize wine loss during the procedure.
These wine ingredient kits didn’t come with any enzymes or anything, which normally one would add at this stage, so I just closed it up with a rubber bung and fermentation lock and said “nighty-night!”. There already seems to be some gentle bubbling activity in the fermentation lock, so things seem to be progressing nicely. Now it’s a waiting game — I’ll keep my eyes on it every day to make sure nothing starts growing on it, but theoretically I won’t have to do anything with it for at least 10 more days (Day 20). At that point, I’ll check the specific gravity to see if it’s ready to move on to the clearing stage.
Fingers crossed things continue to move along well!
—————————————————————–
My name is Leigh Erwin, and I am a brand-spankin’ new home winemaker! E. C. Kraus has asked me to share with you my journey from a first-time dabbler to an accomplished home winemaker. From time to time I’ll be checking in with this blog and reporting my experience with you: the good, bad — and the ugly.
Leigh Erwin: A Time To Rack…
 Hi, everyone!
I’m happy to report that both my white and red wines seem to be fermenting nicely! The Gewürztraminer has been happily milling about in secondary fermentation, while my Rosso Fortissimo has been plugging along in primary fermentation.
I left the fermentation lock securely on the Gewurzt during this whole process, despite my nagging curiosity to remove it and give the wine a sniff. It looked great, and nothing appeared to be growing on it, so that was good enough for me to assume all was going well.
In regards to the Rosso, I gave it a gentle stir throughout the primary fermentation in order to keep those grape skins wet and submerged. I did miss one day right at the very beginning, but I don’t think that really had any effect on the wine, because at the end of the primary fermentation it all seemed great to me.
Even though people have said you tend to get more extract from the grape skins if they are left loose in the carboy, I did really like the ease and convenience of keeping them in the cheesecloth pouch that was provided to me in the wine ingredient kit. I remember leaving them loose when I made the Carmenere, and that was such a pain in the butt to clean up. I just made sure I gave the bag a good stir every day and hopefully that’ll be enough to get a good enough extraction for my husbands and my standards. We’re not shooting for any award winners quite yet!
Both wines were scheduled to move onto their respective next steps on the same day, so it was going to be an extremely busy day for me if they were both ready! I measured the specific gravity of both with my wine hydrometer, and truth be told, they were both NOT ready to move on.
The instructions for the Gewurzt said in order to move on to the degassing stage, the specific gravity should be less than 0.995, and no bubbling seen. After measuring the specific gravity and converting the result to account for the calibration temperature of the hydrometer, the SG of the Gewurzt was 0.996. So close! But not close enough! I’m not surprised it wasn’t quite there yet. If you recall, there had been some delays early on in the process due to fluctuating temperatures during primary fermentation. Also, paying closer attention to the fermentation lock, I did notice that there was still a little bit of bubbling going on.
So, I decided to let the Gewurzt sit for another day, and I’ll just check it daily until it’s ready.
The Rosso, on the other hand, had a specific gravity of 0.999 after temperature correction, while it was less than the 1.000 recommended SG for this wine, so it was ready to move onto the secondary fermentation. I’ll fill you in on all that in my next post!…
—————————————————————–
My name is Leigh Erwin, and I am a brand-spankin’ new home winemaker! E. C. Kraus has asked me to share with you my journey from a first-time dabbler to an accomplished home winemaker. From time to time I’ll be checking in with this blog and reporting my experience with you: the good, bad — and the ugly.
An Ode to Beer’s Main Ingredient
 Tim from One Mind Brewing shares some tips and tricks about working with his favorite brewing ingredient: yeast.
My name is Tim, and I’m a brewaholic. I love beer, I love brewing beer, and I love everything about the process. Today I want to ramble about the most important ingredient. What is it you ask? Well, to get there first we must ask a simple question.
What makes beer?
The single most important ingredient when it comes to making beer is yeast. To those who might argue and say that without water there is no beer, my retort is simple: With water and no yeast you still have no beer, so to me, the yeast is the most important ingredient!
Getting the Most From Your Beer Yeast – Pitching Rates
The beer yeast is a huge part of what makes beer. Without adequately pitched yeast, flavor profile and alcohol content are difficult to control at best, and horrific at worst.
You may have noticed the word “adequately” in there. It’s probably the most important word, because without an adequate yeast pitch it’s entirely possible you’ll still end up with beer — even likely. But it’s much harder to get the exact result you want without consistent yeast pitching across all of your homebrew batches.
But what is adequate, exactly? Well, there are a few sources online to help with that. My go-to source for preparing a dry yeast starter is Mr Malty, because there is a dry yeast option. For preparing liquid beer yeast starters though, I prefer yeastcalculator.com. Both options are fairly intuitive, but I’ll share some tips below.
Preparing a Beer Yeast Starter – Parameters
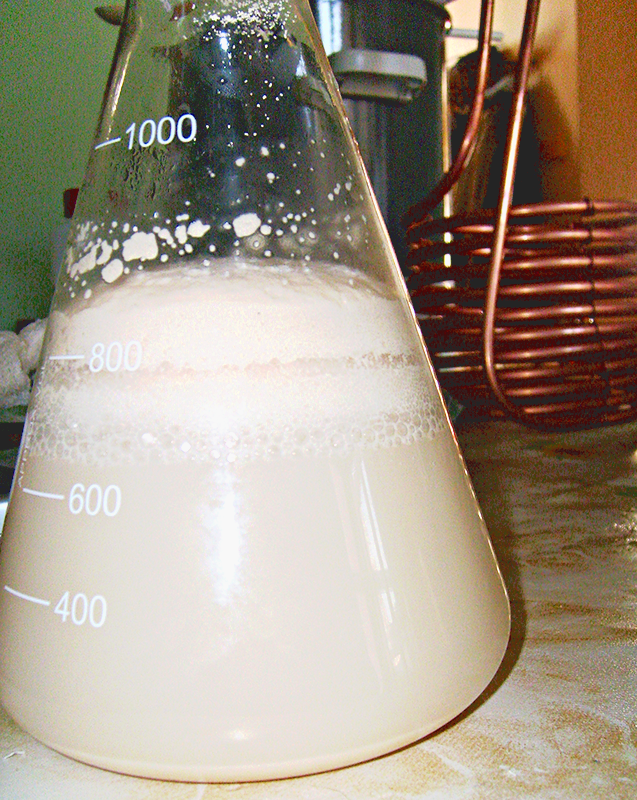
If you’re new to calculating pitch rates, don’t worry about the additional “steps” as mentioned in the calculators. It’s not really necessary if you’re using fresh yeast and making a moderate gravity brew. The important parts here are: the date on the beer yeast to determine viability; the starting specific gravity of your beer (OG, as measured with a Hydrometer or Refractometer); the volume of the starter; and the aeration method of the starter. There is also a starter calculator off to the left to help you with how much DME to use for your starter, though that becomes rote quickly if you do the same size starters regularly.
Do I Have to Have a Stir Plate?
It is important to note that you do not absolutely need a stir plate or any specialized equipment other than a jug or a growler to do a yeast starter in. However, you will get far better results out of a stir plate.
Preparing a Beer Yeast Starter – Aeration
Back to the calculator. The first two options for “Method of Aeration” are pretty self-explanatory. If you’re not going to shake the starter periodically, put none. If you are, then select “intermittent shaking.” Then you’ve got Troester vs. Zainasheff. My understanding is that Zainasheff’s method is to scale up from unstirred starters, while Troester’s method was devised with science. Cell counts from stir plate starters, rather than guesswork based on unstirred. If you’re ready for a headache or have a much better understanding of it than I do, read more about it here. That said, I opt for the Troester method with my stir plate.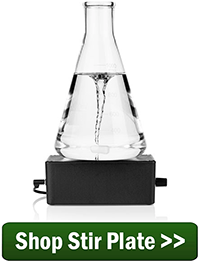
Putting Your Yeast Starter to the Test
The real fun part about yeast starters is learning (trial and error means you get to brew MORE!) what pitch rates result in what flavor profiles. While there are some resources online to assist, you really do have to try it to know for sure with your own setup what works best for you. For example, I wanted a Hefeweizen with a more pronounced banana flavor/aroma. After a bit of research, I stumbled upon this lovely thread regarding open fermentation to get more ester production. I blogged about it on my blog and used WLP300 for that one. I’m going to try open fermenting with WLP565 (Belgian Saison) in the near future as well as a few others, though those aren’t set in stone just yet. There are many, many ways to experiment with beer yeast and flavor profiles. Your only limit is your imagination. Well, that and your bank account I suppose.
To really be able to appreciate it, experimentation needs to be done in a controlled way. The best way to control it is to do things in reproducible ways. The most important variable is controlling your yeast pitch rates and the fermentation temperature. If you have a fermentation chamber, great. If not, a simple swamp cooler will suffice. The hard part is really going to be reproducible yeast pitch rates for new brewers.
Without doing yeast cell counts in a lab, the best we can do on a homebrew scale is to keep the way we are preparing our beer yeast starter consistent and use the same equipment every time. Your exact numbers may not match what the calculators say, but as long as you’re consistent within your process, the results will be reproducible on your system. That’s the important part for experimentation, at least as far as I and my taste buds are concerned.
Remember: The difference between science and screwing around is writing it down. So don’t forget to take notes while you brew!
So know you should have enough information for preparing your own beer yeast starter. If you have any questions about yeast starters, feel free to reach out!
—————————————————————–
Tim Daniel is a brew blogger from One Mind Brewing. He’s an avid brewer who loves sharing tips and tricks with others. You can visit him on Facebook, as well.
Cloning Ithaca Beer Co.'s Flower Power–Pt. 7: Final Side-by-Side and Recipe Edits
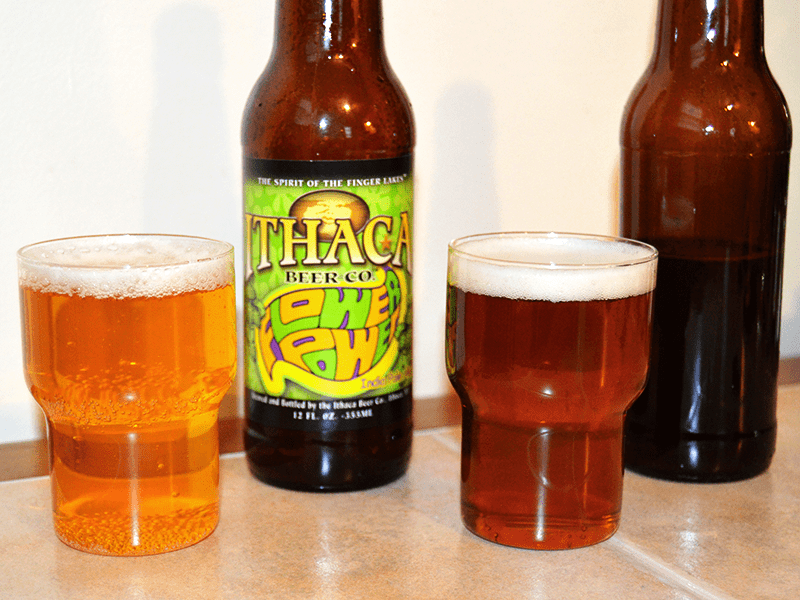 I’ve got to tell you, this Flower Power IPA clone has really come into its own over the past few weeks. The somewhat harsh, alcoholic bite that I noticed in the initial tasting has completely gone away, leaving behind a lush, citrusy hop flavor that’s damn near irresistible. I’ve recently had a few IPAs from the store (from major American craft brewers, no less) that don’t stand close to this brew. It just goes to show that it is possible to make better beer than you can buy.
In addition to the development in flavor, there has also been a big change in the appearance of the beer. In my initial taste test about two weeks after kegging and bottling, both the kegged and bottled beers showed some serious haze. The kegged beer gradually became clearer as it was consumed, and with a little extra time, the bottled beer became clear as could be, as long as I avoided pouring the sediment into the glass.
Regrettably, I finished off the kegged portion of the Flower Power clone before getting a final photo, but I’ve got some bottles stashed away and one more bottle of the original Flower Power IPA for a final side-by-side comparison. Here are my tasting notes:
- Aroma – Both burst with fresh, American hop aroma. The original Flower Power has more of a malty, sweet honey aroma.
- Appearance – Both clear, with a decent white head. The clone has somewhat more head retention than the original. Original is golden straw in color, while the clone is more of a bright orange.
- Flavor – For all intents and purposes, they are identical. It’s hard to pick out differences when the hops just sit on your palate.
- Mouthfeel – Both are medium-full bodied, carbonation is good. Bitterness doesn’t linger too much.
- Overall – Aside from the color, the clone is nearly spot on. A wonderful IPA in its own right.
Flower Power Clone Recipe Adjustments
Don’t get me wrong – this clone is awesome just the way it is. But if I wanted to make a perfect clone of the Flower Power IPA, how would I change the beer recipe to make it more accurately resemble the original version of the beer?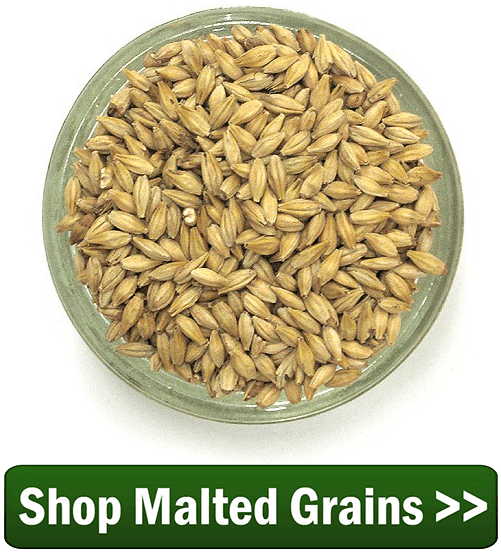
When adjusting a beer recipe, it’s important not to make too many drastic changes all at once. Instead, focus on just one or two areas and make incremental adjustments. This will make it easier to keep track of what changes have what effect on the beer. After all, the beer is close – we don’t need to reinvent it, just tweak it a little.
That said, the biggest “fault” is the color. To fix that, I would make the following adjustment:
- Grain bill – The clone is too dark. In the original beer recipe, the grain bill is 14.5 lbs. Weyerman pale malt and 1 lb. honey malt, with an estimated color of 9 SRM. I’d consider switching the base malt from a pale ale malt (3˚L) to a 2-row brewers malt (1.8˚L) and possibly reduce the honey malt to .75 lb. to get the color closer to 7 SRM. To maintain a malty sweetness (which is where I think the original really stands out), I’d make sure to keep the mash temperatures on the high end, maybe 154˚F.
Conclusion
This has been a fun experiment in recipe development. Though the first attempt at this Flower Power clone wasn’t a perfect match, I’ve stumbled across an amazing IPA recipe in the process. Best of all, I feel that I’ve really proven to myself that yes, you can make better, fresher beer at home than what you can buy at the store.
What beer would you like to see cloned on the E. C. Kraus Homebrew Blog?
—————————————————————–
Review the whole Flower Power clone brewing process below:
- Part 1: Developing a Recipe
- Part 2: Brewing Water Adjustments
- Part 3: Brew Day
- Part 4: Primary Fermentation Mishaps
- Part 5: Bottling & Kegging
- Part 6: A Conditioning Taste Test
- Part 7: Final Side-by-Side and Recipe Edits
—————————————————————–
David Ackley is a beer writer, homebrewer, and self-described “craft beer crusader.” He holds a General Certificate in Brewing from the Institute of Brewing and Distilling and is founder of the Local Beer Blog.
Leigh Erwin: Making Russo Fortissimo
 Hi all!
I’m very excited today, as it’s the first time ever I’ve attempted to make two wine ingredient kits at the same time!
The other day, I tucked the Gewurztraminer in for it’s 12 days or so in secondary fermentation, and since I have the equipment, ingredients, and space, I figured why not start another wine!
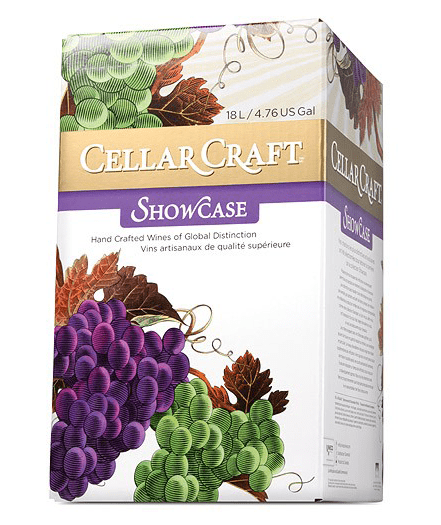
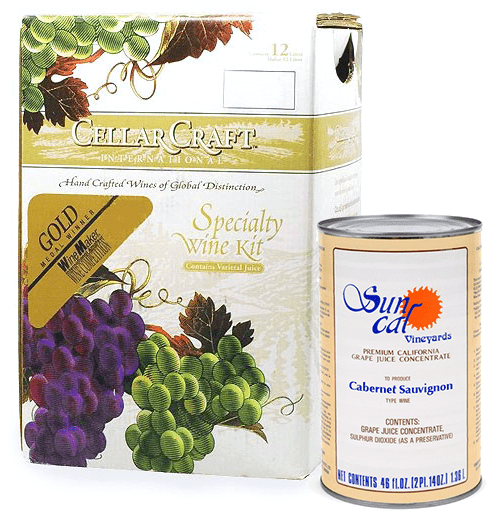
For my second wine ingredient kit of 2015, I’m going to make the Cellar Craft Showcase Red Wine – Rosso Fortissimo. I had sterilized everything the night before, so I was pretty much all ready to go and get started today.
The one thing that I remembered being a pain in the butt last time was marking the 23L mark on the fermenter. I know I know, it’s not THAT big a deal, but when the biggest measuring device you have is only 2 cups (500mL), filling the fermenter up to 23L with water to mark it is kind of annoying.
After putting markings on my fermenter, I dumped out the water and then added back in 2L plus the bentonite package. I mixed that as well as I could, though there were a couple of small lumps remaining when I gave up on that part. I don’t think it’ll be a big deal. I’m sure they’ll all get mixed up well eventually!
Then came what I think is the hardest part of the whole process: adding the wine juice. I always feel so awkward during this stage, since the bag is so heavy and sloshes around like crazy. I wish they made something a little sturdier so I would feel a little more secure about pouring it in.
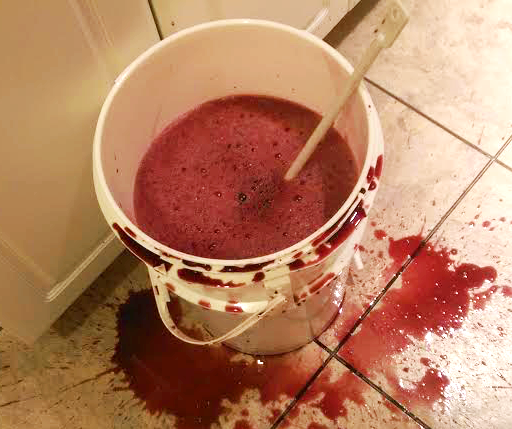 Well, of course while I was pouring the wine juice into the fermenter, my hands slipped and I spilled a bit on the floor. You can see from the picture that it’s really not that much, but at the time I was a little nervous that I was going to spill more. Thankfully, that didn’t happen.
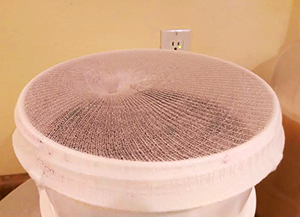 For the grape skins that came with this particular kit, I decided this time I would use the mesh bag that was supplied, since last time I remembered it was really a pain to get all the bits out of the wine when it was time to move on to secondary fermentation. I feel like I needed a third hand to do this, but I figured out a way to sort of secure the mesh to the top of the fermenter — at least in the beginning — to try and make the process a little easier.
Once the bag got too heavy, I had to apply some pressure to the bag with my elbows to keep it from falling in before I was finished squeezing all the grapes out of the pouch. Surprisingly, this went off pretty smoothly. I mixed everything together and then put on the lid. The instructions that came with this wine ingredient kit said the best time for checking specific gravity is between 12 and 24 hours after beginning, so that’s what I’m going to do before I move on any further.
After cleaning up the grape skin massacre on the floor with a mop and cleaning the spatter off the cupboards and doors, I felt like a little bit like a criminal cleaning up the scene of a crime. Hopefully in this case, I’ve already done my time and the rest will be smooth sailing.
I’m really hopeful for this wine ingredient kit. Despite any trials and tribulations, the Rosso Fortissimo smell incredible and can’t wait to see how it turns out.
—————————————————————–
My name is Leigh Erwin, and I am a brand-spankin’ new home winemaker! E. C. Kraus has asked me to share with you my journey from a first-time dabbler to an accomplished home winemaker. From time to time I’ll be checking in with this blog and reporting my experience with you: the good, bad — and the ugly.
Introducing The Cork Retriever!
 No, the Cork Retriever is not a new breed of hunting dog, but it can be just as nice to have around.
A Cork Retriever is a useful tool that any winemaker should have. Anyone whose tried to fetch a cork from inside a wine bottle knows what I’m talking about. You try your darnedest to uncork the bottle, but neither the corkscrew nor the cork feel obliged to cooperate. Instead of the wine cork coming out, it ends up going in.
Not only do you end up with the aggravation of drinking a bottle of wine with a cork floating in it, now you need to figure out how to get the cork out or end up throwing away a perfectly good, reusable, wine bottle.
Whoever said that, necessity is the mother of invention was a genius, and the Wine Cork Retriever is just one more piece of evidence supporting their wisdom.
The Wine Cork Retriever is designed to remove the cork from within the bottle. Now, instead of throwing the wine bottle away, you can rescue it, and use it to bottle your next batch of wine.
The Wine Cork Retriever is easy to use. The three heavy wire prongs go into the bottle and act like a cradle. They spread out as they are pushed in, so you can easily grab the cork.
Once the cork is in the cradle, just give it a tug on the grip handle. As the prongs are pulled out they come together, trapping the cork tightly and pulling it out.
Not only does the Wine Cork Retriever save your wine bottles, it saves you from all the headache. That alone is worth having one sitting around.
—————————————————————–
Ed Kraus is a 3rd generation home brewer/winemaker and has been an owner of E. C. Kraus since 1999. He has been helping individuals make better wine and beer for over 25 years.
Why The Big Difference In Price Between Wine Making Juices?
 There is a great spread of prices between our different brands of wine making juices. Some are in the $30 range while some are over $200. Many of our customers simply wonder why.
There are a couple of reasons for this:
- Level Of Concentration:
The first reason has to do with the how much these wine making juices are concentrated. At one end of the spectrum is our SunCal brand juice that comes in a 46 ounce can (about 1-1/2 quarts) for producing 5 gallons of wine. On the other end of the spectrum are our 18 liter wine ingredient kits (4.75 gallons) that is only slightly concentrated for making 6 gallons of wine. One is just much more concentrated than the other. Higher levels of concentration tend to take out some of the finer subtleties of a wine, making the wine more a everyday-drinker. Wine making juices that have been concentrated less or not at all will have flavors that can develop into something more complex or layered as it is aged. - The Selection Of Grape
Not all grapes are the same. Where and how they are grown can make a big difference. The soil, the climate, the age of the vines, all come into play when evaluating the grapes. Simply put, certain regions can command a higher price for there grapes because they make better wines. So, as you go up in price, you are going up in grape selection as well. This is no different than wines you buy commercially at the store. As a general rule-of-thumb, the better the selection of grape the more you will pay for the wine.
Having Said All This. . .
How much money you’ll want to put into the quality of a wine making juice may be different than the next winemaker. This has to do with how well you are able to discern the difference between various levels of quality. It makes no sense for you to buy a level of quality you are unable to taste, appreciate or even looking for.
Some of our customers are completely happy making wine from nothing but our SunCal selection. They use this brand over and over again and are completely satisfied with the quality. They can see no reason to spend anymore on wine making juices based on the quality they are already getting.
Other winemakers consider SunCal an everyday, common wine that they would not want to put their efforts into. These home winemakers would prefer to spend their time making more top-end wines.
The Bottom Line…
Figure out what level of quality suites your level of wine appreciation. Start out with maybe our California Connoisseur or European Select. These are mid-range wine making juices. After that maybe try a KenRidge Classic or a Cellar Craft Sterling and see what you think. By trying different levels you should be able to hone in on what is best for you.
—————————————————————–
Ed Kraus is a 3rd generation home brewer/winemaker and has been an owner of E. C. Kraus since 1999. He has been helping individuals make better wine and beer for over 25 years.
Leigh Erwin: Racking My Gewurztraminer to Secondary
 Hi everyone!
If you recall, Day 8 of the primary fermentation for my Gewurztraminer came and went with not much fanfare. According to the instructions, secondary fermentation should start on Day 8 IF the specific gravity was less than 1.010 on the wine hydrometer. Well, mine was not quite that low — almost, but not quite. It was 1.016 to be specific.
I waited one more day and checked the specific gravity again. This time, it was even closer at just over 1.010. I thought for a second if I should go ahead and move forward, but decided to turn off the heating pad and let it go one more day. It was SO close to 1.010 but since it was hovering just over that value, I decided killing the heat and let it slowly go for one more day would probably be the best thing to do.
So, Day 10 came and I checked the specific gravity on the hydrometer again. The temperature had dropped down to 64.5°F. since I didn’t have the heating pad on, and the specific gravity was….drum roll please….1.006! Perfect! That’s less than 1.010, so it was ready to move onto the secondary fermentation stage!
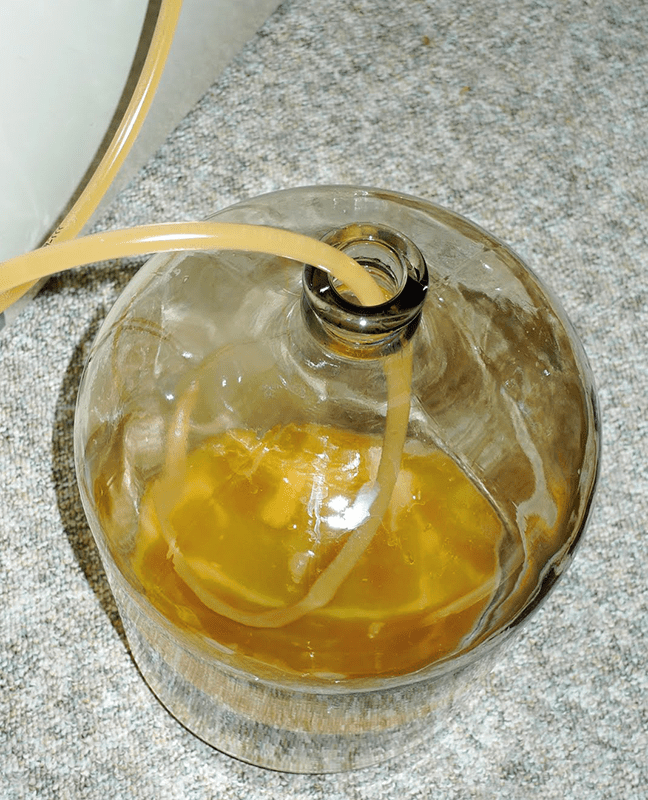
I had previously cleaned and sanitized all the wine making equipment I needed to prepare for secondary fermentation, so today’s step took hardly any time at all. I kept the tubing in the solution overnight just to make extra sure any travel dust or whatnot was gone and done for.
I hooked up the sterilized tubing to the spout on my primary fermenter, and let the wine flow into my glass carboy. I tipped the fermenter a little at the end to get as much wine transferred as possible without letting too much sediment in there. I think I did a fairly good job on that, because there was a nice amount of sediment left on the bottom of the fermenter when it was all said and done.
Finally, I cleaned and sterilized all the equipment I used and put them up to dry.
A couple of notes on this Gewurztraminer so far:
-
- It smells great! I didn’t taste it this time, as I was drinking some herbal tea and I knew I wouldn’t be able to taste the wine very well, but I did give it a nice sniff and it smelled wonderful. Smells like fermentation—a healthy fermentation!
- Remember how I said it was really cool in the finished basement where I am now making my wine? Well, turns out that in the haze that was unpacking the house and getting everything set up, I neglected to notice that every single vent was actually closed! No heat was even getting in there! No wonder it was so cool! I ended up opening up the vent in the small winery room, so if all goes well I won’t actually need the heating pad unless absolutely necessary! Score!
—————————————————————–
My name is Leigh Erwin, and I am a brand-spankin’ new home winemaker! E. C. Kraus has asked me to share with you my journey from a first-time dabbler to an accomplished home winemaker. From time to time I’ll be checking in with this blog and reporting my experience with you: the good, bad — and the ugly.
5 Gallons Of Apple Juice, Three Hard Cider Recipes – Part 3: Bottling
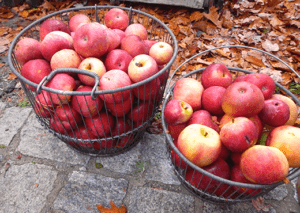 After several weeks of fermentation, it’s time to bottle my hard apple cider.
Just as a refresher, I took five gallons of apple juice, pasteurized the juice and pitched the yeast, and then divided it into three separate fermenters for secondary fermentation: one plain, one dry-hopped, and one with blueberry and cardamom.
Unfortunately, the blueberry and cardamom batch became infected. I took measures to stave off the infection, but I probably could have been more timely and/or aggressive with my efforts. Today, I decided to just dump the blueberry cardamom batch. I gave it a taste and while it may well have passed as drinkable, in my head I would’ve known that it wasn’t as good as it could have been. In the end, dumping a few bottles (less than a gallon) worth of cider isn’t the end of the world. I’m not going to worry about it, and instead I’ll just learn from my mistakes and move on. I think next time I would wait a little longer to add the fruit and spices, and maybe make a blueberry syrup or extract instead of using whole fruit.
Meanwhile, my other two hard apple ciders look and taste pretty good, so I’m going to go ahead and bottle. The only thing is that they are very hazy, which is weird, because the infected cider was nearly crystal clear. Who can explain that phenomenon? Next time I make a cider, I’ll do a proper cold crash to see if it will clear. The good news is, as far as I can tell, there’s no infection.
So on to bottling…
 When bottling split batches like this, it’s essential to use a priming sugar calculator. This will help make sure that you have enough carbonation and also don’t over prime and end up with a bottle bomb. The bottling process takes a little longer for the split batches, simply because you have to add the priming sugar, bottle, rinse, and repeat. Still, I think I finished bottling in just about an hour.
Now here’s a timesaving bottling tip: Line up your bottles single file, then put caps in place. Then you can go down the line and quickly cap each bottle in succession. (You might do this in several rows.)
After tasting the hydrometer samples, I’m pretty excited about the plain hard apple cider: dry, but with plenty of apple flavor and some vanilla notes. The hopped apple cider is good too, but I think it will really shine once it’s bottled, carbonated, and chilled.
The one thing I’d like to figure out is how long to age the cider. I’ve heard that hard apple cider can take a year to really peak, but I’ve also heard that using ale yeast (like I did), can lead to a drinkable product a lot sooner. I guess I’ll just have to taste ‘em as I go and find out!
Do you like to make hard apple cider? What advice do you have for fermenting and bottle conditioning?
Series: Part 1 | Part 2 | Part 3
—————————————————————–
David Ackley is a beer writer, homebrewer, and self-described “craft beer crusader.” He holds a General Certificate in Brewing from the Institute of Brewing and Distilling and is founder of the Local Beer Blog.