Alternative Techniques For Adding Hops To Beer

Hops – they’reHops Ready To Add To Beer the defining ingredient in many styles of both craft and homebrewed beer. From brown ales to stouts to IPAs, there’s hardly a beer out there that isn’t made with the addition of hops.
You may be aware that adding hops to beer at different points of the boil contribute different characteristics to the finished beer. Hops added early to the boiling wort are responsible for most of the bitterness in the beer, while hops added later to the boil contribute more of the floral, spicy, piney, or citrusy flavor and aroma qualities that hopheads know and love.
If you are following a beer recipe it is customary for it to state the boiling times for the various hop additions, whether it be: 60, 30, 15 or 5 minutes. Just following these times for standard hop additions.
But besides these standard hop additions through out the wort boil, there are a few alternative techniques for adding hops to beer that you may want to have in your homebrewing tool box:

  1. First wort hopsFirst wort hopping involves adding hops while collecting the runnings from an all-grain mash. Simply take the hops that you would add at the end of the boil and place them in the brew kettle as you collect the wort pre-boil. Some brewers believe that this technique results in “a more refined hop aroma, a more uniform bitterness, and a more harmonious beer overall.”
  1. Dry hopDry hopping is the practice of adding hops to the secondary fermenter while the beer is conditioning. This is another technique which adds additional aroma to the beer. As with first wort hopping, low alpha acid aroma hops are best suited for dry hopping. Use a screen, mesh hop bag, or cold crash your beer to separate the hops from the finished beer.
  1. Hop back – This is a method of adding hops to beer that is a little bit more involved. A hop back is a piece of equipment used to recirculate beer through the hops packed into it. For Sierra Nevada,Shop Hops it’s called a torpedo (hence “Torpedo” IPA), and for Dogfish Head it’s called Randal the Enamel Animal. If you’re a do-it-yourself-er, you can build your own hop back using a stainless steel container and standard hardware store fittings.
  1. Foosball table – If you’re a fan of the Dogfish Head IPAs, you’ve probably heard why they’re named 60-Minute, 90-Minute, and 120-Minute. Founder Sam Calagione originally used a jury-rigged foosball table for adding hops gradually throughout the 60-, 90-, or 120-minute boil. The idea is that this “continual hopping” results in a more rounded hop profile. While that may be true, this example highlights how creative ideas can be applied to the brewing process. Don’t be afraid to try out some techniques of your own!

What’s your “go-to” technique for adding hops to beer? Please share in the comments below!
—–
David Ackley is a beer writer, brewer, and self-described “craft beer crusader.” He holds a General Certificate in Brewing from the Institute of Brewing and Distilling and is founder and editor of the Local Beer Blog.

Yuengling Clone Beer Recipe (All Grain)

Yuengling BreweryAs you may know, Pennsylvania’s Yuengling is the oldest operating brewery in America. Founded in 1829, Dick Yuengling is the fifth generation to own and run this family business. As far as some of the lighter American lagers go, Yuengling Traditional Lager is one of the better ones (in my humble opinion). If you’re looking for a smooth lager that isn’t too heavy, this Yuengling clone may be a good option.

Building a Yuengling Clone Beer Recipe From All-Grain

Every good clone recipe requires some research. (Ideally, this includes some drinking!) From the brewery’s website, we learn that all Yuengling beers contain “a balance of American barley and imported two-row malt with choice Cluster and Cascade hops…”
Further, the description for the Traditional Lager tells us “roasted caramel malt” is included. Plus, as an amber lager, it’s similar to the Vienna lager, so we can refer to that style for some guidance. Vienna lagers feature Vienna malt, a grain that’s been kilned a little more than the typical two-row malt, so I’ve made sure to include a decent portion in this all-grain clone. The fermentable ingredients should yield a beer in the ballpark of 4.4% ABV, which is the alcohol content of Yuengling. Finally, a pound of caramel malt helps achieve that distinctive amber color.
Yuengling isn’t known as a hoppy beer, so I’ve kept the IBUs low at around 13. If you’d like some additional flavor and aroma, feel free to add an extra quarter ounce or so of Cascade hops during the last 10 minutes of the boil.

Shop Barley Grains
Yuengling Traditional Lager Clone Recipe
(All Grain, 5 Gallon Recipe)

*recipe assumes a mash efficiency of ~75%
5 lbs. Briess 2-Row Brewer’s Malt
2.5 lbs. Vienna Malt
1 lb. Caramel 60L
.25 oz. Cluster hops (6.5%) at :60
.25 oz. Cascade hops (7%) at :30
Wyeast Pilsen Lager 2007

Directions: Mash grains at 152°F for 60 minutes. Ferment 48°-56°F for two weeks. Condition at 40°F or below for at least four weeks before bottling or kegging.
Shop HopsThe most important thing with this clone recipe will be the fermentation temperature control. Yuengling doesn’t have much in the way of esters or aromas derived from the fermentation, so it’s important that this beer is fermented cool and cold conditioned to keep those yeast characteristics in check. Wyeast 2007 is a clean fermenting strain, so the beer yeast selection in this case should help.
As with all clone brews, it may take a little trial and error to get the beer recipe just the way you like it. Hopefully, this one will serve as a good starting point.
Have you tried a Yuengling clone beer recipe before? How did it go?
—–
David Ackley is a beer writer, brewer, and self-described “craft beer crusader.” He holds a General Certificate in Brewing from the Institute of Brewing and Distilling and is founder and editor of the Local Beer Blog.

Back Sweetening Wine After Fermentation Or Before Bottling

Wine Glass Full Of Sugar CubesIs it ok to back sweeten a wine right after the fermentation or should I wait?
Thank,
Terry
—–
Hello Terry,
Before back sweetening a wine, it is important that you wait until the fermentation has completed. It is also just also important that the wine have plenty of time to settle out all the yeast. Most often, the yeast has not had time to do this by the time you do your second racking. So, normally you will not want to back sweeten your wine right after the fermentation.
In reality, the best time to back sweeten a wine is right before bottling. This gives plenty of time for the wine to clear up. There is no upside to sweetening the wine sooner than this, only a potential for problems.
The reason clearing the wine is so important is because the wine be in a stable state before sweetening, otherwise all the new sugars that are added will end up as fodder for a renewed fermentation.
Cloudiness in a wine usually indicates it still has excessive wine yeast. The wine yeast is as fine as flour and settles out the slowest, so it is that last thing to be suspended in the wine. It is very hard to stabilize a wine that has residual wine yeast still floating throughout the wine.
The wine stabilizer, potassium sorbate, is what has to be used to stabilize a wine when back sweetening a wine. While a sulfite such as sodium metabisulfite or Campden tablets should be used as well, all of this is still not enough to completely stabilize the wine if too much residual yeast is still in the wine.
Shop Potassium SorbatePotassium sorbate stabilizes a wine in an entirely different way than these two sulfites. It does so by putting a restrictive coating on the outside surface of each of the few remaining yeast cells. This does not kill or destroy the yeast. They will die on their own in hours or days. But it makes them unable to reproduce themselves. The ability to reproduce is the real threat that can manifest into a full-blown fermentation.
If the wine is still even slightly, visually cloudy, there may not be enough potassium sorbate to go around to do a complete coat all the yeast cells. This is the downside to back sweetening the wine sooner then necessary.
In a nutshell, don’t back sweeten your wine right after fermentation. Give it plenty of time to clear, then back sweeten. And if convenient, don’t even think about back sweeten you wine until right before bottling.
Happy Wine Making,
Ed Kraus
—–
Ed Kraus is a 3rd generation home brewer/winemaker and has been an owner of E. C. Kraus since 1999. He has been helping individuals make better wine and beer for over 25 years.

Bottling Homebrew Beer For The First Time

Bottling Homebrew Beer At HomeHomebrewers have two choices: they can bottle their homebrew or they can keg it. Most start out by bottling homebrew beer because it’s less expensive and requires less specialized equipment. Bottling day takes a few hours, but with a beer in hand and a friend to help, it goes by in no time.
Here’s what you need for bottling homebrew beer at home:

Bottling Homebrew Beer:

  1. Thoroughly clean and sanitize everything that may come in contact with your beer: bottling bucket, racking cane, siphoning hose, bottling wand, bottles, caps. Be sure to check inside the spigot on your bottling bucket, as sediment tends to collect here!
  1. Take a hydrometer reading. This is to confirm that the fermentation has completed. Most beer recipes come with an expected final gravity hydrometer reading. You can also compare your final reading to your original gravity reading to calculate the alcohol content of your brew.
  1. Mix in your priming sugar. Boil two cups of water to sterilize and drive out any chlorine. Remove from heat, stir in priming sugar to dissolve. (Check your beer recipe for the exact amount of priming sugar, but usually it’s about 1 oz. corn sugar/gallon of beer.) Gently pour the mixture into your bottling bucket.
  1. Transfer your beer to the bottling bucket.Shop Bottle Cappers Using a sanitized racking cane and siphoning hose, transfer your beer from the fermenter into the bottling bucket. Leave behind as much yeast sediment as possible. Take care to avoid extra splashing. (Tip: Use an auto-siphon to get the beer flowing.)
  1. Get everything prepped for the actual bottling of the homebrew beer. Line up your clean, sanitized bottles on the floor, attach the siphoning hose to the spigot on the bottling bucket, and fix your bottling wand to the end of the hose.
  1. Fill your beer bottles. Insert the bottling wand into each beer bottle and press the tip firmly to the bottom to start filling. Lift the wand to stop the flow just before the beer reaches the top of the bottle. (I like to fill a few bottles, then place a sanitized cap over the top to reduce the chances of contamination.)
  1. Cap your beer bottles. After filling each of your bottles, cap them with a capper by pressing handles with firm, even pressure.
  1. Store beer for conditioning.shop_beer_bottles Place all the bottles back in a dark, temperature steady closet to carbonate and condition. In two weeks, they’ll be ready to drink!

Another blog post related to bottling homebrew beer, How to Inspect Your Bottles When Bottling Beer. This goes over the importance of sanitizing and inspection your beer bottles for any compromising damages such as chips and cracks.
Questions? Feel free to contact us with any questions you may have about bottling homebrew beer.
Happy Homebrewing,
Ed Kraus
—–
Ed Kraus is a 3rd generation home brewer/winemaker and has been an owner of E. C. Kraus since 1999. He has been helping individuals make better wine and beer for over 25 years.

Homebrew Recipe of the Day: Saison Rue Clone (All-Grain)

Glass of Saison RueThe Bruery in Placentia, CA, is one of the most respected Belgian-style breweries in the US. But instead of the standard lineup of saisons, dubbels, and trippels, this brewery makes a variety of inventive brews using unusual herbs, spices, and yeast strains. Many of their beers pack a punch in alcohol content, but all of them deliver a wallop of creative flavor.
For many years Saison Rue was considered the Bruery’s “flagship” beer. The beer is now exclusively produced by the Bruery’s wild and experimental side project known at Bruery Terreaux, and Saison Rue has been re-released under that name. It’s best described as an imperial rye saison with brett – in other words, a strong Belgian ale made with a significant amount of rye malt and finish with “wild” Brettanomyces yeast.
Brettanomyces yeast is often used by craft brewers to give beers a dry, somewhat funky, “barnyard” character. Brett takes a long time to develop, initially giving notes of pineapple, but delivering more of the funky notes after 3-6 months. It’s fun to see how these Brett beers change over time.
I recently brewed this Saison Rue clone for a homebrew festival. One professional brewer remarked that it was his favorite beer at the fest. If you like strong, complex Belgian ales, this one’s for you!
The Saison Rue clone beer recipe below comes from Michael Agnew’s excellent Craft Beer for the Homebrewer, a recipe book chock-full of homebrew clone recipes of commercial beers – I highly recommend it!

Saison Rue Clone Beer Recipe (via Craft Beer for the Homebrewer)
(5-gallon batch, all-grain)

Specs  
OG: 1.072
FG: 1.008
ABV: 8.5%
IBU: 30
SRM: 10

Ingredients  
9.25 lbs. two-row pale malt 
4.4 lbs. rye malt 
6 oz. brown malt  Shop Conical Fermenter
1 lb. rice hulls 
.55 oz. Magnum hops pellets – first wort hops
.15 oz. spearmint at :20
9 oz. corn sugar at :5
.5 oz. Sterling hops at :0
Wyeast 1388: Belgian Strong Ale yeast 
Wyeast 5112: Brettanomyces bruxellensis yeast (added at bottling)
Corn sugar for priming (use a priming calculator to determine how much sugar to use)
Directions
Prepare an appropriate starter using the Wyeast 1388, or plan on pitching two packs of yeast. Mash the crushed malt along with the rice hulls at 150˚F for one hour. Sparge with 170˚F water to collect 6 gallons of wort. Add the Magnum hops while collecting wort in the kettle, then bring wort to a boil. Boil for 40 minutes, then add the spearmint. After 15 minutes, add the corn sugar, stirring to avoid scorching at the bottom of the kettle. After five minutes, cut the heat and add the Sterling hops. Chill wort to 70˚F or below, then transfer to a clean, sanitized fermenter.
Ferment initially at 65˚F, but allow the temperature to slowly rise to 85˚F over the course of a week. At the end of primary fermentation, transfer to a secondary fermenter. After 5-7 days, transfer to a bottling bucket along with the Brettanomyces yeast and corn sugar and bottle. This Saison Rue clone beer will be ready to drink in 2-3 weeks, but the Brettanomyces character will develop over the course of several months, so be sure to save some bottles back for aging!
Are you a fan of Belgian ales? Also consider brewing this Rochefort 8 clone.  
—–
David Ackley is a beer writer, brewer, and self-described “craft beer crusader.” He holds a General Certificate in Brewing from the Institute of Brewing and Distilling and is founder and editor of the Local Beer Blog.

Adding More Grape Concentrate To Wine

Fading Grape ConcentrateI am getting ready to make 10 gallons of wine from 2 cans of Sun Cal Johannisberg Riesling concentrate. My question is would an additional can of Sun Cal Riesling really improve the fullness of the wine or would not really be worth the investment of shipping another can of concentrate? I have made a batch of this wine several years ago and it turn out pretty good. Hope you can help…
Name: Vincent O.
State: IA
—–
Hello Vincent,
Thanks you for this interesting question.
[To catch up other readers, Sun Cal concentrated grape juices come in 46 fl. oz. cans. Each can makes 5 gallons of wine when you follow the directions. Along with the can, sugar, acid blend, tannin, yeast nutrient and yeast are added to make up the wine recipe. Vincent, wants to push the envelop a little by adding more grape concentrate to his wine. He’s making a double batch, 2 cans to 10 gallons. He’s thinking about adding a third can.]
Without question, adding a third can would bring up the body and flavor of the wine, but the perceived impression of the resulting wine would not be one with 50% more flavor and body. Adding more grape concentrate to the wine would only intensify the wine’s flavor only marginally.
This is because of the way us humans tend to perceive things. All of our senses do not react on an even scale. For example, two jet engines side-by-side are not twice as loud as one. If you double the wattage of a light bulb, it does not seem twice as bright. If you add 50% more concentrate to your wine recipe, it will not seem like 50% more flavor.Shop Grape Concentrate
I’m not saying that adding more grape concentrate to the wine is not a good idea, I’m just letting you know what to expect if you do decide to add more. Whether you feel it would be worth it is completely up to you. You can expect more flavor and body, but it will not be 50% more.
We’ve had many customers over the years that have used 2, and even, 3 cans of Sun Cal concentrate to just 5 gallons and loved the resulting wine.
Another important aspect to this that needs to be addressed is that if you do decide to add more grape concentrate to your wine, you will need to compensate by adding less sugar and less acid blend to the wine recipe. This is because the additional can of grape concentrate is adding both more sugar and more fruit acid.
Regardless, of how much flavor you are trying to get, the sugar level and acid level should always remain the same. The beginning sugar level determines how much alcohol the resulting wine will have. The acid level of the wine controls how tart or sharp the wine will be.
Keeping both of these at their proper level is relatively easy. You will need to use a hydrometer to add the proper amount of sugar. Keep dissolving sugar into wine must until the hydrometer gives you a reading on the potential alcohol scale of 10% or 11%.Shop Wine Kits
An acid test kit will be needed to know how much acid blend to add to the wine recipe for proper taste. An acid test kit is a valuable tool for controlling any wine’s acidity. After taking a reading the directions will show you how to determine how much acid blend to add.
Adding more grape concentrate to wine is something that is pretty simple to do. Plus, it’s away fun to experiment. That’s half the fun of making your own wine. You have the opportunity to make your own personal creations.

Happy Winemaking!

Liquid Beer Yeast vs Dry Beer Yeast For Homebrewing

Liquid Beer Yeast and Dry Beer YeastGuest beer blogger, Heather Erickson, shares some of her tips and insights about liquid and dry beer yeast.
————————————————-
When I first got into homebrewing, I was introduced to the Wyeast Smack Pack. This is a pouch of liquid yeast that has within it another pouch of activator that can be busted open by smacking it.
I can’t lie, it was kind of fun smacking that direct beer yeast activator and watching those little yeasties start working. Over the years, I have experimented with dry beer yeast and well, I’m torn between the results. Below are some of the pros and cons of liquid beer yeast vs dry beer yeast.

  • Pro: Liquid beer yeast offers variety
    With Wyeast offering over 50 different beer yeast strains for homebrewing, variety is quite possibly the spice of life with liquid yeasts. From a Belgian Strong Ale to a good ole American Ale, the variety of liquid beer yeast strains seem pretty endless. Besides the everyday ale/lager yeasts, liquid yeast varieties also include seasonal offerings.
  • Pro: Dry beer yeast keeps longer
    As a once a month home brewer, I find myself in two scenarios: either I am scrambling for brewing ingredients the day of, or I am crossing my fingers that my beer yeast is still healthy. The dry yeast alternative negates that second worry. Staying fresh for up to two years in the refrigerator, a dry yeast option like Fermentis Safale US-05 is a high-performing alternative to my usual go-to liquid beer yeast smack pack.
  • Con: Liquid yeast is more expensive
    If we are just looking at the numbers, on average, a liquid beer yeast pouch is about twice as much, if not more, than a packet of dry beer yeast. While cost might not be a concern if you prefer a certain type of flavor that a beer yeast provides, the economics are still worth noting.Shop Stir Plate
  • Con: You won’t know if your dry beer yeast is healthy unless you rehydrate
    Rehydrating dry beer yeast prior to pitching seems to be a point of contention among homebrewers. While some believe this step is necessary to ensure healthy yeast cells, others feel that it isn’t. Even dry yeast manufacturers are torn on the topic. A dry beer yeast packet boasts anywhere from 200-300 billion yeast cells, compared to 100 billion in liquid yeast. Pitching the dry yeast straight into your fermenter without rehydration could end up killing some of those cells, up to 50% or so. Taking that into account, the number of cells in both liquid beer yeast and dry beer yeast would end up being just about equal.

Besides water, yeast is arguably the most important ingredient in beer. Without it, you just have sugar water. That’s why there has always been such a big debate about using liquid beer yeast vs dry beer yeast for homebrewing your beer. It’s an important piece of the brewing puzzle.
My advice? Test out your tried and true Pale Ale recipe with a Wyeast 1056 and a Fermentis Safale US-05. Whichever pint you prefer is the yeast you should use.
Happy brewing!
—–
Heather Erickson is a homebrewer with three years experience and has competed in the GABF Pro-Am Competition. She writes the blog This Girl Brews and is a regular contributor to homebrewing sites. Find her on Twitter at @thisgirlbrews.

Simple Style Guide: Brewing Irish Stout

Irish Stout With Clovers An Irish stout is a dark, robust ale, technically considered a dry stout. (Other types of stout include sweet stout, oatmeal stout, American stout, and Russian Imperial stout.)
We can’t talk about Irish stouts without mentioning Guinness. Since the late 1700s, Guinness has been brewing dark, flavorful ales in Dublin. They now distribute their famous stouts all over the world. Murphy’s is another example of Irish stout. It’s somewhat less bitter than Guinness. Try both, as well as a stout from your local brewery, to get a sense of the flavor characteristics that you enjoy in an Irish stout.

Brewing Irish Stout
The easiest way to go about brewing an Irish stout is to use a beer recipe kit. Brewers Best has an excellent Irish Stout Recipe Kit, as does Brewcraft.
For the more adventurous brewers, follow these guidelines to build your own beer recipe.

Grain Bill and Fermentables
An Irish stout gets its dark color and dry, bitter flavor from roasted barley. When brewing Irish stout roasted barley is a “must”. Roasted barley is not malted. Instead, it is steeped in water and then kilned at a high temperature, giving the grain a very dark brown, nearly black, color. This will affect the color of the beer, and can also give the head on the beer a nice tan color. Roasted barley also imparts the dry, bitter flavor of coffee that stouts are known for. It doesn’t take much – Briess recommends using roasted barley for just 3-7% of the total grain bill.Shop Steam Freak Kits
Replace a portion of the roasted barley with black malt or chocolate malt to reduce to dry bitterness. Try Murphy’s, Guinness, and other Irish Stouts to judge how much bitterness you would like.
These ingredients can be combined with mild ale malt or light malt extract to form the majority of your grain bill. Your original specific gravity shouldn’t exceed 1.050.
One defining characteristic of Irish stouts is their creamy mouthfeel. Sometimes this is achieved through the use of flaked barley (Guinness uses about 25% flaked barley in their Guinness draft). Sometimes these Irish stouts are given an extra creamy mouthfeel by using nitrogen instead of CO2 to “carbonate” the beer. Nitrogen forms smaller bubbles than CO2, so they’re less prickly on the tongue. It can be difficult to accomplish this as a homebrewer, though if you’re set up to serve your beer on draft, it can be done with sanitary nitrogen instead of CO2.

Hops
English hops work best when brewing Irish stout. The majority of hops in Guinness is Kent Goldings, while Murphy’s uses mostly Target. Shoot for 30-45 IBUs. Since hop aroma is low to none, emphasize the early additions.Shop Home Brew Starter Kit

Yeast
Irish stouts typically have some mild fruity aromas, which come from esters produced by the yeast. Wyeast 1084: Irish Ale is the best option here. Prepare a yeast starter to achieve a complete fermentation and the dry finish you’re looking for.
With these basics, you’ll brewing Irish stout fit for the pub in no time. What tips do you have for brewing a stout?
—–
David Ackley is a beer writer, brewer, and self-described “craft beer crusader.” He holds a General Certificate in Brewing from the Institute of Brewing and Distilling and is founder and editor of the Local Beer Blog.

Special Interview: Dan Bies Of Briess Malt

Dan Bies 4Today we have an extra special guest! In this exclusive interview, Dan Bies of Briess Malt & Ingredients Co. shares his tips for brewing with Briess malts and malt extracts, as well as some insights into the Briess product development process. This is great information for brewers of all levels! We hope you enjoy!
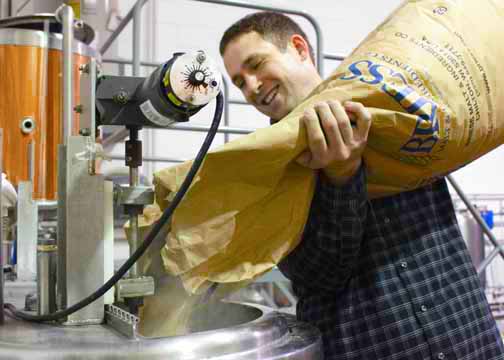
Dan works in the technical service department at Briess. He is their pilot brewer which essentially means he gets to have a lot of fun doing test batches of beer with vast array of products that Briess has to offer.

1. Hi Dan, thanks for taking the time to share your expertise with us today. For starters, can you tell us how you came to work with Briess, how long you’ve been with the company, and what you do there?
The day I started working in the Briess malt analysis lab is the day I became determined to start home brewing. I’ve been at Briess for six years now and my current position is as a Pilot Brewer, Technical Services Representative, and QA Chemist. I help to commercialize new extract products and assist customers with application-related questions on our existing products. I also do recipe and finished product development on a variety of beverages including beer, Malta, and Flavored Malt beverages.

2. Part of the fun of home brewing is developing your own recipes. Can you share with us some of things you think about in terms of malt and malt extract when developing a new beer recipe?
Dan Bies 5
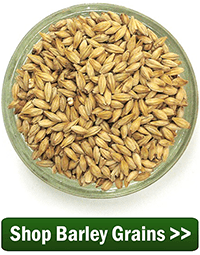
When formulating with malt and extract my first consideration is a target style. Once I have this I try to think of what is traditionally used in its formulation and what attributes the ingredients bring to the character of the beer. Next I consider possible substitutions; this usually results in chewing on malts and making malt teas. Lastly, I brew. I typically use extract and grain interchangeably, but I almost always find myself steeping additional grain into extract brews.

3. What are some of the main differences between wort made from extract and wort made from grain? How do these products differ in the their effects on the final beer? Are there any additives in malt extract?
There’s almost no difference when using extracts Briess makes. We brew all of our malt extracts from the same Briess malts used by breweries and home brewers, using traditional brewing techniques in a 500-barrel brewery. By the way, it’s the second largest brewhouse in Wisconsin. Malt and water, that’s all that goes into our extracts. Absolutely no additives are used. Plus, all of our extracts are made using specialty malts to achieve full color and flavor. Some malt extract producers use the boil to develop color and flavor.Dan Bies 2
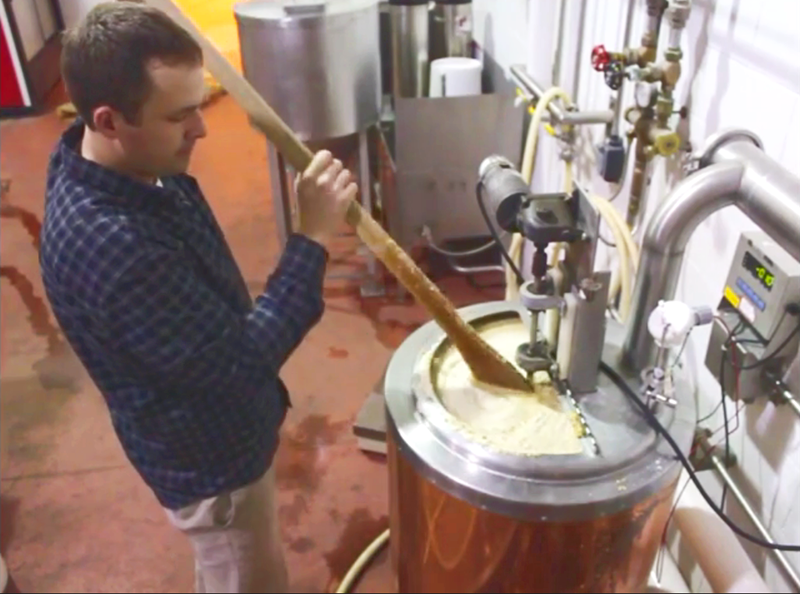
Extract brewers who use Briess extracts can achieve the same results as an all grain brewer, however they must take care in choosing their ingredients. Liquid malt extracts will develop color and some flavor if they’re not stored properly and exposed to heat. Time can do the same thing, but heat is the worst offender. So it’s really important that malt extracts are properly stored from the time they leave the Briess warehouse. Using the freshest possible liquid malt extract from a reliable distributor is key. You can tell the date a Briess malt extract was produced by reading the lot code. For example, 130521 would be May 21, 2013. The first two digits indicate the year, the middle two the month and the last two the date of production.
If you’re not sure of the freshness we recommend that you use dry extracts. These do not darken or develop flavor defects over time because the products are simply too dry for the negative reactions to occur.

4.  Have you found a ratio of malt extract to grain that works well for you?
Depends on style and desired character. Not all Briess malts are showcased in the CBW® [Brewers Grade Malt Extracts] line. If I ever want to go heavy on specialty malts, but don’t have time for all-grain, I will formulate with specialty malts to match a flavor and color target, steep the malt, then add the remaining fermentables with a light malt extract. I feel that almost any style can be made with a large inclusion of light malt extract and steeped grains. A small amount of Munich 10 or Bonlander® Munich Malt steeped with Pilsen Light extract is a great substitute for Pale Ale Malt.Shop Malted Grains

5. OK, now let’s switch gears and talk a little about product development. I’ve noticed that Briess releases a new variety of malt from time to time. How does Briess go about developing a new malt or malt extract product? What is that process like?
When we determine a new malt or malt extract we would like to add to our standard product list, the first thing we do is bring in all competitor products of the same or similar style. Then we conduct blind sensory, analyze the results and decide the target flavor, color and other attributes it should have. Then we produce pilot batches until the target product is met. Some of the recent introductions only took one try. Then a second blind sensory is held to see how our new malt fits into the category. That process is repeated, if necessary, until we are entirely happy with the results. Then we make several productions, use the new malt or extract in our pilot brewery, develop recipes that showcase it, and then brew at a number of breweries before officially releasing it. Our sensory panel includes our maltsters, brewers, experienced GABF judges, food scientists trained in sensory analysis, and other staff members.

shop_home_brew_starter_kit6. Are there any new products in the pipeline you’d like to share with us?
We recently started producing a high maltose yellow corn syrup for use in gluten-free beers and food. Produced from corn grits, this product is the equivalent of the wort brewers would get if they used corn in their brews; however, it is in a convenient liquid form. This makes brewing with this popular grain easy and avoids the needs for long separate grain cooking and boiling cycles. Because it’s made from grain and unrefined, this type of corn syrup has a pleasing corn flavor, yellow color and some of the vitamins and nutrients needed for yeast nutrition. We made this syrup using Organic Corn so it is all-natural and non-GMO.
Did you enjoy this post? Please take a moment to share it on your favorite social network! Thanks and cheers!
—–
David Ackley is a beer writer, brewer, and self-described “craft beer crusader.” He is a graduate of the Oskar Blues Brew School in Brevard, NC, and founder of the Local Beer Blog.
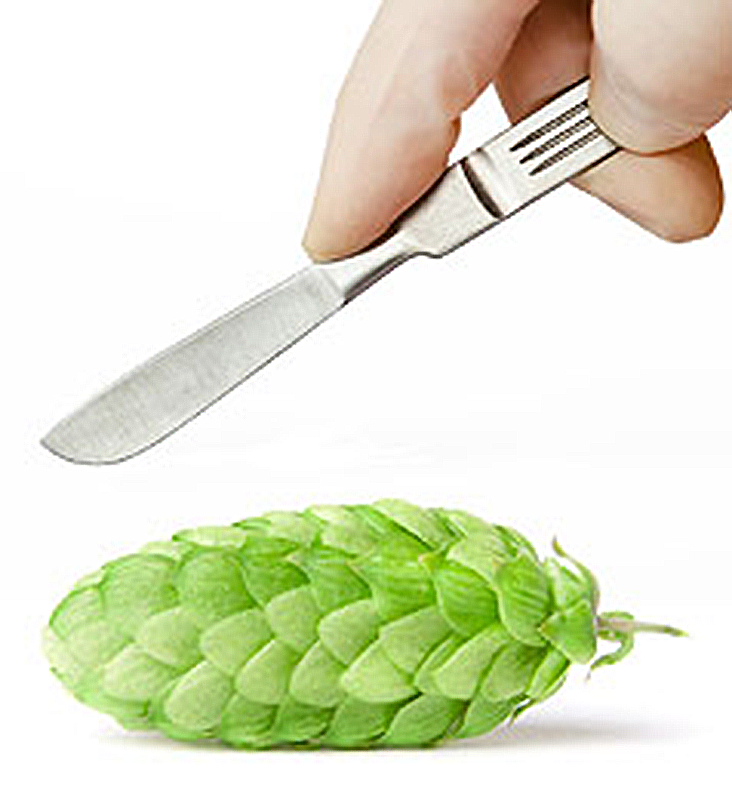
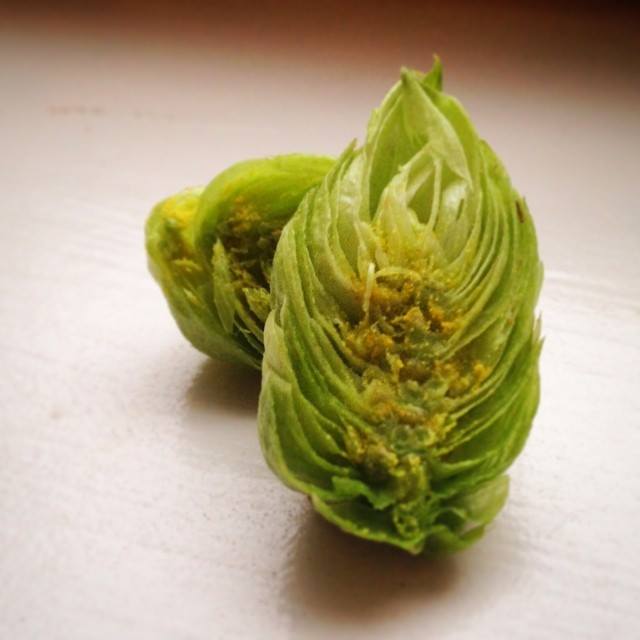
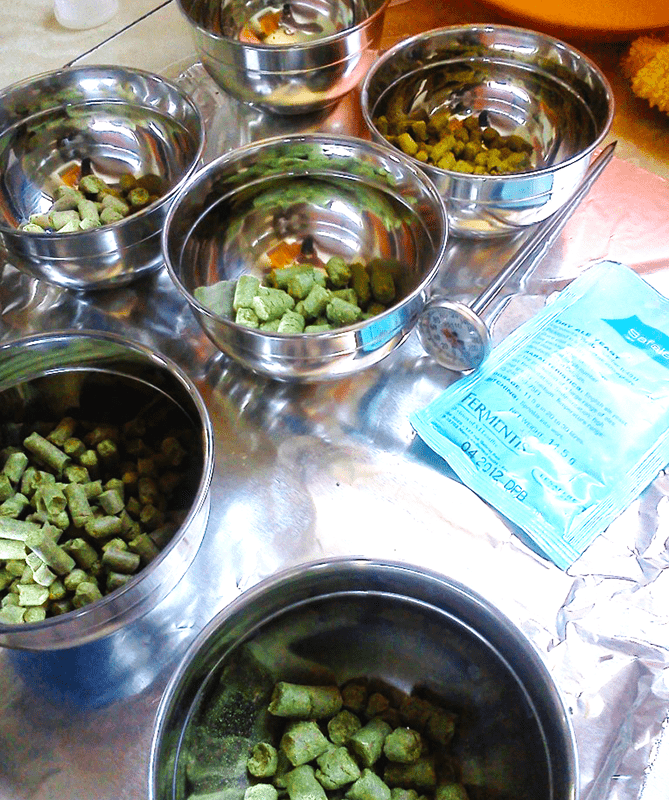
The Anatomy Of A Hop Cone

Look at anatomy of hop conePrized by brewers far and wide for its bittering, flavor, and aroma qualities, the hop is an integral part of beer. But what is a hop? What’s inside the hops? What’s the anatomy of a hop cone?
Hops come from a perennial plant called Humulus lupulus (lupulus as in wolf, so named for the voraciousness of the plant’s growth), which sends vines up from a rhizome in the ground. These vines (a.k.a. bines) have been known to climb to 20 feet or higher in a commercial hop field. Hops, the part of the plant used in brewing, are the flowers of the plant. It is the hop flowers’ essential oils and resins that make it so valuable as a beer brewing ingredient.
A hop flower looks like a miniature green pine cone. The resins, commonly referred to as alpha acids, are contained at the base of the hop cone in the lupulin glands. When boiled, these alpha acids are isomerized, a quick shift in molecular structure that makes them soluble in wort.
The alpha acids are what make beer bitter. A simple calculation allows brewers to figure out the IBUs (international bittering units) of their beer and compare their beer to others using a universally accepted scale. The two primary chemicals within the alpha acids are called humulone and cohumulone.
But also within the anatomy of a hop cone are other components that contribute to flavor and aroma. These characteristics are derived from hop oils. Because they’re more delicate than the alpha acids, the hop oils will evaporate if they’re boiled for too long. For this reason, they’re added to the wort late in the boil or afterwards. Commercial brewers may use a hop back, but homebrewers will usually put the hops directly in the secondary fermenter (this practice is called dry hopping).
There are several different types of essential oils within the hop cone, each contributing different flavor and aroma characteristics:

  • Myrcene – floral, citrus, and piney
  • Humulene – spicy, herbal, European
  • Caryophyllene – herbal, European
  • Farnesene & other oils

(If you’re interested, Ray Daniels’ book, Designing Great Beers, is a great source for more info on the different hop oils.)Shop Hops
After being harvested from the hop plant, hop cones are usually processed into pellets. Specialized machinery removes the extraneous vegetative material, preserving the resins and oils. The processing results in higher hops utilization (a measure of how many alpha acids are dissolved in the wort) and makes for easier storage. Some brewers, like Sierra Nevada, still use whole hops, but hop pellets have become the industry standard.
When buying hops for home brewing, fresher is always better (unless brewing a lambic, which is made with aged hops). It’s best to purchase your hops right before you use them. If you will be using the hops within a few days, store them sealed in a plastic bag in the refrigerator. Otherwise, keep them in the freezer, preferably vacuum-sealed, until you’re ready to brew.
This is the basic anatomy of a hop cone and why it is used in beer. Here’s where you can find more information about hops: (Nearly) Everything You Need To Know About Hops.
—–
David Ackley is a beer writer, brewer, and self-described “craft beer crusader.” He is a graduate of the Oskar Blues Brew School in Brevard, NC and founder of the Local Beer Blog.