 Homebrewers have two choices: they can bottle their homebrew or they can keg it. Most start out by bottling homebrew beer because it’s less expensive and requires less specialized equipment. Bottling day takes a few hours, but with a beer in hand and a friend to help, it goes by in no time.
Here’s what you need for bottling homebrew beer at home:
- Homebrewing cleaner and sanitizer
- Beer bottle brush
- Hydrometer
- Bottling bucket with a spigot
- Racking cane
- Siphoning hose
- Bottle filler
- Beer bottles (approx. 10, 12 oz. bottles per gallon of beer)
- Caps (plain or oxygen-absorbing)
- Priming sugar
- Capper (either a two-handled Red Baron capper or a bench capper)
Bottling Homebrew Beer:
- Thoroughly clean and sanitize everything that may come in contact with your beer: bottling bucket, racking cane, siphoning hose, bottling wand, bottles, caps. Be sure to check inside the spigot on your bottling bucket, as sediment tends to collect here!
- Take a hydrometer reading. This is to confirm that the fermentation has completed. Most beer recipes come with an expected final gravity hydrometer reading. You can also compare your final reading to your original gravity reading to calculate the alcohol content of your brew.
- Mix in your priming sugar. Boil two cups of water to sterilize and drive out any chlorine. Remove from heat, stir in priming sugar to dissolve. (Check your beer recipe for the exact amount of priming sugar, but usually it’s about 1 oz. corn sugar/gallon of beer.) Gently pour the mixture into your bottling bucket.
- Transfer your beer to the bottling bucket.
 Using a sanitized racking cane and siphoning hose, transfer your beer from the fermenter into the bottling bucket. Leave behind as much yeast sediment as possible. Take care to avoid extra splashing. (Tip: Use an auto-siphon to get the beer flowing.)
- Get everything prepped for the actual bottling of the homebrew beer. Line up your clean, sanitized bottles on the floor, attach the siphoning hose to the spigot on the bottling bucket, and fix your bottling wand to the end of the hose.
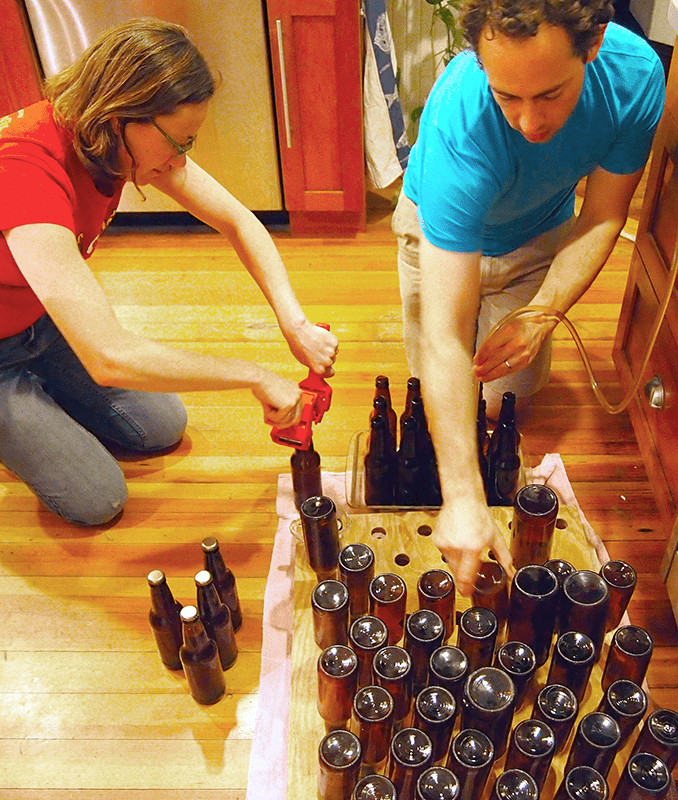
- Fill your beer bottles. Insert the bottling wand into each beer bottle and press the tip firmly to the bottom to start filling. Lift the wand to stop the flow just before the beer reaches the top of the bottle. (I like to fill a few bottles, then place a sanitized cap over the top to reduce the chances of contamination.)
- Cap your beer bottles. After filling each of your bottles, cap them with a capper by pressing handles with firm, even pressure.
- Store beer for conditioning.
 Place all the bottles back in a dark, temperature steady closet to carbonate and condition. In two weeks, they’ll be ready to drink!
Another blog post related to bottling homebrew beer, How to Inspect Your Bottles When Bottling Beer. This goes over the importance of sanitizing and inspection your beer bottles for any compromising damages such as chips and cracks.
Questions? Feel free to contact us with any questions you may have about bottling homebrew beer.
Happy Homebrewing,
Ed Kraus
—–
Ed Kraus is a 3rd generation home brewer/winemaker and has been an owner of E. C. Kraus since 1999. He has been helping individuals make better wine and beer for over 25 years.