Blue Moon Clone Recipe (Extract & All-Grain)

Blue Moon Clone Beer
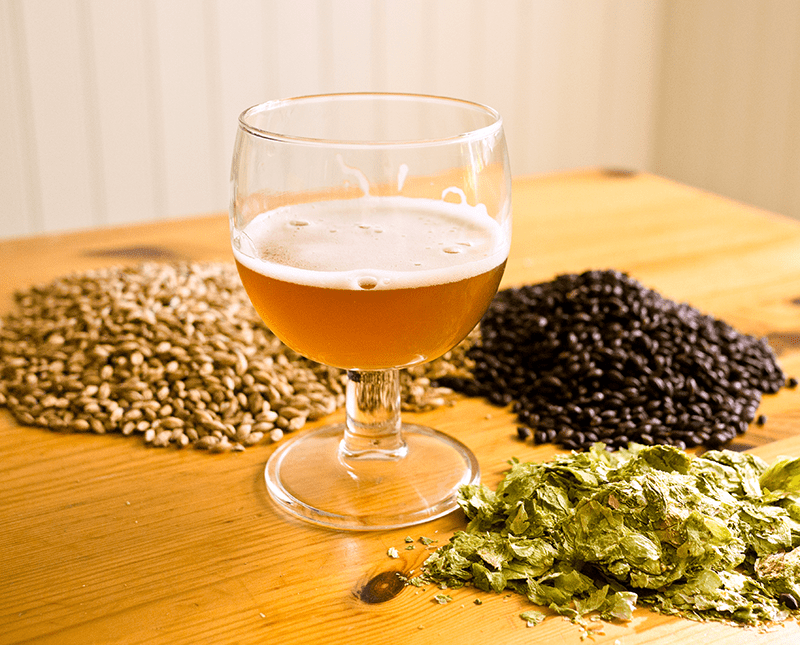
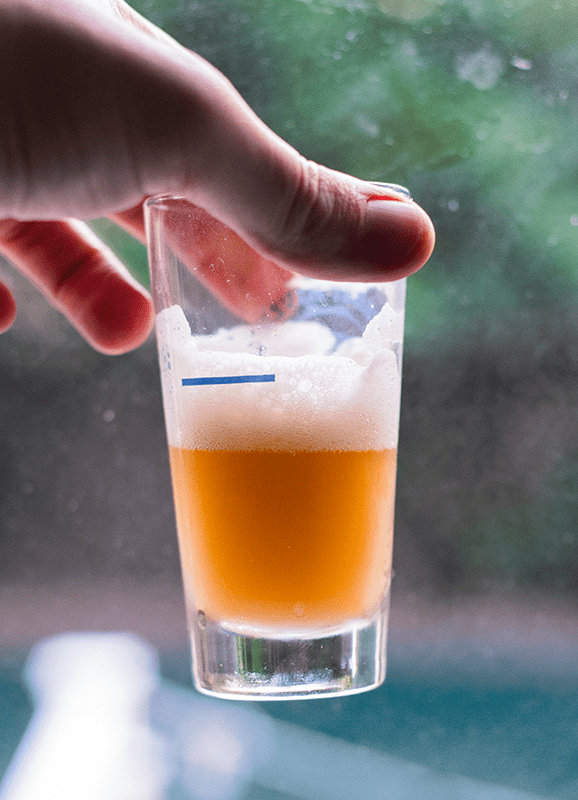
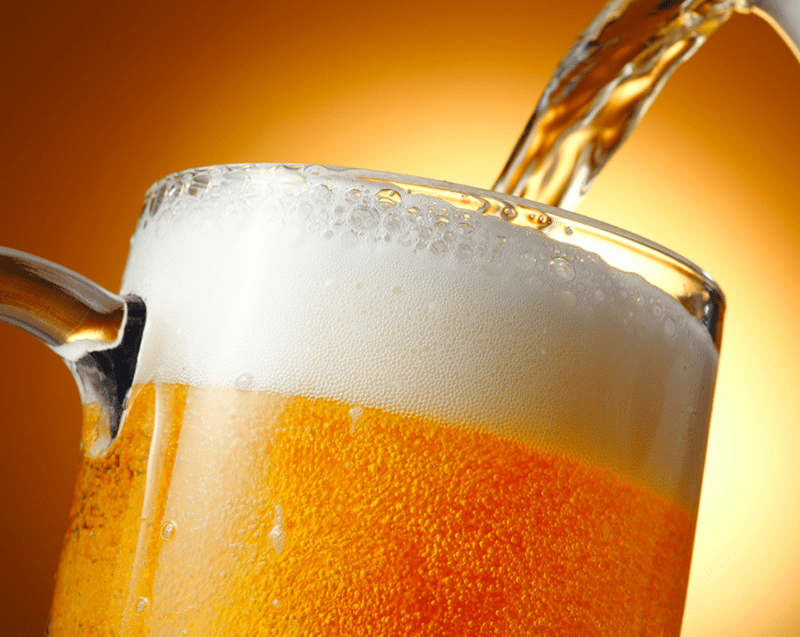
Many craft beer fans entered the world of better beer through Blue Moon. It’s an very smooth and citrusy representation of the Belgian Witbier style: pale yellow in color, somewhat hazy from the use of wheat and oats, and with prominent citrus aroma and flavor from orange peel and coriander.
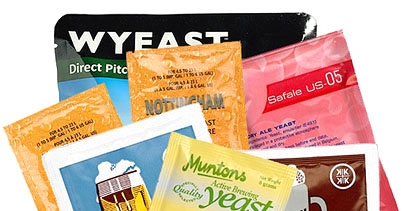
One of the big differences between traditional witbier and Blue Moon is that the latter uses an American ale yeast rather than a Belgian strain. If you want a more traditional interpretation, substitute Wyeast 3942 for the strain listed in the blue moon recipe below. Keep on the low end of the fermentation temperature range to avoid excessive phenolics.
When serving, remember that Belgian wits are supposed to be hazy – try giving that bottle a swirl before you pour it to enhance the haze.
Ready to brew? Then check out these two Blue Moon clone recipes. One of the beer recipes is for homebrewing a Blue Moon using extract in a partial mash. The other is a Blue Moon clone recipe for all-grain homebrewing.

Blue Moon Recipe (Clone)
(Partial Mash Beer Recipe, 5-Gallon Batch)
Specs
OG: 1.055
FG: 1.014
IBUs: 9
ABV: 5.4%
SRM: 5
Ingredients
6.6 lbs. Wheat LME
1 lb. Two-Row Brewers Malt
1 lb. White Wheat Malt
.75 lb. Flaked Oats
1 oz. Hallertau hops (3.9 AAUs) @ :60
3 oz. Valencia dried sweet orange peel @ :10
1.5 tsp. fresh ground coriander @ :10
Wyeast 1056: American Ale YeastShop Steam Freak Kits
5 oz. corn sugar for priming
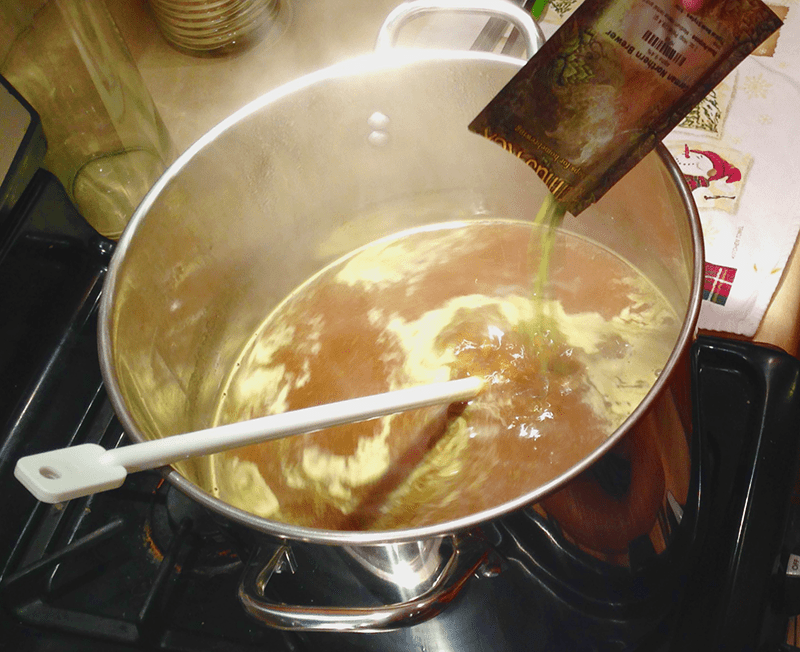
Directions: Prepare a 2L yeast starter. Mash the two-row malt, wheat malt, and flaked oats in 5 quarts of water. Hold temperature at 154°F. for 60 minutes. Strain the wort into the brew kettle, then rinse grains with 1 gallon of water at 170°F., collecting run-off in the brew kettle. Mix in liquid malt extract and add clean water to bring boil volume to 3.5 gallons. Bring to a boil, add hops, and boil for 60 minutes. Add the orange peel and coriander in the last 10 minutes of the boil. Chill wort, top off to 5 gallons, and stir to mix and aerate. Pitch yeast and ferment at 65F for one week, then transfer to secondary for two weeks. Bottle with priming sugar and condition for two weeks. Optional: serve with a slice of orange.

Blue Moon Recipe (Clone)
(All-Grain Beer Recipe, 6-Gallon Batch)
Specs
OG: 1.055
FG: 1.014
IBUs: 9
ABV: 5.4%
SRM: 5
Ingredients
5.5 lb. Two-Row Brewers Malt
4.5 lb. White Wheat Malt
1 lb. Flaked Oats
0.6 oz. Hallertau hops (2.4 AAUs) @ :60Shop Conical Fermenter
3 oz. Valencia (sweet) orange peel @ :10
1.5 tsp. fresh ground coriander @ :10
Wyeast 1056: American Ale Yeast
5 oz. corn sugar for priming
Directions: Prepare a 2L yeast starter. Single infusion mash at 154°F., using 1.5 qts water per pound of grain. Sparge to collect 7.5 gallons of wort. Add hops at beginning of 60-minute boil. Add orange peel and coriander in last 10 minutes of boil. Chill wort, pitch yeast starter, and ferment at 65°F. for one week, then transfer to secondary for two weeks. Bottle with priming sugar and condition for two weeks. Optional: serve with a slice of orange.
Have you ever brewed a Blue Moon clone recipe? How did it go? Share in the comments below!
—–
David Ackley is a beer writer, brewer, and self-described “craft beer crusader.” He holds a General Certificate in Brewing from the Institute of Brewing and Distilling and is founder and editor of the Local Beer Blog.

Late Addition Malt Extract & Late Addition Hops

Late Addition Brewing IngredientsThere are plenty of ways to impact the aroma and flavor of your beer: the beer yeast you choose, additives, and especially malt and hops. But one important “ingredient” that can impact how your beer turns out is often overlooked – time.
In recent years, two methods to create the most optimum homebrew have become popular. For homebrewers using extract, the late addition of malt extract can benefit both the taste and color of your beer, regardless if it is dried malt extract or liquid malt extract. Similarly, any homebrewer can utilize a “hop bursting” technique of late addition hops that’s becoming commonplace for many of the most popular IPAs you’ll find in your bottle shop.
So why switch up your brew day schedule? What are the benefits of late additions? Let’s break it down.

Late Addition Malt Extract (DME/LME)
Whether you’re an extract brewer or an all-grain brewer using malt extract to aid with high gravity beers, waiting until the end of your boil to add all the malt extract may help you perfect your brew.
The benefit of add your malt extract late in the process is simple – it’ll provide greater clarity to your beer as well as increase hop utilization. How those steps take place is a bit more complicated.
To make the best use of malt extract, add 15 to 25 percent at the start of your boil, as your beer recipe instructions tell you to do so. However, by saving the remaining amount to add at the end of your boil, you’re able to avoid a Maillard reaction, a caramelization that leads to the darkening of your beer. Essentially, it’s what happens when sugars get stuck in your pot and begin to harden because of heat. This principal is the same whether you are using liquid malt extract (LME) or dried malt extract (DME).Shop Dried Malt Extract
An added benefit of late addition malt extracts is that they also improve the utilization of hops, allowing for more bittering to come through. This may be a good or bad thing, depending on what beer recipe you’re making and how you prefer your beer to taste.
Late malt extract additions should be added anywhere from when you have 15 minutes left in the boil to flameout. Just turn off your heat source and mix everything in thoroughly before turning the heat back on. If you wait until flameout, the wort will still be hot enough to sanitize everything.

Late Addition Hops
One way to increase hop flavor and aroma and avoid excessive hop bitterness is a technique called “hop bursting.”
The premise is simple: use little or no hops at the beginning of your boil, saving nearly all of them for the “flavoring” and “aroma” addition times at the end of the boil. By doing so, you decrease the alpha acid utilization that adds bitterness and increase the use of oils that lead to fruit, citrus and pine flavors and hop aromas you love so much.
This is particularly important, as the characteristics of late addition hops will greatly impact your senses, especially smell. Even though your tongue helps you out when you taste beer, the sense of smell really helps to drive how you perceive flavors.
Shop HopsA proper hop bursting technique consists of adding hops from 15 minutes left in the boil to after flameout. Remember that the later you add hops, the stronger the aroma. Popular American hop varieties like Simcoe, Amarillo, Cascade, Citra or Centennial will give you a great combination of flavors. Think of hop bursting as an ideal complement to dry-hopping your beer, which also provides strong smells.
If you want an idea of how late addition hops can make a beer taste, try picking up brews made by Stone. Most notably, their popular “Enjoy By” series of IPAs uses hop bursting techniques to create some of the strongest, tastiest hop flavors I’ve ever experienced in a beer.
Half the fun of homebrewing is the potential for experimentation, timing is just one more dynamic that can be toyed with and mastered, so try doing some late addition malt extract and late addition hops, and see how they can work best for you. They may be the key to unlocking your next great homebrew, especially if you’re a hop-head like me!
—–
Bryan Roth is a beer nerd and homebrewer living in Durham, North Carolina. You can read his thoughts on beer and the beer industry on his blog, This Is Why I’m Drunk, and send him suggestions on how to get his wife to drink craft beer via Twitter at @bryandroth.

What is Diastatic Power?… Definition and Chart.

Barley With Diastatic Power In Beer MugIf you’ve been brewing for a while, you’ve probably come across the term “diastatic power” when exploring different malts and learning how to mash. What is diastatic power? What’s the big deal?
A good “diastatic power” (DP) definition would be that it is a measurement of a malted grain’s enzymatic content. When grain is malted, enzymes are produced during germination. These enzymes are responsible for converting the grain’s starches into sugar during mashing. Diastatic power is an indicator of the amount of enzymes available to convert those starches into sugar.
In the US, diastatic power is generally measured in degrees Lintner. Malts with enough DP to convert themselves are at least 30 degrees Lintner; base malts can reach as high as 180 or more. That covers the question as to “what is diastatic power“. Now here’s some actual numbers to take a look at.
Here is a diastatic power chart for some of the more common malted grains:

            Malt                             Degrees Lintner

Briess Red Wheat Malt                    180
Briess White Wheat Malt                 160
Briess Two-Row Malt                      140
Briess Pilsen Malt                            140
Briess Vienna Malt                          130
Briess Rye Malt                               105
Briess Munich Malt 10L                      40
Briess Caramel 20-120                        0
Briess Chocolate Malt                          0Shop Barley Grains
Briess Black Malt                                 0

For most all-grain beer recipes with a substantial amount of base malt, diastatic power isn’t going to be a major issue. DP comes in to play when brewing with a high proportion of specialty malts or unmalted adjuncts. There needs to be enough DP to not only convert the starches in the base grains, but in the specialty malts as well. One of the reasons American adjunct lagers are so high in two-row malt is that the extra DP is needed to convert the adjunct starches into sugar.
Diastatic power is also important when brewing partial mash. Take for example the grain bill for a partial mash recipe such as this one:
6.6 lbs. Light LME
1.5 lb. Caramel 40L
1 lb. Munich Malt (10L)
We know that the Caramel 40L contributes no diastatic power and the Munich only 40 degrees Lintner. The DP available to convert this mini-mash (simply the average by weight of the grains) is only about 16. This is far below the minimum recommended value of 30. Some recommend aiming for 70. In short, the higher the average DP, the more likely your chances are of a successful starch conversion.
There are several possible solutions for the example above:

  1. We could replace the Munich with Vienna malt without a huge impact on flavor and bring up the average diastatic power to 52.
  2. Alternatively, we could add 1 lb. of two-row barley malt to the mini-mash, bringing the average diastatic power to 52, as well.
  3. We could also “cheat” by adding a small amount of diatase enzyme.Shop Barley Crusher

The point is, all it takes is a little tweaking to help make sure the mash has enough DP to convert. The good news is that with a partial mash recipe, the mash represents such a small proportion of the overall gravity that it won’t make a huge difference if it doesn’t. Most of the gravity points will come from the LME.
The next time you brew, calculate your diastatic power and record your brewhouse efficiency. Did you have enough DP for a successful conversion? These are all advantages to know the answer to the question, what is diastatic power.
—–
David Ackley is a beer writer, brewer, and self-described “craft beer crusader.” He holds a General Certificate in Brewing from the Institute of Brewing and Distilling and is founder and editor of the Local Beer Blog.

Selecting The Right Beer Yeast For Your Homebrew

Assortment Of Beer YeastGuest blogger Billy Broas delivers sound advice for selecting the right yeast strain for your homebrew:
—–

Beer yeast is an underappreciated ingredient in homebrewing. Sure, we know that we must take the right steps to keep it happy: make a yeast starter, control the temperature, aerate, etc. But yeast’s flavor impact on the final product is often overlooked. Sometimes we forget that selecting beer yeast that is appropriate is just as important as nurturing the beer yeast we select.
If you’re trying to brew a beer strictly to style, then it’s best to choose a traditional beer yeast strain. In general, go with an American yeast strain for American styles, an English strain for English styles, etc.
Sometimes when selecting beer yeast you choose a traditional strain, but aren’t happy with the results. You might be tempted to switch to a different beer yeast, but don’t forget about all of the different variables that affect yeast character. The beer yeast you select may actually be perfect, but you pitched it a little too warm.
Pitching temperatures, fermentation temperatures, time, and even fermenter shape all impact the flavor you get from a beer yeast when homebrewing. Try tweaking these variables before jumping strain to strain. I was never a big fan of Wyeast 3068 (the Weihenstephan strain), but once I figured out the correct fermentation temperature it became my favorite strain for German ales.
Of course you don’t always need to go by beer style guidelines. Much of the fun in homebrewing is experimenting. You could try a German Ale yeast in an American Pale Ale or a Bohemian Lager yeast in an Irish Stout. If you factor in the variables mentioned above like temperature and aeration, the potential new flavor profiles become endless.
In addition to flavor and aroma, the beer yeast you select will have a big impact on the mouthfeel of the beer. Have you ever made a beer that tasted too thin? Maybe it finished at a very low gravity and dried out too much. A common corrective action is to use more grain to make a “bigger” beer. Or maybe you add some CaraPils to provide more dextrins.
Perhaps the best solution though is selecting beer yeast with lower attenuation – one that doesn’t ferment that last bit of carbohydrates out of the beer. You can keep the rest of the beer recipe the same and because the new strain won’t ferment as many sugars, the final gravity will be higher, resulting in a fuller-tasting beer.
For example, I love using WLP007 Dry English Ale yeast for my English Pale Ales and IPAs, but my English Mild is too low in gravity for that yeast. It’s a 1.035 original gravity beer, so the WLP007 would make it very thin tasting. To give it more body I use a less attenuation English Ale yeast, such as WLP002.
Selecting beer yeast is not a thoughtless task. Choose your beer yeast wisely when homebrewing, and most importantly, take notes on your batches. With time you’ll find the best beer yeast strain for all of your favorite beer recipes!
—–
Billy Broas is a BJCP beer judge and the homebrewing expert on the Rocky Mountain PBS television show “Colorado Brews.” He teaches an online homebrewing class at The Homebrew Academy and runs a blog about craft beer at BillyBrew.com.

Should Beer Be Filtered Before Bottling?

Unfiltered BeerI am about to try brewing my first batch of homebrew. My question is should I be filtering the beer before bottling? I have made wine and Mead before and have not filtered it. I always get a little sediment that collects in the bottom of the bottle. I would REALLY like to be able to bottle the beer without worrying about sediment forming. Any suggestions?
Name: Randy
State: PA
—–
Hi Randy,
Thanks for your question!
Most homebrewers do not filter their homebrew at all for three main reasons:

  1. Because there are a number of ways to get clear beer without a filter,
  2. Bottle conditioning requires that there be beer yeast in the beer, and
  3. Filtration requires additional equipment.

To expand on the second point, most beginning homebrewers bottle their beer. They add a small amount of sugar beforehand so yeast can consume it and naturally carbonate the beer in the bottle. Filtering the beer before bottling would make it impossible to do so.
But just because there’s beer yeast in the beer doesn’t mean we have to have a cloudy beer or a bunch of gunk at the bottom of the beer bottle. Here are a few of the things that can be done to minimize sediment in beer:

  • Use kettle fining agents – One of the things that can be done to reduce sediment and improve clarity in beer is to use Irish moss. It’s typically added during the last 10-15 minutes of the boil to help proteins clump together and settle into a pile. This makes it easier to leave all that stuff behind when racking into the fermenter.
  • Do a secondary fermentation – As beer ferments, yeast will naturally settle to the bottom of the fermenter. By moving the beer into a secondary fermenter, the brewer can take the beer off the yeast cake and leave behind a lot of that yeast sediment. The longer the secondary fermentation, the more yeast will settle out of suspension.Shop Home Brew Starter Kit
  • Use finings in the fermenter – Adding gelatin, isinglass, or another fining agent to the secondary fermenter can accelerate the settling process. The gelatin and isinglass act by forming charged particles which attach themselves to yeast and protein in the beer.

Doing all of the above will ensure minimal sediment in the bottle. It is also important to note that it will usually cause the beer to take longer to bottle condition or carbonate. Instead of 1 week, it might take 2 or 3 to fully bottle condition. Regardless, I would recommend trying these methods before going the filtration route. Here are some more tips for making a clearer beer.
If after brewing a couple batches and deciding that you do want to filter your homebrew, you will need two things: a filter system and a kegging/carbonation system. At the completion of fermentation, you will rack the beer then filter it into a beer keg. You will then force carbonate the keg by storing it under CO2 pressure. Again, I recommend getting the brewing process down before filtering your beer.
Shop Irish MossFinally, it should also be noted that in some styles of beer, especially the hefeweizen and cask ales, the beer should not be filtered at all to conform to style.
That’s basically it. Filtering a beer before bottling is a no-no. Filtering a beer before kegging is fine but not completely necessary. If you are bottling beer and concerned about have a cloudy beer, try beer finings, first.
If you have any further questions, please do not hesitate to leave a comment below!
Til next time…cheers!
—–
David Ackley is a beer writer, brewer, and self-described “craft beer crusader.” He is a graduate of the Oskar Blues Brew School in Brevard, NC, and founder of the Local Beer Blog.

Sweetening Your Wine Kits To Make Them The Way YOU Want Them.

Winemaker Sweetening His Wine KitsI was looking at buying the European Select Riesling and wanted to know if it can be made sweet.
Thanx Parker
—–
Hello Parker,
The short answer to your question is: you can make any of the wine kits we sell as sweet or as dry as you would like. It’s just a simple matter of back sweetening the wine kit.
If you follow the directions that come with these wine kits your wine will come out dry. If you want the wine sweeter add sugar to taste before bottling. We recommend sweetening with cane sugar, but you can experiment with other sweeteners such as honey, grape concentrate, etc.
The cane sugar should be completely dissolved before sweetening the wine kit with it. The easiest way to do this is to put the cane sugar with one to two times the water in a sauce pan. Heat the mix until the liquid becomes clear. Once the mixture has completely cooled you can blend it into the wine.

If you are sweetening your wine kit you must also add potassium sorbate
to eliminate any chance of the wine re-fermenting.


Potassium sorbate
is a wine stabilizer that hinders the yeast cells ability to regenerate itself. Without the potassium sorbate you can end up with bottles of wine that have an active fermentation in them. That would not be a good thing. Pressure will build up until it either pops the cork or explodes the bottle. So, be sure to add a dose of potassium sorbate at the same time. That would be 1/4 teaspoon per gallon of wine.Shop Wine Kits
Another way to go about sweetening wine kits is to use wine conditioner. This is a wine sweetener that already has the wine stabilizer in it. They come in pint bottles. This is usually about the right amount for sweetening six gallons of wine. By using the wine conditioner you do not have to worry about your wine re-fermenting in the bottles.
When back sweetening your wine kits, how much sugar you add is completely up to you. One of the most enjoyable things about making your own wine is that you get to make it the way you want it.
—–
Ed Kraus is a 3rd generation home brewer/winemaker and has been an owner of E. C. Kraus since 1999. He has been helping individuals make better wine and beer for over 25 years.

How To Use A Hydrometer For Brewing Beer

Homebrewer Learning How To Use A HydrometerDo you really need to own a hydrometer? If you want to know the alcohol content of your beer, wine, mead, or cider – then yes! Or, if you want to know how your fermentation is coming along – then yes! Here’s instructions on how to use a hydrometer for brewing beer and how to determine the alcohol of your beer.

What is a hydrometer and how does it work?
A hydrometer is a simple device that helps home brewers and winemakers determine the alcohol content of their beer and wine. It’s a glass tube with a weight on the bottom and it floats in a sample of wort, must, beer, or wine. Based on how high or low the hydrometer floats, we can determine the amount of sugar suspended in the liquid. By taking one reading before fermentation and one reading after, we can easily measure how much sugar was consumed by the yeast and converted into alcohol.

How to take a proper hydrometer reading
To take a hydrometer reading, collect a sample of wort or beer into a graduated cylinder or hydrometer testing jar. Some homebrewers use the tube that the hydrometer comes in, but they’re really not made for this purpose, and that’s not a recommended way to use a hydrometer.
Carefully suspend the hydrometer in the sample and give it a spin to shake off any bubbles. When it slows, read the measurement (in the form of 1.0xx). Remember, if you want to return the wort or beer to the fermenter, the testing cylinder and the hydrometer should both be sanitized.
There are two keys to taking an accurate hydrometer reading:Reading A Hydrometer Illustration

  1. You must take the reading at the level of the top of the liquid sample. Liquids will “climb” up the side of the hydrometer due to the surface tension of the liquid, so measure from the level of the liquid, not where the liquid sticks to the hydrometer (see diagram).
  1. You must either take the reading at the appropriate temperature, or correct for the difference in temperature.Shop Hydrometers

To expand on the second point, every hydrometer is calibrated for a certain temperature, usually 60 or 68 degrees Fahrenheit. I suggest chilling your wort or beer sample by running it under cold water or sticking it in the freezer – just don’t forget about it! Once you’re relatively close to the calibration temperature, just plug the values into a calculator such as this one to adjust the reading.

How to use a hydrometer to calculate alcohol content
To calculate alcohol content, take one hydrometer reading before fermentation (prior to pitching yeast) and one reading after fermentation. Multiply the difference between the two readings by 131.25.
Example:
Starting gravity (SG) = 1.060
Final gravity (FG) = 1.010
1.060 – 1.010 = 0.050
0.050 * 131.25 = 6.56% ABV (alcohol by volume)
Alternatively, you can do the same calculation with gravity points.
Shop Hydrometer JarsFor example: 1.060 = 60 gravity points; 1.010 = 10 gravity points
60 – 10 = 50
50 * .13125 = 6.56% ABV
While using a hydrometer to measure alcohol makes it important enough to have, by itself, the hydrometer is also valuable for tracking fermentations and for verifying that a fermentation has completed once that activity has topped. There such a thing as stuck fermentations that need to be looked out for.
So, that’s all there is to it! That’s how to use a hydrometer. The explanation gets a little technical, but after a couple tries you’ll have a handle on reading hydrometers in no time!
—–
David Ackley is a beer writer, brewer, and self-described “craft beer crusader.” He holds a General Certificate in Brewing from the Institute of Brewing and Distilling and is founder of the Local Beer Blog.

2 Surefire Methods For Using An Airlock

Using An Airlock In The SunMy wine is done fermenting and ready for bulk-aging for a few months in the carboy. Since the SO2 will dissipate from the sanitizing solution in the airlock after a period of time, should it be removed and replaced with fresh sanitizing solution periodically?
Name: Roger Collinge
State: CT
—–
Hello Roger,
This is something that is not talked about very often but is somewhat important to winemaking: how to go about using and airlock.
During the fermentation it’s really not important whether you use a sulfite solution or just plain water in the airlock. There’s so much CO2 gas coming through the airlock at that point that adding sulfites would be futile. The fermentation is perfectly capable of taking care of itself. But once the fermentation settles down it would be beneficial to have sulfites in the airlock. This would keep any bacteria, mold, germs, etc. from growing.
The problem is the sulfite dissipates so readily that you would need to add more sodium metabisulfite or replace the sulfite solution every two or three days to keep the airlock sanitary. This is not too practical.
There are two other ways of using an airlock that will help solve this problem:

  1. Use Vodka or grain alcohol instead of water: This will keep the lock sanitary and will not need attention every few days. The downfall to this method is that alcohol evaporates with time. So you do need to keep an eye on the airlock to make sure that it does not dry out and compromise the wine. Once a week should be sufficient.Shop Wine Airlocks
  1. Use glycerin instead of water: The obvious advantage to this is that glycerin does not evaporate. You don’t have to constantly refill or replace. But the second advantage is it does not promote contaminant growth like water does. It is a very stable product, resistant to mold and bacteria.

The second method of using an airlock is the one I prefer and have used successfully for many, many years. There are no disadvantages to it, and it is much safer than using plain water. But I do know a lot of home wine makers that use alcohol in their airlocks and are perfectly happy with it.
One last thing I wanted to bring up quickly is that you do not want to put anything in the lock that you couldn’t live with being in your wine. Do not use bleaches or other toxic chemicals in your airlock.
The reason for this is because it is possible for the liquid in the lock to flow backwards and into the wine. Read the blog post, “My Air-Lock Is Working Backwards” for more information on this.Shop Sodium Metabisulfite
In that case of using alcohol or glycerin in the airlock, it is not an issue. Both are products that are naturally in any wine and will not be a detriment in any way. But, get a foreign sanitizer in the wine and it’s ruined. Using an airlock with such solutions is risky business and not recommended.
Happy Winemaking,
Ed Kraus
—–
Ed Kraus is a 3rd generation home brewer/winemaker and has been an owner of E. C. Kraus since 1999. He has been helping individuals make better wine and beer for over 25 years.

Carbonating Homebrew With Target Precision

Homebrew That Is CarbonatedWhen it comes to carbonating homebrew, not all things are the same… regardless if you bottling in bottles or in kegs. Belgian ales and hefeweizens are notorious for being bubbly and effervescent; cask conditioned English ales are sometimes called “flat” by those who aren’t familiar with their low carbonation levels.
While beginning homebrewers will get by with the standard one-size-fits-all method of using ¾ cup of priming sugar for every batch of beer, accuracy demands some adjustments when carbonating their homebrew. Besides, you don’t want to over-carbonate and end up with bottle bombs!
Homebrewers who prime their beer with corn sugar before putting it in beer bottles obtain their carbonation by giving yeast additional food to convert into carbon dioxide. Homebrewers with draft systems carbonate by forcing carbon dioxide pressure against their beer, which eventually goes into suspension. In both cases, temperature must be taken into account. This is because liquids at low temperatures retain carbon dioxide more than warmer liquids do.
Carbonation is measured in “volumes CO2.” English ales may be as low as 1.5; German Wheat Beers can reach as high as 4.5. For most of the beers I brew, I aim for 2.2-2.5 vols CO2. Beers in excess of 3.0 vols CO2 may show some issues when opening bottles and pouring.
To accurately carbonate your homebrew, first determine the base style and the appropriate carbonation level.

                 Style                   Volumes of CO2

American ales            2.2–3.0
British ales                 1.5–2.2
German weizens         2.8–5.1
Belgian ales                2.0–4.5
European lagers          2.4–2.6
American lagers          2.5–2.8

Shop Bottle CappersNext, your method for will vary depending on whether you are carbonating homebrew in bottles or carbonating homebrew in kegs.

If Carbonating Homebrew In Bottles…Carbonating Homebrew In Bottles
If bottling, you will need to determine the amount of priming sugar to mix with your batch of beer. After determining your target carbonation level, figure out the amount of residual carbon dioxide in the beer and subtract it from the target carbonation level. Use this number to determine the amount of priming sugar or DME needed to reach the target carbonation.
The Brewer’s Friend Priming Calculator helps immensely with these calculations. A digital scale will help you weight out the precise amount of priming sugar or DME you need.

If Carbonating Homebrew in Kegs…Carbonating Beer In Kegs
Shop Home Brew Starter KitIf kegging and force carbonating, the amount of carbonation you get depends on the level of CO2 pressure on the beer and the beer’s temperature. A chart like this one will help you figure out the amount of pressure you need. (You may want to print out a copy for your home brewery.) Brewers Friend also has a Keg Carbonation Calculator.

Once you’ve figured out how much pressure you need, apply the pressure for about three days, and then turn it down to about 6-8 psi to serve.
Do you bottle or keg? When carbonating homebrew, how do you make sure your CO2 is spot on?
—–
David Ackley is a beer writer, brewer, and self-described “craft beer crusader.” He holds a General Certificate in Brewing from the Institute of Brewing and Distilling and is founder and editor of the Local Beer Blog.

Making Hop Substitutions

Substituting Hops During BoilWhen following a beer recipe, we often find ourselves with hops that don’t quite match up with what the recipe calls for. Either the alpha acid percentage is off, or we can’t get our hands on the right variety of hops – requiring us to make a hop substitution of sorts. So what do we do?
Well, the easiest thing would be to just throw in whatever hops you’ve got and hope for the best, but there are a couple easy ways to make sure that we at least get close to the original beer recipe when substituting.

Substituting Hop Additions for Alpha Acid Content
Since hops are a plant dependent on a number of factors (weather, soil fertility, amount of sunlight, etc.) alpha acid content can change from season to season and from crop to crop. If your beer recipe calls for two ounces of Cascade hops with an alpha acid percentage of 6%, but your Cascades are 8%, how do you adjust the hop addition to make sure you get the same number of IBUs?
An easy solution is to calculate for homebrewing bitterness units (HBUs) or alpha acid units (AAUs):
2 (ounces of hops) * 6 (alpha acid percentage) = 12 HBUs/AAUs
Then just solve for the amount of the hops on hand needed to get the same number of HBUs/AAUs:
X (ounces of hops) * 8 (alpha acid percentage) = 12 HBUs/AAUs
X = 1.5Shop Hops
Substitute 1.5 ounces of your Cascade hops for the 2 ounces called for in the beer recipe, adding the hops to the kettle at the same time as originally called for. (Note: HBUs and AAUs are not the same as IBUs, but they will help to make sure the IBUs of your beer are close to what was intended in the recipe.)
Calculating a hop substitution based on HBU’s is easy enough, right? But what if you don’t have the variety of hops that your homebrew recipe calls for?

Making Hop Substitutions for Variety
If you can’t get your hands on the variety of hops that are called for in the recipe, it just takes a little research to figure out a good possible hop substitution. The HopUnion listing of hop varieties offers suggested hop variety substitutions for most, if not all of the hops on the market.
Shop Accurate ScalesYou can also consult a hop acid chart to find hops with similar qualities. The top half of the chart is for flavor and aroma oils, whereas the bottom shows the typical alpha acid content, which affects bitterness. As you can see, Columbus, Chinook, and Northern Brewer are similar in the flavor and aroma department, but they differ when it comes to alpha acid content. To maintain IBUs, you can use the HBU/AAU calculation method above.

Conclusion
Homebrewing isn’t a perfect science – far from it. But with some research, good technique such as hop substitutions, and some tricks up your sleeve, you can brew consistently good beer batch after batch.
—–
David Ackley is a beer writer, brewer, and self-described “craft beer crusader.” He holds a General Certificate in Brewing from the Institute of Brewing and Distilling and is founder and editor of the Local Beer Blog.